This is the full developer documentation for LocalStack
# Welcome to LocalStack Docs
> Welcome to LocalStack Docs
import { HeroSection } from '../../components/HeroSection';
import { ProductCards } from '../../components/ProductCards';
# Welcome to LocalStack for AWS Docs
> Get started with LocalStack for AWS Docs.
import { OverviewCards, HeroCards } from '../../../components/OverviewCards';
// Import SVGs from assets folder
import rocketIcon from '../../../assets/images/GettingStarted_Color.svg';
import wrenchIcon from '../../../assets/images/Tooling_color.svg';
import cubeIcon from '../../../assets/images/LSAWS_Color.svg';
import starburstIcon from '../../../assets/images/Capabilities_Color.svg';
import plugIcon from '../../../assets/images/Connecting_Color.svg';
import pipelineIcon from '../../../assets/images/CIPipelines_Color.svg';
import usersIcon from '../../../assets/images/OrganizationsAdmin_Color.svg';
import bookIcon from '../../../assets/images/Tutorials_Color.svg';
## What would you like to do today?
# Changelog
> This page lists new features, highlights, and bug fixes for official LocalStack releases.
## Introduction
Browse release notes for official LocalStack major and minor releases since LocalStack v1.0.0.
If you are looking for information about nightly releases, preview features, or experimental features, pull the [latest Docker image](https://hub.docker.com/r/localstack/localstack).
Our changelog is updated with every release.
Updates that affect only LocalStack Web Application or features in preview or limited release may not be reflected.
## Features under Development
LocalStack uses the following terminology to communicate features under development:
* **Preview** refers to a feature under development that usually evolves into becoming a stable feature.
We encourage you to try out these features and report bugs, missing functionality, or general feedback via [GitHub Discussion](https://github.com/orgs/localstack/discussions/new/choose) or our [support channels](/aws/help-support/get-help/).
* **Experimental** refers to a feature prototype that demonstrates initial feasibility and usually comes with many limitations.
Please share your feedback to shape such features and express your interest to get them prioritized.
Disclaimer: Features under development (i.e., labelled as preview/beta, experimental/alpha, or similar terms) are subject to changes (e.g., behavior, pricing tiers) or even complete removal.
## Official Releases
Starting with the end-of-March 2026 release, LocalStack for AWS follows
[calendar versioning](https://calver.org/) using the `YYYY.MM.patch` format.
For example, `2026.03.0` is the initial March 2026 release and patch releases in the same month increment
the last segment (`2026.03.1`, `2026.03.2`, and so on).
Releases up to and including `v4.14.0` continue to use [Semantic Versioning](https://semver.org/).
| Version | Release Date | Release Notes |
|-----------|--------------------|---------------------------------------------------------------------------------------------------|
| `v2026.08`| August 26, 2026 | [v2026.08](https://blog.localstack.cloud/localstack-for-aws-release-2026-08-0/) |
| `v2026.07`| July 22, 2026 | [v2026.07](https://blog.localstack.cloud/localstack-for-aws-release-2026-07-0/) |
| `v2026.06`| June 25, 2026 | [v2026.06](https://blog.localstack.cloud/localstack-for-aws-release-2026-06-0/) |
| `v2026.05`| May 20, 2026 | [v2026.05](https://blog.localstack.cloud/localstack-for-aws-release-2026-05-0/) |
| `v2026.04`| April 29, 2026 | [v2026.04](https://blog.localstack.cloud/localstack-for-aws-release-2026-04-0/) |
| `v2026.03`| March 23, 2026 | [v2026.03](https://blog.localstack.cloud/localstack-for-aws-release-2026-03-0/) |
| `v4.14.0` | February 26, 2026 | [v4.14.0](https://blog.localstack.cloud/localstack-for-aws-release-v-4-14-0/) |
| `v4.13.0` | January 29, 2026 | [v4.13.0](https://blog.localstack.cloud/localstack-for-aws-release-v-4-13-0/) |
| `v4.12.0` | December 11, 2025 | [v4.12.0](https://blog.localstack.cloud/localstack-for-aws-release-v-4-12-0/) |
| `v4.11.0` | November 26, 2025 | [v4.11.0](https://blog.localstack.cloud/localstack-for-aws-release-v-4-11-0/) |
| `v4.10.0` | October 30, 2025 | [v4.10.0](https://blog.localstack.cloud/localstack-for-aws-release-v-4-10-0/) |
| `v4.9.0` | October 2, 2025 | [v4.9.0](https://blog.localstack.cloud/localstack-for-aws-release-v-4-9-0/) |
| `v4.8.0` | September 11, 2025 | [v4.8.0](https://blog.localstack.cloud/localstack-for-aws-release-v-4-8-0/) |
| `v4.7.0` | July 31, 2025 | [v4.7.0](https://blog.localstack.cloud/localstack-for-aws-release-v-4-7-0/) |
| `v4.6.0` | July 3, 2025 | [v4.6.0](https://blog.localstack.cloud/localstack-for-aws-release-v-4-6-0/) |
| `v4.5.0` | June 5, 2025 | [v4.5.0](https://blog.localstack.cloud/localstack-release-v-4-5-0/) |
| `v4.4.0` | May 8, 2025 | [v4.4.0](https://blog.localstack.cloud/localstack-release-v-4-4-0/) |
| `v4.3.0` | March 27, 2025 | [v4.3.0](https://blog.localstack.cloud/localstack-release-v-4-3-0/) |
| `v4.2.0` | February 27, 2025 | [v4.2.0](https://blog.localstack.cloud/localstack-release-v-4-2-0/) |
| `v4.1.0` | January 30, 2025 | [v4.1.0](https://blog.localstack.cloud/localstack-release-v-4-1-0/) |
| `v4.0.0` | November 21, 2024 | [v4.0.0](https://blog.localstack.cloud/announcing-localstack-40-general-availability/) |
| `v3.8.0` | October 3, 2024 | [v3.8.0](https://blog.localstack.cloud/localstack-release-v-3-8-0/) |
| `v3.7.0` | August 29, 2024 | [v3.7.0](https://blog.localstack.cloud/2024-08-29-localstack-release-v-3-7-0/) |
| `v3.6.0` | July 25, 2024 | [v3.6.0](https://discuss.localstack.cloud/t/localstack-release-v3-6-0/997) |
| `v3.5.0` | June 13, 2024 | [v3.5.0](https://discuss.localstack.cloud/t/localstack-release-v3-5-0/947) |
| `v3.4.0` | April 25, 2024 | [v3.4.0](https://discuss.localstack.cloud/t/localstack-release-v3-4-0/871) |
| `v3.3.0` | March 28, 2024 | [v3.3.0](https://discuss.localstack.cloud/t/localstack-release-v3-3-0/828) |
| `v3.2.0` | February 29, 2024 | [v3.2.0](https://discuss.localstack.cloud/t/localstack-release-v3-2-0/782/) |
| `v3.1.0` | January 25, 2024 | [v3.1.0](https://discuss.localstack.cloud/t/localstack-release-v3-1-0/713/) |
| `v3.0.0` | November 16, 2023 | [v3.0.0](https://blog.localstack.cloud/2023-11-16-announcing-localstack-30-general-availability/) |
| `v2.3.0` | September 29, 2023 | [v2.3.0](https://discuss.localstack.cloud/t/localstack-release-v2-3-0/533) |
| `v2.2.0` | July 20, 2023 | [v2.2.0](https://discuss.localstack.cloud/t/localstack-release-v2-2-0/424) |
| `v2.1.0` | May 25, 2023 | [v2.1.0](https://discuss.localstack.cloud/t/localstack-release-v2-1-0/357) |
| `v2.0.0` | March 30, 2023 | [v2.0.0](https://github.com/localstack/localstack/releases/tag/v2.0.0) |
| `v1.4.0` | February 13, 2023 | [v1.4.0](https://github.com/localstack/localstack/releases/tag/v1.4.0) |
| `v1.3.0` | December 1, 2022 | [v1.3.0](https://discuss.localstack.cloud/t/localstack-release-v1-3-0/170) |
| `v1.2.0` | October 8, 2022 | [v1.2.0](https://discuss.localstack.cloud/t/localstack-release-v1-2-0/109) |
| `v1.1.0` | September 3, 2022 | [v1.1.0](https://discuss.localstack.cloud/t/localstack-release-v1-1-0/89) |
| `v1.0.0` | July 13, 2022 | [v1.0.0](https://blog.localstack.cloud/2022-07-13-announcing-localstack-v1-general-availability/) |
# Overview
> Use LocalStack in your CI environment to run tests against your AWS infrastructure in a high-fidelity cloud emulator.
import SectionCards from '../../../../components/SectionCards.astro';
Running integration tests against real AWS in CI means maintaining cloud accounts, waiting on slow provisioning, and sharing a staging environment with every other pipeline.
LocalStack replaces all of that with an emulator that runs inside the CI job itself.
Deploy with the same Infrastructure as Code you already use in production, run your test suite against emulated AWS APIs, and discard the environment when the job ends.
Every run gets a fresh emulator instance, and no test ever requires a real AWS account.
## CI workflow overview
The following diagram illustrates a typical CI workflow, using LocalStack instead of the AWS cloud:

A CI build is triggered when you push source code to your version control repository (such as GitHub).
The CI runner checks out the source code, then runs a sequence of build and test steps.
Where those tests depend on AWS services, they run against the LocalStack emulator rather than the real AWS cloud.
You create the resources they need with standard tools such as Terraform, or load them from a [Cloud Pod](/aws/developer-tools/snapshots/cloud-pods/) to avoid redeploying your infrastructure on every run.
If the tests pass, your CD pipeline takes over and deploys the application to real AWS infrastructure.
A deployment therefore only ever starts from a build that has already been validated against emulated AWS, which increases your confidence in the code you ship.
## CI integrations
The steps required to run LocalStack in CI are largely the same, no matter which CI provider you use (such as GitHub Actions, GitLab CI, or CircleCI):
1. Expose a CI Auth Token
2. Install the `lstk` CLI and related tools
3. Start the emulator
4. Seed the emulator with the resources you need
5. Run your tests
6. Collect the output logs
Start with the [CI Best Practices](/aws/ci-pipelines/best-practices/) page for the commands behind each step, then select your CI provider below for its own syntax and features.
# CI Best Practices
> Commands and general practices for running LocalStack in any CI system, from authentication and tool installation to seeding state and collecting logs.
import { Tabs, TabItem } from '@astrojs/starlight/components';
Every CI system has its own configuration syntax, runner model, and feature set.
Consult your CI provider's own documentation for how to declare jobs, secrets, caches, and artifacts.
This guide covers the parts that are the same everywhere, such as the LocalStack-specific commands you run, and the best practices for running a LocalStack job.
Whatever the provider, a CI job follows the same steps:
1. Expose your CI Auth Token to the job as `LOCALSTACK_AUTH_TOKEN`.
2. Install `lstk` and any tools your tests need, such as the AWS CLI or Terraform.
3. Configure and start the emulator with `lstk start`.
4. Deploy your infrastructure, using an Infrastructure as Code tool.
5. Alternatively, seed state from a snapshot with `lstk load`.
6. Run your tests.
7. Collect the emulator logs as a build artifact.
## Set your Auth Token
Every LocalStack CI run needs a [CI Auth Token](https://app.localstack.cloud/workspace/auth-tokens), rather than a personal Developer Auth Token.
Store the token in your CI system as `LOCALSTACK_AUTH_TOKEN`.
Every CI provider offers somewhere to keep sensitive values, and most distinguish secrets from plain environment variables.
Secrets are masked in job logs and withheld from forked-repository builds.
Never commit a token to your repository or paste it into a pipeline definition.
The `lstk` CLI tool automatically passes the `LOCALSTACK_AUTH_TOKEN` value into the emulator container when it starts.
There is no need to invoke `lstk login`, which is only useful in an interactive session.
## Install the tools
Your job needs the `lstk` CLI, plus whichever AWS tooling your tests use.
Many hosted runners already ship Docker, the AWS CLI, and Terraform, so check your runner image before adding an install step.
### `lstk`
[`lstk`](/aws/developer-tools/running-localstack/lstk/) is the recommended way to run and manage LocalStack.
It is a single binary, so installing it in CI is quick with tools such as `npm` or `brew`.
```bash
npm install -g @localstack/lstk
```
```bash
brew install localstack/tap/lstk
```
See the [`lstk` installation guide](/aws/developer-tools/running-localstack/lstk/#installation) for all installation methods.
`lstk` also needs a working Docker daemon on the runner, with access to a Docker socket so the emulator can spawn its own containers for services such as Lambda and ECS.
### AWS CLI
`lstk aws` proxies your host `aws` binary with the LocalStack endpoint, credentials, and region already configured, so the AWS CLI must be installed separately (if not already installed in your CI system).
Refer to the [AWS CLI installation instructions](https://docs.aws.amazon.com/cli/latest/userguide/getting-started-install.html) for details, and to the [AWS CLI guide](/aws/connecting/aws-cli/) for using it against LocalStack.
### Terraform
`lstk terraform` drives the real `terraform` binary, so Terraform itself must be on the job's `PATH`.
Install it with your provider's setup step where one exists (for example `hashicorp/setup-terraform` on GitHub Actions), or install it directly.
Refer to the [Terraform installation instructions](https://developer.hashicorp.com/terraform/install) for details, and to the [Terraform guide](/aws/connecting/infrastructure-as-code/terraform/) for using it against LocalStack.
## Configure the emulator
The `lstk` CLI tool uses a `config.toml` file to discover the required configuration parameters when starting the emulator.
Commit a `.lstk/config.toml` to your repository, and both your developers and your CI jobs get the same emulator configuration, with no environment variables to duplicate across pipeline files.
`lstk` picks up `./.lstk/config.toml` automatically when it is run from the root of your source tree:
```toml
# .lstk/config.toml
[[containers]]
type = "aws" # Emulator type: "aws", "snowflake", or "azure"
tag = "2026.4" # Pin the image tag for reproducible builds
port = "4566"
env = ["ci"] # Apply the [env.ci] profile below
[env.ci]
DEBUG = "1"
```
See the [configuration reference](/aws/developer-tools/running-localstack/lstk/configuration/) for every available field.
Keep a single `.lstk/config.toml` for local development and CI where you can.
However, if a CI job needs different settings, pass an alternative file with `lstk --config ./ci/lstk.toml start`.
## Start the emulator
Start LocalStack with a single command:
```bash
lstk start
```
`lstk start` brings the LocalStack emulator all the way to a ready state.
It pulls the container image if needed, validates your license, starts the container, and returns only once the emulator is ready, so there is no need for a separate wait or health-check step.
If startup fails, the command exits with a non-zero return code, causing your CI job to fail.
For machine-readable output, add the global `--json` flag to any command.
See [structured output](/aws/developer-tools/running-localstack/lstk/automation/#structured-output) and [exit codes](/aws/developer-tools/running-localstack/lstk/automation/#exit-codes) if your pipeline needs to inspect results programmatically.
## Seed state from Infrastructure as Code
Most CI pipelines create the resources their tests need by applying the same Infrastructure as Code they use for production.
The `lstk` proxies automatically point those tools at the emulator, without any explicit configuration.
For example, with Terraform, run your usual commands through `lstk terraform` (or its `lstk tf` alias):
```bash
lstk terraform init
lstk terraform apply -auto-approve
```
The [`lstk cdk`](/aws/connecting/infrastructure-as-code/aws-cdk/) and [`lstk sam`](/aws/connecting/infrastructure-as-code/aws-sam/) proxies work the same way, and [other IaC tools](/aws/connecting/infrastructure-as-code/) can target the emulator through its endpoint directly.
## Seed state from a snapshot
Rather than deploying your whole infrastructure on every run, you can seed the emulator from a [snapshot](/aws/developer-tools/snapshots/) captured earlier, either from a Cloud Pod or from a local snapshot file:
```bash
# Load a Cloud Pod (requires LOCALSTACK_AUTH_TOKEN)
lstk load pod:my-baseline
# Load a snapshot file produced by an earlier job
lstk load ./baseline.snapshot
```
`lstk load` starts the emulator first, if it is not already running, so it can replace a separate `lstk start` step.
Alternatively, name the snapshot in your config, and `lstk start` loads it for you on every fresh start:
```toml
[[containers]]
type = "aws"
port = "4566"
snapshot = "pod:my-baseline"
```
Override the configured snapshot for a single run with `lstk start --snapshot pod:other-baseline`, or skip auto-loading entirely with `lstk start --no-snapshot`.
To produce the snapshot in the first place, see [Cloud Pods](/aws/developer-tools/snapshots/cloud-pods/) and [saving snapshots locally](/aws/developer-tools/snapshots/saving-snapshots-locally/).
## Run your tests
Once the emulator is running, point your tooling at it.
For Infrastructure as Code tools (such as Terraform), use the `lstk` proxy version of the tool, such as `lstk terraform`.
For test suites and SDK-based code, either set the endpoint and test credentials in the job's environment:
```bash
export AWS_ENDPOINT_URL=http://localhost.localstack.cloud:4566
export AWS_ACCESS_KEY_ID=test
export AWS_SECRET_ACCESS_KEY=test
```
Or create a `localstack` AWS profile and select it:
```bash
lstk setup aws
export AWS_PROFILE=localstack
```
See [connecting to LocalStack](/aws/connecting/) for the full set of options.
## Collect logs
The emulator container disappears when the job ends, so consider exporting the logs before the test terminates, then store them as a build artifact:
```bash
lstk logs --verbose > localstack.log
```
Run this step even when the tests fail, so you capture the logs regardless of success or failure. To make failures easier to diagnose in the first place, set `DEBUG = "1"` in your CI environment profile.
See [logging](/aws/customization/logging/) for the available log levels.
# BitBucket
> Use LocalStack in BitBucket Pipelines.
## Introduction
[BitBucket Pipeline](https://bitbucket.org/product/features/pipelines) is a CI/CD tool that allows you to build, test, and deploy your code directly from BitBucket.
This guide will show you how to use LocalStack in BitBucket Pipelines.
BitBucket runs your build and the Docker daemon in separate containers, and does not support mounting volumes.
This guide therefore starts the LocalStack container directly with `docker run`, so the pipeline controls the port mappings and the Docker connection itself, and then uses the [`lstk`](/aws/developer-tools/running-localstack/lstk/) tool proxies to interact with it.
On CI systems without those constraints, `lstk` can manage the container lifecycle as well; see [CI Best Practices](/aws/ci-pipelines/best-practices/).
## Setting up the BitBucket Pipeline
When you want to integrate LocalStack into your job configuration, you just have to execute the following steps:
- Specify the Docker Socket to allow the LocalStack container to access the Docker daemon.
- Pass your CI Auth Token to the container, which is required to start the emulator.
- Export the `LSTK_ENDPOINT_URL` environment variable to point `lstk` at the LocalStack endpoint.
- Install the AWS CLI and `lstk` to interact with LocalStack's emulated services.
- Start the LocalStack container in detached mode by specifying the Docker Socket and Docker Host.
- Wait for the emulator to become ready before using it.
The following example BitBucket Pipeline configuration (`bitbucket-pipelines.yaml`) executes these steps, creates a new S3 bucket, and queries the list of S3 buckets:
```yaml showshowLineNumbers
image: node:22
definitions:
services:
docker:
memory: 2048
pipelines:
default:
- step:
name: Test Localstack
services:
- docker
script:
- export DOCKER_SOCK=$DOCKER_HOST
- export LSTK_ENDPOINT_URL="http://localhost.localstack.cloud:4566"
- echo "${BITBUCKET_DOCKER_HOST_INTERNAL} localhost.localstack.cloud " >> /etc/hosts
- apt-get update && apt-get install -y awscli
- npm install -g @localstack/lstk
- docker run -d --rm -p 4566:4566 -p 4510-4559:4510-4559 -e LOCALSTACK_AUTH_TOKEN=${LOCALSTACK_AUTH_TOKEN:?} -e DEBUG=1 -e DOCKER_SOCK=tcp://${BITBUCKET_DOCKER_HOST_INTERNAL}:2375 -e DOCKER_HOST=tcp://${BITBUCKET_DOCKER_HOST_INTERNAL}:2375 --name localstack-aws localstack/localstack-pro
- |
for _ in $(seq 1 60); do
curl -sf "${LSTK_ENDPOINT_URL}/_localstack/health" > /dev/null && break
sleep 2
done
- lstk aws s3 mb s3://test-bucket
- lstk aws s3 ls
```
## Configuring a CI Auth Token
For the configuration above to work, add your CI Auth Token to the project's environment variables.
The LocalStack container will automatically pick it up and activate your LocalStack license.
Go to the [CI Auth Token page](https://app.localstack.cloud/workspace/auth-tokens) and copy your CI Auth Token.
To add a CI Auth Token to your BitBucket Pipeline:
- Select a workspace from the BitBucket dashboard.
- Select the **Settings** on the top navigation bar.
- Select **Workspace settings** from the **Settings dropdown** menu.
- On the left-hand menu, navigate to **Pipelines** and click on **Workspace variables**.
- Add a new variable with the name `LOCALSTACK_AUTH_TOKEN` and the value of your CI Auth Token, and mark it as **Secured**.
## Current Limitations
### Mounting Volumes
BitBucket Pipelines does not support mounting volumes, so you cannot mount a volume to the LocalStack container.
This limitation prevents you from mounting the Docker Socket to the LocalStack container, which is required to create compute resources, such as Lambda functions or ECS tasks.
# CircleCI
> Use LocalStack in CircleCI.
## Introduction
[CircleCI](https://circleci.com) is a continuous integration and continuous delivery (CI/CD) platform which uses a configuration file (usually named `.circleci/config.yml`) to define the build, test, and deployment workflows.
This guide shows how to run LocalStack in CircleCI using the [`lstk` CLI](/aws/developer-tools/running-localstack/lstk/).
## Snippets
### Start up LocalStack
```yaml showshowLineNumbers
version: '2.1'
jobs:
localstack-test:
machine:
image: ubuntu-2204:current
steps:
- checkout
# LOCALSTACK_AUTH_TOKEN comes from the project's environment variables
- run:
name: Install lstk
command: npm install -g @localstack/lstk
- run:
name: Configure the AWS profile
command: lstk setup aws
- run:
name: Start LocalStack
command: lstk start
- run:
name: Test LocalStack
command: |
lstk aws s3 mb s3://test-bucket
lstk aws s3 ls
workflows:
localstack-test:
jobs:
- localstack-test
```
`lstk start` pulls the image, validates your license, and returns only once the emulator is ready, so no separate wait step is needed.
`lstk aws` proxies the `aws` binary with LocalStack's endpoint and credentials applied, so the AWS CLI must be available on the runner; add an install step if your image does not provide it.
`lstk setup aws` writes a `localstack` AWS profile for that binary to use. It is optional, but without it `lstk` notes on every call that no profile was found.
### Configuration
To configure LocalStack use the `environment` key on the job level or a shell command, where the latter takes higher precedence.
`lstk start` forwards host environment variables prefixed with `LOCALSTACK_` into the container, which strips the prefix, so set `LOCALSTACK_DEBUG` to control the container's `DEBUG` option.
Read more about the [configuration options](/aws/customization/configuration-options) of LocalStack.
#### Job level
```yaml showshowLineNumbers
...
jobs:
localstack-test:
machine:
image: ubuntu-2204:current
environment:
LOCALSTACK_DEBUG: "1"
LOCALSTACK_LS_LOG: "trace"
steps:
...
- run: lstk start
...
```
#### Shell command
```yaml showshowLineNumbers
...
jobs:
localstack-test:
machine:
image: ubuntu-2204:current
steps:
- run:
name: Configure LocalStack
command: |
echo 'export LOCALSTACK_DEBUG=1' >> "$BASH_ENV"
echo 'export LOCALSTACK_LS_LOG=trace' >> "$BASH_ENV"
...
```
### Configuring a CI Auth Token
To enable LocalStack for AWS, you need to add your LocalStack CI Auth Token to the project's environment variables.
`lstk` will automatically pick it up and activate the licensed features.
Go to the [CI Auth Token page](https://app.localstack.cloud/workspace/auth-tokens) and copy your CI Auth Token.
To add the CI Auth Token to your CircleCI project, follow these steps:
- Click on **Project Settings**.
- Select **Environment Variables** from the left side menu.
- Click **Add Environment Variable**.
- Name your environment variable `LOCALSTACK_AUTH_TOKEN`.
- Paste your CI Auth Token into the input field.
After adding the variable, CircleCI injects `LOCALSTACK_AUTH_TOKEN` into your job environment.
### Dump LocalStack logs
```yaml showshowLineNumbers
...
jobs:
localstack-test:
machine:
image: ubuntu-2204:current
steps:
...
- run:
name: Dump LocalStack logs
when: always
command: lstk logs --verbose | tee localstack.log
- store_artifacts:
path: localstack.log
name: localstack-logs
...
```
### Store LocalStack state
You can preserve your AWS infrastructure with LocalStack in various ways.
To be able to use any of the below samples, you must [set a valid CI Auth Token](#configuring-a-ci-auth-token).
_Note: For best result we recommend to use a combination of the below techniques, and you should familiarize yourself with CircleCI's data persistence approach, see their [official documentation](https://circleci.com/docs/persist-data/)._
#### Cloud Pods
Cloud Pods providing an easy solution to persist LocalStack's state, even between workflows or projects.
Find more information about [Cloud Pods](/aws/developer-tools/snapshots/cloud-pods).
##### Multiple projects
Update or create the Cloud Pod in it's own project (ie in a separate Infrastructure as Code repo), this would create a base Cloud Pod, which you can use in the future without any configuration or deployment.
_Note: If there is a previously created Cloud Pod which doesn't need updating this step can be skipped._
```yaml showshowLineNumbers
...
jobs:
localstack-update-cloud-pod:
machine:
image: ubuntu-2204:current
steps:
- run: npm install -g @localstack/lstk
- run: lstk start
...
- run:
name: Load state if exists
command: lstk load pod: || true
...
# Deploy infrastructure changes
...
- run:
name: Save Cloud Pod
command: lstk save pod:
workflows:
localstack-build:
jobs:
- localstack-update-cloud-pod
```
In a separate project use the previously created base Cloud Pod as below:
```yaml showshowLineNumbers
...
jobs:
localstack-use-cloud-pod:
machine:
image: ubuntu-2204:current
steps:
- run: npm install -g @localstack/lstk
- run: lstk start
...
- run:
name: Load Cloud Pod
command: lstk load pod:
...
# Run some tests
workflows:
localstack-build:
jobs:
- localstack-use-cloud-pod
```
##### Same project
To use a dynamically updated Cloud Pod in multiple workflows but in the same project, you must eliminate the race conditions between the update workflow and the others.
Before you are able to use any stored artifacts in your pipeline, you must provide either a valid [project API token](https://circleci.com/docs/managing-api-tokens/#creating-a-project-api-token) or a [personal API token](https://circleci.com/docs/managing-api-tokens/#creating-a-personal-api-token) to CircleCI.
```yaml showshowLineNumbers
...
parameters:
run_workflow_build:
default: true
type: boolean
run_workflow_test1:
default: false
type: boolean
run_workflow_test2:
default: false
type: boolean
...
jobs:
localstack-update-state:
machine:
image: ubuntu-2204:current
steps:
- run: npm install -g @localstack/lstk
- run: lstk start
...
- run:
name: Load Cloud Pod
command: lstk load pod: || true
...
# Deploy infrastructure
...
- run:
name: Save Cloud Pod
command: lstk save pod:
- run:
name: Trigger other workflows
# Replace placeholders with right values
command: |
curl --request POST \
--url https://circleci.com/api/v2/project////pipeline
--header 'Circle-Token: $CIRCLECI_TOKEN' \
--header 'content-type: application/json' \
--data '{"parameters":{"run_workflow_build":false, "run_workflow_test1":true, "run_workflow_test2":true}}'
localstack-use-state:
machine:
image: ubuntu-2204:current
steps:
- run: npm install -g @localstack/lstk
- run: lstk start
...
- run:
name: Load state if exists
command: lstk load pod: || true
...
# Example workflows
workflows:
localstack-build:
when: << pipeline.parameters.run_workflow_build >>
jobs:
- localstack-update-state
localstack-test1:
when: << pipeline.parameters.run_workflow_test1 >>
- localstack-use-state
...
localstack-test2:
when: << pipeline.parameters.run_workflow_test2 >>
jobs:
- localstack-use-state
...
```
#### Workspace
This strategy persist LocalStack's state between jobs for the current workflow.
```yaml showshowLineNumbers
...
jobs:
localstack-save-state:
machine:
image: ubuntu-2204:current
steps:
- run: npm install -g @localstack/lstk
- run: lstk start
...
# LocalStack already running and deployed infrastructure
- run:
name: Save a snapshot
command: lstk save ./ls-state.snapshot
- persist_to_workspace:
paths:
- ls-state.snapshot
# Store state as artifact for local debugging
- store_artifacts:
path: ls-state.snapshot
name: ls-state
...
localstack-load-state:
machine:
image: ubuntu-2204:current
steps:
- run: npm install -g @localstack/lstk
- run: lstk start
...
# LocalStack already running
- attach_workspace:
at: .
- run:
name: Load the snapshot
command: |
if [ -f ls-state.snapshot ]; then
lstk load ./ls-state.snapshot --merge=overwrite
fi
...
workflows:
localstack-build:
jobs:
- localstack-save-state
- localstack-load-state
```
More information about Localstack's [snapshots](/aws/developer-tools/snapshots/saving-snapshots-locally).
#### Cache
To preserve state between workflow runs, you can take leverage of CircleCI's caching too.
This strategy will persist LocalStack's state for every workflow re-runs, but not for different workflows.
```yaml showshowLineNumbers
...
jobs:
localstack-update-state:
machine:
image: ubuntu-2204:current
steps:
- run: npm install -g @localstack/lstk
- run: lstk start
...
# LocalStack already running
# Let's restore previous workflow run's LocalStack state
- restore_cache:
# Use latest "ls-state" prefixed cache
key: ls-state-
- run:
name: Load the snapshot
command: |
if [ -f ls-state.snapshot ]; then
lstk load ./ls-state.snapshot --merge=overwrite
fi
...
# Infrastructure had been updated
# Let's update cached LocalStack state
- run:
name: Save a snapshot
command: lstk save ./ls-state.snapshot
- save_cache:
key: ls-state-{{checksum ls-state.snapshot}}
paths: ls-state.snapshot
...
localstack-do-work:
machine:
image: ubuntu-2204:current
steps:
- run: npm install -g @localstack/lstk
- run: lstk start
# LocalStack already running
- restore_cache:
# Use latest "ls-state" prefixed cache
key: ls-state-
- run:
name: Load the snapshot
command: |
if [ -f ls-state.snapshot ]; then
lstk load ./ls-state.snapshot --merge=overwrite
fi
...
# Example workflows
workflows:
localstack-build:
jobs:
- localstack-update-state
- localstack-do-work
...
```
More information about [snapshots](/aws/developer-tools/snapshots/saving-snapshots-locally).
# CodeBuild
> Use LocalStack in CodeBuild.
## Introduction
[AWS CodeBuild](https://docs.aws.amazon.com/codebuild/latest/userguide/welcome.html) is a managed AWS service for the build and testing phases of software development.
CodeBuild allows you to define your build project, set the source code location, and handles the building and testing, while supporting various programming languages, build tools, and runtime environments.
This guide shows how to run LocalStack in CodeBuild using the [`lstk` CLI](/aws/developer-tools/running-localstack/lstk/).
The CodeBuild standard images already provide Docker, Node.js, and the AWS CLI, so `lstk` is the only part that needs installing.
:::note
LocalStack depends on the Docker socket to emulate your infrastructure.
To enable it, update your project by ticking **Environment > Additional Configuration > Privileged > Enable this flag if you want to build Docker Images or want your builds to get elevated privileges**.
:::
## Snippets
### Start up LocalStack
LocalStack requires a CI Auth Token to run.
Go to the [CI Auth Token page](https://app.localstack.cloud/workspace/auth-tokens) and copy your CI Auth Token, then add it to the project's environment variables:
- Navigate to your project dashboard, click **Edit** to open the dropdown, and select **Environment**.
- Click on **Additional configuration** and navigate to the **Environment variables** section.
- Specify **Name** as `LOCALSTACK_AUTH_TOKEN` and **Value** as your CI Auth Token.
Specify **Type** as per your requirement.
- Click on **Update environment** to save your environment variables.
`lstk` automatically recognizes the token and activates the licensed features.
You can then install `lstk` and start the emulator in your buildspec file:
```yml showshowLineNumbers
version: 0.2
phases:
install:
runtime-versions:
nodejs: 22
commands:
- npm install -g @localstack/lstk
pre_build:
commands:
# LOCALSTACK_AUTH_TOKEN comes from the project's environment variables
- lstk setup aws
- lstk start
build:
commands:
- lstk aws s3 mb s3://test-bucket
- lstk aws s3 ls
```
`lstk start` pulls the image, validates your license, and returns only once the emulator is ready, so no separate wait step is needed.
`lstk aws` proxies the runner's `aws` binary with LocalStack's endpoint and credentials applied.
`lstk setup aws` writes a `localstack` AWS profile for that binary to use.
### Configuration
To set LocalStack configuration options, pass them as `LOCALSTACK_`-prefixed environment variables.
`lstk start` forwards those into the container which strips the prefix, so `LOCALSTACK_DEBUG` sets the container's `DEBUG` option.
```yml showshowLineNumbers
version: 0.2
env:
variables:
LOCALSTACK_DEBUG: "1"
LOCALSTACK_LS_LOG: "trace"
...
phases:
...
```
Settings that apply to every run belong in an [`[env.*]` profile](/aws/developer-tools/running-localstack/lstk/configuration/) in a `.lstk/config.toml` committed to your repository, which also lets you pin the image tag.
Read more about the [configuration options](/aws/customization/configuration-options) of LocalStack.
### Dump LocalStack logs
```yaml showshowLineNumbers
...
phases:
pre_build:
commands:
# Starts up LocalStack
...
build:
commands:
# Run some commands which might fail
...
post_build:
commands:
# Dump logs on build fail
- '[ ${CODEBUILD_BUILD_SUCCEEDING:-0} -eq 0 ] && (lstk logs --verbose | tee localstack.log) || true'
...
# Optionally store dumped logs as artifact
artifacts:
files:
- localstack.log
```
### Store LocalStack state
You can preserve your AWS infrastructure with LocalStack in various ways.
#### Cloud Pods
Find more information about Cloud Pods [here](/aws/developer-tools/snapshots/cloud-pods).
```yml showshowLineNumbers
...
phases:
pre_build:
commands:
...
# LocalStack is up and running already
# Allow the load to fail as the pod does not exist at first run
- lstk load pod: || true
...
- lstk save pod:
...
```
#### Artifact
Instead of the LocalStack platform, you can keep the state as a local snapshot file and move it between builds with CodeBuild's own artifact storage.
Find out more about [snapshots](/aws/developer-tools/snapshots/saving-snapshots-locally/).
```yml showshowLineNumbers
...
phases:
pre_build:
commands:
# LocalStack is up and running already
- |
if [ -f ls-state.snapshot ]; then
lstk load ./ls-state.snapshot --merge=overwrite
fi
...
- lstk save ./ls-state.snapshot
...
artifacts:
files:
- ls-state.snapshot
```
Alternatively save as a secondary artifact:
```yml showshowLineNumbers
...
artifacts:
...
secondary-artifacts:
ls-state:
files:
- ls-state.snapshot
...
```
To use previously stored artifacts as inputs, set them as a source in the project.
#### Cache
```yml showshowLineNumbers
...
phases:
pre_build:
commands:
# LocalStack is up and running already
- |
if [ -f ls-state.snapshot ]; then
lstk load ./ls-state.snapshot --merge=overwrite
fi
...
- lstk save ./ls-state.snapshot
...
cache:
paths:
- 'ls-state.snapshot'
```
## Current Limitations
- `lstk` pulls the emulator image from Docker Hub by default, where you may run into the following error:
```bash
toomanyrequests: You have reached your pull rate limit. You may increase the limit by authenticating and upgrading: https://www.docker.com/increase-rate-limit
```
To resolve this, either use your Docker Hub account credentials to pull the image, or point `lstk` at LocalStack's public ECR mirror with the [`image` field](/aws/developer-tools/running-localstack/lstk/configuration/#custom-container-image) in `.lstk/config.toml`:
```toml
[[containers]]
type = "aws"
port = "4566"
image = "public.ecr.aws/localstack/localstack-pro"
tag = "latest"
```
- LocalStack depends on the Docker socket to emulate your infrastructure.
To enable it, update your project by ticking **Environment > Additional Configuration > Privileged > Enable this flag if you want to build Docker Images or want your builds to get elevated privileges**.
For further information see the official CodeBuild [documentation](https://docs.aws.amazon.com/codebuild/latest/userguide/build-spec-ref.html).
# GitHub Actions
> Use LocalStack in GitHub Actions.
This page contains easily customizable snippets to show you how to manage LocalStack in a GitHub Actions pipeline.
The GitHub-hosted `ubuntu-latest` runner already provides Docker, Node.js, and the AWS CLI, so `lstk` is the only part that needs installing.
On a self-hosted runner, add install steps for whichever of those are missing.
:::caution
The [`LocalStack/setup-localstack`](https://github.com/localstack/setup-localstack) action is no longer supported with `lstk`.
Install and drive [`lstk`](/aws/developer-tools/running-localstack/lstk/) directly in a `run` step, as shown in the snippets below.
:::
## Snippets
### Start up Localstack
To enable LocalStack for AWS, you need to add your LocalStack CI Auth Token to the project's environment variables.
`lstk` will automatically pick it up and activate the licensed features.
Go to the [CI Auth Token page](https://app.localstack.cloud/workspace/auth-tokens) and copy your CI Auth Token.
To add the CI Auth Token to your GitHub project, follow these steps:
- Navigate to your repository **Settings > Secrets** and press **New repository secret**.
- Enter `LOCALSTACK_AUTH_TOKEN` as the name of the secret and paste your CI Auth Token as the value.
Click **Add secret** to save your secret.
You can then install `lstk` and start the emulator, passing the secret to the step:
```yaml showshowLineNumbers
- name: Install lstk
run: npm install -g @localstack/lstk
- name: Configure the AWS profile
run: lstk setup aws
- name: Start LocalStack
run: lstk start
env:
LOCALSTACK_AUTH_TOKEN: ${{ secrets.LOCALSTACK_AUTH_TOKEN }}
```
`lstk start` pulls the image, validates your license, and returns only once the emulator is ready, so no separate wait step is needed.
To pin the image tag, commit a [`.lstk/config.toml`](/aws/developer-tools/running-localstack/lstk/configuration/) to your repository rather than passing it on the command line.
Where several steps run `lstk`, set `LOCALSTACK_AUTH_TOKEN` once at the job level instead of repeating it on every step.
`lstk setup aws` writes a `localstack` AWS profile for the runner's `aws` binary to use. It is optional, but without it `lstk` notes on every call that no profile was found.
### Configuration
To set LocalStack configuration options, pass them as `LOCALSTACK_`-prefixed environment variables.
`lstk start` forwards those into the container, which strips the prefix, so `LOCALSTACK_DEBUG` sets the container's `DEBUG` option.
For example:
```yml showshowLineNumbers
- name: Start LocalStack
run: lstk start
env:
LOCALSTACK_AUTH_TOKEN: ${{ secrets.LOCALSTACK_AUTH_TOKEN }}
LOCALSTACK_DEBUG: "1"
```
You can add extra configuration options as further `LOCALSTACK_`-prefixed variables.
Settings that apply to every run belong in an [`[env.*]` profile](/aws/developer-tools/running-localstack/lstk/configuration/) in `.lstk/config.toml` instead.
### Dump Localstack logs
```yaml showshowLineNumbers
- name: Show localstack logs
if: always()
run: |
lstk logs --verbose | tee localstack.log
```
`if: always()` makes the step run even after a failing test, which is when the logs matter most.
### Store Localstack state
You can preserve your AWS infrastructure with Localstack in various ways.
#### Cloud Pods
```yaml showshowLineNumbers
...
# Localstack is up and running already
- name: Load the Cloud Pod
continue-on-error: true # Allow it to fail as pod does not exist at first run
run: lstk load pod:
env:
LOCALSTACK_AUTH_TOKEN: ${{ secrets.LOCALSTACK_AUTH_TOKEN }}
...
- name: Save the Cloud Pod
run: lstk save pod:
env:
LOCALSTACK_AUTH_TOKEN: ${{ secrets.LOCALSTACK_AUTH_TOKEN }}
...
```
Find more information about cloud pods [here](/aws/developer-tools/snapshots/cloud-pods).
#### Artifact
Instead of the LocalStack platform, you can keep the state as a local snapshot file and move it between runs with GitHub's own artifact storage.
```yaml showshowLineNumbers
...
- name: Download the previous state
continue-on-error: true # Allow it to fail as the artifact does not exist at first run
uses: actions/download-artifact@v4
with:
name: my-ls-state
- name: Start LocalStack and load the state
run: |
lstk start
if [ -f ls-state.snapshot ]; then
lstk load ./ls-state.snapshot --merge=overwrite
fi
env:
LOCALSTACK_AUTH_TOKEN: ${{ secrets.LOCALSTACK_AUTH_TOKEN }}
...
- name: Save the state
run: lstk save ./ls-state.snapshot
- name: Upload the state
uses: actions/upload-artifact@v4
with:
name: my-ls-state
path: ls-state.snapshot
...
```
More information about [snapshots](/aws/developer-tools/snapshots/saving-snapshots-locally/).
## Current Limitations
### Running Lambdas targeting the `arm64` architecture
Deploying Lambdas targeting the `arm64` architecture on GitHub Actions can pose challenges.
While the [`LAMBDA_IGNORE_ARCHITECTURE` configuration](https://docs.localstack.cloud/references/configuration/#lambda) is an option for cross-architecture compatible Lambdas, it may not be suitable for statically compiled Lambdas.
To address this, users are recommended to leverage Docker's [`setup-qemu-action`](https://github.com/docker/setup-qemu-action) to enable emulation for the `arm64` architecture.
It's important to note that using this approach may result in significantly slower build times.
### Running LocalStack on Windows runners
LocalStack requires Docker to run, which is not natively supported on Windows runners.
Windows runners don't support Docker natively due to licensing restrictions.
It is currently not possible to run LocalStack on Windows runners.
# GitLab CI
> Use LocalStack in GitLab CI.
This page contains easily customizable snippets to show you how to manage LocalStack in a GitLab CI pipeline with the [`lstk` CLI](/aws/developer-tools/running-localstack/lstk/).
GitLab runs your job in one container and the Docker daemon in another, so every snippet below pairs the job with a Docker-in-Docker (`dind`) service.
:::tip
While working with a Docker-in-Docker (`dind`) setup, the Docker runner requires `privileged` mode.
You must always use `privileged = true` in your GitLab CI's `config.toml` file while setting up LocalStack in GitLab CI runners.
For more information, see [GitLab CI Docker-in-Docker](https://docs.gitlab.com/ee/ci/docker/using_docker_build.html#use-docker-in-docker-executor) documentation.
:::
## Snippets
### Start up LocalStack
LocalStack requires a [CI Auth Token](https://app.localstack.cloud/workspace/auth-tokens), which you must add to the repository's environment variables as `LOCALSTACK_AUTH_TOKEN`.
Go to your project's **Settings > CI/CD** and expand the **Variables** section.
Select the **Add Variable** button and fill in the necessary details with `LOCALSTACK_AUTH_TOKEN` as the key and your CI Auth Token as the value.
After you create the variable, you can use it in the `.gitlab-ci.yml` file.
However, variables set in the GitLab UI are not automatically passed down to service containers.
You need to assign them as variables in the UI, and then re-assign them in your `.gitlab-ci.yml`.
#### Container
In this setup, `lstk` owns the emulator's lifecycle: `DOCKER_HOST` points it at the `dind` daemon, and `lstk start` runs the emulator container there.
```yaml showshowLineNumbers
image: node:22
stages:
- job
job:
stage: job
variables:
DOCKER_HOST: tcp://docker:2375
DOCKER_TLS_CERTDIR: ""
LOCALSTACK_AUTH_TOKEN: $LOCALSTACK_AUTH_TOKEN
LOCALSTACK_HOST: localhost.localstack.cloud:4566
services:
- name: docker:dind
alias: docker
command: ["--tls=false"]
before_script:
- npm install -g @localstack/lstk
- apt-get update && apt-get install -y awscli
- dind_ip="$(getent hosts docker | cut -d' ' -f1)"
- echo "${dind_ip} localhost.localstack.cloud" >> /etc/hosts
- lstk setup aws
script:
- lstk start
- lstk aws s3 mb s3://test-bucket
- lstk aws s3 ls
```
`lstk start` pulls the image, validates your license, and returns only once the emulator is ready, so no separate wait step is needed.
Because the emulator runs on the `dind` daemon, its ports are published on the `docker` service rather than on the job container.
The `/etc/hosts` entry and `LOCALSTACK_HOST` are what let `lstk` and your tests reach it at `localhost.localstack.cloud:4566`; without them `lstk` falls back to `127.0.0.1`, where nothing is listening.
:::note
`lstk` bind-mounts the Docker socket into the emulator, and sets the emulator's own `DOCKER_HOST`, only when it reaches the daemon over a Unix socket.
A TCP `dind` daemon has no socket to mount, so services that spawn their own containers (Lambda, ECS, EKS) need the daemon address passed in explicitly.
`lstk start` forwards `LOCALSTACK_`-prefixed variables to the emulator, which strips the prefix, so set `LOCALSTACK_DOCKER_HOST` to the `dind` daemon as seen from inside the `dind` network (its bridge gateway, usually `tcp://172.17.0.1:2375`).
:::
#### Service
Alternatively, run LocalStack as a GitLab service container and use `lstk` purely as a client, pointing it at the service with `LSTK_ENDPOINT_URL`.
GitLab passes the job's `variables` to service containers too, so the emulator picks up both the auth token and the Docker connection directly, with no prefixing required.
```yaml showshowLineNumbers
image: node:22
stages:
- job
job:
stage: job
variables:
DOCKER_SOCK: tcp://docker:2375
DOCKER_HOST: tcp://docker:2375
DOCKER_TLS_CERTDIR: ""
LOCALSTACK_AUTH_TOKEN: $LOCALSTACK_AUTH_TOKEN
LSTK_ENDPOINT_URL: http://localstack:4566
services:
- name: localstack/localstack-pro:latest
alias: localstack
- name: docker:dind
alias: docker
command: ["--tls=false"]
before_script:
- npm install -g @localstack/lstk
- apt-get update && apt-get install -y awscli curl
- |
for _ in $(seq 1 60); do
curl -sf "${LSTK_ENDPOINT_URL}/_localstack/health" > /dev/null && break
sleep 2
done
script:
- lstk aws s3 mb s3://test-bucket
- lstk aws s3 ls
```
GitLab starts service containers before the job's first command, but does not wait for them to become ready, hence the health poll.
### Dump LocalStack logs
```yaml showshowLineNumbers
...
job:
script:
- set +e
- ; status=$?
- lstk logs --verbose | tee localstack.log
- exit $status
artifacts:
when: always
paths:
- localstack.log
...
```
Collect the logs as the last `script` step rather than in `after_script`, where the emulator container is no longer reachable.
Capturing the test command's exit code keeps the job's result intact while still writing the logs after a failing test, which is when they matter most.
In the [Service](#service) setup, `lstk logs` is not available, because `lstk` does not manage the service container.
Set `CI_DEBUG_SERVICES: "true"` to have GitLab stream the service container's logs into the job log instead.
### Store LocalStack state
You can preserve your AWS infrastructure with LocalStack in various ways.
#### Artifact
```yaml showshowLineNumbers
...
job:
before_script:
- (test -f ./ls-state.snapshot && lstk load ./ls-state.snapshot --merge=overwrite) || true
script:
...
- lstk save ./ls-state.snapshot
...
artifacts:
paths:
- $CI_PROJECT_DIR/ls-state.snapshot
...
```
More info about LocalStack's snapshots [here](/aws/developer-tools/snapshots/saving-snapshots-locally/).
#### Cache
```yaml showshowLineNumbers
...
job:
before_script:
- (test -f ./ls-state.snapshot && lstk load ./ls-state.snapshot --merge=overwrite) || true
script:
...
- lstk save ./ls-state.snapshot
...
cache:
key:
untracked: true
files:
- $CI_PROJECT_DIR/ls-state.snapshot
paths:
- $CI_PROJECT_DIR/ls-state.snapshot
...
```
Additional information about snapshots [here](/aws/developer-tools/snapshots/saving-snapshots-locally/).
#### Cloud Pod
```yaml showshowLineNumbers
...
job:
before_script:
- lstk load pod: || true
script:
...
- lstk save pod:
...
```
Find more information about Cloud Pods [here](/aws/developer-tools/snapshots/cloud-pods).
## Current Limitations
- LocalStack must be able to reach a Docker socket to provision containers for certain services, such as Lambda, EKS, and ECS.
- The runner must be able to resolve the LocalStack domain (by default _localhost.localstack.cloud_); see the sample pipelines for a possible solution.
- To separate steps into their own jobs, you must preserve LocalStack's state, since GitLab does not preserve job-related containers or services across a pipeline.
- Docker tooling is necessary to start up LocalStack in GitLab CI.
- When LocalStack runs as a container, it is not accessible during the `after_script` phase.
# Travis CI
> Use LocalStack in Travis CI.
This guide shows how to start and use LocalStack in your Travis CI jobs, managed with the [`lstk` CLI](/aws/developer-tools/running-localstack/lstk/).
## Configuring a CI Auth Token
`lstk` validates your LocalStack license before it starts the emulator, so a [CI Auth Token](https://app.localstack.cloud/workspace/auth-tokens) is required rather than a personal Developer Auth Token.
To configure this in Travis CI, go to the project settings (`More options` → `Settings`), scroll down to the `Environment Variables` section, and add your CI Auth Token as `LOCALSTACK_AUTH_TOKEN`.
Travis CI exposes the variable to the build, and `lstk` picks it up from the environment and passes it to the emulator container.
Keep `Display value in build log` switched off so the token is not printed.
## Setting up the Travis CI job
When you want to integrate LocalStack into your job configuration, you just have to execute the following steps:
- Install `lstk`, along with the AWS CLI that `lstk aws` proxies.
- Generate the `localstack` AWS profile with `lstk setup aws`.
- Use `lstk` to start LocalStack.
There is no need to pull the image or wait for the container: `lstk start` pulls the image if needed and returns only once the emulator is ready.
The following example Travis CI job config (`.travis.yaml`) executes these steps, creates a new S3 bucket, and prints a nice message in the end:
```yaml showshowLineNumbers
language: node_js
node_js:
- "22"
services:
- docker
before_install:
# Install lstk
- npm install -g @localstack/lstk
# Install the AWS CLI, which `lstk aws` runs under the hood
- curl -sSL "https://awscli.amazonaws.com/awscli-exe-linux-x86_64.zip" -o awscliv2.zip
- unzip -q awscliv2.zip && sudo ./aws/install
# Write the localstack AWS profile, so lstk does not warn that it's missing
- lstk setup aws
# Start LocalStack; LOCALSTACK_AUTH_TOKEN comes from the project's environment variables
- lstk start
script:
# Test LocalStack by creating a new S3 bucket (and verify that it has been created by listing all buckets)
- lstk aws s3 mb s3://test
- lstk aws s3 ls
- echo "Execute your tests here :)"
```
Travis CI images vary by language and distribution, so drop either install step if your image already provides the tool.
# Overview
> Connect to LocalStack using your favorite AWS tools, such as CLI, SDKs, IaC, the web console, and IDE integrations.
import SectionCards from '../../../../components/SectionCards.astro';
If you already run an application on AWS, you almost certainly connect to it through familiar tools, such as the AWS CLI, an AWS SDK, an Infrastructure as Code tool such as Terraform or AWS CDK, or an IDE plugin. Running that same application against LocalStack means continuing to use those tools; you only need to point them at LocalStack instead of AWS.
# AWS CLI
> Use AWS Command Line Interface (CLI) to create local AWS resources with LocalStack.
## Introduction
The [AWS Command Line Interface (CLI)](https://aws.amazon.com/cli/) is the standard tool from Amazon for creating and managing AWS services via a command line interface.
Due to LocalStack's compatibility with the AWS APIs, this tool can also access LocalStack's emulated services.
You can use the AWS CLI with LocalStack using one or more of the following approaches:
- [AWS CLI](#aws-cli) - Use the standard `aws` command with hand-crafted configuration options necessary to communicate with LocalStack.
- [LocalStack AWS CLI](#localstack-aws-cli-lstk-aws) - Use the `lstk aws` command to set the configuration options for you.
- [Using AWS CLI from a pre-built container](#using-aws-cli-from-a-pre-built-container) - Use Amazon's pre-built AWS CLI container image instead of installing `aws` locally.
:::note
`lstk aws` supersedes the older [`awslocal` wrapper script](/aws/connecting/infrastructure-as-code/deprecated-wrapper-scripts#awslocal), which is deprecated but still available if you need it.
:::
## AWS CLI
If you don't already have `aws` (version 2) installed, follow the [official AWS CLI installation instructions](https://docs.aws.amazon.com/cli/latest/userguide/getting-started-install.html).
Once installed, you can configure the AWS CLI to redirect AWS API requests to LocalStack using two approaches:
- [Configuring an endpoint URL](#configuring-an-endpoint-url)
- [Configuring a custom profile](#configuring-a-custom-profile)
### Configuring an endpoint URL
You can use AWS CLI with an endpoint URL by configuring environment variables and including the `--endpoint-url=` flag in your `aws` CLI commands.
For example:
```bash
export AWS_ACCESS_KEY_ID="test"
export AWS_SECRET_ACCESS_KEY="test"
export AWS_DEFAULT_REGION="us-east-1"
aws --endpoint-url=http://localhost.localstack.cloud:4566 kinesis list-streams
```
:::note
Pre-signed URLs for S3 are generated with the credentials configured on the client, such as the default `test`/`test` pair shown above.
For LocalStack to be able to validate a pre-signed URL, it must be generated with valid credentials. More details at [S3 signature validation](/aws/services/s3/#signature-validation).
:::
### Configuring a custom profile
You can configure a custom profile to use with LocalStack.
Add the following profile to your AWS configuration file (by default, this file is at `~/.aws/config`):
```bash
[profile localstack]
region=us-east-1
output=json
endpoint_url = http://localhost.localstack.cloud:4566
```
Add the following profile to your AWS credentials file (by default, this file is at `~/.aws/credentials`):
```bash
[localstack]
aws_access_key_id=test
aws_secret_access_key=test
```
You can now use the `localstack` profile with the `aws` CLI:
```bash
aws s3 mb s3://test --profile localstack
aws s3 ls --profile localstack
```
:::tip
Alternatively, you can also set the `AWS_PROFILE=localstack` environment variable, in which case the `--profile localstack` parameter can be omitted in the commands above.
:::
## LocalStack AWS CLI (`lstk aws`)
`lstk aws` serves as a thin wrapper and a substitute for the standard `aws` command, enabling you to run AWS CLI commands within the LocalStack environment without specifying the `--endpoint-url` parameter or a profile.
### Installation
To make use of `lstk aws`, you must install both the `lstk` CLI and the standard `aws` command from Amazon.
1. To install `lstk`, follow the [`lstk` installation instructions](/aws/developer-tools/running-localstack/lstk/#installation).
2. To install `aws`, follow the [official AWS CLI installation instructions](https://docs.aws.amazon.com/cli/latest/userguide/getting-started-install.html).
### Usage
The `lstk aws` command shares identical usage with the standard `aws` command.
For comprehensive usage instructions, refer to the manual pages by running `lstk aws help`.
```bash
lstk aws kinesis list-streams
```
## Using AWS CLI from a pre-built container
As an alternative to installing the `aws` command directly on your local machine, Amazon provides a [pre-built container image with the AWS CLI pre-installed](https://docs.aws.amazon.com/cli/latest/userguide/install-cliv2-docker.html). This approach is most suitable when working in multi-container environments, rather than single-machine installations. If you take this approach, an extra step is required for communication with LocalStack, also running inside a container.
By default, the AWS CLI container is isolated from `0.0.0.0:4566` on the host machine, which means the AWS CLI cannot reach LocalStack. To ensure the two docker containers can communicate create a network on the docker engine:
```bash
docker network create localstack
0c9cb3d37b0ea1bfeb6b77ade0ce5525e33c7929d69f49c3e5ed0af457bdf123
```
Then modify the `docker-compose.yml` specifying the network to use:
```yaml
networks:
default:
external:
name: 'localstack'
```
Run the AWS CLI v2 docker container using this network (example):
```bash
docker run --network localstack --rm -it amazon/aws-cli --endpoint-url=http://localstack:4566 lambda list-functions
{
"Functions": []
}
```
If you use AWS CLI v2 from a docker container often, create an alias:
```bash
alias laws='docker run --network localstack --rm -it amazon/aws-cli --endpoint-url=http://localstack:4566'
```
So you can type:
```bash
laws lambda list-functions
{
"Functions": []
}
```
# Overview
> Use LocalStack with AWS SDKs to manage your AWS resources locally.
import SectionCards from '../../../../../components/SectionCards.astro';
## Introduction
LocalStack integrates with official AWS Software Development Kits (SDKs) so you can connect to LocalStack services using the same SDKs you use for AWS services.
This lets you develop and test your applications locally without connecting to the cloud.
## How to connect with AWS SDKs?
To connect to LocalStack services using AWS SDKs, you can use one of the following methods:
- **Manual configuration:** Manually configure the SDK to connect to LocalStack services by setting the endpoint URL to `http://localhost.localstack.cloud:4566` or `localhost:4566`.
This can also be specified using a [profile or an environment variable](https://docs.aws.amazon.com/sdkref/latest/guide/feature-ss-endpoints.html).
- **Transparent endpoint injection (recommended):** Connect to LocalStack services without modifying your application code.
Transparent endpoint injection uses the integrated DNS server to resolve AWS API calls to target LocalStack.
Refer to the [Transparent Endpoint Injection](/aws/customization/networking/transparent-endpoint-injection/) guide for more information.
## Supported SDKs
# AWS SDK for C++
> How to use the C++ AWS SDK with LocalStack.
## Overview
The [AWS SDK for C++](https://docs.aws.amazon.com/sdk-for-cpp), like other AWS SDKs, lets you set the endpoint when creating resource clients,
which is the preferred way of integrating the C++ SDK with LocalStack.
## Example
Consider the following example, which creates an SQS queue, sends a message to it, then receives the same message via the SDK:
```cpp showshowLineNumbers
#include
#include
#include
#include
#include
#include
#include
#include
using namespace Aws;
int main()
{
// initialize AWS SDK
SDKOptions options;
options.loggingOptions.logLevel = Utils::Logging::LogLevel::Debug;
InitAPI(options);
// create SQS client with local endpoint configuration
Aws::Client::ClientConfiguration clientConfig;
clientConfig.endpointOverride = "http://localhost.localstack.cloud:4566";
SQS::SQSClient client = SQS::SQSClient(clientConfig);
// create queue
std::cout << "Creating queue ..." << std::endl;
Aws::SQS::Model::CreateQueueRequest cqReq;
cqReq.SetQueueName("test-queue");
auto cqRes = client.CreateQueue(cqReq);
auto queueUrl = cqRes.GetResult().GetQueueUrl();
// send message
std::cout << "Sending message ..." << std::endl;
Aws::SQS::Model::SendMessageRequest smReq;
smReq.SetQueueUrl(queueUrl);
smReq.SetMessageBody("test message 123");
client.SendMessage(smReq);
// receive message
std::cout << "Receiving message ..." << std::endl;
Aws::SQS::Model::ReceiveMessageRequest rmReq;
rmReq.SetQueueUrl(queueUrl);
auto rmRes = client.ReceiveMessage(rmReq);
const auto& messages = rmRes.GetResult().GetMessages();
std::cout << "Received " << messages.size() << " messages from queue " << queueUrl << std::endl;
// print message
const auto& message = messages[0];
std::cout << "Received message:" << std::endl;
std::cout << " MessageId: " << message.GetMessageId() << std::endl;
std::cout << " ReceiptHandle: " << message.GetReceiptHandle() << std::endl;
std::cout << " Body: " << message.GetBody() << std::endl;
// delete message
std::cout << "Deleting message ..." << std::endl;
Aws::SQS::Model::DeleteMessageRequest dmReq;
dmReq.SetQueueUrl(queueUrl);
dmReq.SetReceiptHandle(message.GetReceiptHandle());
auto dmRes = client.DeleteMessage(dmReq);
std::cout << "Delete message success result: " << dmRes.IsSuccess() << std::endl;
// shut down the SDK
ShutdownAPI(options);
return 0;
}
```
Once compiled, we'll see the following output when running the application:
```sh
Creating queue ...
Sending message ...
Receiving message ...
Received 1 messages from queue http://localhost.localstack.cloud:4566/000000000000/test-queue
Received message:
MessageId: 4731b327-49b2-4410-a8da-2c479e7bde04
ReceiptHandle: ZTQ1M2Q1ZjYtMjBkZS00ODQxLTlkYzQtMjBlMGQ4MDNkODVkIGFybjphd3M6c3FzOnVzLWVhc3QtMTowMDAwMDAwMDAwMDA6dGVzdC1xdWV1ZSA0NzMxYjMyNy00OWIyLTQ0MTAtYThkYS0yYzQ3OWU3YmRlMDQgMTY3ODIxMjExMS42ODk1NTE=
Body: test message 123
Deleting message ...
Delete message success result: 1
```
## Resources
- [AWS SDK for C++](https://docs.aws.amazon.com/sdk-for-cpp)
- [Getting Started Guide](https://docs.aws.amazon.com/sdk-for-cpp/v1/developer-guide/getting-started.html)
# AWS SDK for .NET
> How to use the .NET AWS SDK with LocalStack.
## Overview
The [AWS SDK for .NET](https://aws.amazon.com/sdk-for-net/), like other AWS SDKs, lets you set the endpoint when creating resource clients,
which is the preferred way of integrating the .NET SDK with LocalStack.
## Example
Here is an example of how to create an `LambdaClient` with the endpoint set to LocalStack.
```csharp
var lambdaClient = new AmazonLambdaClient(new AmazonLambdaConfig(
{
ServiceURL = "http://localhost.localstack.cloud:4566"
}
);
```
If you want to specify a region and credentials when creating the client, please set them as `AuthenticationRegion` and `BasicAWSCredentials`, like in this example:
```csharp
var lambdaClient = new AmazonLambdaClient(new BasicAWSCredentials("test", "test"), new AmazonLambdaConfig(
{
ServiceURL = "http://localhost.localstack.cloud:4566",
AuthenticationRegion = "eu-west-1"
}
);
```
:::note
Make sure you are setting the `AuthenticationRegion` and not the `RegionEndpoint`.
Setting the `RegionEndpoint` to a constant like `RegionEndpoint.EUWest1` will override the ServiceURL, and your request will end up against AWS.
:::
### S3 specific endpoint
Here is another example, this time with an `S3Client` and its specific endpoint.
```csharp
var config = new AmazonS3Config({ ServiceURL = "http://s3.localhost.localstack.cloud:4566" });
var s3client = new AmazonS3Client(config);
```
:::note
In case of issues resolving this DNS record, we can fallback to [http://localhost:4566](http://localhost:4566) in combination with the provider setting `ForcePathStyle = true`.
The S3 service endpoint is slightly different from the other service endpoints, because AWS is deprecating path-style based access for hosting buckets.
:::
```csharp
var config = new AmazonS3Config(
{
ServiceURL = "http://localhost.localstack.cloud:4566",
ForcePathStyle = true
}
);
var s3client = new AmazonS3Client(config);
```
## Alternative: Using LocalStack.NET
As an alternative to manual endpoint configuration, you can use LocalStack.NET, an easy-to-use .NET client for LocalStack.
### Overview
`LocalStack.NET` provides a thin wrapper around the official [aws-sdk-net](https://github.com/aws/aws-sdk-net) (AWS SDK for .NET). It automatically configures the target endpoints to use LocalStack for your local cloud application development.
When LocalStack is disabled in configuration, LocalStack.NET automatically uses the official AWS SDK clients, allowing your application to target your real AWS account with no code changes.
**LocalStack.NET Documentation:** Comprehensive guide and examples [here](https://github.com/localstack-dotnet/localstack-dotnet-client).
### How it Works
Instead of manually setting the endpoint configurations when initializing a client, `LocalStack.NET` offers methods that handle these details.
The library aims to reduce the boilerplate required to set up LocalStack clients in .NET.
### Example Usage
#### Dependency Injection Approach
```csharp showshowLineNumbers
public void ConfigureServices(IServiceCollection services)
{
// Add framework services.
services.AddMvc();
services.AddLocalStack(Configuration)
services.AddDefaultAWSOptions(Configuration.GetAWSOptions());
services.AddAwsService();
}
...
var amazonS3Client = serviceProvider.GetRequiredService();
```
#### Standalone Approach
```csharp showshowLineNumbers
var sessionOptions = new SessionOptions();
var configOptions = new ConfigOptions();
ISession session = SessionStandalone.Init()
.WithSessionOptions(sessionOptions)
.WithConfigurationOptions(configOptions).Create();
var amazonS3Client = session.CreateClientByImplementation();
```
### Benefits
- **Consistent Client Configuration:** `LocalStack.NET` provides a standardized approach to initialize clients, eliminating the need for manual endpoint configurations.
- **Tailored for .NET Developers:** The library offers functionalities specifically developed to streamline integration of LocalStack with .NET applications.
- **Adaptable Environment Transition:** Switching between LocalStack and actual AWS services can be achieved with minimal configuration changes when leveraging `LocalStack.NET`.
- **Versatile .NET Compatibility:** Supports a broad spectrum of .NET versions, from .NET Framework 4.6.1 and .NET Standard 2.0, up to recent .NET iterations such as .NET 10.
### Considerations
- Both the standard AWS SDK method and `LocalStack.NET` provide ways to integrate with LocalStack using .NET.
The choice depends on developer preferences and specific project needs.
- `LocalStack.NET` works alongside the AWS SDK, using it as a base and providing a more focused API for LocalStack interactions.
## Aspire Integration
If you are building cloud-native applications with [Aspire](https://aspire.dev/), LocalStack provides first-class integration through the Aspire orchestration framework.
The [`LocalStack.Aspire.Hosting`](https://github.com/localstack-dotnet/dotnet-aspire-for-localstack) package enables seamless local development with automatic container lifecycle management, service discovery, and observability integration.
For detailed guidance on using LocalStack with Aspire, including configuration options and example projects, see the [Aspire integration guide](/aws/customization/integrations/app-frameworks/aspire).
## Resources
- [AWS SDK for .NET](https://aws.amazon.com/sdk-for-net/)
- [Official repository of the AWS SDK for .NET](https://github.com/aws/aws-sdk-net)
- [LocalStack.NET Documentation](https://github.com/localstack-dotnet/localstack-dotnet-client)
- [LocalStack.Aspire.Hosting Documentation](https://github.com/localstack-dotnet/dotnet-aspire-for-localstack)
# AWS SDK for Go
> How to use the Go AWS SDK with LocalStack.
import { Tabs, TabItem } from '@astrojs/starlight/components';
## Overview
The [AWS SDK for Go](https://aws.amazon.com/sdk-for-go/), like other AWS SDKs, lets you set the endpoint when creating resource clients,
which is the preferred way of integrating the Go SDK with LocalStack.
The Go SDK has two major versions, each with their own way of specifying the LocalStack endpoint:
* [aws-sdk-go](https://github.com/aws/aws-sdk-go)
* [aws-sdk-go-v2](https://github.com/aws/aws-sdk-go-v2)
## Examples
Here is an example of how to create an S3 Client from a Session with the endpoint set to LocalStack.
Full examples for both SDK versions can be found [in our samples repository](https://github.com/localstack/localstack-aws-sdk-examples/tree/main/go).
```go showshowLineNumbers
package main
import (
"github.com/aws/aws-sdk-go/aws"
"github.com/aws/aws-sdk-go/aws/session"
"github.com/aws/aws-sdk-go/service/s3"
"github.com/aws/aws-sdk-go/aws/credentials"
)
func main() {
// Initialize a session
sess, _ := session.NewSession(&aws.Config{
Region: aws.String("us-east-1"),
Credentials: credentials.NewStaticCredentials("test", "test", ""),
S3ForcePathStyle: aws.Bool(true),
Endpoint: aws.String("http://localhost:4566"),
})
// Create S3 service client
client := s3.New(sess)
// ...
}
```
```go showshowLineNumbers
package main
import (
"context"
"log"
"github.com/aws/aws-sdk-go-v2/aws"
"github.com/aws/aws-sdk-go-v2/config"
"github.com/aws/aws-sdk-go-v2/service/s3"
)
func main() {
awsEndpoint := "http://localhost:4566"
awsRegion := "us-east-1"
awsCfg, err := config.LoadDefaultConfig(context.TODO(),
config.WithRegion(awsRegion),
)
if err != nil {
log.Fatalf("Cannot load the AWS configs: %s", err)
}
// Create the resource client
client := s3.NewFromConfig(awsCfg, func(o *s3.Options) {
o.UsePathStyle = true
o.BaseEndpoint = aws.String(awsEndpoint)
})
// ...
}
```
## Resources
* [localstack-aws-sdk-examples for Go](https://github.com/localstack/localstack-aws-sdk-examples/tree/main/go)
* [AWS SDK for Go](https://aws.amazon.com/sdk-for-go/)
* [Official repository of the AWS SDK for Go (v1)](https://github.com/aws/aws-sdk-go)
* [Official repository of the AWS SDK for Go (v2)](https://github.com/aws/aws-sdk-go-v2)
# AWS SDK for Java
> How to use the Java AWS SDK with LocalStack.
import { Tabs, TabItem } from '@astrojs/starlight/components';
## Overview
The AWS SDK for Java provides a Java API for AWS services.
Using the SDK, your Java application can interact
with LocalStack services the same way it does with Amazon services.
Support for new services is regularly added to
the SDK.
For a list of the supported services and their API versions that are
included with each release of the SDK, view the [release notes](https://github.com/aws/aws-sdk-java#release-notes)
for the version that you’re working with.
The Java SDK currently supports two major versions:
* [AWS SDK for Java v1](https://github.com/aws/aws-sdk-java)
* [AWS SDK for Java v2](https://github.com/aws/aws-sdk-java-v2)
## Examples
Full examples for both SDK versions can be found in the
[example repository](https://github.com/localstack/localstack-aws-sdk-examples/tree/main/java).
This includes proper
exception handling and all the necessary Maven dependencies.
The scripts to create the AWS services on LocalStack can be found under the `src/main/resources` folder
of each module in the repository.
### S3 Service
Below you'll find an example of how to create an S3 client with the endpoint configured for LocalStack.
The client can be used to upload a file to an existing bucket and then retrieve it.
#### Configuring the S3 Client
```java showshowLineNumbers
// Credentials that can be replaced with real AWS values. (To be handled properly and not hardcoded.)
// These can be skipped altogether for LocalStack, but we generally want to avoid discrepancies with production code.
final String ACCESS_KEY = "test";
final String SECRET_KEY = "test";
// S3 Client with configured credentials, endpoint directing to LocalStack and desired region.
AmazonS3 s3Client = AmazonS3ClientBuilder.standard()
.withCredentials(new AWSStaticCredentialsProvider(credentials))
.withEndpointConfiguration(new EndpointConfiguration("s3.localhost.localstack.cloud:4566",
Regions.US_EAST_1.getName()))
.build();
```
```java showshowLineNumbers
// Credentials that can be replaced with real AWS values. (To be handled properly and not hardcoded.)
// These can be skipped altogether for LocalStack, but we generally want to avoid discrepancies with production code.
final String ACCESS_KEY = "test";
final String SECRET_KEY = "test";
// Desired region.
Region region = Region.US_EAST_1;
// S3 Client with configured credentials, endpoint directing to LocalStack and desired region.
S3Client s3Client = S3Client.builder()
.endpointOverride(URI.create("https://s3.localhost.localstack.cloud:4566"))
.credentialsProvider(StaticCredentialsProvider.create(
AwsBasicCredentials.create(ACCESS_KEY, SECRET_KEY)))
.region(region)
.build();
```
#### Interacting with S3
```java showshowLineNumbers
// Existing bucket name.
final String BUCKET_NAME = "records";
// The key of the object in the bucket, usually the name of the file.
final String key = "hello-v1.txt";
// Creating a File object and FileInputStream.
File file = new File(filePathOnDisk);
InputStream fileInputStream = new FileInputStream(file);
// Creating an ObjectMetadata to specify the content type and content length.
ObjectMetadata metadata = new ObjectMetadata();
metadata.setContentType("text/plain");
metadata.setContentLength(file.length());
// Put the file into the S3 bucket
s3Client.putObject(new PutObjectRequest(BUCKET_NAME, key, fileInputStream, metadata));
// Retrieving the object from the bucket.
S3Object s3Object = s3Client.getObject(BUCKET_NAME, key);
// Read the text content of the file using a BufferedReader.
S3ObjectInputStream objectInputStream = s3Object.getObjectContent();
BufferedReader reader = new BufferedReader(new InputStreamReader(objectInputStream));
```
```java showshowLineNumbers
// Existing bucket name.
final String BUCKET_NAME = "records";
// The key of the object in the bucket, usually the name of the file.
final String objectKey = "hello-v2x.txt";
// Creating the PUT request with all the relevant information.
PutObjectRequest putObjectRequest = PutObjectRequest.builder()
.bucket(BUCKET_NAME)
.key(objectKey)
.build();
// Put the file into the S3 bucket
PutObjectResponse response = s3Client.putObject(putObjectRequest, Paths.get(filePath));
// Creating the GET request with all the relevant information.
GetObjectRequest getObjectRequest = GetObjectRequest.builder()
.bucket(BUCKET_NAME)
.key(objectKey)
.build();
// Retrieving the object from the bucket.
ResponseInputStream response = s3Client.getObject(getObjectRequest);
```
### DynamoDB Service
Another interesting case is interacting with the DynamoDB service.
Here we can see code snippets of a DynamoDB client inserting an entity of type `Person` into a table with the same name.
Once the object is in the database, we would like to retrieve it as well.
Just like the example before, the scripts to create the AWS services on LocalStack can be found under the `src/main/resources` folder of each module in the repository.
Pay particular attention to the handling of the data model in the v2 example.
As part of improvements, some boilerplate code can be abstracted with the help of specific annotations, which help label the Java bean, the partition key and even specify converters for certain data types.
Unfortunately, the enhanced mapping in v2 does not support Date type, but a handwritten converter is enough to cater to the application's needs.
The full list of supported converters can be found [here](https://sdk.amazonaws.com/java/api/latest/software/amazon/awssdk/enhanced/dynamodb/internal/converter/attribute/package-summary.html).
#### Configuring the DynamoDB Client
```java showshowLineNumbers
// Credentials that can be replaced with real AWS values. (To be handled properly and not hardcoded.)
// These can be skipped altogether for LocalStack, but we generally want to avoid discrepancies with production code.
final String ACCESS_KEY = "test";
final String SECRET_KEY = "test";
// Building a basic credentials object.
BasicAWSCredentials credentials = new BasicAWSCredentials(ACCESS_KEY, SECRET_KEY);
// Creating the DynamoDB client using the credentials, specific region and an endpoint configured for LocalStack.
private static AmazonDynamoDB dynamoDBClient = AmazonDynamoDBClientBuilder.standard()
.withCredentials(new AWSStaticCredentialsProvider(credentials))
.withEndpointConfiguration(
new EndpointConfiguration("localhost.localstack.cloud:4566", Regions.US_EAST_1.getName()))
.build();
```
```java showshowLineNumbers
// Credentials that can be replaced with real AWS values. (To be handled properly and not hardcoded.)
// These can be skipped altogether for LocalStack, but we generally want to avoid discrepancies with production code.
final String ACCESS_KEY = "test";
final String SECRET_KEY = "test";
// Creating the AWS Credentials provider, using the above access and secret keys.
AwsCredentialsProvider credentials = StaticCredentialsProvider.create(
AwsBasicCredentials.create(ACCESS_KEY, SECRET_KEY));
// Selected region.
Region region = Region.US_EAST_1;
// Creating the dynamoDB client using the credentials, the specific region and a LocalStack endpoint.
DynamoDbClient dynamoDbClient = DynamoDbClient.builder()
.region(region)
.credentialsProvider(
credentials)
.endpointOverride(URI.create("https://localhost.localstack.cloud:4566"))
.build();
// Creating an enhanced client, which provides additional actions to the plain client.
DynamoDbEnhancedClient enhancedClient = DynamoDbEnhancedClient.builder()
.dynamoDbClient(dynamoDbClient)
.build();
```
#### Interacting with DynamoDB
```java showshowLineNumbers
// Existing table name
String TABLE_NAME = "person";
// Creating a DynamoDB instance
DynamoDB dynamoDB = new DynamoDB(dynamoDBClient);
// Creating a Table object that will be an interface in interacting with the DB table.
Table table = dynamoDB.getTable(TABLE_NAME);
//Creating a Person object.
Person person = new Person();
person.setId(personID);
person.setName("John Doe");
person.setBirthdateFromString("1984-10-12");
// Creating an Item to represent the Person object.
Item item = new Item()
.withPrimaryKey("id", person.getId())
.withString("name", person.getName())
.withString("birthdate", person.getBirthdateAsString());
// Adding the item to the DynamoDB table.
table.putItem(item);
// The "id" field was defined as partition key.
String partitionKey = "id";
// Getting the item from the DynamoDB table using the primary key.
Item item = table.getItem(partitionKey, personId);
// Mapping the DynamoDB item to a Person object.
Person person = new Person();
person.setId(item.getString("id"));
person.setName(item.getString("name"));
person.setBirthdateFromString(item.getString("birthdate"));
```
```java showshowLineNumbers
// Existing table name.
String TABLE_NAME = "person";
// Creating the Person object.
Person person = new Person();
person.setId(personID);
person.setName("John Doe");
person.setBirthdateFromString("1979-01-01");
// Using the enhanced client to interact with the table.
DynamoDbTable table = enhancedClient.table(TABLE_NAME,
TableSchema.fromBean(Person.class));
// Adding new entry to the table.
table.putItem(person);
// Person's id.
String personId = "000012356";
// Retrieving the entity based on id.
Person person = table.getItem(Key.builder().partitionValue(personId).build());
```
## Resources
* [AWS SDK for Java](https://aws.amazon.com/sdk-for-java/)
* [Official repository of the AWS SDK for Java (v1)](https://github.com/aws/aws-sdk-java)
* [Official repository of the AWS SDK for Java (v2)](https://github.com/aws/aws-sdk-java-v2)
* [localstack-aws-sdk-examples for Java](https://github.com/localstack/localstack-aws-sdk-examples/tree/main/java)
# AWS SDK for JavaScript
> How to use the JavaScript AWS SDK with LocalStack.
import { Tabs, TabItem } from '@astrojs/starlight/components';
## Overview
The [AWS SDK for JavaScript](https://aws.amazon.com/sdk-for-javascript/), like other AWS SDKs, lets you set the endpoint when creating resource clients,
which is the preferred way of integrating the JavaScript SDK with LocalStack.
The JavaScript SDK has two major versions, each with their own way of specifying the LocalStack endpoint:
* [aws-sdk-js](https://github.com/aws/aws-sdk-js)
* [aws-sdk-js-v3](https://github.com/aws/aws-sdk-js-v3)
## Examples
Here is an example of how to create a Lambda client and an S3 client with the endpoint set to LocalStack.
```javascript showshowLineNumbers
const AWS = require('aws-sdk');
// Configure the AWS SDK to use the LocalStack endpoint and credentials
const lambda = new AWS.Lambda({
endpoint: 'http://localhost:4566',
accessKeyId: 'test',
secretAccessKey: 'test',
region: 'us-east-1',
});
// List the Lambda functions using the LocalStack endpoint
lambda.listFunctions({}, (err, data) => {
if (err) {
console.error(err);
} else {
console.log(data);
}
});
// Now, we create an S3 client, which has a special endpoint
// You can read the S3 documentation to learn more about the different endpoints.
const s3 = new AWS.S3({
endpoint: 'http://s3.localhost.localstack.cloud:4566',
s3ForcePathStyle: true, // If you want to use virtual host addressing of buckets, you can remove `s3ForcePathStyle: true`.
accessKeyId: 'test',
secretAccessKey: 'test',
region: 'us-east-1',
});
// If your region is `us-east-1`, you will need to override the globalEndpoint of the client
// due to an issue in the SDK with `createBucket`.
// you will need to set it to the hostname of your endpoint specified right above
// If your region is different than `us-east-1`, you can skip that line
s3.api.globalEndpoint = 's3.localhost.localstack.cloud';
// Call an S3 API using the LocalStack endpoint
s3.listBuckets((err, data) => {
if (err) {
console.error(err);
} else {
console.log(data);
}
});
```
```javascript showshowLineNumbers
const { LambdaClient, ListFunctionsCommand } = require('@aws-sdk/client-lambda');
const { S3Client, ListBucketsCommand } = require('@aws-sdk/client-s3');
// Configure the AWS SDK to use the LocalStack endpoint and credentials
const lambda = new LambdaClient({
endpoint: 'http://localhost:4566',
region: 'us-east-1',
credentials: {
accessKeyId: 'test',
secretAccessKey: 'test',
},
});
// Call a Lambda API using the LocalStack endpoint
lambda.send(new ListFunctionsCommand({}))
.then((data) => console.log(data))
.catch((error) => console.error(error));
// By default, @aws-sdk/client-s3 will using virtual host addressing:
// -> http://.s3.localhost.localstack.cloud:4566/
// To allow those requests to be directed to LocalStack, you need to set a specific endpoint.
// If this is not possible, you can set the special S3 configuration flag to use path
// addressing instead:
// -> http://s3.localhost.localstack.cloud:4566//
// You can read the S3 documentation to learn more about the different endpoints.
const s3 = new S3Client({
region: 'us-east-1',
forcePathStyle: true, // If you want to use virtual host addressing of buckets, you can remove `forcePathStyle: true`.
endpoint: 'http://s3.localhost.localstack.cloud:4566',
credentials: {
accessKeyId: 'test',
secretAccessKey: 'test',
},
});
// Call an S3 API using the LocalStack endpoint
s3.send(new ListBucketsCommand({}))
.then((data) => console.log(data))
.catch((error) => console.error(error));
```
:::note
In case of issues resolving S3 DNS record, we can fallback to `http://localhost:4566` in combination with the provider setting `forcePathStyle: true` (see the specific way of setting this parameter for each SDK above).
The S3 service endpoint is slightly different from the other service endpoints, because AWS is deprecating path-style based access for hosting buckets.
See [S3 documentation](/aws/services/s3) about endpoints.
:::
## Resources
* [AWS SDK for JavaScript](https://aws.amazon.com/sdk-for-javascript/)
* [Official repository of the AWS SDK for JavaScript (v2)](https://github.com/aws/aws-sdk-js)
* [Official repository of the AWS SDK for JavaScript (v3)](https://github.com/aws/aws-sdk-js-v3)
# AWS SDK for PHP
> How to use the PHP AWS SDK with LocalStack.
## Overview
The [AWS SDK for PHP](https://aws.amazon.com/sdk-for-php/), like other AWS SDKs, lets you set the endpoint when creating resource clients,
which is the preferred way of integrating the PHP SDK with LocalStack.
## Example
Here is an example of how to create an `S3Client` with the endpoint set to LocalStack.
```php showshowLineNumbers
use Aws\S3\S3Client;
use Aws\Exception\AwsException;
// Configuring S3 Client with virtual-hosted-style addressing (recommended)
$s3 = new Aws\S3\S3Client([
'version' => '2006-03-01',
'region' => 'us-east-1',
'endpoint' => 'http://s3.localhost.localstack.cloud:4566',
]);
```
This configuration uses virtual-hosted-style addressing, which AWS recommends and some regions require.
If you need to use path-style addressing (for non-DNS-compliant bucket names or other specific requirements), enable it explicitly:
```php showshowLineNumbers
// Only use path-style if you have a specific requirement for it
$s3 = new Aws\S3\S3Client([
'version' => '2006-03-01',
'region' => 'us-east-1',
'use_path_style_endpoint' => true,
'endpoint' => 'http://localhost:4566', // Use non-S3-prefixed endpoint with path-style
]);
```
A full example can be found [in our samples repository](https://github.com/localstack/localstack-aws-sdk-examples/tree/main/php).
## Resources
* [localstack-aws-sdk-examples for PHP](https://github.com/localstack/localstack-aws-sdk-examples/tree/main/php)
* [AWS SDK for PHP](https://aws.amazon.com/sdk-for-php/)
* [Official repository of the AWS SDK for PHP](https://github.com/aws/aws-sdk-php)
# AWS SDK for Python (Boto3)
> How to use the Python Boto3 AWS SDK with LocalStack.
[Boto3](https://github.com/boto/boto3) is the Amazon Web Services (AWS) Software Development Kit (SDK) for Python, which allows Python developers to write software that makes use of AWS services.
You can easily create a `boto3` client that interacts with your LocalStack instance.
The example below creates a `boto3` client that lists all available Lambda functions:
```python showshowLineNumbers
import boto3
endpoint_url = "http://localhost.localstack.cloud:4566"
# alternatively, to use HTTPS endpoint on port 443:
# endpoint_url = "https://localhost.localstack.cloud"
def main():
client = boto3.client("lambda", endpoint_url=endpoint_url)
result = client.list_functions()
print(result)
if __name__ == "__main__":
main()
```
:::note
If you're connecting from within a Python **Lambda function** handler in LocalStack, you can create a default client without configuring the `endpoint_url` - LocalStack will automatically forward the invocations to the local API endpoints (available in Pro, see [here](/aws/customization/networking/transparent-endpoint-injection) for more details).
:::
```python
client = boto3.client("lambda")
...
```
Alternatively, if you prefer to (or need to) set the endpoints directly, you can use the environment variable `AWS_ENDPOINT_URL`, which is available when executing user code (e.g., Lambda functions) in LocalStack:
```python
import os
client = boto3.client("lambda", endpoint_url=os.getenv("AWS_ENDPOINT_URL"))
...
```
### Further Material
* [localstack-python-client](https://github.com/localstack/localstack-python-client): small Python library with additional utils for interacting with LocalStack
# AWS SDK for Ruby
> How to use the Ruby AWS SDK with LocalStack.
## Overview
The [AWS SDK for Ruby](https://aws.amazon.com/sdk-for-ruby/), like other AWS SDKs, lets you set the endpoint when creating resource clients, which is the preferred way of integrating the Ruby SDK with LocalStack.
## Example
Here is an example of how to create a S3 bucket with the AWS configuration endpoint set to LocalStack:
```ruby showshowLineNumbers
require "aws-sdk-s3"
# Wraps Amazon S3 bucket actions.
class BucketCreateWrapper
attr_reader :bucket
# @param bucket [Aws::S3::Bucket] An Amazon S3 bucket initialized with a name.
def initialize(bucket)
@bucket = bucket
end
# Creates an Amazon S3 bucket in the specified AWS Region.
#
# @param region [String] The Region where the bucket is created.
# @return [Boolean] True when the bucket is created; otherwise, false.
def create?(region)
@bucket.create(create_bucket_configuration: { location_constraint: region })
true
rescue Aws::Errors::ServiceError => e
puts "Couldn't create bucket. Here's why: #{e.message}"
false
end
# Gets the Region where the bucket is located.
#
# @return [String] The location of the bucket.
def location
if @bucket.nil?
"None. You must create a bucket before you can get its location!"
else
@bucket.client.get_bucket_location(bucket: @bucket.name).location_constraint
end
rescue Aws::Errors::ServiceError => e
"Couldn't get the location of #{@bucket.name}. Here's why: #{e.message}"
end
end
def run_demo
region = "us-east-2"
Aws.config.update(
endpoint: 'http://s3.localhost.localstack.cloud:4566', # update with localstack endpoint
access_key_id: 'test', # update with localstack credentials
secret_access_key: 'test', # update with localstack credentials
region: region,
force_path_style: true, # Enable 'force_path_style' => true, if bucket name is non DNS compliant
)
bucket_name = "doc-example-bucket-#{SecureRandom.uuid}"
wrapper = BucketCreateWrapper.new(Aws::S3::Bucket.new(bucket_name))
return unless wrapper.create?(region)
puts "Created bucket #{wrapper.bucket.name}."
puts "Your bucket's region is: #{wrapper.location}"
end
run_demo if $PROGRAM_NAME == __FILE__
```
You can run the example by saving it to a file, for example `localstack.rb`, and then running it with:
```bash
ruby ./localstack.rb
Created bucket doc-example-bucket-b911f85f-4dd3-4668-a32e-3f69aa4e37dc.
Your bucket's region is: us-east-2
```
:::note
The endpoint we configure for the S3 and virtual host bucket is `http://s3.localhost.localstack.cloud`.
In case of issues resolving the DNS record, we can fall back to `http://localhost:4566` in combination with the provider setting `force_path_style: true`.
The S3 service endpoint differs slightly from the other service endpoints because AWS deprecates path-style-based access for hosting buckets.
:::
For alternative AWS services, you can use the following configuration:
```ruby showshowLineNumbers
region = "us-east-2"
Aws.config.update(
endpoint: 'http://localhost.localstack.cloud:4566', # update with localstack endpoint
access_key_id: 'test', # update with localstack credentials
secret_access_key: 'test', # update with localstack credentials
region: region,
)
```
## Resources
- [AWS SDK for Ruby](https://aws.amazon.com/sdk-for-ruby/)
- [Official repository of the AWS SDK for Ruby](https://github.com/aws/aws-sdk-ruby)
# Overview
> Use the LocalStack web app as a local equivalent of the AWS Console to inspect and manage resources running on LocalStack.
import SectionCards from '../../../../../components/SectionCards.astro';
If you use the AWS Console today to inspect resources, navigate stacks, or check on your environment, the LocalStack web app gives you the same kind of view for the resources running on your LocalStack instance. Sign in once, and you can browse and manage your local AWS resources without leaving the browser.
# Instance Management
> Instance Management allows you to view and manage your LocalStack instances through the LocalStack Web Application alongside other auxiliary features.
## Introduction
Once your LocalStack instance is running, the [LocalStack Web Application](https://app.localstack.cloud/) is the primary way to access and inspect it from your browser, the local equivalent of opening the AWS Console. **Instance Management** is where you first connect to a running instance and see everything it exposes.
You can access it through the [**LocalStack Instances**](https://app.localstack.cloud/instances) section in the sidebar of the LocalStack Web Application.
From here you can view and manage your LocalStack instances while you build and test your cloud applications locally. Instance Management offers these features:
- **Overview**: Shows the stack details of your LocalStack instances.
- **Status**: Shows the status of the services running in the LocalStack container.
- **Resource Browser**: Lets you view and manage your local AWS resources.
- **State**: Allows you to export and import the state of your LocalStack instances.
- **IAM Policy Stream**: Provides a stream of IAM policies corresponding to the AWS API calls.
- **App Inspector**: Provides insight into the state of your running application, including data payloads and IAM policy evaluation.
- **Chaos Engineering**: Allows you to inject failures & simulate outages in your LocalStack instance.
- **Extensions**: Provides extra integrations to improve your LocalStack experience.
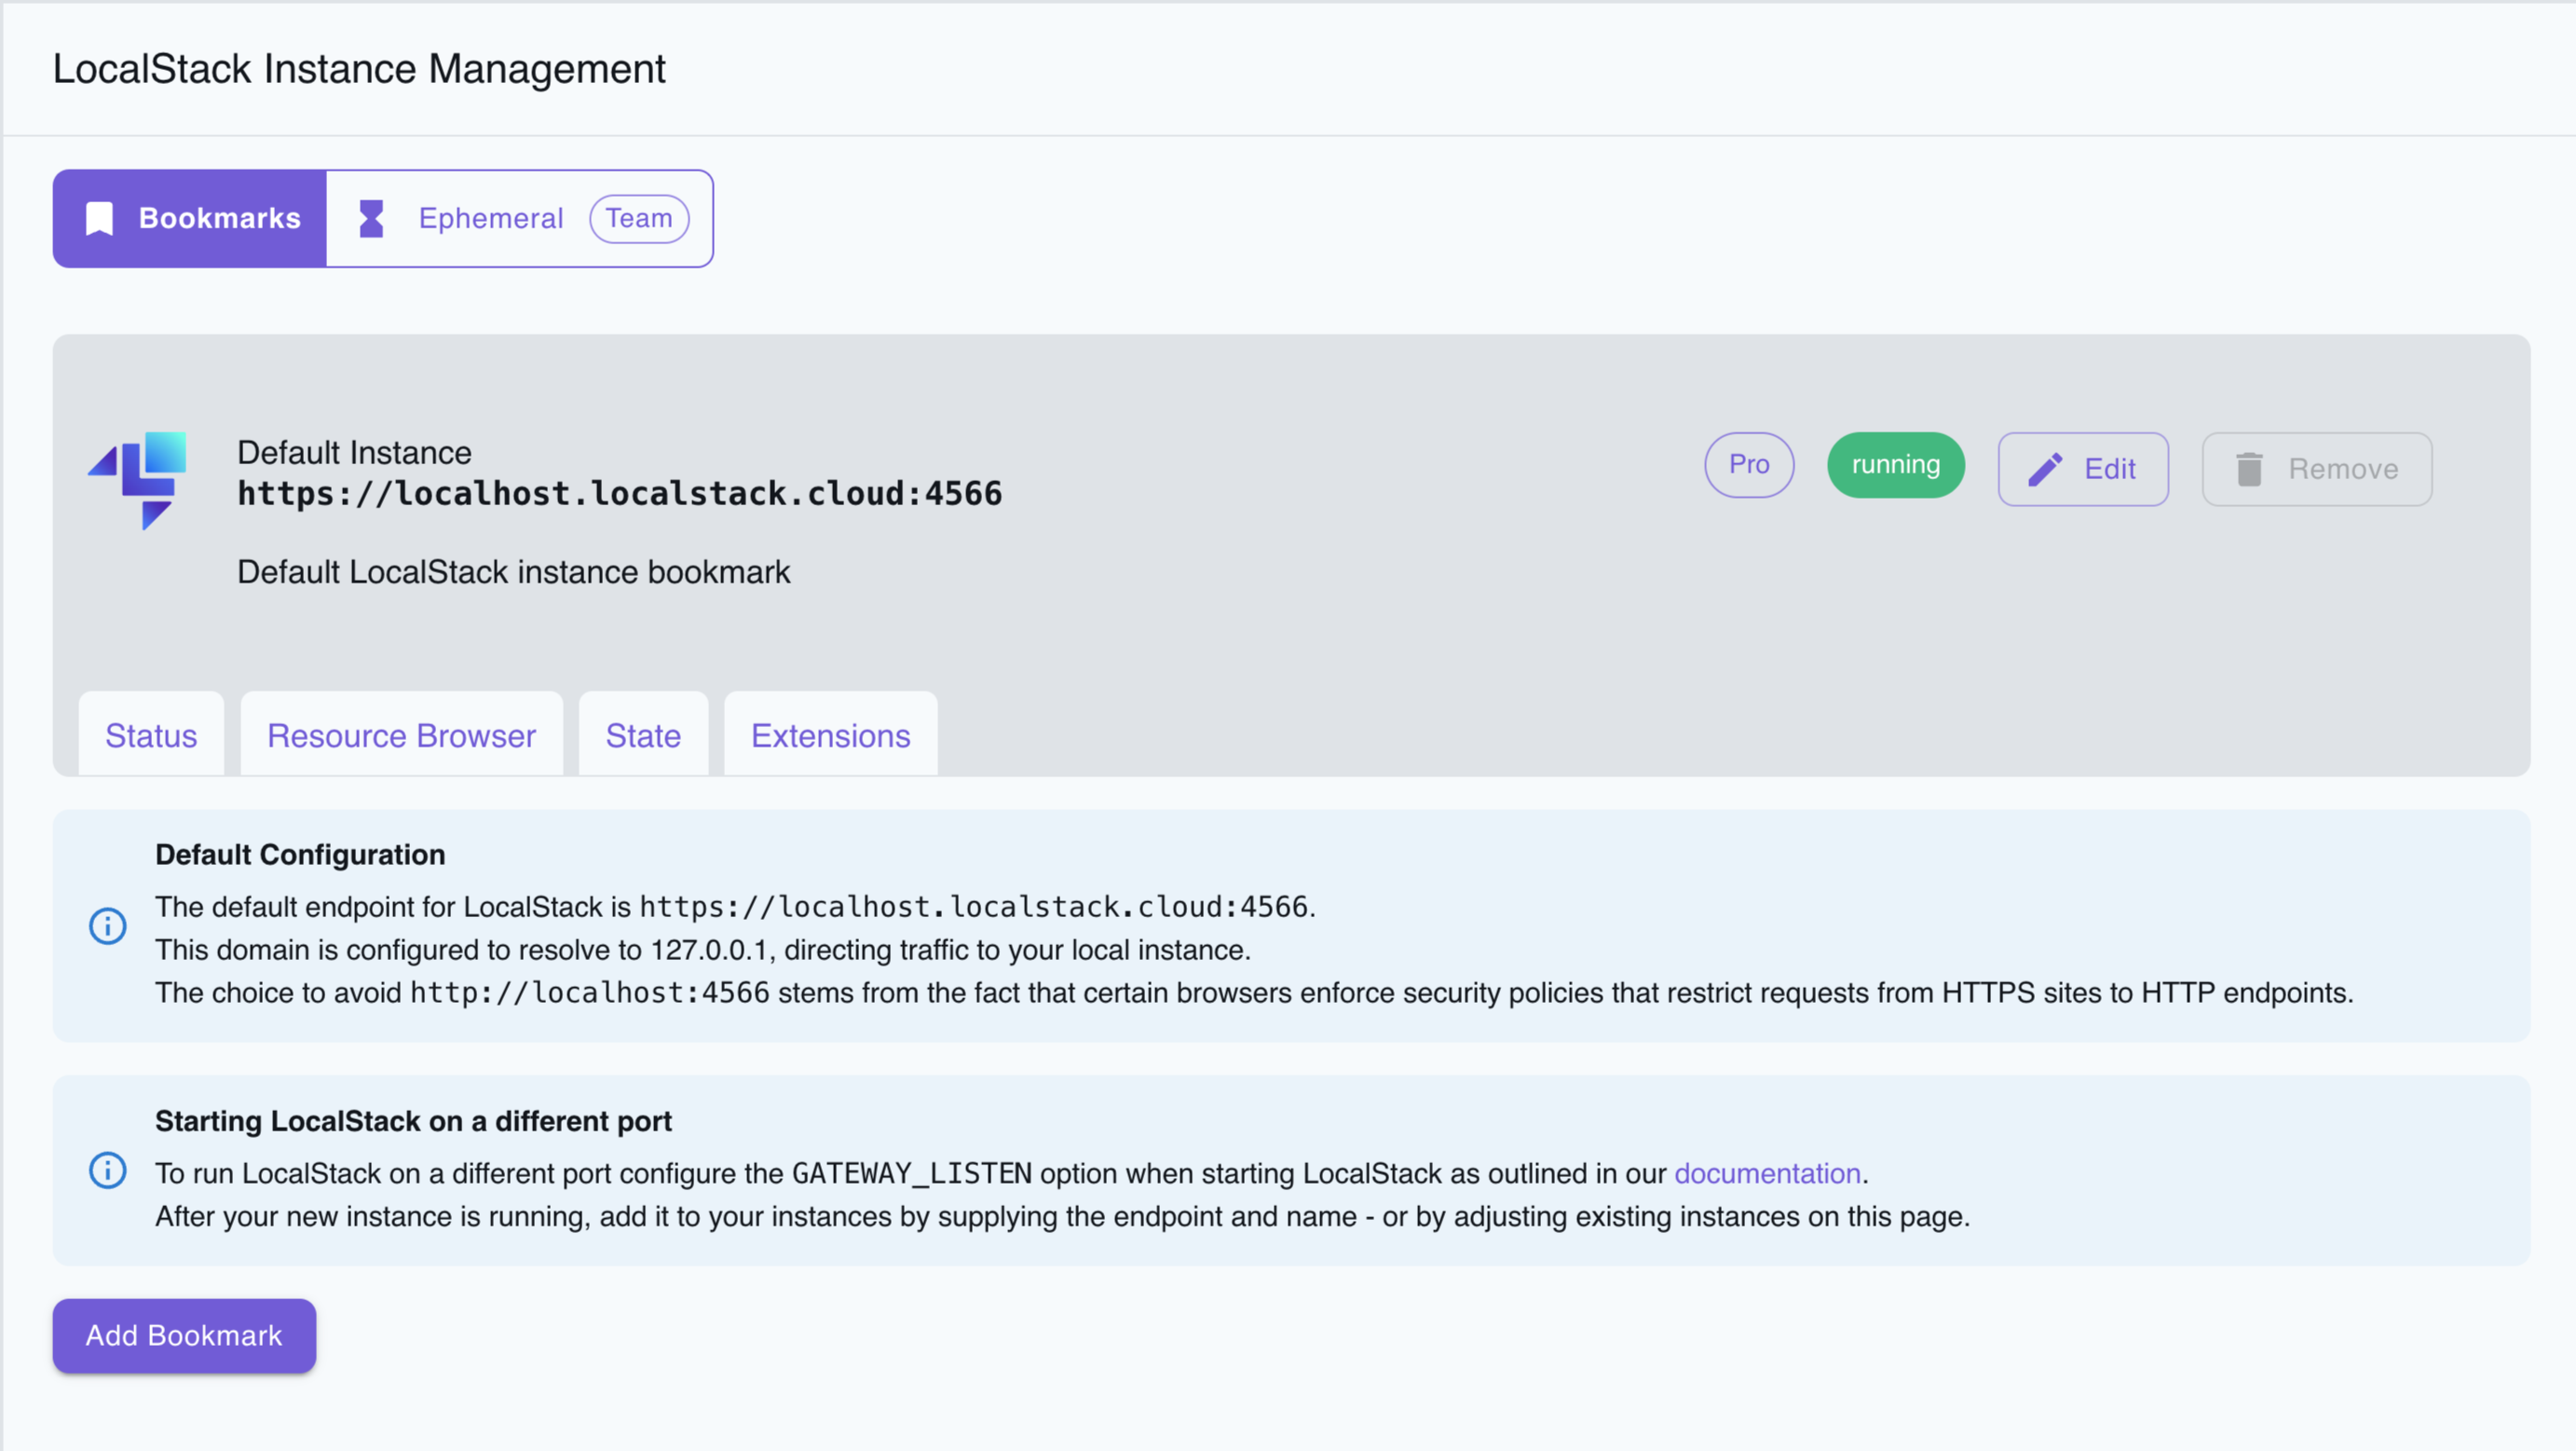
## Instance Bookmark
Instance Bookmark lets users save references to instances without directly creating or managing them.
To create an Instance Bookmark, do the following:
- Click on the **Add Bookmark** button on the Instance Management page.
- Enter a name for the bookmark, specify the endpoint, and add a description.
- Click on the **Save Bookmark** button.
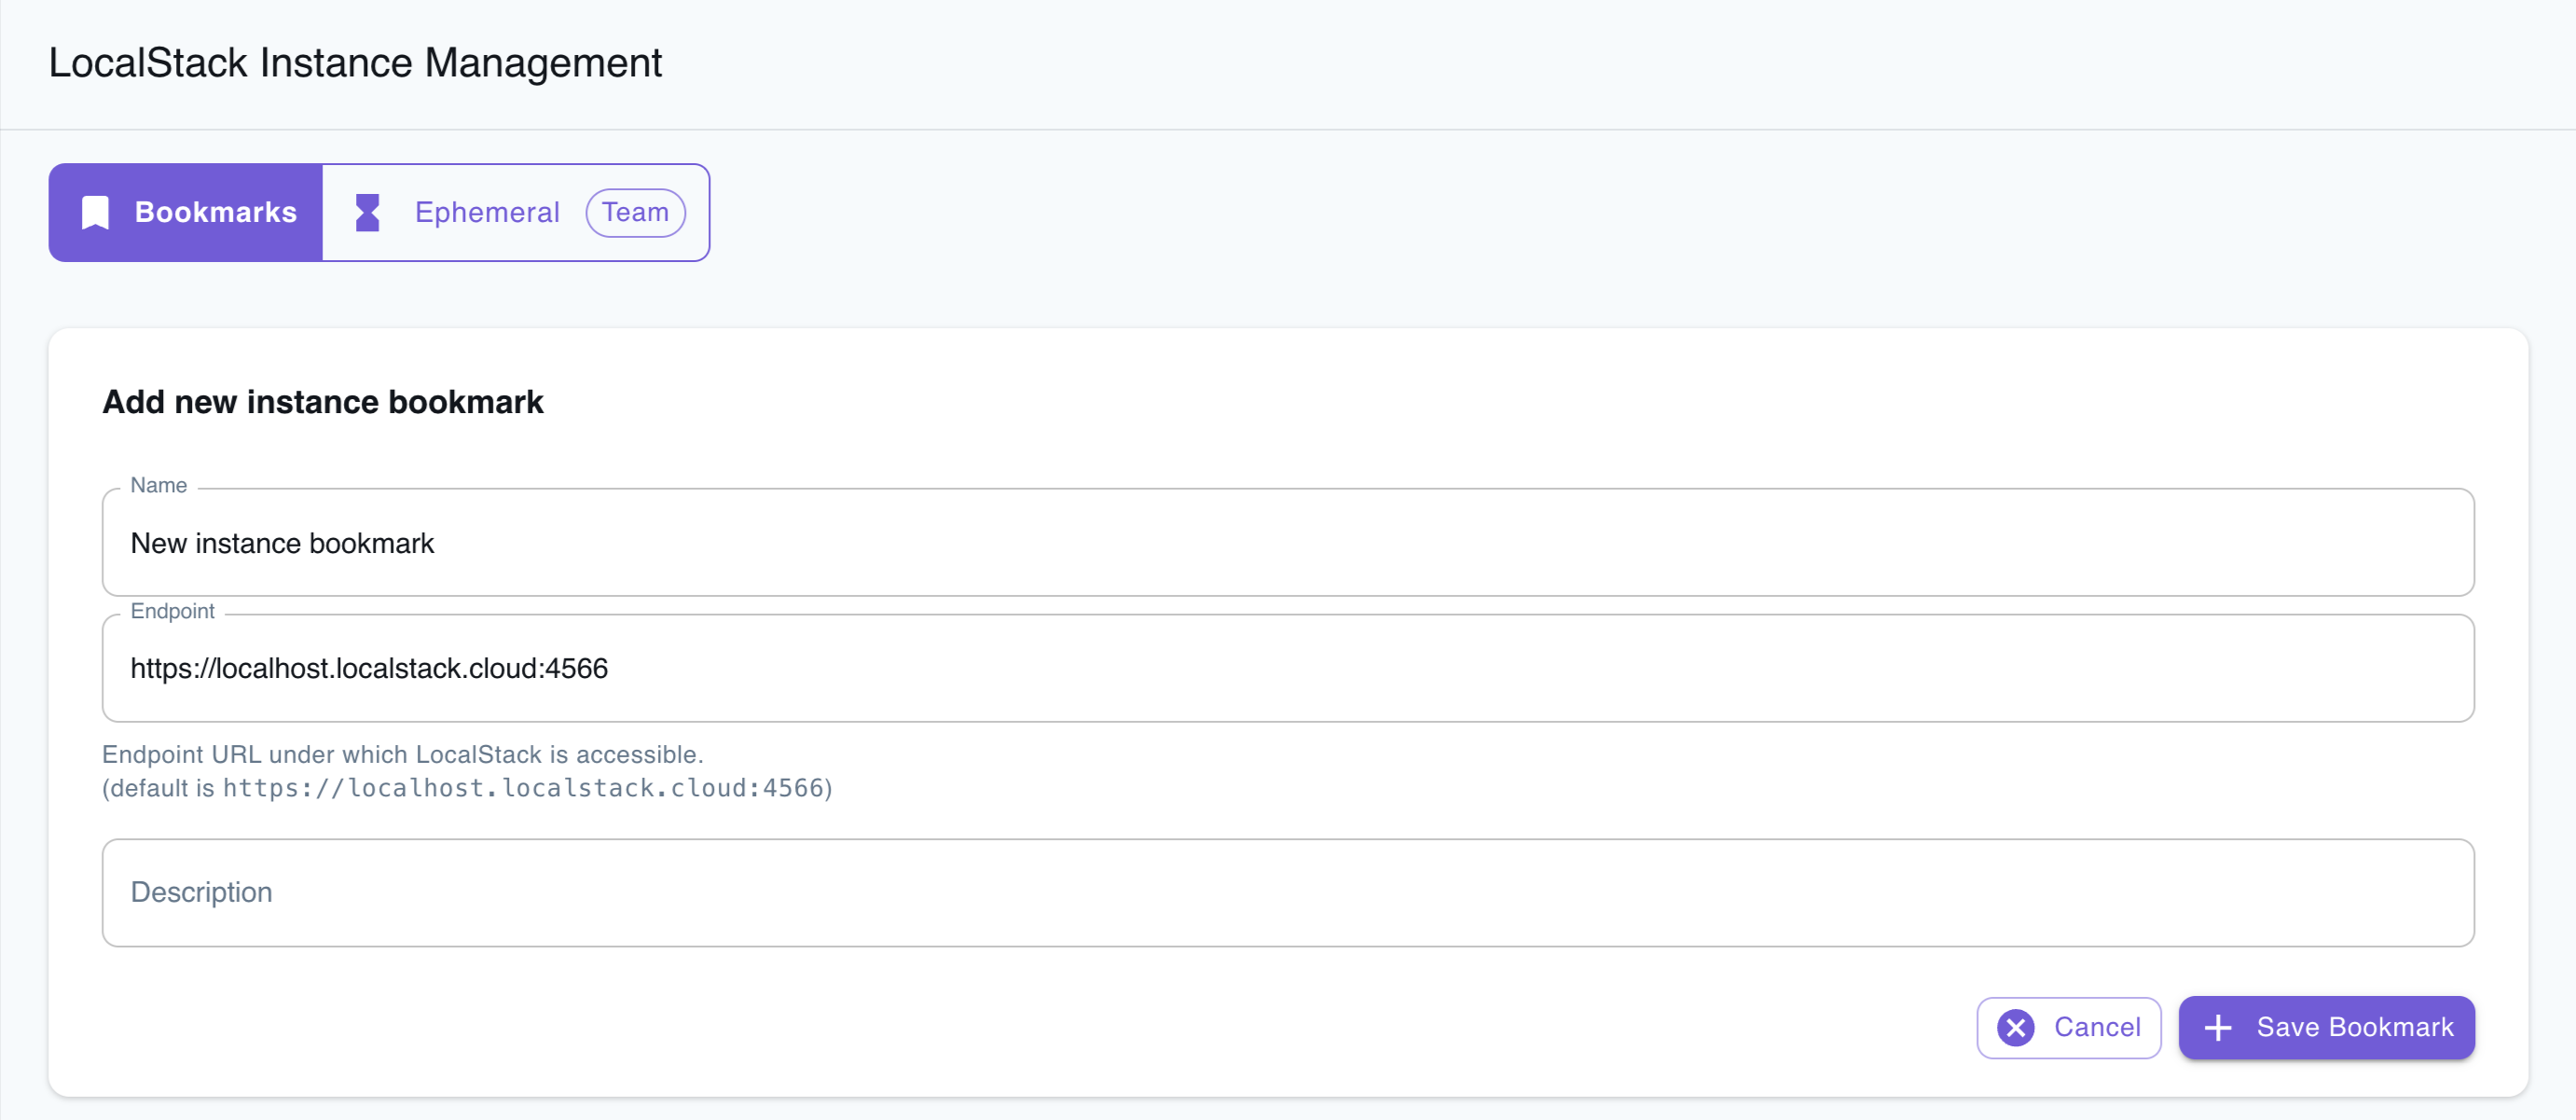
## Connect to an instance on a different machine
You can use the Instance Bookmark feature to connect the LocalStack Web Application to a LocalStack instance running on a different machine.
To connect the Web Application with your running LocalStack instance, you need to ensure the endpoint URL’s server SSL certificate corresponds to the hostname/IP address of the URL.
This is necessary when the endpoint URL is set as something like `https://myhost:4566` or uses an IP address like `https://1.2.3.4:4566`.
Sites with an `https://...` URL must use HTTPS for requests, and the SSL certificate must match the hostname (e.g., localhost.localstack.cloud).
To address this, consider setting up a local TCP proxy server that listens on `127.0.0.1:4566` and forwards all requests to the endpoint where your LocalStack instance runs.
In the Web user interface, you can keep the default setting, `https://localhost.localstack.cloud:4566`.
Tools like [simpleproxy](https://manpages.ubuntu.com/manpages/trusty/man1/simpleproxy.1.html) or [proxy.py](https://github.com/abhinavsingh/proxy.py) can help set this up.
Alternatively, you can direct `localhost.localstack.cloud` to your target machine's IP address by modifying the `/etc/hosts` file, which is useful if you’re using the LocalStack Web UI on a macOS or Linux-based machine.
:::note
To bind to a custom IP address and port, configure the ['GATEWAY_LISTEN' configuration variable](/aws/customization/configuration-options/#core).
For troubleshooting, refer to the [network troubleshooting docs](/aws/customization/networking/).
:::
# Resource Browser
> The Resource Browser allows you to view and manage your local AWS resources through the LocalStack Web Application.
## Introduction
The LocalStack Resource Browser allow you to view, manage, and deploy AWS resources locally while building & testing their cloud applications locally.
It provides an internal, integrated experience, similar to the AWS Management Console, to manage the ephemeral resources in a LocalStack container on your local machine.
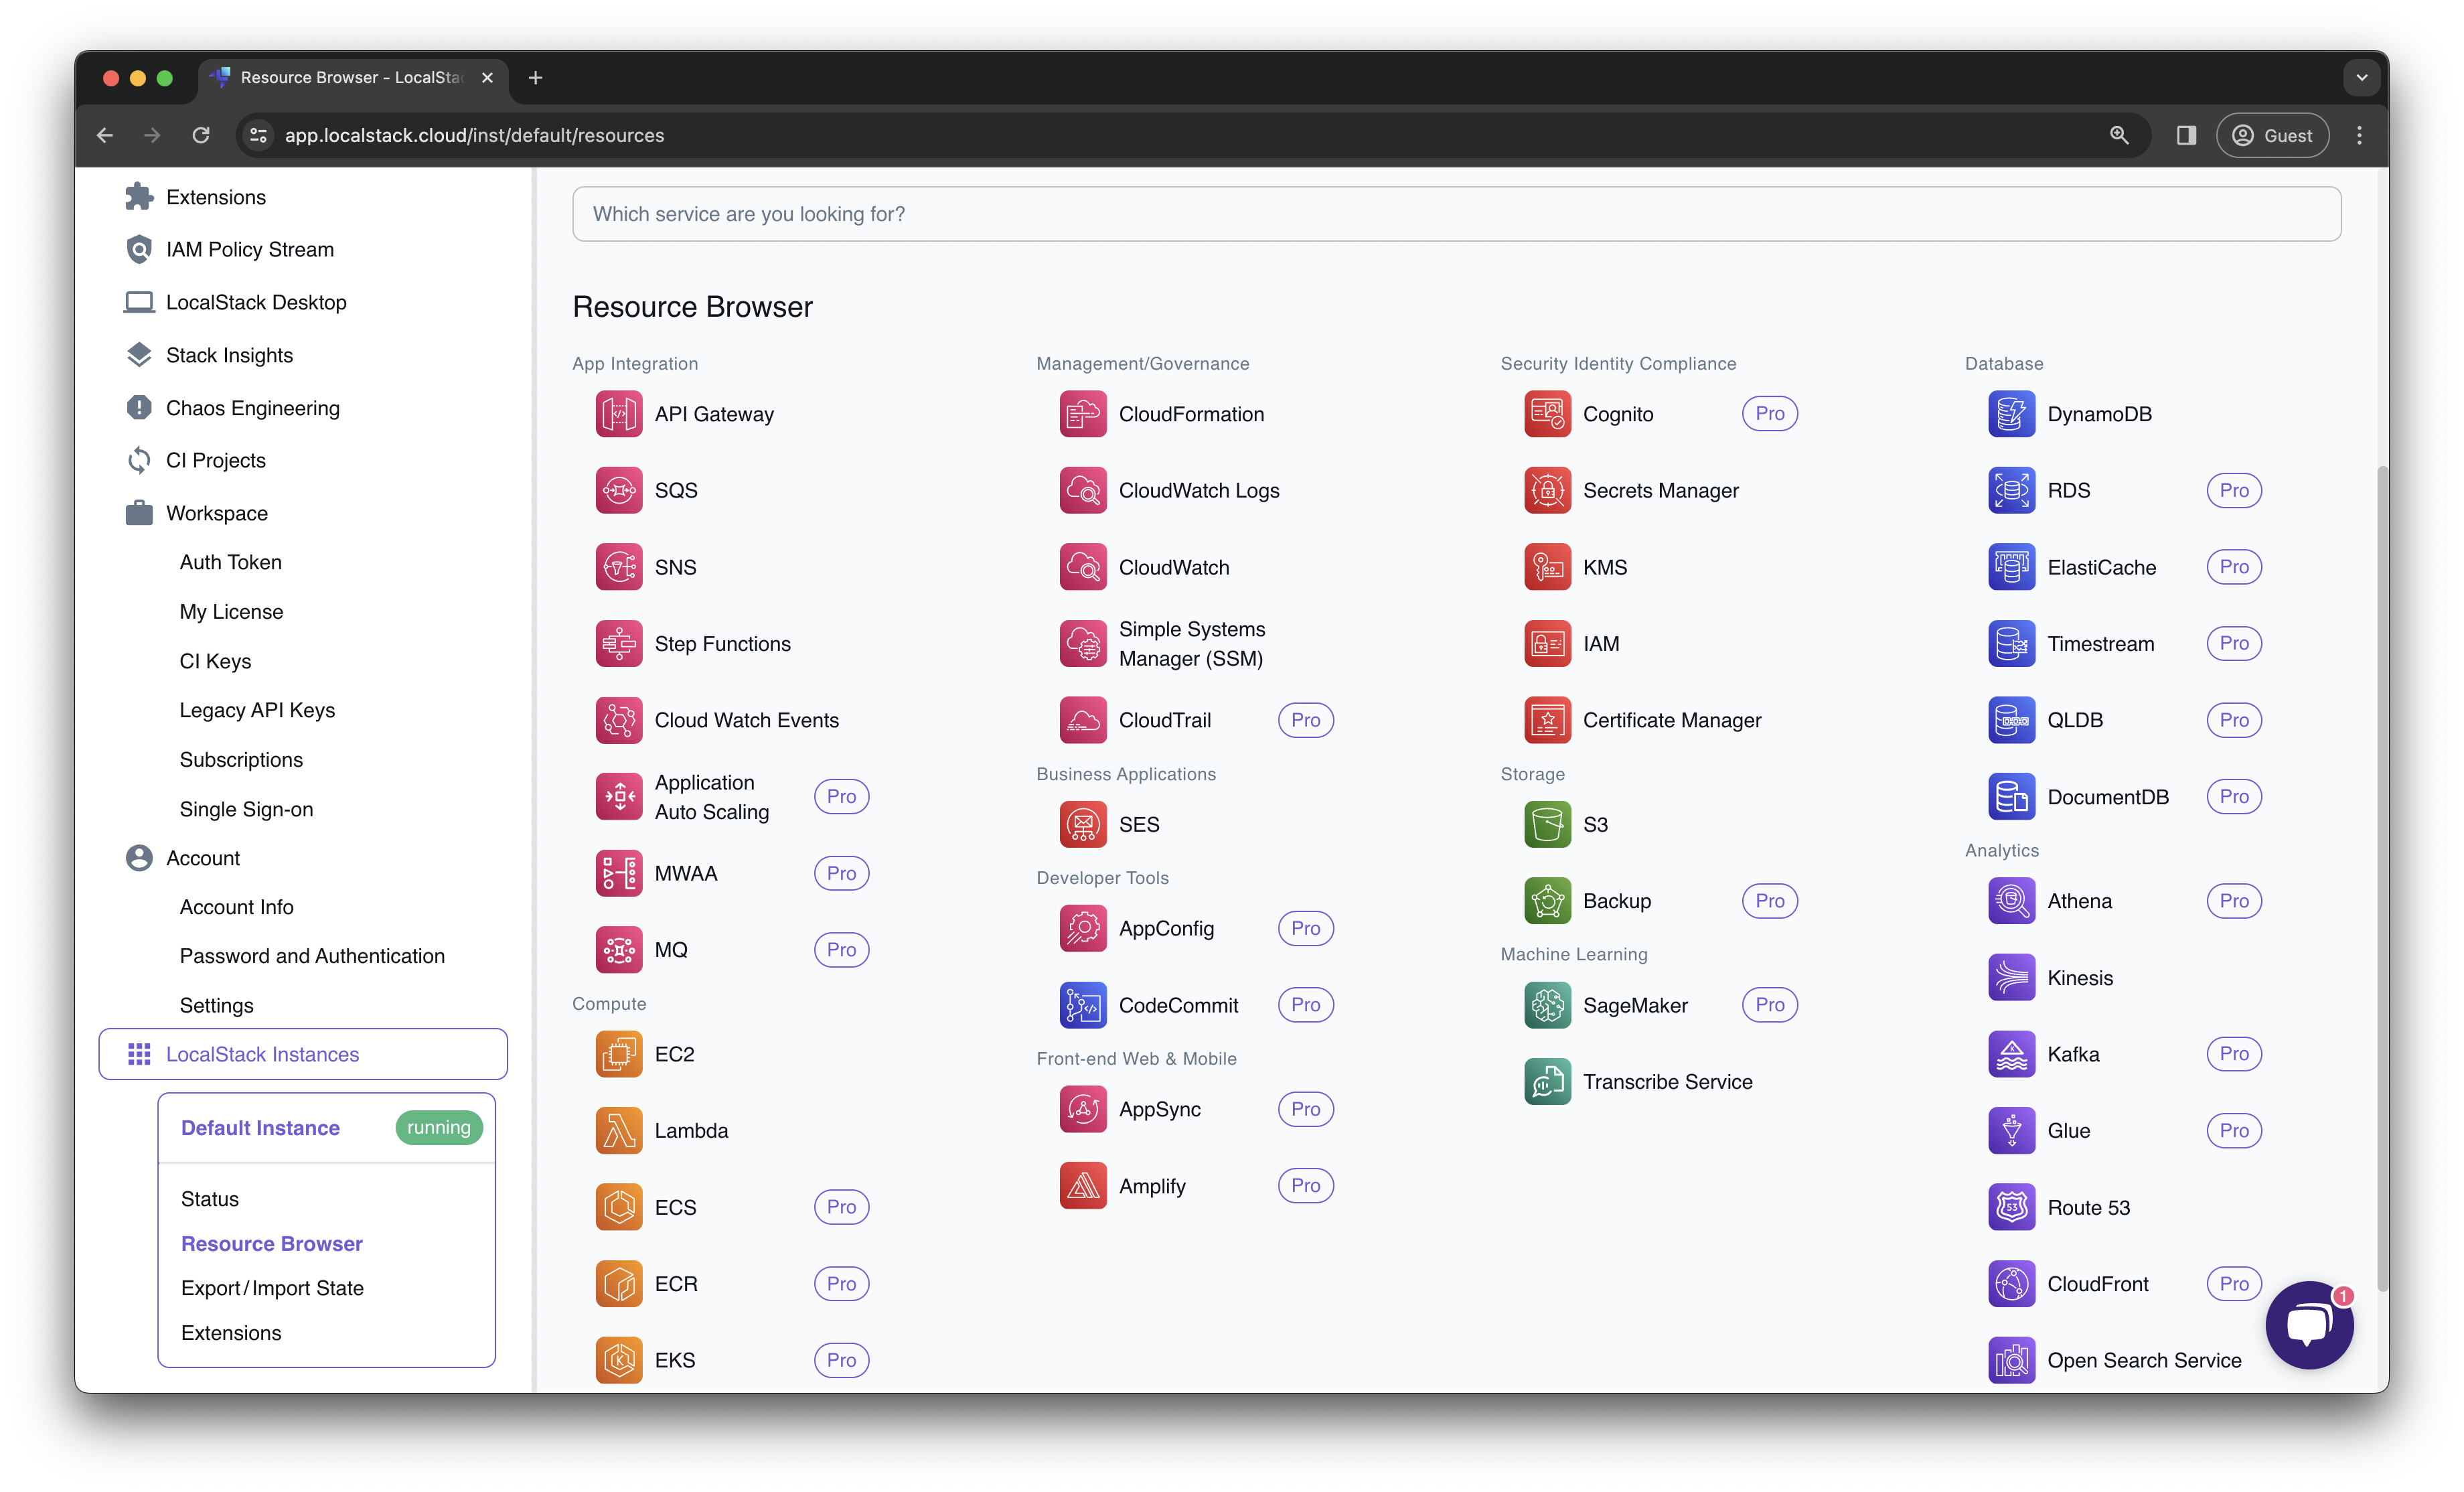
The Resource Browser provide an experience similar to the AWS Management Console.
However, the Resource Browser is not a replacement for the AWS Management Console and only replicate some of the features of the AWS Management Console.
We recommend using our [integrations](/aws/customization/integrations/) to create your resources, with the Resource Browser being used for quick viewing and management of your resources.
The LocalStack Web Application connects to your LocalStack container and retrieves the information about your local resources directly via `localhost` without using the internet.
None of the information is sent to the internet, or stored on any external servers maintained by LocalStack.
:::tip
An AWS region dropdown menu in the dashboard is located on the top right of the page.
You can select your desired region to ensure that you can view your resources.
If you cannot view resources that you have recently created, you should verify that you are checking the resources in the correct region.
:::
## Supported services
The Resource Browser supports the following AWS services:
| Resource Group | Service |
|------------------------------|-------------------------------------------------------------------------------------------------------|
| **App Integration** | [API Gateway](https://app.localstack.cloud/inst/default/resources/apigateway) |
| | [Amazon MQ](https://app.localstack.cloud/inst/default/resources/mq/brokers) |
| | [Amazon MWAA](https://app.localstack.cloud/inst/default/resources/mwaa/environments) |
| | [Amazon SNS](https://app.localstack.cloud/inst/default/resources/sns) |
| | [Amazon SQS](https://app.localstack.cloud/inst/default/resources/sqs) |
| | [Application Auto Scaling](https://app.localstack.cloud/inst/default/resources/application-autoscaling) |
| | [AWS Step Functions](https://app.localstack.cloud/inst/default/resources/stepfunctions) |
| **Compute** | [Amazon EC2](https://app.localstack.cloud/inst/default/resources/ec2) |
| | [Amazon ECS](https://app.localstack.cloud/inst/default/resources/ecs) |
| | [Amazon ECR](https://app.localstack.cloud/inst/default/resources/ecr/repositories) |
| | [Amazon EKS](https://app.localstack.cloud/inst/default/resources/eks/clusters) |
| | [AWS Lambda](https://app.localstack.cloud/inst/default/resources/lambda/functions) |
| **Management/Governance** | [AWS Account](https://app.localstack.cloud/inst/default/resources/account/contactinfo) |
| | [AWS CloudFormation](https://app.localstack.cloud/inst/default/resources/cloudformation) |
| | [Amazon CloudWatch](https://app.localstack.cloud/inst/default/resources/cloudwatch) |
| | [Amazon CloudTrail](https://app.localstack.cloud/inst/default/resources/cloudtrail/events) |
| | [Amazon EventBridge (CloudWatch Events)](https://app.localstack.cloud/inst/default/resources/events) |
| | [AWS Systems Manager (SSM)](https://app.localstack.cloud/inst/default/resources/ssm) |
| **Business Applications** | [Amazon SES](https://app.localstack.cloud/inst/default/resources/ses) |
| **Developer Tools** | [AWS AppConfig](https://app.localstack.cloud/inst/default/resources/appconfig/applications) |
| | [AWS CodeCommit](https://app.localstack.cloud/inst/default/resources/codecommit/repositories) |
| **Front-end Web & Mobile** | [AWS Amplify](https://app.localstack.cloud/inst/default/resources/amplify/apps) |
| | [AWS AppSync](https://app.localstack.cloud/inst/default/resources/appsync) |
| **Security Identity Compliance** | [AWS ACM (Certificate Manager)](https://app.localstack.cloud/inst/default/resources/acm/certificates) |
| | [Amazon Cognito Identity](https://app.localstack.cloud/inst/default/resources/cognito-idp) |
| | [AWS IAM (Identity and Access Management)](https://app.localstack.cloud/inst/default/resources/iam) |
| | [AWS Key Management Service (KMS)](https://app.localstack.cloud/inst/default/resources/kms) |
| | [AWS Secrets Manager](https://app.localstack.cloud/inst/default/resources/secretsmanager) |
| **Storage** | [Amazon S3](https://app.localstack.cloud/inst/default/resources/s3) |
| | [AWS Backup](https://app.localstack.cloud/inst/default/resources/backup/plans) |
| **Machine Learning** | [Amazon SageMaker](https://app.localstack.cloud/inst/default/resources/sagemaker/models) |
| | [Amazon Transcribe](https://app.localstack.cloud/inst/default/resources/transcribe/transcriptionjobs) |
| **Database** | [Amazon DynamoDB](https://app.localstack.cloud/inst/default/resources/dynamodb) |
| | [Amazon RDS](https://app.localstack.cloud/inst/default/resources/rds) |
| | [Amazon ElastiCache](https://app.localstack.cloud/inst/default/resources/elasticache) |
| | [Amazon DocumentDB](https://app.localstack.cloud/inst/default/resources/docdb/clusters) |
| | [Amazon Neptune](https://app.localstack.cloud/inst/default/resources/neptune/clusters) |
| | [Amazon Timestream](https://app.localstack.cloud/inst/default/resources/timestream-write) |
| | [Amazon Redshift](https://app.localstack.cloud/inst/default/resources/redshift/clusters) |
| **Analytics** | [Amazon Athena](https://app.localstack.cloud/inst/default/resources/athena/databases) |
| | [Amazon Kinesis](https://app.localstack.cloud/inst/default/resources/kinesis) |
| | [Amazon MSK (Managed Streaming for Kafka)](https://app.localstack.cloud/inst/default/resources/kafka) |
| | [AWS Glue](https://app.localstack.cloud/inst/default/resources/glue) |
| | [Amazon Route 53](https://app.localstack.cloud/inst/default/resources/route53) |
| | [Amazon CloudFront](https://app.localstack.cloud/inst/default/resources/cloudfront/distributions) |
| | [Amazon OpenSearch Service](https://app.localstack.cloud/inst/default/resources/opensearch/domains) |
| **Cloud Financial Management** | [AWS Cost Explorer](https://app.localstack.cloud/inst/default/resources/ce/costcategorydefinitions) |
| **Migration & Transfer** | [Database Migration Service](https://app.localstack.cloud/inst/default/resources/dms/endpoints) |
## Troubleshooting
If you encounter a `Network Failure` error message while accessing the Resource Browser, it is likely that the LocalStack container is not running or the instance is not reachable at the endpoint specified in the instance bookmark.
# Stack Overview
> Stack Overview reflects the current state of your LocalStack environment.
## Introduction
The Stack Overview provides a summary of deployed resources, categorized services with configurations, and quick access to resource details like identifiers and endpoints.
You can access the Stack Overview in the [LocalStack Web Application](https://app.localstack.cloud/inst/default/overview).
Alternatively, go to your LocalStack Instance and click on **Overview** to see a high-level visualization of your locally running cloud app architecture.
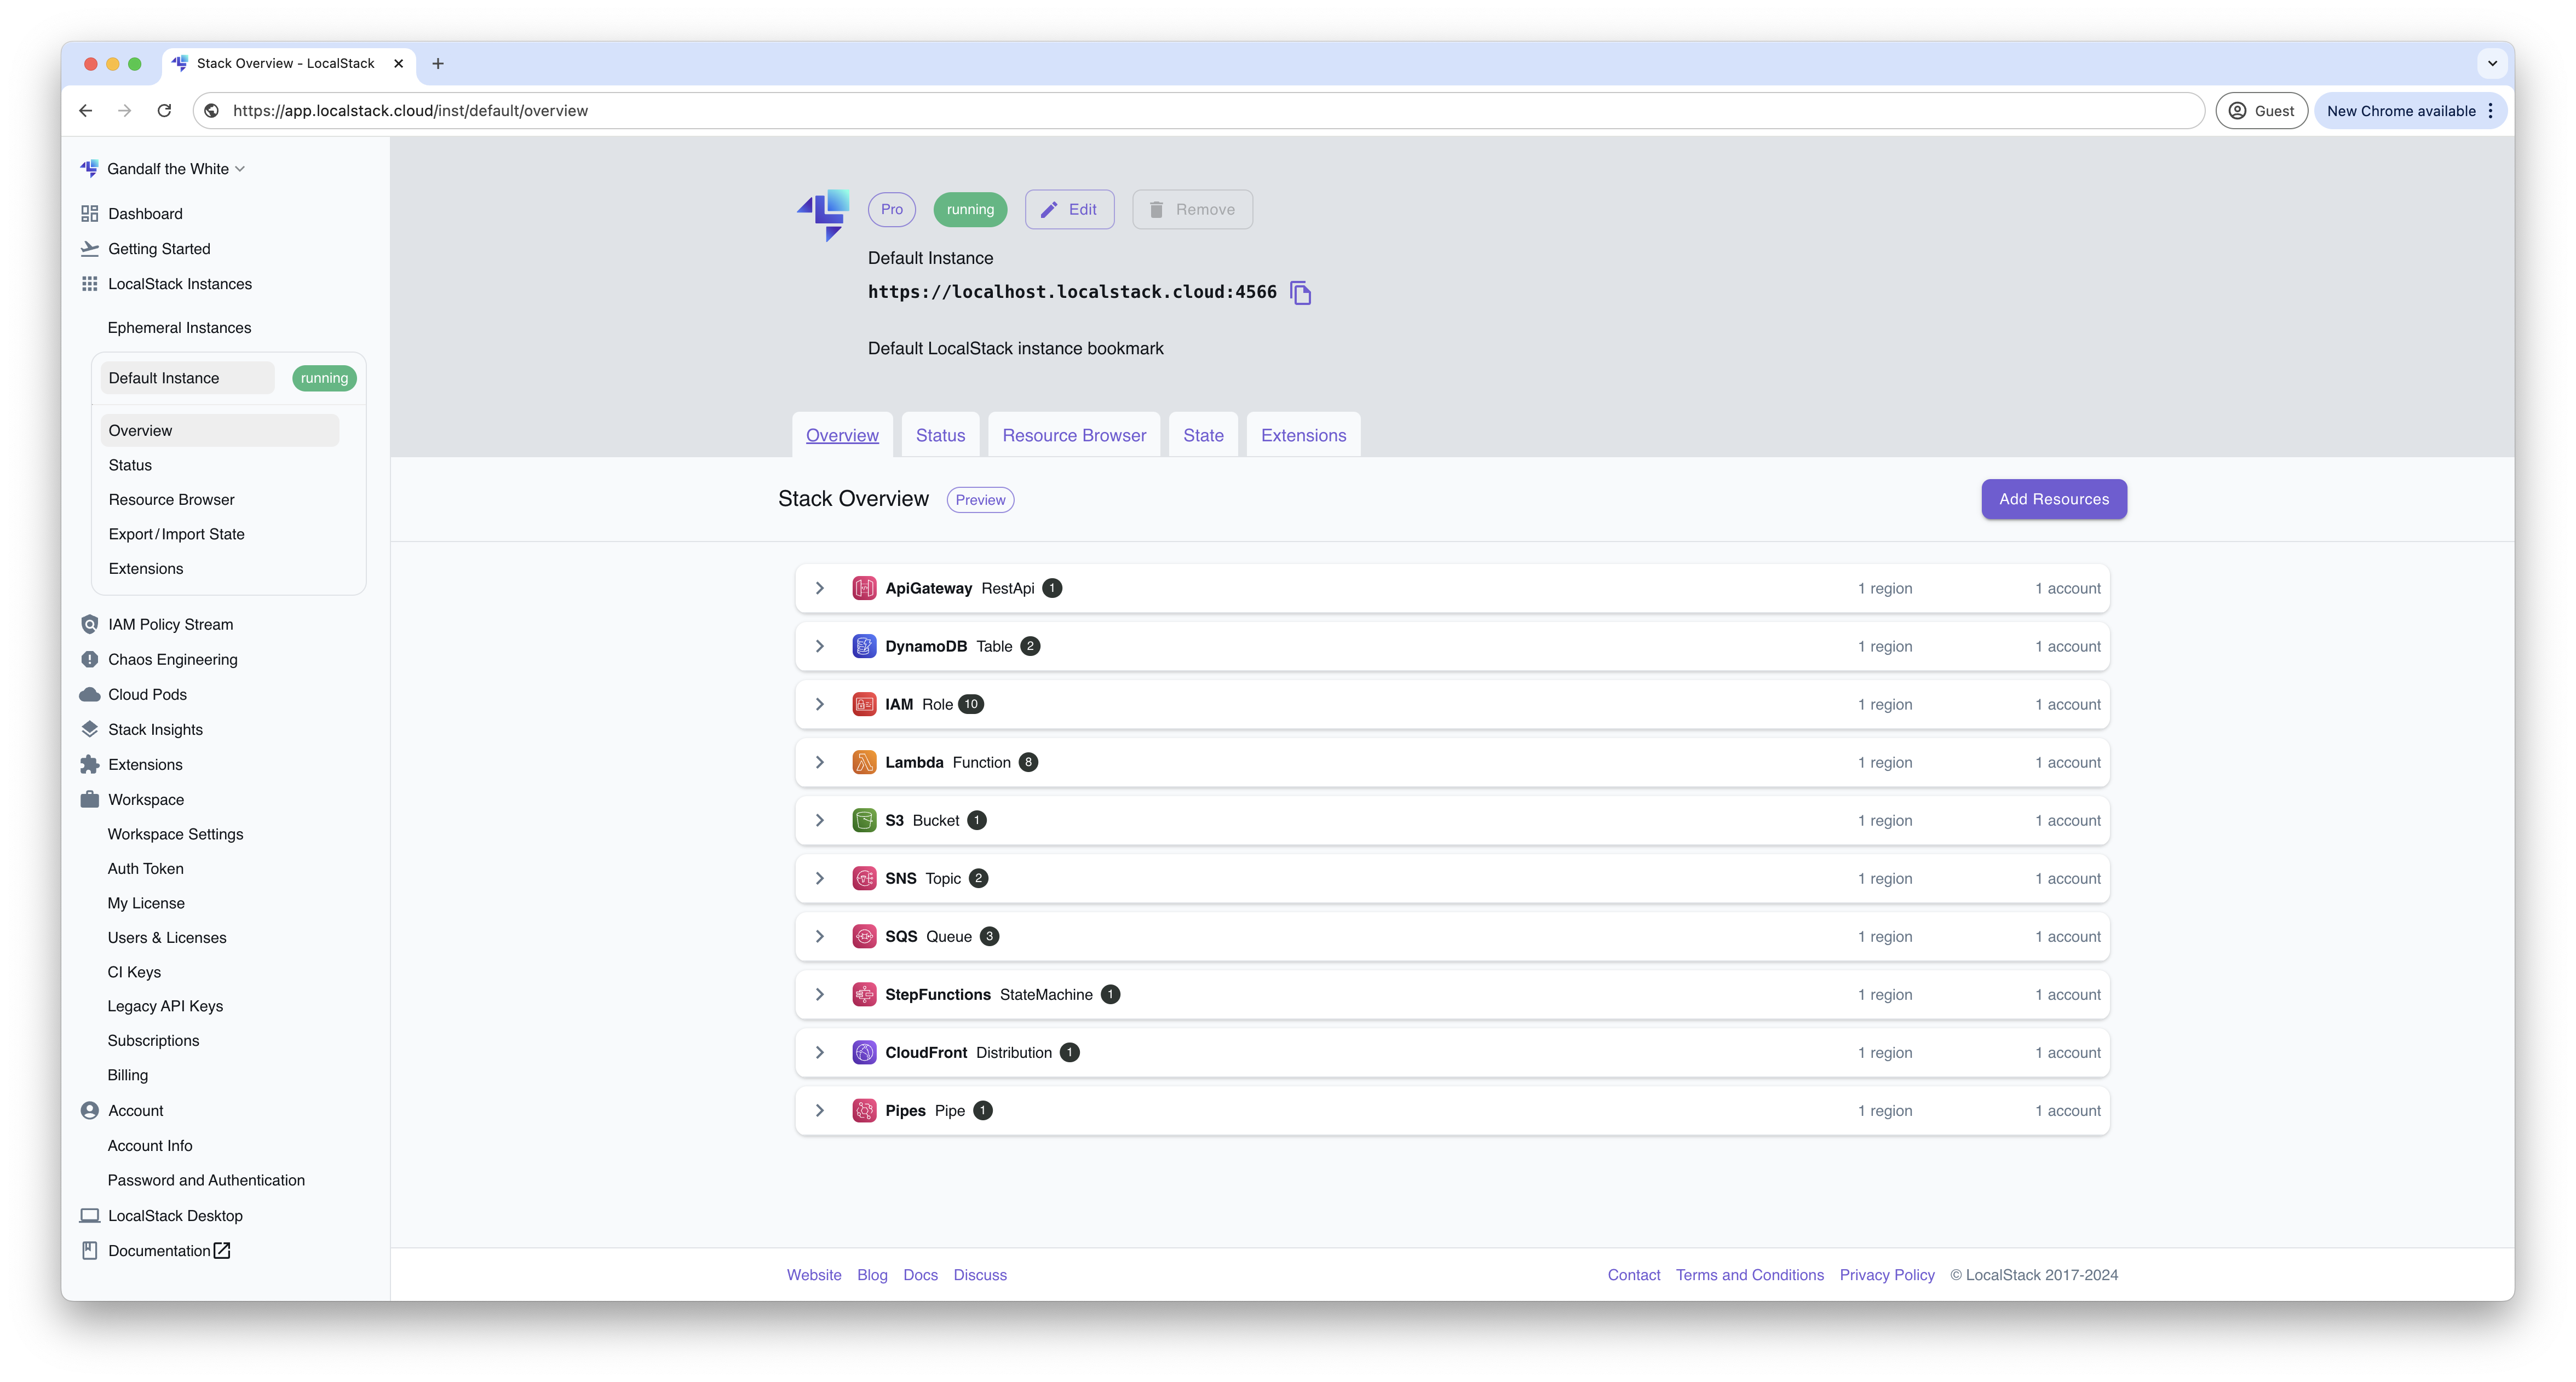
:::note
Stack Overview is offered as a **preview** feature and is under active development.
:::
## Supported Resources
The following resources are supported by Stack Overview:
1. [`AWS::ApiGateway::RestApi`](https://docs.aws.amazon.com/AWSCloudFormation/latest/UserGuide/aws-resource-apigateway-restapi.html)
2. [`AWS::CloudFormation::Stack`](https://docs.aws.amazon.com/AWSCloudFormation/latest/UserGuide/aws-resource-cloudformation-stack.html)
3. [`AWS::DynamoDB::Table`](https://docs.aws.amazon.com/AWSCloudFormation/latest/UserGuide/aws-resource-dynamodb-table.html)
4. [`AWS::EC2::VPC`](https://docs.aws.amazon.com/AWSCloudFormation/latest/UserGuide/aws-resource-ec2-vpc.html)
5. [`AWS::Events::EventBus`](https://docs.aws.amazon.com/AWSCloudFormation/latest/UserGuide/aws-resource-events-eventbus.html)
6. [`AWS::IAM::Group`](https://docs.aws.amazon.com/AWSCloudFormation/latest/UserGuide/aws-resource-iam-group.html)
7. [`AWS::IAM::Role`](https://docs.aws.amazon.com/AWSCloudFormation/latest/UserGuide/aws-resource-iam-role.html)
8. [`AWS::IAM::User`](https://docs.aws.amazon.com/AWSCloudFormation/latest/UserGuide/aws-resource-iam-user.html)
9. [`AWS::Lambda::Function`](https://docs.aws.amazon.com/AWSCloudFormation/latest/UserGuide/aws-resource-lambda-function.html)
10. [`AWS::S3::Bucket`](https://docs.aws.amazon.com/AWSCloudFormation/latest/UserGuide/aws-resource-s3-bucket.html)
11. [`AWS::SES::EmailIdentity`](https://docs.aws.amazon.com/AWSCloudFormation/latest/UserGuide/aws-resource-ses-emailidentity.html)
12. [`AWS::SNS::Topic`](https://docs.aws.amazon.com/AWSCloudFormation/latest/UserGuide/aws-resource-sns-topic.html)
13. [`AWS::SQS::Queue`](https://docs.aws.amazon.com/AWSCloudFormation/latest/UserGuide/aws-resource-sqs-queue.html)
14. [`AWS::SSM::Parameter`](https://docs.aws.amazon.com/AWSCloudFormation/latest/UserGuide/aws-resource-ssm-parameter.html)
15. [`AWS::SecretsManager::Secret`](https://docs.aws.amazon.com/AWSCloudFormation/latest/UserGuide/aws-resource-secretsmanager-secret.html)
16. [`AWS::StepFunctions::StateMachine`](https://docs.aws.amazon.com/AWSCloudFormation/latest/UserGuide/aws-resource-stepfunctions-statemachine.html)
17. [`AWS::CloudFront::Distribution`](https://docs.aws.amazon.com/AWSCloudFormation/latest/UserGuide/aws-resource-cloudfront-distribution.html)
18. [`AWS::Pipes::Pipe`](https://docs.aws.amazon.com/AWSCloudFormation/latest/UserGuide/aws-resource-pipes-pipe.html)
# Credentials
> Credentials for accessing LocalStack AWS API
Like AWS, LocalStack requires AWS credentials to be supplied in all API operations.
## Access Key ID
For root accounts, the choice of access key ID affects [multi-account namespacing](/aws/customization/advanced/multi-account-setups).
Access key IDs can be one of following patterns:
### Accounts IDs
You can specify a 12-digit number which will be taken by LocalStack as the account ID.
For example, `112233445566`.
### Structured access key ID
You can specify a structured key like `LSIAQAAAAAAVNCBMPNSG` (which translates to account ID `000000000042`).
This must be at least 20 characters in length and must be decodable to an account ID.
By default, LocalStack will only accept access keys that start with the `LSIA...` or `LKIA...` prefix.
If keys with `ASIA...`/`AKIA...` prefix are provided, these are rejected and the fallback account ID `000000000000` is used.
This is a safeguard to prevent misuse of production AWS access key IDs.
To disable this safeguard, set the `PARITY_AWS_ACCESS_KEY_ID` configuration variable.
:::danger
Disabling the access key safeguard and using production access key IDs may cause accidental connections to AWS.
We strongly recommend leaving it on.
:::
Please refer to the [IAM docs](/aws/services/iam) to learn how to create access keys in LocalStack.
### Alphanumeric string
You can also specify an arbitrary alphanumeric access key ID like `test` or `foobar123`.
In all such cases, the account ID is evaluated to `000000000000`.
## Secret Access Key
The value of the secret access key is generally ignored by LocalStack.
We recommend using the same value as access key ID or `test`.
S3 can optionally validate request signatures, in which case the secret access key matters: it must be the secret the access key ID was issued with, or `test` for access key IDs not issued by LocalStack.
See [S3 signature validation](/aws/services/s3/#signature-validation) for details.
# Overview
> Connect to LocalStack from your IDE. Install, configure, run, and inspect LocalStack without leaving your editor.
import SectionCards from '../../../../../components/SectionCards.astro';
Use IDE extensions to install, configure, run, and inspect LocalStack alongside the code you are developing, without leaving your editor. The LocalStack Toolkit manages the LocalStack lifecycle from VS Code, and the AWS Toolkit for VS Code lets you browse and operate on the resources running on your LocalStack instance from a familiar AWS-style explorer.
# AWS Toolkit for VS Code
> Use the AWS Toolkit for VS Code to browse and operate on AWS resources running on LocalStack.
## Introduction
The [AWS Toolkit for VS Code](https://docs.aws.amazon.com/toolkit-for-vscode/) is an Amazon-maintained extension for Visual Studio Code that lets you interact with AWS resources directly from the editor.
When configured with a `localstack` profile, the AWS Toolkit operates against your local LocalStack instance instead of a real AWS account, giving you the same AWS-style resource browser experience you already use against AWS.
## AWS Explorer
Once installed, the AWS Toolkit adds an **AWS Explorer** view to the VS Code activity bar. Selecting the `localstack` profile points the Explorer at your local LocalStack instance, where you can browse the resources you have provisioned.
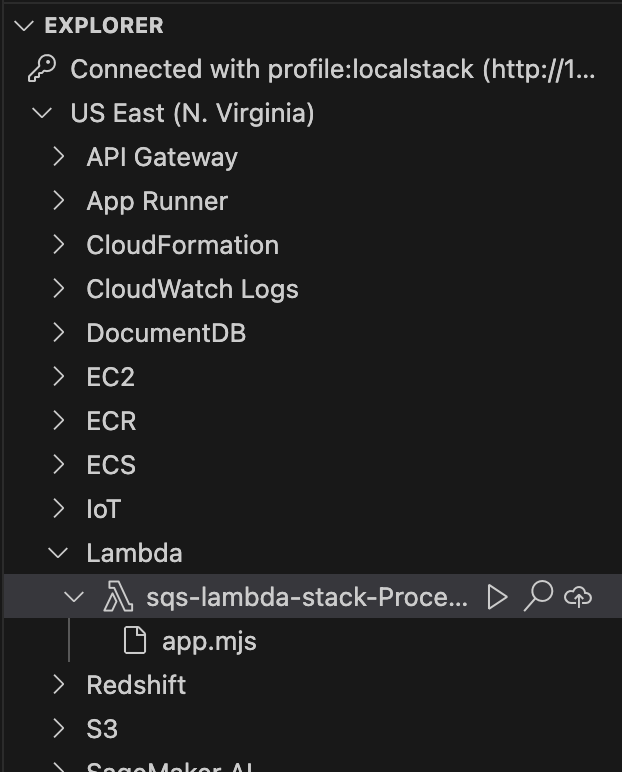
For installation, profile setup, and the full set of features the AWS Toolkit provides, see the [AWS Toolkit for VS Code User Guide](https://docs.aws.amazon.com/toolkit-for-vscode/).
# LocalStack Toolkit for VS Code
> Install, configure, and run LocalStack without leaving VS Code.
## Introduction
The [LocalStack Toolkit for VS Code](https://github.com/localstack/localstack-toolkit-vscode) enables you to install, configure, and run LocalStack without leaving VS Code.
## Prerequisites
- [VS Code](https://code.visualstudio.com/)
## Install and configure LocalStack
The setup wizard ensures LocalStack is installed and configured for a seamless integration with AWS tools, like the AWS CLI, SDKs, AWS SAM or the AWS CDK.
LocalStack can be installed either locally for the current user or globally for all users.
You can [start using LocalStack for free by signing up for a free account](https://www.localstack.cloud/pricing) or signing into an existing one. The setup wizard facilitates this process and configures your authentication token required to start LocalStack.
The LocalStack Toolkit integrates seamlessly with AWS tools like the [AWS CLI](https://docs.aws.amazon.com/cli/latest/userguide/cli-chap-getting-started.html). It automatically configures a dedicated `localstack` AWS profile in your `.aws/config` and `.aws/credentials` files, if one is not already present.

## Run LocalStack
The LocalStack button in the VS Code status bar provides an instant view of LocalStack's runtime status, such as `stopped` or `running`.

The status bar button provides access to `Start` and `Stop` LocalStack commands. The status button turns red if LocalStack is not found or misconfigured. You can also open the LocalStack log view from here.

## Viewing LocalStack logs
You can see LocalStack logs in the VS Code Output panel. Simply select LocalStack from the drop-down menu.
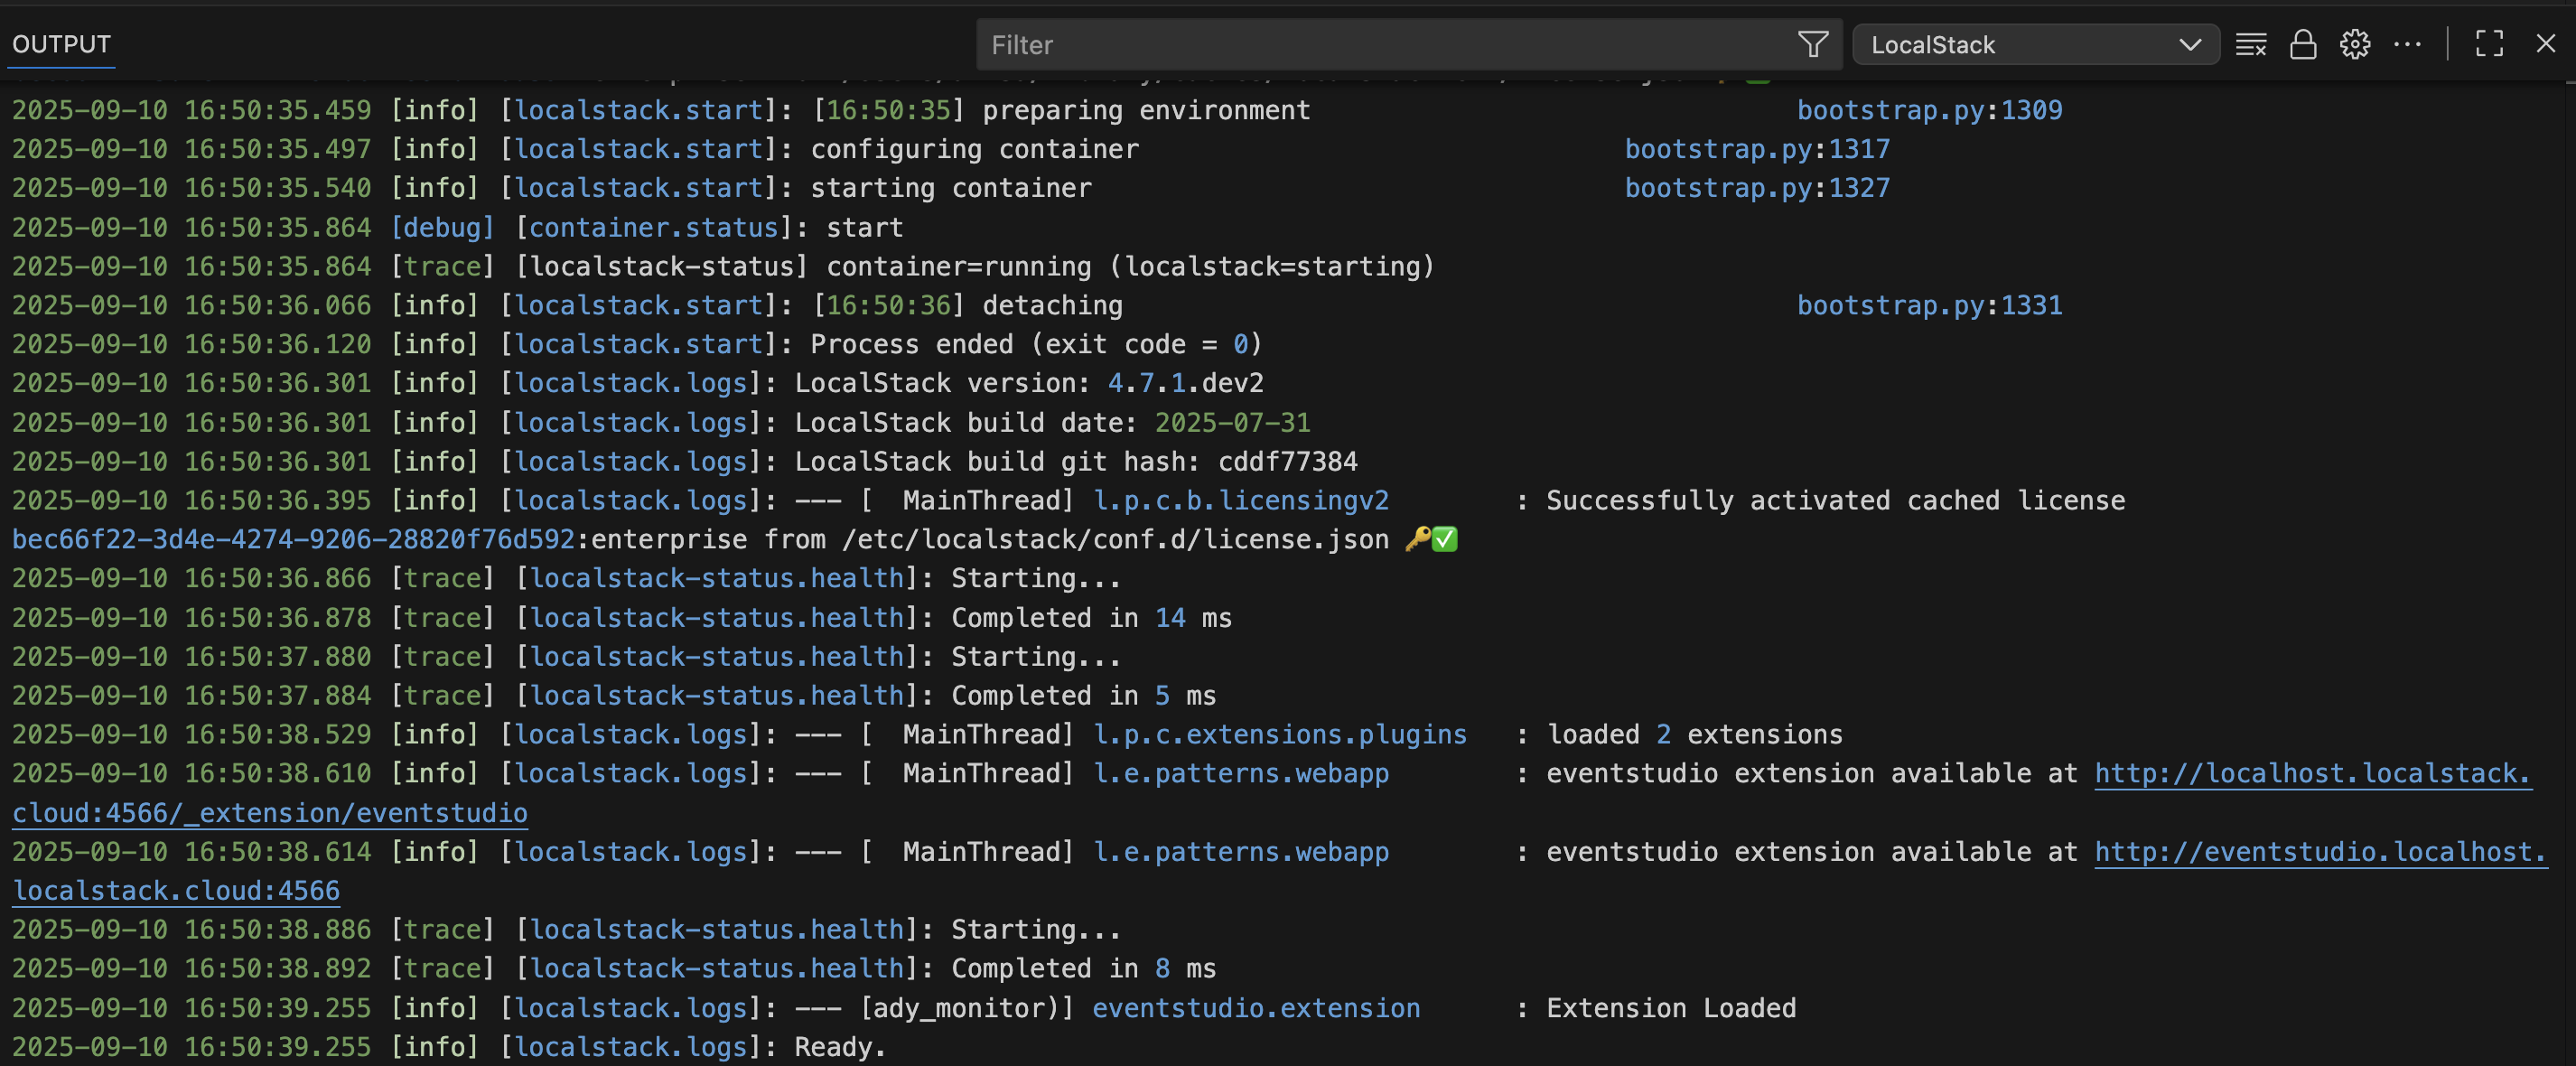
## `localstack` AWS profile
Once the profile is configured you can use it from your favorite AWS tools like AWS CLI, SDKs, CDK to deploy to and interact with LocalStack.
For example, to list SQS queues using the AWS CLI and your `localstack` profile:
```bash
aws --profile localstack sqs list-queues
```
## LocalStack Commands Table
| ID | Title | Menu Contexts |
| --------------------------------- | ---------------------------------- | ---------------- |
| `localstack.configureAwsProfiles` | Configure AWS Profile "localstack" | `commandPalette` |
| `localstack.setup` | Run Setup Wizard | `commandPalette` |
| `localstack.start` | Start LocalStack | `commandPalette` |
| `localstack.stop` | Stop LocalStack | `commandPalette` |
| `localstack.viewLogs` | View Logs | `commandPalette` |
:::note
The AWS Toolkit for VS Code, a separate VS Code extension available from Amazon, now provides the ability to connect with LocalStack. This automates much of the existing manual setup required to debug Lambda functions (https://docs.localstack.cloud/aws/developer-tools/lambda-tools/remote-debugging/).
:::
## Contributing
[Read our contributing guidelines](https://github.com/localstack/localstack-toolkit-vscode/blob/main/CONTRIBUTING.md) to learn how you can help.
### LocalStack Toolkit for VS Code extension support
Please provide feedback or report an issue on the LocalStack Toolkit for VS Code by using our [GitHub Discussions board](https://github.com/orgs/localstack/discussions) page.
### LocalStack general support
For LocalStack-related questions, feedback, and contributions, you can visit our [help & support page](/aws/help-support/get-help/) to learn about the different support channels and report issues on our [GitHub Discussions board](https://github.com/orgs/localstack/discussions/new/choose).
# Overview
> Deploy resources to LocalStack using the same Infrastructure as Code tools you already use against AWS.
import SectionCards from '../../../../../components/SectionCards.astro';
If you provision AWS resources with an Infrastructure as Code (IaC) tool today, you can keep using the same templates, modules, and stacks against LocalStack. Each integration shows how to point your IaC tool at LocalStack so the resources are created locally instead of in your AWS account.
# AWS CDK
> Use the AWS CDK (Cloud Development Kit) with LocalStack.

## Overview
The AWS Cloud Development Kit (CDK) is an Infrastructure-as-Code (IaC) tool using general-purpose programming languages such as TypeScript/JavaScript, Python, Java, and .NET to programmatically define your cloud architecture on AWS.
## AWS CDK CLI for LocalStack
[`lstk cdk`](/aws/developer-tools/running-localstack/lstk/cloud-and-iac-commands/#cdk) proxies the [AWS CDK](https://github.com/aws/aws-cdk) library against local APIs provided by LocalStack. It requires the AWS CDK CLI version `2.177.0` or newer on your `PATH`.
:::note
`lstk cdk` supersedes the older [`cdklocal` wrapper script](/aws/connecting/infrastructure-as-code/deprecated-wrapper-scripts#cdklocal), which is deprecated but still available if you need it.
:::
### Installation
Install `lstk` by following the [`lstk` installation instructions](/aws/developer-tools/running-localstack/lstk/#installation).
You'll also need the AWS CDK CLI installed separately:
```bash
# Install globally
npm install -g aws-cdk
# Verify it installed correctly
cdk --version
```
### Usage
`lstk cdk` can be used as a drop-in replacement of where you would otherwise use `cdk` when targeting the AWS Cloud.
```bash
lstk cdk --help
```
### Configuration
`lstk cdk`'s only lstk-specific flag (before the CDK action) is `--region ` (default `us-east-1`); CDK always targets the default LocalStack account `000000000000`, so there is no `--account` flag.
The following environment variables can be configured:
- `AWS_ENDPOINT_URL`: The endpoint URL (i.e., protocol, host, and port) to connect to LocalStack (default: `http://localhost.localstack.cloud:4566`)
- `AWS_ENDPOINT_URL_S3`: The S3-specific endpoint URL, required alongside `AWS_ENDPOINT_URL` and must include `.s3.` to correctly identify S3 API calls
- `LSTK_CDK_CMD`: Binary to invoke (default `cdk`)
- `AWS_REGION`: Fallback for `--region`
### Example
Make sure that LocalStack is installed and successfully started with the required services before running the example
```bash
curl http://localhost.localstack.cloud:4566/_localstack/health
```
The CDK command line ships with a sample app generator to run a quick test for getting started.
```bash
# create sample app
mkdir /tmp/test; cd /tmp/test
lstk cdk init sample-app --language=javascript
# bootstrap localstack environment
lstk cdk bootstrap
# deploy the sample app
lstk cdk deploy
> Do you wish to deploy these changes (y/n)? y
```
Once the deployment is done, you can inspect the created resources via the [`lstk aws`](/aws/developer-tools/running-localstack/lstk/cloud-and-iac-commands/#aws) command line
```bash
lstk aws sns list-topics
{
"Topics": [
{
"TopicArn": "arn:aws:sns:us-east-1:000000000000:TestStack-TestTopic339EC197-79F43WWCCS4Z"
}
]
}
```
## Current Limitations
### Updating CDK stacks
Updating CDK stacks may result in deployment failures and inconsistent state within LocalStack.
It is advisable to prioritize re-creating (deleting and re-deploying) over updating stacks.
:::note
CDK Asset deployment (e.g., Lambda code, S3 content) requires a LocalStack paid plan.
This process relies on the `AWS::CloudFormation::CustomResource` API. If deployments hang or fail silently, check the LocalStack logs for `CustomResource` errors.
:::
### Stacks with validated certificates
By default, stacks with validated certificates may not be deployed using the `local` lambda executor.
This originates from the way how CDK ensures the certificate is ready - it creates a single-file lambda function with a single dependency on `aws-sdk` which is usually preinstalled and available globally in lambda runtime.
When this lambda is executed locally from the `/tmp` folder, the package can not be discovered by Node due to the way how Node package resolution works.
## CDK Version Compatibility
`lstk cdk` requires AWS CDK CLI `2.177.0` or newer, as noted in [Installation](#installation).
If you're using an older `aws-cdk` version, or the legacy `cdklocal` wrapper script, see [CDK Version Compatibility](/aws/connecting/infrastructure-as-code/deprecated-wrapper-scripts#cdklocal) on the deprecated wrapper scripts page for the relevant environment-variable workarounds.
# AWS Chalice
> Use AWS Chalice with LocalStack.
import { FileTree } from '@astrojs/starlight/components';
[AWS Chalice](https://aws.github.io/chalice/) is a serverless micro framework used to develop and deploy your serverless applications on AWS resources.
Chalice provides integrated functionality with most of the AWS Toolings like S3 Storage, Simple Queue Service, API Gateway and more.
It offers a handy CLI interface that allows you to easily create, develop & deploy your serverless applications.
LocalStack offers an [AWS Chalice client](https://github.com/localstack/chalice-local) that allows you to interact with your Chalice applications locally.
Using LocalStack, you can kick-start your development process, create a new Chalice application, and test it application locally.
## Creating a new Chalice project
Start LocalStack inside a Docker container by running:
```bash
lstk start
```
Install the `chalice-local` package by running:
```bash
pip install chalice-local
```
You can now create a new Chalice project by running:
```bash
chalice-local new-project
```
You will be prompted with an interactive menu where you can choose the name of your project and the project type.
In this example, we are using `localstack-test` as the project name and `REST API` as the project type:
```sh
___ _ _ _ _ ___ ___ ___
/ __|| || | /_\ | | |_ _|/ __|| __|
| (__ | __ | / _ \ | |__ | || (__ | _|
\___||_||_|/_/ \_\|____||___|\___||___|
The python serverless microframework for AWS allows
you to quickly create and deploy applications using
Amazon API Gateway and AWS Lambda.
Please enter the project name
[?] Enter the project name: localstack-test
[?] Select your project type: REST API
> REST API
S3 Event Handler
Lambda Functions only
Legacy REST API Template
[CDK] Rest API with a DynamoDB table
Your project has been generated in ./localstack-test
```
Let's take a look inside the project structure:
- app.py
- chalicelib
- \_\_init\_\_.py
- requirements-dev.txt
- requirements.txt
- tests
- \_\_init\_\_.py
- test_app.py
The `app.py` is our main API file.
It has only one Route that would assign the URL of the application to the function.
The decorators here primarily "wrap" functions here which makes it easy to write Code Logic by breaking them down into separate routes.
For now, our Application is serving only a JSON Message which is `{'hello': 'world'}`.
## Testing the Chalice API
Just as with AWS, you can now test your API using `chalice-local local`:
```bash
chalice-local local
Serving on http://127.0.0.1:8000
```
You can also do a `curl` to test the API:
```bash
curl -X GET http://127.0.0.1:8000
{"hello":"world"}
```
## Deploying the Chalice API
You can use `chalice-local deploy` to deploy the REST API now:
```bash
chalice-local deploy
Creating deployment package.
Creating IAM role: localstack-test-dev
Creating lambda function: localstack-test-dev
Creating Rest API
Resources deployed:
- Lambda ARN: arn:aws:lambda:us-east-1:000000000000:function:localstack-test-dev
- Rest API URL: https://y5iuni004m.execute-api.us-east-1.amazonaws.com/api/
```
We now have our Chalice Application deployed on a Lambda Amazon Resource Name (ARN) along with a REST API URL.
# AWS SAM
> Use the AWS SAM (Serverless Application Model) with LocalStack.
## Introduction
The AWS Serverless Application Model (SAM) is an open-source framework for developing serverless applications.
It uses a simplified syntax to define functions, APIs, databases, and event source mappings.
When you deploy, SAM converts its syntax into AWS CloudFormation syntax, helping you create serverless applications more quickly.
LocalStack can work with SAM using [`lstk sam`](/aws/developer-tools/running-localstack/lstk/cloud-and-iac-commands/#sam), which lets you deploy SAM applications on LocalStack.
This guide explains how to set up local AWS resources using `lstk sam`.
## `lstk sam`
`lstk sam` proxies the `sam` command line interface, facilitating the use of the SAM framework with LocalStack.
When executing deployment commands like `lstk sam [ build | deploy | validate | package ]`, it configures the SAM settings for LocalStack and runs the specified SAM command.
:::note
`lstk sam` supersedes the older [`samlocal` wrapper script](/aws/connecting/infrastructure-as-code/deprecated-wrapper-scripts#samlocal), which is deprecated but still available if you need it.
:::
### Install lstk
To use `lstk sam`, install `lstk` by following the [`lstk` installation instructions](/aws/developer-tools/running-localstack/lstk/#installation).
You'll also need the [AWS SAM CLI](https://docs.aws.amazon.com/serverless-application-model/latest/developerguide/install-sam-cli.html) (version `1.95.0` or newer) installed and on your `PATH`.
### Create a new SAM project
You can initialize a new SAM project using the following command:
```bash
lstk sam init
```
Select `1` to create a new SAM application using an AWS Quick Start template.
The SAM CLI will ask you for the project name and the runtime for the Lambda function.
For this example, select `1` for the Hello World example.
Choose the Python runtime and `zip` for the packaging type.
Optionally, you can enable X-Ray tracing, monitoring, and structured JSON logging.
Then, enter the project name and press `Enter`.
### Deploy the SAM application
After initializing the SAM project, enter the project directory and deploy the application using the following command:
```bash
lstk sam deploy --guided
```
Enter the default values for the deployment, such as the stack name, region, and confirm the changes.
`lstk sam` will package and deploy the application to LocalStack.
### Configuration
The `lstk sam` command supports several options and environment variables beyond what is available with the standard `sam` command.
| Option | Default | Description |
|----------------------|-----------------|--------------|
| `--region ` | `us-east-1` | Deployment region |
| `--account ` | `000000000000` | Target AWS account id (12 digits) |
`lstk sam`-specific flags must appear **before** the SAM action (for example, `lstk sam --region us-west-2 build`)
| Environment Variable | Default value | Description |
|-------------------------|----------------|--------------|
| `AWS_ENDPOINT_URL` | - | Override the auto-resolved LocalStack endpoint |
| `AWS_ENDPOINT_URL_S3` | - | Override the auto-resolved LocalStack S3 endpoint |
| `LSTK_SAM_CMD` | `sam` | Binary to invoke |
| `AWS_REGION` | - | Fallback for `--region` |
| `AWS_ACCESS_KEY_ID` | - | Fallback for `--account` |
## Debugging on VS Code
To debug your Lambda functions in VS Code while using the SAM CLI's `sam local` command alongside other services provided by LocalStack, set up a launch configuration in the `.vscode/launch.json` file.
Insert the following settings into the file:
```json showshowLineNumbers
{
"type": "aws-sam",
"request": "direct-invoke",
"name": "Job dispatcher lambda",
"invokeTarget": {
"target": "code",
"projectRoot": "${workspaceFolder}",
"lambdaHandler": "lambda/lambda.handler"
},
"lambda": {
"runtime": "python3.8",
"payload": {},
"environmentVariables": {
"ENDPOINT_URL": "http://localstack:4566/",
"S3_ENDPOINT_URL": "http://s3.localhost.localstack.cloud:4566/",
"AWS_ACCESS_KEY_ID": "test",
"AWS_SECRET_ACCESS_KEY": "test",
"AWS_SESSION_TOKEN": "test",
"AWS_REGION": "us-east-1",
"MAIN_DOCKER_NETWORK": "localstack-network"
}
},
"sam": {
"dockerNetwork": "localstack-network"
}
}
```
The `dockerNetwork` property is essential as it allows the LocalStack container to use the `sam invoke` commands within the same network as the LocalStack container itself.
Adjust the Lambda function handler and environment variables as needed.
# Cloud Custodian
> Use Cloud Custodian with LocalStack
## Introduction
Cloud Custodian is an open-source rules engine and cloud management tool designed to help organizations maintain security and compliance across their cloud environments.
Cloud Custodian's YAML DSL allows definition of rules to filter and tag resources, and then apply actions to those resources.
Cloud Custodian can be used to manage local AWS resources in LocalStack, resembling the live AWS environment, allowing you to test and validate your security policies locally.
You can use Cloud Custodian with LocalStack by just specifying the Cloud Custodian package to use the LocalStack profile configured with your AWS CLI.
## Getting started
This guide is designed for users who are new to Cloud Custodian and assumes basic knowledge of the AWS CLI and our [`lstk aws`](/aws/developer-tools/running-localstack/lstk/cloud-and-iac-commands/#aws) command.
Start your LocalStack container using your preferred method.
We will demonstrate how you can spin up an EC2 instance and tag it with the key `Custodian`, and then use Cloud Custodian to stop the instance.
### Install Cloud Custodian
To install Cloud Custodian, run the following command:
```bash
pip install c7n
```
After installing Cloud Custodian, you can configure a [custom LocalStack profile](http://docs.localstack.cloud/user-guide/integrations/aws-cli/#configuring-a-custom-profile) in your AWS CLI configuration file.
### Create an EC2 instance
You can create an EC2 instance using `lstk aws`.
You can use the [`RunInstances`](https://docs.aws.amazon.com/AWSEC2/latest/APIReference/API_RunInstances.html) API to create an EC2 instance.
The following example creates an EC2 instance with the tag `Custodian` (any value):
```bash
lstk aws ec2 run-instances \
--image-id ami-ff0fea8310f3 \
--count 1 \
--instance-type t3.nano \
--tag-specifications "ResourceType=instance,Tags=[{Key=Custodian,Value=AnyValue}]"
```
You can navigate to the LocalStack logs to verify that the EC2 instance was created successfully:
```bash
2023-10-16T15:27:35.479 INFO --- [ asgi_gw_0] l.u.container_networking : Determined main container network: bridge
2023-10-16T15:27:35.504 INFO --- [ asgi_gw_0] l.u.container_networking : Determined main container target IP: 172.17.0.2
2023-10-16T15:27:36.154 INFO --- [ asgi_gw_0] l.s.ec2.vmmanager.docker : Instance i-d87f1ab75e95ab0d2 will be accessible via SSH at: 127.0.0.1:22, 172.17.0.3:22
2023-10-16T15:27:36.155 INFO --- [ asgi_gw_0] l.s.ec2.vmmanager.docker : Instance i-d87f1ab75e95ab0d2 port mappings (container -> host): {'22/tcp': 22}
2023-10-16T15:27:36.218 INFO --- [ asgi_gw_0] localstack.request.aws : AWS ec2.RunInstances => 200
```
### Create a Cloud Custodian policy
You can now create a Cloud Custodian policy to stop the EC2 instances with the tag `Custodian`.
Create a file named `custodian.yml` and add the following content:
```yaml showshowLineNumbers
policies:
- name: my-first-policy
resource: aws.ec2
filters:
- "tag:Custodian": present
actions:
- stop
```
The above policy specifies the following:
- `name`: The name of the policy.
- `resource`: The AWS resource to apply the policy to.
- `filters`: The filters to apply to the resource.
In this case, the filter is `tag:Custodian` and the value is `present`.
- `actions`: The actions to apply to the resource.
In this case, the action is `stop`.
### Run the Cloud Custodian policy
You can now run the Cloud Custodian policy using the following command:
```bash
custodian run \
--output-dir=.
custodian.yml \
--profile localstack
```
:::tip
Alternatively, you can also set the `AWS_PROFILE=localstack` environment variable, in which case the `--profile localstack` parameter can be omitted in the commands above.
:::
You should see the following output:
```sh
2023-10-16 21:06:13,853: custodian.policy:INFO policy:my-first-policy resource:aws.ec2 region:us-east-1 count:1 time:0.20
2023-10-16 21:06:13,961: custodian.policy:INFO policy:my-first-policy action:stop resources:1 execution_time:0.10
```
You can then navigate to the LocalStack logs to verify that the EC2 instance was stopped successfully:
```bash
2023-10-16T15:36:13.583 INFO --- [ asgi_gw_0] localstack.request.aws : AWS sts.GetCallerIdentity => 200
2023-10-16T15:36:13.851 INFO --- [ asgi_gw_1] localstack.request.aws : AWS ec2.DescribeInstances => 200
2023-10-16T15:36:13.960 INFO --- [ asgi_gw_0] localstack.request.aws : AWS ec2.StopInstances => 200
```
### Create CloudWatch metrics for Cloud Custodian
Cloud Custodian creates CloudWatch metrics for each policy.
These metrics show how many resources met the filters, the time taken to gather and filter those resources, and the time required to perform actions.
Certain filters and actions might produce their own metrics.
To activate metric output, you must set the `metrics` flag running Cloud Custodian.
```bash
custodian run -s . \
--metrics aws custodian.yml \
--profile localstack
```
You can access the CloudWatch metrics in the [LocalStack Web Application](https://app.localstack.cloud/inst/default/resources/cloudwatch).
## Further reading
- [Example Policies](https://cloudcustodian.io/docs/aws/examples/index.html) for practical examples of specific policies for individual AWS modules.
- [Cloud Custodian documentation](https://cloudcustodian.io/docs/quickstart/index.html) to learn more about Cloud Custodian.
- [Integrations](https://cloudcustodian.io/docs/aws/topics/index.html) with Config, Security Hub, Systems Manager, and X-Ray.
- [Monitoring the environment](https://cloudcustodian.io/docs/aws/usage.html) by generating CloudWatch metrics.
# Crossplane
> Use the Crossplane cloud-native control plane framework with LocalStack.
## Overview
[Crossplane](https://www.crossplane.io) is a cloud-native control plane framework, which offers an extensible backend that enables orchestrating applications and infrastructure via declarative APIs and resource definitions.
Crossplane offers a native [AWS provider](https://github.com/upbound/provider-aws) which can be used to create and manage AWS cloud resources via the Crossplane platform.
For example, it can be used to create S3 buckets, SQS queues, Lambda functions, among many other resources.
Crossplane AWS provider supports a comprehensive set of some [900+ resource types](https://marketplace.upbound.io/providers/upbound/provider-aws).
## Getting started
In the following, we provide a step-by-step guide for installing Crossplane in a local test environment, and creating AWS resources (S3 bucket, SQS queue) in LocalStack via Crossplane.
### Prerequisites
- LocalStack running in local Docker
- A local Kubernetes cluster:
- We can use the [embedded Kubernetes cluster](https://docs.docker.com/desktop/kubernetes) that ships with modern versions of Docker Desktop (can be easily enabled in the Docker settings)
- Alternatively, you can [create a local EKS cluster](/aws/services/eks/#create-an-embedded-kubernetes-cluster) in LocalStack directly, which will spin up a light-weight embedded `k3d` Kubernetes cluster in your Docker environment
- The [`helm`](https://helm.sh) and [`kubectl`](https://kubernetes.io/docs/tasks/tools/#kubectl) command-line clients installed
## Installing Crossplane in local Kubernetes
Once your `kubectl` is configured to point to the local Kubernetes cluster, we first install Crossplane via `helm`:
```bash
helm repo add crossplane-stable https://charts.crossplane.io/stable
helm repo update
helm install crossplane crossplane-stable/crossplane --namespace crossplane-system --create-namespace
```
The installation may take a few minutes.
In parallel, we can install the `crossplane` command-line tool.
```bash
curl -sL https://raw.githubusercontent.com/crossplane/crossplane/master/install.sh | bash
sudo mv crossplane /usr/local/bin
```
To confirm that the installation was successful, we can run these commands, which should yield output similar to the following:
```bash
crossplane version
```
```bash title="Output"
Client Version: v1.17.0
Server Version: v1.17.0
```
```bash
kubectl get crds | grep crossplane
```
```bash title="Output"
compositions.apiextensions.crossplane.io 2023-09-03T11:30:36Z
configurations.pkg.crossplane.io 2023-09-03T11:30:36Z
```
### Installing the Crossplane AWS Provider
Once the basic Crossplane installation is running properly, we can proceed with installing the AWS provider.
Newer versions of Crossplane promote the use of [provider families](https://docs.upbound.io/providers/provider-families), which are collections of providers for different groups of resources.
For example, there is a separate provider for each individual AWS service (like S3, SQS, Lambda, etc), and in addition provider family provides shared resources for common configuration of all services (e.g., credentials, etc).
In the following, we first install the AWS provider for S3.
Note that you can copy/paste the entire multi-line command below into your terminal:
```bash
cat < Reference for the legacy awslocal, tflocal, samlocal, and cdklocal wrapper scripts, superseded by lstk.
## Introduction
The following (now deprecated) wrapper scripts were used in conjunction with LocalStack, to direct the `aws`, `terraform`, `sam`, and `cdk` commands to LocalStack endpoints.
- [`awslocal`](#awslocal) - Runs AWS CLI commands against LocalStack.
- [`tflocal`](#tflocal) - Runs Terraform against LocalStack.
- [`samlocal`](#samlocal) - Runs AWS SAM CLI commands against LocalStack.
- [`cdklocal`](#cdklocal) - Runs AWS CDK commands against LocalStack.
:::caution
`awslocal`, `tflocal`, `samlocal`, and `cdklocal` are **deprecated** in favor of [`lstk`](/aws/developer-tools/running-localstack/lstk/), which provides equivalent functionality via `lstk aws`, `lstk terraform` (alias `lstk tf`), `lstk sam`, and `lstk cdk`.
These wrapper scripts remain available and continue to work. This page documents them for anyone still relying on them.
:::
See the [AWS CLI](/aws/connecting/aws-cli), [Terraform](/aws/connecting/infrastructure-as-code/terraform), [AWS SAM](/aws/connecting/infrastructure-as-code/aws-sam), and [AWS CDK](/aws/connecting/infrastructure-as-code/aws-cdk) pages for the current `lstk`-based workflow.
## awslocal
`awslocal` serves as a thin wrapper and a substitute for the standard `aws` command, enabling you to run AWS CLI commands within the LocalStack environment without specifying the `--endpoint-url` parameter or a profile.
### Installation
Install the `awslocal` command using the following command:
```bash
pip install awscli-local[ver1]
```
:::tip
The above command installs the most recent version of the underlying AWS CLI version 1 (`awscli`) package.
If you would rather manage your own `awscli` version (e.g., `v1` or `v2`) and only install the wrapper script, you can use the following command:
```bash
pip install awscli-local
```
:::
:::note
Automatic installation of AWS CLI version 2 is not supported (at the time of writing there is no official pypi package for `v2` available), but the `awslocal` technically also works with AWS CLI v2 (see [Current Limitations](#current-limitations) for more details).
:::
### Usage
The `awslocal` command shares identical usage with the standard `aws` command.
For comprehensive usage instructions, refer to the manual pages by running `awslocal help`.
```bash
awslocal kinesis list-streams
```
### Configuration
| Variable Name | Description |
| ---------------- | ----------------------------------------------------------------------------------- |
| AWS_ENDPOINT_URL | The endpoint URL to connect to (takes precedence over USE_SSL/LOCALSTACK_HOST) |
| LOCALSTACK_HOST | A variable defining where to find LocalStack (default: `localhost:4566`) |
| USE_SSL | Whether to use SSL when connecting to LocalStack (default: False) |
### Current Limitations
Please note that there is a known limitation for using the `cloudformation package ...` command with the AWS CLI v2.
The problem is that the AWS CLI v2 is [not available as a package on pypi.org](https://github.com/aws/aws-cli/issues/4947), but is instead shipped as a binary package that cannot be easily patched from `awslocal`.
To work around this issue, you have 2 options:
- Downgrade to the v1 AWS CLI (this is the recommended approach)
- There is an unofficial way to install AWS CLI v2 from sources.
We do not recommend this, but it is technically possible.
Also, you should install these libraries in a Python virtualenv, to avoid version clashes with other libraries on your system:
```bash
virtualenv .venv
. .venv/bin/activate
pip install https://github.com/boto/botocore/archive/v2.zip https://github.com/aws/aws-cli/archive/v2.zip
```
Please also note there is a known limitation for issuing requests using
`--no-sign-request` with the AWS CLI.
LocalStack's routing mechanism depends on
the signature of each request to identify the correct service for the request.
Thus, adding the flag `--no-sign-requests` provokes your request to reach the
wrong service.
One possible way to address this is to use the `awslocal` CLI
instead of AWS CLI.
## tflocal
`tflocal` is a small wrapper script to run Terraform against LocalStack. It uses the [Terraform Override mechanism](https://www.terraform.io/language/files/override) and creates a temporary file `localstack_providers_override.tf` to configure the endpoints for the AWS `provider` section.
The endpoints for all services are configured to point to the LocalStack API (`http://localhost:4566` by default).
### Installation
To install the `tflocal` command, you can use `pip` (assuming you have a local Python installation):
```bash
pip install terraform-local
```
After installation, you can use the `tflocal` command, which has the same interface as the `terraform` command line.
```bash
tflocal --help
```
### Usage
```bash
tflocal init
tflocal apply
```
### Configuration
| Environment Variable | Default value | Description |
| ------------------------ | -------------------------------- | ----------- |
| `TF_CMD` | `terraform` | Terraform command to call |
| `AWS_ENDPOINT_URL` | - | Hostname and port of the target LocalStack instance |
| `LOCALSTACK_HOSTNAME` | `localhost` | Host name of the target LocalStack instance |
| `EDGE_PORT` | `4566` | Port number of the target LocalStack instance |
| `S3_HOSTNAME` | `s3.localhost.localstack.cloud` | Special hostname to be used to connect to LocalStack S3 |
| `USE_EXEC` | - | Whether to use `os.exec` instead of `subprocess.Popen` (try using this in case of I/O issues) |
| `_ENDPOINT` | - | Setting a custom service endpoint, e.g., `COGNITO_IDP_ENDPOINT=http://example.com` |
| `AWS_DEFAULT_REGION` | `us-east-1` | The AWS region to use (determined from local credentials if `boto3` is installed) |
| `CUSTOMIZE_ACCESS_KEY` | - | Enables you to override the static AWS Access Key ID |
| `AWS_ACCESS_KEY_ID` | `test` (`accountId`: 000000000000) | AWS Access Key ID to use for multi-account setups |
:::note
While using `CUSTOMIZE_ACCESS_KEY`, following cases are taking precedence over each other from top to bottom:
1. If the `AWS_ACCESS_KEY_ID` environment variable is set.
2. If `access_key` is configured in the Terraform AWS provider.
3. If the `AWS_PROFILE` environment variable is set and properly configured.
4. If the `AWS_DEFAULT_PROFILE` environment variable is set and configured.
5. If credentials for the `default` profile are configured.
6. If none of the above settings are present, it falls back to using the default `AWS_ACCESS_KEY_ID` mock value.
:::
### OpenTofu
You can use the `TF_CMD` environment variable with `tflocal` to specify the `tofu` binary to call:
```bash
TF_CMD=tofu tflocal --help
```
## samlocal
`samlocal` is a wrapper for the `sam` command line interface, facilitating the use of the SAM framework with LocalStack.
When executing deployment commands like `samlocal [ build | deploy | validate | package ]`, the script configures the SAM settings for LocalStack and runs the specified SAM command.
:::note
`samlocal` supports image/container-based Lambda (ECR) deploys and nested CloudFormation stacks, which `lstk sam` does not (yet) support - this is the main reason to keep using `samlocal` today.
:::
### Installation
You can install the `samlocal` wrapper script by running the following command:
```bash
pip install aws-sam-cli-local
```
### Usage
```bash
samlocal init
samlocal deploy --guided
```
### Configuration
| Environment Variable | Default value | Description |
|------------------------|--------------------------------------------------|-------------------------------------------------------------------------|
| AWS_ENDPOINT_URL | `http://localhost.localstack.cloud:4566` | URL at which the `boto3` client can reach LocalStack |
| EDGE_PORT | `4566` | Port number under which the LocalStack edge service is available |
| LOCALSTACK_HOSTNAME | `localhost` | Host under which the LocalStack edge service is available
## cdklocal
`cdklocal` is a thin wrapper script for using the [AWS CDK](https://github.com/aws/aws-cdk) library against local APIs provided by LocalStack.
### Installation
The `cdklocal` command line is published as an [npm library](https://www.npmjs.com/package/aws-cdk-local):
```bash
# Install globally
npm install -g aws-cdk-local aws-cdk
# Verify it installed correctly
cdklocal --version
# e.g. 1.65.5
```
:::note
Using `cdklocal` locally (e.g. within the `node_modules` of your repo instead of globally installed) does not work at the moment for some setups, so make sure you install both `aws-cdk` and `aws-cdk-local` with the `-G` flag.
:::
### Usage
`cdklocal` can be used as a drop-in replacement of where you would otherwise use `cdk` when targeting the AWS Cloud.
```bash
cdklocal --help
# create sample app
mkdir /tmp/test; cd /tmp/test
cdklocal init sample-app --language=javascript
# bootstrap localstack environment
cdklocal bootstrap
# deploy the sample app
cdklocal deploy
```
### Configuration
The following environment variables can be configured:
- `AWS_ENDPOINT_URL`: The endpoint URL (i.e., protocol, host, and port) to connect to LocalStack (default: `http://localhost.localstack.cloud:4566`)
- `LAMBDA_MOUNT_CODE`: Whether to use local Lambda code mounting (via setting `hot-reload` S3 bucket name)
### CDK Version Compatibility
`cdklocal` works with all installed versions of the Node.js `aws-cdk` package.
However, issues exist for `aws-cdk >= 2.177.0`.
For these versions:
- We unset AWS-related environment variables like `AWS_PROFILE` before calling `cdk`.
- We explicitly set `AWS_ENDPOINT_URL` and `AWS_ENDPOINT_URL_S3` to point to LocalStack.
Some environment variables may cause conflicting config, such as wrong region or accidental deploys to real AWS.
To allow specific variables (e.g., `AWS_REGION`), use `AWS_ENVAR_ALLOWLIST`:
```bash
AWS_ENVAR_ALLOWLIST=AWS_REGION,AWS_DEFAULT_REGION AWS_DEFAULT_REGION=eu-central-1 AWS_REGION=eu-central-1 cdklocal ...
```
If you manually set `AWS_ENDPOINT_URL`, it will be used.
You must also set `AWS_ENDPOINT_URL_S3`, and it must include `.s3.` to correctly identify S3 API calls.
See full configuration details [on our configuration docs](https://github.com/localstack/aws-cdk-local?tab=readme-ov-file#configurations).
# Former2
> Use Former2 to generate Infrastructure-as-Code outputs from existing resources with LocalStack.
## Introduction
[Former2](https://github.com/iann0036/former2) allows you to generate Infrastructure-as-Code (IaC) outputs using your pre-existing AWS resources.
It uses the AWS JavaScript SDK to make relevant API calls, scans your infrastructure, and provides you with a resource list.
You can then select the resources for which you want to generate IaC outputs.
Former2 currently supports the following outputs:
- [CloudFormation](https://aws.amazon.com/cloudformation/)
- [Terraform](https://www.terraform.io/)
- [Troposphere](https://github.com/cloudtools/troposphere)
- [CDK V1 (Cfn Primitives) & CDK V2 (Cfn Primitives)](https://docs.aws.amazon.com/cdk/latest/guide/getting_started.html) (TypeScript, Python, Java, C#)
- [CDK for Terraform](https://developer.hashicorp.com/terraform/cdktf) (TypeScript)
- [Pulumi](https://www.pulumi.com/docs/get-started/aws/) (TypeScript)
- [Diagrams](https://diagrams.mingrammer.com/)
With Former2, you can scan the resources within your LocalStack instance and produce Infrastructure-as-Code (IaC) outputs.
These outputs enable you to redeploy your resources while spinning a new LocalStack instance or deploy them to a live Amazon Web Services (AWS) environment.
## Getting started
This guide is designed for users new to Former2 and assumes basic knowledge of the AWS CLI and our [`lstk aws`](/aws/developer-tools/running-localstack/lstk/cloud-and-iac-commands/#aws) command.
We will demonstrate how you can create local AWS resources using LocalStack, and import a CloudFormation output via Former2.
### Install Former2
You can use the publicly hosted [Former2 Web Application](https://former2.com/) or a [self-hosted version](https://github.com/iann0036/former2/blob/master/HOSTING.md) to generate IaC outputs.
For this guide, we will use the publicly hosted version.
You would also need a Former2 Helper extension/add-on for your preferred web browser:
- [Google Chrome](https://chrome.google.com/webstore/detail/former2-helper/fhejmeojlbhfhjndnkkleooeejklmigi)
- [Mozilla Firefox](https://addons.mozilla.org/en-US/firefox/addon/former2-helper/)
- [Microsoft Edge](https://microsoftedge.microsoft.com/addons/detail/okkjnfohglnomdbpimkcdkiojbeiedof)
Alternatively, you can [download and install](https://github.com/iann0036/former2-helper) the extension yourself.
### Create local resources
Start your LocalStack container using your preferred method with the following environment variables, depending on the browser you are using:
- **Google Chrome**: `EXTRA_CORS_ALLOWED_ORIGINS=chrome-extension://fhejmeojlbhfhjndnkkleooeejklmigi`
- **Mozilla Firefox**: `EXTRA_CORS_ALLOWED_ORIGINS=moz-extension://853c673f-1bd8-4226-a5ff-f1473f7b3d90`
- **Microsoft Edge**: `EXTRA_CORS_ALLOWED_ORIGINS=extension://okkjnfohglnomdbpimkcdkiojbeiedof`
You can create local AWS resources using the AWS CLI and `lstk aws`.
For example, you can create a new S3 bucket, SQS queue, and DynamoDB table using the following commands:
```bash
lstk aws s3 mb s3://my-bucket
lstk aws sqs create-queue --queue-name my-queue
lstk aws dynamodb create-table \
--table-name my-table \
--attribute-definitions AttributeName=id,AttributeType=S \
--key-schema AttributeName=id,KeyType=HASH \
--provisioned-throughput ReadCapacityUnits=5,WriteCapacityUnits=5
```
You can verify that the resources were created successfully by running the following command:
```bash
lstk logs
```
```bash title="Output"
emulator | 2023-10-14T15:31:08.852 INFO --- [ asgi_gw_0] localstack.request.aws : AWS s3.CreateBucket => 200
emulator | 2023-10-14T15:31:09.356 INFO --- [ asgi_gw_0] localstack.request.aws : AWS sqs.CreateQueue => 200
emulator | 2023-10-14T15:31:12.920 INFO --- [ asgi_gw_0] botocore.credentials : Found credentials in environment variables.
emulator | 2023-10-14T15:31:13.332 INFO --- [ asgi_gw_0] localstack.utils.bootstrap : Execution of "require" took 2028.25ms
emulator | 2023-10-14T15:31:13.712 INFO --- [ asgi_gw_0] localstack.request.aws : AWS dynamodb.CreateTable => 200
```
```bash
lstk aws s3 ls
```
```bash title="Output"
2023-10-14 21:01:08 my-bucket
```
```bash
lstk aws sqs list-queues
```
```bash title="Output"
{
"QueueUrls": [
"http://localhost.localstack.cloud:4566/000000000000/my-queue"
]
}
```
```bash
lstk aws dynamodb list-tables
```
```bash title="Output"
{
"TableNames": [
"my-table"
]
}
```
### Configure Former2
Navigate to the Former2 setup dashboard.
Open the [**Credentials**](https://former2.com/#section-setup-credentials) tab and enter your IAM credentials.
For LocalStack, you can just configure the `AWS_ACCESS_KEY_ID` and `AWS_SECRET_ACCESS_KEY` environment variables as `test` and `test`, respectively.
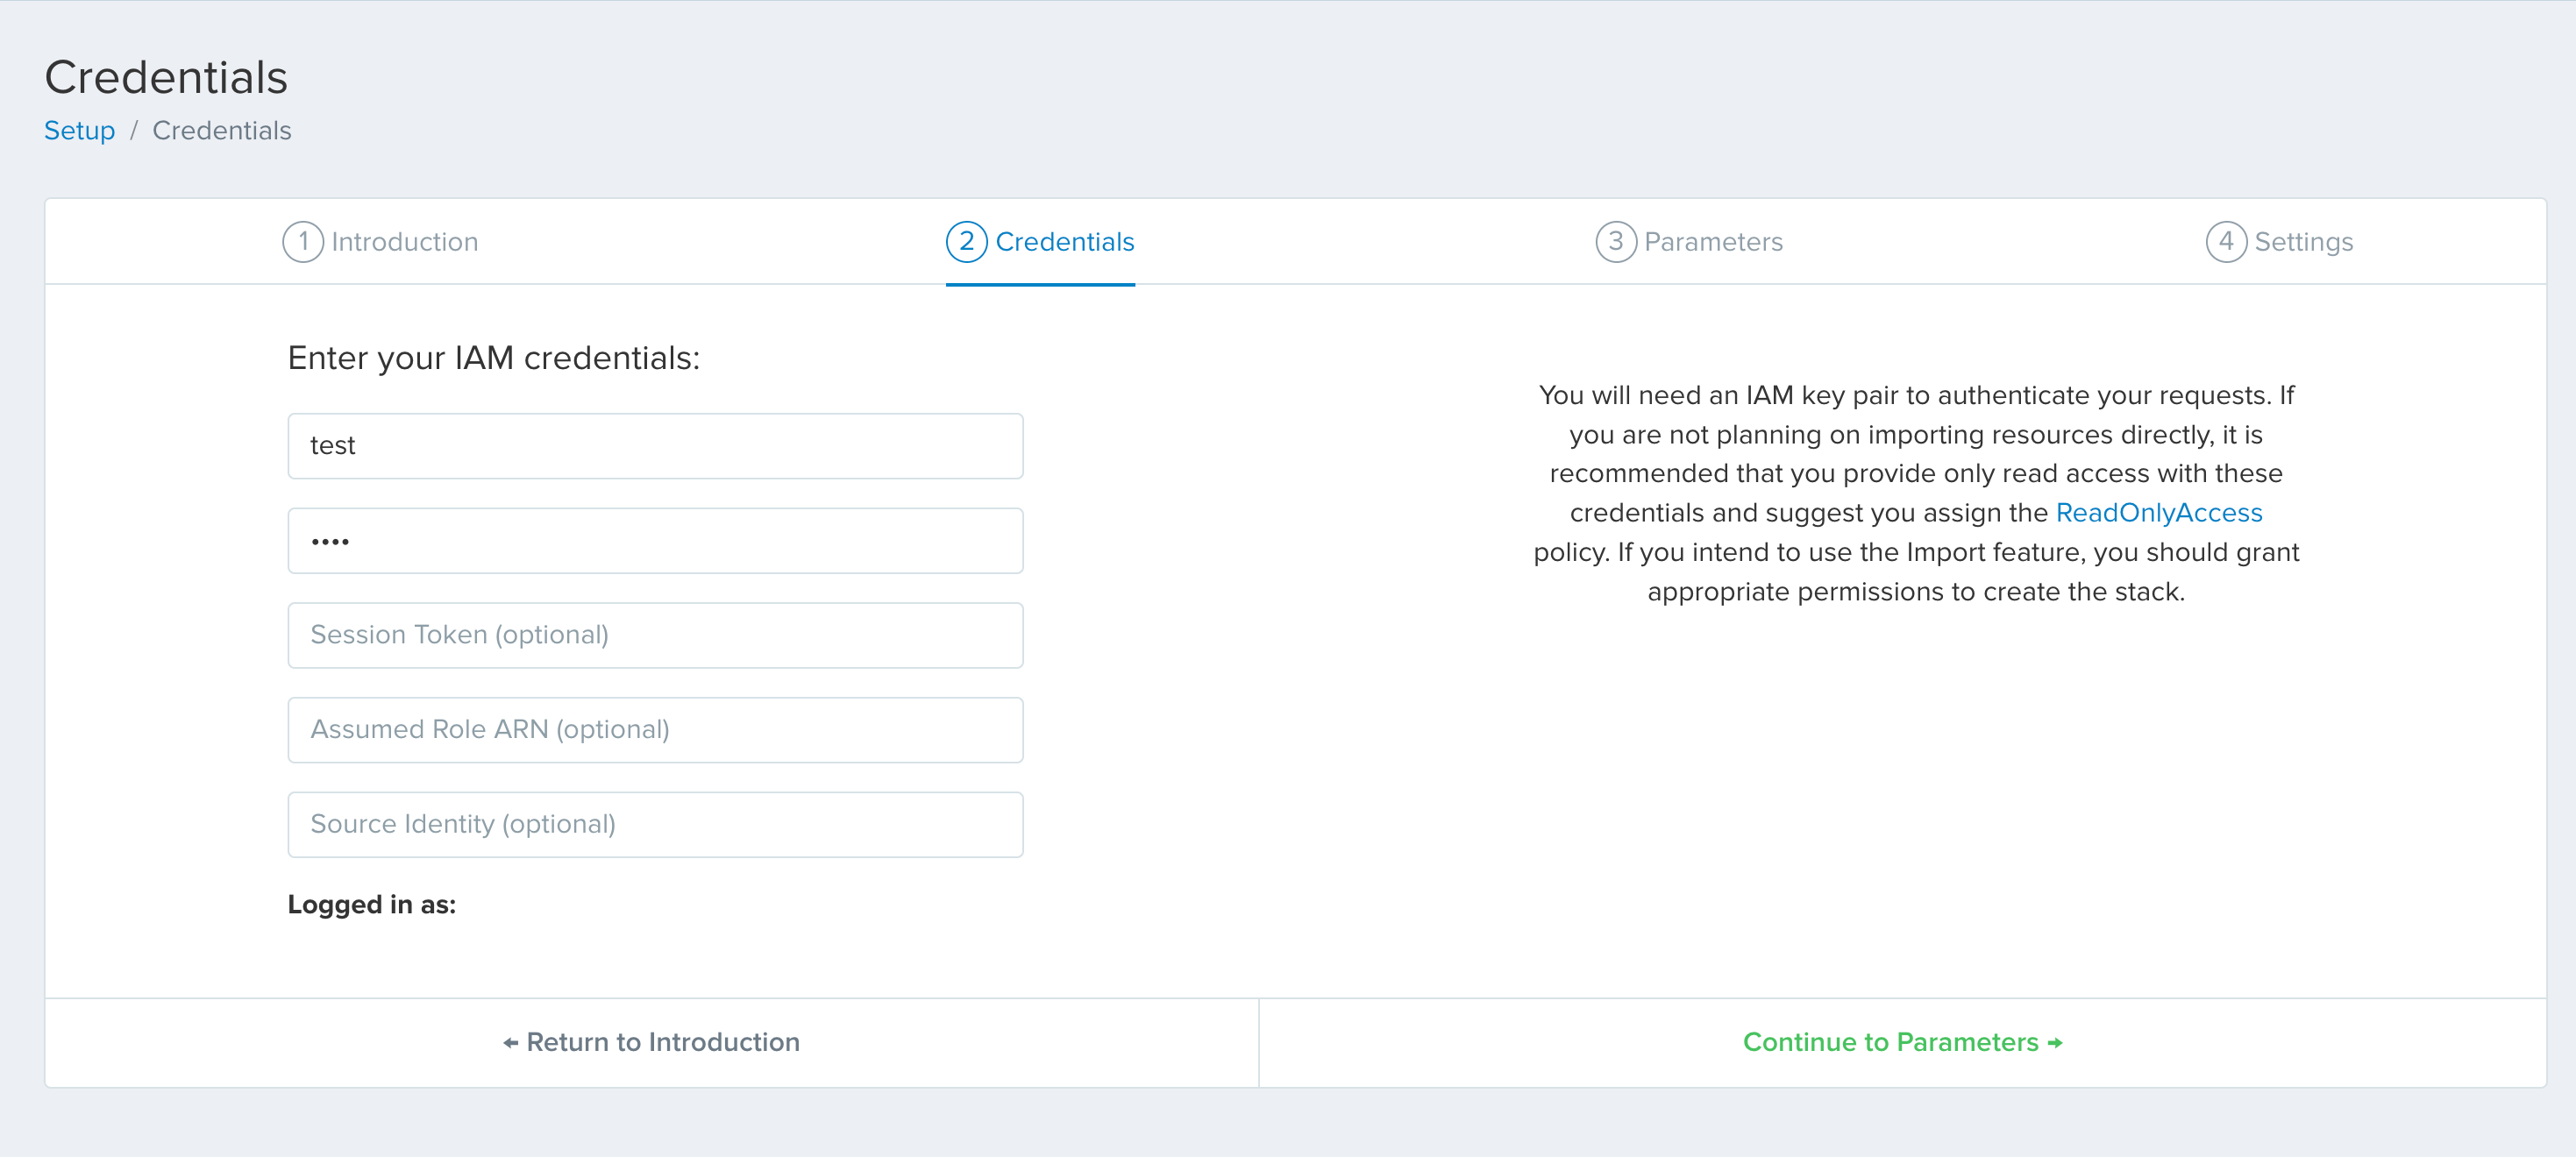
Click on [**Continue to Parameters**](https://former2.com/#section-setup-parameters) and include your own CloudFormation stack parameters by adding them below.
Click on [**Continue to Settings**](https://former2.com/#section-setup-settings) and navigate to **Custom Endpoints**.
Toggle the **Use LocalStack Endpoint** switch to enable the LocalStack endpoint URL (`http://localhost:4566`).
Click on [**Go to Dashboard**](https://former2.com/#section-dashboard) to complete the setup.
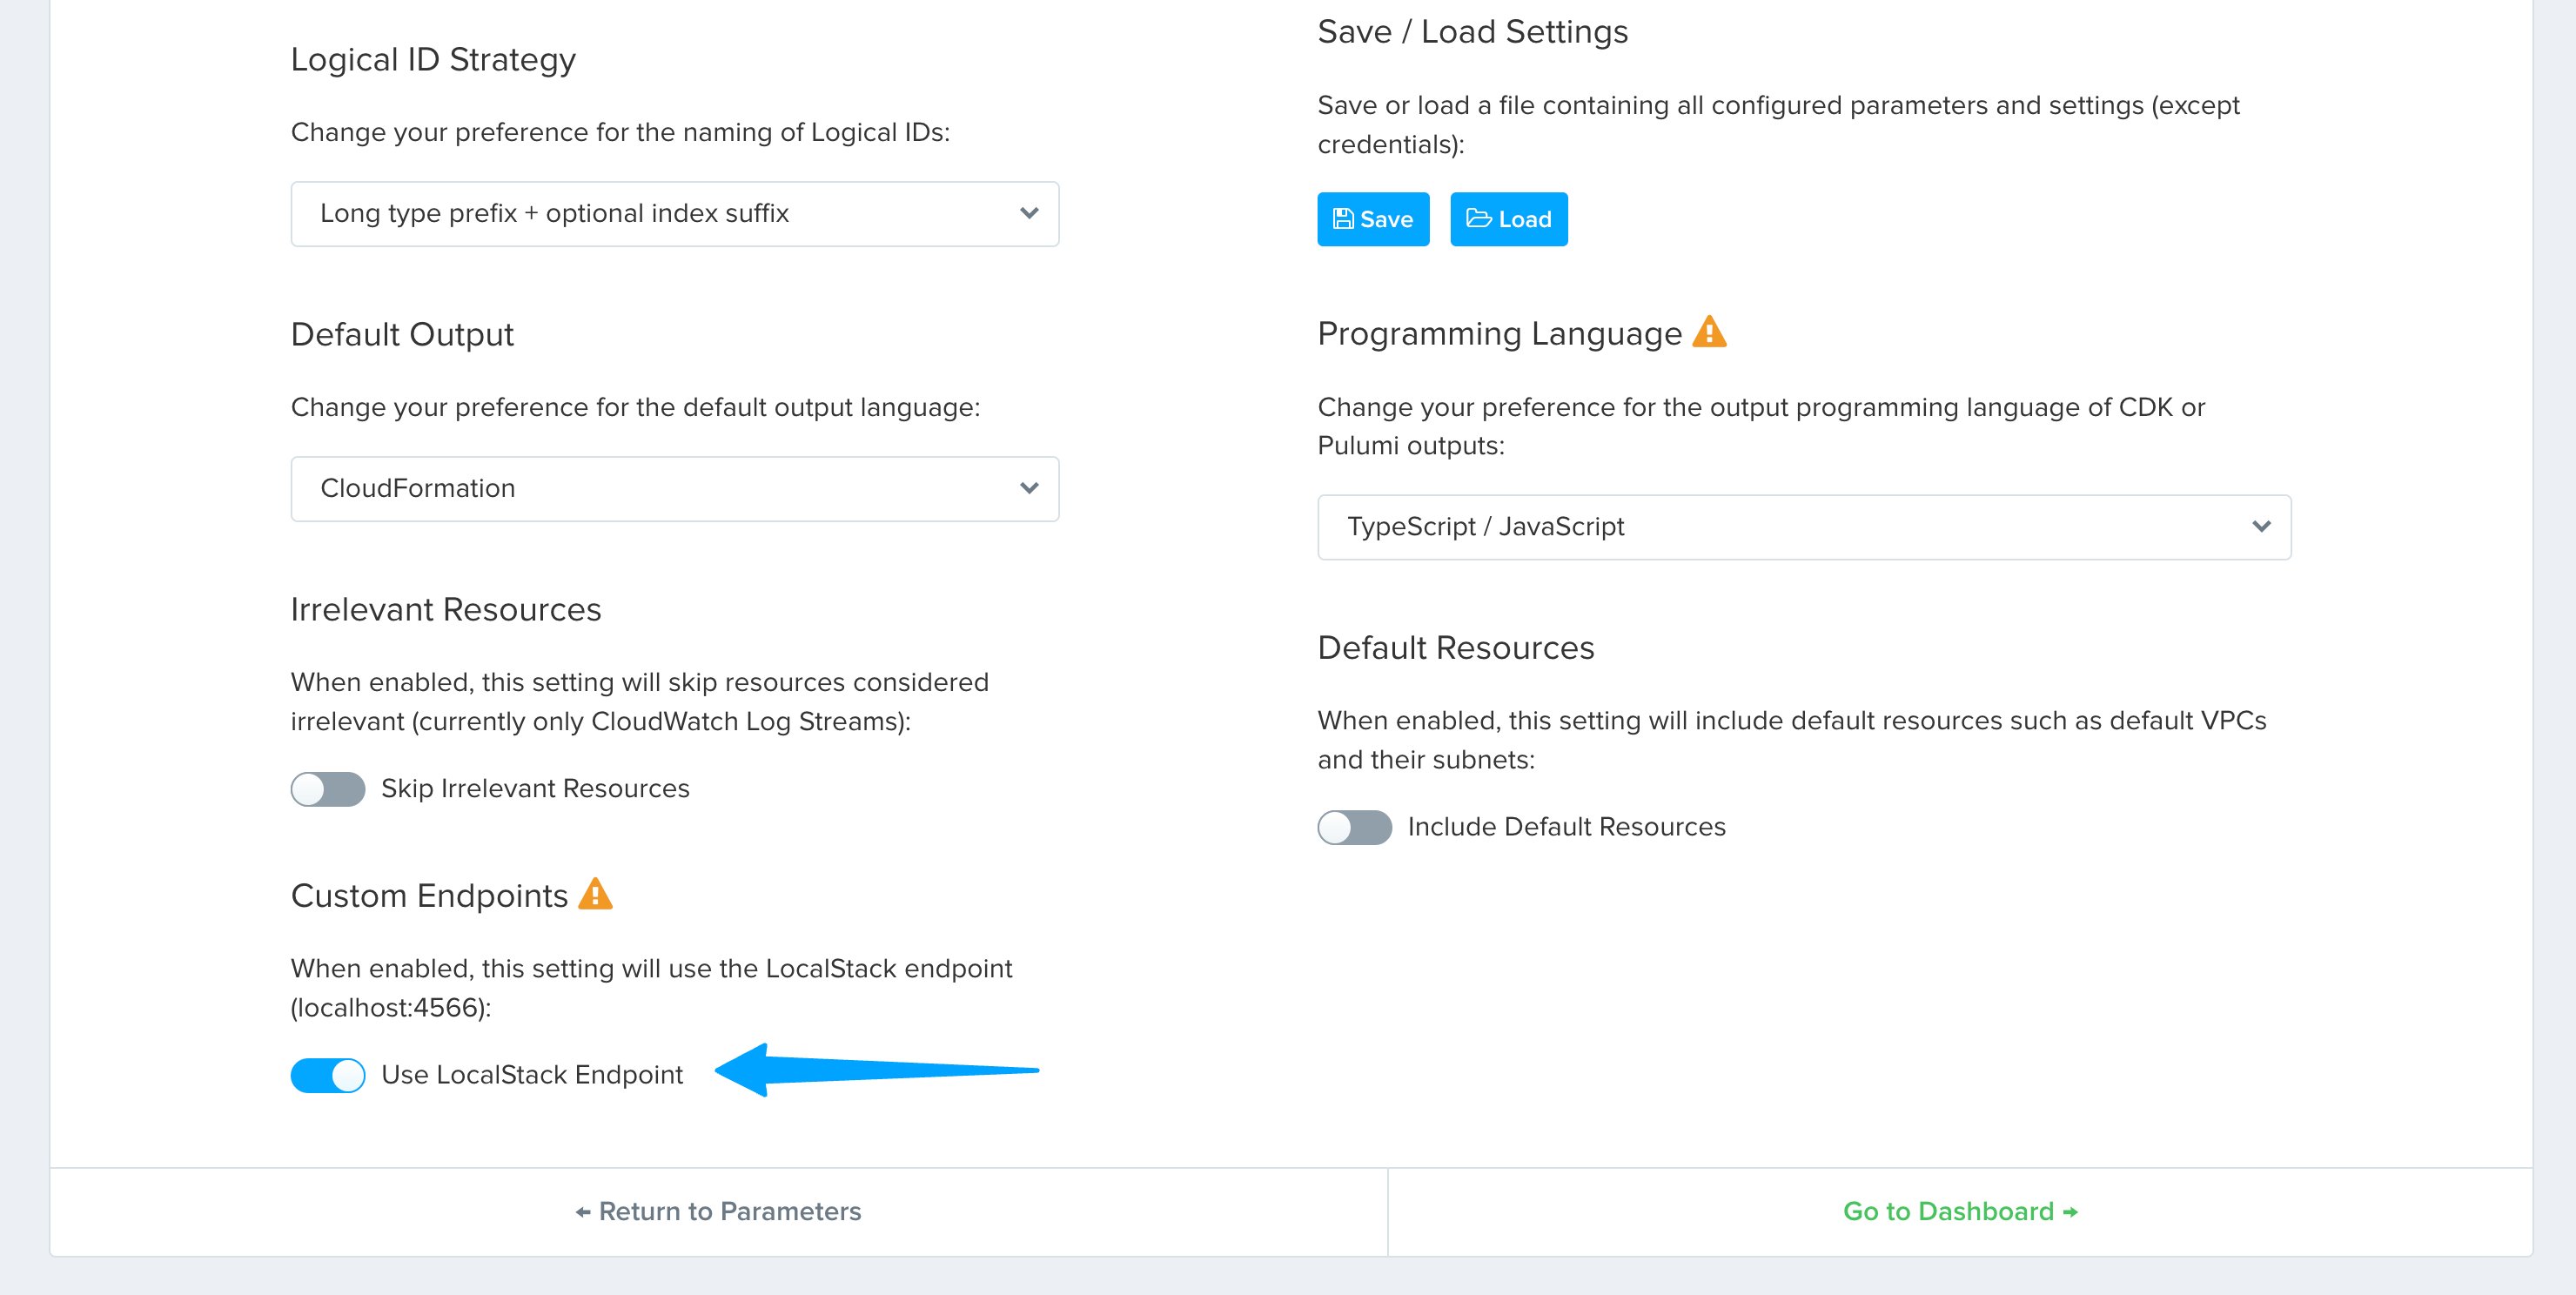
You can now click on **Scan Account** button on the top-right corner of the dashboard to scan your LocalStack instance for resources.
Once the scan is complete, you can select the resources you want to generate IaC outputs for.
### Generate IaC output
Navigate to [S3](https://former2.com/#section-storage-s3), [DynamoDB](https://former2.com/#section-database-dynamodb), and [SQS](https://former2.com/#section-applicationintegration-sqs) to verify that the resources you created earlier are listed.
You can select the resources you want to generate IaC outputs for and click on **Add Selected**.
Finally, you can click on **Generate** on the top-left corner of the dashboard to generate the IaC outputs.
You can also choose to generate the IaC outputs in a different format by clicking on the various options available on the left-hand side of the dashboard.
# Pulumi
> Use the Pulumi Infrastructure as Code framework with LocalStack.
import { FileTree } from "@astrojs/starlight/components";
## Introduction
Pulumi's SDK for infrastructure-as-code allows you to create, deploy, and manage AWS containers, serverless functions, and other infrastructure using popular programming languages.
It supports a range of cloud providers, including AWS, Azure, Google Cloud, and Kubernetes.
LocalStack can integrate with Pulumi through the Pulumi configuration environment.
There are two main methods to configure Pulumi for use with LocalStack:
- Using the `pulumilocal` wrapper script which automatically configures service endpoints.
- Manually setting up the service endpoints in your Pulumi configuration, which requires ongoing maintenance.
This guide will show you how to set up local AWS resources using both the `pulumilocal` wrapper and manual configuration.
## `pulumilocal` wrapper script
:::note
`pulumi-local` currently does not support the `aws-native` package as it relies on the AWS Cloud Control API.
:::
`pulumilocal` is a wrapper for the `pulumi` command line interface, facilitating the use of Pulumi with LocalStack.
When executing deployment commands like `pulumilocal ["up", "destroy", "preview", "cancel"]`, the script configures the Pulumi settings for LocalStack and runs the specified Pulumi command.
The endpoints are set to point to the LocalStack API (`http://localhost:4566`).
This setup simplifies the deployment of Pulumi stacks against LocalStack.
### Configure the Local Backend
Optionally, you can set environment variables to store state locally, avoiding cloud storage.
```bash
export PULUMI_CONFIG_PASSPHRASE=lsdevtest
export PULUMI_BACKEND_URL=file://`pwd`/myproj
```
:::note
For further options please consult the official documentation on available [environment variables](https://www.pulumi.com/docs/cli/environment-variables/) and [local backend](https://www.pulumi.com/docs/concepts/state/#local-filesystem).
:::
### Install the `pulumilocal` wrapper script
You can install the `pulumilocal` wrapper script by running the following command:
```bash
pip install pulumi-local
```
You can now use the `pulumilocal` command to interact with your Pulumi project.
```bash
pulumilocal --help
```
```bash title="Output"
Pulumi - Modern Infrastructure as Code
...
```
### Create a new Pulumi project
To start a new project, use these commands:
```bash
mkdir myproj
pulumilocal new aws-typescript -y -s lsdev --cwd myproj
```
:::tip
The `--cwd` option is unnecessary if you're already in the project directory.
:::
### Deploy the Pulumi stack
Create and select the `lsdev` stack with:
```bash
pulumilocal stack select -c lsdev --cwd myproj
```
If you've just run the `new typescript` command, the stack is already selected.
Deploy it with:
```bash
pulumilocal up --cwd myproj
```
### Configuration
| Environment Variable | Default value | Description |
|-----------------------|-------------------|---------------------------------------------------------------|
| `AWS_ENDPOINT_URL` | - | Target LocalStack instance hostname and port |
| `LOCALSTACK_HOSTNAME` | `localhost` | *(Deprecated)* Target host for connecting to LocalStack |
| `EDGE_PORT` | `4566` | *(Deprecated)* Target port for connecting to LocalStack |
| `PULUMI_CMD` | `pulumi` | Name of the executable Pulumi command on the system PATH |
## Manual configuration
Alternatively, you can manually configure local service endpoints and credentials.
The following section will provide detailed steps for this manual configuration, assuming you have [Pulumi](https://www.pulumi.com/docs/install/) installed.
### Create a new Pulumi stack
Start a new project with:
```bash
mkdir quickstart && cd quickstart
pulumi new aws-typescript
```
We use the default configuration values:
```plaintext
This command will walk you through creating a new Pulumi project.
Enter a value or leave blank to accept the (default), and press .
Press ^C at any time to quit.
project name: (quickstart)
project description: (A minimal AWS TypeScript Pulumi program)
Created project 'quickstart'
Please enter your desired stack name.
To create a stack in an organization, use the format / (e.g. `acmecorp/dev`).
stack name: (dev)
Created stack 'dev'
aws:region: The AWS region to deploy into: (us-east-1)
Saved config
Installing dependencies...
```
This will create the following directory structure.
- index.ts
- node_modules
- package.json
- package-lock.json
- Pulumi.dev.yaml
- Pulumi.yaml
- tsconfig.json
### Configure the stack
Modify your stack configuration in `Pulumi.dev.yaml` to include endpoints for AWS services pointing to `http://localhost:4566`.
However, these endpoints may change depending on the AWS plugin version you are using.
```yaml showshowLineNumbers
config:
aws:accessKey: test
aws:s3UsePathStyle: "true"
aws:secretKey: test
aws:skipCredentialsValidation: "true"
aws:skipRequestingAccountId: "true"
aws:endpoints:
- accessanalyzer: http://localhost:4566
- account: http://localhost:4566
- acm: http://localhost:4566
- acmpca: http://localhost:4566
- amg: http://localhost:4566
- amp: http://localhost:4566
- amplify: http://localhost:4566
- apigateway: http://localhost:4566
- apigatewayv2: http://localhost:4566
- appautoscaling: http://localhost:4566
- appconfig: http://localhost:4566
- appfabric: http://localhost:4566
- appflow: http://localhost:4566
- appintegrations: http://localhost:4566
- appintegrationsservice: http://localhost:4566
- applicationautoscaling: http://localhost:4566
- applicationinsights: http://localhost:4566
- appmesh: http://localhost:4566
- appregistry: http://localhost:4566
- apprunner: http://localhost:4566
- appstream: http://localhost:4566
- appsync: http://localhost:4566
- athena: http://localhost:4566
- auditmanager: http://localhost:4566
- autoscaling: http://localhost:4566
- autoscalingplans: http://localhost:4566
- backup: http://localhost:4566
- batch: http://localhost:4566
- beanstalk: http://localhost:4566
- bedrock: http://localhost:4566
- bedrockagent: http://localhost:4566
- budgets: http://localhost:4566
- ce: http://localhost:4566
- chime: http://localhost:4566
- chimesdkmediapipelines: http://localhost:4566
- chimesdkvoice: http://localhost:4566
- cleanrooms: http://localhost:4566
- cloud9: http://localhost:4566
- cloudcontrol: http://localhost:4566
- cloudcontrolapi: http://localhost:4566
- cloudformation: http://localhost:4566
- cloudfront: http://localhost:4566
- cloudfrontkeyvaluestore: http://localhost:4566
- cloudhsm: http://localhost:4566
- cloudhsmv2: http://localhost:4566
- cloudsearch: http://localhost:4566
- cloudtrail: http://localhost:4566
- cloudwatch: http://localhost:4566
- cloudwatchevents: http://localhost:4566
- cloudwatchevidently: http://localhost:4566
- cloudwatchlog: http://localhost:4566
- cloudwatchlogs: http://localhost:4566
- cloudwatchobservabilityaccessmanager: http://localhost:4566
- cloudwatchrum: http://localhost:4566
- codeartifact: http://localhost:4566
- codebuild: http://localhost:4566
- codecatalyst: http://localhost:4566
- codecommit: http://localhost:4566
- codedeploy: http://localhost:4566
- codeguruprofiler: http://localhost:4566
- codegurureviewer: http://localhost:4566
- codepipeline: http://localhost:4566
- codestarconnections: http://localhost:4566
- codestarnotifications: http://localhost:4566
- cognitoidentity: http://localhost:4566
- cognitoidentityprovider: http://localhost:4566
- cognitoidp: http://localhost:4566
- comprehend: http://localhost:4566
- computeoptimizer: http://localhost:4566
- config: http://localhost:4566
- configservice: http://localhost:4566
- connect: http://localhost:4566
- connectcases: http://localhost:4566
- controltower: http://localhost:4566
- costandusagereportservice: http://localhost:4566
- costexplorer: http://localhost:4566
- costoptimizationhub: http://localhost:4566
- cur: http://localhost:4566
- customerprofiles: http://localhost:4566
- databasemigration: http://localhost:4566
- databasemigrationservice: http://localhost:4566
- dataexchange: http://localhost:4566
- datapipeline: http://localhost:4566
- datasync: http://localhost:4566
- dax: http://localhost:4566
- deploy: http://localhost:4566
- detective: http://localhost:4566
- devicefarm: http://localhost:4566
- directconnect: http://localhost:4566
- directoryservice: http://localhost:4566
- dlm: http://localhost:4566
- dms: http://localhost:4566
- docdb: http://localhost:4566
- docdbelastic: http://localhost:4566
- ds: http://localhost:4566
- dynamodb: http://localhost:4566
- ec2: http://localhost:4566
- ecr: http://localhost:4566
- ecrpublic: http://localhost:4566
- ecs: http://localhost:4566
- efs: http://localhost:4566
- eks: http://localhost:4566
- elasticache: http://localhost:4566
- elasticbeanstalk: http://localhost:4566
- elasticloadbalancing: http://localhost:4566
- elasticloadbalancingv2: http://localhost:4566
- elasticsearch: http://localhost:4566
- elasticsearchservice: http://localhost:4566
- elb: http://localhost:4566
- elbv2: http://localhost:4566
- emr: http://localhost:4566
- emrcontainers: http://localhost:4566
- emrserverless: http://localhost:4566
- es: http://localhost:4566
- eventbridge: http://localhost:4566
- events: http://localhost:4566
- evidently: http://localhost:4566
- finspace: http://localhost:4566
- firehose: http://localhost:4566
- fis: http://localhost:4566
- fms: http://localhost:4566
- fsx: http://localhost:4566
- gamelift: http://localhost:4566
- glacier: http://localhost:4566
- globalaccelerator: http://localhost:4566
- glue: http://localhost:4566
- grafana: http://localhost:4566
- greengrass: http://localhost:4566
- groundstation: http://localhost:4566
- guardduty: http://localhost:4566
- healthlake: http://localhost:4566
- iam: http://localhost:4566
- identitystore: http://localhost:4566
- imagebuilder: http://localhost:4566
- inspector: http://localhost:4566
- inspector2: http://localhost:4566
- inspectorv2: http://localhost:4566
- internetmonitor: http://localhost:4566
- iot: http://localhost:4566
- iotevents: http://localhost:4566
- ivs: http://localhost:4566
- ivschat: http://localhost:4566
- kafka: http://localhost:4566
- kafkaconnect: http://localhost:4566
- kendra: http://localhost:4566
- keyspaces: http://localhost:4566
- kinesis: http://localhost:4566
- kinesisanalyticsv2: http://localhost:4566
- kinesisvideo: http://localhost:4566
- kms: http://localhost:4566
- lakeformation: http://localhost:4566
- lambda: http://localhost:4566
- launchwizard: http://localhost:4566
- lex: http://localhost:4566
- lexmodelbuilding: http://localhost:4566
- lexmodelbuildingservice: http://localhost:4566
- lexmodels: http://localhost:4566
- lexmodelsv2: http://localhost:4566
- lexv2models: http://localhost:4566
- licensemanager: http://localhost:4566
- lightsail: http://localhost:4566
- location: http://localhost:4566
- locationservice: http://localhost:4566
- logs: http://localhost:4566
- lookoutmetrics: http://localhost:4566
- m2: http://localhost:4566
- macie2: http://localhost:4566
- managedgrafana: http://localhost:4566
- mediaconnect: http://localhost:4566
- mediaconvert: http://localhost:4566
- medialive: http://localhost:4566
- mediapackage: http://localhost:4566
- mediapackagev2: http://localhost:4566
- memorydb: http://localhost:4566
- mq: http://localhost:4566
- msk: http://localhost:4566
- mwaa: http://localhost:4566
- neptune: http://localhost:4566
- networkfirewall: http://localhost:4566
- networkmanager: http://localhost:4566
- oam: http://localhost:4566
- opensearch: http://localhost:4566
- opensearchingestion: http://localhost:4566
- opensearchserverless: http://localhost:4566
- opensearchservice: http://localhost:4566
- opsworks: http://localhost:4566
- organizations: http://localhost:4566
- osis: http://localhost:4566
- outposts: http://localhost:4566
- pcaconnectorad: http://localhost:4566
- pinpoint: http://localhost:4566
- pipes: http://localhost:4566
- polly: http://localhost:4566
- pricing: http://localhost:4566
- prometheus: http://localhost:4566
- prometheusservice: http://localhost:4566
- qbusiness: http://localhost:4566
- quicksight: http://localhost:4566
- ram: http://localhost:4566
- rbin: http://localhost:4566
- rds: http://localhost:4566
- recyclebin: http://localhost:4566
- redshift: http://localhost:4566
- redshiftdata: http://localhost:4566
- redshiftdataapiservice: http://localhost:4566
- redshiftserverless: http://localhost:4566
- rekognition: http://localhost:4566
- resourceexplorer2: http://localhost:4566
- resourcegroups: http://localhost:4566
- resourcegroupstagging: http://localhost:4566
- resourcegroupstaggingapi: http://localhost:4566
- rolesanywhere: http://localhost:4566
- route53: http://localhost:4566
- route53domains: http://localhost:4566
- route53recoverycontrolconfig: http://localhost:4566
- route53recoveryreadiness: http://localhost:4566
- route53resolver: http://localhost:4566
- rum: http://localhost:4566
- s3: http://localhost:4566
- s3api: http://localhost:4566
- s3control: http://localhost:4566
- s3outposts: http://localhost:4566
- sagemaker: http://localhost:4566
- scheduler: http://localhost:4566
- schemas: http://localhost:4566
- sdb: http://localhost:4566
- secretsmanager: http://localhost:4566
- securityhub: http://localhost:4566
- securitylake: http://localhost:4566
- serverlessapplicationrepository: http://localhost:4566
- serverlessapprepo: http://localhost:4566
- serverlessrepo: http://localhost:4566
- servicecatalog: http://localhost:4566
- servicecatalogappregistry: http://localhost:4566
- servicediscovery: http://localhost:4566
- servicequotas: http://localhost:4566
- ses: http://localhost:4566
- sesv2: http://localhost:4566
- sfn: http://localhost:4566
- shield: http://localhost:4566
- signer: http://localhost:4566
- simpledb: http://localhost:4566
- sns: http://localhost:4566
- sqs: http://localhost:4566
- ssm: http://localhost:4566
- ssmcontacts: http://localhost:4566
- ssmincidents: http://localhost:4566
- ssmsap: http://localhost:4566
- sso: http://localhost:4566
- ssoadmin: http://localhost:4566
- stepfunctions: http://localhost:4566
- storagegateway: http://localhost:4566
- sts: http://localhost:4566
- swf: http://localhost:4566
- synthetics: http://localhost:4566
- timestreamwrite: http://localhost:4566
- transcribe: http://localhost:4566
- transcribeservice: http://localhost:4566
- transfer: http://localhost:4566
- verifiedpermissions: http://localhost:4566
- vpclattice: http://localhost:4566
- waf: http://localhost:4566
- wafregional: http://localhost:4566
- wafv2: http://localhost:4566
- wellarchitected: http://localhost:4566
- worklink: http://localhost:4566
- workspaces: http://localhost:4566
- xray: http://localhost:4566
```
### Deploy the stack to LocalStack
To deploy, ensure the S3 service is included in your configuration, start LocalStack, and run:
```bash
pulumi up
```
After the update, check the S3 buckets with:
```bash
lstk aws s3 ls
```
You should see output similar to:
```bash
2021-09-30 11:50:59 my-bucket-6c21027
```
# Serverless Framework
> Use the Serverless Framework with LocalStack.
## Overview
This guide explains how to integrate LocalStack with the [Serverless Framework](https://www.serverless.com/).
Although it probably requires a few code changes, integrating LocalStack with the Serverless Framework is fairly straightforward.
In particular, the setup consists of the following two steps.
1. Installing and configuring the [Serverless-LocalStack plugin](https://github.com/localstack/serverless-localstack).
2. Adjusting AWS endpoints in Lambda functions.
## Prerequisites
This guide assumes that you have the following tools installed.
- The `lstk` CLI ([Install](/aws/developer-tools/running-localstack/lstk/#installation))
- Serverless ([Install](https://www.serverless.com/framework/docs/getting-started/))
It also assumes that you already have a Serverless app set up consisting of a couple of Lambda functions and a `serverless.yml` file similar to the following.
An example Serverless app integrated with LocalStack can be found here: Simple REST API using the Serverless Framework and LocalStack
```yaml showshowLineNumbers
service: my-service
frameworkVersion: ">=1.1.0 <=2.50.0"
provider:
name: aws
runtime: python3.8
environment:
DYNAMODB_TABLE: ${self:service}-${opt:stage, self:provider.stage}
iamRoleStatements:
- Effect: Allow
Action:
- dynamodb:Query
- ...
Resource: "arn:aws:dynamodb:${opt:region, self:provider.region}:*:table/${self:provider.environment.DYNAMODB_TABLE}"
functions:
create:
handler: todos/create.create
events:
- http:
path: todos
method: post
cors: true
...
resources:
Resources:
TodosDynamoDbTable:
Type: 'AWS::DynamoDB::Table'
DeletionPolicy: Retain
Properties:
...
TableName: ${self:provider.environment.DYNAMODB_TABLE}
```
## Install and configure Serverless-LocalStack Plugin
To install the plugin, execute the following command in the root of your project.
```bash
npm install -D serverless-localstack
```
Next, set up the plugin by adding the following properties to `serverless.yml`.
```yaml
...
plugins:
- serverless-localstack
custom:
localstack:
stages:
- local
```
This sets up Serverless to use the LocalStack plugin but only for the stage "local".
Next, you need make minor adjustments to your function code in order to make your application work no matter if it is deployed on AWS or LocalStack.
## Adjust AWS endpoints in Lambda functions
You are likely using an AWS SDK (such as [Boto3](https://github.com/boto/boto3) for Python) in your Lambda functions to interact with other AWS services such as DynamoDB.
For example, in Python, your code to set up a connection to DynamoDB may look like this:
```python
...
dynamodb = boto3.resource('dynamodb')
...
```
By default, this call attempts to create a connection via the usual AWS endpoints.
However, when running services in LocalStack, we need to make sure, our applications creates a connection via the LocalStack endpoint instead.
Usually, all of LocalStack's services are available via a specific port on localhost (e.g. `localhost.localstack.cloud:4566`).
However, this endpoint only works when accessing LocalStack from outside its Docker runtime.
Since the Lambda functions execute within the LocalStack Docker container, Lambda functions cannot access other services via the usual localhost endpoint.
Instead, LocalStack provides a special environment variable `AWS_ENDPOINT_URL` which contains the internal endpoint of the LocalStack services from within its runtime environment.
Hence, you need to configure the Lambda functions to use the `AWS_ENDPOINT_URL` endpoint when accessing other AWS services in LocalStack.
In Python, this may look something like.
The code detects if it is running in LocalStack by checking if the `AWS_ENDPOINT_URL` variable exists and then configures the endpoint URL accordingly.
```python showshowLineNumbers
...
if 'AWS_ENDPOINT_URL' in os.environ:
dynamodb = boto3.resource('dynamodb', endpoint_url=os.environ['AWS_ENDPOINT_URL'])
else:
dynamodb = boto3.resource('dynamodb')
...
```
In LocalStack for AWS, no code changes are required using our [Transparent Endpoint Injection](/aws/customization/networking/transparent-endpoint-injection).
## Deploying to LocalStack
You can now deploy your Serverless service to LocalStack.
First, start LocalStack by running
```bash
lstk start
```
Then deploy the endpoint by running
```bash
serverless deploy --stage local
```
The expected result should be similar to:
```bash
Serverless: Packaging service...
Serverless: Excluding development dependencies...
Serverless: Creating Stack...
Serverless: Checking Stack create progress...
........
Serverless: Stack create finished...
Serverless: Uploading CloudFormation file to S3...
Serverless: Uploading artifacts...
Serverless: Uploading service my-service.zip file to S3 (38.3 KB)...
Serverless: Validating template...
Serverless: Skipping template validation: Unsupported in Localstack
Serverless: Updating Stack...
Serverless: Checking Stack update progress...
.....................................
Serverless: Stack update finished...
Service Information
service: my-service
stage: local
region: us-east-1
stack: my-service-local
resources: 35
api keys:
None
endpoints:
http://localhost.localstack.cloud:4566/restapis/XXXXXXXXXX/local/_user_request_
functions:
...
layers:
None
```
Use the displayed endpoint `http://localhost.localstack.cloud:4566/restapis/XXXXXXXXXX/local/_user_request_/my/custom/endpoint` to make requests to the deployed service.
## Advanced topics
### Local code mounting for lambda functions
serverless-localstack supports a feature for lambda functions that allows local code mounting:
```yaml showshowLineNumbers
# serverless.yml
custom:
localstack:
# ...
lambda:
mountCode: True
```
When this flag is set, the lambda code will be mounted into the container running the function directly from your local directory instead of packaging and uploading it.
## Ran into trouble?
If you run into any issues or problems while integrating LocalStack with your Serverless app, please [submit an issue](https://github.com/localstack/serverless-localstack/issues).
# Terraform
> Use the Terraform Infrastructure as Code framework with LocalStack.
import { Tabs, TabItem } from '@astrojs/starlight/components';
## Introduction
[Terraform](https://terraform.io/) is an Infrastructure-as-Code (IaC) framework developed by HashiCorp.
It enables users to define and provision infrastructure using a high-level configuration language.
Terraform uses HashiCorp Configuration Language (HCL) as its configuration syntax.
HCL is a domain-specific language designed for writing configurations that define infrastructure elements and their relationships.
LocalStack supports Terraform via the [AWS provider](https://registry.terraform.io/providers/hashicorp/aws/latest/docs) through [custom service endpoints](https://registry.terraform.io/providers/hashicorp/aws/latest/docs/guides/custom-service-endpoints#localstack).
You can configure Terraform to use LocalStack in two ways:
- Using [`lstk terraform`](/aws/developer-tools/running-localstack/lstk/cloud-and-iac-commands/#terraform) (alias `lstk tf`) to automatically configure the service endpoints for you.
- Manually configuring the service endpoints in your Terraform configuration with additional maintenance.
In this guide, we will demonstrate how you can create local AWS resources using Terraform and LocalStack, by using `lstk terraform` and a manual configuration example.
## `lstk terraform`
`lstk terraform` (alias `lstk tf`) runs Terraform against LocalStack. It uses the [Terraform Override mechanism](https://www.terraform.io/language/files/override) and creates a temporary file `localstack_providers_override.tf` to configure the endpoints for the AWS `provider` section, then forwards your arguments to the real `terraform` binary.
The endpoints for all services are configured to point to the LocalStack API (`http://localhost:4566` by default).
It allows you to easily deploy your unmodified Terraform scripts against LocalStack.
:::note
`lstk terraform` supersedes the older [`tflocal` wrapper script](/aws/connecting/infrastructure-as-code/deprecated-wrapper-scripts#tflocal), which is deprecated but still available if you need it.
:::
### Create a Terraform configuration
Create a new file named `main.tf` and add a minimal S3 bucket configuration to it.
The following contents should be added in the `main.tf` file:
```hcl
resource "aws_s3_bucket" "test-bucket" {
bucket = "my-bucket"
}
```
### Install lstk
To use `lstk terraform`, install `lstk` by following the [`lstk` installation instructions](/aws/developer-tools/running-localstack/lstk/#installation).
You'll also need the [`terraform` CLI](https://developer.hashicorp.com/terraform/install) itself installed and on your `PATH`.
Once installed, you can use `lstk terraform`, which has the same interface as the `terraform` command line.
```bash
lstk terraform --help
```
```bash title="Output"
Usage: terraform [global options] [args]
...
```
### Deploy the Terraform configuration
Start your LocalStack container using your preferred method.
Initialize Terraform using the following command:
```bash
lstk terraform init
```
You can now provision the S3 bucket specified in the configuration:
```bash
lstk terraform apply
```
### Configuration
The `lstk terraform` command supports several options and environment variables beyond what is available with standard `terraform`. Flags that are specific to `lstk terraform` must appear **before** the Terraform action:
| Option | Description |
| ---------------------- | ----------- |
| `--region ` | Deployment region |
| `--account ` | Target AWS account id (12 digits) |
| Environment Variable | Default value | Description |
| ------------------------------ | ------------------------------------- | ----------- |
| `AWS_ENDPOINT_URL` | - | Override the auto-resolved LocalStack endpoint |
| `LSTK_TF_CMD` | `terraform` | Binary to invoke, e.g. `tofu` |
| `LSTK_TF_OVERRIDE_FILE_NAME` | `localstack_providers_override.tf` | Override file name |
| `LSTK_TF_DRY_RUN` | - | When set, generate the override file but do not run Terraform |
| `AWS_REGION` | - | Fallback for `--region` |
| `AWS_ACCESS_KEY_ID` | - | Fallback for `--account` |
## Manual Configuration
Instead of using `lstk terraform`, you have the option to manually configure the local service endpoints and credentials.
The following sections will provide detailed steps for this manual configuration.
### General Configuration
To begin, you need to define mock credentials for the AWS provider.
Specify the following in your `main.tf` file:
```hcl showshowLineNumbers
provider "aws" {
access_key = "test"
secret_key = "test"
region = "us-east-1"
}
```
### Request Management
Next, to prevent routing and authentication issues (which are unnecessary in this context), you should provide some general parameters:
```hcl showshowLineNumbers
provider "aws" {
access_key = "test"
secret_key = "test"
region = "us-east-1"
skip_credentials_validation = true
skip_metadata_api_check = true
}
```
### Services
Furthermore, it's necessary to configure the individual services to use LocalStack.
#### Using AWS_ENDPOINT_URL_S3 (Recommended for S3)
With terraform-provider-aws version 5.x and later, you can use the `AWS_ENDPOINT_URL_S3` environment variable instead of configuring the endpoint in your Terraform code:
```bash
export AWS_ENDPOINT_URL_S3=http://s3.localhost.localstack.cloud:4566
```
This allows your Terraform configuration to work unchanged against both LocalStack and real AWS.
No `endpoints` block is needed for S3, and virtual-hosted-style addressing is used by default.
#### Configuring Endpoints in Terraform
Alternatively, you can configure service endpoints directly in your provider block.
For S3, use the virtual hosted-style endpoint:
```hcl showshowLineNumbers
endpoints {
s3 = "http://s3.localhost.localstack.cloud:4566"
}
```
:::note
The S3 endpoint uses the `s3.localhost.localstack.cloud` hostname to support virtual-hosted-style addressing, which AWS recommends and some regions require.
If you cannot resolve this DNS record, you can use `http://localhost:4566` as a fallback and enable path-style addressing by adding `s3_use_path_style = true` to the provider configuration.
Only use path-style if you have a specific requirement for it.
:::
### Final Configuration
The final minimal configuration for deploying an S3 bucket via a `main.tf` file should resemble the following:
```hcl showshowLineNumbers
provider "aws" {
access_key = "mock_access_key"
secret_key = "mock_secret_key"
region = "us-east-1"
skip_credentials_validation = true
skip_metadata_api_check = true
endpoints {
s3 = "http://s3.localhost.localstack.cloud:4566"
}
}
resource "aws_s3_bucket" "test-bucket" {
bucket = "my-bucket"
}
```
:::tip
With terraform-provider-aws >= 5.x, you can simplify this further by removing the `endpoints` block and using the environment variable instead:
```bash
export AWS_ENDPOINT_URL_S3=http://s3.localhost.localstack.cloud:4566
```
Then your provider configuration only needs the credentials and skip parameters.
:::
### Endpoint Configuration
Here's a configuration example with additional service endpoints.
Please note that these provider configurations may not be necessary if you use `lstk terraform` (as described above).
You can save the following configuration in a file named `provider.tf` and include it in your Terraform configuration.
```hcl showshowLineNumbers
provider "aws" {
access_key = "test"
secret_key = "test"
region = "us-east-1"
skip_credentials_validation = true
skip_metadata_api_check = true
endpoints {
apigateway = "http://localhost:4566"
apigatewayv2 = "http://localhost:4566"
cloudformation = "http://localhost:4566"
cloudwatch = "http://localhost:4566"
dynamodb = "http://localhost:4566"
ec2 = "http://localhost:4566"
es = "http://localhost:4566"
elasticache = "http://localhost:4566"
firehose = "http://localhost:4566"
iam = "http://localhost:4566"
kinesis = "http://localhost:4566"
lambda = "http://localhost:4566"
rds = "http://localhost:4566"
redshift = "http://localhost:4566"
route53 = "http://localhost:4566"
s3 = "http://s3.localhost.localstack.cloud:4566"
secretsmanager = "http://localhost:4566"
ses = "http://localhost:4566"
sns = "http://localhost:4566"
sqs = "http://localhost:4566"
ssm = "http://localhost:4566"
stepfunctions = "http://localhost:4566"
sts = "http://localhost:4566"
}
}
```
:::note
The S3 endpoint uses `s3.localhost.localstack.cloud` to support virtual-hosted-style addressing (AWS recommended).
If you need to use path-style addressing instead, change the S3 endpoint to `http://localhost:4566` and add `s3_use_path_style = true` to the provider block.
:::
:::note
To heuristically detect whether your Terraform configuration should be deployed against LocalStack, you can use the following snippet:
```hcl showshowLineNumbers
data "aws_caller_identity" "current" {}
output "is_localstack" {
value = data.aws_caller_identity.current.id == "000000000000"
}
```
It will detect whether the AWS account ID is `000000000000`, which is the default value for LocalStack.
If you use a different account ID within LocalStack, you can customize the snippet accordingly.
:::
## OpenTofu
OpenTofu is an open-source fork of Terraform acting as a drop-in replacement for Terraform, as it's compatible with Terraform versions 1.5.x and most of 1.6.x. You can use OpenTofu with LocalStack to create and manage your AWS resources with your pre-existing Terraform configurations. You can use the `LSTK_TF_CMD` environment variable with `lstk terraform` to specify the `tofu` binary to call, or setup a manual configuration to point the individual services to LocalStack.
```bash
LSTK_TF_CMD=tofu lstk terraform --help
```
```bash title="Output"
Usage: tofu [global options] [args]
The available commands for execution are listed below.
The primary workflow commands are given first, followed by
less common or more advanced commands.
...
```
## Terragrunt
Terragrunt is an open-source wrapper for Terraform that provides extra tools for keeping your configurations DRY, working with multiple Terraform modules, and managing remote state. You can use Terragrunt with LocalStack to create and manage your AWS resources with your pre-existing Terraform configurations.
### Configuration
A sample `terragrunt.hcl` configuration file to use with LocalStack is shown below:
```hcl showshowLineNumbers
generate "provider" {
path = "provider.tf"
if_exists = "overwrite_terragrunt"
contents = < Customize how the LocalStack emulator behaves, including configuration options, logging, Kubernetes, other installations, integrations, networking, and advanced features.
import SectionCards from '../../../../components/SectionCards.astro';
LocalStack provides a wide range of options for customizing how the emulator behaves and where it runs. Most users are well served by the defaults, but as your needs grow you can fine-tune everything from logging verbosity and networking to running on Kubernetes, alternative installation methods, and third-party integrations.
# Overview
> Tailor LocalStack for complex setups using power-user features.
import SectionCards from '../../../../../components/SectionCards.astro';
LocalStack offers power-user features for tailoring the emulator for complex environments. Most users will not need to understand these features, but they are useful when you have complex requirements or are integrating LocalStack into a larger system.
# ARM64 Support
> Running LocalStack on ARM64 CPUs
## Introduction
Since [version 0.13](https://github.com/localstack/localstack/releases/tag/v0.13.0), LocalStack officially publishes a [multi-architecture Docker manifest](https://hub.docker.com/r/localstack/localstack).
This manifest contains links to a Linux AMD64 as well as a Linux ARM64 image.
## Pulling the LocalStack image
With the multi-arch Docker manifest, your Docker client (and therefore [`lstk`](/aws/developer-tools/running-localstack/lstk)) now automatically selects the image according to your platform:
```bash
docker pull localstack/localstack
```
You can check the architecture of the pulled image by using `docker inspect`:
```bash
docker inspect localstack/localstack | jq '.[0].Architecture'
```
```bash title="Output"
"arm64"
```
## Lambda multi-architecture support
Since LocalStack 2.0, Lambda functions execute in Docker containers with the target platform `linux/amd64` or `linux/arm64`
depending on the [instruction set architecture](https://docs.aws.amazon.com/lambda/latest/dg/foundation-arch.html) configured for the function (`x86_64` by default or `arm64`).
This behavior can lead to errors if the host system, the Docker image, or the code/layer of the function do not support the target architecture.
If you prefer to execute Lambda functions on your native platform architecture, you can set the [Lambda configuration](https://docs.localstack.cloud/aws/customization/configuration-options/#lambda) variable to `LAMBDA_IGNORE_ARCHITECTURE=1`.
Example scenario: I have an amd64 machine and want to run a an arm64 Lambda function. I know that the Lambda function runs on both architectures (i.e., no architecture specific code or dependencies).
Host systems with [multi-architecture support](https://docs.docker.com/build/building/multi-platform/) can run containers for different Linux architectures using emulation.
For example, an Apple Silicon MacBook can execute `linux/arm64` (`arm64`) Lambda functions natively or emulate them for `linux/arm64` (`x86_64`).
However, emulation through qemu is only best-effort and certain features such as [ptrace](https://github.com/docker/for-mac/issues/5191#issuecomment-834154431) for debugging might not work.
You can check the supported architectures on your host system with:
```bash
docker run --privileged --rm tonistiigi/binfmt
```
```json title="Output"
{
"supported": [
"linux/amd64",
"linux/arm64",
"linux/386"
],
"emulators": [
"jar",
"llvm-12-runtime.binfmt",
"python3.10",
"python3.9",
"qemu-aarch64"
]
}
```
If you want to execute Docker Lambda functions or binaries which have not been built for your architecture,
you might need to configure cross-platform emulation on your system.
You can do so by installing the `bin_fmt` emulator with the following command:
:::danger
The following command installs additional emulators on your host system.
:::
```bash
docker run --privileged --rm tonistiigi/binfmt --install amd64
```
## Troubleshooting
### Container exits with SIGILL on Apple Silicon
On newer Apple Silicon hardware (for example Apple M4), running under Colima or Podman with an older Linux guest kernel can cause the container to crash immediately after license activation with exit code `252` (SIGILL).
See [Why does the LocalStack container exit immediately with SIGILL (exit code 252) on Apple Silicon?](/aws/getting-started/faq/#why-does-the-localstack-container-exit-immediately-with-sigill-exit-code-252-on-apple-silicon) for the workaround and permanent fix.
### Pulling images for other architectures
:::note
Please be aware that this workaround is not supported by LocalStack at all.
:::
If you want to use a LocalStack image which has been built for another architecture than yours, you can instruct Docker to use another platform by setting the `DOCKER_DEFAULT_PLATFORM` environment variable:
```bash
export DOCKER_DEFAULT_PLATFORM=linux/amd64
```
When using Docker Compose, you can use the `platform` element [as described in the specification](https://github.com/compose-spec/compose-spec/blob/master/spec.md#platform).
### Emulating AMD64 in host mode on Apple Silicon
:::note
Please be aware that this workaround is not supported by LocalStack at all.
:::
This advanced workaround is running the open source version of LocalStack in host mode (i.e., developer mode) using AMD64 emulation on an ARM64 machine.
First, you should enable "Rosetta" on your preferred terminal.
This way you'll be installing packages for `x86_64` platform.
What we will be doing now is installing Java and Python executables using Homebrew, it should automatically resolve packages to proper architecture versions.
```bash
# Install Homebrew
/bin/bash -c "$(curl -fsSL https://raw.githubusercontent.com/Homebrew/install/HEAD/install.sh)"
# Install java11 and follow instructions
brew install java11
# Install jenv and follow instructions
brew install jenv
# Add Java11 to jenv and use it globally
jenv add /Library/Java/JavaVirtualMachines/openjdk-11.jdk/Contents/Home/
jenv global 11
# Install pyenv and follow instructions
brew install pyenv
# Install python and enable it globally (check localstack/.python-version)
pyenv install 3.11.9
pyenv global 3.11.9
```
Then clone LocalStack to your machine, run `make install` and then `make start`.
### Raspberry Pi
If you want to run LocalStack on your Raspberry Pi, make sure to use a 64bit operating system.
In our experience, it works best on a Raspberry Pi 4 8GB with [Ubuntu Server 20.04 64Bit for Raspberry Pi](https://ubuntu.com/download/raspberry-pi).
You can check if Docker is running and your architecture is ARM64 / aarch64 by using `docker info`:
```bash
docker info
```
```bash title="Output"
Client:
...
Server:
...
Operating System: Ubuntu 20.04
OSType: linux
Architecture: aarch64
...
```
# Cross-Account and Cross-Region Access
> Accessing resources in another account or region
## Introduction
LocalStack automatically namespaces all resources based on the account ID and, in some cases, the region.
However, there are certain resource types that can be accessed across multiple accounts or regions.
This document provides information to help design such setups.
:::note
Cross-account support in LocalStack is being actively developed.
Please report any issues to [LocalStack Support](/aws/help-support/get-help).
:::
Cross-account/cross-region access happens when a client attempts to access a resource in another account or region than what it is configured with:
The examples below select the account with the `--account` flag of `lstk aws`.
You can also set the account ID through the `AWS_ACCESS_KEY_ID` environment variable, for example `AWS_ACCESS_KEY_ID=111111111111 lstk aws ...`.
```bash
# Create a queue in one account and region
lstk aws --account 111111111111 sqs create-queue \
--queue-name my-queue \
--region ap-south-1
```
```json title="Output"
{
"QueueUrl": "http://sqs.ap-south-1.localhost.localstack.cloud:443/111111111111/my-queue"
}
```
```bash
# Set some attributes
lstk aws --account 111111111111 sqs set-queue-attributes \
--attributes VisibilityTimeout=60 \
--queue-url http://sqs.ap-south-1.localhost.localstack.cloud:443/111111111111/my-queue \
--region ap-south-1
# Retrieve the queue attribute from another account and region
# The required information for LocalStack to locate the queue is available in the queue URL
lstk aws --account 222222222222 sqs get-queue-attributes \
--attribute-names VisibilityTimeout \
--region eu-central-1 \
--queue-url http://sqs.ap-south-1.localhost.localstack.cloud:443/111111111111/my-queue
```
```json title="Output"
{
"Attributes": {
"VisibilityTimeout": "60"
}
}
```
## Cross-Account
Resources that can be accessed across accounts are identified by their Amazon Resource Names (ARNs) or other schemes such as SQS Queue URLs.
The full list of resources and operations that allow cross-account access are listed below.
:::tip
LocalStack does not enforce IAM for cross-account access by default.
Use the `ENFORCE_IAM` [configuration](/aws/customization/configuration-options#iam) option to enable it.
:::
### EC2 Peering
It is possible to create peered VPCs and transit gateway peering attachments that are in a different region or account than the requester.
Ensure that the `PeerRegion` and `PeerOwnerId` arguments are correctly set when creating these resources.
### KMS keys
- `CreateGrant`
- `Decrypt`
- `DescribeKey`
- `Encrypt`
- `GenerateDataKey`
- `GenerateDataKeyPair`
- `GenerateDataKeyPairWithoutPlaintext`
- `GenerateDataKeyWithoutPlaintext`
- `GenerateMac`
- `GetKeyRotationStatus`
- `GetPublicKey`
- `ListGrants`
- `RetireGrant`
- `RevokeGrant`
- `Sign`
- `Verify`
- `VerifyMac`
### Lambda functions and layers
- `AddLayerVersionPermission`
- `CreateAlias`
- `DeleteAlias`
- `DeleteFunction`
- `DeleteFunctionConcurrency`
- `DeleteLayerVersion`
- `GetAlias`
- `GetFunction`
- `GetFunctionConfiguration`
- `GetLayerVersion`
- `GetLayerVersionByArn`
- `GetLayerVersionPolicy`
- `GetPolicy`
- `Invoke`
- `ListAliases`
- `ListLayerVersions`
- `ListTags`
- `ListVersionsByFunction`
- `PublishVersion`
- `PutFunctionConcurrency`
- `RemoveLayerVersionPermission`
- `TagResource`
- `UntagResource`
- `UpdateAlias`
- `UpdateFunctionCode`
### S3 buckets
Like AWS, LocalStack S3 has a bucket namespace which is shared by all accounts.
This means that the bucket name has to be globally unique.
- `GetObject`
- `ListObjects`
- `PutObject`
### Secrets Manager
- `DeleteSecret`
- `DescribeSecret`
- `GetResourcePolicy`
- `GetSecretValue`
- `ListSecretVersionIds`
- `PutResourcePolicy`
- `PutSecretValue`
- `RestoreSecret`
- `TagResource`
- `UntagResource`
- `UpdateSecret`
### SNS topics
- `AddPermission`
- `DeleteTopic`
- `GetTopicAttributes`
- `ListSubscriptionByTopic`
- `Publish`
- `RemovePermission`
- `SetTopicAttributes`
- `Subscribe`
### SQS queues
On AWS, all operations except `AddPermission`, `CreateQueue`, `DeleteQueue`, `ListQueues`, `ListQueueTags`, `RemovePermission`, `SetQueueAttributes`, `TagQueue` and `UntagQueue` allow cross-account access.
On LocalStack, all operations allow cross-account access.
## Cross-Region
AWS provides individual API endpoints for each region, and typically, resources can only be accessed within their respective regions.
On the other hand, LocalStack operates on a unified API endpoint, allowing interactions with services across regions.
# Filesystem Layout
> Understanding the runtime directory layout LocalStack uses internally
import { FileTree } from '@astrojs/starlight/components';
This page describes the filesystem directory layout used internally by LocalStack.
:::note
This filesystem layout was introduced in LocalStack v1 and can be disabled by setting `LEGACY_DIRECTORIES` to `1`.
:::
LocalStack uses following directory layout when running within a container.
- etc
- localstack
- init
- usr
- lib
- localstack
- var
- lib
- **localstack** the LocalStack volume directory root
- cache
- lib
- logs
- state
- tmp
## Directory contents
### LocalStack volume directory
- `/var/lib/localstack`: the [LocalStack volume](#localstack-volume) directory root
- `/var/lib/localstack/lib`: variable packages (like extensions or lazy-loaded third-party dependencies)
- `/var/lib/localstack/logs`: logs for recent LocalStack runs
- `/var/lib/localstack/state`: contains the state of services if persistence is enabled (such as OpenSearch cluster data)
- `/var/lib/localstack/tmp`: temporary data that is not expected to survive LocalStack runs (may be cleared when LocalStack starts or stops)
- `/var/lib/localstack/cache`: temporary data that is expected to survive LocalStack runs (is not cleared when LocalStack starts or stops)
### Configuration
- `/etc/localstack`: configuration directory
- `/etc/localstack/init`: root directory for [initialization hooks](/aws/customization/advanced/initialization-hooks)
### Static libraries
- `/usr/lib/localstack`: static third-party packages installed into the container images
:::note
Previously, directories were individually configurable, e.g., via `DATA_DIR` or `HOST_TMP_DIR`.
These have been deprecated since LocalStack v1, since we now follow a directory convention.
`DATA_DIR` implicitly points to `/var/lib/localstack/state` if persistence is enabled.
Use `PERSISTENCE=1` to enable persistence.
If `DATA_DIR` is set, its value is ignored, a warning is logged and `PERSISTENCE` is set to `1`.
`HOST_TMP_FOLDER` is determined by inspecting the volume mounts and using the source of the bind mount to `/var/lib/localstack`.
:::
## LocalStack volume
For LocalStack to function correctly, the LocalStack volume must be mounted from the host into the container at `/var/lib/localstack`.
### Using docker-compose
When using Docker Compose, this can be achieved using following:
```yaml
volumes:
- "${LOCALSTACK_VOLUME_DIR:-./volume}:/var/lib/localstack"
```
`${LOCALSTACK_VOLUME_DIR}` could be an arbitrary location on the host, e.g., `./volume`.
In this case, the effective layout would be something like:
- localstack
- cache
- machine.json
- server.test.pem
- server.test.pem.crt
- server.test.pem.key
- lib
- opensearch
- 1.1.0
- logs
- localstack_infra.err
- localstack_infra.log
- state
- startup_info.json
- tmp
- zipfile.4986fb95
### Using lstk
When using [`lstk`](/aws/developer-tools/running-localstack/lstk) to start LocalStack, the volume directory is configured with the `volume` field on a container block.
It should point to a directory on the host which is then automatically mounted into `/var/lib/localstack`:
```toml
# .lstk/config.toml
[[containers]]
type = "aws"
volume = "./volume"
```
If `volume` is not set, `lstk` defaults to `/lstk/volume/`.
Run [`lstk volume path`](/aws/developer-tools/running-localstack/lstk/lifecycle-commands/#volume) to print the resolved directory.
# Initialization Hooks
> Writing shell or Python scripts to customize or initialize your LocalStack instance.
import { Tabs, TabItem, FileTree } from '@astrojs/starlight/components';
## Lifecycle Stages and Hooks
LocalStack has four well-known lifecycle phases or stages:
* `BOOT`: the container is running but the LocalStack runtime has not been started
* `START`: the Python process is running and the LocalStack runtime is starting
* `READY`: LocalStack is ready to serve requests
* `SHUTDOWN`: LocalStack is shutting down
You can hook into each of these lifecycle phases using custom shell or Python scripts.
Each lifecycle phase has its own directory in `/etc/localstack/init`.
You can mount individual files, stage directories, or the entire init directory from your host into the container.
- etc
- localstack
- init
- boot.d executed in the container before localstack starts
- ready.d executed when localstack becomes ready
- shutdown.d executed when localstack shuts down
- start.d executed when localstack starts up
In these directories, you can put either executable shell scripts or Python programs, which will be executed from within a Python process.
All except `boot.d` will be run in the same Python interpreter as LocalStack, which gives additional ways of configuring/extending LocalStack.
You can also use subdirectories to organize your init scripts.
Currently, known script extensions are `.sh` and `.py`.
Additionally, with the installation of the `localstack-extension-terraform-init` [extension](/aws/customization/integrations/extensions/), `.tf` files can also be supported.
Shell scripts have to be executable, and have to have a [shebang](https://en.wikipedia.org/wiki/Shebang_(Unix)) (usually `#!/bin/bash`).
A script can be in one of four states: `UNKNOWN`, `RUNNING`, `SUCCESSFUL`, `ERROR`.
Scripts are by default in the `UNKNOWN` state once they have been discovered.
The remaining states should be self-explanatory.
### Execution Order and Script Failures
Scripts are sorted and executed in alphanumerical order.
If you use subdirectories, scripts in parent folders are executed first, and then the directories are traversed in alphabetical order, depth first.
If an init script fails, the remaining scripts will still be executed in order.
A script is considered in `ERROR` state if it is a shell script and returns with a non-zero exit code, or if a Python script raises an exception during its execution.
## Status Endpoint
There is an additional endpoint at `localhost:4566/_localstack/init` which returns the state of the initialization procedure.
Boot scripts (scripts placed in `boot.d`) are currently always in the `UNKNOWN` state, since they are executed outside the LocalStack process and we don't know whether they have been successfully executed or not.
```bash
curl -s localhost:4566/_localstack/init | jq .
```
```json
{
"completed": {
"BOOT": false,
"START": true,
"READY": true,
"SHUTDOWN": false
},
"scripts": [
{
"stage": "BOOT",
"name": "booting.sh",
"state": "UNKNOWN"
},
{
"stage": "READY",
"name": "pre_seed.py",
"state": "SUCCESSFUL"
}
]
}
```
### Querying Stages
You can also query a specific stage at `localhost:4566/_localstack/init/`:
```bash
curl -s localhost:4566/_localstack/init/ready | jq .
```
```json
{
"completed": true,
"scripts": [
{
"stage": "READY",
"name": "pre_seed.py",
"state": "SUCCESSFUL"
}
]
}
```
To check whether a given stage has been completed you can now run, for example:
```bash
curl -s localhost:4566/_localstack/init/ready | jq .completed
```
which returns either `true` or `false`.
## Example
A common use case for init hooks is pre-seeding LocalStack with custom state.
For example if you want to have a certain S3 bucket or DynamoDB table created when starting LocalStack, init hooks can be very useful.
:::tip
If you have more complex states, [Cloud Pods](/aws/developer-tools/snapshots/cloud-pods) and [how to auto-load them on startup](/aws/developer-tools/snapshots/cloud-pods#auto-loading-from-cloud-pods) may be a good option to look into!
:::
To execute aws cli commands when LocalStack becomes ready,
simply create a script `init-aws.sh` and mount it into `/etc/localstack/init/ready.d/`.
Make sure the script is executable: run `chmod +x init-aws.sh` on the file first.
You can use anything available inside the container, and can install new software:
```bash
#!/bin/bash
npm install -g @localstack/lstk
lstk setup aws
lstk aws s3 mb s3://my-bucket
lstk aws sqs create-queue --queue-name my-queue
```
Start Localstack:
```yaml
services:
localstack:
container_name: "${LOCALSTACK_DOCKER_NAME:-localstack-main}"
image: localstack/localstack
ports:
- "127.0.0.1:4566:4566"
environment:
- DEBUG=1
volumes:
- "/path/to/init-aws.sh:/etc/localstack/init/ready.d/init-aws.sh" # ready hook
- "${LOCALSTACK_VOLUME_DIR:-./volume}:/var/lib/localstack"
- "/var/run/docker.sock:/var/run/docker.sock"
```
Declare the bind mount and the `DEBUG` profile in your config file, then start LocalStack:
```toml
# .lstk/config.toml
[[containers]]
type = "aws"
env = ["debug"]
volumes = ["/path/to/init-aws.sh:/etc/localstack/init/ready.d/init-aws.sh"]
[env.debug]
DEBUG = "1"
```
```bash
lstk start
```
Another use for init hooks can be seen when [adding custom TLS certificates to LocalStack](/aws/developer-tools/security-testing/custom-tls-certificates#custom-tls-certificates-with-init-hooks).
### Terraform Files as Init Hooks
Running Terraform configuration files as init hooks requires the installation of a special extension.
For more information on how to manage [LocalStack extensions](/aws/customization/integrations/extensions/), please refer to the dedicated documentation page,
and for more details on running init hooks in development mode, you can check out the [extension repository description](https://github.com/localstack/localstack-extensions/tree/main/terraform-init).
Start LocalStack with **`EXTENSION_AUTO_INSTALL="localstack-extension-terraform-init"`**.
Mount a **`main.tf`** file into **`/etc/localstack/init/ready.d`**
When LocalStack starts up, it will install the extension, which in turn installs Terraform into the container.
If one of the init stage directories contain a `main.tf` file, the extension will run `terraform init` and `terraform apply` on that directory.
```terraform
# main.tf
resource "aws_s3_bucket" "example" {
bucket = "my-tf-test-bucket"
tags = {
Name = "My bucket"
Environment = "Dev"
}
}
```
Start LocalStack for AWS with mounted `main.tf`:
```yaml
services:
localstack:
container_name: "localstack-main"
image: localstack/localstack-pro
ports:
- "127.0.0.1:4566:4566" # LocalStack Gateway
environment:
# Activate LocalStack for AWS: https://docs.localstack.cloud/getting-started/auth-token/
- LOCALSTACK_AUTH_TOKEN=${LOCALSTACK_AUTH_TOKEN:?}
- EXTENSION_AUTO_INSTALL=localstack-extension-terraform-init
volumes:
# you could also place your main.tf in `./ready.d` and set "./ready.d:/etc/localstack/init/ready.d"
- "./main.tf:/etc/localstack/init/ready.d/main.tf"
- "./volume:/var/lib/localstack"
- "/var/run/docker.sock:/var/run/docker.sock"
```
```toml
# .lstk/config.toml
[[containers]]
type = "aws"
env = ["terraform-init"]
volumes = ["./main.tf:/etc/localstack/init/ready.d/main.tf"]
[env.terraform-init]
EXTENSION_AUTO_INSTALL = "localstack-extension-terraform-init"
```
```bash
lstk start
```
You can wait for LocalStack to complete the startup process, and then print the created S3 bucket:
```bash
lstk aws s3 ls
```
The logs should show something like:
```bash
2024-06-26T20:36:19.946 INFO --- [ady_monitor)] l.extension : Applying terraform project from file /etc/localstack/init/ready.d/main.tf
2024-06-26T20:36:19.946 DEBUG --- [ady_monitor)] localstack.utils.run : Executing command: ['tflocal', '-chdir=/etc/localstack/init/ready.d', 'init', '-input=false']
2024-06-26T20:36:26.864 DEBUG --- [ady_monitor)] localstack.utils.run : Executing command: ['tflocal', '-chdir=/etc/localstack/init/ready.d', 'apply', '-auto-approve']
```
For a more complex demo project, on how to use Terraform init hooks for your testing environments, you can check out [this example](/aws/tutorials/using-terraform-with-testcontainers-and-localstack/) in the Tutorials section.
## Troubleshooting
If you are having issues with your initialization hooks not being executed, please perform the following checks:
* Do the scripts have a known file extensions (`.sh` or `.py`)?
* If not, rename the files to the matching file extension.
* Is the script file configured to use LF endings instead of CRLF endings?
* If not, switch the file to LF mode as it is utilized in the Unix environment within a container.
* Is the script marked as executable?
* If not, set the executable flag on the file (`chmod +x ...`).
* If it's a shell script, does it have a shebang (e.g., `#!/bin/bash`) as the first line in the file?
* If not, add the shebang header (usually `#!/bin/bash`) on top of your script file.
* Is the script being listed in the logs when running LocalStack with `DEBUG=1`?
* The detected scripts are logged like this:
```bash
...
Init scripts discovered: {BOOT: [], START: [], READY: [Script(path='/etc/localstack/init/ready.d/setup.sh', stage=READY, state=UNKNOWN)], SHUTDOWN: []}
...
Running READY script /etc/localstack/init/ready.d/setup.sh
...
```
* If your script does not show up in the list of discovered init scripts, please check your Docker volume mount.
Most likely the scripts are not properly mounted into the Docker container.
* Are resources not being created?
* Ensure that AWS [credentials](/aws/connecting/credentials) are set, e.g. through `AWS_ACCESS_KEY_ID` and `AWS_SECRET_ACCESS_KEY` environment variables.
# Multi-Account Setups
> Using LocalStack in multi-tenant setups
:::note
Please note that multi-accounts may not work for use-cases that have cross-account and cross-service access.
Please contact [LocalStack Support](/aws/help-support/get-help) to request support for specific use-cases.
:::
LocalStack ships with multi-account support which allows namespacing based on AWS account ID.
LocalStack uses the value in the AWS Access Key ID field for the purpose of namespacing over account ID.
For more information, see [Credentials](/aws/connecting/credentials).
The Access Key ID field can be configured in the AWS CLI in multiple ways: please refer to [AWS CLI documentation](https://docs.aws.amazon.com/cli/latest/userguide/cli-configure-quickstart.html#cli-configure-quickstart-precedence).
## Examples
In the following examples, we select the account ID with the `--account` flag of `lstk aws`.
```bash
lstk aws --account 000000000001 ec2 create-key-pair --key-name green-hospital
lstk aws --account 000000000002 ec2 create-key-pair --key-name red-medicine
lstk aws --account 000000000001 ec2 describe-key-pairs
{
"KeyPairs": [
{
"KeyFingerprint": "6b:e3:a3:41:4b:60:f3:6d:7b:84:3e:17:e3:ad:d0:15",
"KeyName": "green-hospital"
}
]
}
lstk aws --account 000000000002 ec2 describe-key-pairs
{
"KeyPairs": [
{
"KeyFingerprint": "16:4c:64:13:36:41:7c:75:d0:51:f0:db:ed:d7:c8:95",
"KeyName": "red-medicine"
}
]
}
```
Alternatively, you can set the account ID through the `AWS_ACCESS_KEY_ID` environment variable:
```bash
AWS_ACCESS_KEY_ID=000000000001 lstk aws ec2 describe-key-pairs
```
If no explicit Account ID is set, LocalStack falls back to default.
In this example, no resources are returned.
```bash
lstk aws ec2 describe-key-pairs
{
"KeyPairs": []
}
```
# Regions Coverage
> Understanding the Region Coverage for LocalStack's emulation of AWS services.
## Introduction
LocalStack ships with multi-region support, enabling users to emulate different AWS regions and namespace resources based on the region.
LocalStack supports a wide range of AWS regions, including commercial, government, and China regions, providing a realistic environment for development and testing across multiple regions on your local machine.
## Supported Regions
| Region Code | Supported | Notes |
|-----------------|------------|--------------------------------------------|
| us-east-1 | ✔️ | Commonly used as the default region |
| us-east-2 | ✔️ | |
| us-west-1 | ✔️ | |
| us-west-2 | ✔️ | |
| ca-central-1 | ✔️ | |
| ca-west-1 | ✔️ | Available in LocalStack Enterprise only |
| eu-north-1 | ✔️ | |
| eu-west-1 | ✔️ | |
| eu-west-2 | ✔️ | |
| eu-west-3 | ✔️ | |
| eu-central-1 | ✔️ | |
| eu-south-1 | ✔️ | |
| eu-south-2 | ✔️ | |
| eu-central-2 | ✔️ | |
| ap-south-1 | ✔️ | |
| ap-south-2 | ✔️ | |
| ap-northeast-1 | ✔️ | |
| ap-northeast-2 | ✔️ | |
| ap-northeast-3 | ✔️ | |
| ap-southeast-1 | ✔️ | |
| ap-southeast-2 | ✔️ | |
| ap-southeast-3 | ✔️ | |
| ap-southeast-4 | ✔️ | |
| ap-southeast-5 | ✔️ | Available in LocalStack Enterprise only |
| ap-east-1 | ✔️ | |
| sa-east-1 | ✔️ | |
| af-south-1 | ✔️ | |
| me-south-1 | ✔️ | |
| me-central-1 | ✔️ | |
| cn-north-1 | ✔️ | Available in LocalStack Enterprise only |
| cn-northwest-1 | ✔️ | Available in LocalStack Enterprise only |
| us-gov-east-1 | ✔️ | Available in LocalStack Enterprise only |
| us-gov-west-1 | ✔️ | Available in LocalStack Enterprise only |
| il-central-1 | ✔️ | |
# Usage Tracking
> Understanding what data LocalStack collects and how you can opt out of usage tracking
## Overview
For license activations, we track the timestamp and the licensing credentials.
It is tracked regardless of whether the user disables event tracking since we collect this in the backend, not the client.
## LocalStack usage statistics
For Pro users, most of the information is collected to populate the [Stack Insights](/aws/organizations-admin/stack-insights) dashboard.
Collecting basic anonymized usage of AWS services helps us better direct engineering efforts to services that are used the most or cause the most issues.
### Session information
The current usage event collection on the client side includes:
- A randomly generated ID pertaining to the session
- The Auth Token
- A randomly generated machine ID is kept throughout the session but deleted once the LocalStack cache directory is removed
- The operating system (mostly Linux since LocalStack typically runs in our Debian container)
- The LocalStack version being used
- Whether LocalStack is running in a CI environment
- Whether LocalStack is running in Docker
- Whether this is an internal test run (LocalStack development flag)
Here is an example of a usage event:
```json
{
"session_id": "f41119fd-af20-4d48-af92-2b8d69f8cf7e",
"machine_id": "1b6a2f12",
"api_key": "0123456789",
"system": "Linux",
"version": "1.0.5.dev",
"is_ci": false,
"is_docker": true,
"is_testing": false
}
```
### AWS API call metadata
The AWS API call metadata includes:
- The service being called (like `s3` or `lambda`)
- The operation being called (like `PutObject`, `CreateQueue`, `DeleteQueue`)
- The HTTP status code of the response
- If it is a 400 error, we collect the error type and message.
If it is a 500 error (internal LocalStack error), and `DEBUG=1` is enabled, we may also collect the stack trace to help us identify LocalStack bugs
- Whether the call originated from inside LocalStack
- The region user made the call to
- The dummy account ID user made the request
- The user agent the request was made with (`aws-cli`, `terraform`)
Here is an example of AWS API call metadata:
```json
{
"name": "aws_request",
"metadata": {
"session_id": "64517be1-7dd0-479b-a8ec-88d3e544afd9",
"client_time": "2022-08-30 12:27:25.556001"
},
"payload": {
"service": "sqs",
"operation": "DeleteQueue",
"status_code": 400,
"err_type": "AWS.SimpleQueueService.NonExistentQueue",
"err_msg": "The specified queue does not exist for this wsdl version.",
"is_internal": false,
"region": "us-east-1",
"account_id": "000000000000",
"user_agent": "aws-cli/1.25.52 Python/3.10.4 Linux/5.13.0-28-generic awscrt/0.14.0 botocore/1.27.52"
}
}
```
### CLI invocations
We collect an anonymized event if a CLI command was invoked, but do not collect any of the parameter values.
This event is not connected to the session or the Auth Token.
Here is an example of a CLI invocation event:
```json
{
"name": "cli_cmd",
"metadata": {
"client_time": "2022-08-30 14:46:54.116457"
},
"payload": {
"cmd": "lstk start",
"params": [
"file"
]
}
}
```
### Feature usage
We collect the usage of particular features in an anonymized and aggregated way.
- If you use init scripts, we collect the stage, how many scripts are being executed, and how long they took
- Nothing else at the moment, but we may track additional features
## What we are not collecting?
- Specific LocalStack configuration values
- Content or file names of files being uploaded to S3
- More generally, we don't collect any parameters of AWS API Calls.
We do not track S3 bucket names, Lambda function names, EC2 configurations, or anything similar
- Any sensitive information about the request (like credentials and URL parameters)
## Configuration
You can disable event reporting in your LocalStack instance by setting the environment variable `DISABLE_EVENTS=1`.
# Configuration
> Set the environment variables and flags that change how LocalStack starts and runs.
LocalStack exposes various configuration options to control its behaviour.
With `lstk`, these options can be passed as `LOCALSTACK_`-prefixed environment variables when starting the container:
```bash
LOCALSTACK_DEBUG=1 lstk start
```
Alternatively, set them as named environment profiles in your config file and reference them from the container block:
```toml
# .lstk/config.toml
[[containers]]
type = "aws"
env = ["debug"]
[env.debug]
DEBUG = "1"
```
```bash
lstk start
```
See [Passing environment variables to the container](/aws/developer-tools/running-localstack/lstk/configuration/#passing-environment-variables-to-the-container) for details.
To facilitate interoperability, configuration variables can be prefixed with `LOCALSTACK_` in docker.
For instance, setting `LOCALSTACK_PERSISTENCE=1` is equivalent to `PERSISTENCE=1`.
Configurations marked as **Deprecated** will be removed in the next major version.
You can find previously removed configuration variables under [Legacy](#legacy).
## Core
Options that affect the core LocalStack system.
| Variable | Example Values | Description |
| - | - | - |
| `DEBUG` | `0` (default) \|`1`| Flag to increase log level and print more verbose logs (useful for troubleshooting issues)|
| `IMAGE_NAME`| `localstack/localstack` (default), `localstack/localstack:0.11.0` | Specific name and tag of LocalStack Docker image to use.|
| `LOCALSTACK_HOST`| `localhost.localstack.cloud:4566` (default) | This is interpolated into URLs and addresses that are returned by LocalStack. It has the form `:`. |
| `GATEWAY_LISTEN` | `0.0.0.0:4566,0.0.0.0:443` (default in Docker mode), `127.0.0.1:4566,127.0.0.1:443` (default in host mode) | Configures the bind addresses of LocalStack. It has the form `:(,:)*`. When unset, LocalStack listens on both the HTTP edge port (`4566`) and HTTPS (`443`). |
| `USE_SSL` | `0` (default) | Whether to return URLs using HTTP (`0`) or HTTPS (`1`). Changed with 3.0.0. In earlier versions this was toggling SSL support on or off. |
| `PERSISTENCE` | `0` (default) | Enable persistence. See [Persistence Mechanism](/aws/developer-tools/snapshots/persistence) and [Filesystem Layout](/aws/customization/advanced/filesystem). |
| `MAIN_CONTAINER_NAME` | `localstack-main` (default) | Specify the main docker container name |
| `LS_LOG` | `trace`, `trace-internal`, `debug`, `info`, `warn`, `error`, `warning`| Specify the log level. Currently overrides the `DEBUG` configuration. `trace` for detailed request/response, `trace-internal` for internal calls, too. |
| `EXTERNAL_SERVICE_PORTS_START` | `4510` (default) | Start of the [External Service Port Range](/aws/customization/networking/external-port-range) (inclusive). |
| `EXTERNAL_SERVICE_PORTS_END` | `4560` (default) | End of the [External Service Port Range](/aws/customization/networking/external-port-range) (exclusive). |
| `EAGER_SERVICE_LOADING` | `0` (default) \|`1` | Boolean that toggles lazy loading of services. If eager loading is enabled, services are started at LocalStack startup rather than their first use. Be aware that eager loading increases the LocalStack startup time. |
| `SERVICES`| `s3,sqs` | A comma-delimited string of services. Check the [internal health endpoint](/aws/customization/networking/internal-endpoints#localstack-endpoints) `/_localstack/health` for valid service names. If `SERVICES` is set LocalStack will only load the listed services. All other services will be disabled and cannot be used. |
| `ALLOW_NONSTANDARD_REGIONS` | `0` (default) | Allows the use of non-standard AWS regions. By default, LocalStack only accepts [standard AWS regions](https://docs.aws.amazon.com/general/latest/gr/rande.html). |
| `PARITY_AWS_ACCESS_KEY_ID` | `0` (default) | Enables the use production-like access key IDs. By default, LocalStack issues keys with `LSIA...` and `LKIA...` prefix, and will reject keys that start with `ASIA...` or `AKIA...`. |
| `LOCALSTACK_RESPONSE_HEADER_ENABLED` | `1` (default) \| `0` | Whether LocalStack adds the [`x-localstack` response header](/aws/customization/networking/internal-endpoints#x-localstack-response-header) to every AWS API response. The header value is the LocalStack version and lets client tools detect LocalStack and its version. |
## CLI
`lstk` is configured through its config file rather than through environment variables.
See [Configuration](/aws/developer-tools/running-localstack/lstk/configuration/) on the `lstk` page for the config file search order, the field reference, and how to define named environment profiles.
## Docker
Options to configure how LocalStack interacts with Docker.
| Variable | Example Values | Description |
| - | - | - |
| `LOCALSTACK_VOLUME_DIR` | `~/.cache/localstack/volume` (on Linux) | The location on the host of the LocalStack volume directory mount. See [Filesystem Layout](/aws/customization/advanced/filesystem) |
| `DOCKER_FLAGS` | | Allows to pass custom flags (e.g., volume mounts) to "docker run" when running LocalStack in Docker. |
| `DOCKER_SOCK` | `/var/run/docker.sock` | Path to local Docker UNIX domain socket |
| `DOCKER_BRIDGE_IP` | `172.17.0.1` | IP of the docker bridge used to enable access between containers |
| `LEGACY_DOCKER_CLIENT` | `0`\|`1` | Whether LocalStack should use the command-line Docker client and subprocess execution to run Docker commands, rather than the Docker SDK. |
| `DOCKER_CMD` | `docker` (default), `sudo docker`| Shell command used to run Docker containers (only used in combination with `LEGACY_DOCKER_CLIENT`) |
| `FORCE_NONINTERACTIVE` | | When running with Docker, disables the `--interactive` and `--tty` flags. Useful when running headless. |
## Local AWS Services
This section covers configuration options that are specific to certain AWS services.
### API Gateway
| Variable | Example Values | Description |
| - | - | - |
| `PROVIDER_OVERRIDE_APIGATEWAY` | `legacy`\|`next_gen` (default)| The [new API Gateway implementation](/aws/services/apigateway#new-api-gateway-implementation) is active by default since LocalStack 4.0. |
### AppSync
| Variable | Example Values | Description |
| - | - | - |
| `GRAPHQL_ENDPOINT_STRATEGY` | `legacy`\|`domain`\|`path` | Governs how AppSync endpoints are created to access a GraphQL API (see [AppSync Endpoints](/aws/services/appsync/#configuring-graphql-endpoints)) |
| `APPSYNC_JS_LIBS_VERSION` | `latest`(default) \|`refresh`\|`` | Control the version of the `@aws-appsync/utils` package to use. `latest` means fetch the latest but only if not present. `refresh` means always fetch the latest version. `` means use a specific git reference. |
### Batch
| Variable | Example Values | Description |
| - | - | - |
| `BATCH_DOCKER_FLAGS` | `-e TEST_ENV=1337` | Additional flags provided to the batch container. Same restrictions as `LAMBDA_DOCKER_FLAGS`. |
### Bedrock
| Variable | Example Values | Description |
| - | - | - |
| `BEDROCK_PREWARM` | `0` (default) \| `1` | Pre-warm the Bedrock engine directly on LocalStack startup instead of on demand. |
| `DEFAULT_BEDROCK_MODEL` | `smollm2:360m` (default) | The model that is used initially to handle text model invocations in Bedrock. Any text-based model available for Ollama is usable. |
| `BEDROCK_PULL_MODELS` | `deepseek-r1,mistral` \' '' (default) | A list of models that should get pulled into the model cache on startup. `DEFAULT_BEDROCK_MODEL` is automatically in there |
| `BEDROCK_DOCKER_FLAGS` | `-v /certs:/certs` | Additional flags passed to Docker when creating Bedrock containers. Same restrictions as `LAMBDA_DOCKER_FLAGS`. |
### BigData (EMR, Athena, Glue)
| Variable | Example Values | Description |
| - | - | - |
| `BIGDATA_DOCKER_NETWORK` | | Network the bigdata should be connected to. The LocalStack container has to be connected to that network as well. Per default, the bigdata container will be connected to a network LocalStack is also connected to.
| `BIGDATA_DOCKER_FLAGS` | | Additional flags for the bigdata container. Same restrictions as `LAMBDA_DOCKER_FLAGS`.
### CloudFormation
| Variable | Example Values | Description |
| - | - | - |
| `CFN_PER_RESOURCE_TIMEOUT` | `300` (default) | Set the timeout to deploy each individual CloudFormation resource.
| `CFN_VERBOSE_ERRORS` | `0` (default) \|`1` | Show exceptions for CloudFormation deploy errors.
| `CFN_STRING_REPLACEMENT_DENY_LIST` | `""` (default) \|`https://api-1.execute-api.us-east-2.amazonaws.com/test-resource,https://api-2.execute-api.us-east-2.amazonaws.com/test-resource` | Comma-separated list of AWS URLs that should not be modified to point to Localstack. For example, when deploying a CloudFormation template we might want to leave certain resources pointing to actual AWS URLs, or even leave environment variables with URLs like that untouched.
### CloudFront
| Variable | Example Values | Description |
| - | - | - |
| `CLOUDFRONT_LAMBDA_EDGE` | `0` (default) \| `1` | Enable Lambda@Edge support for CloudFront distributions. |
### CloudWatch
| Variable | Example Values | Description |
| - | - | - |
| `PROVIDER_OVERRIDE_CLOUDWATCH` | `v1` | Use the old CloudWatch provider. |
### CodeBuild
| Variable | Example Values | Description |
| - | - | - |
| `CODEBUILD_REMOVE_CONTAINERS` | `0`\|`1` (default) | Remove Docker containers associated with a CodeBuild build tasks after execution. Disabling this and dumping container logs might help with troubleshooting failing builds. |
| `CODEBUILD_ENABLE_CUSTOM_IMAGES` | `0` (default) \|`1` | Enable the usage of arbitrary CodeBuild build images. By default, all the builds are executed in a Amazon Linux 2023 container. |
| `CODEBUILD_DOCKER_FLAGS` | `-v /certs:/certs` | Additional flags passed to Docker when creating CodeBuild build containers. Same restrictions as `LAMBDA_DOCKER_FLAGS`. |
### CodePipeline
| Variable | Example Values | Description |
| - | - | - |
| `CODEPIPELINE_GH_TOKEN` | | GitHub Personal Access Token to used by CodeConnections Source action to access private repositories on GitHub. |
### DMS
| Variable | Example Values | Description |
| - | - | - |
| `DMS_SERVERLESS_DEPROVISIONING_DELAY` | `60` (default), any positive integer | Delay the deprovisioning of serverless by defined seconds. Once deprovisioned the statistics will be reset. |
| `DMS_SERVERLESS_STATUS_CHANGE_WAITING_TIME` | `0` (default), any positive integer | Simulates a waiting time (in seconds) between status changes when the serverless replication starts. The waiting time will be applied for each status change (there are 6 status changes before the task is running). |
### DocumentDB
| Variable | Example Values | Description |
| - | - | - |
| `DOCDB_PROXY_CONTAINER` | `0` (default) \|`1` | Whether the DocumentDB starts the MongoDB container proxied over LocalStack container. When enabled lambda functions can use the `Endpoint` configuration of the DocDB cluster or instance to connect to the DocumentDB. By default the container starts without proxy as standalone container. |
| `DOCDB_DOCKER_FLAGS` | `-v /certs:/certs` | Additional flags passed to Docker when creating DocumentDB containers. Same restrictions as `LAMBDA_DOCKER_FLAGS`. |
### DynamoDB
| Variable | Example Values | Description |
| - | - | - |
| `DYNAMODB_ERROR_PROBABILITY` | Decimal value between `0.0`(default) and `1.0` | Randomly inject `ProvisionedThroughputExceededException` errors into DynamoDB API responses. |
| `DYNAMODB_HEAP_SIZE` | `256m` (default), `1G` | Sets the JAVA EE maximum memory size for DynamoDB; full table scans require more memory |
| `DYNAMODB_SHARE_DB` | `0`\|`1` | When activated, DynamodDB will use a single database instead of separate databases for each credential and region. |
| `DYNAMODB_IN_MEMORY` | `0` (default) \|`1` | When activated, DynamodDB will start in in-memory mode, which can have a faster throughput. If you use this options, both persistence and cloud pods will not work for DynamoDB |
| `DYNAMODB_OPTIMIZE_DB_BEFORE_STARTUP` | `0`\|`1` | Optimize the database tables in the store before starting |
| `DYNAMODB_DELAY_TRANSIENT_STATUSES` | `0`\|`1` | When activated, DynamoDB will introduce artificial delays in resource creation to simulate the actual cloud service more closely. Currently works only for CREATING and DELETING online index statuses. |
| `DYNAMODB_CORS` | `*` | Enable CORS support for specific allow-list list the domains separated by `,` use `*` for public access (default is `*`) |
| `DYNAMODB_REMOVE_EXPIRED_ITEMS` | `0`\|`1` | Enables [Time to Live (TTL)](https://docs.aws.amazon.com/amazondynamodb/latest/developerguide/TTL.html) feature |
### ECR
| Variable | Example Values | Description |
| - | - | - |
| `ECR_ENDPOINT_STRATEGY` | `domain` (default)\|`off`\| | Governs how the default ECR endpoints are returned |
### ECS
| Variable | Example Values | Description |
| - | - | - |
| `ECS_REMOVE_CONTAINERS` | `0`\|`1` (default) | Remove Docker containers associated with ECS tasks after execution. Disabling this and dumping container logs might help with troubleshooting failing ECS tasks. |
| `ECS_DOCKER_FLAGS` | `--privileged`, `--dns 1.2.3.4` | Additional flags passed to Docker when creating ECS task containers. Same restrictions as `LAMBDA_DOCKER_FLAGS`. |
| `ECS_DISABLE_AWS_ENDPOINT_URL` | `0` (default) \| `1` | Whether to disable injecting the environment variable `AWS_ENDPOINT_URL`, which automatically configures [supported AWS SDKs](https://docs.aws.amazon.com/sdkref/latest/guide/feature-ss-endpoints.html). |
| `ECS_TASK_EXECUTOR` | `kubernetes` | Whether to run ECS tasks when LocalStack is deployed on Kubernetes. Tasks are added to ELB load balancer target groups. |
### EC2
| Variable | Example Values | Description |
| - | - | - |
| `EC2_DOCKER_FLAGS` | `--privileged` | Additional flags passed to Docker when launching containerized instances. Same restrictions as `LAMBDA_DOCKER_FLAGS`. |
| `EC2_DOCKER_INIT` | `0`\|`1` (default) | Start container instances with docker-init system, learn more [here](https://docs.docker.com/reference/cli/docker/container/run/#init). Disable this if you want to use a custom init system. |
| `EC2_DOWNLOAD_DEFAULT_IMAGES` | `0`\|`1` (default) | At startup, LocalStack for AWS downloads latest Ubuntu images from Docker Hub for use as AMIs. This can be disabled for security reasons. |
| `EC2_EBS_MAX_VOLUME_SIZE` | `1000` (default) | Maximum size (in MiBs) of user-specified EBS block devices mounted into EC2 container instances. |
| `EC2_MOUNT_BLOCK_DEVICES` | `1`\|`0` (default) | Whether to create and mount user-specified EBS block devices into EC2 container instances. |
| `EC2_REMOVE_CONTAINERS` | `0`\|`1` (default) | Controls whether created Docker containers are removed at instance termination or LocalStack shuts down. Disable this if there is a need to examine the container filesystem for debugging. |
| `EC2_VM_MANAGER` | `docker` (default) \| `kubernetes` (Enterprise) \| `mock` | Emulation method to use in LocalStack for AWS. The `kubernetes` value runs instances as Kubernetes pods. |
### EKS
| Variable | Example Values | Description |
| - | - | - |
| `K3S_FLAGS` | | Customize the `k3s` cluster created by LocalStack to emulate EKS clusters. (formerly `EKS_K3S_FLAGS`, still accepted as a deprecated alias) |
| `EKS_LOADBALANCER_PORT` | `8081` (default) | Local port on which the Kubernetes load balancer is exposed on the host. |
| `K3S_IMAGE_TAG` | `v1.31.5-k3s1` (default) | Custom tag of the `rancher/k3s` image used to spin up Kubernetes clusters locally. (formerly `EKS_K3S_IMAGE_TAG`, still accepted as a deprecated alias) |
| `MANAGED_K8S_PROVIDER` | `k3s` (default)\|`local` | The k8s provider which should be used to start the k8s cluster backing EKS. For more information on the providers, please see [Elastic Kubernetes Service (EKS)](/aws/services/eks) (formerly `EKS_K8S_PROVIDER`, still accepted as a deprecated alias) |
| `K3S_IMAGE_REPOSITORY` | `rancher/k3s` (default) | Custom repository of the `rancher/k3s` image used to spin up Kubernetes clusters locally. (formerly `EKS_K3S_IMAGE_REPOSITORY`, still accepted as a deprecated alias) |
| `K3D_START_LB_INGRESS` | `0` (default) | Whether to start the k3d load balancer and Traefik ingress controller automatically when creating an EKS cluster. Set to `1` to enable. (formerly `EKS_START_K3D_LB_INGRESS`, still accepted as a deprecated alias) |
| `EKS_PERSIST_CLUSTER_CONTENTS` | `0` (default) | When Persistence is enabled or when saving/loading Cloud Pods, this flag can be used to control whether the content deployed to EKS clusters will be persisted. Set to `1` to enable. |
| `K3D_CLUSTER_TOKEN` | `localstack-k3d-cluster-token` (default) | Token used to authenticate agent nodes joining a k3d-backed EKS cluster. Setting an explicit token ensures consistent node authentication across k3d versions, which is required for dynamic agent assignment. (formerly `EKS_K3D_CLUSTER_TOKEN`, still accepted as a deprecated alias) |
| `K3D_VERSION` | `v5.9.0` (default) | Overrides the k3d CLI version used to manage EKS clusters. (formerly `EKS_K3D_VERSION`, still accepted as a deprecated alias) |
:::note
The EKS configuration variables were renamed to cloud-agnostic names since they're shared across cloud emulators (AWS EKS / Azure AKS). The previous `EKS_*`, `LOCALSTACK_K8S_*`, and `LAMBDA_K8S_*` names still work as deprecated aliases and will be removed in a future release.
If you configure these options through the LocalStack CLI **v1**, keep the `LOCALSTACK_` prefix on the new names (e.g. `LOCALSTACK_MANAGED_K8S_PROVIDER`). The CLI v1 only forwards host environment variables prefixed with `LOCALSTACK_` into the container, where the prefix is stripped to yield the in-container variable (`MANAGED_K8S_PROVIDER`).
:::
### ElastiCache
| Variable | Example Values | Description |
| - | - | - |
| `PROVIDER_OVERRIDE_ELASTICACHE` | `legacy` | Use the legacy ElastiCache provider. |
| `REDIS_CONTAINER_MODE` | `1`\|`0` (default) | Start ElastiCache cache nodes in separate containers instead of in the LocalStack container |
| `ELASTICACHE_DOCKER_FLAGS` | `-v /certs:/certs` | Additional flags passed to Docker when creating ElastiCache containers. Same restrictions as `LAMBDA_DOCKER_FLAGS`. |
### ElasticSearch
:::note
Also see [OpenSearch configuration variables](#opensearch) which are used to manage both OpenSearch and ElasticSearch clusters.
:::
| Variable | Example Values | Description |
| - | - | - |
| `IGNORE_ES_DOWNLOAD_ERRORS` | `0`\|`1` | Whether to ignore errors (e.g., network/SSL) when downloading ElasticSearch plugins |
### Glue
| Variable | Example Values | Description |
| - | - | - |
| `GLUE_JOB_EXECUTOR` | `docker` (default) \| `kubernetes` | Whether to run Glue jobs when LocalStack is deployed on Kubernetes. Jobs are run as pods in the Kubernetes cluster. |
| `DOCKER_GLOBAL_IMAGE_PREFIX` | | Specify custom images for Glue jobs by configuring their custom image repository. |
| `GLUE_DOCKER_FLAGS` | `-v /certs:/certs` | Additional flags passed to Docker when creating Glue job containers. Same restrictions as `LAMBDA_DOCKER_FLAGS`. |
### IAM
| Variable | Example Values | Description |
| - | - | - |
| `ENFORCE_IAM` (pro) | `0` (default)\|`1` | Enable IAM policy evaluation and enforcement. If this is disabled (the default), IAM policies will have no effect to your requests. |
| `IAM_SOFT_MODE` (pro) | `0` (default)\|`1` | Enable IAM soft mode. This leads to policy evaluation without actually denying access. Needs `ENFORCE_IAM` enabled as well. For more information, see [Identity and Access Management](/aws/services/iam).|
### Kinesis
| Variable | Example Values | Description |
| - | - | - |
| `KINESIS_ERROR_PROBABILITY` | Decimal value between `0.0`(default) and `1.0` | Randomly inject `ProvisionedThroughputExceededException` errors into Kinesis API responses. |
| `KINESIS_SHARD_LIMIT` | `100` (default), `Infinity` (to disable) | Integer value , causing the Kinesis API to start throwing exceptions to mimic the default shard limit. |
| `KINESIS_ON_DEMAND_STREAM_COUNT_LIMIT` | `10` (default), `Infinity` (to disable) | Integer value , causing the Kinesis API to start throwing exceptions to mimic the default on demand stream count limit. |
| `KINESIS_LATENCY` | `500` (default), `0` (to disable)| Integer value of milliseconds, causing the Kinesis API to delay returning a response in order to mimic latency from a live AWS call. |
| `KINESIS_MOCK_PROVIDER_ENGINE` | `node` (default) \| `scala` | String value of `node` (default) or `scala` that determines the underlying build of Kinesis Mock. |
| `KINESIS_MOCK_MAXIMUM_HEAP_SIZE` | `512m` (default) | JVM memory format string that sets the maximum memory size for the Kinesis Mock Scala server, corresponds to the JVM `-Xmx` flag. |
| `KINESIS_MOCK_INITIAL_HEAP_SIZE` | `256m` (default) | JVM memory format string that sets the initial memory size for the Kinesis Mock Scala server, corresponds to the JVM `-Xms` flag. |
### Kinesis Analytics
| Variable | Example Values | Description |
| - | - | - |
| `KINESISANALYTICSV2_DOCKER_FLAGS` | `-v /certs:/certs` | Additional flags passed to Docker when creating Kinesis Analytics v2 (Flink) containers. Same restrictions as `LAMBDA_DOCKER_FLAGS`. |
### Kafka
| Variable | Example Values | Description |
| - | - | - |
| `KAFKA_DOCKER_FLAGS` | `-v /certs:/certs` | Additional flags passed to Docker when creating Kafka/MSK containers. Same restrictions as `LAMBDA_DOCKER_FLAGS`. |
### Lambda
:::note
The legacy [Lambda](/aws/services/lambda) implementation has been removed since LocalStack 3.0 (Docker `latest` since 2023-11-09).
Please consult the [migration guide](/aws/services/lambda#migrating-to-lambda-v2) for more information.
:::
| Variable| Example Values | Description |
| - | - | - |
| `BUCKET_MARKER_LOCAL` | `hot-reload` (default) | Magic S3 bucket name for [Hot Reloading](/aws/developer-tools/lambda-tools/hot-reloading). The S3Key points to the source code on the local file system. |
| `HOSTNAME_FROM_LAMBDA` | `localstack` | Endpoint host under which APIs are accessible from Lambda containers (optional). This can be useful in docker-compose stacks to use the local container hostname if neither IP address nor container name of the main container are available (e.g., in CI). Often used in combination with `LAMBDA_DOCKER_NETWORK`.|
| `LAMBDA_DISABLE_AWS_ENDPOINT_URL` | `0` (default) \| `1` | Whether to disable injecting the environment variable `AWS_ENDPOINT_URL`, which automatically configures [supported AWS SDKs](https://docs.aws.amazon.com/sdkref/latest/guide/feature-ss-endpoints.html). |
| `LAMBDA_DISABLE_JAVA_SDK_V2_CERTIFICATE_VALIDATION` | `1` (default) | Whether to disable the certificate name validation for [AWS Java SDK v2](https://docs.aws.amazon.com/sdk-for-java/latest/developer-guide/home.html) calls when using [transparent endpoint injection](/aws/customization/networking/transparent-endpoint-injection).|
| `LAMBDA_DOCKER_DNS` | `""` (default) | Optional custom DNS server for the container running your Lambda function. Overwrites the default LocalStack [DNS Server](/aws/customization/networking/dns-server). Hence, resolving `localhost.localstack.cloud` requires additional configuration. |
| `LAMBDA_DOCKER_FLAGS` | `-e KEY=VALUE`, `-v host:container`, `-p host:container`, `--add-host domain:ip` | Additional flags passed to Docker `run`\|`create` commands. Supports environment variables (also with `--env-file`, but the file has to be mounted into the LocalStack container), ports, volume mounts, extra hosts, networks, DNS servers, labels, ulimits, user, platform, and privileged mode. The `--env-file` argument for Docker `run` and Docker Compose have different feature sets. To provide both, we support the `--env-file` for environment files with the docker run syntax, while `--compose-env-file` supports the full docker compose features, like placeholders with `${}`, replacing quotes, etc. |
| `LAMBDA_DOCKER_NETWORK` | `bridge` (Docker default) | [Docker network driver](https://docs.docker.com/network/) for the Lambda and ECS containers. Needs to be set to the network the LocalStack container is connected to. Limitation: `host` mode currently not supported. |
| `LAMBDA_DOWNLOAD_AWS_LAYERS` | `1` (default, pro) | Whether to download public Lambda layers from AWS through a LocalStack proxy when creating or updating functions. |
| `LAMBDA_EVENT_SOURCE_MAPPING_SQS_POLLER_COUNT` | `5` (default) | Number of concurrent pollers spawned per SQS event source mapping for standard queues, each running in its own thread. Capped by `ScalingConfig.MaximumConcurrency` when set on the event source mapping. FIFO queues always use a single poller to preserve message-group ordering. |
| `LAMBDA_IGNORE_ARCHITECTURE` | `0` (default) | Whether to ignore the AWS architectures (x86_64 or arm64) configured for the lambda function. Set to `1` to run cross-platform compatible lambda functions natively (i.e., Docker selects architecture). |
| `LAMBDA_K8S_IMAGE_PREFIX` | `amazon/aws-lambda-` (default, enterprise) | Prefix for images that will be used to execute Lambda functions in Kubernetes. |
| `LAMBDA_K8S_INIT_IMAGE` | | Specify the image for downloading the init binary from LocalStack. The image must include the `curl` and `chmod` commands. This is only relevant for container-based Lambdas on Kubernetes |
| `LAMBDA_KEEPALIVE_MS` | `600000` (default 10min) | Time in milliseconds until lambda shuts down the execution environment after the last invocation has been processed. Set to `0` to immediately shut down the execution environment after an invocation. |
| `LAMBDA_LIMITS_CONCURRENT_EXECUTIONS` | `1000` (default) | The maximum number of events that functions can process simultaneously in the current Region. See [AWS service quotas](https://docs.aws.amazon.com/general/latest/gr/lambda-service.html) |
| `LAMBDA_LIMITS_CODE_SIZE_ZIPPED` | `52428800` (default) | The maximum zip file size in bytes for the [CreateFunction](https://docs.aws.amazon.com/lambda/latest/dg/API_CreateFunction.html) operation. Raising this limit enables the creation of larger Lambda functions without the need to upload the code to an S3 deployment bucket. |
| `LAMBDA_LIMITS_CREATE_FUNCTION_REQUEST_SIZE` | `70167211` (default) | The maximum HTTP request size in bytes for the [CreateFunction](https://docs.aws.amazon.com/lambda/latest/dg/API_CreateFunction.html) operation. Raising this limit enables larger HTTP requests including zipped file size. |
| `LAMBDA_LIMITS_MAX_FUNCTION_ENVVAR_SIZE_BYTES` | `4096` (default) | The maximum size of the environment variables that you can use to configure your function. |
| `LAMBDA_PREBUILD_IMAGES` | `0` (default) | Prebuild images before execution which increases the cold start time but reduces the time until the Lambda function is `ACTIVE`. (preview) |
| `LAMBDA_REMOVE_CONTAINERS` | `1` (default) | Whether to remove any Lambda Docker containers. |
| `LAMBDA_RUNTIME_ENVIRONMENT_TIMEOUT` | `20` (default) | How many seconds Lambda will wait for the runtime environment to start up. Increase this timeout if I/O is slow or your Lambda deployments are large or contain many files. |
| `LAMBDA_RUNTIME_EXECUTOR` | `docker` (default) | Where Lambdas will be executed. |
| | `kubernetes` (enterprise) | Execute lambdas in a Kubernetes cluster. |
| `LAMBDA_RUNTIME_IMAGE_MAPPING` | [base images for Lambda](https://docs.aws.amazon.com/lambda/latest/dg/runtimes-images.html) (default) | Customize the Docker image of Lambda runtimes, either by:
a) pattern with `` placeholder, e.g. `custom-repo/lambda-:2022`
b) json dict mapping the `` to an image, e.g. `{"python3.9": "custom-repo/lambda-py:thon3.9"}` |
| `LAMBDA_RUNTIME_VALIDATION` | `0` (default) | Set to `1` to enforce strict [AWS parity](https://blog.localstack.cloud/2022-08-04-parity-explained/) by raising an exception when using a deprecated [Lambda runtime](https://docs.aws.amazon.com/lambda/latest/dg/lambda-runtimes.html) for the API operation [CreateFunction](https://docs.aws.amazon.com/lambda/latest/api/API_CreateFunction.html). Deprecated Lambda runtimes (e.g., `nodejs14.x`) can be used with disabled validation (current default). |
| `LAMBDA_SYNCHRONOUS_CREATE` | `0` (default) | Set to `1` to create lambda functions synchronously (not recommended). |
| `LAMBDA_TRUNCATE_STDOUT` | `2000` (default) | Allows increasing the default char limit for truncation of lambda log lines when printed in the console. This does not affect the logs processing in CloudWatch. |
### MemoryDB
| Variable | Example Values | Description |
| - | - | - |
| `REDIS_CONTAINER_MODE` | `1`\|`0` (default) | Start MemoryDB cluster nodes in separate containers instead of in the LocalStack container |
| `MEMORYDB_DOCKER_FLAGS` | `-v /certs:/certs` | Additional flags passed to Docker when creating MemoryDB containers. Same restrictions as `LAMBDA_DOCKER_FLAGS`. |
### MWAA
| Variable | Example Values | Description |
| - | - | - |
| `MWAA_PIP_TRUSTED_HOSTS` | `pypi.org,files.pythonhosted.org` | Comma-separated list of hosts for which SSL verification is not performed when installing Python dependencies for MWAA environment. |
| `MWAA_S3_POLL_INTERVAL` | `30` (default) | Interval in seconds with which MWAA polls S3 bucket to check for new or updated assets. |
| `MWAA_DOCKER_FLAGS` | `-e TEST_ENV=1337` | Additional flags provided to the Airflow container. Same restrictions as `LAMBDA_DOCKER_FLAGS`. |
### MQ
| Variable | Example Values | Description |
| - | - | - |
| `MQ_DOCKER_FLAGS` | `-v /certs:/certs` | Additional flags passed to Docker when creating Amazon MQ broker containers. Same restrictions as `LAMBDA_DOCKER_FLAGS`. |
### Neptune
| Variable | Example Values | Description |
| - | - | - |
| `NEPTUNE_DB_TYPE` | `neo4j`\|`tinkerpop` (default) | Starts Neptune DB as traditional netpune with Tinkerpop/Gremlin (default) or in Neo4J mode. |
| `NEPTUNE_ENABLE_TRANSACTION` | `1`\|`0` (default) | Enables Gremlin transaction. This is an experimental feature, [see notes](/aws/services/neptune#gremlin-transactions) |
| `NEPTUNE_GREMLIN_DEBUG` | `1`\|`0` (default) | Enable Gremlin logs |
| `NEPTUNE_USE_SSL` | `1`\|`0` (default) | Whether to start the Neptune server with SSL configuration, which will enable wss protocol. This setting is only valid for Tinkerpop/Gremlin. By default SSL is not enabled. |
### OpenSearch
| Variable | Example Values | Description |
| - | - | - |
| `OPENSEARCH_CUSTOM_BACKEND` | `http://opensearch:9200` | URL to a custom OpenSearch backend cluster. If this is set to a valid URL, then LocalStack will not create OpenSearch cluster instances, but instead forward all domains to the given backend (see [Custom Opensearch Backends](/aws/services/opensearch#custom-opensearch-backends). |
| `OPENSEARCH_MULTI_CLUSTER` | `1`\| `0` | When activated, LocalStack will spawn one OpenSearch cluster per domain. Otherwise all domains will share a single cluster instance. This is ignored if `OPENSEARCH_CUSTOM_BACKEND` is set. |
| `OPENSEARCH_ENDPOINT_STRATEGY` | `path`\|`domain`\|`port` | Governs how domain endpoints are created to access a cluster (see [Opensearch Endpoints](/aws/services/opensearch#domain-endpoints)). |
| `SKIP_INFRA_DOWNLOADS` | `1` \| `0` (default) | **Deprecated since 1.3.0** Whether to skip downloading additional infrastructure components (e.g., specific Elasticsearch versions) |
| `IGNORE_OS_DOWNLOAD_ERRORS` | `0`\|`1` | Whether to ignore errors (e.g., network/SSL) when downloading OpenSearch plugins |
### RDS
| Variable | Example Values | Description |
| - | - | - |
| `RDS_CLUSTER_ENDPOINT_HOST_ONLY` | `1` (default) \| `0` | Whether the cluster endpoint returns the host only (which is AWS parity). If set to `0` it will return `:`. |
| `RDS_PG_CUSTOM_VERSIONS` | `0` \| `1` (default) | Whether to install and use custom Postgres versions for RDS (or alternatively, use default version 15). |
| `RDS_MYSQL_DOCKER` | `1` (default) \| `0` | Whether to disable MySQL engines (and use MariaDB instead). MySQL engine for cluster/instances will start in a new docker container. If you have troubles running MySQL in docker, you can disable the feature. |
| `MYSQL_IMAGE` | `mysql:8.0` | Defines a specific MySQL image that should be used when spinning up the MySQL engine. Only available if `RDS_MYSQL_DOCKER` is enabled. |
| `MSSQL_IMAGE` | `mcr.microsoft.com/mssql/server:2022-latest` | Defines a specific image that should be used when spinning up a SQL server engine. |
| `MSSQL_ACCEPT_EULA` | `Y` | Set to `Y` if you accept the [EULA from MSSQL](https://hub.docker.com/_/microsoft-mssql-server). |
| `RDS_PG_MAX_CONNECTIONS` | `0` (default) | Sets the maximum number of connections for Postgres RDS instances. |
| `RDS_DOCKER_FLAGS` | `-v /certs:/certs` | Additional flags passed to Docker when creating RDS containers. Same restrictions as `LAMBDA_DOCKER_FLAGS`. |
### S3
| Variable | Example Values | Description |
| - | - | - |
| `S3_SKIP_SIGNATURE_VALIDATION`| `0` \| `1` (default) | Used to toggle validation of S3 pre-signed URLs. Set to `0` to validate their signature and expiration. See [Signature validation](/aws/services/s3/#signature-validation) for the credentials accepted by the validation. |
| `S3_VALIDATE_SIGNATURES` | `0` (default) \| `1` | Used to toggle SigV4 signature validation of regular (non-pre-signed) S3 requests. Set to `1` to validate the request signature and the payload integrity. See [Signature validation](/aws/services/s3/#signature-validation) for the credentials accepted by the validation. |
| `S3_SKIP_KMS_KEY_VALIDATION` | `0` \| `1` (default) | Used to toggle validation of provided KMS key in S3 operations. |
### SageMaker
| Variable | Example Values | Description |
| - | - | - |
| `SAGEMAKER_DOCKER_FLAGS` | `-v /certs:/certs` | Additional flags passed to Docker when creating SageMaker training and endpoint containers. Same restrictions as `LAMBDA_DOCKER_FLAGS`. |
### SNS
| Variable | Example Values | Description |
| - | - | - |
| `SNS_SES_SENDER_ADDRESS` | `no-reply@sns.localstack.cloud` \| `admin@localstack.com` (default) | The email address used to send SNS `email` and `email-json` notifications. |
### SQS
| Variable | Example Values | Description |
| - | - | - |
| `SQS_DELAY_PURGE_RETRY` | `0` (default) | Used to toggle PurgeQueueInProgress errors when making more than one PurgeQueue call within 60 seconds. |
| `SQS_DELAY_RECENTLY_DELETED` | `0` (default) | Used to toggle QueueDeletedRecently errors when re-creating a queue within 60 seconds of deleting it. |
| `SQS_ENABLE_MESSAGE_RETENTION_PERIOD`| `0` (default) \| `1` | Used to toggle the MessageRetentionPeriod feature (see [Enabling `MessageRetentionPeriod`](/aws/services/sqs/#enabling-messageretentionperiod) |
| `SQS_ENDPOINT_STRATEGY`| `standard` (default) \| `domain` \| `path` \| `off` | Configures the format of Queue URLs (see [SQS Queue URLs](/aws/services/sqs/#queue-urls) |
| `SQS_DISABLE_CLOUDWATCH_METRICS` | `0` (default) | Disables the CloudWatch Metrics for SQS when set to `1` |
| `SQS_CLOUDWATCH_METRICS_REPORT_INTERVAL` | `60` (default) | Configures the report interval (in seconds) for `Approximate*` metrics that are sent to CloudWatch periodically. Sending will be disabled if `SQS_DISABLE_CLOUDWATCH_METRICS=1` |
### Step Functions
| Variable | Example Values | Description |
| - | - | - |
| `SFN_MOCK_CONFIG` | `/tmp/MockConfigFile.json` | Specifies the file path to the mock configuration file that defines mock service integrations for Step Functions. |
### Verified Permissions
| Variable | Example Values | Description |
| - | - | - |
| `VERIFIEDPERMISSIONS_DISABLE_JWT_VERIFICATION` | `0` (default) \| `1` | Disables JWT signature verification for OIDC identity sources. When enabled, LocalStack will decode tokens without validating signatures against the issuer's JWKS, allowing use of unreachable or self-signed OIDC providers in local development. |
## Security
:::danger
Please be aware that the following options may have severe security implications.
:::
| Variable| Example Values | Description |
| - | - | - |
| `DISABLE_CORS_HEADERS` | `0` (default) | Whether to disable the returning of default CORS headers in API responses (disables access from https://app.localstack.cloud). |
| `DISABLE_CORS_CHECKS` | `0` (default) | Whether to disable all CSRF (server-side) mitigations. |
| `DISABLE_CUSTOM_CORS_S3` | `0` (default) | Whether to disable CORS override by S3. |
| `DISABLE_CUSTOM_CORS_APIGATEWAY` | `0` (default)| Whether to disable CORS override by apigateway. |
| `EXTRA_CORS_ALLOWED_ORIGINS` | | Comma-separated list of origins that are allowed to communicate with localstack. |
| `EXTRA_CORS_ALLOWED_HEADERS` | | Comma-separated list of header names to be be added to Access-Control-Allow-Headers CORS header. |
| `EXTRA_CORS_EXPOSE_HEADERS` | | Comma-separated list of header names to be be added to Access-Control-Expose-Headers CORS header. |
| `ENABLE_CONFIG_UPDATES` | `0` (default) | Whether to enable dynamic configuration updates at runtime. |
## Emails
Please check with your SMTP email service provider for the following settings.
| Variable | Example Values | Description |
| - | - | - |
| `SMTP_HOST` | `localhost:1025` | Hostname (and optionally the port) of the SMTP server. The port defaults to 25. |
| `SMTP_USER` | | Login username for the SMTP server if required. |
| `SMTP_PASS` | | Login password for the SMTP server if required. |
| `SMTP_EMAIL` | `sender@example.com` | Origin email address. Required for Cognito only. |
## Persistence
To learn more about these configuration options, see [Persistence](/aws/developer-tools/snapshots/persistence).
| Variable | Valid options | Description |
| - | - | - |
| `SNAPSHOT_SAVE_STRATEGY` | `ON_SHUTDOWN`\|`ON_REQUEST`\|`SCHEDULED`\|`MANUAL` | Strategy that governs when LocalStack should make state snapshots |
| `SNAPSHOT_LOAD_STRATEGY` | `ON_STARTUP`\|`ON_REQUEST`\|`MANUAL` | Strategy that governs when LocalStack restores state snapshots |
| `SNAPSHOT_FLUSH_INTERVAL` | 15 (default) | The interval (in seconds) between persistence snapshots. It only applies to a `SCHEDULED` save strategy (see [Persistence Mechanism](/aws/developer-tools/snapshots/persistence))|
| `DISABLE_COMPATIBILITY_RULES` | `0` (default) \| `1` | Disable the [snapshot compatibility rules](/aws/developer-tools/snapshots/service-coverage#snapshot-compatibility) that prevent loading incompatible state into LocalStack. Applies to both snapshot persistence and Cloud Pods. |
## Cloud Pods
To learn more about these configuration options, see [Cloud Pods](/aws/developer-tools/snapshots/cloud-pods).
| Variable | Valid options | Description |
| - | - | - |
| `AUTO_LOAD_POD` | | Comma-separated list of Cloud Pods to be automatically loaded at startup time. This feature is disabled when snapshot persistence is set via the `PERSISTENCE` variable. |
| `POD_LOAD_CLI_TIMEOUT` | 60 (default) | Timeout in seconds to wait before returning from load operations on the Cloud Pods CLI |
| `POD_ENCRYPTION` | `0` (default) \| `1` | Whether to encrypt the Cloud Pods artifacts at rest. |
| `ENABLE_POD_RESOURCES=1` | `0` (default) \| `1` | Whether to save a detailed Stack Overview including available resources for the Cloud Pod |
| `MERGE_STRATEGY` | `account-region-merge` (default) \| `service-merge` \| `overwrite` | The merge strategy to apply when loading a Cloud Pod into LocalStack (see [merging snapshots](/aws/developer-tools/snapshots/merging-snapshots/)) |
## Extensions
| Variable | Example Values | Description |
| - | - | - |
| `EXTENSION_AUTO_INSTALL` | | Install a list of extensions automatically at startup. Comma-separated list of extensions directives which will be installed automatically at startup (see [managing extensions](/aws/customization/integrations/extensions/managing-extensions#automating-extensions-installation))|
## Miscellaneous
| Variable | Example Values | Description |
| - | - | - |
| `SKIP_SSL_CERT_DOWNLOAD` | | Whether to skip downloading the SSL certificate for localhost.localstack.cloud |
| `CUSTOM_SSL_CERT_PATH` | `/var/lib/localstack/custom/server.test.pem` | Defines the absolute path to a custom SSL certificate for localhost.localstack.cloud |
| `OVERRIDE_IN_DOCKER` | | Overrides the check whether LocalStack is executed within a docker container. If set to `true`, LocalStack assumes it runs in a docker container. Should not be set unless necessary. |
| `DISABLE_EVENTS` | `1` | Whether to disable publishing LocalStack events |
| `OUTBOUND_HTTP_PROXY` | `http://10.10.1.3` | HTTP Proxy used for downloads of runtime dependencies and connections outside LocalStack itself |
| `OUTBOUND_HTTPS_PROXY` | `https://10.10.1.3` | HTTPS Proxy used for downloads of runtime dependencies and connections outside LocalStack itself |
| `REQUESTS_CA_BUNDLE` | `/var/lib/localstack/lib/ca_bundle.pem` | CA Bundle to be used to verify HTTPS requests made by LocalStack |
| `DOCKER_HOST` | `unix:///var/run/docker.sock` (default) | Daemon socket to connect Docker. Used by the LocalStack dependency [Docker](https://docs.docker.com/engine/reference/commandline/cli/#environment-variables). |
| `SSL_NO_VERIFY` | `0` \| `1` | Disables TLS verification when making requests to the LocalStack Cloud, including the license server, and when fetching the certificate for localhost.localstack.cloud. |
## Debugging
| Variable | Example Values | Description |
| - | - | - |
| `DEVELOP` | | Starts a debugpy server before starting LocalStack services
| `DEVELOP_PORT` | | Port number for debugpy server
| `WAIT_FOR_DEBUGGER` | | Forces LocalStack to wait for a debugger to start the services
## DNS
To learn more about these configuration options, see [DNS Server](/aws/customization/networking/dns-server).
| Variable | Example Values | Description |
| - | - | - |
| `DNS_ADDRESS` | `0.0.0.0` (default) | Address the LocalStack should bind the DNS server on (port 53 tcp/udp). Value `0` to disable.
| `DNS_SERVER` | Default upstream DNS or `8.8.8.8` (default) | Fallback DNS server for queries not handled by LocalStack.
| `DNS_RESOLVE_IP` | `127.0.0.1` (default) | IP address the DNS server should return as A record for queries handled by LocalStack. If customized, this value will be returned in preference to the DNS server response.
| `DNS_NAME_PATTERNS_TO_RESOLVE_UPSTREAM` | `([^.]+\.)*(ecr\|lambda)\.[^.]+\.amazonaws\.com` (example) | List of domain names that should *NOT* be redirected by the LocalStack DNS to the LocalStack container, but instead always forwarded to the upstream resolver. This will *NOT* redirect requests made to LocalStack due to manual endpoint configuration. Comma-separated list of Python-flavored regex patterns. See [the DNS server documentation](/aws/customization/networking/dns-server#skip-localstack-dns-resolution) for more details.
| `DNS_LOCAL_NAME_PATTERNS` | `([^.]+\.)*(ecr\|lambda)\.[^.]+\.amazonaws\.com` (example) | **Deprecated since 3.0.2** List of domain names that should *NOT* be redirected by the LocalStack DNS to the LocalStack container, but instead always forwarded to the upstream resolver. This will *NOT* redirect requests made to LocalStack due to manual endpoint configuration. Comma-separated list of Python-flavored regex patterns. **Renamed to `DNS_NAME_PATTERNS_TO_RESOLVE_UPSTREAM`**
## Transparent Endpoint Injection
| Variable | Example Values | Description |
| - | - | - |
| `DISABLE_TRANSPARENT_ENDPOINT_INJECTION` | `0` (default in Pro) \| `1` | Whether to disable DNS resolution of AWS hostnames to the LocalStack container. Pro feature. (see [Transparent Endpoint Injection](/aws/customization/networking/transparent-endpoint-injection))
## LocalStack for AWS
| Variable | Example Values | Description |
|----------------------|----------------|-------------|
| `LOCALSTACK_AUTH_TOKEN` | | [Auth token](/aws/getting-started/auth-token) to activate LocalStack for AWS. |
| `LOCALSTACK_API_KEY` | | **Deprecated since 3.0.0** API key to activate LocalStack for AWS.
**Use the `LOCALSTACK_AUTH_TOKEN` instead (except for [CI environments](/aws/ci-pipelines/)).** |
| `LOG_LICENSE_ISSUES` | `0` \| `1` (default) | Whether to log issues with the license activation to the console. |
## Legacy
These configurations have already been removed and **won't have any effect** on newer versions of LocalStack.
**Please remove them from your configuration.**
| Variable | Removed in | Example Values | Description |
| - | - | - | - |
| `ACTIVATE_PRO` | 2026.7.0 | `0` \| `1` (default) | Whether Pro should be activated or not. Previously allowed starting LocalStack without Pro features when set to `0`. The flag had no remaining effect and was removed; use the community image (`localstack/localstack`) if you do not need Pro features. |
| `EVENT_RULE_ENGINE` | 4.1.0 | `python` (default) \| `java` (deprecated) | Engine for [event pattern matching](https://docs.aws.amazon.com/eventbridge/latest/userguide/eb-event-patterns-content-based-filtering.html) used in EventBridge, EventBridge Pipes, and Lambda Event Source Mapping. Our new `python` implementation introduced with version `4.0.3` makes the `java` engine (previously in preview) using AWS [event-ruler](https://github.com/aws/event-ruler) obsolete. |
| `LAMBDA_EVENT_SOURCE_MAPPING` | 4.0.0 | `v2` (default since [3.8.0](https://blog.localstack.cloud/localstack-release-v-3-8-0/#new-default-lambda-event-source-mapping-implementation)) \| `v1` | Feature flag to switch Lambda Event Source Mapping (ESM) implementations. |
| `PROVIDER_OVERRIDE_STEPFUNCTIONS` | 4.0.0 | `v2` (default) \| `legacy` | The new LocalStack-native StepFunctions provider (v2) is active by default since LocalStack 3.0. |
| `PROVIDER_OVERRIDE_EVENTS` | 2026.04.0 | `v2` (default) \| `legacy` | The new EventBridge provider is active by default since LocalStack 4.0. Remove this variable from your configuration, as any value now points to an invalid provider configuration and prevents the `events` provider from loading. |
| `STEPFUNCTIONS_LAMBDA_ENDPOINT` | 4.0.0 | `default` | This is only supported for the `legacy` provider. URL to use as the Lambda service endpoint in Step Functions. By default this is the LocalStack Lambda endpoint. Use default to select the original AWS Lambda endpoint. |
| `LOCAL_PORT_STEPFUNCTIONS` | 4.0.0 | `8083` (default) | This is only supported for the legacy provider. It defines the local port to which Step Functions traffic is redirected. By default, LocalStack routes Step Functions traffic to its internal runtime. Use this variable only if you need to redirect traffic to a different local Step Functions runtime. |
| `S3_DIR` | 4.0.0 | `/path/to/root` | This was only supported for the `legacy_v2` provider. Configure a global parent directory that contains all buckets as sub-directories (`S3_DIR=/path/to/root`) or an individual directory that will get mounted as special bucket names (`S3_DIR=/path/to/root/bucket1:bucket1`). Only available for LocalStack for AWS.
| `_BACKEND` | 3.0.0 | `http://localhost:7577` | Custom endpoint URL to use for a specific service, where `` is the uppercase service name. |
| `_PORT_EXTERNAL` | 3.0.0 | `4567` | Port number to expose a specific service externally . `SQS_PORT_EXTERNAL`, e.g. , is used when returning queue URLs from the SQS service to the client. |
| `ACTIVATE_NEW_POD_CLIENT` | 3.0.0 | `0`\|`1` (default) | Whether to use the new Cloud Pods client leveraging LocalStack container's APIs. |
| `BIGDATA_MONO_CONTAINER` | 3.0.0 |`0`\|`1` (default) | Whether to spin Big Data services inside the LocalStack main container. Glue jobs breaks when using `BIGDATA_MONO_CONTAINER=0`. |
| `DEFAULT_REGION` | 3.0.0 | `us-east-1` (default) | AWS region to use when talking to the API (needs to be activated via `USE_SINGLE_REGION=1`). LocalStack now has full multi-region support. |
| `EDGE_BIND_HOST` | 3.0.0 | `127.0.0.1` (default), `0.0.0.0` (docker)| Address the edge service binds to. Use `GATEWAY_LISTEN` instead. |
| `EDGE_FORWARD_URL` | 3.0.0 | `http://10.0.10.5678` | Optional target URL to forward all edge requests to (e.g., for distributed deployments) |
| `EDGE_PORT` | 3.0.0 | `4566` (default)| Port number for the edge service, the main entry point for all API invocations. |
| `EDGE_PORT_HTTP` | 3.0.0 | `4566` (default)| Port number for the edge service, the main entry point for all API invocations. |
| `ES_CUSTOM_BACKEND` | 3.0.0 | `http://elasticsearch:9200` | Use [`OPENSEARCH_CUSTOM_BACKEND`](#opensearch) instead. URL to a custom elasticsearch backend cluster. If this is set to a valid URL, then LocalStack will not create elasticsearch cluster instances, but instead forward all domains to the given backend (see [Custom Elasticsearch Backends](/aws/services/es#custom-elasticsearch-backends)). |
| `ES_ENDPOINT_STRATEGY` | 3.0.0 | `path`\|`domain`\|`port` (formerly `off`) | Use [`OPENSEARCH_ENDPOINT_STRATEGY`](#opensearch) instead. Governs how domain endpoints are created to access a cluster (see [Elasticsearch Endpoints](/aws/services/es#endpoints)) |
| `ES_MULTI_CLUSTER` | 3.0.0 | `0`\|`1` | Use [`OPENSEARCH_MULTI_CLUSTER`](#opensearch) instead. When activated, LocalStack will spawn one Elasticsearch cluster per domain. Otherwise all domains will share a single cluster instance. This is ignored if `ES_CUSTOM_BACKEND` is set. |
| `HOSTNAME_EXTERNAL` | 3.0.0 | `localhost` (default) | Name of the host to expose the services externally. This host is used, e.g., when returning queue URLs from the SQS service to the client. Use `LOCALSTACK_HOST` instead. |
| `KINESIS_INITIALIZE_STREAMS` | 3.0.0 | `"my-first-stream:1,my-other-stream:2:us-west-2,my-last-stream:1"` | A comma-delimited string of stream names, its corresponding shard count and an optional region to initialize during startup. If the region is not provided, the default region is used. Only works with the `kinesis-mock` `KINESIS_PROVIDER`. |
| `KINESIS_PROVIDER` | 3.0.0 | `kinesis-mock` (default) and `kinesalite` | |
| `KMS_PROVIDER` | 3.0.0 | `moto` (default), `local-kms` | `local-kms` has been removed. |
| `LAMBDA_CODE_EXTRACT_TIME` | 3.0.0 | `25` (default) | Time in seconds to wait at max while extracting Lambda code. By default, it is 25 seconds for limiting the execution time to avoid client/network timeout issues.
**Removed in new provider because function creation happens asynchronously.**|
| `LAMBDA_CONTAINER_REGISTRY` | 3.0.0 | `lambci/lambda` (default) | An alternative docker registry from where to pull lambda execution containers.
**Replaced by `LAMBDA_RUNTIME_IMAGE_MAPPING` in new provider.** |
| `LAMBDA_EXECUTOR` | 3.0.0 | | Method to use for executing Lambda functions. For `docker` and `docker-reuse`, if LocalStack itself is started inside Docker, then the `docker` command needs to be available inside the container (usually requires to run the container in privileged mode). More information in Lambda Executor Modes.
**Removed in new provider. Mount the Docker socket or see [migration guide](/aws/services/lambda).** |
| | | `docker` (default) | Run each function invocation in a separate Docker container. |
| | | `local` (fallback) | Run Lambda functions in a temporary directory on the local machine. |
| | | `docker-reuse` | Create one Docker container per function and reuse it across invocations. |
| `LAMBDA_FALLBACK_URL` | 3.0.0 | | Fallback URL to use when a non-existing Lambda is invoked. Either records invocations in DynamoDB (value `dynamodb://`) or forwards invocations as a POST request (value `http(s)://...`).
**Removed in new provider.** |
| `LAMBDA_FORWARD_URL` | 3.0.0 | | URL used to forward all Lambda invocations (useful to run Lambdas via an external service).
**Removed in new provider.** |
| `LAMBDA_JAVA_OPTS` | 3.0.0 | `-Xmx512M` | Allow passing custom JVM options to Java Lambdas executed in Docker. Use `_debug_port_` placeholder to configure the debug port, e.g., `-agentlib:jdwp=transport=dt_socket,server=y,suspend=y,address=_debug_port_`.
**Currently not supported in new provider but possible via custom entrypoint.** |
| `LAMBDA_REMOTE_DOCKER` | 3.0.0 | | determines whether Lambda code is copied or mounted into containers.
**Removed in new provider because zip file copying is used by default and hot reloading automatically configures mounting.** |
| | | `true` (default) | your Lambda function definitions will be passed to the container by copying the zip file (potentially slower). It allows for remote execution, where the host and the client are not on the same machine.|
| | | `false` | your Lambda function definitions will be passed to the container by mounting a volume (potentially faster). This requires to have the Docker client and the Docker host on the same machine. |
| `LAMBDA_STAY_OPEN_MODE` | 3.0.0 | `1` (default) | Usage of the stay-open mode of Lambda containers. Only applicable if `LAMBDA_EXECUTOR=docker-reuse`. Set to `0` if you want to use [Hot Reloading](/aws/developer-tools/lambda-tools/hot-reloading).
**Removed in new provider because stay-open mode is the default behavior. `LAMBDA_KEEPALIVE_MS` can be used to configure how long containers should be kept running in-between invocations.** |
| `LAMBDA_XRAY_INIT` | 3.0.0 | `1` \| `0` (default) | Whether to fully initialize XRay daemon for Lambda containers (may increase Lambda startup times).
**the X-Ray daemon is now always initialized.** |
| `LEGACY_EDGE_PROXY` | 3.0.0 | `1` \| `0` (default) | Whether to use the legacy edge proxy or the newer Gateway/HandlerChain framework. |
| `LOCALSTACK_HOSTNAME` | 3.0.0 | `http://${LOCALSTACK_HOSTNAME}:4566` | Name of the host where LocalStack services are available. Use this hostname as endpoint in order to access the services from within your Lambda functions (e.g., to store an item to DynamoDB or S3 from a Lambda). This option is read-only. Use `LOCALSTACK_HOST` instead. |
| `MOCK_UNIMPLEMENTED` | 3.0.0 | `1` \| `0` (default) | Whether to return mocked success responses (instead of 501 errors) for currently unimplemented API methods |
| `PERSIST_ALL` | 3.0.0 | `true` (default) | Whether to persist all resources (including user code like Lambda functions), or only "light-weight" resources (e.g., SQS queues, or Cognito users). Can be set to `false` to reduce storage size of `DATA_DIR` folders or Cloud Pods. |
| `SYNCHRONOUS_KINESIS_EVENTS` | 3.0.0 | `1` (default) \| `0` | Whether or not to handle Kinesis Lambda event sources as synchronous invocations. |
| `USE_SINGLE_REGION` | 3.0.0 | `1` \| `0` (default) | Whether to use the legacy single-region mode, defined via `DEFAULT_REGION`. |
| `DATA_DIR`| 2.0.0 | blank (disabled/default), `/tmp/localstack/data` | Local directory for saving persistent data. Use `PERSISTENCE` instead. |
| `DISABLE_TERM_HANDLER` | 2.0.0 | `""` (default) \| `1` | Whether to disable signal passing to LocalStack when running in docker. Enabling this will prevent an orderly shutdown when running inside LS in docker. Setting this to anything else than an empty string will disable it.
| `HOST_TMP_FOLDER` | 2.0.0 | `/some/path` | Temporary folder on the host that gets mounted as `$TMPDIR/localstack` into the LocalStack container. Required only for Lambda volume mounts when using `LAMBDA_REMOTE_DOCKER=false.` |
| `INIT_SCRIPTS_PATH` | 2.0.0 | `/some/path` | Before 1.0, this was used to configure the path to the initializing files with extensions `.sh` that were found in `/docker-entrypoint-initaws.d`. This has been replaced by the [init-hook system](/aws/customization/advanced/initialization-hooks/). |
| `LEGACY_DIRECTORIES` | 2.0.0 | `0` (default) | Use legacy method of managing internal filesystem layout. See [Filesystem Layout](/aws/customization/advanced/filesystem). |
| `LEGACY_INIT_DIR` | 2.0.0 | `1` \| `0`(default) | Used with `INIT_SCRIPTS_PATH`. This has been replaced by the [init-hook system](/aws/customization/advanced/initialization-hooks). |
| `MULTI_ACCOUNTS` | 2.0.0 | `0` (default) | Enable multi-accounts (preview) |
| `SQS_PROVIDER` | 2.0.0 | `moto` (default) and `elasticmq` | |
| `SYNCHRONOUS_API_GATEWAY_EVENTS` | 2.0.0 | `1` (default) \| `0` | Whether or not to handle API Gateway Lambda event sources as synchronous invocations. |
| `SYNCHRONOUS_DYNAMODB_EVENTS` | 2.0.0 | `1` (default) \| `0` | Whether or not to handle DynamoDB Lambda event sources as synchronous invocations. |
| `SYNCHRONOUS_SQS_EVENTS` | 2.0.0 | `1` \| `0` (default) | Whether or not to handle SQS Lambda event sources as synchronous invocations. |
| `SYNCHRONOUS_SNS_EVENTS` | 2.0.0 | `1` \| `0` (default) | Whether or not to handle SNS Lambda event sources as synchronous invocations. |
| `TMPDIR`| 2.0.0 | `/tmp` (default) | Temporary folder on the host running the CLI and inside the LocalStack container .|
| `USE_LIGHT_IMAGE` | 2.0.0 | `1` (default) | Whether to use the light-weight Docker image. Overwritten by `IMAGE_NAME`.|
| `PORT_WEB_UI` | 0.12.8 | `8080` (default) | Port for the legacy Web UI. Replaced by our [Web Application](https://app.localstack.cloud) |
# Overview
> Integrate LocalStack with supported extensions, SDKs, application frameworks, and testing tools.
import SectionCards from '../../../../../components/SectionCards.astro';
LocalStack integrates with a wide range of third-party software from the cloud development ecosystem. This section is mostly useful to platform teams who need to wire LocalStack into existing development and testing workflows.
## The Cloud Development Ecosystem
Whether you’re installing a supported extension, driving LocalStack from the Java or Python SDKs, or wiring it into an application framework, this section shows how to integrate LocalStack with the tools you already use.
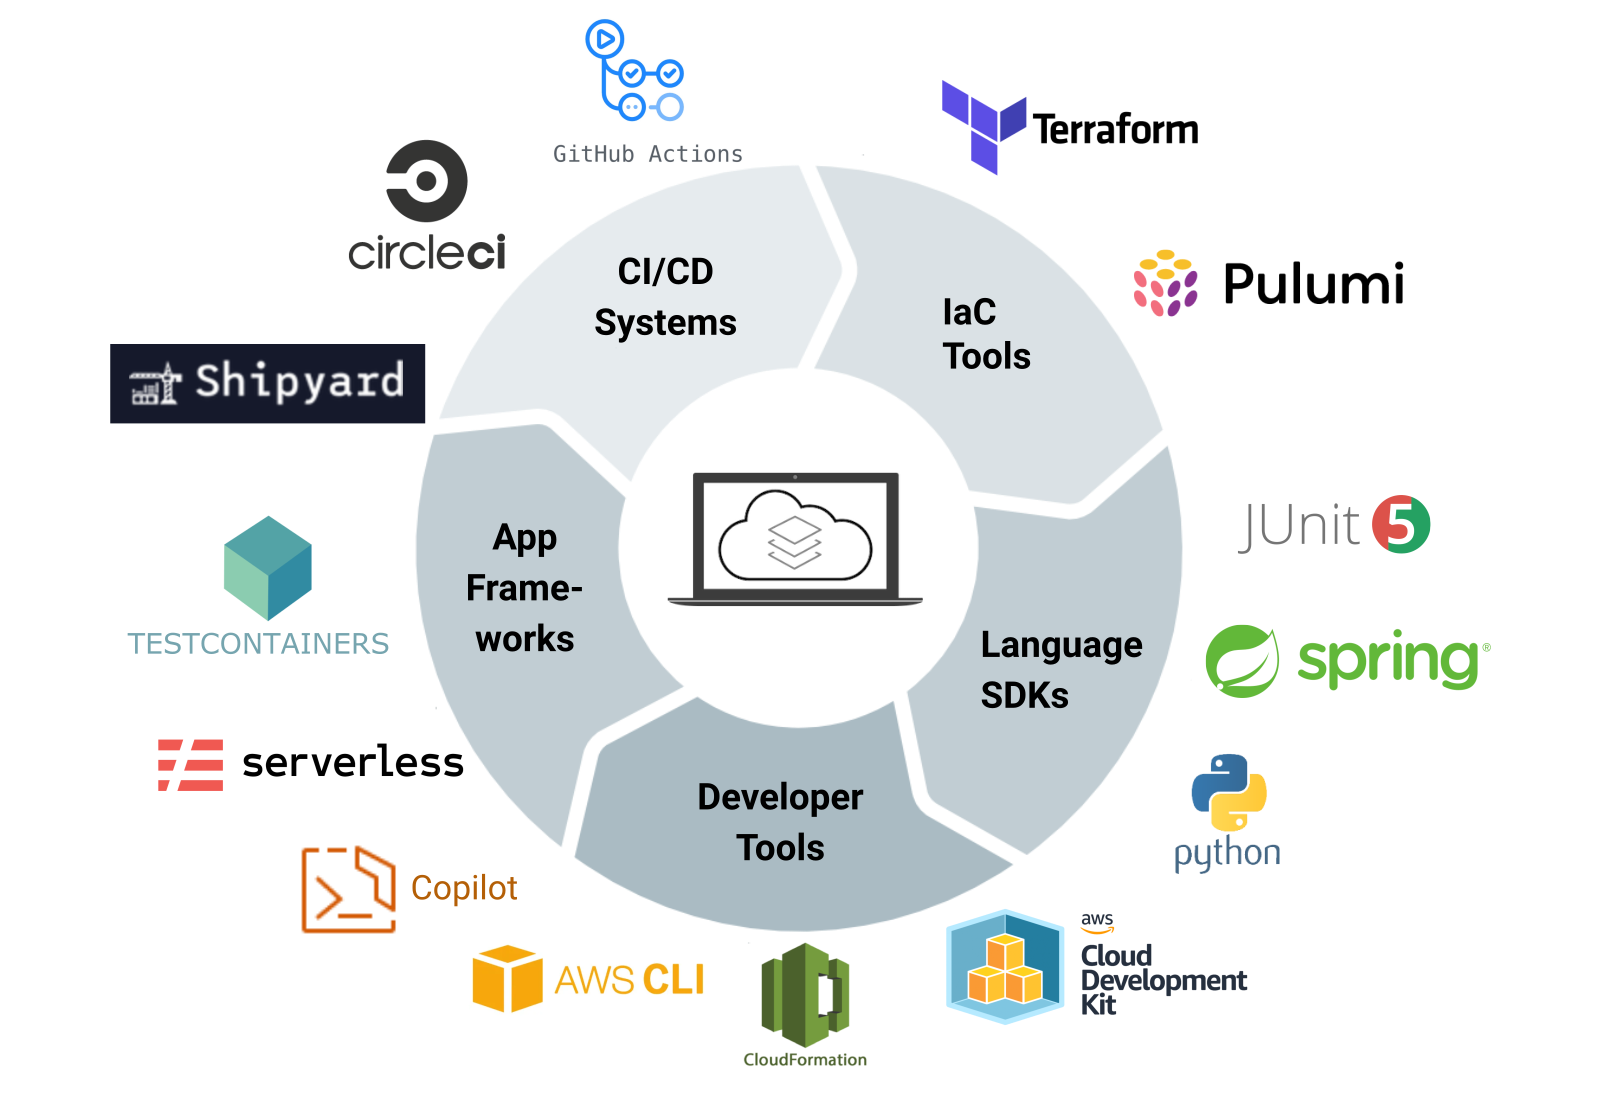
## Integrations
We strive to make integrating LocalStack into your workflow as seamless as possible. Explore LocalStack Extensions, the LocalStack SDKs, supported app frameworks, and testing integrations:
# Overview
> Use LocalStack with your application frameworks to develop and test your applications locally.
LocalStack supports popular application frameworks that simplify building and deploying serverless and event-driven applications. With these integrations, you can develop locally using the same tools and abstractions you rely on in production, while also benefiting from faster feedback loops and no cloud dependencies.
This section covers how to use LocalStack with:
- Serverless Framework
- Architect (ARC)
- Quarkus
- Spring Cloud Function
- Aspire
Each guide shows how to configure the framework to work seamlessly with LocalStack for local development and testing.
# Architect
> Use the Architect Infrastructure as Code framework with LocalStack.
## Overview
Architect enables you to quickly build large serverless apps without worrying about the underlying infrastructure.
On this page we discuss how Architect and LocalStack can be used together.
If you are adapting an existing configuration, you might be able to skip certain steps at your own discretion.
## Example
### Setup
To use Architect in conjunction with LocalStack, simply install the `arclocal` command (sources can be found [here](https://github.com/localstack/architect-local)).
```bash
npm install -g architect-local @architect/architect aws-sdk
```
The `arclocal` command has the same usage as the `arc` command, so you can start right away.
Create a test directory
```bash
mkdir architect_quickstart && cd architect_quickstart
```
then create an architect project
```bash
arclocal init
```
### Deployment
Now you need to start LocalStack.
After LocalStack has started you can deploy your Architect setup via:
```bash
arclocal deploy
```
## Further reading
For more architect examples, you can take a look at the [official architect docs](https://arc.codes).
# Aspire
> Use the Aspire framework with LocalStack
## Introduction
[Aspire](https://aspire.dev/) is an opinionated, cloud-ready stack for building observable, production-ready distributed applications. It provides a consistent approach to service discovery, configuration, telemetry, and health checks across cloud-native applications.
With Aspire, developers can orchestrate cloud-native applications locally using the same AWS resources they deploy in production. By combining Aspire with LocalStack, teams can emulate their full cloud environment—including Lambda, SQS, S3, and DynamoDB—with minimal configuration and no AWS costs.
LocalStack integrates with Aspire through the [`LocalStack.Aspire.Hosting`](https://github.com/localstack-dotnet/dotnet-aspire-for-localstack) package, enabling seamless local development and testing of AWS-powered applications within the Aspire orchestration framework. This package extends the official [AWS integrations for .NET Aspire](https://github.com/aws/integrations-on-dotnet-aspire-for-aws) to provide LocalStack-specific functionality.
## Getting started
This guide demonstrates how to integrate LocalStack into Aspire projects for local AWS service emulation.
### Prerequisites
- [.NET 8 SDK](https://dotnet.microsoft.com/download/dotnet/8.0) or later
- [Docker Desktop](https://docs.docker.com/get-docker/) or compatible container runtime
- [Node.js](https://nodejs.org/) (for AWS CDK infrastructure provisioning)
- Basic familiarity with [Aspire concepts](https://aspire.dev/get-started/welcome/)
### Installation
Add the LocalStack Aspire integration to your App Host project:
```bash
dotnet add package LocalStack.Aspire.Hosting
```
For projects that need to interact with AWS services, add the LocalStack.NET client:
```bash
dotnet add package LocalStack.Client
```
## Usage
Configure LocalStack integration in your Aspire AppHost project using auto-configuration:
```csharp
var builder = DistributedApplication.CreateBuilder(args);
// 1. Set up AWS SDK configuration (optional)
var awsConfig = builder.AddAWSSDKConfig()
.WithProfile("default")
.WithRegion(RegionEndpoint.USWest2);
// 2. Add LocalStack container
var localstack = builder
.AddLocalStack(awsConfig: awsConfig, configureContainer: container =>
{
container.Lifetime = ContainerLifetime.Session;
container.DebugLevel = 1;
container.LogLevel = LocalStackLogLevel.Debug;
});
// 3. Add your AWS resources as usual
var awsResources = builder.AddAWSCloudFormationTemplate("resources", "template.yaml")
.WithReference(awsConfig);
var project = builder.AddProject("api")
.WithReference(awsResources);
// 4. Auto-configure LocalStack for all AWS resources
builder.UseLocalStack(localstack);
builder.Build().Run();
```
The `UseLocalStack()` method automatically:
- Detects all AWS resources (CloudFormation, CDK stacks)
- Configures LocalStack endpoints for all AWS services and project resources
- Sets up proper dependency ordering and CDK bootstrap if needed
- Transfers LocalStack configuration to service projects via environment variables
## AWS SDK Configuration
When using the AWS SDK for .NET with LocalStack in an Aspire context, the SDK clients need to be configured to point to the LocalStack endpoint.
### Using LocalStack.NET
The [`LocalStack.Client`](https://github.com/localstack-dotnet/localstack-dotnet-client) library simplifies AWS SDK configuration:
```csharp
services.AddLocalStack(configuration);
services.AddDefaultAWSOptions(configuration.GetAWSOptions());
services.AddAwsService();
services.AddAwsService();
```
This automatically configures AWS service clients to use the LocalStack endpoint when running locally. See the [.NET](/aws/connecting/aws-sdks/dotnet/) guide for more information.
## Infrastructure Provisioning
LocalStack integrates well with Infrastructure as Code tools within the Aspire orchestration model.
### AWS CDK Integration
You can provision AWS resources using AWS CDK during application startup:
```csharp
var awsConfig = builder.AddAWSSDKConfig()
.WithProfile("default")
.WithRegion(RegionEndpoint.USWest2);
var localstack = builder.AddLocalStack("localstack");
var customStack = builder
.AddAWSCDKStack("custom", scope => new CustomStack(scope, "Aspire-custom"))
.WithReference(awsConfig);
```
You can use AWS CDK Stack classes to define and deploy resources:
```csharp
// An excerpt of a CDK Stack class
internal sealed class CustomStack : Stack
{
public CustomStack(Construct scope, string id) : base(scope, id)
{
// Example resources
var bucket = new Bucket(this, "Bucket");
var topic = new Topic(this, "ChatTopic");
var queue = new Queue(this, "ChatMessagesQueue", new QueueProps
{
VisibilityTimeout = Duration.Seconds(30),
});
topic.AddSubscription(new SqsSubscription(queue));
// ... (rest of the stack)
}
}
```
:::note
For detailed AWS CDK integration patterns with LocalStack and Aspire, refer to the [provisioning playground example](https://github.com/localstack-dotnet/dotnet-aspire-for-localstack/tree/master/playground/provisioning).
:::
## Configuration Reference
For comprehensive configuration options, including environment variables, container settings, and advanced scenarios, refer to the [Configuration Guide](https://github.com/localstack-dotnet/dotnet-aspire-for-localstack/blob/master/docs/CONFIGURATION.md).
## Sample Projects
### Playground Examples
The [playground examples](https://github.com/localstack-dotnet/dotnet-aspire-for-localstack/tree/master/playground) include Lambda development patterns and infrastructure provisioning with AWS CDK.
### LocalStack Serverless .NET Demo
A reference implementation demonstrating serverless applications with Lambda functions, S3, DynamoDB, SQS, and CDK provisioning: [localstack-serverless-dotnet-demo](https://github.com/localstack-dotnet/localstack-serverless-dotnet-demo)
### OpenTelemetry with Aspire and LocalStack
An event registration system showcasing distributed tracing and observability patterns with Lambda and SQS: [dotnet-otel-aspire-localstack-demo](https://github.com/Blind-Striker/dotnet-otel-aspire-localstack-demo)
## Resources
- [Aspire Documentation](https://aspire.dev/)
- [LocalStack.Aspire.Hosting on GitHub](https://github.com/localstack-dotnet/dotnet-aspire-for-localstack)
- [LocalStack.Client on GitHub](https://github.com/localstack-dotnet/localstack-dotnet-client)
- [AWS Aspire Integration](https://github.com/aws/integrations-on-dotnet-aspire-for-aws)
- [AWS SDK for .NET Documentation](https://docs.aws.amazon.com/sdk-for-net/)
- [LocalStack Serverless .NET Demo](https://github.com/localstack-dotnet/localstack-serverless-dotnet-demo)
- [OpenTelemetry with Aspire and LocalStack Demo](https://github.com/Blind-Striker/dotnet-otel-aspire-localstack-demo)
# Quarkus
> Use the Quarkus framework with LocalStack
## Introduction
Quarkus is a Java framework optimized for cloud, serverless, and containerized environments.
Quarkus leverages a Kubernetes Native Java stack tailored for GraalVM & OpenJDK HotSpot, which further builds on various Java libraries and standards.
Localstack is supported by Quarkus as a Dev service for Amazon Services.
Quarkus Amazon Services automatically starts a LocalStack container in development mode and when running tests, and the extension client is configured automatically.
## Getting started
In this guide, we will demonstrate how you can create a service client for creating and managing Lambdas on LocalStack.
The Lambda extension is based on [AWS Java SDK 2.x](https://docs.aws.amazon.com/sdk-for-java/v2/developer-guide/welcome.html).
### Prerequisites
- [LocalStack](/aws/getting-started/installation/) installed and running
- [JDK 17+](https://www.oracle.com/java/technologies/javase/jdk17-archive-downloads.html) with `JAVA_HOME` configured properly
- [Maven 3.8.1+](https://maven.apache.org/download.cgi)
- [Docker](https://docs.docker.com/get-docker/)
### Create a Maven project
Create a new project with the following command:
```bash showshowLineNumbers
mvn io.quarkus.platform:quarkus-maven-plugin:3.6.3:create \
-DprojectGroupId=org.acme \
-DprojectArtifactId=amazon-lambda-quickstart \
-DclassName="org.acme.lambda.QuarkusLambdaSyncResource" \
-Dpath="/sync" \
-Dextensions="resteasy-reactive-jackson,amazon-lambda"
cd amazon-lambda-quickstart
```
The above command generates a Maven project structure with imports for RESTEasy Reactive/JAX-RS and Amazon Lambda Client extensions.
### Configure Lambda Client
Both Lambda clients (sync and async) can be configured through the `application.properties` file, which should be located in the `src/main/resources` directory.
Additionally, ensure that a suitable implementation of the sync client is added to the `classpath`.
By default, the extension employs the URL connection HTTP client, so it's necessary to include a URL connection client dependency in the `pom.xml` file:
```xml
software.amazon.awssdk
url-connection-client
```
If you want to use Apache HTTP client instead, configure it as follows in `application.properties`:
```xml
quarkus.lambda.sync-client.type=apache
```
Add the following dependencies to the `pom.xml` file:
```xml
software.amazon.awssdk
apache-client
```
To configure LocalStack, add the following properties to the `application.properties` file:
```bash showshowLineNumbers
quarkus.lambda.endpoint-override=http://localhost.localstack.cloud:4566
quarkus.lambda.aws.region=us-east-1
quarkus.lambda.aws.credentials.type=static
quarkus.lambda.aws.credentials.static-provider.access-key-id=test-key
quarkus.lambda.aws.credentials.static-provider.secret-access-key=test-secret
```
### Package the application
You can package the application with the following command:
```bash
./mvnw clean package
```
You can further run the application in dev mode with the following command:
```bash
java -Dparameters.path=/quarkus/is/awesome/ -jar target/quarkus-app/quarkus-run.jar
```
:::tip
With GraalVM installed, you can also create a native executable binary using the following command:
```bash
./mvnw clean package -Dnative.
```
:::
:::note
Dev Services for Amazon Services is automatically enabled for each extension added to the `pom.xml`, except in the following scenarios:
- When `quarkus.devservices.enabled` is set to false.
- When `devservices.enabled` is set to false per extension (e.g., `quarkus.s3.devservices.enabled=false`).
- When the `endpoint-override` is configured (e.g., `quarkus.s3.endpoint-override=http://localhost.localstack.cloud:4566`).
:::
## Supported extensions
- [Lambda](https://docs.quarkiverse.io/quarkus-amazon-services/dev/amazon-lambda.html)
- [S3](https://docs.quarkiverse.io/quarkus-amazon-services/dev/amazon-s3.html)
- [SSM](https://docs.quarkiverse.io/quarkus-amazon-services/dev/amazon-ssm.html)
- [SQS](https://docs.quarkiverse.io/quarkus-amazon-services/dev/amazon-sqs.html)
- [SNS](https://docs.quarkiverse.io/quarkus-amazon-services/dev/amazon-sns.html)
- [SES](https://docs.quarkiverse.io/quarkus-amazon-services/dev/amazon-ses.html)
- [Secrets Manager](https://docs.quarkiverse.io/quarkus-amazon-services/dev/amazon-secretsmanager.html)
- [KMS](https://docs.quarkiverse.io/quarkus-amazon-services/dev/amazon-kms.html)
- [IAM](https://docs.quarkiverse.io/quarkus-amazon-services/dev/amazon-iam.html)
## Configuration
The following configuration properties are fixed at build time.
All the other configuration properties can be overridden at runtime.
| Property | Type | Default |
| --------------------------------------------------------------------------------------------------- | -------------------- | ----------------------------- |
| `quarkus.aws.devservices.localstack.image-name` | string | `localstack/localstack:3.0.1` |
| `quarkus.aws.devservices.localstack.init-scripts-folder` | string | |
| `quarkus.aws.devservices.localstack.init-scripts-classpath` | string | |
| `quarkus.aws.devservices.localstack.init-completion-msg` | string | |
| `quarkus.aws.devservices.localstack.container-properties` | `Map` | |
| `quarkus.aws.devservices.localstack.additional-services."additional-services".enabled` | boolean | |
| `quarkus.aws.devservices.localstack.additional-services."additional-services".shared` | boolean | `false` |
| `quarkus.aws.devservices.localstack.additional-services."additional-services".service-name` | string | `localstack` |
| `quarkus.aws.devservices.localstack.additional-services."additional-services".container-properties` | `Map` | |
:::note
- If `quarkus.aws.devservices.localstack.additional-services."additional-services".enabled` is set to `true` and the endpoint-override is not configured, LocalStack will be started and utilized instead of the provided configuration.
For all services excluding Cognito, LocalStack will function as the core cloud emulator.
In the case of Cognito, the emulation/mocking will be done by Moto.
- The `quarkus.aws.devservices.localstack.additional-services."additional-services".shared` indicates whether the LocalStack container managed by Dev Services is shared.
In shared mode, Quarkus utilizes label-based service discovery, specifically the `quarkus-dev-service-localstack` label, to identify running containers.
If a matching container is found, it is used.
Otherwise, Dev Services initiates a new container.
It's important to note that sharing is not supported for the Cognito extension.
- In `quarkus.aws.devservices.localstack.additional-services."additional-services".service-name`, the value of the `quarkus-dev-service-localstack` label is attached to the initiated container.
In dev mode, when the shared flag is true, Dev Services checks for a container with the `quarkus-dev-service-localstack` label set to the configured value before starting a new one.
If found, it utilizes the existing container.
Otherwise, it creates a new container with the `quarkus-dev-service-localstack` label set to the specified value.
In test mode, Dev Services groups services with the same service-name value into a single container instance.
This property is useful when there's a requirement for multiple shared LocalStack instances.
:::
### Specific configuration
Dev Services can support specific configurations passed to the LocalStack container.
These configurations can be globally applied to all containers or specified individually per service.
```bash
quarkus.aws.devservices.localstack.image-name=localstack/localstack:3.0.3
quarkus.dynamodb.devservices.container-properties.DYNAMODB_HEAP_SIZE=1G
```
### Additional services
To start additional services for which a Quarkus extension does not exist or is not imported in the project, use the `additional-services` property:
```bash
quarkus.aws.devservices.localstack.additional-services."kinesis".enabled=true
quarkus.aws.devservices.localstack.additional-services."redshift".enabled=true
```
# Self-managed Kafka cluster
> Using LocalStack Lambda with a self-managed Kafka cluster.
LocalStack for AWS supports [AWS Managed Streaming for Kafka (MSK)](/aws/services/kafka) and you can create Kafka clusters directly through the MSK API that will run in LocalStack.
In some cases, you may want to run your own self-managed Kafka cluster and integrate it with your applications, like triggering Lambdas from a Kafka stream running in your own cluster.
## Running self-managed Kafka
You can find the [example Docker Compose](https://github.com/localstack/localstack-docs/blob/master/src/content/docs/aws/customization/integrations/app-frameworks/docker-compose.yml) file which contains a single-noded ZooKeeper and a Kafka cluster and a simple LocalStack setup as well as [Kowl](https://github.com/cloudhut/kowl), an Apache Kafka Web UI.
1. Run Docker Compose:
```bash showshowLineNumbers
docker-compose up -d
```
2. Create the Lambda function:
```bash showshowLineNumbers
lstk aws lambda create-function \
--function-name fun1 \
--handler lambda.handler \
--runtime python3.8 \
--role arn:aws:iam::000000000000:role/lambda-role \
--zip-file fileb://lambda.zip
{
"FunctionName": "fun1",
"FunctionArn": "arn:aws:lambda:us-east-1:000000000000:function:fun1",
"Runtime": "python3.8",
"Role": "arn:aws:iam::000000000000:role/lambda-role",
"Handler": "lambda.handler",
"CodeSize": 294,
"Description": "",
"Timeout": 3,
"LastModified": "2021-05-19T02:01:06.617+0000",
"CodeSha256": "/GPsiNXaq4tBA4QpxPCwgpeVfP7j+1tTH6zdkJ3jiU4=",
"Version": "$LATEST",
"VpcConfig": {},
"TracingConfig": {
"Mode": "PassThrough"
},
"RevisionId": "d85469d2-8558-4d75-bc0e-5926f373e12c",
"State": "Active",
"LastUpdateStatus": "Successful",
"PackageType": "Zip"
}
```
3. Create an example secret:
```bash showshowLineNumbers
lstk aws secretsmanager create-secret --name localstack
{
"ARN": "arn:aws:secretsmanager:us-east-1:000000000000:secret:localstack-TDIuI",
"Name": "localstack",
"VersionId": "32bbb8e2-46ee-4322-b3d5-b6459d54513b"
}
```
4. Create an example Kafka topic:
```bash showshowLineNumbers
docker exec -ti kafka kafka-topics --zookeeper zookeeper:2181 --create --replication-factor 1 --partitions 1 --topic t1
Created topic t1.
```
5. Create the event source mapping to your local kafka cluster:
```bash showshowLineNumbers
lstk aws lambda create-event-source-mapping \
--topics t1 \
--source-access-configuration Type=SASL_SCRAM_512_AUTH,URI=arn:aws:secretsmanager:us-east-1:000000000000:secret:localstack-TDIuI \
--function-name arn:aws:lambda:us-east-1:000000000000:function:fun1 \
--self-managed-event-source '{"Endpoints":{"KAFKA_BOOTSTRAP_SERVERS":["localhost:9092"]}}'
{
"UUID": "4a2b0ea6-960c-4847-8684-465876dd6dbd",
"BatchSize": 100,
"FunctionArn": "arn:aws:lambda:us-east-1:000000000000:function:fun1",
"LastModified": "2021-05-19T04:02:49+02:00",
"LastProcessingResult": "OK",
"State": "Enabled",
"StateTransitionReason": "User action",
"Topics": [
"t1"
],
"SourceAccessConfigurations": [
{
"Type": "SASL_SCRAM_512_AUTH",
"URI": "arn:aws:secretsmanager:us-east-1:000000000000:secret:localstack-TDIuI"
}
],
"SelfManagedEventSource": {
"Endpoints": {
"KAFKA_BOOTSTRAP_SERVERS": [
"localhost:9092"
]
}
}
}
```
6. Additionally visit `http://localhost:8080` for Kowl's UI.
# Spring Cloud Function
> Use the Spring Cloud Function framework with LocalStack.
import { Tabs, TabItem } from '@astrojs/starlight/components';
import { Badge } from '@astrojs/starlight/components';
## Overview
In this guide, you will learn how to use LocalStack to test
your serverless applications powered by Spring Cloud Function framework.
:::note
Some features and services described in this document may not work properly on aarch64, including Apple's M1 silicon.
:::
## Covered Topics
We will create a new Rest API application that will route requests
to a Cloud Function using `functionRouter` and routing expressions.
The primary language for the application is Kotlin powered by
[Gradle](https://gradle.org) build tool, but the described concepts would work for
any other JVM setup.
- [Overview](#overview)
- [Covered Topics](#covered-topics)
- [Current Limitations](#current-limitations)
- [Setting up an Application](#setting-up-an-application)
- [Starting a new Project](#starting-a-new-project)
- [Project Settings](#project-settings)
- [Configure Log4J2 for AWS Lambda](#configure-log4j2-for-aws-lambda)
- [Configure Spring Cloud Function for Rest API](#configure-spring-cloud-function-for-rest-api)
- [Define an Application class](#define-an-application-class)
- [Configure Jackson](#configure-jackson)
- [Define Logging Utility](#define-logging-utility)
- [Add Request/Response utilities](#add-requestresponse-utilities)
- [Creating a sample Model / DTO](#creating-a-sample-model--dto)
- [Creating Rest API endpoints](#creating-rest-api-endpoints)
- [Cold Start and Warmup](#cold-start-and-warmup-)
- [Creating other lambda Handlers](#creating-other-lambda-handlers)
- [Setting up Deployment](#setting-up-deployment)
- [Testing, Debugging and Hot Reloading](#testing-debugging-and-hot-reloading)
- [Useful Links](#useful-links)
### Current Limitations
This document demonstrates the usage of the Spring Cloud Function framework
together with LocalStack.
It does not cover some of the application-specific topics,
like 404 error handling, or parametrized routing, that you need to consider
when building production-ready applications.
## Setting up an Application
We recommend using [jenv](https://github.com/jenv/jenv) to manage multiple Java runtimes.
### Starting a new Project
Please follow the instructions from the official [website](https://gradle.org) to
install the Gradle build tool on your machine.
Then run the following command to initialize a new Gradle project
```bash
gradle init
```
Running the command below will run the gradle wrapper task
```bash
gradle wrapper
```
After running the wrapper task, you will find the Gradle wrapper script `gradlew`.
From now on, we will use the wrapper instead of the globally installed Gradle binary:
```bash
./gradlew
```
### Project Settings
Let's give our project a name:
open `settings.gradle`, and adjust the autogenerated name to something meaningful.
```groovy
rootProject.name = 'localstack-sampleproject'
```
Now we need to define our dependencies.
Here's a list of what we will be using in our project.
Gradle plugins:
- [java](https://docs.gradle.org/current/userguide/java_plugin.html)
- [kotlin jvm](https://kotlinlang.org/docs/gradle.html#targeting-the-jvm)
- [kotlin spring plugin](https://kotlinlang.org/docs/all-open-plugin.html#spring-support)
- [spring boot plugin](https://docs.spring.io/spring-boot/docs/current/gradle-plugin/reference/htmlsingle/)
- [spring dependency management plugin](https://docs.spring.io/spring-boot/docs/current/gradle-plugin/reference/htmlsingle/#managing-dependencies)
- [shadow plugin](https://github.com/johnrengelman/shadow)
Dependencies:
- [kotlin stdlib](https://mvnrepository.com/artifact/org.jetbrains.kotlin/kotlin-stdlib)
- [spring cloud starter function web](https://mvnrepository.com/artifact/org.springframework.cloud/spring-cloud-starter-function-web)
- [spring cloud function adapter for aws](https://mvnrepository.com/artifact/org.springframework.cloud/spring-cloud-function-adapter-aws)
- [lambda log4j2](https://mvnrepository.com/artifact/com.amazonaws/aws-lambda-java-log4j2)
- [lambda events](https://mvnrepository.com/artifact/com.amazonaws/aws-lambda-java-events)
- [jackson core](https://mvnrepository.com/artifact/com.fasterxml.jackson.core/jackson-core)
- [jackson databind](https://mvnrepository.com/artifact/com.fasterxml.jackson.core/jackson-databind)
- [jackson annotations](https://mvnrepository.com/artifact/com.fasterxml.jackson.core/jackson-annotations)
- [jackson module kotlin](https://mvnrepository.com/artifact/com.fasterxml.jackson.module/jackson-module-kotlin)
In order to deploy our application to AWS, we need to build so-called "fat jar"
which contains all application dependencies.
To that end, we use the "Shadow Jar" plugin.
Here's our final `build.gradle`:
```groovy showshowLineNumbers=true title="build.gradle"
plugins {
id "java"
id "org.jetbrains.kotlin.jvm" version '1.5.31'
id "org.jetbrains.kotlin.plugin.spring" version '1.5.31'
id 'org.springframework.boot' version '2.5.5'
id "io.spring.dependency-management" version '1.0.11.RELEASE'
id "com.github.johnrengelman.shadow" version '7.0.0'
}
group = 'org.localstack.sampleproject'
sourceCompatibility = 11
tasks.withType(JavaCompile) {
options.encoding = 'UTF-8'
}
repositories {
mavenCentral()
maven { url "https://plugins.gradle.org/m2/" }
}
ext {
springCloudVersion = "3.1.4"
awsLambdaLog4jVersion = "1.2.0"
awsLambdaJavaEventsVersion = "3.10.0"
jacksonVersion = "2.12.5"
}
dependencies {
implementation "org.jetbrains.kotlin:kotlin-stdlib"
implementation "org.springframework.cloud:spring-cloud-starter-function-web:$springCloudVersion"
implementation "org.springframework.cloud:spring-cloud-function-adapter-aws:$springCloudVersion"
implementation "com.amazonaws:aws-lambda-java-log4j2:$awsLambdaLog4jVersion"
implementation "com.amazonaws:aws-lambda-java-events:$awsLambdaJavaEventsVersion"
implementation "com.fasterxml.jackson.core:jackson-core:$jacksonVersion"
implementation "com.fasterxml.jackson.core:jackson-databind:$jacksonVersion"
implementation "com.fasterxml.jackson.core:jackson-annotations:$jacksonVersion"
implementation "com.fasterxml.jackson.module:jackson-module-kotlin:$jacksonVersion"
}
import com.github.jengelman.gradle.plugins.shadow.transformers.*
// Configure the main class
jar {
manifest {
attributes 'Start-Class': 'org.localstack.sampleproject.Application'
}
}
// Build a fatjar (with dependencies) for aws lambda
shadowJar {
transform(Log4j2PluginsCacheFileTransformer)
dependencies {
exclude(
dependency("org.springframework.cloud:spring-cloud-function-web:${springCloudVersion}")
)
}
// Required for Spring
mergeServiceFiles()
append 'META-INF/spring.handlers'
append 'META-INF/spring.schemas'
append 'META-INF/spring.tooling'
transform(PropertiesFileTransformer) {
paths = ['META-INF/spring.factories']
mergeStrategy = "append"
}
}
assemble.dependsOn shadowJar
```
Please note that we will be using `org.localstack.sampleproject` as a
working namespace, and `org.localstack.sampleproject.Application` as an
entry class for our application.
You can adjust it for your needs, but don't forget to change your package names accordingly.
### Configure Log4J2 for AWS Lambda
Spring framework comes with Log4J logger, so all we need to do is to configure
it for AWS Lambda.
In this project, we are following
[official documentation](https://docs.aws.amazon.com/lambda/latest/dg/java-logging.html#java-wt-logging-using-log4j2.8)
to setup up `src/main/resources/log4j2.xml` content.
```xml title="log4j2.xml" showshowLineNumbers
?xml version="1.0" encoding="UTF-8"?>
%d{yyyy-MM-dd HH:mm:ss} %X{AWSRequestId} %-5p %c{1}:%L - %m%n
```
### Configure Spring Cloud Function for Rest API
Spring Function comes with `functionRouter` that can route
requests to different `Beans` based on predefined routing expressions.
Let's configure it to lookup our function Beans by HTTP method and path, create a
new `application.properties` file under `src/main/resources/application.properties`
with the following content:
```dotenv
spring.main.banner-mode=off
spring.cloud.function.definition=functionRouter
spring.cloud.function.routing-expression=headers['httpMethod'].concat(' ').concat(headers['path'])
spring.cloud.function.scan.packages=org.localstack.sampleproject.api
```
Once configured, you can use `FunctionInvoker` as a handler for your Rest API lambda function.
It will automatically pick up the configuration we have just set.
```java title="FunctionInvoker.kt"
org.springframework.cloud.function.adapter.aws.FunctionInvoker::handleRequest
```
### Define an Application class
Now our application needs an entry-class, the one we referenced earlier.
Let's add it under `src/main/kotlin/org/localstack/sampleproject/Application.kt`.
```kotlin showshowLineNumbers
package org.localstack.sampleproject
import org.springframework.boot.autoconfigure.SpringBootApplication
@SpringBootApplication
class Application
fun main(args: Array) {
// Do nothing unless you use a custom runtime
}
```
### Configure Jackson
In our sample project we are using a JSON format for requests and responses.
The easiest way to get started with JSON is to use the Jackson library.
Let's configure it by creating a new configuration class `JacksonConfiguration.kt` under
`src/main/kotlin/org/localstack/sampleproject/config`:
```kotlin title="JacksonConfiguration.kt" showshowLineNumbers
package org.localstack.sampleproject.config
import com.fasterxml.jackson.annotation.JsonInclude
import com.fasterxml.jackson.databind.*
import org.springframework.context.annotation.Bean
import org.springframework.context.annotation.Configuration
import org.springframework.context.annotation.Primary
import org.springframework.http.converter.json.Jackson2ObjectMapperBuilder
import java.text.DateFormat
@Configuration
class JacksonConfiguration {
@Bean
fun jacksonBuilder() = Jackson2ObjectMapperBuilder()
.dateFormat(DateFormat.getDateInstance(DateFormat.FULL))
@Bean
@Primary
fun objectMapper(): ObjectMapper = ObjectMapper().apply {
configure(DeserializationFeature.FAIL_ON_UNKNOWN_PROPERTIES, false)
configure(SerializationFeature.FAIL_ON_EMPTY_BEANS, false)
configure(SerializationFeature.WRITE_ENUMS_USING_TO_STRING, true)
configure(SerializationFeature.WRITE_DATES_AS_TIMESTAMPS, false)
configure(SerializationFeature.ORDER_MAP_ENTRIES_BY_KEYS, true)
configure(MapperFeature.SORT_PROPERTIES_ALPHABETICALLY, true)
setSerializationInclusion(JsonInclude.Include.NON_NULL)
findAndRegisterModules()
}
}
```
In applications where you need support for multiple formats or a format
different from JSON (for example, SOAP/XML applications) simply use multiple
beans with corresponding
[ObjectMapper](https://mvnrepository.com/artifact/com.fasterxml.jackson.dataformat/jackson-dataformat-xml)
implementations.
### Define Logging Utility
Let's create a small logging utility to simplify interactions with the logger
```kotlin title="Logger.kt" showshowLineNumbers
package org.localstack.sampleproject.util
import org.apache.logging.log4j.LogManager
import org.apache.logging.log4j.Logger
open class Logger {
val LOGGER: Logger = LogManager.getLogger(javaClass.enclosingClass)
}
```
### Add Request/Response utilities
To reduce the amount of boilerplate code, we are going to introduce three
utility functions for our Rest API communications:
- to build regular json response
- to build error json response
- to parse request payload using ObjectMapper.
Note that ObjectMapper does not necessarily need to be a JSON only.
It could also be XML or any other Mapper extended from standard ObjectMapper.
Your application may even support multiple protocols with different request/response formats at once.
Let's define utility functions to to build API gateway responses:
```kotlin showshowLineNumbers
package org.localstack.sampleproject.util
import org.springframework.messaging.Message
import org.springframework.messaging.support.MessageBuilder
data class ResponseError(
val message: String,
)
fun buildJsonResponse(data: T, code: Int = 200): Message {
return MessageBuilder
.withPayload(data)
.setHeader("Content-Type", "application/json")
.setHeader("Access-Control-Allow-Origin", "*")
.setHeader("Access-Control-Allow-Methods", "OPTIONS,POST,GET")
.setHeader("statusCode", code)
.build()
}
fun buildJsonErrorResponse(message: String, code: Int = 500) =
buildJsonResponse(ResponseError(message), code)
```
And now a utility function to process API Gateway requests:
```kotlin showshowLineNumbers
package org.localstack.sampleproject.util
import com.amazonaws.services.lambda.runtime.events.APIGatewayProxyRequestEvent
import com.fasterxml.jackson.databind.ObjectMapper
import org.springframework.messaging.Message
import java.util.function.Function
fun apiGatewayFunction(
objectMapper: ObjectMapper,
callable: (message: Message, context: APIGatewayProxyRequestEvent) -> Message<*>
): Function, Message<*>> = Function { input ->
try {
val context = objectMapper.readValue(
objectMapper.writeValueAsString(input.headers),
APIGatewayProxyRequestEvent::class.java
)
return@Function callable(input, context)
} catch (e: Throwable) {
val message = e.message?.replace("\n", "")?.replace("\"", "'")
return@Function buildJsonErrorResponse(message ?: "", 500)
}
}
```
### Creating a sample Model / DTO
To transfer data from requests into something more meaningful than JSON strings
(and back) you will be using a lot of Models and Data Transfer Objects (DTOs).
It's time to define our first one.
```kotlin showshowLineNumbers title="SampleModel.kt"
package org.localstack.sampleproject.model
import com.fasterxml.jackson.annotation.JsonIgnore
data class SampleModel(
val id: Int,
val name: String,
@JsonIgnore
val jsonIgnoredProperty: String? = null,
)
```
### Creating Rest API endpoints
Let's add our first endpoints to simulate CRUD operations on previously
defined `SampleModel`:
```kotlin showshowLineNumbers title="SampleApi.kt"
package org.localstack.sampleproject.api
import com.fasterxml.jackson.databind.ObjectMapper
import org.localstack.sampleproject.model.SampleModel
import org.localstack.sampleproject.util.Logger
import org.localstack.sampleproject.util.apiGatewayFunction
import org.localstack.sampleproject.util.buildJsonResponse
import org.springframework.context.annotation.Bean
import org.springframework.stereotype.Component
private val SAMPLE_RESPONSE = mutableListOf(
SampleModel(id = 1, name = "Sample #1"),
SampleModel(id = 2, name = "Sample #2"),
)
@Component
class SampleApi(private val objectMapper: ObjectMapper) {
companion object : Logger()
@Bean("POST /v1/entities")
fun createSampleEntity() = apiGatewayFunction(objectMapper) { input, context ->
LOGGER.info("calling POST /v1/entities")
SAMPLE_RESPONSE.add(input.payload)
buildJsonResponse(input.payload, code = 201)
}
@Bean("GET /v1/entities")
fun listSampleEntities() = apiGatewayFunction(objectMapper) { input, context ->
LOGGER.info("calling GET /v1/entities")
buildJsonResponse("hello world")
}
@Bean("GET /v1/entities/get")
fun getSampleEntity() = apiGatewayFunction(objectMapper) { input, context ->
LOGGER.info("calling GET /v1/entities/get")
val desiredId = context.queryStringParameters["id"]!!.toInt()
buildJsonResponse(SAMPLE_RESPONSE.find { it.id == desiredId })
}
}
```
Note how we used Spring's dependency injection to inject `ObjectMapper` Bean we
configured earlier.
#### Cold Start and Warmup
We know Java's cold start is always a pain.
To minimize this pain, we will try to define a pre-warming endpoint within the Rest API.
By invoking this function every 5-10 mins we can make sure Rest API lambda is always kept in a pre-warmed state.
```kotlin showshowLineNumbers title="ScheduleApi.kt"
package org.localstack.sampleproject.api
import com.fasterxml.jackson.databind.ObjectMapper
import org.localstack.sampleproject.util.apiGatewayFunction
import org.localstack.sampleproject.util.buildJsonResponse
import org.springframework.context.annotation.Bean
import org.springframework.stereotype.Component
@Component
class ScheduleApi(private val objectMapper: ObjectMapper) {
@Bean("SCHEDULE warmup")
fun warmup() = apiGatewayFunction(objectMapper) { input, context ->
// execute scheduled events
buildJsonResponse("OK")
}
}
```
Now you can add a scheduled event to the Rest API lambda function with the following synthetic payload (to simulate API gateway request).
This way, you can define any other scheduled events, but we recommend using pure lambda functions.
```json
{
"httpMethod": "SCHEDULE",
"path": "warmup"
}
```
As you may have guessed, this input will get mapped to the `SCHEDULE warmup` Bean.
> For more information, please read the "Setting up Deployment" section.
### Creating other lambda Handlers
HTTP requests are not the only thing our Spring Function-powered lambdas can do.
We can still define pure lambda functions, DynamoDB stream handlers, and so on.
Below you can find a little example of few lambda functions grouped in `LambdaApi` class.
```kotlin showshowLineNumbers title="LambdaApi.kt"
package org.localstack.sampleproject.api
import com.amazonaws.services.lambda.runtime.events.DynamodbEvent
import org.localstack.sampleproject.model.SampleModel
import org.localstack.sampleproject.util.Logger
import org.springframework.cloud.function.adapter.aws.SpringBootStreamHandler
import org.springframework.context.annotation.Bean
import org.springframework.stereotype.Component
import java.util.function.Function
@Component
class LambdaApi : SpringBootStreamHandler() {
companion object : Logger()
@Bean
fun functionOne(): Function {
return Function {
LOGGER.info("calling function one")
return@Function "ONE";
}
}
@Bean
fun functionTwo(): Function {
return Function {
LOGGER.info("calling function two")
return@Function it;
}
}
@Bean
fun dynamoDbStreamHandlerExample(): Function {
return Function {
LOGGER.info("handling DynamoDB stream event")
}
}
}
```
As you can see from the example above, we are using `SpringBootStreamHandler`
class as a base that takes care of the application bootstrapping process and
AWS requests transformation.
Now `org.localstack.sampleproject.api.LambdaApi` can be used as a handler for
your lambda function along with `FUNCTION_NAME` environmental variable with
the function bean name.
You may have noticed we used `DynamodbEvent` in the last example.
The `Lambda-Events` package comes with a set of predefined wrappers that you can use to handle different lifecycle events from AWS.
## Setting up Deployment
Check our [sample project](https://github.com/localstack/localstack-pro-samples/tree/master/sample-archive/spring-cloud-function-microservice)
for usage examples.
```yaml showshowLineNumbers
service: localstack-sampleproject-serverless
provider:
name: aws
runtime: java11
stage: ${opt:stage}
region: us-west-1
lambdaHashingVersion: 20201221
deploymentBucket:
name: deployment-bucket
package:
artifact: build/libs/localstack-sampleproject-all.jar
plugins:
- serverless-localstack
- serverless-deployment-bucket
custom:
localstack:
stages: - local
functions:
http_proxy:
timeout: 30
handler: org.springframework.cloud.function.adapter.aws.FunctionInvoker::handleRequest
events: - http:
path: /{proxy+}
method: ANY
cors: true # Please, note that events are a LocalStack for AWS feature - schedule:
rate: rate(10 minutes)
enabled: true
input:
httpMethod: SCHEDULE
path: warmup
lambda_helloOne:
timeout: 30
handler: org.localstack.sampleproject.api.LambdaApi
environment:
FUNCTION_NAME: functionOne
lambda_helloTwo:
timeout: 30
handler: org.localstack.sampleproject.api.LambdaApi
environment:
FUNCTION_NAME: functionTwo
````
```java title="ApplicationStack.kt" showshowLineNumbers
package org.localstack.cdkstack
import java.util.UUID
import software.amazon.awscdk.core.Construct
import software.amazon.awscdk.core.Duration
import software.amazon.awscdk.core.Stack
import software.amazon.awscdk.services.apigateway.CorsOptions
import software.amazon.awscdk.services.apigateway.LambdaRestApi
import software.amazon.awscdk.services.apigateway.StageOptions
import software.amazon.awscdk.services.events.Rule
import software.amazon.awscdk.services.events.RuleTargetInput
import software.amazon.awscdk.services.events.Schedule
import software.amazon.awscdk.services.events.targets.LambdaFunction
import software.amazon.awscdk.services.lambda.*
import software.amazon.awscdk.services.lambda.Function
import software.amazon.awscdk.services.s3.Bucket
private val STAGE = System.getenv("STAGE") ?: "local"
private const val JAR_PATH = "../../build/libs/localstack-sampleproject-all.jar"
class ApplicationStack(parent: Construct, name: String) : Stack(parent, name) {
init {
val restApiLambda = Function.Builder.create(this, "RestApiFunction")
.code(Code.fromAsset(JAR_PATH))
.handler("org.springframework.cloud.function.adapter.aws.FunctionInvoker")
.timeout(Duration.seconds(30))
.runtime(Runtime.JAVA_11)
.tracing(Tracing.ACTIVE)
.build()
val corsOptions = CorsOptions.builder().allowOrigins(listOf("*")).allowMethods(listOf("*")).build()
LambdaRestApi.Builder.create(this, "ExampleRestApi")
.proxy(true)
.restApiName("ExampleRestApi")
.defaultCorsPreflightOptions(corsOptions)
.deployOptions(StageOptions.Builder().stageName(STAGE).build())
.handler(restApiLambda)
.build()
val warmupRule = Rule.Builder.create(this, "WarmupRule")
.schedule(Schedule.rate(Duration.minutes(10)))
.build()
val warmupTarget = LambdaFunction.Builder.create(restApiLambda)
.event(RuleTargetInput.fromObject(mapOf("httpMethod" to "SCHEDULE", "path" to "warmup")))
.build()
warmupRule.addTarget(warmupTarget)
SingletonFunction.Builder.create(this, "ExampleFunctionOne")
.code(Code.fromAsset(JAR_PATH))
.handler("org.localstack.sampleproject.api.LambdaApi")
.environment(mapOf("FUNCTION_NAME" to "functionOne"))
.timeout(Duration.seconds(30))
.runtime(Runtime.JAVA_11)
.uuid(UUID.randomUUID().toString())
.build()
SingletonFunction.Builder.create(this, "ExampleFunctionTwo")
.code(Code.fromAsset(JAR_PATH))
.handler("org.localstack.sampleproject.api.LambdaApi")
.environment(mapOf("FUNCTION_NAME" to "functionTwo"))
.timeout(Duration.seconds(30))
.runtime(Runtime.JAVA_11)
.uuid(UUID.randomUUID().toString())
.build()
}
}
````
```hcl title="variables.tf" showshowLineNumbers
variable "STAGE" {
type = string
default = "local"
}
variable "AWS_REGION" {
type = string
default = "us-east-1"
}
variable "JAR_PATH" {
type = string
default = "build/libs/localstack-sampleproject-all.jar"
}
provider "aws" {
access_key = "test_access_key"
secret_key = "test_secret_key"
region = var.AWS_REGION
s3_force_path_style = true
skip_credentials_validation = true
skip_metadata_api_check = true
endpoints {
apigateway = var.STAGE == "local" ? "http://localhost:4566" : null
cloudformation = var.STAGE == "local" ? "http://localhost:4566" : null
cloudwatch = var.STAGE == "local" ? "http://localhost:4566" : null
cloudwatchevents = var.STAGE == "local" ? "http://localhost:4566" : null
iam = var.STAGE == "local" ? "http://localhost:4566" : null
lambda = var.STAGE == "local" ? "http://localhost:4566" : null
s3 = var.STAGE == "local" ? "http://localhost:4566" : null
}
}
resource "aws_iam_role" "lambda-execution-role" {
name = "lambda-execution-role"
assume_role_policy = <
## Testing, Debugging and Hot Reloading
Please read our [Lambda Tools](/aws/developer-tools/lambda-tools)
documentation to learn more about testing, debugging, and hot reloading
for JVM Lambda functions.
## Useful Links
* [Spring Cloud Function on LocalStack (Kotlin JVM)](https://github.com/localstack/localstack-pro-samples/tree/master/sample-archive/spring-cloud-function-microservice)
```
# Overview
> Use LocalStack Extensions to customize and extend your local development experience.
LocalStack Extensions add services and integrations to your LocalStack container. This feature is available across all LocalStack plans.
You can find supported extensions in the [Official Extensions Library](https://app.localstack.cloud/extensions/library).
:::tip
Want to try out a common LocalStack extension?
Our [MailHog tutorial](/aws/customization/integrations/extensions/mailhog) teaches you how to install and use the official MailHog extension. It’s a quick way to explore how extensions work in LocalStack.
:::
:::note
The feature and the API are currently in preview stage and may be subject to change.
Please report any issues or feature requests on [LocalStack Extension's GitHub repository](https://github.com/localstack/localstack-extensions).
The new CLI experience, `lstk`, does not support LocalStack Extensions. There is no `lstk extensions` command suite.
Continue using the legacy [LocalStack CLI](/aws/developer-tools/running-localstack/localstack-cli/) to install and manage extensions.
:::
# Extensions Library
> Extend LocalStack by adding new services and features as extensions.
## Introduction
LocalStack extensions allows you to extend and customize LocalStack.
A LocalStack extension is a Python application that runs together with LocalStack within the LocalStack container.
LocalStack extensions are available across all plans, and the list of available extensions can be found in the [Extensions Library](https://app.localstack.cloud/extensions/library).
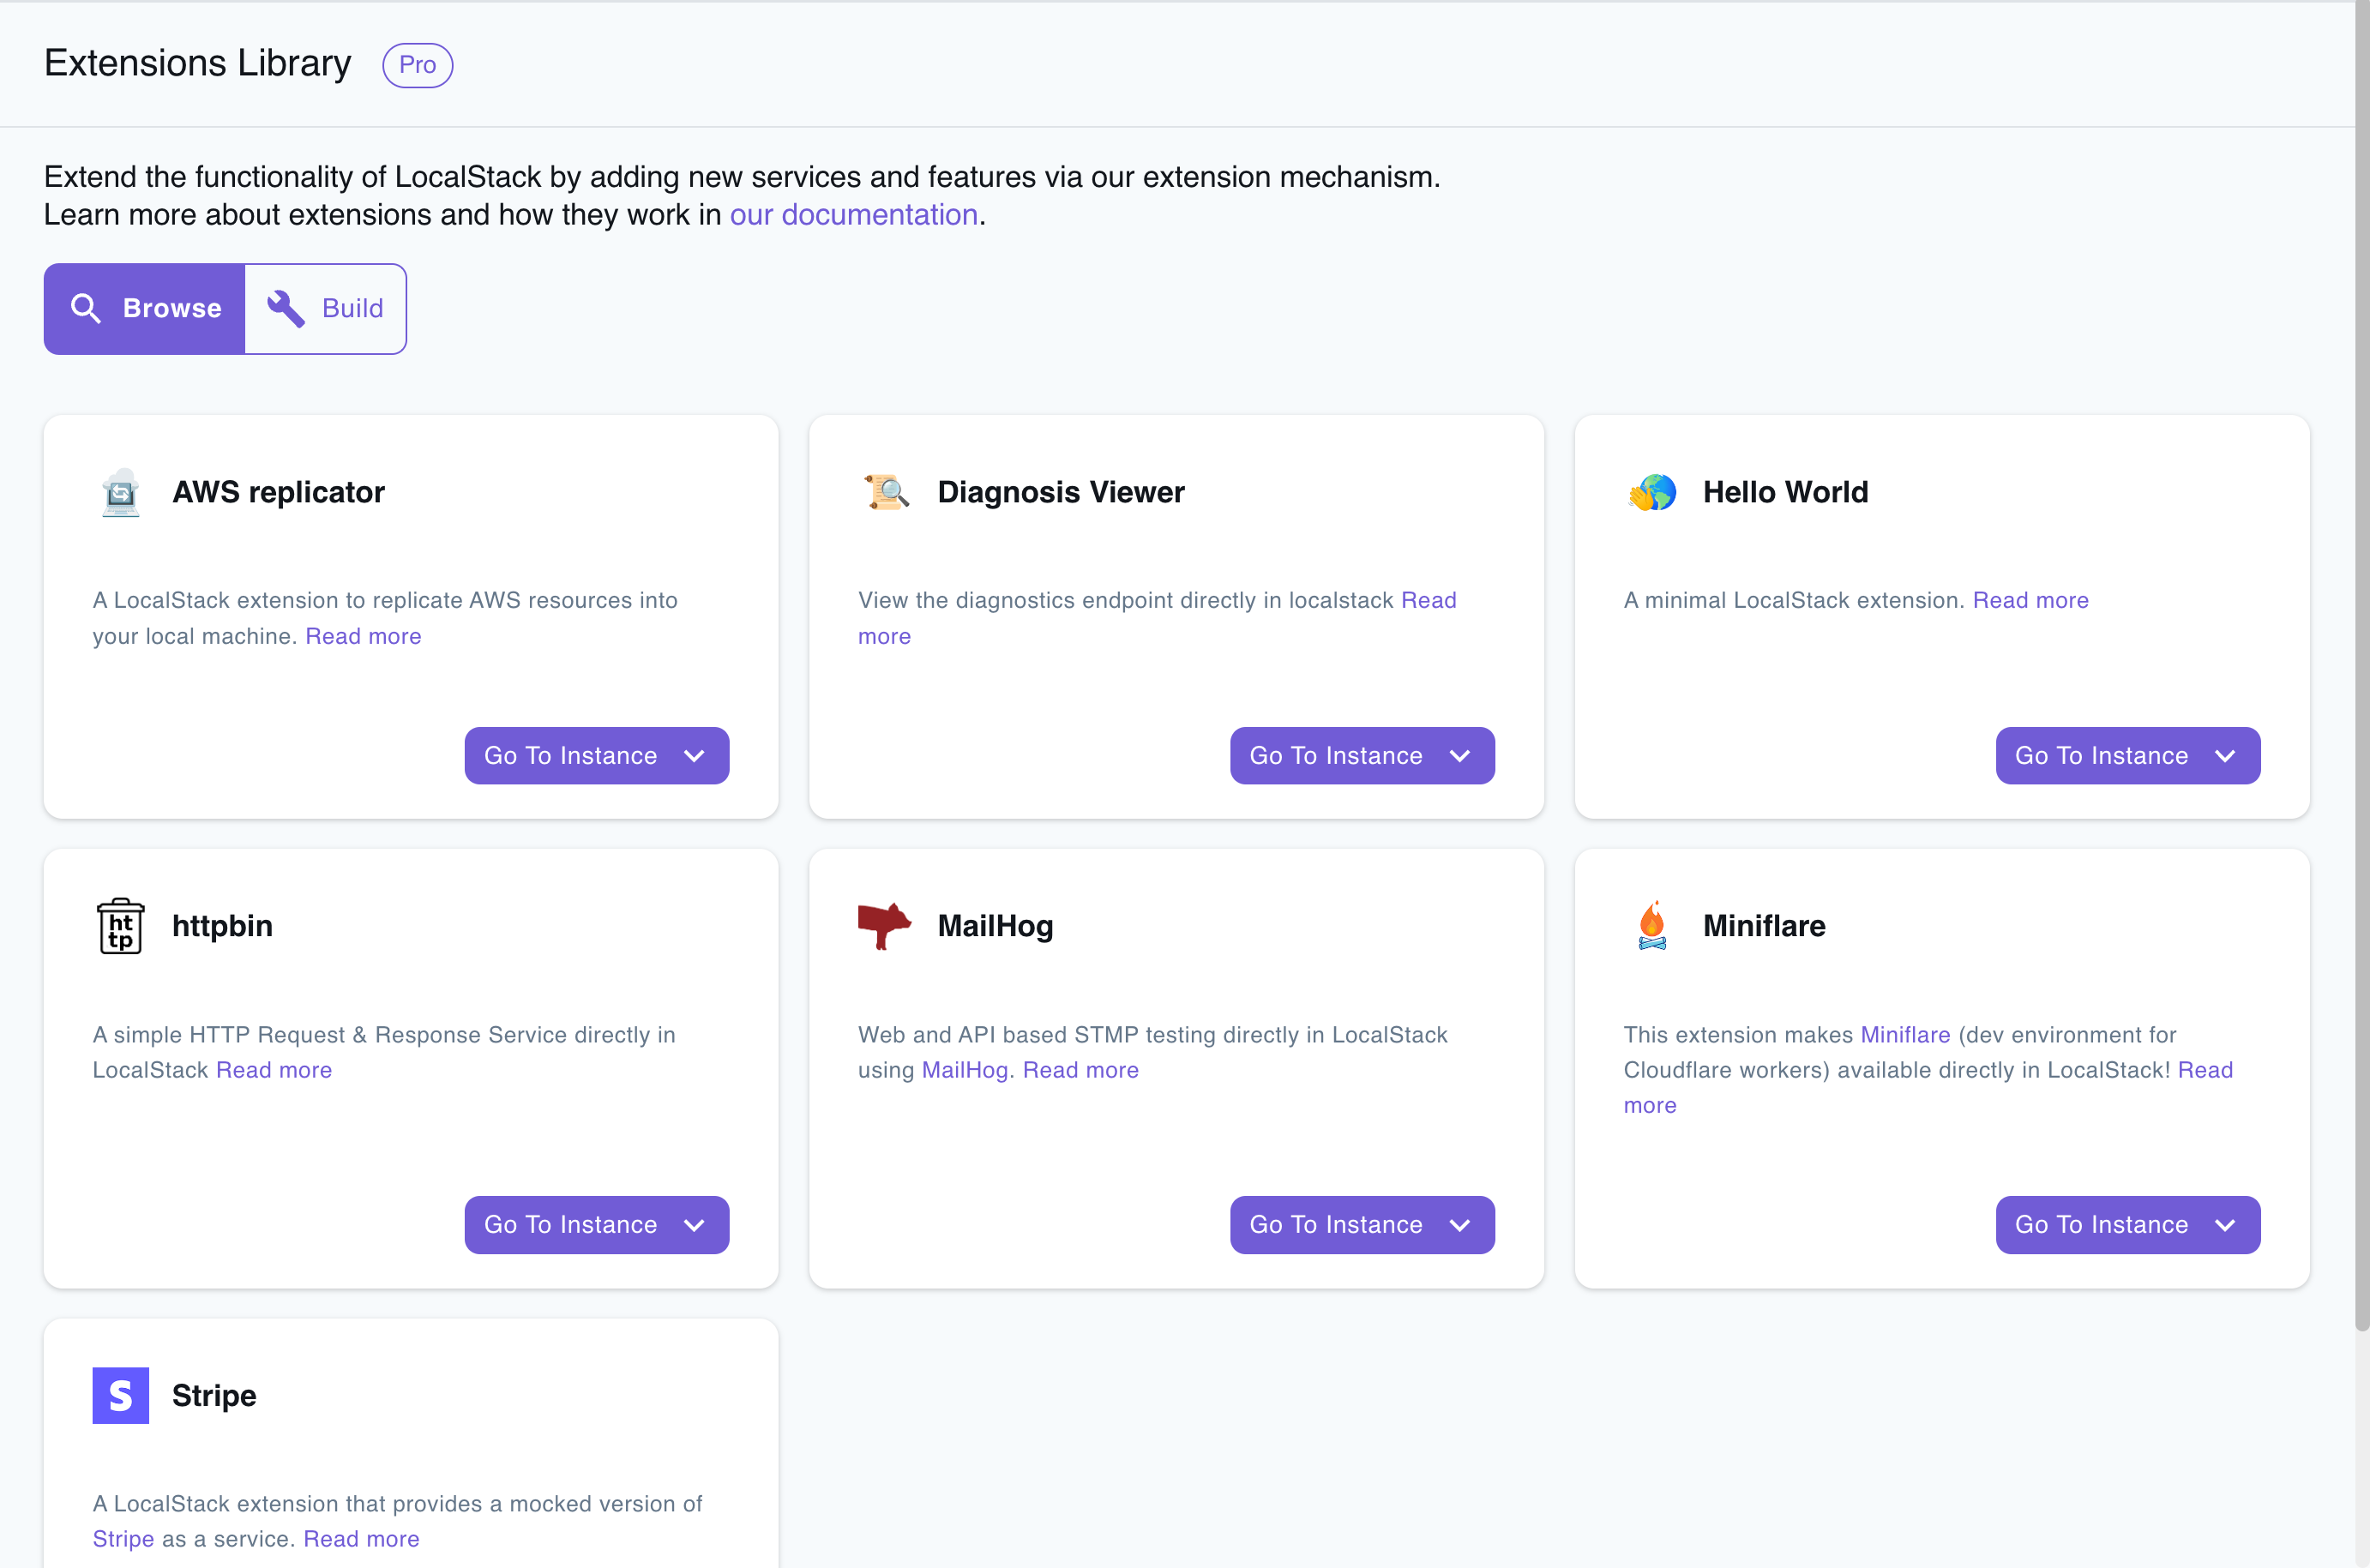
## Installing an Extension
To install an extension using the LocalStack Extensions Library, you can navigate to the [**app.localstack.cloud/extensions/library**](https://app.localstack.cloud/extensions/library) and click on the **Go to Instance** button to open the list of available instances.
If you are running your LocalStack instance locally, you can click on the **Default** option.
You will be redirected to the LocalStack instance page, where you can directly click the **Install** button to install the Extension.
The installation process will take a few seconds, and **will restart your LocalStack instance**.
Click **Continue** to proceed.
## Managing Extensions
You can further manage the installed extensions by navigating to the **Extensions** tab in the LocalStack Instance page.
You can remove an Extension by clicking the **Remove** button.
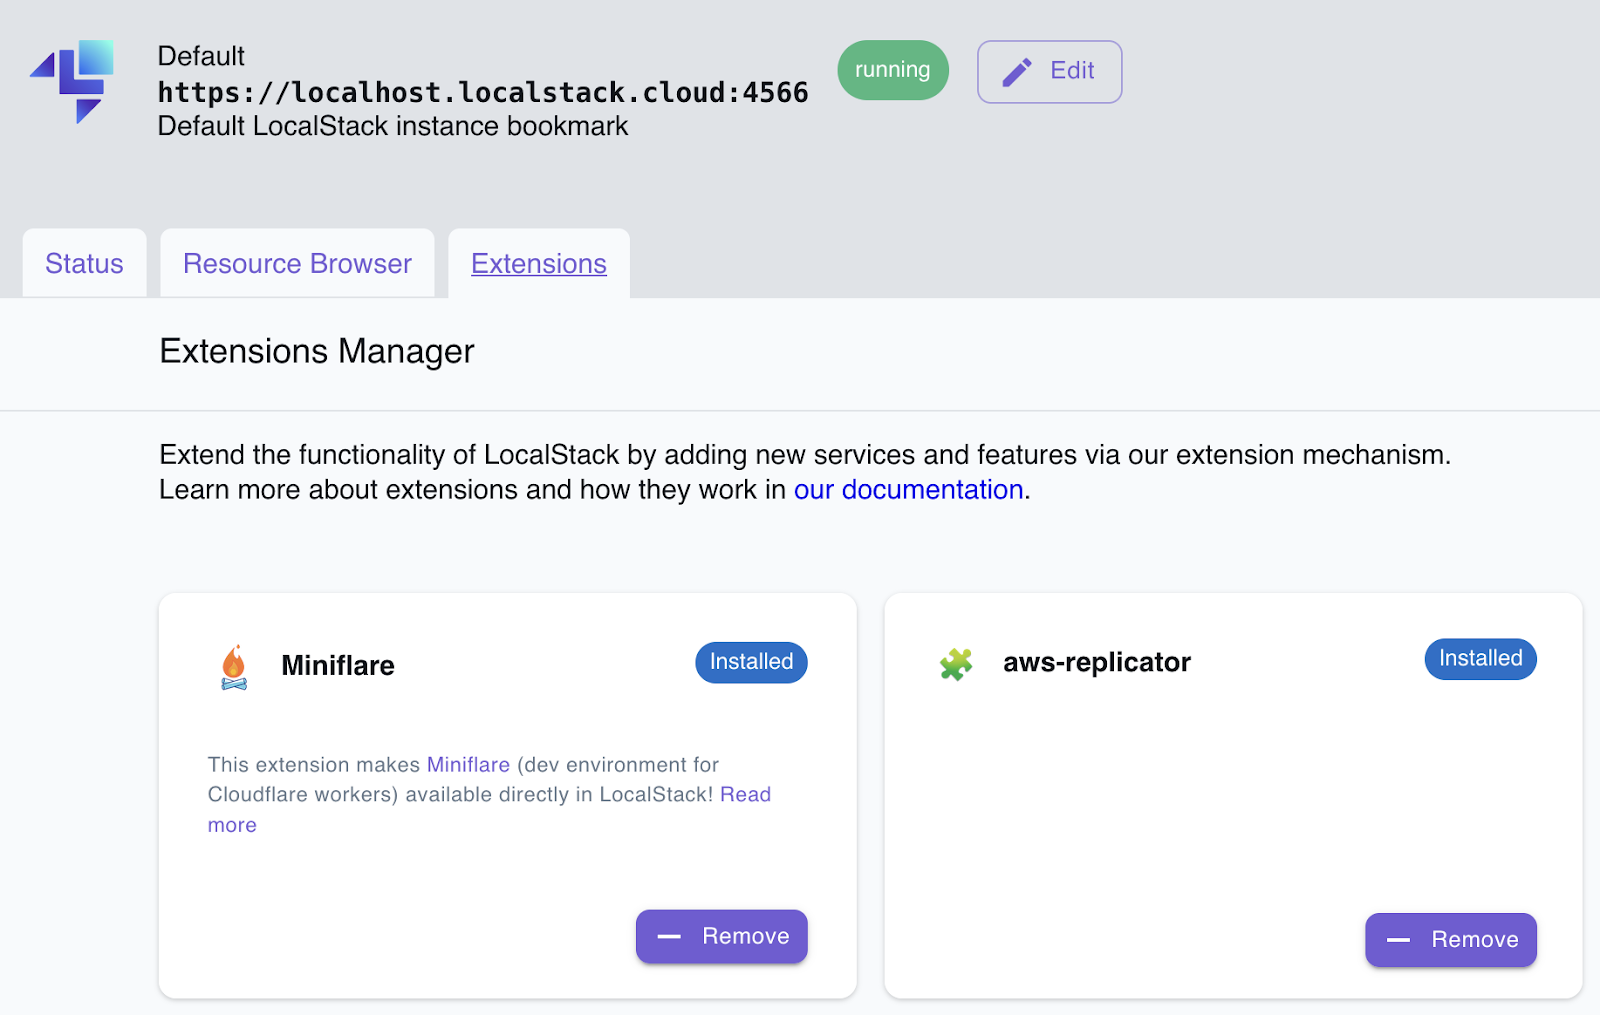
# MailHog
> Learn how to install and use the official MailHog extension.
## Introduction
MailHog is an open source email testing tool for developers.
It provides a simple SMTP server and web interface that allows developers to easily catch and inspect emails sent from their application during development.
In this guide, you will install and use the [official MailHog extension for LocalStack](https://github.com/localstack/localstack-extensions/tree/main/mailhog) and send an email through SES, while inspecting it in MailHog.
## Prerequisites
- [LocalStack Account](https://app.localstack.cloud/)
- [AWS CLI](https://docs.aws.amazon.com/cli/latest/userguide/cli-chap-welcome.html)
## Installation
To get started, start your LocalStack instance with your `LOCALSTACK_AUTH_TOKEN`.
Access our [Extension Manager](https://app.localstack.cloud/inst/default/extensions/manage), and click the **Install** button for the MailHog extension.
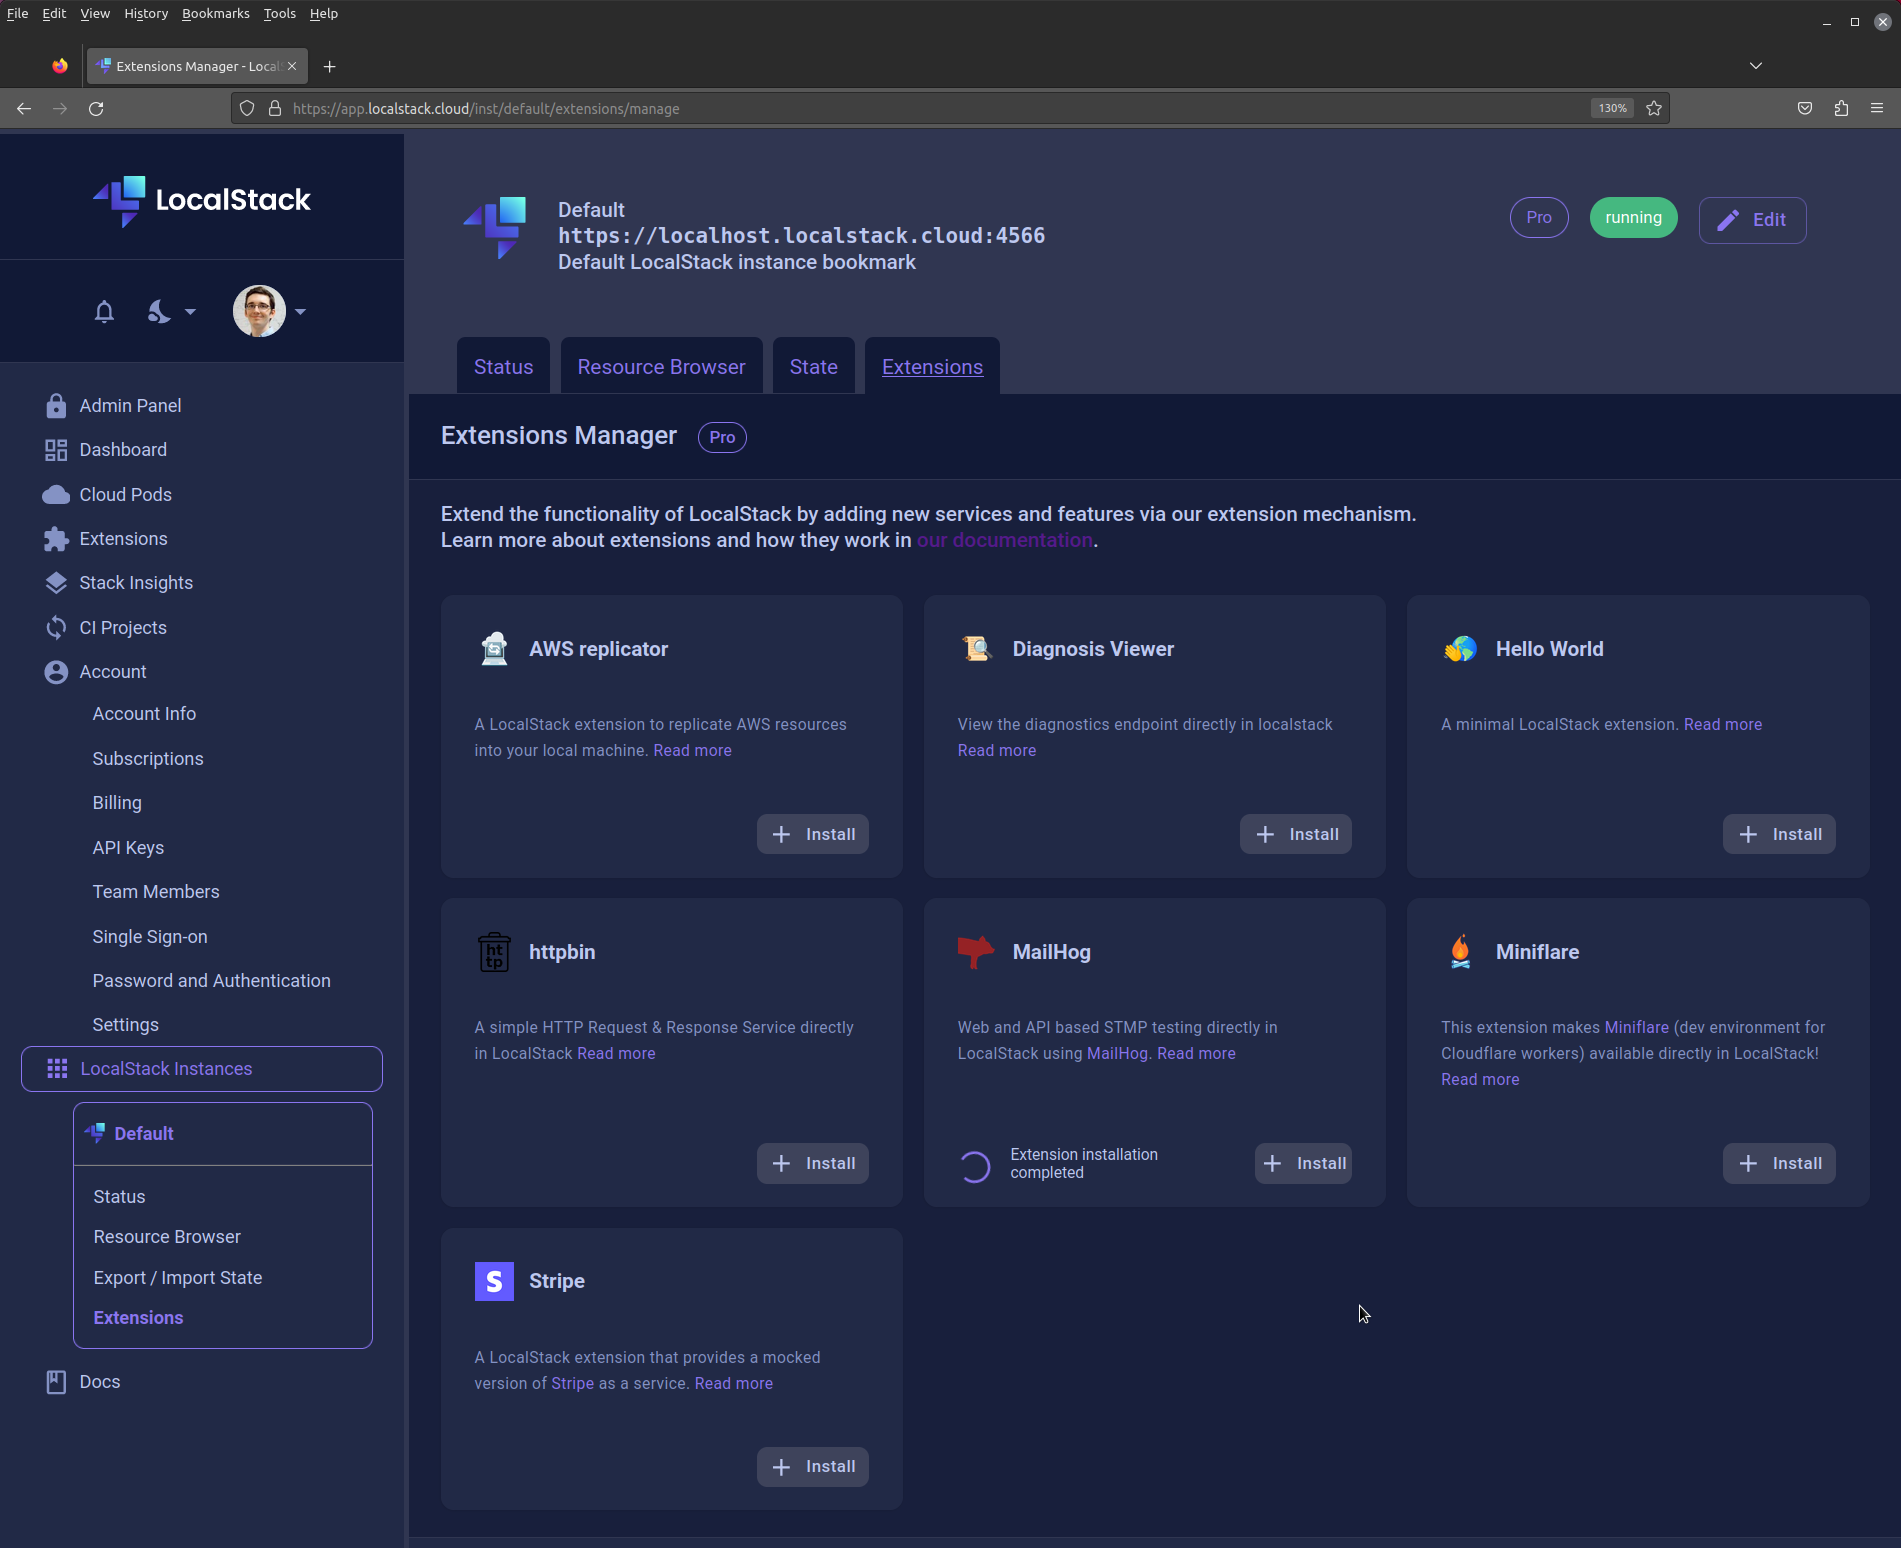
You'll receive a confirmation prompt indicating that LocalStack container will restart, after which the extension will become accessible.
Check your LocalStack logs for MailHog extension output, where you should see relevant logging information:
```bash
2023-10-11T19:10:54.708 INFO --- [ MainThread] l.extensions.platform : loaded 1 extensions
2023-10-11T19:10:54.709 INFO --- [ MainThread] mailhog.extension : starting mailhog server
2023-10-11T19:10:54.709 INFO --- [ MainThread] mailhog.extension : configuring SMTP host to internal mailhog smtp: localhost:25
...
2023-10-11T19:10:55.023 INFO --- [ MainThread] mailhog.extension : serving mailhog extension on host: http://mailhog.localhost.localstack.cloud:4566
2023-10-11T19:10:55.023 INFO --- [ MainThread] mailhog.extension : serving mailhog extension on path: http://localhost:4566/mailhog/
```
## Usage
MailHog enables you to conduct end-to-end testing of applications that utilize SES (Simple Email Service) for sending emails.
To test this, let's use the AWS CLI to send an email.
### Send an Email
You can use the [`VerifyEmailIdentity`](https://docs.aws.amazon.com/cli/latest/reference/ses/verify-email-identity.html) API to verify an email address with SES.
This is a required step before you can send emails from SES.
Run the following command to verify an email address:
```bash
aws --endpoint-url=http://localhost.localstack.cloud:4566 \
ses verify-email-identity --email-address user1@yourdomain.com
```
You can further send an email using the [`SendEmail`](https://docs.aws.amazon.com/cli/latest/reference/ses/send-email.html) API.
Run the following command to send an email:
```bash
aws --endpoint-url=http://localhost.localstack.cloud:4566 \
ses send-email \
--from user1@yourdomain.com \
--message 'Body={Text={Data="Hello from LocalStack to MailHog"}},Subject={Data=Test Email}' \
--destination 'ToAddresses=recipient1@example.com'
```
### Navigate to Extension UI
Navigate in your browser to the [MailHog UI in LocalStack](http://mailhog.localhost.localstack.cloud:4566/).
You should see the email you sent in the MailHog UI.
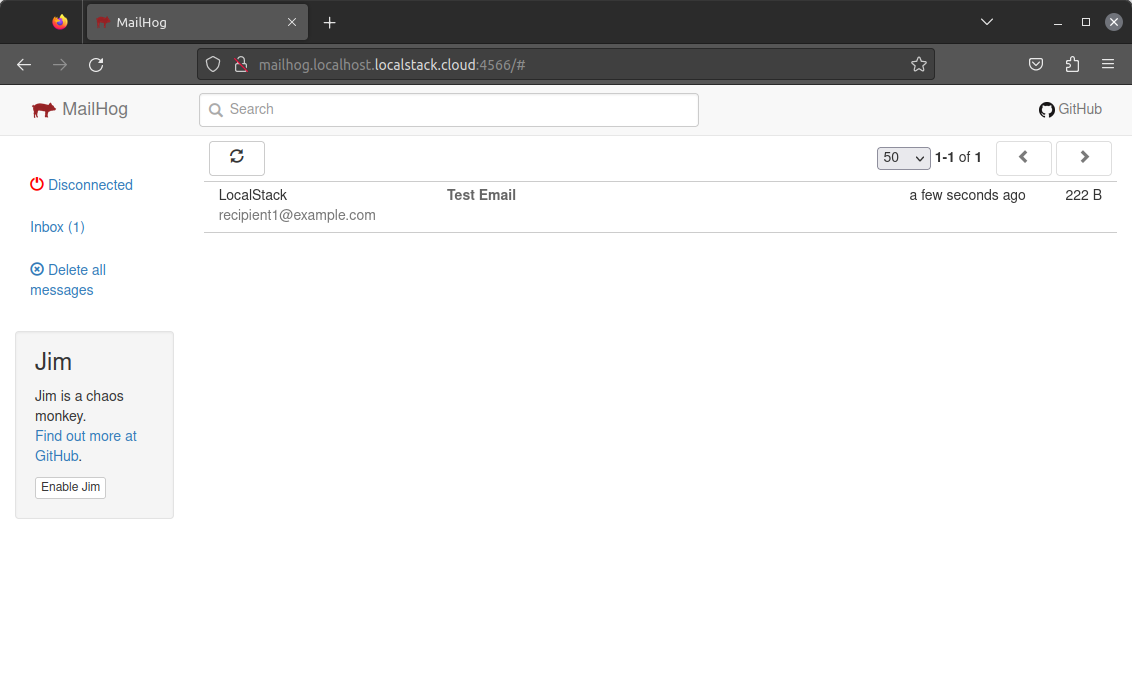
## Next steps
- Explore our collection of official extensions, along with a growing ecosystem of third-party extensions, in our [Extensions Library](https://app.localstack.cloud/extensions/library).
- Learn about the various methods for extension management and automating their installation when using LocalStack in a CI environment.
Get detailed insights from our [Managing Extensions](/aws/customization/integrations/extensions/managing-extensions) guide.
# Managing extensions
> How to manage LocalStack extensions in your LocalStack environment.
import { FileTree } from '@astrojs/starlight/components';
You have different options to install and manage your LocalStack extensions depending on your environment and work style.
Extensions are managed through the LocalStack container, but stored in the [LocalStack volume](/aws/customization/advanced/filesystem) on your host.
The next time you start up LocalStack, your extensions will still be there!
## Using the extensions manager in our App
The easiest way to manage official extensions is through our webapp and our [Extension Manager App](https://app.localstack.cloud/inst/default/extensions/manage).
Simply install and remove extensions from your specific LocalStack instance directly from the App.
If you have multiple instances of LocalStack, each instance has its own set of extensions,
and our App allows you to manage extensions for each instance individually.
:::tip
When you install or uninstall extensions, LocalStack needs to be restarted.
LocalStack will do this automatically for you!
It re-starts the process inside the running container, not the container itself.
However, you may lose LocalStack state if you do not use persistence.
:::
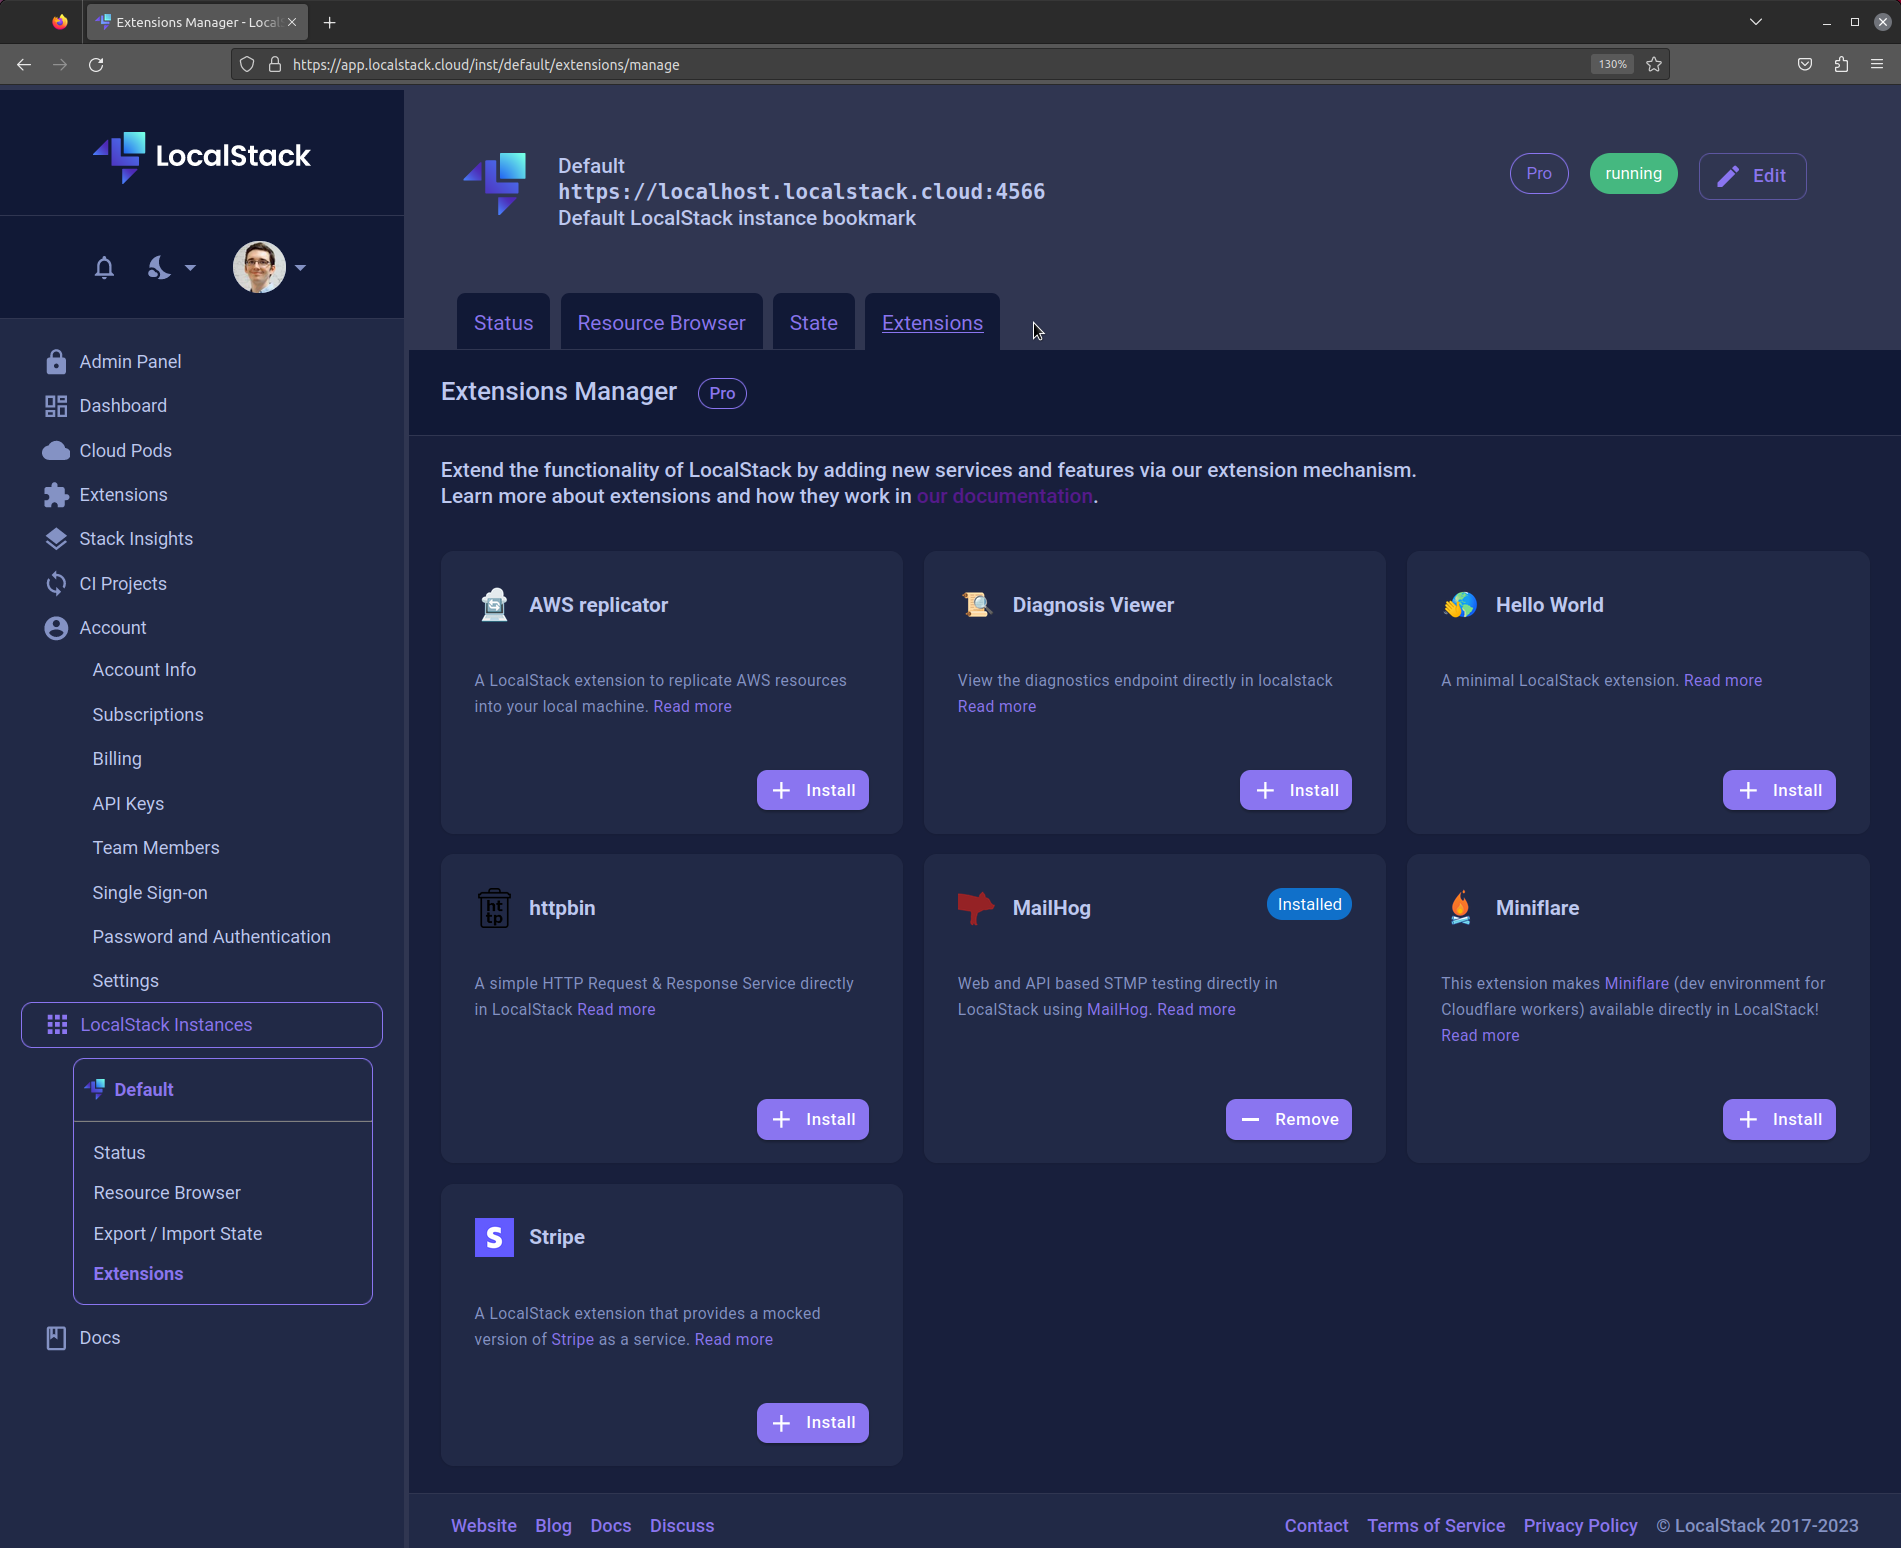
## Using the extensions CLI
:::note
The new CLI experience, `lstk`, does not support LocalStack Extensions. There is no `lstk extensions` command suite.
Continue using the legacy [LocalStack CLI](/aws/developer-tools/running-localstack/localstack-cli/) for the commands in this section.
:::
If you use LocalStack with the CLI, you can also use our `localstack extensions` CLI command suite.
To get a list of all available commands in LocalStack Extensions, run:
```bash
localstack extensions --help
Usage: localstack extensions [OPTIONS] COMMAND [ARGS]...
Manage LocalStack extensions (preview)
Options:
-v, --verbose Print more output
-h, --help Show this message and exit
Commands:
init Initialize the LocalStack extensions environment
install Install a LocalStack extension
list List installed extension
uninstall Remove a LocalStack extension
```
To install an extension, specify the name of the `pip` dependency that contains the extension.
For example, for the official Stripe extension, you can either use the package distributed on PyPI:
```bash
localstack extensions install localstack-extension-httpbin
```
Extensions are just Python pip packages, and the `install` command will accept anything that resolves to a valid pip package.
For example, you can install the latest development version directly from our Git repository using the `git+https` directive.
```bash
localstack extensions install "git+https://github.com/localstack/localstack-extensions/#egg=localstack-extension-httpbin&subdirectory=httpbin"
```
If you have Python distribution as files on your local machine, for instance pip wheels or source distributions, then you can also install those via the `file://` directive
The file will be automatically mounted into the container and installed from there.
```bash
pip install file://./my-extensions/dist/my-extension-0.0.1.dev0.tar.gz
```
### Specify the `LOCALSTACK_VOLUME_DIR`
Extensions should be installed in the `LOCALSTACK_VOLUME_DIR`.
The default directory on your host is currently `~/.cache/localstack`.
If you decide to mount a different directory to `/var/lib/localstack` in your docker-compose file, as shown below, you must specify the `LOCALSTACK_VOLUME_DIR` before installing extensions.
```yaml
volumes:
- '/tmp/volume:/var/lib/localstack' # LOCALSTACK_VOLUME_DIR mount
- '/var/run/docker.sock:/var/run/docker.sock'
```
Here's how you can use `LOCALSTACK_VOLUME_DIR` in your commands:
```bash
export LOCALSTACK_VOLUME_DIR=/tmp/volume
localstack extensions install file:///tmp/my_files/my-extension-1.0.0.tar.gz
```
## Automating extensions installation
When you are working in CI or with docker-compose, you may want to automate extension management.
LocalStack provides two ways to do this:
### Environment variable
The `EXTENSION_AUTO_INSTALL` variable is interpreted by LocalStack at startup,
to ensure that the extensions set in the variable value are installed when the container starts up.
The value is a comma-separated list of extensions directives that can also be specified in `localstack extensions install`.
If you want to use the `file://` directive, the distribution file needs to be mounted into the container.
In a docker-compose file, this would look something like:
```yaml showLineNumbers
services:
localstack:
container_name: 'localstack-main'
image: localstack/localstack-pro
ports:
- '127.0.0.1:4566:4566'
- '127.0.0.1:4510-4559:4510-4559'
environment:
- LOCALSTACK_AUTH_TOKEN=${LOCALSTACK_AUTH_TOKEN:?}
- DEBUG=1
- EXTENSION_AUTO_INSTALL=localstack-extension-mailhog,localstack-extension-httpbin
volumes:
- './volume:/var/lib/localstack'
- '/var/run/docker.sock:/var/run/docker.sock'
```
### Configuration file
LocalStack also supports configuration files to automatically install extensions.
Inside the container, LocalStack will resolve the file `/etc/localstack/conf.d/extensions.txt`, and will install all extensions defined in this list.
Since LocalStack extensions are essentially just Python pip packages, the `extensions.txt` has the same format as a [pip requirements file](https://pip.pypa.io/en/stable/reference/requirements-file-format/).
An example project could look something like this:
- `extensions.txt`
```text
localstack-extension-mailhog
git+https://github.com/localstack/localstack-extensions/#egg=localstack-extension-aws-replicator&subdirectory=aws-replicator
```
- Project layout:
- extension-install - conf.d - extensions.txt - docker-compose.yml
- `docker-compose.yaml`
```yaml showLineNumbers
services:
localstack:
...
volumes:
- "./volume:/var/lib/localstack"
- "conf.d:/etc/localstack/conf.d"
- "/var/run/docker.sock:/var/run/docker.sock"
```
When LocalStack starts up, you should see it tries to install the extensions and all their dependencies.
## Extension Management within LocalStack
Extensions in LocalStack are Python distributions that operate within their dedicated virtual environment, residing in the [LocalStack Volume](/aws/customization/advanced/filesystem).
This involves the creation of a"variable packages folder `/var/lib/localstack/lib`," where the volume management system establishes both an `extensions` folder and a virtual environment named `python_venv`.
Within this environment, all extensions and their dependencies are managed.
LocalStack integrates its virtual environment, ensuring the resolution of all transitive dependencies associated with extensions.
Here's an example what the default LocalStack volume looks like after installing the MailHog extension:
```bash
pwd
~/.cache/localstack/volume
tree -L 4
```
- cache
- ...
- lib
- extensions
- python_venv
- bin
- include
- lib
- lib64 -> lib
- pyvenv.cfg
- mailhog
- v1.0.1
- MailHog_linux_amd64
- logs
- tmp
- state
## Troubleshooting
### Fixing `"ModuleNotFoundError: No module named 'flask'"`
After a recent update in our packaging, you may see this error in your logs when starting LocalStack with an Extension:
```bash
ModuleNotFoundError: No module named 'flask'
```
To resolve this, follow these steps:
- Clear the directory mounted to the LocalStack container at `/var/lib/localstack`.
- Pull the `latest` image of LocalStack (`localstack/localstack-pro:latest`).
- Restart the LocalStack container.
- Reinstall any extensions you were using, unless you have `EXTENSION_AUTO_INSTALL` enabled.
# Official Extensions
> Browse the official and community LocalStack Extensions available on the marketplace.
## Introduction
The tables below list the extensions currently available on the [LocalStack marketplace](https://app.localstack.cloud/extensions/library), and are kept up to date automatically.
You can install any of the extensions below with the LocalStack CLI:
```bash
localstack extensions install
```
See [Managing extensions](/aws/customization/integrations/extensions/managing-extensions/) for more details on installing, listing, and removing extensions.
:::note
This page is auto-generated from the LocalStack marketplace API.
:::
## Official Extensions
Extensions built and maintained by the LocalStack team.
| Extension | Description | Author | Install |
|-----------|-------------|--------|---------|
| AWS Proxy | Proxy requests from your LocalStack instance to real AWS resources | LocalStack | `localstack extensions install localstack-extension-aws-proxy` |
| Diagnosis Viewer | View the diagnostics endpoint directly in localstack | LocalStack | `localstack extensions install localstack-extension-diagnosis-viewer` |
| Hello World | A minimal LocalStack extension | LocalStack | `localstack extensions install localstack-extension-hello-world` |
| httpbin | A simple HTTP Request & Response Service directly in LocalStack | LocalStack | `localstack extensions install localstack-extension-httpbin` |
| MailHog | Web and API based SMTP testing directly in LocalStack using MailHog | LocalStack | `localstack extensions install localstack-extension-mailhog` |
| Miniflare | This extension makes Miniflare (dev environment for Cloudflare workers) available directly in LocalStack | LocalStack | `localstack extensions install localstack-extension-miniflare` |
| Resource Graph | Altimeter based LocalStack extension that allows you to create and import into neptune a graph of the resources in your LocalStack instance | LocalStack | `localstack extensions install localstack-extension-resource-graph` |
| Stripe | A LocalStack extension that provides a mocked version of Stripe as a service | LocalStack | `localstack extensions install localstack-extension-stripe` |
| Terraform Init Hooks | Use Terraform files as initialization hooks to pre-seed your LocalStack instance automatically | Thomas Rausch | `localstack extensions install localstack-extension-terraform-init` |
## Community Extensions
Extensions contributed and maintained by the LocalStack community and partners.
| Extension | Description | Author | Install |
|-----------|-------------|--------|---------|
| Authress | Add authentication, permissions, and access control to LocalStack | Authress | `localstack extensions install localstack-extension-authress` |
| Claude (Anthropic API) | LocalStack Extension for testing Anthropic Claude API integrations locally | LocalStack Team | `localstack extensions install localstack-claude` |
| Keycloak | LocalStack Extension for developing Keycloak-secured apps locally | LocalStack Team | `localstack extensions install localstack-keycloak` |
| ParadeDB | LocalStack Extension for running ParadeDB search databases locally | LocalStack & ParadeDB | `localstack extensions install localstack-paradedb` |
| TypeDB | LocalStack Extension that facilitates developing TypeDB-based applications locally. | LocalStack & TypeDB | `localstack extensions install localstack-extension-typedb` |
| WireMock | LocalStack Extension that facilitates running WireMock mock APIs locally. | LocalStack & WireMock | `localstack extensions install localstack-wiremock` |
| Xero | LocalStack Extension for developing against the Xero Finance API locally | LocalStack Team | `localstack extensions install localstack-xero` |
# Overview
> LocalStack offers various developer endpoints and SDKs provides a programmatic and easy way to interact with them.
LocalStack SDKs provide a programmatic interface for interacting with your local cloud environment. These SDKs expose developer endpoints that make it easier to automate workflows, integrate LocalStack into your tools, and build advanced use cases around state, services, or CI automation.
This section introduces the available SDKs and explains how to use them to enhance your local cloud development experience.
# Java
> Use the LocalStack SDK for Java.
## Introduction
You can use the LocalStack SDK for Java to develop Java applications that interact with the LocalStack platform and internal developer endpoints.
The SDK extends the REST API, offering an object-oriented interface for easier use.
The LocalStack SDK for Java currently supports these features:
- Save, list, load, and delete Cloud Pods.
- Manage fault configurations for the Chaos API.
:::note
This SDK is still in a preview phase, and will be subject to fast and breaking changes.
:::
## Installation
The best way to use the LocalStack SDK for Java in your project is to consume it from Maven Central.
You can use Maven to import the entire SDK into your project.
```xml showLineNumbers
cloud.localstack
localstack-sdk
0.0.1
```
Similarly, you can copy the following line in the dependencies block of your `build.gradle(.kts)` file, if you are using Gradle as a build tool.
```kotlin
implementation("cloud.localstack:localstack-sdk:0.0.1")
```
## Quick Start
Currently, the LocalStack SDK for Java only supports Chaos and Cloud Pods APIs.
Both these features have a client that can be instantiated from the `cloud.localstack.sdk.chaos` and
`cloud.localstack.sdk.pods` package, respectively.
The clients accept requests built by using the [builder pattern](https://en.wikipedia.org/wiki/Builder_pattern).
For instance, let us imagine the case in which you want to add a fault rule for S3 on the `us-east-1` region.
You first need to use the `FaultRuleRequest` class to build a fault rule request.
Then, you need to pass such a request object to the `addFaultRules` method of a created `ChaosClient`.
```java showLineNumbers
import cloud.localstack.sdk.chaos.ChaosClient;
import cloud.localstack.sdk.chaos.requests.FaultRuleRequest;
var client = new ChaosClient();
var faultRuleRequest = new FaultRuleRequest.Builder().faultRule("s3", "us-east-1").build();
var addedRules = client.addFaultRules(request);
```
As a second example, let us look at the necessary code to save and load a Cloud Pod.
Similarly to the `ChaosClient`, the `PodsClient` exposes two functions, `savePod` and `loadPod`, which expect a `SavePodRequest` and a `LoadPodRequest`, respectively.
The resulting code is the following:
```java showLineNumbers
import cloud.localstack.sdk.pods.PodsClient;
import cloud.localstack.sdk.pods.requests.LoadPodRequest;
import cloud.localstack.sdk.pods.requests.SavePodRequest;
var podsClient = new PodsClient();
// save a cloud pod
var saveRequest = new SavePodRequest.Builder().podName(POD_NAME).build();
podsClient.savePod(saveRequest);
//load a cloud pod
var loadRequest = new LoadPodRequest.Builder().podName(POD_NAME).build();
podsClient.loadPod(loadRequest);
```
# Python
> Use the LocalStack SDK for Python.
## Introduction
You can use the LocalStack SDK for Python to develop Python applications that interact with the LocalStack platform and internal developer endpoints.
The SDK extends the REST API, offering an object-oriented interface for easier use.
The LocalStack SDK for Python supports these features:
- Save, list, load, and delete Cloud Pods.
- Manage fault configurations for the Chaos API.
- Automatically reset service states.
- List SQS queue messages without causing side effects.
- Retrieve and delete sent SES messages.
:::note
This SDK is still in a preview phase, and will be subject to fast and breaking changes.
:::
## Installation
Install the latest `localstack-sdk-python` release via pip:
```bash
pip install --upgrade localstack-sdk-python
```
## Basic Concepts
LocalStack SDK for Python organizes functionality into specific modules like `aws`, `state`, `pods`, and `chaos`.
For example, the `aws` module allows developers to initialize clients for various AWS services.
Using the SDK in Python is straightforward: developers can import the relevant modules and initialize specific clients (e.g., `AWSClient`, `StateClient`, `PodsClient`, `ChaosClient`) to perform actions on local AWS services.
### AWS endpoints
#### SQS
The following code snippet shows how to set up an SQS client, create a queue, send messages, and retrieve them to test local SQS interactions using LocalStack.
```python showLineNumbers
import json
import boto3
import localstack.sdk.aws
# Initialize LocalStack AWS client
client = localstack.sdk.aws.AWSClient()
# Set up SQS client using the LocalStack AWS client configuration
sqs_client = boto3.client(
"sqs",
endpoint_url=client.configuration.host,
region_name="us-east-1",
aws_access_key_id="test",
aws_secret_access_key="test",
)
# Create an SQS queue
queue_name = "test-queue"
sqs_client.create_queue(QueueName=queue_name)
queue_url = sqs_client.get_queue_url(QueueName=queue_name)["QueueUrl"]
# Send messages to the queue
for i in range(5):
sqs_client.send_message(
QueueUrl=queue_url,
MessageBody=json.dumps(
{"event": f"event-{i}", "message": f"message-{i}"}
),
)
# Retrieve messages from the queue
response = sqs_client.receive_message(
QueueUrl=queue_url,
MaxNumberOfMessages=5
)
# Print each message body
messages = response.get("Messages", [])
for msg in messages:
print("Message Body:", msg.get("Body"))
```
```bash showLineNumbers
Message Body: {"event": "event-0", "message": "message-0"}
Message Body: {"event": "event-1", "message": "message-1"}
Message Body: {"event": "event-2", "message": "message-2"}
Message Body: {"event": "event-3", "message": "message-3"}
Message Body: {"event": "event-4", "message": "message-4"}
```
#### SES
The following code snippet verifies an email address, sends a raw email, retrieves the message ID, and discards all SES messages afterward.
```python showLineNumbers
import boto3
import localstack.sdk.aws
client = localstack.sdk.aws.AWSClient()
# Initialize SES client
ses_client = boto3.client(
"ses",
endpoint_url=client.configuration.host,
region_name="us-east-1",
aws_access_key_id="test",
aws_secret_access_key="test",
)
# Verify email address
email = "user@example.com"
ses_client.verify_email_address(EmailAddress=email)
# Send a raw email
raw_message_data = f"From: {email}\nTo: recipient@example.com\nSubject: test\n\nThis is the message body.\n\n"
ses_client.send_raw_email(RawMessage={"Data": raw_message_data})
# Get and print SES message IDs
messages = client.get_ses_messages()
for msg in messages:
print("Message ID:", msg.id)
# Discard all SES messages
client.discard_ses_messages()
```
```bash
Message ID: khqzljuixhpnpejl-mnlhgajk-ebch-zfxq-orit-qgexxjlrkipo-ywgvwr
```
### State Management
LocalStack provides various features for managing local state, including Cloud Pods, which allow for saving, loading, and deleting cloud states.
### Cloud Pods
Cloud Pods is a feature that enables storing and managing snapshots of the current state.
This code snippet shows listing available pods, saving a new pod, loading it, and then deleting it.
You need to set your `LOCALSTACK_AUTH_TOKEN` in your terminal session before running the snippet.
```python showLineNumbers
from localstack.sdk.pods import PodsClient
POD_NAME = "ls-cloud-pod"
client = PodsClient()
# List all pods
pods = client.list_pods()
print("Pods:", pods)
# Save Cloud Pod
client.save_pod(pod_name=POD_NAME)
print(f"Pod '{POD_NAME}' saved.")
# Load Cloud Pod
client.load_pod(pod_name=POD_NAME)
print(f"Pod '{POD_NAME}' loaded.")
# Delete Cloud Pod
client.delete_pod(pod_name=POD_NAME)
print(f"Pod '{POD_NAME}' deleted.")
```
```bash
Pods: cloudpods=[PodListCloudpodsInner(max_version=1, pod_name='check-pod', last_change=None)]
Pod 'ls-cloud-pod' saved.
Pod 'ls-cloud-pod' loaded.
Pod 'ls-cloud-pod' deleted.
```
### State Reset
The following example demonstrates how to reset the current cloud state using LocalStack’s `StateClient`.
```python showLineNumbers
import boto3
from localstack.sdk.state import StateClient
# Initialize StateClient and SQS client
client = StateClient()
sqs_client = boto3.client(
"sqs",
endpoint_url=client.configuration.host,
region_name="us-east-1",
aws_access_key_id="test",
aws_secret_access_key="test",
)
# Create SQS queue
sqs_client.create_queue(QueueName="test-queue")
url = sqs_client.get_queue_url(QueueName="test-queue")["QueueUrl"]
print("Queue URL before reset:", url)
# Reset state
client.reset_state()
print("State reset.")
# Try to retrieve the queue URL after state reset
try:
sqs_client.get_queue_url(QueueName="test-queue")
except Exception as exc:
error_code = exc.response["Error"]["Code"]
print("Error after state reset:", error_code)
```
```bash
Queue URL before reset: http://sqs.us-east-1.localhost.localstack.cloud:4566/000000000000/test-queue
State reset.
Error after state reset: AWS.SimpleQueueService.NonExistentQueue
```
### Chaos API
LocalStack’s Chaos API enables fault injection to simulate issues in AWS services.
This example shows how to add a fault rule for the S3 service, retrieve and display the rule, and finally delete it to return to normal operations.
```python showLineNumbers
import localstack.sdk.chaos
from localstack.sdk.models import FaultRule
# Initialize ChaosClient
client = localstack.sdk.chaos.ChaosClient()
# Add a fault rule for S3
rule = FaultRule(region="us-east-1", service="s3")
rules = client.add_fault_rules(fault_rules=[rule])
print("Added S3 rule:", [(r.region, r.service) for r in rules])
# Retrieve and display current fault rules
rules = client.get_fault_rules()
print("Current rules:", [(r.region, r.service) for r in rules])
# Delete the S3 fault rule
rules = client.delete_fault_rules(fault_rules=[rule])
print("Rules after deleting S3 rule:", [(r.region, r.service) for r in rules])
```
```bash
Added S3 rule: [('us-east-1', 's3')]
Current rules: [('us-east-1', 's3')]
Rules after deleting S3 rule: []
```
# Testing Utils
> Tools to simplify application testing on LocalStack.
## Introduction
LocalStack provides a set of tools to simplify application testing on LocalStack.
These tools are available for Python and can be used to integrate with various unit testing frameworks and simplify the setup of AWS clients with LocalStack.
## Python
This [Python Testing Utils](https://github.com/localstack/localstack-python-utils) streamlines the integration of Localstack with your unit tests.
### Installation
```bash
pip install localstack-utils
```
### Usage
```python showLineNumbers
import time
import boto3
import unittest
from localstack_utils.localstack import startup_localstack, stop_localstack
class TestKinesis(unittest.TestCase):
def setUp(self):
startup_localstack()
def tearDown(self):
stop_localstack()
return super().tearDown()
def test_create_stream(self):
kinesis = boto3.client(
service_name="kinesis",
aws_access_key_id="test",
aws_secret_access_key="test",
endpoint_url="http://localhost.localstack.cloud:4566",
)
kinesis.create_stream(StreamName="test", ShardCount=1)
time.sleep(1)
response = kinesis.list_streams()
self.assertGreater(len(response.get("StreamNames", [])), 0)
```
# Overview
> Use LocalStack with testing tools & utilities to test your application infrastructure locally.
LocalStack integrates with popular testing frameworks and platforms to help you automate and scale cloud application testing. LocalStack makes it easier to run containers with isolated test environments or execute parallel tests in CI pipelines.
This section covers how to use LocalStack with:
- **Testcontainers**: spin up reproducible, containerized test environments
- **LambdaTest HyperExecute**: fast, scalable execution of cloud-native test suites
# LambdaTest HyperExecute
> Executing LocalStack tests on LambdaTest's HyperExecute.
[HyperExecute](https://www.lambdatest.com/hyperexecute) is a test orchestration platform designed to optimize the execution of automated tests in the cloud.
It supports a wide range of testing frameworks and integrates seamlessly with CI/CD pipelines, such as GitHub Actions.
You can use HyperExecute to run your LocalStack tests on your local machine or in the CI pipeline using a single configuration file.
:::note
LambdaTest provides specialized runners for LocalStack.
The default runners don't provide a Docker socket, which is required for LocalStack to work properly.
If you want to use LocalStack with HyperExecute, you need to get in touch with the LambdaTest team to get access to the specialized runners.
:::
## Getting started
To get started with HyperExecute, you need to fulfill the following prerequisites:
- [HyperExecute CLI](https://www.lambdatest.com/support/docs/hyperexecute-cli-run-tests-on-hyperexecute-grid/)
- [GitHub Personal Access Token](https://docs.github.com/en/authentication/keeping-your-account-and-data-secure/managing-your-personal-access-tokens)
- [LambdaTest Account](https://hyperexecute.lambdatest.com/) and Access Key for HyperExecute (`he`)
### Configuring the HyperExecute environment
Create a new file named `he.yml` in the root directory of your project and add the following content:
```yaml showshowLineNumbers
version: "0.1"
runson: linux
autosplit: true
parallelism: 2
concurrency: 2
scenarioCommandStatusOnly: true
runtime:
- language: python
version: '3.10'
- language: node
version: '18'
pre:
- npm install -g @localstack/lstk
- pip install awscli
- LOCALSTACK_AUTH_TOKEN=${{ .secrets.LOCALSTACK_AUTH_TOKEN }} lstk start --non-interactive --timeout 60s
- lstk aws s3 mb s3://test-bucket
- lstk aws sqs create-queue --queue-name test-queue
- lstk aws sns create-topic --name test-topic
```
The above minimal configuration file starts LocalStack and creates an S3 bucket, SQS queue, and SNS topic.
:::note
`lstk` requires a LocalStack Auth Token, and CI environments need a [CI Auth Token](/aws/getting-started/auth-token/) rather than a personal Developer Token.
Add it to your HyperExecute Portal as a secret named `LOCALSTACK_AUTH_TOKEN` so `${{ .secrets.LOCALSTACK_AUTH_TOKEN }}` resolves at runtime.
:::
### Enabling test execution on HyperExecute
To enable test execution on HyperExecute, you need to add the following content to your GitHub Actions workflow file:
```yaml showshowLineNumbers
version: "0.1"
runson: linux
...
pre:
...
- bin/deploy.sh
testDiscovery:
type: raw
mode: dynamic
command: pytest --co -q tests | sed '$d'
testRunnerCommand: pytest $test
sourcePayload:
platform: git
link: https://github.com/localstack-samples/sample-serverless-image-resizer-s3-lambda
ref: main
accessToken: ${{ .secrets.PAT }}
```
Before running the tests, add your Personal Access Token (PAT) to your HyperExecute Portal as a secret.
In this minimal configuration, you will set up our [`Serverless image resizer`](https://github.com/localstack-samples/sample-serverless-image-resizer-s3-lambda) application and run the tests using `pytest`.
The `bin/deploy.sh` script is responsible for deploying the application to LocalStack.
HyperExecute will automatically detect the tests and run them in parallel.
### Running the tests locally
You can run the tests locally using the following command:
```bash
hyperexecute --user '' --key '' --config he.yaml
```
Swap `` and `` with your HyperExecute username and access key.
You can find your access key in the HyperExecute Portal.
### Running the tests in the CI pipeline
In this example, we will use GitHub Actions to run the tests in the CI pipeline.
To do so, you need to add the following content to your GitHub Actions workflow file in `.github/workflows/main.yml`:
```yaml showshowLineNumbers
name: Running tests on HyperExecute
on:
push:
branches:
- main
pull_request:
branches:
- main
jobs:
HE:
runs-on: ubuntu-latest
steps:
- uses: actions/checkout@v4
- run: |
wget https://downloads.lambdatest.com/hyperexecute/linux/hyperexecute
chmod +x hyperexecute
./hyperexecute \
--user {{ secrets.username }} \
--key ${{ secrets.HE }} \
--config he.yaml
```
Add your username and access key to your GitHub repository secrets.
You can find your access key in the HyperExecute Portal.
You need to add your LocalStack Auth Token to your GitHub repository secrets.
# Testcontainers
> Use Testcontainers with LocalStack.
import { Tabs, TabItem } from '@astrojs/starlight/components';
## Overview
[Testcontainers](https://www.testcontainers.com/) is a library that helps you to run your
tests against real dependencies.
In this guide, you will learn how to use [Testcontainers](https://www.testcontainers.com/)
with LocalStack.
## Covered Topics
- [Overview](#overview)
- [Covered Topics](#covered-topics)
- [Installing the Localstack module](#installing-the-localstack-module)
- [Obtaining a LocalStack container](#obtaining-a-localstack-container)
- [Configuring the AWS client](#configuring-the-aws-client)
- [Special Setup for using RDS](#special-setup-for-using-rds)
- [Useful Links](#useful-links)
### Installing the Localstack module
```sh
dotnet add package Testcontainers.LocalStack --version 3.0.0
```
```go
go get github.com/testcontainers/testcontainers-go/modules/localstack
```
```java showshowLineNumbers
org.testcontainers
localstack
1.18.0
test
```
```java
testImplementation 'org.testcontainers:localstack:1.18.0'
```
```javascript
npm i @testcontainers/localstack
```
### Obtaining a LocalStack container
```csharp showshowLineNumbers
var localStackContainer = new LocalStackBuilder().Build();
await localStackContainer.StartAsync()
.ConfigureAwait(false);
```
```go
container, err := localstack.StartContainer(ctx, localstack.NoopOverrideContainerRequest)
```
```java
LocalStackContainer localstack = new LocalStackContainer(DockerImageName.parse("localstack/localstack:3"));
```
```javascript
const localstack = new LocalstackContainer("localstack/localstack:3").start()
```
## Configuring the AWS client
```csharp showshowLineNumbers
var config = new AmazonS3Config();
config.ServiceURL = localStackContainer.GetConnectionString();
using var client = new AmazonS3Client(config);
```
```go showshowLineNumbers
func s3Client(ctx context.Context, l *localstack.LocalStackContainer) (*s3.Client, error) {
// the Testcontainers Docker provider is used to get the host of the Docker daemon
provider, err := testcontainers.NewDockerProvider()
if err != nil {
return nil, err
}
host, err := provider.DaemonHost(ctx)
if err != nil {
return nil, err
}
mappedPort, err := l.MappedPort(ctx, nat.Port("4566/tcp"))
if err != nil {
return nil, err
}
customResolver := aws.EndpointResolverWithOptionsFunc(
func(service, region string, opts ...interface{}) (aws.Endpoint, error) {
return aws.Endpoint{
PartitionID: "aws",
URL: fmt.Sprintf("http://%s:%d", host, mappedPort.Int()),
SigningRegion: region,
}, nil
})
awsCfg, err := config.LoadDefaultConfig(context.TODO(),
config.WithRegion(region),
config.WithEndpointResolverWithOptions(customResolver),
config.WithCredentialsProvider(credentials.NewStaticCredentialsProvider(accesskey, secretkey, token)),
)
if err != nil {
return nil, err
}
client := s3.NewFromConfig(awsCfg, func(o *s3.Options) {
o.UsePathStyle = true
})
return client, nil
}
```
```java showshowLineNumbers
S3Client s3 = S3Client.builder()
.endpointOverride(localstack.getEndpoint())
.credentialsProvider(StaticCredentialsProvider.create(AwsBasicCredentials.create(localstack.getAccessKey(), localstack.getSecretKey())))
.region(Region.of(localstack.getRegion()))
.build();
```
```typescript showshowLineNumbers
const awsConfig = {
endpoint: localstack.getConnectionUri(),
credentials: {
accessKeyId: "test",
secretAccessKey: "test",
},
region: "eu-central-1",
};
const s3 = S3Client(awsConfig);
```
## Special Setup for using RDS
Some services like RDS require additional setup so that the correct port is exposed and accessible for the tests.
The reserved ports on LocalStack are between `4510-4559`, depending on your use case you might need to expose several ports using `witExposedPorts`.
Check the [pro-sample on how to use RDS with Testcontainers for Java](https://github.com/localstack/localstack-pro-samples/tree/master/testcontainers-java-sample).
The Testcontainer can be created like this:
```java
/**
* Start LocalStackContainer with exposed Ports. Those ports are used by services like RDS, where several databases can be started, running on different ports.
* In this sample we only map 5 ports, however, depending on your use case you may need to map ports up to 4559
*/
@Rule
public LocalStackContainer localstack = new LocalStackContainer(DockerImageName("localstack/localstack:2.0.0"))
.withExposedPorts(4510, 4511, 4512, 4513, 4514) // the port can have any value between 4510-4559, but LS starts from 4510
.withEnv("LOCALSTACK_AUTH_TOKEN", auth_token); // add your Auth Token here
```
To find the exposed port which you can use to connect to the instance:
```java
// identify the port localstack provides for the instance
int localstack_port = response.dbInstance().endpoint().port();
// get the port it was mapped to, e.g. the one we can reach from host/the test
int mapped_port = localstack.getMappedPort(localstack_port);
```
## Useful Links
* https://www.testcontainers.com (Java, .NET, Go, Python, Ruby, Node.js)
* https://www.testcontainers.org (Java)
* https://www.testcontainers.org/modules/localstack (Java)
* https://golang.testcontainers.org (Go)
* https://golang.testcontainers.org/modules/localstack (Go)
* https://node.testcontainers.org (NodeJs)
* https://node.testcontainers.org/modules/localstack (NodeJs)
# Overview
> Run LocalStack on Kubernetes, a common approach for enterprises to centrally manage their containers.
LocalStack is a local AWS cloud environment that emulates core AWS services for development and testing.
When LocalStack is deployed on Kubernetes and configured to use the Kubernetes-native executor (by setting `CONTAINER_RUNTIME=kubernetes`), services that would normally spawn Docker containers (ie., Lambda, ECS, or RDS) instead create Kubernetes pods within the cluster. This enables dynamic scaling, isolation, and native Kubernetes orchestration.
Supported cases:
- Local Development Environments: Provide isolated, consistent environments for individual developers or small teams.
- Hosted Development Environments: Provide scalable and isolated development environments for teams.
- CI/CD Pipeline Testing: Run end-to-end integration tests in a reproducible, cloud-like environment during CI/CD workflows.
## Requirements:
- K8s Cluster (such as k3d, minikube, EKS)
- [kubectl](https://kubernetes.io/docs/reference/kubectl/)
- (Optional) [Helm](https://helm.sh/)
- (Optional) LS helm chart
- (Optional) LS operator
## Deployment methods
LocalStack can be deployed into a Kubernetes cluster using multiple methods:
* using the LocalStack Operator
* using the LocalStack helm chart
* by manually creating Kubernetes manifests
The table below compares these methods.
| Deployment approach | Pros | Cons |
|---------------------|------|------|
| **Operator** | · Declarative, self-managed control plane
· Built-in validation, defaulting, and reconciliation logic | · Requires in-cluster component (controller) |
| **Helm chart** | · Simplifies deployment using templates and `values.yaml`
· Supports versioning, upgrades, and rollbacks
· Supports LocalStack for AWS under all Licences | · Customization is limited to chart values and overrides |
| **DIY (YAML manifests)** | · Full control over Kubernetes configuration and resources | · Time-consuming to set up and maintain
· Manual updates and lifecycle management |
## Limitations
| Service | Supported | Explanation |
| ------- | --------- | ----------- |
| `Sagemaker` | No | Requires spawning Docker containers at runtime, which is unavailable when LocalStack runs inside a Kubernetes pod. |
| `Bedrock` | No | Requires spawning Docker containers at runtime, which is unavailable when LocalStack runs inside a Kubernetes pod. |
| `EKS` | No | Uses k3d, which requires Docker to create clusters. A Docker-free local mode is available but unsupported. |
| `CodeBuild` | No | Requires spawning Docker containers at runtime, which is unavailable when LocalStack runs inside a Kubernetes pod. |
| `SSM` | Partial | Most SSM functionality is supported. Session Manager (`ssm:StartSession`) for exec-ing into EC2 instances is not supported. |
| `ECS` | Partial | Core task execution is supported. FireLens log routing, volume mounts, port exposure from tasks, and private registry credentials via `RepositoryCredentials` are not supported. |
| `EC2` | Partial | Core EC2 functionality is supported. User data scripts may not behave identically to AWS — full parity is not guaranteed. |
| `RDS` | Partial | Most database engines are supported. MySQL 5.7 is not supported. Persistence across pod restarts is not supported, except for PostgreSQL and MariaDB. |
## Help & Support
LocalStack Enterprise (or additional purchase of the Kubernetes pack add-on) is the only version that provides:
- Official support and integration for Kubernetes environments.
- Dynamic pod creation by services like Lambda, ECS, RDS, etc.
# Concepts & Architecture
> Concepts & Architecture
This conceptual guide explains how LocalStack runs inside a Kubernetes cluster, how workloads are executed, and how networking and DNS behave in a Kubernetes-based deployment.
## How the LocalStack pod works
The LocalStack pod runs the LocalStack runtime and acts as the central coordinator for all emulated AWS services within the cluster.
Its primary responsibilities include:
* Exposing the LocalStack edge endpoint and AWS service API ports
* Receiving and routing incoming AWS API requests
* Orchestrating services that require additional compute (for example Lambda, Glue, ECS, and EC2)
* Managing the lifecycle of compute workloads spawned on behalf of AWS services
From a Kubernetes perspective, the LocalStack pod is a standard pod that fully participates in cluster networking. It is typically exposed through a Kubernetes `Service`, and all AWS API interactions —whether from inside or outside the cluster— are routed through this pod.
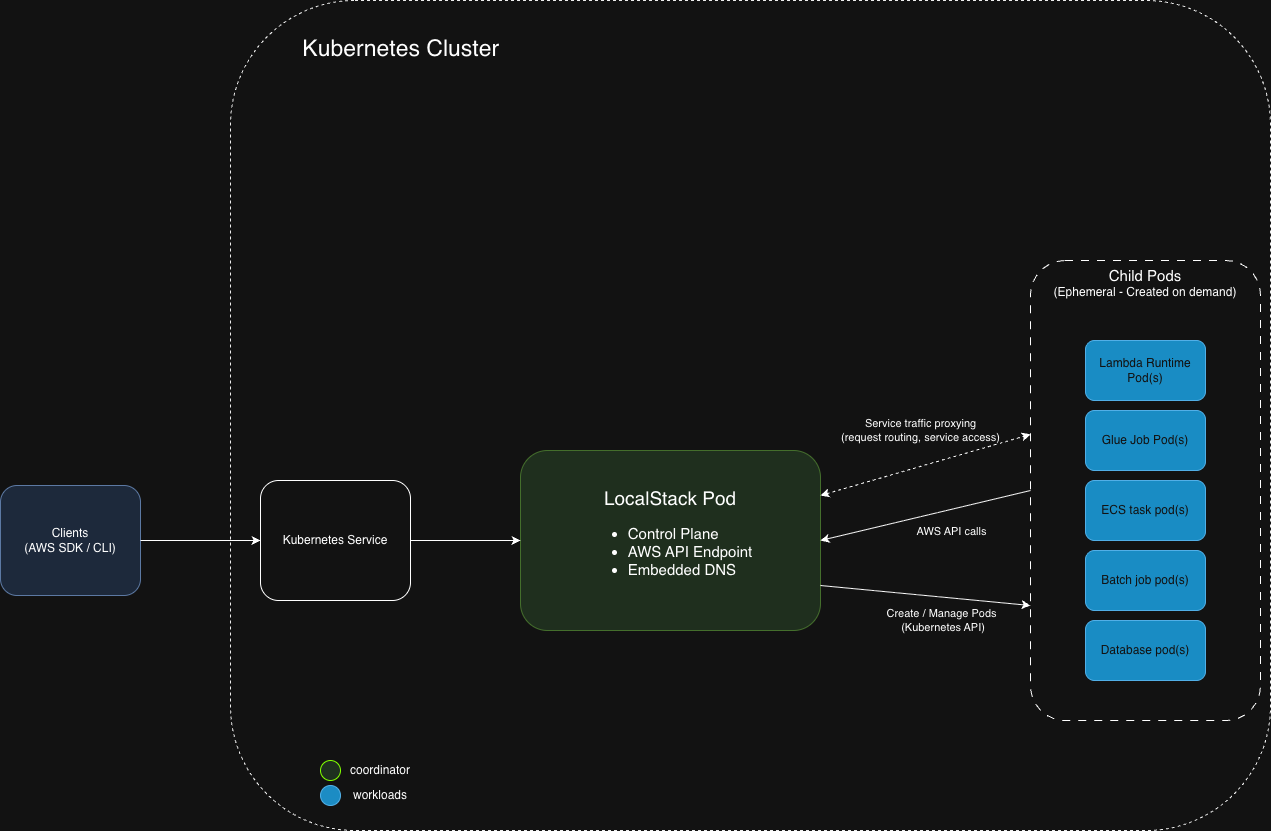
## Execution modes
LocalStack supports two execution modes for running compute workloads:
* Kubernetes-native executor
* Docker executor
### Kubernetes-native executor
The Kubernetes-native executor runs workloads as Kubernetes pods. In this mode, LocalStack communicates directly with the Kubernetes API to create, manage, and clean up pods on demand.
This execution mode provides stronger isolation, better security, and full integration with Kubernetes scheduling, resource limits, and lifecycle management.
The execution mode is configured using the `CONTAINER_RUNTIME` environment variable.
### Docker executor
The Docker executor runs workloads as containers started via a Docker runtime that is accessible from the LocalStack pod. This provides a simple, self-contained execution model without Kubernetes-level scheduling.
However, Kubernetes does not provide a Docker daemon inside pods by default. To use the Docker executor in Kubernetes, the LocalStack pod must be given access to a Docker-compatible runtime (commonly via a Docker-in-Docker sidecar), which adds complexity and security concerns.
## Child pods
For compute-oriented AWS services, LocalStack can execute workloads either within the LocalStack pod itself or as separate Kubernetes pods.
When the Kubernetes-native executor is enabled, LocalStack launches compute workloads as dedicated Kubernetes pods (referred to here as *child pods*). These include:
* Lambda function invocations
* Glue jobs
* ECS tasks and Batch jobs
* EC2 instances
* RDS databases
* Apache Airflow workflows
* Amazon Managed Service for Apache Flink
* Amazon DocumentDB databases
* Redis instances
* CodeBuild containers
For example, each Glue job run or ECS task invocation results in a new pod created from the workload’s configured runtime image and resource requirements.
These child pods execute independently of the LocalStack pod. Kubernetes is responsible for scheduling them, enforcing resource limits, and managing their lifecycle. Most child pods are short-lived and terminate once the workload completes, though some services (such as Lambda) may keep pods running for longer periods.
## Networking model
LocalStack runs as a standard Kubernetes pod and is accessed through a Kubernetes `Service` that exposes the edge API endpoint and any additional service ports.
Other pods within the cluster communicate with LocalStack through this Service using normal Kubernetes DNS resolution and cluster networking.
When the Kubernetes-native executor is enabled, child pods communicate with LocalStack in the same way, by sending API requests over the cluster network to the LocalStack Service.
## DNS behavior
LocalStack includes a DNS server capable of resolving AWS-style service endpoints.
In a Kubernetes deployment:
* The DNS server can be exposed through the same Kubernetes Service as the LocalStack API ports.
* This allows transparent resolution of AWS service hostnames and `localhost.localstack.cloud` to LocalStack endpoints from within the cluster.
* If a custom domain is used to refer to the LocalStack Kubernetes service (via `LOCALSTACK_HOST`) then this name and subdomains of this name are also resolved by the LocalStack DNS server
This enables applications running in Kubernetes to interact with LocalStack using standard AWS SDK endpoint resolution without additional configuration.
## Storage
LocalStack can store data that persists across sessions, such as data that can be used for [local persistence](https://docs.localstack.cloud/aws/developer-tools/snapshots/persistence/) or caching downloaded resources between sessions. See the [LocalStack volume](/aws/customization/advanced/filesystem/#localstack-volume) page for more information.
This volume directory can be created in Kubernetes using a [Persistent Volume](https://kubernetes.io/docs/concepts/storage/persistent-volumes/) and associated [Persistent Volume Claim](https://kubernetes.io/docs/concepts/storage/persistent-volumes/#persistentvolumeclaims). This volume should be mounted into the pod at `/var/lib/localstack` to persist LocalStack state. See the [Operator](/aws/customization/kubernetes/kubernetes-operator/) and [Helm Chart](/aws/customization/kubernetes/deploy-helm-chart) documentation for specific details.
## Choose execution mode
The Kubernetes-native executor should be used when LocalStack is deployed inside a Kubernetes cluster and workloads must run reliably and securely.
It is the recommended execution mode for nearly all Kubernetes deployments, because Kubernetes does not include a Docker daemon inside pods and does not provide native Docker access. The Kubernetes-native executor aligns with Kubernetes’ workload model, enabling pod-level isolation, scheduling, and resource governance.
The Docker executor is not supported for use inside Kubernetes clusters. While it may function in environments that have been explicitly configured to expose a Docker-compatible runtime to the LocalStack pod, such setups are uncommon and may introduce security or operational complexity. For Kubernetes-based deployments, the Kubernetes-native executor is the supported and recommended execution mode.
# Kubernetes Configuration
> Kubernetes configuration reference for LocalStack running on Kubernetes
When LocalStack runs on Kubernetes with the Kubernetes executor enabled, a set of configuration variables controls how child pods are created and managed. These variables apply to pods spawned by services such as Lambda, ECS, and RDS.
### Namespace
By default, LocalStack creates child pods in the `default` namespace. Use `K8S_NAMESPACE` to deploy them into a different namespace.
```bash
K8S_NAMESPACE=localstack-workloads
```
The namespace must already exist in your cluster before starting LocalStack.
### Labels and annotations
You can attach custom Kubernetes labels and annotations to all child pods created by LocalStack. This is useful for integrating with cluster tooling such as monitoring agents, network policies, or admission controllers.
Both variables accept a comma-separated list of `key=value` pairs:
```bash
K8S_LABELS=env=dev,team=platform
K8S_ANNOTATIONS=prometheus.io/scrape=true,prometheus.io/port=8080
```
### Pod configuration
`K8S_POD_CONFIG` configures Kubernetes metadata, scheduling, and resource settings for child pods created by supported services such as Lambda and ECS.
`LOCALSTACK_K8S_POD_CONFIG` configures Kubernetes metadata, scheduling, and resource settings for child pods created by supported services, including Lambda, ECS, CodeBuild, DocumentDB, ElastiCache, Kafka, Kinesis Data Analytics, MWAA, RDS (MySQL and SQL Server engines), Glue, and EC2.
Use it to define reusable pod profiles with fields such as `nodeSelector`, `tolerations`, `affinity`, `resources`, `labels`, and `annotations`.
The value must be valid JSON.
```bash
K8S_POD_CONFIG='{"profiles":{"default":{"nodeSelector":{"pool":"general"}}}}'
```
For the full JSON schema, profile resolution order, and examples, see [Pod Configuration](/aws/customization/kubernetes/pod-configuration/).
### Container security context
`K8S_CONTAINER_SECURITY_CONTEXT` sets the [container security context](https://kubernetes.io/docs/tasks/configure-pod-container/security-context/) applied to child pods created by LocalStack. The value should be a JSON object matching the Kubernetes `SecurityContext` spec.
This is useful when your cluster enforces pod security policies or security admission controls that require specific security context fields to be set.
```bash
K8S_CONTAINER_SECURITY_CONTEXT='{"runAsNonRoot": true, "runAsUser": 1000, "allowPrivilegeEscalation": false}'
```
### Init images
LocalStack uses init containers in some child pods to perform setup tasks before the main container starts. The following variables let you override the default images used for these init containers:
- `K8S_CURL_INIT_IMAGE` — the image used for the curl-based init container, typically responsible for waiting on network dependencies.
- `LAMBDA_K8S_INIT_IMAGE` — the image used for the init container in Lambda pods specifically.
You may need to override these if your cluster cannot pull from the default registry, for example when working in an air-gapped environment or when images must be sourced from a private registry.
```bash
K8S_CURL_INIT_IMAGE=my-registry.example.com/curl-init:latest
LAMBDA_K8S_INIT_IMAGE=my-registry.example.com/lambda-init:latest
```
### Lambda image prefix
`LAMBDA_K8S_IMAGE_PREFIX` sets a prefix applied to all Lambda runtime image names when pulling them in the Kubernetes executor. Use this to redirect image pulls to a private registry or mirror.
```bash
LAMBDA_K8S_IMAGE_PREFIX=my-registry.example.com/lambda-images/
```
### Readiness timeouts
LocalStack waits for child pods, deployments, and services to become ready before considering them available. The following variables control how long LocalStack waits before timing out:
- `K8S_WAIT_FOR_POD_READY_TIMEOUT` — maximum time to wait for a pod to reach the `Ready` state
- `K8S_WAIT_FOR_DEPLOYMENT_READY_TIMEOUT` — maximum time to wait for a deployment to become available
- `K8S_WAIT_FOR_SERVICE_READY_TIMEOUT` — maximum time to wait for a service endpoint to be ready
```bash
K8S_WAIT_FOR_POD_READY_TIMEOUT=120
K8S_WAIT_FOR_DEPLOYMENT_READY_TIMEOUT=180
K8S_WAIT_FOR_SERVICE_READY_TIMEOUT=60
```
Increase these values if your cluster is under heavy load or if image pulls are slow.
### Configuration reference
| Variable | Description |
|---|---|
| `K8S_NAMESPACE` | Kubernetes namespace for child pods |
| `K8S_LABELS` | Comma-separated `key=value` labels applied to child pods |
| `K8S_ANNOTATIONS` | Comma-separated `key=value` annotations applied to child pods |
| `K8S_POD_CONFIG` | JSON pod configuration for supported child pods. See [Pod Configuration](/aws/customization/kubernetes/pod-configuration/) |
| `K8S_CONTAINER_SECURITY_CONTEXT` | JSON security context applied to child pod containers |
| `K8S_CURL_INIT_IMAGE` | Init container image used for network readiness checks |
| `LAMBDA_K8S_INIT_IMAGE` | Init container image used in Lambda pods |
| `LAMBDA_K8S_IMAGE_PREFIX` | Image name prefix for Lambda runtime images |
| `K8S_WAIT_FOR_POD_READY_TIMEOUT` | Timeout waiting for pod readiness |
| `K8S_WAIT_FOR_DEPLOYMENT_READY_TIMEOUT` | Timeout waiting for deployment readiness |
| `K8S_WAIT_FOR_SERVICE_READY_TIMEOUT` | Timeout waiting for service readiness |
# Deploy with Helm
> Install and run LocalStack on Kubernetes using the official Helm chart.
A Helm chart is a package that bundles Kubernetes manifests into a reusable, configurable deployment unit. It makes applications easier to install, upgrade, and manage.
Using the LocalStack Helm chart lets you deploy LocalStack to Kubernetes with set defaults while still customizing resources, persistence, networking, and environment variables through a single `values.yaml`. This approach is especially useful for teams running LocalStack in shared clusters or CI environments where repeatable, versioned deployments matter.
## Getting Started
This guide shows you how to install and run LocalStack on Kubernetes using the official Helm chart. It walks you through adding the Helm repository, installing and configuring LocalStack, and verifying that your deployment is running and accessible in your cluster.
## Prerequisites
* **Kubernetes** 1.19 or newer
* **Helm** 3.2.0 or newer
* A working Kubernetes cluster (self-hosted, managed, or local)
* `kubectl` installed and configured for your cluster
* Helm CLI installed and available in your shell `PATH`
:::note
**Namespace note:** All commands in this guide assume installation into the **`default`** namespace.
If you’re using a different namespace:
* Add `--namespace ` (and `--create-namespace` on first install) to Helm commands
* Add `-n ` to `kubectl` commands
:::
## Install
### 1) Add Helm repo
```bash
helm repo add localstack https://localstack.github.io/helm-charts
helm repo update
```
### 2) Install with default configuration
```bash
helm install localstack localstack/localstack
```
This creates the LocalStack resources in your cluster using the chart defaults.
### Install LocalStack for AWS
If you want to use the `localstack-pro` image, create a `values.yaml` file:
```yaml
image:
repository: localstack/localstack-pro
extraEnvVars:
- name: LOCALSTACK_AUTH_TOKEN
value: ""
```
Then install using your custom values:
```bash
helm install localstack localstack/localstack -f values.yaml
```
#### Auth token from a Kubernetes Secret
If your auth token is stored in a Kubernetes Secret, you can reference it using `valueFrom`:
```yaml
extraEnvVars:
- name: LOCALSTACK_AUTH_TOKEN
valueFrom:
secretKeyRef:
name:
key:
```
## Configure chart
The chart ships with sensible defaults, but most production setups will want a small `values.yaml` to customize behavior.
### View all default values
```bash
helm show values localstack/localstack
```
### Override values with a custom `values.yaml`
Create a `values.yaml` and apply it during install/upgrade:
```bash
helm upgrade --install localstack localstack/localstack -f values.yaml
```
## Verify
### 1) Check the Pod status
```bash
kubectl get pods
```
After a short time, you should see the LocalStack Pod in `Running` status:
```text
NAME READY STATUS RESTARTS AGE
localstack-7f78c7d9cd-w4ncw 1/1 Running 0 1m9s
```
### 2) Optional: Port-forward to access LocalStack from localhost
If you’re running a **local cluster** (for example, k3d) and LocalStack is not exposed externally, port-forward the service:
```bash
kubectl port-forward svc/localstack 4566:4566
```
Now verify connectivity with the AWS CLI:
```bash
aws sts get-caller-identity --endpoint-url "http://0.0.0.0:4566"
```
Example response:
```json
{
"UserId": "AKIAIOSFODNN7EXAMPLE",
"Account": "000000000000",
"Arn": "arn:aws:iam::000000000000:root"
}
```
## Common customizations
### Enable persistence
If you want state to survive Pod restarts, enable PVC-backed persistence:
* Set: `persistence.enabled = true`
Example `values.yaml`:
```yaml
persistence:
enabled: true
```
:::note
This is especially useful for workflows where you seed resources or rely on state across restarts.
:::
This performs these two changes:
* sets `PERSISTENCE=1`, and
* creates a psrsistent volume claim for the (customizable) storage class.
### Set Pod resource requests and limits
Some environments (notably **EKS on Fargate**) may terminate the LocalStack pod if not configured with reasonable requests/limits:
```yaml
resources:
requests:
cpu: 1
memory: 1Gi
limits:
cpu: 2
memory: 2Gi
```
### Add environment variables and startup scripts
You can inject environment variables or run a startup script to:
* pre-configure LocalStack
* seed AWS resources
* tweak LocalStack behavior
Use:
* `extraEnvVars` for environment variables
* `startupScriptContent` for startup scripts
Example pattern:
```yaml
extraEnvVars:
- name: DEBUG
value: "1"
startupScriptContent: |
echo "Starting up..."
# add your initialization logic here
```
### Install into a different namespace
Use `--namespace` and create it on first install:
```bash
helm install localstack localstack/localstack --namespace localstack --create-namespace
```
Then include the namespace on kubectl commands:
```bash
kubectl get pods -n localstack
```
### Update installation
```bash
helm repo update
helm upgrade localstack localstack/localstack
```
If you use a `values.yaml`:
```bash
helm upgrade localstack localstack/localstack -f values.yaml
```
### Helm chart options
Run:
```bash
helm show values localstack/localstack
```
Keep the parameter tables on this page for quick reference (especially for common settings like persistence, resources, env vars, and service exposure).
# eksctl
> Running `eksctl` on LocalStack to create EKS clusters.
import { Tabs, TabItem } from '@astrojs/starlight/components';
## Introduction
[eksctl](https://eksctl.io/) is a CLI tool for creating and managing EKS clusters, Amazon's managed Kubernetes service.
LocalStack supports running `eksctl` on LocalStack to create EKS clusters locally.
LocalStack's EKS spin up embedded Kubernetes clusters using [K3s](https://github.com/k3s-io/k3s) to allow you to use the EKS APIs in your local environment.
:::note
The support for `eksctl` is currently experimental and may not work in all cases.
We are working on improving the support for `eksctl` in LocalStack.
:::
## Getting started
This guide is designed for users new to `eksctl` and running EKS clusters with LocalStack.
Start LocalStack using your preferred method.
We will demonstrate how you can create a local EKS cluster using `eksctl` and fetch the nodes in the cluster.
### Pre-requisites
- LocalStack with `LOCALSTACK_AUTH_KEY` configured
- [Docker](https://www.docker.com/)
- [`eksctl`](https://eksctl.io/) (version 0.167.0 or higher)
- [`kubectl`](https://kubernetes.io/docs/tasks/tools/#kubectl)
### Create a cluster
To create a cluster, you can use the `eksctl create cluster` command.
You can use the `--profile` flag to [specify the LocalStack profile](https://docs.localstack.cloud/user-guide/integrations/aws-cli/#configuring-a-custom-profile) to use for the cluster.
Run the following command to create a cluster:
{/* TODO: change labels so they are formatted like **** in markdown */}
```bash
eksctl create cluster --nodes 1 --profile localstack
```
```bash
export AWS_CLOUDFORMATION_ENDPOINT=http://localhost.localstack.cloud:4566
export AWS_EC2_ENDPOINT=http://localhost.localstack.cloud:4566
export AWS_EKS_ENDPOINT=http://localhost.localstack.cloud:4566
export AWS_ELB_ENDPOINT=http://localhost.localstack.cloud:4566
export AWS_ELBV2_ENDPOINT=http://localhost.localstack.cloud:4566
export AWS_IAM_ENDPOINT=http://localhost.localstack.cloud:4566
export AWS_STS_ENDPOINT=http://localhost.localstack.cloud:4566
eksctl create cluster --nodes 1
```
### Get the nodes
You can use the `kubectl` command to get the nodes in the cluster:
```bash
kubectl get nodes
```
# FAQ
> FAQ
This section covers common issues when running LocalStack on Kubernetes and how to diagnose them.
## The LocalStack Pod won’t start
### Potential issues
* The auth token is invalid. If license activation fails, the Pod will terminate immediately.
* The container image cannot be pulled or takes a long time to pull.
* The Pod cannot be scheduled because no nodes have sufficient capacity or nodes are tainted.
* **When using the Operator:** the Operator cannot validate the LocalStack license and refuses to create the Pod.
### Potential fixes
1. Check the Pod status
List all Pods in the cluster and locate the LocalStack Pod:
```bash
kubectl get pods -A
```
2. Describe the Pod
If the Pod exists, inspect it for scheduling or startup errors:
```bash
kubectl describe pod -n
```
Errors are typically visible in the `Events:` section.
Example:
```text
Back-off restarting failed container localstack in pod
```
This indicates that the LocalStack container crashed after startup.
3. Check Pod logs
If the Pod started but then crashed:
```bash
kubectl logs -n
```
Startup errors are usually found near the end of the log output. Debugging is similar to running LocalStack in Docker—there is nothing Kubernetes-specific about most startup failures.
4. If the Pod was never created
* **Helm:** check the output of `helm install`
* **Operator:** check the Operator logs:
```bash
kubectl logs -n localstack-operator-system deployments/localstack-operator-system
```
## Services are unavailable
If an AWS service fails to start or respond:
* Verify that your LocalStack license includes the service you are trying to use.
* Check the LocalStack Pod logs for license-related or service-specific errors.
There are typically no additional Kubernetes-level actions required for this issue.
## DNS resolution failures
### DNS timeouts
If you see errors such as:
```text
Unable to get DNS result from upstream server for domain . The DNS operation timed out.
```
* Check whether the upstream DNS server was detected correctly.
* Look for a log line like:
```text
Determined fallback dns:
```
* If the detected DNS server is not valid for your cluster, set it explicitly using the `DNS_SERVER` configuration option.
### `localhost.localstack.cloud` does not resolve
* **Inside LocalStack-spawned compute Pods**
* Ensure `DNS_ADDRESS` is **not** set to `0`.
* **Inside other Pods in the cluster**
* Configure the Pod DNS settings to use the LocalStack Service IP.
* Set `dnsPolicy: None` and define a custom DNS config and search domains.
* See: [https://kubernetes.io/docs/concepts/services-networking/dns-pod-service/#pod-dns-config](https://kubernetes.io/docs/concepts/services-networking/dns-pod-service/#pod-dns-config)
* **Alternative**
* Configure your cluster DNS (for example CoreDNS) to forward requests ending in `localhost.localstack.cloud` to the LocalStack DNS server.
* This is done automatically when using the LocalStack Operator.
## Permission / RBAC issues
### Docker permission errors
```text
Creating Docker SDK client failed
```
This is expected in Kubernetes. LocalStack attempts to connect to a Docker socket, which is typically unavailable in Pods. Docker is **not required** for running LocalStack on Kubernetes.
### Filesystem permission errors
```text
PermissionError: [Errno 13] Permission denied: '/etc/resolv.conf'
```
This is expected when running LocalStack as a non-root user. Transparent endpoint injection may not work for init scripts or extensions in this case.
### Kubernetes API permission errors
```text
kubernetes.client.exceptions.ApiException: (403) Reason: Forbidden
```
This indicates missing or incorrect RBAC permissions for the LocalStack Pod’s ServiceAccount.
* If using the official Helm chart or Operator, update to the latest version:
* Helm: `helm repo update localstack`
* Operator: re-apply the latest controller manifest
* If deploying LocalStack manually (not recommended), ensure the ServiceAccount role includes the required permissions:
[https://github.com/localstack/helm-charts/blob/main/charts/localstack/templates/role.yaml](https://github.com/localstack/helm-charts/blob/main/charts/localstack/templates/role.yaml)
## Networking problems
### LocalStack or spawned Pods cannot connect to other cluster resources
* Ensure the LocalStack Pod uses:
```yaml
dnsPolicy: ClusterFirst
```
### LocalStack cannot connect to real AWS
You may want LocalStack to connect to real AWS when testing hybrid workflows, forwarding specific requests, or accessing resources that are not fully emulated locally.
Common causes for connection failure:
* **Transparent Endpoint Injection**
* Review: [https://docs.localstack.cloud/aws/customization/networking/transparent-endpoint-injection/](https://docs.localstack.cloud/aws/customization/networking/transparent-endpoint-injection/)
* **Egress restrictions**
* Ensure cluster network policies allow outbound internet access.
### Spawned Pods cannot connect to LocalStack
* Spawned compute workloads should connect to LocalStack using:
```text
localhost.localstack.cloud
```
* Using the Kubernetes Service name is possible, but host-based access (for example S3 virtual-host addressing) will not work.
* Verify that the LocalStack DNS server is running (see DNS resolution failures).
### Other Pods cannot connect to LocalStack
* Use the Kubernetes Service name created by Helm or the Operator.
* Confirm the LocalStack Pod is running.
:::note
API responses returned by LocalStack include the `localhost.localstack.cloud` domain.
You can override this by setting:
```text
LOCALSTACK_HOST=
```
:::
### Cannot connect from the host machine
* For local clusters (k3d, kind):
* Ensure ports are forwarded correctly.
* Port `4566` (and service ports `4510–4559`) must be exposed.
* See:
* [https://k3d.io/v5.3.0/usage/exposing_services/](https://k3d.io/v5.3.0/usage/exposing_services/)
* [https://kind.sigs.k8s.io/docs/user/configuration/#extra-port-mappings](https://kind.sigs.k8s.io/docs/user/configuration/#extra-port-mappings)
* Alternatively, use port-forwarding:
```bash
kubectl port-forward -n 4566
```
## Child containers are not spawning
### Certificate issues when spawning child pods
If you experience the following error when creating child pods (i.e., Lambda pod failure), then your proxy settings might be applied to cluster internal communication:
```
localstack.services.lambda_.invocation.assignment.AssignmentException: Could not start new environment: MaxRetryError:MyHTTPSConnectionPool(host='192.168.0.1', port=443): Max retries exceeded with url: /api/v1/namespaces/ns-perf-a39e28bf-c600-498d-9ecc-41419eca1007/pods/lambda-pod-52c280f8dd194dc72bced60e190db6ef/log (Caused by SSLError(SSLCertVerificationError(1, '[SSL: CERTIFICATE_VERIFY_FAILED] certificate verify failed: unable to get local issuer certificate (_ssl.c:1032)')))
```
If you are using `HTTP_PROXY` or `HTTPS_PROXY` environment variables to configure a TLS terminating proxy server (i.e., corporate environments), then you may need to add the Kubernetes API server IP address to the `NO_PROXY` environment variable.
In the example above, add `NO_PROXY=192.168.0.1` to your pod environment variables.
For Lambda child pods, LocalStack automatically extends the Lambda execution environment's `no_proxy` value with the configured `LOCALSTACK_HOST` host, such as `localhost.localstack.cloud`.
This ensures Lambda runtime traffic to LocalStack bypasses corporate proxies.
If your cluster uses an admission controller or webhook to inject proxy variables into pods, ensure that it does not overwrite this value, or configure it to include the LocalStack host in `no_proxy`/`NO_PROXY`.
### Docker runtime errors
```text
DockerNotAvailable: Docker not available
```
* Ensure `CONTAINER_RUNTIME=kubernetes` is set.
* Verify your license includes Kubernetes support.
* When using Helm, ensure `lambda.executor: kubernetes` is not overriding the runtime unintentionally.
### Image pull failures
```text
ErrImagePull
```
This usually means the cluster restricts which images can be pulled.
* Allow the LocalStack images in your cluster
* If you must use a custom image name or pull-through cache, see:
[https://docs.localstack.cloud/aws/customization/configuration-options/](https://docs.localstack.cloud/aws/customization/configuration-options/)
### Admission or security policy failures
Errors such as:
```text
kubernetes.utils.create_from_yaml.FailToCreateError
```
* Ensure you are running the latest LocalStack and Helm chart / Operator version.
* Check for:
* Validating admission webhooks
[https://kubernetes.io/docs/reference/access-authn-authz/admission-controllers/#validatingadmissionwebhook](https://kubernetes.io/docs/reference/access-authn-authz/admission-controllers/#validatingadmissionwebhook)
* Pod Security Admission restrictions
[https://kubernetes.io/docs/concepts/security/pod-security-admission/](https://kubernetes.io/docs/concepts/security/pod-security-admission/)
### Child Pod timeouts
If a child Pod is created but times out:
* This is commonly caused by slow or blocked image pulls.
* Inspect the child Pod status and events, similar to diagnosing a LocalStack Pod startup failure.
## Logs to check
* Check LocalStack Pod logs as described in **The LocalStack Pod won’t start**
* If using the Operator, also check the Operator logs:
```bash
kubectl logs -n localstack-operator-system deployments/localstack-operator-system
```
# Kubernetes Executor
> Configuring Kubernetes Executor for compute services in LocalStack Enterprise.
LocalStack Enterprise provides a Kubernetes executor for various emulated services.
It allows you to run these services as Kubernetes pods in your Kubernetes clusters.
By default, LocalStack uses the `docker` backend for these services.
You can use either service-specific configuration variables or the generic `CONTAINER_RUNTIME` variable set to `kubernetes` to enable the Kubernetes executor.
## EC2 Kubernetes Executor
The LocalStack Enterprise image allows you to run EC2 instances on Kubernetes.
You can do so by setting the `EC2_VM_MANAGER` environment variable to `kubernetes` in the LocalStack container.
Each EC2 instance in the Kubernetes VM manager is backed by a Pod.
The following operations are supported:
| Operation | Notes |
| :------------------- | :------------------------------------- |
| `DescribeInstances` | Returns all EC2 instances |
| `RunInstances` | Defines and starts an EC2 instance |
| `StartInstances` | Starts an already defined EC2 instance |
| `StopInstances` | Stops a running EC2 instance |
| `TerminateInstances` | Stops and undefines a EC2 instance |
The current implementation is in preview and does not support volumes, custom AMIs, or networking features available in other VM managers.
## ECS Kubernetes Executor
The LocalStack Enterprise image allows you to run ECS tasks on Kubernetes.
The tasks are added to ELB load balancer target groups.
You can do so by setting the `ECS_TASK_EXECUTOR` environment variable to `kubernetes` in the LocalStack container.
## Lambda Kubernetes Executor
The LocalStack Enterprise image allows you to execute Lambda functions as Kubernetes pods.
You can do so by setting `LAMBDA_RUNTIME_EXECUTOR` ( or `lambda.executor` when using the Helm configuration) to `kubernetes`.
For more information, see the [Helm Chart configuration](https://github.com/localstack/helm-charts/blob/ce47b1590605901650ab788556bc871efbd78b8d/charts/localstack/values.yaml#L178-L208).
- Kubernetes Lambda Executor in LocalStack scales Lambda execution by spawning new environments (running in pods) during concurrent invocations.
Inactive environments shut down after 10 minutes (configurable via `LAMBDA_KEEPALIVE_MS`).
- Executor schedules multiple Lambda functions according to Kubernetes cluster defaults without specifying node affinity.
Users can assign labels to lambda pods using the `K8S_LABELS` variable (e.g., `K8S_LABELS=key=value,key2=value2`).
- Timeout configurations similar to AWS are enforced using the `Timeout` function parameter.
No intrinsic limits on the number of Lambdas; default limit on concurrent executions is 1000 (`LAMBDA_LIMITS_CONCURRENT_EXECUTIONS`).
- Custom DNS configuration for Lambda on Kubernetes can be set through the `LAMBDA_DOCKER_DNS` configuration variable.
- Users can customize Lambda runtime behavior by building custom images, pushing them to their registry, and specifying these images using the `LAMBDA_RUNTIME_IMAGE_MAPPING` configuration variable.
- Lambda on Kubernetes supports Warm Start and Persistence.
Persistence must be configured for the LocalStack pod.
The `/var/lib/localstack` directory should be persisted over LocalStack runs, typically in a volume.
Lambda hot reloading & remote debugging are not supported in the Kubernetes executor as the bind mounting into pods cannot be done at runtime.
## Other services
You can run the following services on Kubernetes clusters using the LocalStack Enterprise image:
- [DocumentDB](/aws/services/docdb)
- [MWAA](/aws/services/docdb)
- [Glue](/aws/services/glue)
- [RDS](/aws/services/rds) ([MySQL](/aws/services/rds/#mysql-engine) & [MSSQL](/aws/services/rds/#microsoft-sql-server-engine))
To use Kubernetes as the runtime backend, set the `CONTAINER_RUNTIME` configuration variable to `kubernetes`.
Note that there are no service-specific configuration variables for these services.
# Deploy LocalStack Operator
> Deploy and manage LocalStack in a Kubernetes cluster using the LocalStack Operator.
import OperatorPermissionsTable from '../../../../../components/kubernetes-operator/OperatorPermissionsTable';
The LocalStack Operator is our Kubernetes-native way to deploy and manage LocalStack instances. It abstracts Kubernetes-specific configuration and automates operational tasks, making LocalStack deployments more consistent and easier to maintain. It can manage multiple LocalStack instances within a cluster to provide isolated local clouds for multiple users.
The Operator manages the full lifecycle of LocalStack resources and enables advanced Kubernetes integrations that are difficult to configure manually.
## Getting started
This guide explains how to deploy and manage LocalStack in a Kubernetes cluster using the LocalStack Operator.
### Advanced features
The Operator supports the following advanced capabilities:
* Opt-in DNS and endpoint injection for Kubernetes workloads
* Cluster DNS configuration to resolve AWS-style subdomains in the same namespace
* Automatic loading of Cloud Pods on startup
* Support for initialization hooks
* Simplified logging configuration
* Automatic mounting of a PersistentVolumeClaim (PVC) for the LocalStack data directory, enabling artifact caching and persistence
### Prerequisites
Before installing the LocalStack Operator, ensure you have:
* A running Kubernetes cluster
* A LocalStack license that includes Kubernetes features
* An authentication token for that license
:::note
A separate auth token must be used for each LocalStack instance.
:::
### Deploy Operator
The easiest way to install the Operator controller is to apply the published manifests directly from GitHub.
```bash
# Install the latest version
kubectl apply -f https://github.com/localstack/localstack-operator/releases/latest/download/controller.yaml
```
To install a specific version:
```bash
# Example: install v0.4.0
kubectl apply -f https://github.com/localstack/localstack-operator/releases/v0.4.0/download/controller.yaml
```
See the [Operator releases page](https://github.com/localstack/localstack-operator/releases) for all available versions.
### Deploy LocalStack instance
Once the Operator is running, you can deploy a LocalStack instance by creating a `LocalStack` custom resource.
A minimal example looks like this:
```yaml
apiVersion: api.localstack.cloud/v1alpha1
kind: LocalStack
metadata:
name: localstack
namespace: my-namespace
spec:
image: localstack/localstack-pro:latest
dnsProvider: coredns
dnsConfigName: coredns
dnsConfigNamespace: kube-system
envFrom:
- secretRef:
name: localstack-auth-token
```
In this example, the LocalStack auth token is read from a Kubernetes Secret named `localstack-auth-token`.
You can create this Secret with:
```bash
kubectl create secret generic localstack-auth-token \
--from-literal=LOCALSTACK_AUTH_TOKEN="$LOCALSTACK_AUTH_TOKEN"
```
With this example, the auth token must be available in the `LOCALSTACK_AUTH_TOKEN` environment variable when creating the Secret.
:::note
The Secret must be created in the **same namespace** as the `LocalStack` resource. In the example above, that is `my-namespace`.
:::
:::note
More advanced examples are available in the LocalStack Operator GitHub repository.
:::
## Accessing LocalStack
By default, the Operator creates a `ClusterIP` Service named:
```text
localstack-
```
For the example above (`name: localstack`), the Service name is:
```text
localstack-localstack
```
This Service exposes:
* The LocalStack gateway port (`4566`)
* AWS service ports
* Port `53` for DNS
Using standard Kubernetes DNS resolution, the Service can be reached at:
* `localstack-localstack` (same namespace)
* `localstack-localstack.my-namespace`
* `localstack-localstack.my-namespace.svc.cluster.local`
When `dnsProvider: coredns` is configured, LocalStack can also be reached through **any subdomain** of these service names.
## Inject LocalStack endpoints into workloads
:::note
Transparent endpoint injection requires LocalStack Operator version 0.4.13 or later.
:::
The Operator can configure individual workloads to use the LocalStack instance in their namespace without changing cluster-wide DNS.
It uses an admission webhook to update opted-in Pods when Kubernetes creates them.
Pods without the opt-in label are not affected.
### Opt in a workload
Add the `localstack.cloud/inject-dns: "true"` label to the Pod template of each Deployment, StatefulSet, Job, or other workload that needs to access LocalStack:
```yaml
spec:
template:
metadata:
labels:
localstack.cloud/inject-dns: "true"
```
Add the same label directly under `metadata.labels` when you create a standalone Pod.
### Injected configuration
For an opted-in Pod, the Operator:
* Configures the Pod's DNS to send requests to LocalStack first, before falling back to the cluster DNS resolver. LocalStack only responds to domain names it owns, that is, those ending in `localhost.localstack.cloud` or your configured `$LOCALSTACK_HOST`, so requests such as `my-bucket.s3.localhost.localstack.cloud` resolve to LocalStack while every other DNS request, including in-cluster Service names, is forwarded to the cluster resolver as normal.
* Sets `AWS_ENDPOINT_URL` to `http://localstack-.:4566` in every regular, init, and ephemeral container. [AWS SDKs and tools that support this setting](https://docs.aws.amazon.com/sdkref/latest/guide/feature-ss-endpoints.html#ss-endpoints-support) use the LocalStack endpoint without application-specific endpoint configuration.
If a container already defines `AWS_ENDPOINT_URL`, the Operator replaces its value with the LocalStack endpoint.
An endpoint configured directly in application code, with the AWS CLI `--endpoint-url` option, or with a service-specific endpoint environment variable takes precedence over `AWS_ENDPOINT_URL`.
:::note
The injected DNS search domains assume that the cluster uses the default `cluster.local` domain.
Clusters configured with a different cluster domain require additional DNS configuration.
:::
### Injection requirements and behavior
The namespace must contain exactly one `LocalStack` resource.
If the namespace contains no `LocalStack` resources or more than one, the Operator creates the Pod without injecting DNS or the endpoint.
The Operator also skips injection when the LocalStack Service does not have a usable ClusterIP.
Injection occurs only when Kubernetes creates a Pod.
After adding the label to an existing workload, recreate its Pods to apply the configuration.
The webhook does not block Pod creation.
If the Operator or LocalStack Service is unavailable, Kubernetes creates the Pod without the injected configuration.
## Manage webhook certificates
The endpoint injection webhook uses TLS.
Choose how the Operator manages its serving certificate when you install the Operator.
### Self-managed certificates
The default `self-managed` mode requires no additional cluster components.
The Operator creates and rotates the certificate and keeps the Kubernetes API server's trust configuration up to date.
Existing installations continue to use this mode without configuration changes.
### cert-manager certificates
Use `cert-manager` mode to delegate certificate issuance and rotation to [cert-manager](https://cert-manager.io/docs/).
Install cert-manager and create an `Issuer` or `ClusterIssuer` before starting the Operator in this mode.
The Operator reports an error at startup if the cert-manager `Certificate` resource is unavailable.
Configure the Operator manager with the following flags or equivalent environment variables:
| Flag | Environment variable | Default | Description |
| --- | --- | --- | --- |
| `--certificate-mode` | `CERTIFICATE_MODE` | `self-managed` | Set to `cert-manager` to delegate certificate management. |
| `--certificate-issuer-name` | `CERTIFICATE_ISSUER_NAME` | Unset | Name of the issuer. Required in `cert-manager` mode. |
| `--certificate-issuer-kind` | `CERTIFICATE_ISSUER_KIND` | `ClusterIssuer` | Set to `Issuer` or `ClusterIssuer`. |
When you install the Operator from the published `controller.yaml`, add the environment variables to the Operator's ConfigMap and restart the manager:
```bash
kubectl patch configmap localstack-operator-controller-manager-config \
--namespace localstack-operator-system \
--type merge \
--patch '{"data":{"CERTIFICATE_MODE":"cert-manager","CERTIFICATE_ISSUER_NAME":"","CERTIFICATE_ISSUER_KIND":"ClusterIssuer"}}'
kubectl rollout restart deployment/localstack-operator-controller-manager \
--namespace localstack-operator-system
```
Replace `` with the name of your issuer.
Set `CERTIFICATE_ISSUER_KIND` to `Issuer` if you use a namespaced issuer.
Use a cert-manager [`CA` issuer](https://cert-manager.io/docs/configuration/ca/) rather than a `SelfSigned` issuer.
:::caution
Before switching from `cert-manager` back to `self-managed`, delete the Operator's `webhook-server-cert` `Certificate` resource.
Otherwise, cert-manager and the Operator both update the same certificate Secret.
:::
The webhook does not block Pod creation while you switch certificate modes.
## CRDs
The LocalStack Operator introduces a `LocalStack` Custom Resource Definition (CRD) that controls how LocalStack instances are deployed and configured.
:::Note
CRD documentation is currently maintained manually. For a full reference of available fields, see: [https://github.com/localstack/localstack-operator/blob/main/api-docs.md](https://github.com/localstack/localstack-operator/blob/main/api-docs.md)
:::
## Permissions
The Operator manifest creates all required `Roles`, `ClusterRoles`, and `bindings`.
### Manager ClusterRole
This ClusterRole allows the Operator to manage LocalStack resources and related Kubernetes objects.
Resources include:
* Pods (including exec and logs)
* Services
* Secrets
* Deployments
* ServiceAccounts
* LocalStack CRDs (`localstacks`, `status`, `finalizers`)
* RBAC roles and role bindings
Verbs include:
```text
create, delete, get, list, watch, patch, update
```
### Metrics and proxy ClusterRoles
Additional ClusterRoles are created for:
* Reading metrics (`/metrics`)
* Authentication and authorization reviews (`tokenreviews`, `subjectaccessreviews`)
## DNS handling
With `dnsProvider: coredns`, the LocalStack Operator configures cluster DNS to forward AWS-style subdomain requests to the LocalStack DNS server.
This enables features such as:
* S3 virtual-host–style addressing
* API Gateway domain name resolution
Example from another pod in the cluster:
```bash
aws apigatewayv2 create-api \
--name testGatewayProxy \
--protocol-type HTTP \
--target "https://httpbin.org"
```
Example response:
```json
{
"ApiEndpoint": "http://1d4b6907.execute-api.localstack-localstack.my-namespace:4566",
"ApiId": "1d4b6907"
}
```
Calling the API:
```bash
curl http://1d4b6907.execute-api.localstack-localstack.my-namespace:4566/json
```
This works without additional DNS configuration in client applications.
### EKS Auto Mode
Amazon EKS Auto Mode does not expose the CoreDNS configuration for the Operator to modify.
Set `dnsProvider: eksauto` on the `LocalStack` resource to prevent the Operator from trying to update CoreDNS:
```yaml
spec:
# ... other fields
dnsProvider: eksauto
dnsConfigName: coredns
dnsConfigNamespace: kube-system
```
The `dnsConfigName` and `dnsConfigNamespace` fields remain required by the `LocalStack` resource schema, but the Operator does not use their values in `eksauto` mode.
Use opt-in [endpoint injection](#inject-localstack-endpoints-into-workloads) to configure workloads that need to access LocalStack.
## Storage
:::note
Requires Operator version 0.4.0 or later.
:::
To persist the [LocalStack volume](/aws/customization/advanced/filesystem/#localstack-volume), use the `spec.pvcName` to specify the PVC you want to mount. This automatically mounts the PVC at `/var/lib/localstack`.
For example:
```yaml
# pvc definition
apiVersion: v1
kind: PersistentVolumeClaim
metadata:
name: myPvc
spec:
# ...
# LocalStack instance definition
apiVersion: api.localstack.cloud/v1alpha1
kind: LocalStack
metadata:
name: localstack
namespace: my-namespace
spec:
# ...
pvcName: myPvc
```
## Update
The Operator can be upgraded by applying a newer controller manifest.
Example:
```bash
# Install an older version
kubectl apply -f https://github.com/localstack/localstack-operator/releases/download/v0.3.3/controller.yaml
# Upgrade to a newer version
kubectl apply -f https://github.com/localstack/localstack-operator/releases/download/v0.4.1/controller.yaml
```
Kubernetes will handle rolling updates of the Operator deployment.
## Verify
To verify that the Operator and LocalStack instance are running:
```bash
kubectl get pods -n my-namespace
kubectl get localstacks -n my-namespace
```
Ensure that:
* The Operator controller pod is running
* The LocalStack resource reports a healthy status
* The LocalStack Service is created
:::note
* The LocalStack Operator is available **only with licenses that include Kubernetes features**
* Each LocalStack instance requires its **own auth token**
* DNS integration and Cloud Pod automation are Operator-exclusive features
:::
# Limitations
> Known limitations when running LocalStack on Kubernetes
Some LocalStack services have limited or no support when running on Kubernetes.
:::note
We are continually working on improving parity between Docker and Kubernetes so there will be fewer limitations in the future.
:::
## Unsupported services
The following services require the use of Docker, and are not supported when running LocalStack on Kubernetes:
- Sagemaker
- Bedrock
- EKS
- CodeBuild
## Limitations of partially supported services
### SSM
- Exec into EC2 instances is not supported.
### ECS
- Firelens is not supported.
- Volumes are not supported.
- Exposing ports from tasks is not supported.
- [`RepositoryCredentials`](https://docs.aws.amazon.com/AmazonECS/latest/APIReference/API_RepositoryCredentials.html) is not supported.
### EC2
- Userdata does not have full parity with AWS.
### ElastiCache/MemoryDB
- Requires using `REDIS_CONTAINER_MODE=1`.
### RDS
- MySQL 5.7 is not supported on Kubernetes.
- Persistence is not supported.
### Neptune
- Persistence is not supported.
# OpenShift
> Use the OpenShift managed Kubernetes cluster to deploy LocalStack.
## Introduction
OpenShift is a container orchestration platform as a service designed to simplify the deployment, scaling, and management of containerized applications.
Built on Kubernetes, OpenShift provides a comprehensive set of tools and features that facilitate the orchestration, automation, and monitoring of containerized workloads.
With OpenShift, you can deploy LocalStack on a managed Kubernetes cluster, as a cloud sandbox that emulates various AWS services & APIs.
This guide demonstrates how you can deploy LocalStack on OpenShift using Devfile.
You can use the deployed LocalStack container to create AWS resources that you can use for local development and testing purposes.
:::danger
Creating shared/hosted LocalStack instances may have some licensing implications.
For example, a valid license might be necessary for each user who interacts with the instance.
If you have any questions or uncertainties regarding the licensing implications, we encourage you to [contact us](https://localstack.cloud/contact) for further details.
:::
## Getting started
This guide is designed for users new to LocalStack and assumes basic knowledge of the AWS CLI and our [`lstk aws` AWS CLI proxy](/aws/developer-tools/running-localstack/lstk/cloud-and-iac-commands/#aws).
As a general prerequisite, you should have access to the [OpenShift Web Console](https://docs.openshift.com/container-platform/4.14/web_console/web-console-overview.html).
We will demonstrate how you can create local AWS resources using LocalStack using the AWS CLI.
Instead of running LocalStack locally, you will deploy it on OpenShift and use the exposed endpoint to interact with the LocalStack container.
### Setting up LocalStack on OpenShift
You can deploy LocalStack via the **Developer** perspective in the OpenShift Web Console.
Navigate to the **+Add** view to deploy LocalStack using a Devfile.
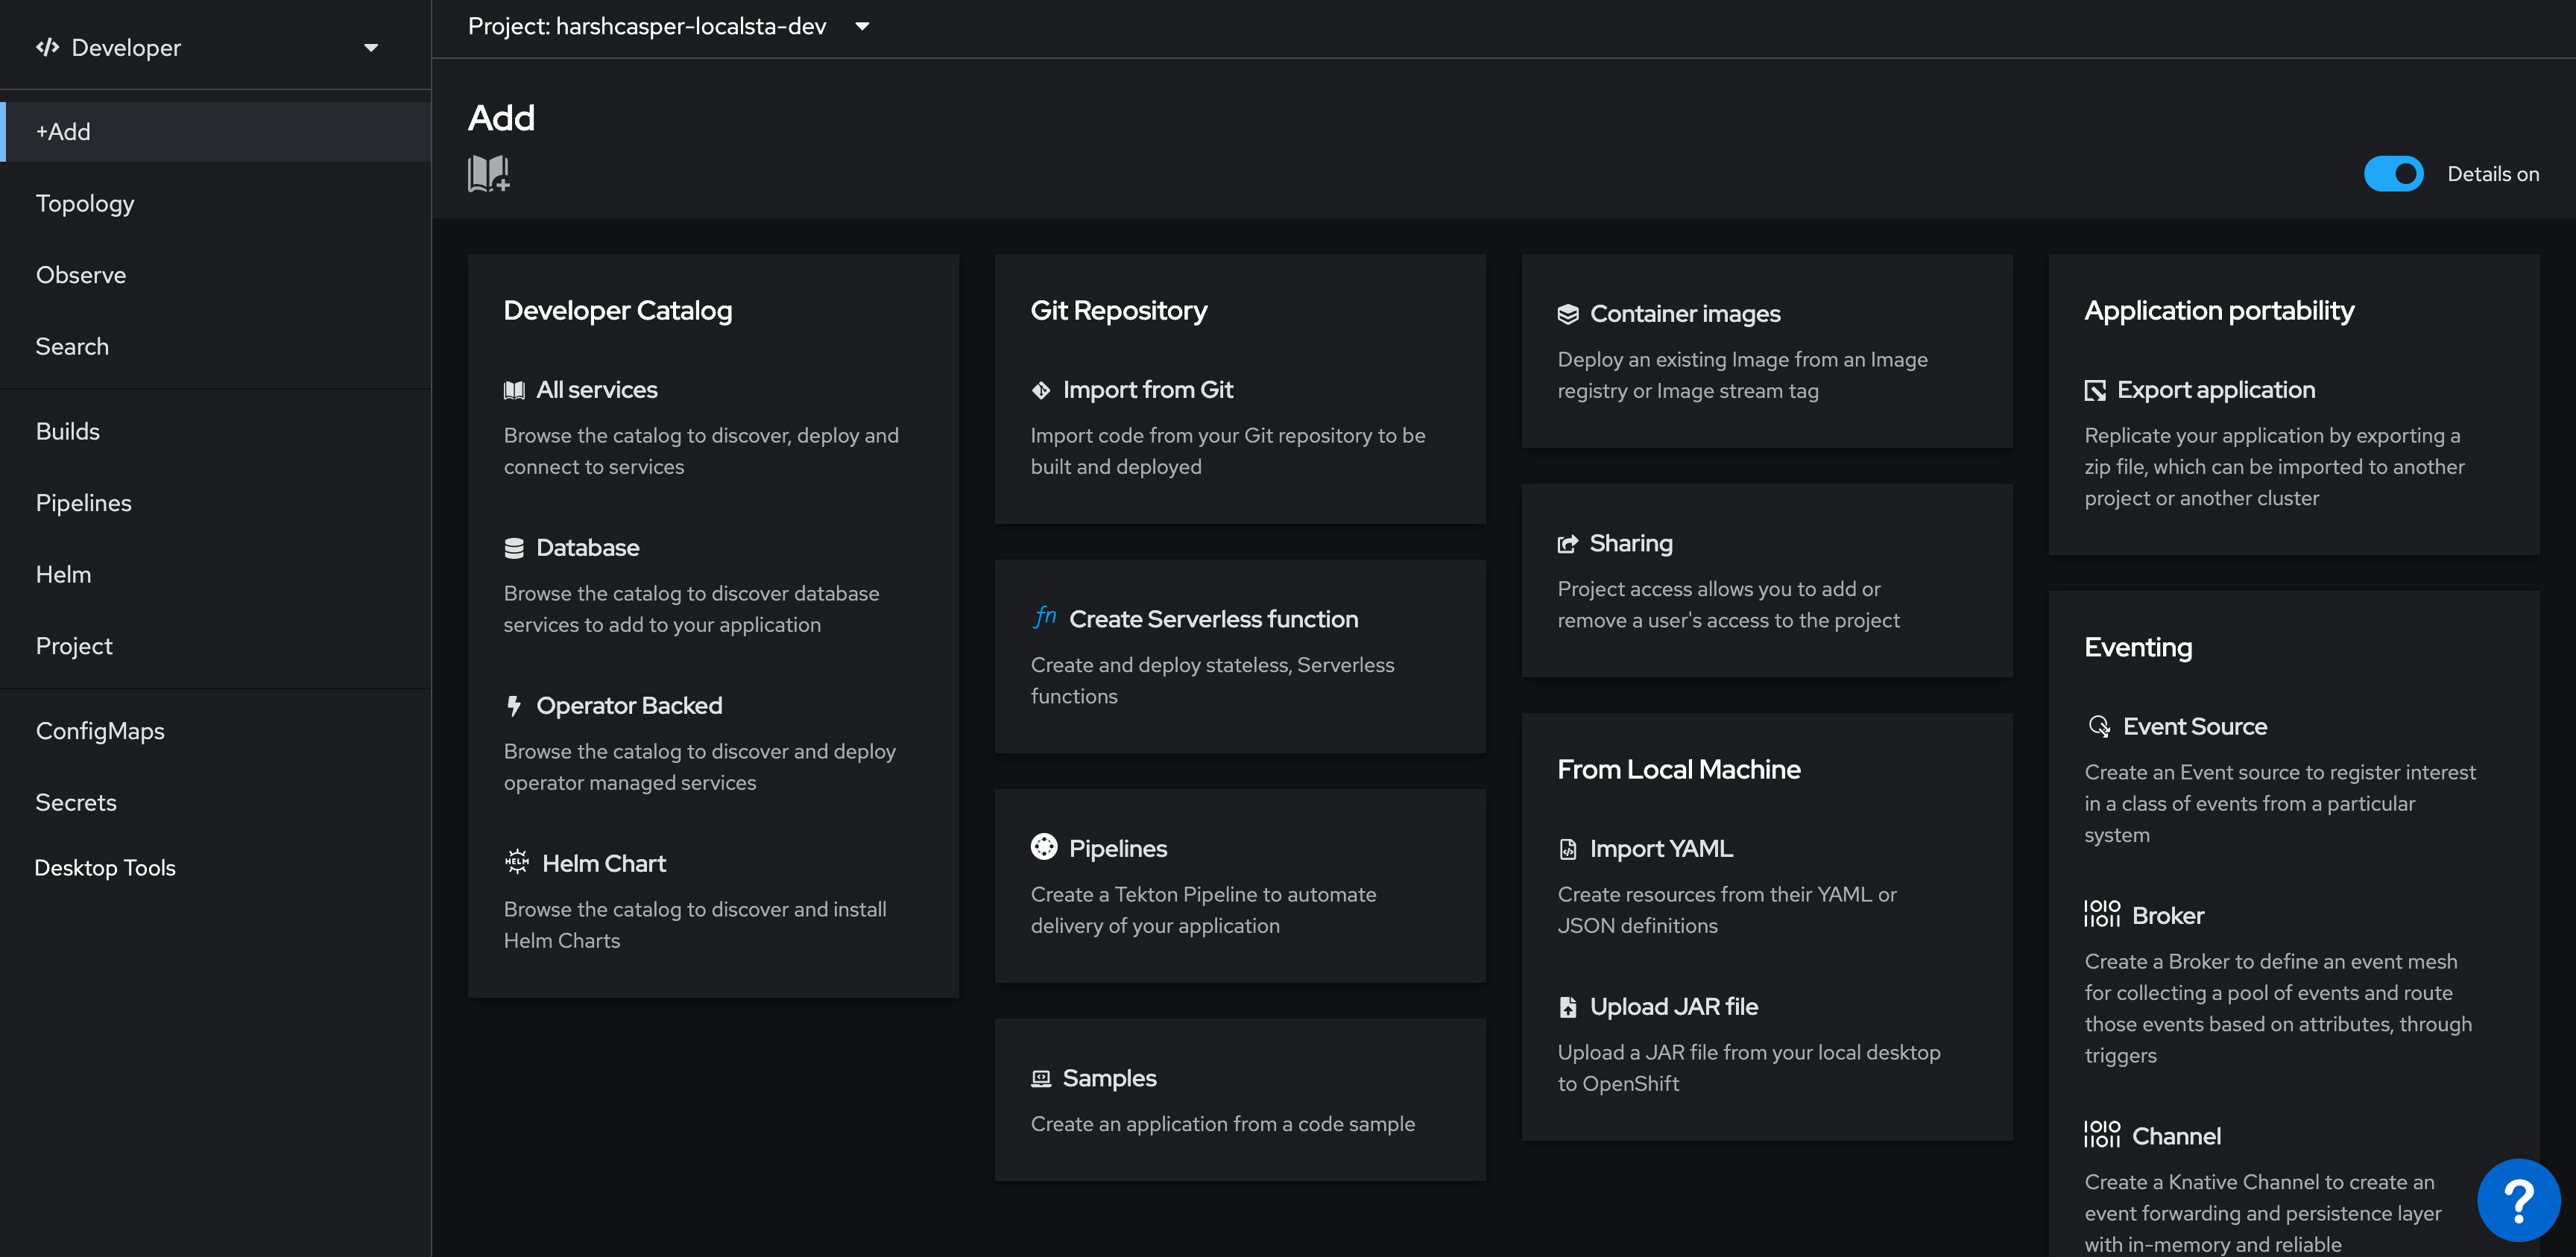
To deploy LocalStack on OpenShift, click on **Import from Git** in the **Git Repository** tile.
In the Git section, enter the following Git repository URL to import the Devfile and Helm charts which contains the configuration for LocalStack: [**https://github.com/localstack/localstack-dev-spaces**](https://github.com/localstack/localstack-dev-spaces).
OpenShift Web Console will automatically detect the Devfile and display the import strategy.
A unique application name will be generated to the application grouping to label your resources.
A unique name will also be provided to the component that will be used to name associated resources.
You can edit these values if you want.
Click on **Create** to deploy LocalStack on OpenShift.
### Viewing the LocalStack deployment
You can see the build status of the LocalStack deployment in the **Topology** view.
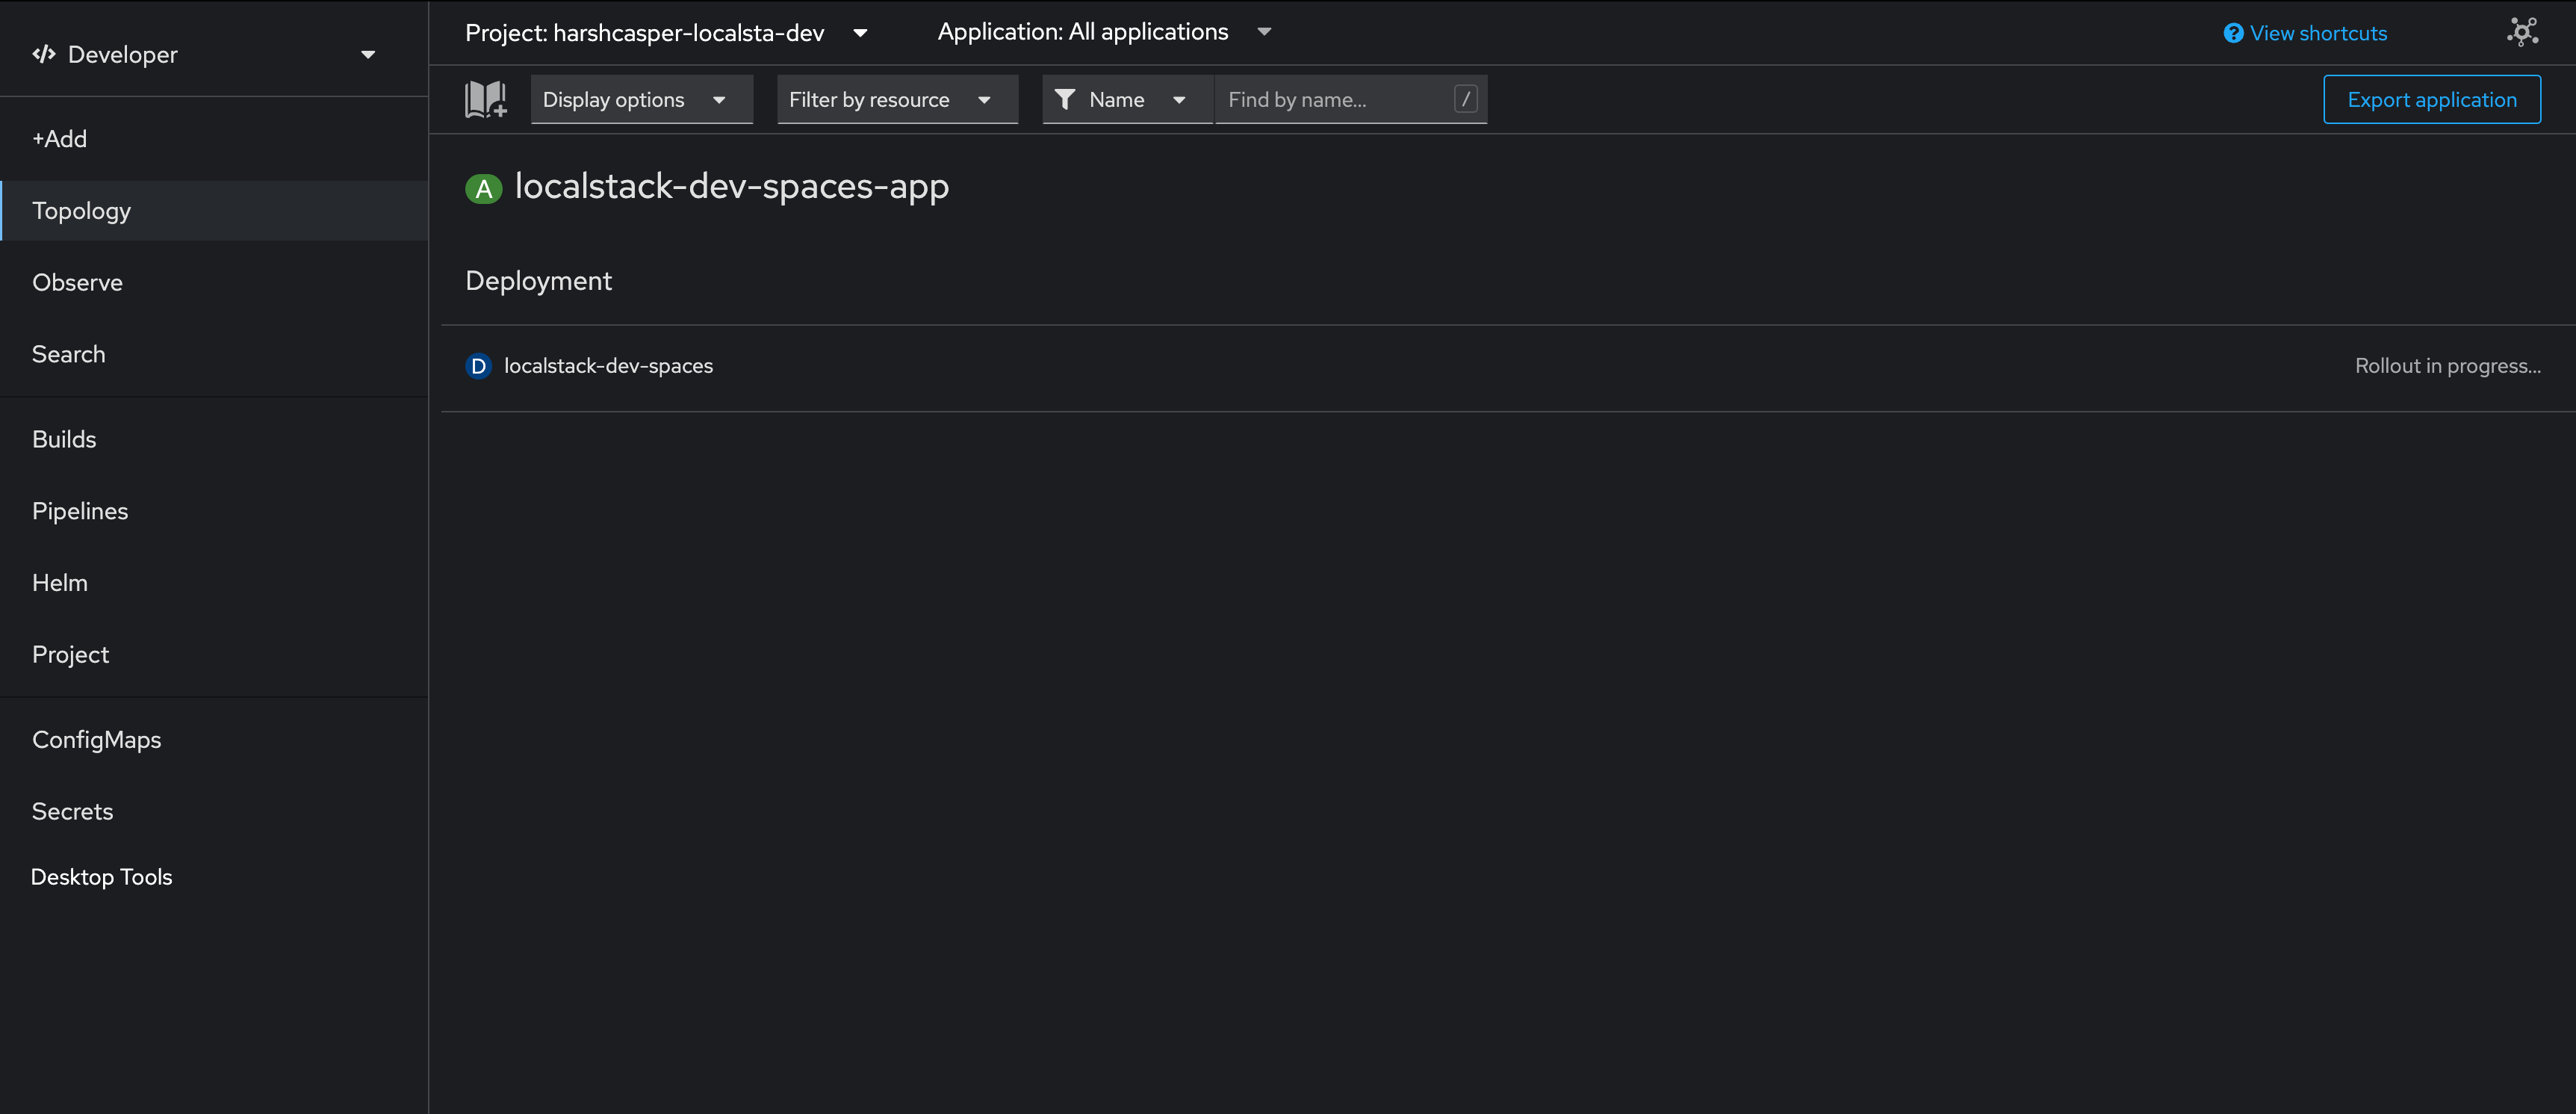
After successful deployment, you can see the **localstack-dev-spaces** pod in the **Topology** view.
Click on the pod to view the details.
You will be able to see the following details:
- Running pods along with the status and logs.
- Builds for your existing pods and an option to create new builds.
- Exposed services along with the service port and the pod port.
- Exposed routes for your deployed pods on the cluster.
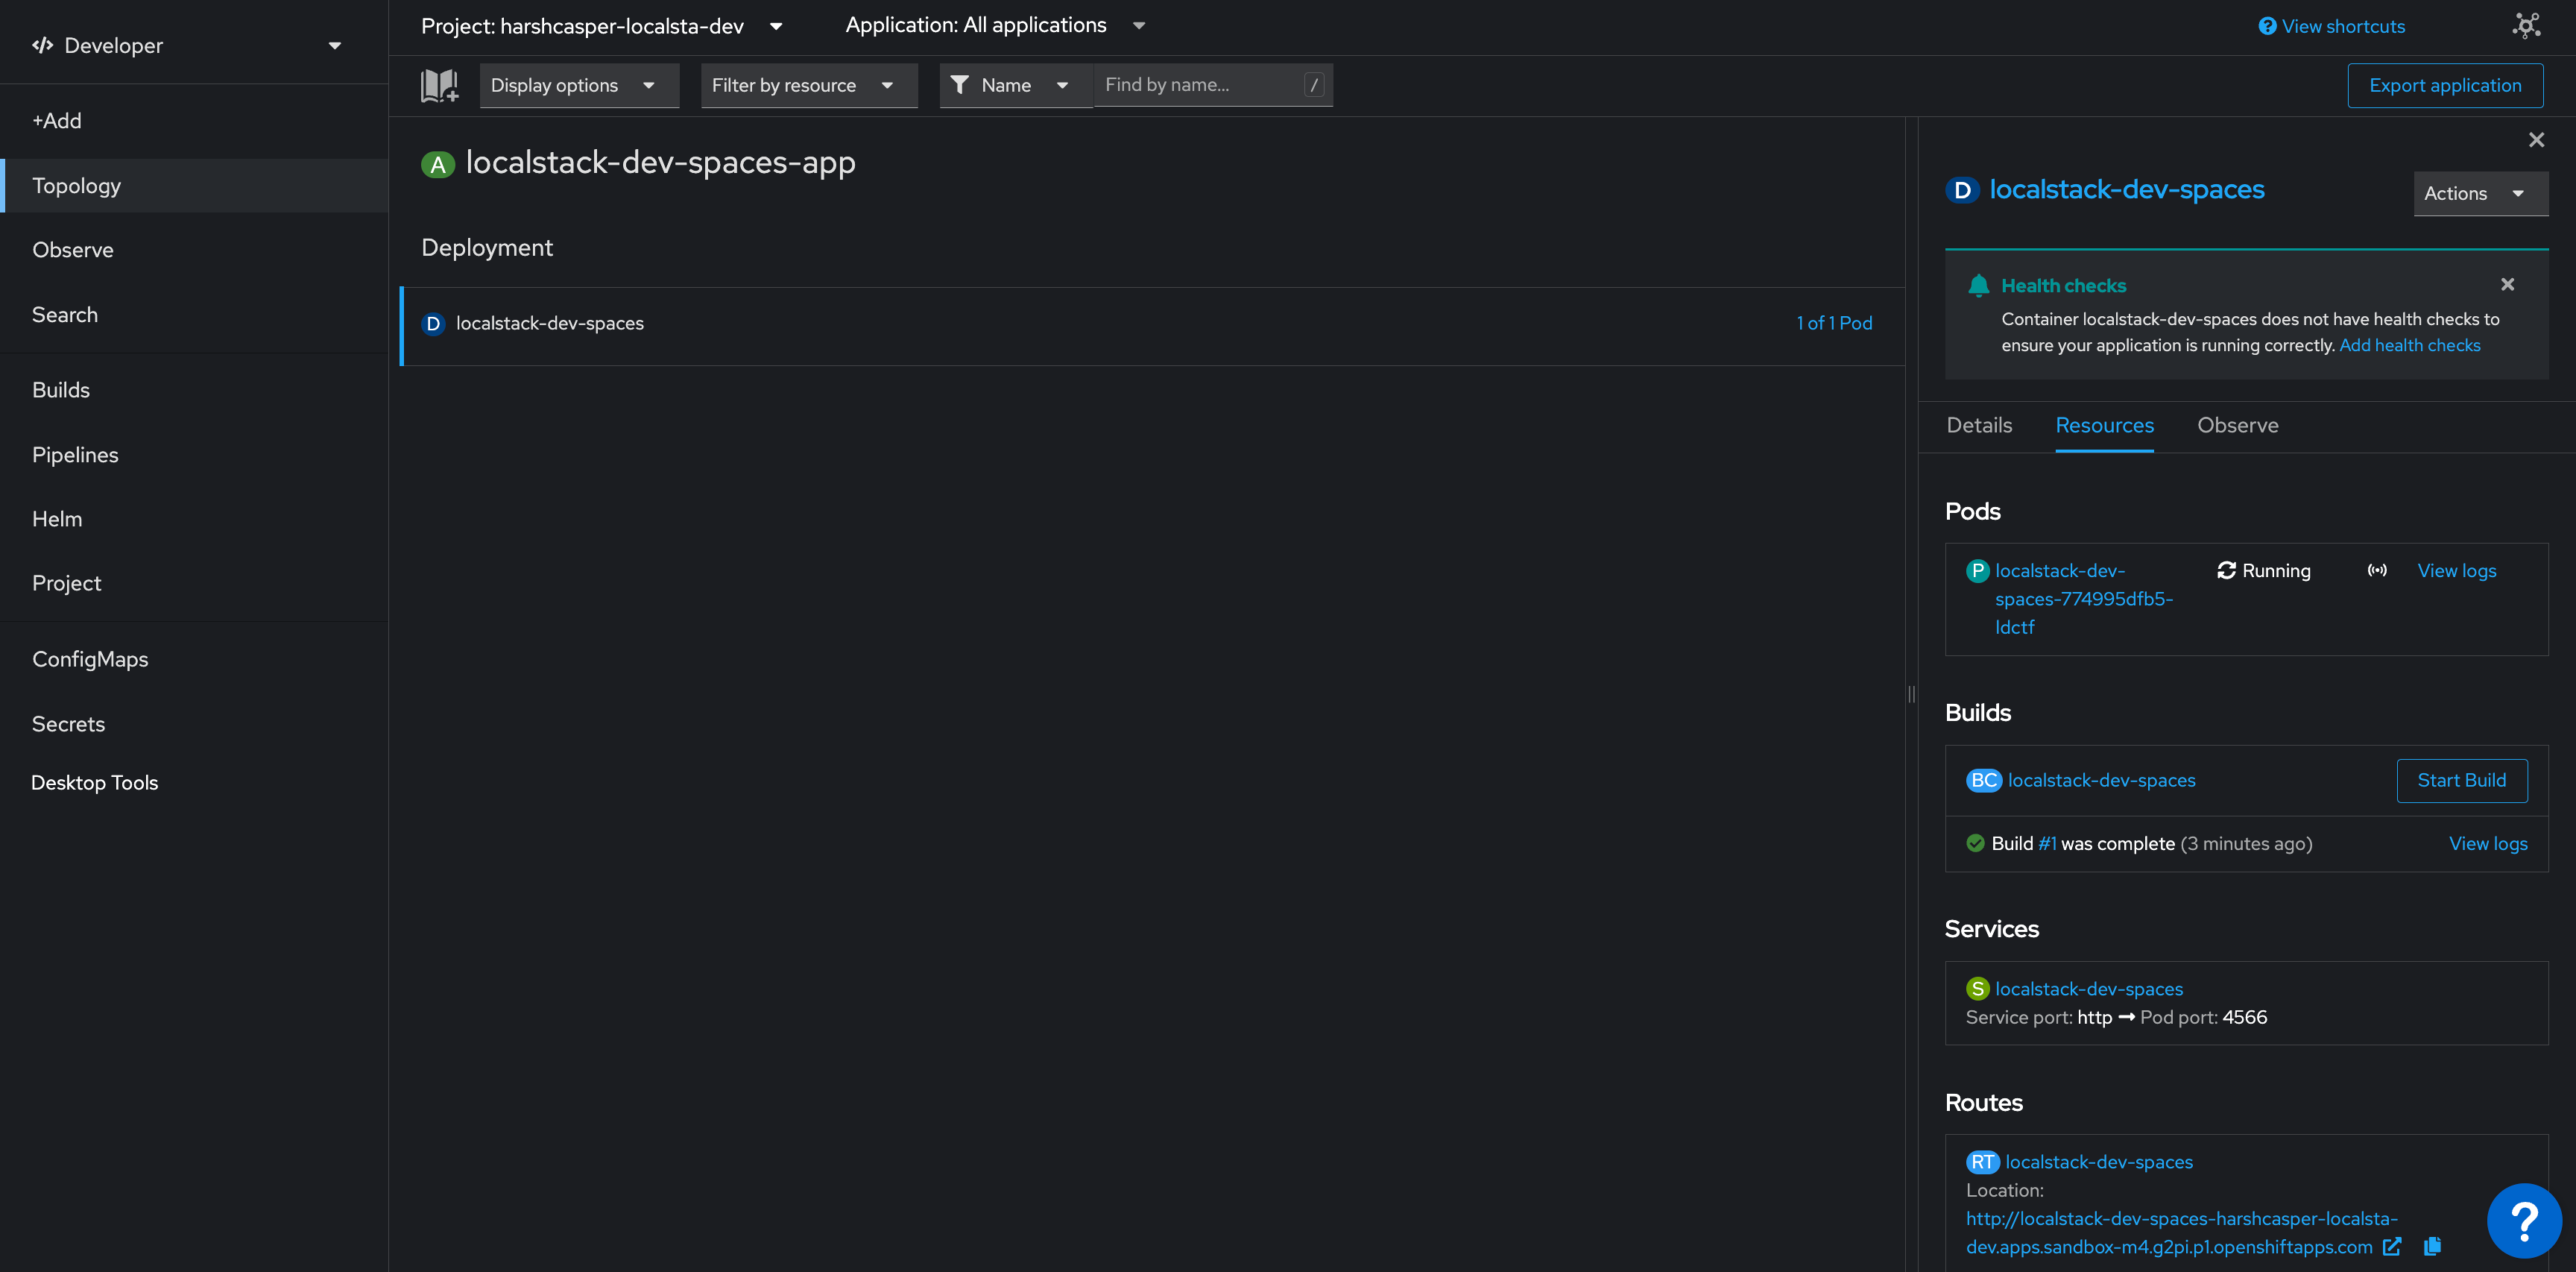
### Creating AWS resources on OpenShift
Click on the **localstack-dev-spaces** pod to view the details.
You will be able to see the exposed route for the LocalStack container.
Copy the route URL and use it to interact with the LocalStack container.
Since LocalStack is running on the cluster rather than on your machine, point `lstk` at the exposed route instead of its default local endpoint.
Set `LSTK_ENDPOINT_URL` once for the whole session:
```bash
export LSTK_ENDPOINT_URL=''
lstk aws s3 mb s3://my-bucket
lstk aws sqs create-queue --queue-name my-queue
```
Alternatively, pass the global `--endpoint-url` flag per command:
```bash
lstk --endpoint-url '' aws s3 mb s3://my-bucket
lstk --endpoint-url '' aws sqs create-queue --queue-name my-queue
```
In the above commands, replace `` with the route URL of the LocalStack container.
:::note
By default, `lstk aws` targets the emulator on your local machine.
Since we are running LocalStack on OpenShift, we need to specify the route URL of the LocalStack container, using either `LSTK_ENDPOINT_URL` or `--endpoint-url`.
The flag takes precedence over the environment variable.
:::
You can further use the other `lstk` tool proxies, such as [`lstk cdk`](/aws/developer-tools/running-localstack/lstk/cloud-and-iac-commands/#cdk), [`lstk sam`](/aws/developer-tools/running-localstack/lstk/cloud-and-iac-commands/#sam), and [`lstk terraform`](/aws/developer-tools/running-localstack/lstk/cloud-and-iac-commands/#terraform), to interact with the deployment.
As with `lstk aws`, set `LSTK_ENDPOINT_URL` or pass `--endpoint-url` to point these at the route URL instead of a local emulator.
### Deleting the LocalStack deployment
To delete the LocalStack deployment, click on the **localstack-dev-spaces** pod in the **Topology** view.
Click on the **Actions** menu and select **Delete Deployment**.
# Pod Configuration
> Configure Kubernetes pods launched by LocalStack services.
## Introduction
When LocalStack runs inside Kubernetes with the Kubernetes executor enabled, some services create child pods for workloads such as Lambda invocations and ECS tasks.
In heterogeneous clusters, these child pods may need additional Kubernetes configuration so they are scheduled onto the right node pools, carry the right resource requests, or integrate with cluster policies.
Use the `K8S_POD_CONFIG` environment variable to configure Kubernetes metadata, scheduling, and resource settings for LocalStack-spawned pods.
The variable accepts a JSON object with reusable `profiles` and optional per-service mappings.
The value must be valid JSON. LocalStack validates this configuration at startup and refuses to start if the value is not valid JSON or contains unknown fields, so misconfigurations surface before any child pods are created.
## Supported services
`LOCALSTACK_K8S_POD_CONFIG` applies to child pods created by the following services:
- Lambda (`lambda`)
- ECS (`ecs`)
- CodeBuild (`codebuild`)
- DocumentDB (`docdb`)
- ElastiCache (`elasticache`)
- Kafka (`kafka`)
- Kinesis Data Analytics (`kinesisanalyticsv2`)
- MWAA (`mwaa`)
- RDS (`rds`), for the MySQL and SQL Server (MSSQL) engines only
- Glue (`glue`)
- EC2 (`ec2`)
The value in parentheses is the key to use for that service under the `services` block.
:::note
RDS pod configuration only applies to the MySQL and SQL Server engines.
The PostgreSQL and MariaDB engines run in-process inside the main LocalStack pod rather than spawning a separate child pod, so `LOCALSTACK_K8S_POD_CONFIG` doesn't apply to them.
:::
## Supported fields
Each profile can define the following fields:
| Field | Description |
|---|---|
| `tolerations` | Kubernetes tolerations applied to the pod spec |
| `nodeSelector` | Node selector applied to the pod spec |
| `affinity` | Kubernetes affinity configuration applied to the pod spec |
| `topologySpreadConstraints` | Topology spread constraints applied to the pod spec |
| `priorityClassName` | Priority class name applied to the pod spec |
| `resources` | Resource requests and limits applied to every non-init container in the pod |
| `labels` | Labels merged into the pod metadata |
| `annotations` | Annotations merged into the pod metadata |
Scheduling fields such as `nodeSelector`, `tolerations`, and `affinity` replace the corresponding values on the generated pod spec.
They are not merged with existing spec values.
Resource settings are applied to the pod's application containers; init containers keep their generated defaults.
## Configure default profiles
The simplest configuration is to define default profiles.
LocalStack uses the architecture-specific defaults for Lambda and ECS when the workload architecture is known, and falls back to `default` otherwise.
```json
{
"profiles": {
"default": {
"nodeSelector": {
"pool": "general"
}
},
"defaultArm64": {
"nodeSelector": {
"pool": "arm-nodes"
}
},
"defaultAmd64": {
"nodeSelector": {
"pool": "amd-nodes"
}
}
}
}
```
With this configuration:
- Lambda and ECS ARM workloads use the `defaultArm64` profile.
- Lambda and ECS x86 workloads use the `defaultAmd64` profile.
- Workloads without architecture information use the `default` profile.
To use this with the Helm chart, pass the JSON as an environment variable in your `values.yaml`:
```yaml
extraEnvVars:
- name: K8S_POD_CONFIG
value: |
{
"profiles": {
"default": {
"nodeSelector": {
"pool": "general"
}
},
"defaultArm64": {
"nodeSelector": {
"pool": "arm-nodes"
}
},
"defaultAmd64": {
"nodeSelector": {
"pool": "amd-nodes"
}
}
}
}
```
If you deploy LocalStack with the [LocalStack Operator](/aws/customization/kubernetes/kubernetes-operator/), set the same configuration as structured YAML under `spec.podSchedulingConfig` in your `LocalStack` resource instead of passing JSON:
```yaml
apiVersion: api.localstack.cloud/v1alpha1
kind: LocalStack
spec:
# other fields
podSchedulingConfig:
profiles:
default:
nodeSelector:
pool: general
defaultArm64:
nodeSelector:
pool: arm-nodes
defaultAmd64:
nodeSelector:
pool: amd-nodes
```
## Configure per-service profiles
Use the `services` block when a service needs a dedicated profile.
A service can reference a single profile with `profile`, or it can map `arm64` and `amd64` workloads to different profiles.
```json
{
"profiles": {
"default": {
"nodeSelector": {
"pool": "general"
}
},
"defaultAmd64": {
"nodeSelector": {
"pool": "amd-nodes"
}
},
"lambda-arm": {
"nodeSelector": {
"pool": "lambda-arm-nodes"
},
"resources": {
"requests": {
"cpu": "500m",
"memory": "512Mi"
},
"limits": {
"cpu": "2",
"memory": "2Gi"
}
}
},
"ecs-tasks": {
"nodeSelector": {
"pool": "ecs-nodes"
}
},
"database": {
"nodeSelector": {
"pool": "db-nodes"
}
}
},
"services": {
"lambda": {
"arm64": "lambda-arm"
},
"ecs": {
"profile": "ecs-tasks"
},
"rds": {
"profile": "database"
}
}
}
```
In this example, ARM Lambda pods use `lambda-arm`.
AMD64 Lambda pods use `defaultAmd64`.
ECS pods always use `ecs-tasks`, and RDS pods always use `database`, regardless of architecture, because `services..profile` bypasses architecture-based routing.
Workloads without architecture information use `default`.
## Profile resolution
LocalStack resolves the profile for a child pod in this order:
1. `services..profile`
2. `services..arm64` or `services..amd64`
3. `profiles.defaultArm64` or `profiles.defaultAmd64`
4. `profiles.default`
5. No scheduling, resource, or metadata profile is applied. System labels are still added.
`defaultArm64`, `defaultAmd64`, and `default` are reserved profile names.
Use them only for global defaults.
Architecture values are normalized before lookup.
For example, `ARM64` is treated as `arm64`, and `x86_64` or `X86_64` are treated as `amd64`.
The keys in `K8S_POD_CONFIG` should still be `arm64` and `amd64`.
If a service references a profile that does not exist, LocalStack logs a warning and applies no pod configuration for that request.
It does not silently fall back to `default`.
## Labels and annotations
`labels` and `annotations` in `K8S_POD_CONFIG` are merged into the metadata of the generated child pod.
Profile labels override labels set through `K8S_LABELS`, and profile annotations override annotations set through `K8S_ANNOTATIONS`.
LocalStack also injects the following system labels:
```yaml
app.kubernetes.io/managed-by: localstack
localstack.cloud/service:
```
System labels are applied last and cannot be overridden.
You can use these labels to target LocalStack-spawned pods from Kubernetes tooling such as network policies, admission controllers, or monitoring agents.
## Example with scheduling and metadata
The following example schedules Lambda pods on dedicated nodes, adds tolerations, sets resource limits, and attaches metadata used by platform tooling:
```json
{
"profiles": {
"lambda": {
"nodeSelector": {
"workload": "localstack-lambda"
},
"tolerations": [
{
"key": "dedicated",
"operator": "Equal",
"value": "localstack",
"effect": "NoSchedule"
}
],
"resources": {
"requests": {
"cpu": "250m",
"memory": "256Mi"
},
"limits": {
"cpu": "1",
"memory": "1Gi"
}
},
"labels": {
"team": "platform"
},
"annotations": {
"prometheus.io/scrape": "true"
}
}
},
"services": {
"lambda": {
"profile": "lambda"
}
}
}
```
## Related configuration
- Use `K8S_NAMESPACE` to choose the namespace for child pods.
- Use `K8S_LABELS` and `K8S_ANNOTATIONS` for simple labels and annotations that apply to all child pods.
- Use `K8S_CONTAINER_SECURITY_CONTEXT` to configure the security context for child pod containers.
For the complete list of Kubernetes executor configuration variables, see the [Kubernetes configuration reference](/aws/customization/kubernetes/configuration/).
# Logging
> Control LocalStack log output, verbosity, and error reporting.
LocalStack supports logging output and error reporting through the `lstk` CLI or a Docker/Docker Compose based setup.
LocalStack's logging setup allows you to:
- Discover errors in your code during development & testing.
- Get visibility into how and why your API calls are failing.
- Figure out unexpected errors such as Lambda timeouts and more!
With LocalStack logging, you can easily retrieve additional detail around errors using various configuration variables to specify the verbosity and the log level.
## Log Level
You can explicitly set a log level via two configuration variables: `DEBUG` and `LS_LOG`.
You can configure them while starting the LocalStack container, either with the CLI or a Docker/Docker-Compose setup.
`DEBUG` can be either `0` or `1` (`0` is the default).
With `DEBUG`, you can print more verbose logs, useful for troubleshooting issues.
With `DEBUG=1`, errors inside LocalStack are reported to the client in full, and these stack traces can help you better triage your issues.
`LS_LOG` supports the following values:
- `trace`
- `trace-internal`
- `debug`
- `info`
- `warn`
- `error`
- `warning`
The `LS_LOG` affects the log handlers level directly.
If `LS_LOG` is configured as `trace` or `trace-internal`, it will automatically set `DEBUG=1`.
To retrieve the debug information, it is recommended to set `DEBUG=1`.
While configuring `LS_LOG` as `trace` or `trace-internal`, the LocalStack container will report the same log format but append the request and response objects and the HTTP headers to the log line.
## Error reporting
AWS requests are logged uniformly in the `INFO` log level (set by default or when `DEBUG=0`).
The shape is `AWS . => ()`.
Requests to HTTP endpoints are logged in a similar way.
```bash
2022-07-12T10:12:03.250 INFO --- [ asgi_gw_0] localstack.request.aws : AWS s3.PutObject => 404 (NoSuchBucket)
2022-07-12T10:12:11.295 INFO --- [ asgi_gw_0] localstack.request.aws : AWS s3.CreateBucket => 200
2022-07-12T10:12:13.159 INFO --- [ asgi_gw_1] localstack.request.aws : AWS s3.PutObject => 200
2022-07-12T10:12:28.761 INFO --- [ asgi_gw_0] localstack.request.http : GET /_localstack/health => 200
```
## Log inspection
You can inspect the logs of the LocalStack container using [`lstk`](/aws/developer-tools/running-localstack/lstk) or your Docker/Docker Compose setup.
With `lstk`, you can run the following command to inspect the logs of the LocalStack container:
```bash
lstk logs
```
By default this prints the currently available logs, with noisy internal lines filtered out.
Add `--follow` to stream logs in real time, and `--verbose` to show every line unfiltered:
```bash
# Stream filtered logs in real-time
lstk logs --follow
# Stream all logs without filtering
lstk logs --follow --verbose
```
With Docker/Docker-Compose, you can run `docker ps` to get the container ID of the LocalStack container and then run `docker logs ` to inspect the logs.
To view the logs via a user interface, you can use the following options:
- [LocalStack Desktop](/aws/developer-tools/running-localstack/localstack-desktop/)
- [LocalStack Docker Extension](/aws/customization/other-installations/localstack-docker-extension/)
# Overview
> Expose endpoints, resolve DNS, and integrate LocalStack with your local network.
import CardGridLayout from '../../../../../components/CardGridLayout.astro';
If you're having trouble connecting your application to LocalStack, you're likely running into a networking mismatch. This section helps you identify the right troubleshooting path based on where your code is running.
## Networking Troubleshooting
Choose the scenario below that best describes your networking layout. Whether you're running code on your host machine, in a container, or across multiple hosts, simply follow the corresponding guide to resolve common connection issues.
:::tip
LocalStack only binds to IPv4 addresses (e.g. `127.0.0.1`). Make sure you're not trying to access LocalStack over IPv6.
:::
## [Using the endpoint URL](/aws/customization/networking/accessing-endpoint-url)
For example, setting the `endpoint_url` parameter with an [AWS SDK](/aws/connecting/aws-sdks/).
:::note
TLS certificates for `localhost.localstack.cloud` support only certain AWS regions. See [TLS Certificate Coverage](/aws/customization/networking/https-tls-support) for details.
:::
## [Using transparent endpoint injection](/aws/customization/networking/transparent-endpoint-injection)
For example, you have a Lambda function that needs to access LocalStack resources.
## [Accessing a resource created by LocalStack](/aws/customization/networking/accessing-resources-created)
For example, you have created an OpenSearch cluster and are trying to access that resource by its URL.
# Accessing LocalStack via the endpoint URL
> This documentation provides step-by-step guidance on how to access LocalStack services via the endpoint URL and troubleshoot common issues.
import { Tabs, TabItem } from '@astrojs/starlight/components';
This documentation provides step-by-step guidance on how to access LocalStack services via the endpoint URL and troubleshoot common issues.
## From the same computer

Suppose you have LocalStack installed on your machine and want to access it using the AWS CLI.
To connect, you must expose port 4566 from your LocalStack instance and connect to `localhost` or a domain name that points to `localhost`.
While [`lstk`](/aws/developer-tools/running-localstack/lstk) does this automatically, when running the Docker container directly or with docker compose, you must configure it manually.
Check out the [getting started documentation](/aws/getting-started/installation) for more information.
:::tip
If you bind a domain name to `localhost`, ensure that you are not subject to [DNS rebind protection](/aws/customization/networking/dns-server#dns-rebind-protection).
:::
You can also use the `GATEWAY_LISTEN` [configuration variable](/aws/customization/configuration-options) to change the exposed port if necessary.
## From a container LocalStack created

Suppose your code is running inside an ECS container that LocalStack has created.
The LocalStack instance is available at the domain `localhost.localstack.cloud`.
All subdomains of `localhost.localstack.cloud` also resolve to the LocalStack instance, e.g. API Gateway default URLs.
For LocalStack versions before 2.3.0
To enable access to the LocalStack instance, it's advisable to start LocalStack in a [user-defined network](https://docs.docker.com/network/bridge/), and then set the `MAIN_DOCKER_NETWORK` environment variable to this network's name.
This allows the code running inside the container to access the LocalStack instance using its hostname.
For example:
```bash
# create the network
docker network create my-network
# launch localstack
MAIN_DOCKER_NETWORK=my-network DOCKER_FLAGS="--network my-network" localstack start
# then your code can access localstack at its container name (by default: localstack-main)
aws --endpoint-url http://localstack-main:4566 s3api list-buckets
```
```bash
# create the network
docker network create my-network
# launch localstack
docker run --rm -it --network my-network -e MAIN_DOCKER_NETWORK=my-network localstack/localstack[-pro]
# then your code can access localstack at its container name (by default: localstack-main)
aws --endpoint-url http://localstack-main:4566 s3api list-buckets
```
```yaml
services:
localstack:
# other configuration here
environment:
MAIN_DOCKER_NETWORK=ls
networks:
- ls
networks:
ls:
name: ls
# Your application code can then use
# http://localstack:4566 for the
# endpoint url
```
## From your container

Suppose you're accessing AWS resources such as S3 in LocalStack by running your application code in a container.
Your application container should be configured to use LocalStack as its DNS server.
Once this is done, the domain name `localhost.localstack.cloud` will resolve to the LocalStack container.
All subdomains of `localhost.localstack.cloud` will also resolve to the LocalStack instance, e.g. API Gateway default URLs.
To configure your application container:
* either determine your LocalStack container IP, or configure your LocalStack container to have a fixed known IP address;
* set the DNS server of your application container to the IP address of the LocalStack container.
```bash
# start localstack
lstk start
# get the ip address of the LocalStack container
docker inspect localstack-aws | \
jq -r '.[0].NetworkSettings.Networks | to_entries | .[].value.IPAddress'
# prints 172.27.0.2
# run your application container
docker run --rm -it --dns 172.27.0.2
```
```bash
# start localstack
docker network create ls
docker run --rm -it --network ls --name localstack-main localstack/localstack[-pro]
# get the ip address of the LocalStack container
docker inspect localstack-main | \
jq -r '.[0].NetworkSettings.Networks | to_entries | .[].value.IPAddress'
# prints 172.27.0.2
# run your application container
docker run --rm -it --dns 172.27.0.2 --network ls
```
```yaml showshowLineNumbers
services:
localstack:
container_name: "${LOCALSTACK_DOCKER_NAME:-localstack-main}"
image: localstack/localstack
ports:
# Now only required if you need to access LocalStack from the host
- "127.0.0.1:4566:4566"
# Now only required if you need to access LocalStack from the host
- "127.0.0.1:4510-4559:4510-4559"
environment:
- DEBUG=${DEBUG:-0}
volumes:
- "${LOCALSTACK_VOLUME_DIR:-./volume}:/var/lib/localstack"
- "/var/run/docker.sock:/var/run/docker.sock"
networks:
ls:
# Set the container IP address in the 10.0.2.0/24 subnet
ipv4_address: 10.0.2.20
application:
image: ghcr.io/localstack/localstack-docker-debug:main
entrypoint: ""
command: ["sleep", "infinity"]
dns:
# Set the DNS server to be the LocalStack container
- 10.0.2.20
networks:
- ls
networks:
ls:
ipam:
config:
# Specify the subnet range for IP address allocation
- subnet: 10.0.2.0/24
```
For LocalStack versions before 2.3.0
To facilitate access to LocalStack from within the container, it's recommended to start LocalStack in a user-defined network and set the MAIN_DOCKER_NETWORK environment variable to the network's name.
Doing so enables the containerized code to connect to the LocalStack instance using its hostname.
For instance:
```bash
# create the network
docker network create my-network
# launch localstack
DOCKER_FLAGS="--network my-network" localstack start
# launch your container
docker run --rm it --network my-network
# then your code can access localstack at its container name (by default: localstack-main)
```
```bash
# create the network
docker network create my-network
# launch localstack
docker run --rm -it --network my-network localstack/localstack[-pro]
# launch your container
docker run --rm it --network my-network
# then your code can access localstack at its container name (by default: localstack-main)
```
```yaml showshowLineNumbers
services:
localstack:
# other configuration here
networks:
- ls
your_container:
# other configuration here
networks:
- ls
networks:
ls:
name: ls
# Your application code can then use
# http://localstack:4566 for the
# endpoint url
```
### Wildcard DNS access
LocalStack newer than version 2.3.0 supports wildcard DNS access by default.
Please update your LocalStack container and see the [instructions](#from-your-container).
## From a separate host

LocalStack must listen to the address of the host, or `0.0.0.0`.
```toml
# .lstk/config.toml
[[containers]]
type = "aws"
env = ["listen-all"]
[env.listen-all]
GATEWAY_LISTEN = "0.0.0.0"
```
```bash
lstk start
```
```bash
# this command exposes ports on all interfaces by default
docker run --rm -it -p 4566:4566 localstack
```
```yaml
services:
localstack:
# other configuration here
ports:
- "4566:4566"
# other ports
```
Check out our [FAQ article on accessing LocalStack from another computer](/aws/getting-started/faq#how-can-i-access-localstack-from-an-alternative-computer).
# Accessing a resource created by LocalStack
> This guide will explore different scenarios and provide detailed instructions on accessing resources created by LocalStack under different scenarios.
If you have created a resource using LocalStack, such as an OpenSearch cluster or RDS database, you may need to access it from your application.
Typically, these resources are accessible through a URL or a hostname provided by LocalStack.
By default, LocalStack returns the hostname `localhost.localstack.cloud`, which resolves to LocalStack using DNS.
For special environments (e.g., proxies), the [configuration](/aws/customization/configuration-options) `LOCALSTACK_HOST` customizes the URLs returned by LocalStack.
This guide will explore different scenarios and provide detailed instructions on accessing resources created by LocalStack under different scenarios.
## From your host

For example, suppose you have created an OpenSearch cluster using LocalStack and want to access it from the same computer.
In such a case, you can set the `LOCALSTACK_HOST` environment variable to specify the desired hostname and port that will be returned.
Check out the [service-specific documentation](/aws/services) for more details.
## From a container LocalStack created

Check out our documentation while [using the endpoint URL](/aws/customization/networking/accessing-endpoint-url).
For LocalStack versions before 2.3.0
The Lambda service in LocalStack also supports the HOSTNAME_FROM_LAMBDA environment variable, which can be handy if LocalStack is reachable through a specific hostname.
Suppose you're running LocalStack in a user-defined network using Docker, where the LocalStack container can be accessed from other containers in the network using its service name.
In that case, you can set the HOSTNAME_FROM_LAMBDA environment variable to this value to help resolve any issues with lambda functions accessing resources created by LocalStack.
## From your container

Check out our documentation [on using the endpoint URL](/aws/customization/networking/accessing-endpoint-url#from-your-container).
## From a separate host

LocalStack must listen to the address of the host, or `0.0.0.0`.
Check out our [FAQ article on accessing LocalStack from another computer](/aws/getting-started/faq#how-can-i-access-localstack-from-an-alternative-computer).
# DNS Server
> Use LocalStack as DNS server to resolve AWS queries to LocalStack.
LocalStack includes a DNS server that enables seamless connectivity to LocalStack from different environments using `localhost.localstack.cloud`.
The DNS server is available on all IPv4 addresses within the LocalStack container (i.e., listening to `0.0.0.0`) and resolves `localhost.localstack.cloud` to the LocalStack container.
Therefore, containers that are configured to use the DNS server can reach LocalStack using `localhost.localstack.cloud`.
This configuration happens automatically for containers created by LocalStack, including compute resources such as Lambda, ECS, and EC2.
Your container can be configured to use the DNS server as demonstrated in the [Network Troubleshooting guide](/aws/customization/networking/accessing-endpoint-url/#from-the-same-computer).
If you wish to use the DNS server on your host system, follow the instructions under [System DNS configuration](#system-dns-configuration).
LocalStack for AWS additionally offers [Transparent Endpoint Injection](/aws/customization/networking/transparent-endpoint-injection/) (active by default),
which enables seamless connectivity to LocalStack without changing your application code targeting AWS.
The DNS server resolves AWS domains such as `*.amazonaws.com` including subdomains to the LocalStack container.
Therefore, your application seamlessly accesses the LocalStack APIs instead of the real AWS APIs.
:::note
On your host machine, `localhost.localstack.cloud` and any subdomains such as `mybucket.s3.localhost.localstack.cloud` resolve to `localhost` using a public DNS entry by LocalStack
unless your router has [DNS rebind protection](#dns-rebind-protection) enabled.
:::
### Fallback DNS server
If you want to use another upstream DNS resolver than your default system DNS resolver or Google DNS (`8.8.8.8` fallback if detection fails),
specify the fallback DNS server where all non-redirected queries (i.e., not matching `DNS_NAME_PATTERNS_TO_RESOLVE_UPSTREAM`) will be forwarded to:
```bash
DNS_SERVER=1.1.1.1
```
By default, LocalStack attempts to detect the default system DNS resolver upon startup.
If this detection fails, LocalStack uses Google DNS `8.8.8.8` as a fallback.
### Skip LocalStack DNS resolution
If you want to resolve certain AWS URLs to AWS instead of LocalStack,
specify a comma-separated list of skip patterns using Python-flavored regex such as:
```bash
DNS_NAME_PATTERNS_TO_RESOLVE_UPSTREAM='.*(ecr|lambda).*.amazonaws.com'
```
Using this configuration, the LocalStack DNS server resolves all AWS domains to LocalStack _except_ ECR and Lambda domains which will be resolved via the `DNS_SERVER` (i.e., the real DNS entry by default).
For example, `https://123456789012.dkr.ecr.us-west-2.amazonaws.com` will be forwarded to the upstream DNS resolver and reach real AWS.
This can be used for hybrid setups, where certain API calls (e.g., ECR, Lambda) target AWS, whereas other services will target LocalStack.
The regex pattern follows Python flavored-regex and can be tested at [regex101.com](https://regex101.com/r/OzIsQa/1).
It redirects to the main page if the saved example would not work.]: #
:::danger
Use this configuration with caution because we generally do not recommend connecting to real AWS from within LocalStack.
:::
### DNS Server bind address
If you experience problems when running LocalStack and the DNS server is the issue, you can disable the DNS server using:
```bash
DNS_ADDRESS=0
```
:::danger
We do not recommend disabling the DNS server since this disables resolving `localhost.localstack.cloud` to the LocalStack container.
:::
### LocalStack endpoints
If you operate behind an enterprise proxy and wish to customize the domain name returned by LocalStack services (e.g., SQS queue URL),
check out the [Configuration](/aws/customization/configuration-options#core) `LOCALSTACK_HOST`.
If you wish to customize internal LocalStack DNS routing of `localhost.localstack.cloud`,
refer to the instructions in the [Route53 documentation](/aws/services/route53#customizing-internal-endpoint-resolution).
## DNS rebind protection
If you rely on your local network's DNS, your router/DNS server might block requests due to the DNS Rebind Protection.
This feature is enabled by default in pfSense, OPNSense, OpenWRT, AVM FritzBox, and potentially also other devices.
Some of the vendors might allow upstream responses in the 127.0.0.0/8 range (like OpenWRT).
```bash
If you are using the LocalStack DNS server, DNS rebind protection should not cause any issues.
```
You can check if your DNS setup works correctly by resolving a subdomain of `localhost.localstack.cloud`:
```bash {16}
dig test.localhost.localstack.cloud
; <<>> DiG 9.16.8-Ubuntu <<>> test.localhost.localstack.cloud
;; global options: +cmd
;; Got answer:
;; ->>HEADER<<- opcode: QUERY, status: NOERROR, id: 45150
;; flags: qr rd ra; QUERY: 1, ANSWER: 2, AUTHORITY: 0, ADDITIONAL: 1
;; OPT PSEUDOSECTION:
; EDNS: version: 0, flags:; udp: 65494
;; QUESTION SECTION:
;test.localhost.localstack.cloud.
IN A
;; ANSWER SECTION:
test.localhost.localstack.cloud.
10786 IN CNAME localhost.localstack.cloud.
localhost.localstack.cloud.
389 IN A 127.0.0.1
;; Query time: 16 msec
;; SERVER: 127.0.0.53#53(127.0.0.53)
;; WHEN: Fr Jän 14 11:23:12 CET 2022
;; MSG SIZE rcvd: 90
```
If the DNS resolves the subdomain to your localhost (127.0.0.1), your setup is working.
If not, please check the configuration of your router / DNS if the Rebind Protection is active or [enable the LocalStack DNS on your system](#system-dns-configuration).
## System DNS configuration
If you wish to use the DNS server on your host system, you need to expose the LocalStack DNS server and configure your operating system.
This is necessary if you want to test unmodified application code directly on your system against LocalStack and cannot configure the endpoint URL.
:::danger
Please be careful when changing the network configuration on your system, as this may have undesired side effects.
Remember to save the default configuration and restore it after testing.
:::
1. Expose the LocalStack DNS server:
a) `lstk` does not publish port `53` on the host by default.
Add `expose_ports = [53]` to the container block in your `config.toml` to expose it:
```toml
# .lstk/config.toml
[[containers]]
type = "aws"
expose_ports = [53]
```
b) For Docker Compose, add the following port mappings to your `docker-compose.yml`:
```yaml
ports:
- "127.0.0.1:53:53" # Expose DNS server to host
- "127.0.0.1:53:53/udp" # Expose DNS server to host
```
:::note
If port 53 is already bound, `docker-compose up` fails with the error:
```plain
Error response from daemon: Ports are not available: exposing port UDP 127.0.0.1:53 -> 0.0.0.0:0: command failed
```
To find out if a program is listening on a port, run the following command:
```bash
# sudo is required if the port is < 1024
# [sudo] lsof -P -i : | grep LISTEN
sudo lsof -P -i :53 | grep LISTEN
```
In macOS, a common process that listens on port 53 is `mDNSResponder`.
Docker for Mac 4.24 has a [known issue](https://docs.docker.com/desktop/release-notes/#4240) and suggests the following workaround:
> Deactivate network acceleration by adding `"kernelForUDP": false`, in the `settings.json` file located at `~/Library/Group Containers/group.com.docker/settings.json`.
Additionally, ensure that "Internet Sharing" is disabled in the system preferences as suggested in [this GitHub issue](https://github.com/docker/for-mac/issues/7008#issuecomment-1748344545).
:::
2. Configure LocalStack to use a `DNS_SERVER` other than the host, for example using [CloudFlare DNS](https://www.cloudflare.com/learning/dns/what-is-1.1.1.1/) `DNS_SERVER=1.1.1.1`.
3. Configure your system to use the LocalStack DNS depending on your operating system:
### macOS
Search for "DNS servers" in the system preferences and add a new DNS server with the IP `127.0.0.1`.
Updates in the system settings are automatically reflected in `/etc/resolv.conf` and should add such an entry such as `nameserver 127.0.0.1`.
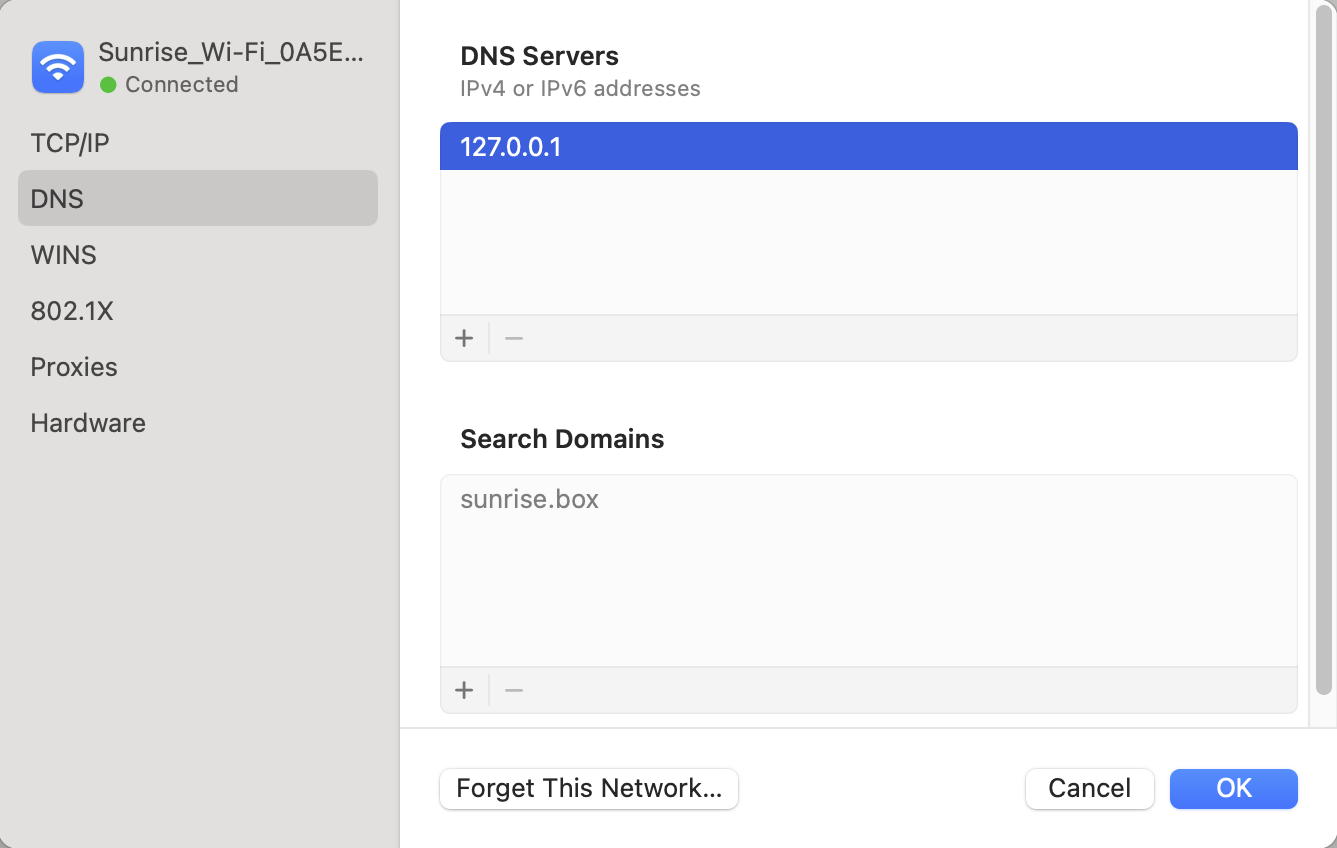
### Linux
In Linux, the configuration depends on your network manager/DNS configuration.
#### systemd-resolved
[//]: # (TODO: fix docs for Linux)
On many modern systemd-based distributions, like Ubuntu, systemd-resolved is used for name resolution.
LocalStack provides a CLI command for exactly this scenario.
To use systemd-resolved and the LocalStack domain resolution, try the following steps.
Start LocalStack for AWS with `DNS_ADDRESS=127.0.0.1` as environment variable.
This makes LocalStack bind port 53 on 127.0.0.1, whereas systemd-resolved binds its stub resolver to 127.0.0.53:53, which prevents a conflict.
Once LocalStack is started, you can test the DNS server using `dig @127.0.0.1 s3.amazonaws.com` versus `dig @127.0.0.53 s3.amazonaws.com`, the former should return an A record `127.0.0.1`, the latter the real AWS DNS result.
:::caution
The `dns` command is only available in the [deprecated LocalStack CLI](/aws/developer-tools/running-localstack/localstack-cli#dns-systemd-resolved).
`lstk` has no equivalent command, so these steps require the legacy `localstack` CLI.
:::
Run:
```bash
localstack dns systemd-resolved
```
To revert, please run:
```bash
localstack dns systemd-resolved --revert
```
:::note
You need sudo privileges to execute this command.
:::
This command sets the DNS server of the bridge interface of the docker network LocalStack currently runs in to the LocalStack container's IP address.
(The command does not work with host networking or without LocalStack running for this reason.)
Also, it configures the DNS route to exclusively (and only) route the following DNS names (and its subdomains) to the LocalStack DNS:
```text
~amazonaws.com
~aws.amazon.com
~cloudfront.net
~localhost.localstack.cloud
```
If you want to perform this action manually, please do the following steps:
1. Find out the bridge interface and container IP of your LocalStack container.
Use `docker inspect localstack-main` to get the IP address and network, then `docker inspect network` to get the interface name.
If the interface name is not mentioned, it is usually the first 12 characters of the network ID prefixed with `br-`, like `br-0ae393d3345e`.
If you use the default bridge network, it is usually `docker0`.
1. Configure the DNS resolver for the bridge network:
```bash
# resolvectl dns
```
3. Set the DNS route to route only the above mentioned domain names (and subdomains) to LocalStack:
```bash
# resolvectl domain ~amazonaws.com ~aws.amazon.com ~cloudfront.net ~localhost.localstack.cloud
```
In both cases, you can use `resolvectl query s3.amazonaws.com` or `resolvectl query example.com` to check which interface your DNS request is routed through, to confirm only the above mentioned domains (and its subdomains) are routed to LocalStack.
When correctly configured, either using the LocalStack CLI command or manually, only the requests for the mentioned domain names are routed to LocalStack, all other queries will resolve as usual.
#### Other resolution settings
Depending on your Linux distribution, the settings to set a DNS server can be quite different.
In some systems, directly editing `/etc/resolv.conf` is possible, like described in [macOS](#macos).
If your `/etc/resolv.conf` is overwritten by some service, it might be possible to install and enable/start `resolvconf` and specify the nameserver in `/etc/resolvconf/resolv.conf.d/head` with `nameserver 127.0.0.1`.
This will prepend this line in the resolv.conf file even after changes.
:::note
Using these options, every DNS request is forwarded to LocalStack, which will forward queries it does not need to modify (in essence all but certain AWS domains).
LocalStack does not share or store any forwarded DNS requests, except for local exception logging in debug mode.
:::
# External Service Port Range
> The range of ports used by services not directly provided by LocalStack
## Introduction
LocalStack provides local cloud services, such as [OpenSearch](/aws/services/opensearch) or [Elasticsearch](/aws/services/es), which might utilize external software bound to specific ports.
This documentation discusses two approaches to access these external services within LocalStack and explores the concept of an _external service port range_.
## Proxy Functionality for External Services
LocalStack offers a proxy functionality to access external services indirectly.
In this approach, LocalStack assigns local domains to the external services based on the individual service's configuration.
For instance, if OpenSearch is configured to use the [`OPENSEARCH_ENDPOINT_STRATEGY=domain`](/aws/services/opensearch#domain-endpoints) setting, a cluster can be reached using the domain name `...localhost.localstack.cloud`.
Incoming messages to these domains are relayed to servers running on ports that do not require external accessibility.
## Direct Access with External Service Port Range
An alternative approach to accessing external services is by utilizing the _external service port range_.
This method, applicable to services like OpenSearch, is activated using the [`OPENSEARCH_ENDPOINT_STRATEGY=port`](/aws/services/opensearch#domain-endpoints) configuration.
The external service port range is pre-defined and set to `4510-4559` by default.
When a LocalStack service starts an external service, it automatically selects an available port from within the specified range.
The primary advantage of this approach is that these ports are accessible from outside the Docker container, allowing direct access to the external service without the need for LocalStack to act as a proxy.
## Configuring the External Service Port Range
To configure the external service port range, you can make use of the environment variables `EXTERNAL_SERVICE_PORTS_START` and `EXTERNAL_SERVICE_PORTS_END`.
The range is defined as `(EXTERNAL_SERVICE_PORTS_START, EXTERNAL_SERVICE_PORTS_END]`, wherein the `EXTERNAL_SERVICE_PORTS_END` value is not included in the range.
By adjusting these environment variables, you can customize the port range according to your requirements, granting you greater flexibility in managing external service access.
## Running multiple LocalStack containers with Custom Port Mapping
If you wish to run multiple instances of LocalStack simultaneously, it is essential to ensure that the edge port (default: `4566`) and external service ports are mapped to non-overlapping ranges.
Here's how you can achieve this using docker-compose to start your LocalStack instances:
```yaml showshowLineNumbers
services:
localstack-main-1:
container_name: localstack-main-1
image: localstack/localstack
ports:
- "4566:4566" # LocalStack Gateway
- "4510-4559:4510-4559" # external services port range
environment:
- GATEWAY_LISTEN=0.0.0.0:4566
- EXTERNAL_SERVICE_PORTS_START=4510
- EXTERNAL_SERVICE_PORTS_END=4559
- MAIN_CONTAINER_NAME=localstack-main-1
volumes:
- "${LOCALSTACK_VOLUME_DIR:-./volume}:/var/lib/localstack"
- "/var/run/docker.sock:/var/run/docker.sock"
localstack-main-2:
container_name: localstack-main-2
image: localstack/localstack
ports:
- "4666:4666" # LocalStack Gateway
- "4610-4659:4610-4659" # external services port range
environment:
- GATEWAY_LISTEN=0.0.0.0:4666
- EXTERNAL_SERVICE_PORTS_START=4610
- EXTERNAL_SERVICE_PORTS_END=4659
- MAIN_CONTAINER_NAME=localstack-main-2
volumes:
- "${LOCALSTACK_VOLUME_DIR:-./volume}:/var/lib/localstack"
- "/var/run/docker.sock:/var/run/docker.sock"
localstack-main-3:
container_name: localstack-main-3
image: localstack/localstack
ports:
- "4766:4766" # LocalStack Gateway
- "4710-4759:4710-4759" # external services port range
environment:
- GATEWAY_LISTEN=0.0.0.0:4766
- EXTERNAL_SERVICE_PORTS_START=4710
- EXTERNAL_SERVICE_PORTS_END=4759
- MAIN_CONTAINER_NAME=localstack-main-3
volumes:
- "${LOCALSTACK_VOLUME_DIR:-./volume}:/var/lib/localstack"
- "/var/run/docker.sock:/var/run/docker.sock"
```
By customizing the `GATEWAY_LISTEN` and `EXTERNAL_SERVICE_PORTS_START`/`EXTERNAL_SERVICE_PORTS_END` values for each instance, you can ensure that they operate on distinct port ranges, preventing any conflicts and enabling smooth execution of multiple LocalStack instances.
Each instance is given a distinct `MAIN_CONTAINER_NAME` so that it can be addressed individually.
# HTTPS/TLS Support
> Overview of TLS certificate coverage for the `localhost.localstack.cloud` domain and supported AWS regions for secure HTTPS access to LocalStack service endpoints.
## Introduction
LocalStack provides TLS certificates for the `localhost.localstack.cloud` domain, which allows secure HTTPS access to service endpoints using region-specific hostnames such as:
```arduino
https://s3.us-east-1.localhost.localstack.cloud:4566
```
These certificates enable proper hostname validation for supported AWS regions when using HTTPS with SDKs, the AWS CLI, browsers, and other tools.
If LocalStack runs behind a corporate proxy that interferes with fetching the public certificate, you can set [`SSL_NO_VERIFY=1`](/aws/customization/configuration-options#miscellaneous) to disable TLS verification when downloading the certificate from `localhost.localstack.cloud`.
### Supported Regions
Due to certificate authority and infrastructure limitations, TLS certificates are currently only issued for a subset of AWS regions. If you attempt to use an unsupported region, you may encounter TLS errors such as:
```vbnet
SSL: CERTIFICATE_VERIFY_FAILED
hostname mismatch
x509: certificate is not valid for any names
```
The full list of supported regions is available here:
- `us-east-1`
- `us-east-2`
- `us-west-1`
- `us-west-2`
- `eu-central-1`
- `eu-west-1`
### Why this limitation exists
TLS certificates must explicitly include supported hostnames. Because each region requires hostname coverage, and certificate authorities impose size and validation constraints, it is currently not possible to include all AWS regions in the LocalStack certificate.
We are actively working to expand coverage where technically feasible.
# Internal Endpoints
> Overview of LocalStack and AWS specific internal endpoints for local development and testing
LocalStack provides several internal endpoints for various local AWS services and LocalStack-specific features.
These endpoints are not part of the official AWS API and are available in the `/_localstack` and `/_aws` paths.
You can use [curl](https://curl.se/) or your favourite HTTP REST client to access endpoints.
You can start your LocalStack instance and go to [http://localhost.localstack.cloud:4566/\_localstack/swagger](http://localhost.localstack.cloud:4566/_localstack/swagger)
to browse the Swagger UI, visualize and interact with all the API's resources implemented in LocalStack.
### LocalStack endpoints
The API path for the LocalStack internal resources is `/_localstack`.
Several endpoints are available under this path.
For instance, `/_localstack/health` checks the available and running AWS services in LocalStack while
`/_localstack/diagnose` (enable with the `DEBUG=1` configuration variable), reports extensive and sensitive data from
the LocalStack instance.
:::tip
You can use the `/_localstack/health` endpoint to restart or kill the services.
You can use [curl](https://curl.se/) or your HTTP REST client to access the endpoint:
```bash
curl -v --request POST --header "Content-Type: application/json" --data '{"action":"restart"}' http://localhost.localstack.cloud:4566/_localstack/health
curl -v --request POST --header "Content-Type: application/json" --data '{"action":"kill"}' http://localhost.localstack.cloud:4566/_localstack/health
```
:::
### AWS endpoints
The API path for the AWS internal resources is `/_aws`.
These endpoints offer LocalStack-specific features in addition to the ones offered by the AWS services.
For instance, `/aws/services/sqs/messages` conveniently access all messages within a SQS queue, without deleting them.
### `x-localstack` response header
LocalStack adds an `x-localstack` HTTP header to every response served by its AWS gateway.
The header value is the LocalStack version string (for example, `2026.3.1.dev65`), so client tools can detect both that they are talking to LocalStack and which version is running in a single round-trip.
```bash
curl -s -i http://localhost.localstack.cloud:4566/_localstack/health | grep -i x-localstack
# x-localstack: 2026.3.1.dev65
```
:::note
Before LocalStack `v2026.04`, the header value was the static string `true`.
Starting with `v2026.04`, it returns the LocalStack version instead.
Clients that only check for the *presence* of the header remain compatible.
:::
The header is enabled by default and can be disabled by setting [`LOCALSTACK_RESPONSE_HEADER_ENABLED`](/aws/customization/configuration-options#core) to `0`.
# Transparent endpoint injection
> Transparently resolve your AWS calls to LocalStack
## Introduction
LocalStack provides Transparent Endpoint Injection,
which enables seamless connectivity to LocalStack without modifying your application code targeting AWS.
The [DNS Server](/aws/customization/networking/dns-server) resolves AWS domains such as `*.amazonaws.com` including subdomains to the LocalStack container.
Therefore, your application seamlessly accesses the LocalStack APIs instead of the real AWS APIs.
For local testing, you might need to disable SSL validation as explained under [Self-signed certificates](#self-signed-certificates).
:::note
This feature is enabled when the LocalStack DNS server is used.
If you wish to use Transparent Endpoint Injection, do not set `DNS_ADDRESS=0` when configuring LocalStack.
:::
:::danger
Transparent endpoint injection is required when using some tooling, for example AWS CDK custom resources.
These resources invoke lambda functions, which execute code written by the CDK authors.
They cannot be configured to make requests against LocalStack, so Transparent Endpoint Injection is used to redirect requests made against AWS to target LocalStack.
:::
## Motivation
Previously, your application code targeting AWS needs to be modified to target LocalStack.
For example, the AWS SDK client for Python called boto3 needs to be configured using the environment variable `AWS_ENDPOINT_URL`, which is available within Lambda functions in LocalStack:
```python
client = boto3.client("lambda", endpoint_url=os.environ['AWS_ENDPOINT_URL'])
```
For [supported AWS SDKs](https://docs.aws.amazon.com/sdkref/latest/guide/feature-ss-endpoints.html#ss-endpoints-sdk-compat)
(including boto3 since [1.28.0](https://github.com/boto/boto3/blob/develop/CHANGELOG.rst#L892)),
this configuration happens automatically without any custom code changes.
Currently, no application code changes are required to let your application connect to local cloud APIs because
Transparent Endpoint Injection uses the integrated [DNS Server](/aws/customization/networking/dns-server) to resolve AWS API calls to target LocalStack.
## Configuration
This section explains the most important configuration options summarized under [Configuration](/aws/customization/configuration-options#dns).
### Disable transparent endpoint injection
If you do not wish to use Transparent Endpoint Injection in LocalStack for AWS, opt out using:
```bash
DISABLE_TRANSPARENT_ENDPOINT_INJECTION=1
```
This option disables DNS resolution of AWS domains to the LocalStack container and prevents Lambda from disabling SSL validation.
If Transparent Endpoint Injection is _not_ used, the AWS SDK within Lambda functions might connect to the real AWS API.
Transparent Endpoint Injection is only available in LocalStack for AWS.
Alternatively, specific AWS endpoints can be resolved to AWS while continuing to use Transparent Endpoint Injection.
Refer to the [DNS server configuration](/aws/customization/networking/dns-server#system-dns-configuration) for skipping selected domain name patterns.
:::danger
Use this configuration with caution because we generally do not recommend connecting to real AWS from within LocalStack.
:::
## Self-signed certificates
In LocalStack for AWS and Lambda, Transparent Endpoint Injection automatically disables SSL certificate validation of the AWS SDK for the
most common Lambda runtimes including Python, Node.js, and Java (SDK v1).
:::note
Python Lambdas that bundle botocore 1.43.54 or newer (which added validation that rejects an empty `AWS_CA_BUNDLE`) work by default under Transparent Endpoint Injection: LocalStack no longer sets an empty `AWS_CA_BUNDLE` when `AWS_ENDPOINT_URL` injection is active, since that mode reaches LocalStack over plain HTTP and needs no certificate handling.
If you instead run with `LAMBDA_DISABLE_AWS_ENDPOINT_URL=1` (DNS-based injection), LocalStack still sets an empty `AWS_CA_BUNDLE` to disable certificate verification, because the SDK connects to real AWS hostnames that resolve to LocalStack over TLS with a non-matching certificate. This is incompatible with a bundled botocore 1.43.54 or newer, which rejects the empty value with an `InvalidConfigError`. If you hit this combination, set `DISABLE_TRANSPARENT_ENDPOINT_INJECTION=1` instead.
:::
For other services and unsupported Lambda runtimes, you may have to configure your AWS clients to accept self-signed certificates because
we are repointing AWS domain names (e.g., `*.amazonaws.com`) to `localhost.localstack.cloud`.
For example, the following command fails with an SSL error:
```bash
aws kinesis list-streams
SSL validation failed for https://kinesis.us-east-1.amazonaws.com/ [SSL: CERTIFICATE_VERIFY_FAILED] certificate verify failed: self signed certificate (_ssl.c:1076)
```
whereas the following command works:
```bash
PYTHONWARNINGS=ignore aws --no-verify-ssl kinesis list-streams
{
"StreamNames": []
}
```
Disabling SSL validation depends on the programming language and version of the AWS SDK used.
For example, the [`boto3` AWS SDK for Python](https://boto3.amazonaws.com/v1/documentation/api/latest/reference/core/session.html#boto3.session.Session.client) provides a parameter `verify=False` to disable SSL verification.
Similar parameters are available for most other [AWS SDKs](https://docs.aws.amazon.com/sdkref/latest/guide/version-support-matrix.html).
For Node.js, you can set this environment variable in your application, to allow the AWS SDK to talk to the local APIs via SSL:
```javascript
process.env.NODE_TLS_REJECT_UNAUTHORIZED = "0"
```
If you are using the Java AWS SDK v2 in Lambda, LocalStack will per default use bytecode instrumentation to disable certificate validation, so the endpoint injection can work.
You can opt out of this behavior by setting `LAMBDA_DISABLE_JAVA_SDK_V2_CERTIFICATE_VALIDATION=0`.
Opting out will lead to certificate errors when using the AWS SDK without manually overriding the endpoint url to point to LocalStack.
:::danger
Disabling SSL validation may have undesired side effects and security implications.
Make sure to use this only for local testing, and never in production.
:::
## Current Limitations
- The mechanism to disable certificate validation for these requests is not currently functional with Go Lambdas.
To work around this issue, you'll need to manually set your endpoint when creating your AWS SDK client, as detailed in our documentation on the [Go AWS SDK](/aws/connecting/aws-sdks/go).
- Transparent Endpoint Injection does not work when code runs inside the LocalStack container. If you need to connect to LocalStack from within the container, here are a couple of alternative approaches:
- Set the AWS_ENDPOINT_URL environment variable:
Set `AWS_ENDPOINT_URL=http://localhost.localstack.cloud:4566`. This is the recommended approach as it directly points your AWS client to the LocalStack endpoint.
- Disable certificate validation (not recommended):
If the first option isn't feasible, you can disable certificate validation by exporting an empty AWS_CA_BUNDLE variable(`export AWS_CA_BUNDLE=""`). However, note that this will cause a warning to be raised for every command. You can suppress these warnings by setting the `PYTHONWARNINGS=ignore` environment variable. This will only work for the `boto3` AWS SDK.
- Transparent endpoint injection involves a combination redirecting requests using DNS and disabling certificate validation for these requests (to avoid issues when using https). Disabling certificate validation only works for processes LocalStack controls, for example Lambda (managed runtimes) and processes LocalStack starts within the LocalStack container. This means that, even in cases where DNS properly redirects the requests both inside the main LocalStack container and any spawned containers, you may still encounter certificate issues for processes not spawned directly by LocalStack. To avoid this issue, use `AWS_ENDPOINT_URL=http://localhost.localstack.cloud:4566` as an alternative.
## Troubleshooting
Suppose you're attempting to access LocalStack, but you're relying on transparent endpoint injection to redirect AWS (`*.amazonaws.com`) requests.
In such cases, there are different approaches you can take depending on your setup.
### From your host

If you're using LocalStack with an [Auth Token](/aws/getting-started/auth-token), then you can utilize the [DNS server](/aws/customization/networking/dns-server) to perform requests to LocalStack as if it were AWS.
You need to make two changes:
* Publish port 53 from the LocalStack docker container to your host.
* Configure your host to use the LocalStack DNS server by default.
For more details, see your [DNS server documentation](/aws/customization/networking/dns-server).
Note that in both cases, SSL verification must be disabled.
### From a lambda function
If you're using LocalStack with a Lambda function, run it inside the same Docker network as LocalStack. The lambda function uses the AWS SDK to communicate directly with LocalStack over the internal Docker network, without leaving the container environment.
Because both the Lambda function and LocalStack are co-located within the Docker network, AWS service requests are resolved internally and routed directly to LocalStack. This does not require transparent endpoint injection or host-level DNS configuration, as networking is handled entirely within Docker.

# Overview
> Run LocalStack in non-default container environments, from alternative images to different container runtimes.
import SectionCards from '../../../../../components/SectionCards.astro';
The [Getting Started](/aws/getting-started/installation) section installs LocalStack using Docker Desktop, but many teams prefer not to use that approach. This section covers alternative installation methods, different images, and container runtimes, so you can run LocalStack in the environment that best fits your needs. For running LocalStack on Kubernetes, see the dedicated [Kubernetes](/aws/customization/kubernetes) section.
# DevContainers
> Add LocalStack to a reproducible, containerized DevContainer development environment using LocalStack templates.
import { Tabs, TabItem } from '@astrojs/starlight/components';
## Overview
[DevContainers](https://containers.dev/) is a local tool to create a self-contained, reproducible and containerized development environment that you can setup to encapsulate your project with all its libraries and dependencies.
In this guide, you will learn how to use [DevContainers](https://containers.dev/) with LocalStack.
You can use the following two approaches to set up LocalStack with DevContainers:
* [LocalStack templates](#localstack-templates)
* [LocalStack feature](#localstack-feature)
## LocalStack Templates
:::note
The LocalStack DevContainer templates and Feature install the legacy `localstack` CLI, not the new CLI experience, `lstk`.
The commands and configuration keys on this page therefore refer to the [legacy LocalStack CLI](/aws/developer-tools/running-localstack/localstack-cli/), which is what is available inside the DevContainer.
:::
LocalStack provides two different approaches for [Templates](https://github.com/localstack/devcontainer-template) which can be used via [supporting tools](https://containers.dev/supporting).
| **Type** | **Advantages** | **Disadvantages** |
|------------------------------|----------------------------------------------------------------------------------------------------|-------------------------------------------------------------------------------------------------------------------------------------------------------------------------------------------|
| **Docker-in-Docker** | • Strict separation from host Docker service
• Control LocalStack with LocalStack CLI
• All-in-one container | • Resources are limited as all resources spawned by LocalStack are encapsulated within the container
• LocalStack volume directory must exist beforehand
• Larger container size
• Cannot use existing images on host system |
| **Docker-outside-of-Docker** | • Easy addition of external services managed by Docker Compose
• DNS service for custom domains | • Host's Docker socket mounted into containers, raising security concerns
• Limited LocalStack CLI usage
• LocalStack volume directory must exist beforehand |
### Docker-in-Docker
* [Dev Container CLI](#dev-container-cli)
* [VS Code](#vscode)
* [Reference file](#reference-file)
#### Dev Container CLI
You can use the DevContainer CLI to create a `devcontainer.json` file from the LocalStack template.
Before you start, ensure that you have the [DevContainer CLI](https://code.visualstudio.com/docs/devcontainers/devcontainer-cli) installed.
Create a JSON file called `options.json` with the desired options in it.
```json showshowLineNumbers
{
"imageVariant": "bullseye",
"awslocal": "true",
"logLevel": "debug",
"debug": "true",
"startup": "true"
}
```
Use the command below to generate your `devcontainer.json` from the template.
Include additional features with the `--features` option if needed.
```bash
devcontainer templates apply \
--template-id ghcr.io/localstack/devcontainer-template/localstack-dind \
--template-args "$(cat ./options.json)" \
--features '[{"id":"ghcr.io/devcontainers/features/aws-cli:1"}]'
```
Start your container using the following command.
```bash
devcontainer up --id-label project=localstack --workspace-folder .
```
Connect to it using the `id-label`.
```bash
devcontainer exec --id-label project=localstack /bin/bash
```
Check that the LocalStack CLI is installed by executing:
```bash
localstack --version
```
To remove the container, run this cleanup script since the Dev Container CLI cannot currently do it.
```bash
for container in $(docker ps -q); do \
[[ "$(docker inspect --format '{{ index .Config.Labels "project"}}' $container)" = "localstack" ]] && \
docker rm -f $container; \
done
```
#### VSCode
:::note
The DevContainer extension is currently reporting issues & bugs.
Follow the [issue](https://github.com/microsoft/vscode-remote-release/issues/10180) for details.
:::
To get started with LocalStack and DevContainers in VS Code, follow these steps:
* Open VS Code with the DevContainers extension installed.
* From the Command Palette, select **Dev Containers: Add Dev Container configuration file**.

* Choose **Add configuration to workspace**; alternatively, select **Add configuration to user data folder** for general usage.

* Select **Show All Definitions...** to view community templates.

* Filter by typing "localstack" in the search bar and select the **LocalStack Docker-in-Docker** template.
[Select official LocalStack Template (DinD)](/aws/customization/other-installations/devcontainers/#localstack-templates)
* Proceed through the configuration by selecting or entering values.
Pressing **Enter** through the options will apply default settings, which include:
* Select the image variant (only Debian-based images are supported).

* Select the log level.

* Select the LocalStack version.

* Relative paths are acceptable for the volume path, but the specified mount folder must be created prior to building the container.


* Select various tools and configuration options from the checklist.
For local tools, either select the appropriate SDK or tool feature, or install it manually.
The template and LocalStack CLI feature do not manage these installations.

* You can also add additional features.

* This results in the following folder structure in your workspace.

#### Reference file
The `devcontainer.json` will look similar to the following:
```json showshowLineNumbers
{
"name": "LocalStack DinD setup",
"image": "mcr.microsoft.com/devcontainers/base:bullseye",
"remoteEnv": {
// Activate LocalStack for AWS: https://docs.localstack.cloud/getting-started/auth-token/
"LOCALSTACK_AUTH_TOKEN": "${localEnv:LOCALSTACK_AUTH_TOKEN}", // required for Pro, not processed via template due to security reasons
"LOCALSTACK_API_KEY": "${localEnv:LOCALSTACK_API_KEY}",
// LocalStack configuration: https://docs.localstack.cloud/references/configuration/
"DEBUG": true,
"LS_LOG": "debug",
"PERSISTENCE": false,
"AWS_ENDPOINT_URL": "http://localhost.localstack.cloud:4566",
"AUTO_LOAD_POD": " ",
"ENFORCE_IAM": false,
"AWS_REGION": "us-east-1",
"AWS_DEFAULT_REGION": "us-east-1",
"IMAGE_NAME": "localstack/localstack-pro:latest",
"LOCALSTACK_VOLUME_DIR": "/data"
},
// 👇 Features to add to the Dev Container.
// More info: https://containers.dev/implementors/features.
"features": {
"ghcr.io/devcontainers/features/docker-in-docker:2": {},
"ghcr.io/localstack/devcontainer-feature/localstack-cli:latest": {
"version": "latest",
"awslocal": true, // if true, add in features manually: ghcr.io/devcontainers/features/aws-cli
"cdklocal": false, // if true, add in features manually: ghcr.io/devcontainers-contrib/features/aws-cdk
"pulumilocal": false, // if true, add in features manually: ghcr.io/devcontainers-contrib/features/pulumi
"samlocal": false, // if true, add in features manually: ghcr.io/customink/codespaces-features/sam-cli
"tflocal": false // if true, add in features manually: ghcr.io/devcontainers-contrib/features/terraform-asdf
},
"ghcr.io/devcontainers/features/aws-cli:1": {}
},
// 👇 Use 'postCreateCommand' to run commands after the container is created.
"postCreateCommand": "type localstack; true && localstack start -d || true",
"mounts": [
{
// to persist build data and images
"source": "dind-var-lib-docker",
"target": "/var/lib/docker",
"type": "volume"
},
{
"source": "./.volume",
"target": "/data",
"type": "bind",
"consistency": "cached"
}
]
}
```
### Docker-outside-of-Docker
* [Dev Container CLI](#dev-container-cli)
* [VS Code](#vscode)
* [Reference files](#reference-files)
#### Dev Container CLI
You can use the DevContainer CLI to create a `devcontainer.json` file from the LocalStack template.
Before you start, ensure that you have the [DevContainer CLI](https://code.visualstudio.com/docs/devcontainers/devcontainer-cli) installed.
Create a JSON file called `options.json` with the desired options in it.
```json showshowLineNumbers
{
"imageVariant": "bookworm",
"awslocal": "true",
"logLevel": "debug",
"debug": "true",
"networkName": "localstack-network",
"networkCidr": "192.168.9.0/24",
"ipAddress": "192.168.9.13"
}
```
Use the command below to generate your `devcontainer.json` from the template.
Include additional features with the `--features` option if needed.
```bash
devcontainer templates apply \
--template-id ghcr.io/localstack/devcontainer-template/localstack-dood \
--template-args "$(cat ./options.json)" \
--features '[{"id":"ghcr.io/devcontainers/features/aws-cli:1"}]'
```
Start your container using the following command.
```bash
devcontainer up --id-label project=localstack --workspace-folder .
```
Connect to it using the `id-label`.
```bash
devcontainer exec --id-label project=localstack /bin/bash
```
Check that the LocalStack CLI is installed by executing:
```bash
localstack --version
```
To remove the container, run this cleanup script since the Dev Container CLI cannot currently do it.
```bash
docker compose \
--project-name "$(basename $PWD)_devcontainer" \
-f ./.devcontainer/docker-compose.yml down
```
#### VSCode
:::note
The DevContainer extension is currently reporting issues & bugs.
Follow the [issue](https://github.com/microsoft/vscode-remote-release/issues/10180) for details.
:::
To get started with LocalStack and DevContainers in VS Code, follow these steps:
* Open VSCode with the DevContainers extension installed.
* From the Command Palette, choose **Dev Containers: Add Dev Container configuration file**.

* Choose the **Add configuration to workspace** option; alternatively, select **Add configuration to user data folder** for general usage.

* Select **Show All Definitions...** to view community templates.

* Start typing "localstack" in the search bar to filter the official LocalStack templates and choose **LocalStack Docker-outside-of-Docker**.

* Navigate through the configuration inputs by either selecting or typing in values.
The defaults provided in the template are sufficient; navigating through the options by hitting Enter will result in a valid configuration.
These options include:
* The image variant (currently only Debian-based images are supported).

* The log level.

* The LocalStack version.

* Note that LocalStack's IP address must be within the defined CIDR range.
The network CIDR defaults to `10.0.2.0/24`, with the container IP set to `10.0.2.20`.
* For the volume path, relative paths are accepted, but you must create the specified mount's folder before successfully building the container.
The default is `./.volume`.


* Select multiple tools and configuration options from the checklist.
For local tools, you must select the appropriate SDK or tool feature, or install it manually.
The template and the underlying LocalStack CLI Feature do not manage these installations.

* You can also add additional features.

* As a result, you will end up with the folder structure shown below.

###### Reference files
```json showshowLineNumbers
{
"name": "LocalStack DooD setup",
"dockerComposeFile": "docker-compose.yml",
"service": "app",
"workspaceFolder": "/workspaces/${localWorkspaceFolderBasename}",
// 👇 Features to add to the Dev Container.
// More info: https://containers.dev/implementors/features.
"features": {
"ghcr.io/devcontainers/features/docker-outside-of-docker:1": {},
"ghcr.io/localstack/devcontainer-feature/localstack-cli:latest": {
"version": "latest",
"awslocal": true, // if true, add in features manually: ghcr.io/devcontainers/features/aws-cli
"cdklocal": false, // if true, add in features manually: ghcr.io/devcontainers-contrib/features/aws-cdk
"pulumilocal": false, // if true, add in features manually: ghcr.io/devcontainers-contrib/features/pulumi
"samlocal": false, // if true, add in features manually: ghcr.io/customink/codespaces-features/sam-cli
"tflocal": false // if true, add in features manually: ghcr.io/devcontainers-contrib/features/terraform-asdf
},
"ghcr.io/devcontainers/features/aws-cli:1": {}
}
}
```
```yml showshowLineNumbers
services:
localstack:
container_name: "localstack-main"
image: localstack/localstack-pro:latest # required for Pro
ports:
- "127.0.0.1:4566:4566" # LocalStack Gateway
- "127.0.0.1:4510-4559:4510-4559" # external services port range
- "127.0.0.1:443:443" # LocalStack HTTPS Gateway (Pro)
env_file:
- .env
volumes:
- "/var/run/docker.sock:/var/run/docker.sock"
- "./.volume:/var/lib/localstack"
networks:
ls:
# Set the container IP address in the 10.0.2.0/24 subnet
ipv4_address: 10.0.2.20
app:
build:
context: .
dockerfile: Dockerfile
volumes:
- ../..:/workspaces:cached
# Overrides default command so things don't shut down after the process ends.
command: sleep infinity
init: true
env_file:
- .env
dns:
# Set the DNS server to be the LocalStack container
- 10.0.2.20
networks:
- ls
networks:
ls:
ipam:
config:
# Specify the subnet range for IP address allocation
- subnet: 10.0.2.0/24
```
```dockerfile
FROM mcr.microsoft.com/devcontainers/base:bookworm
```
```bash showshowLineNumbers
# Activate LocalStack for AWS: https://docs.localstack.cloud/getting-started/auth-token/
LOCALSTACK_AUTH_TOKEN=${LOCALSTACK_AUTH_TOKEN:-} # required for Pro, not processed via template due to security reasons
LOCALSTACK_API_KEY=${LOCALSTACK_API_KEY:-}
# LocalStack configuration: https://docs.localstack.cloud/references/configuration/
DEBUG=true
LS_LOG=debug
PERSISTENCE=false
AWS_ENDPOINT_URL=http://localhost.localstack.cloud:4566
LOCALSTACK_HOST=localhost.localstack.cloud:4566
AUTO_LOAD_POD=
ENFORCE_IAM=false
AWS_REGION=us-east-1
AWS_DEFAULT_REGION=us-east-1
IMAGE_NAME=localstack/localstack-pro:latest
```
## LocalStack Feature
Add the following minimal [Feature](https://github.com/localstack/devcontainer-feature) snippet to your DevContainer config.
```json
...
"features": {
"ghcr.io/localstack/devcontainer-feature/localstack-cli:latest": {}
}
...
```
That's it.
By building your container the LocalStack CLI and any of the enabled local-tools (currently these are `awslocal`, `cdklocal`, `pulumilocal`, `samlocal` and `tflocal`) will be installed.
:::note
The LocalStack Feature does not manage the installation of underlying tools (e.g., for awslocal, aws-cli is not installed).
For more information on dependencies, please refer to the [Feature documentation](https://github.com/localstack/devcontainer-feature).
:::
# Docker Images
> Overview of LocalStack Docker images and their purpose, their tags, and when to use each.
LocalStack functions as a local “mini-cloud” operating system that runs inside a Docker container.
LocalStack has multiple components, which include process management, file system abstraction, event processing, schedulers, and more.
Running inside a Docker container, LocalStack exposes external network ports for integrations, SDKs, or CLI interfaces to connect to LocalStack APIs.
The LocalStack & LocalStack for AWS Docker images have been downloaded over 130+ million times and provide a multi-arch build compatible with AMD/x86 and ARM-based CPU architectures.
This section will cover the different Docker images available for LocalStack and how to use them.
## LocalStack for AWS image
LocalStack for AWS contains various advanced extensions to the LocalStack base platform.
With LocalStack for AWS image, you can access all the emulated AWS cloud services running entirely on your local machine.
To use the LocalStack for AWS image, you can pull the image from Docker Hub:
```bash
docker pull localstack/localstack:latest
```
To use the LocalStack for AWS image, you must configure an environment variable named `LOCALSTACK_AUTH_TOKEN` to contain your Auth Token.
The LocalStack for AWS image will display a warning if you do not set an Auth Token (or if the license is invalid/expired) and will not activate the Pro features.
LocalStack for AWS gives you access to the complete set of LocalStack features, including the [LocalStack Web Application](https://app.localstack.cloud) and [dedicated customer support](/aws/help-support/get-help/).
You can use the LocalStack for AWS image to start your LocalStack container using various [installation methods](/aws/getting-started/installation/).
While configuring to run LocalStack with Docker or Docker Compose, run the `localstack/localstack-pro` image with the appropriate tag you have pulled (if not `latest`).
## Image tags
Starting with the end-of-March 2026 release, LocalStack version tags follow [calendar versioning](https://calver.org/) in the `YYYY.MM.patch` format (for example, `2026.03.0`). Releases up to and including `v4.14.0` use [semantic versioning](https://semver.org).
The following tags are available for the LocalStack Docker image:
| Tag | Updated when | Recommended for |
|---|---|---|
| `latest` / `stable` | Tagged releases only (e.g. `2026.05.0`) | Most users — stable, release-quality builds |
| `dev` | Every merged commit on `main` | Users who need the latest unreleased changes |
| `YYYY.MM` (e.g. `2026.05`) | Each patch release within that month | Users who want bugfixes but want to avoid feature changes |
| `YYYY.MM.patch` (e.g. `2026.05.0`) | Never (pinned) | Fully reproducible environments where no changes are acceptable |
:::note
As of May 2026, `latest` was changed to mirror `stable` and is only updated on official tagged releases. If you previously relied on `latest` for the most recent unreleased changes, switch to the `dev` tag.
The `nightly` tag is no longer published for LocalStack for AWS. Use the `dev` tag to track untagged changes from `main`.
:::
Visit the [LocalStack for AWS tag](https://hub.docker.com/r/localstack/localstack-pro/tags?page=1&ordering=last_updated) page on Docker Hub.
# Enterprise Image
> Custom LocalStack Enterprise image for offline or air-gapped environments with preferred configurations and packages.
## Introduction
LocalStack offers an Enterprise image that allows offline usage and includes a customer-specific configuration.
This offline functionality is enabled by:
- Pre-installed packages required for running specific services that are usually downloaded on demand (such as `opensearch` or `dynamodb-local`).
- A certificate keypair for `localhost.localstack.cloud` to resolve to the LocalStack container via our DNS server.
- An embedded decryption key in the image, eliminating the need to contact the license server to operate LocalStack.
## Why use Enterprise Image?
- **Airgapped environments**: The Enterprise image is ideal for customers who operate in airgapped environments where internet access is restricted.
- **Security Fixes**: The Enterprise image is updated with the latest security fixes and patches including container image scans on a priority basis.
- **Custom Configuration**: The Enterprise image can be customized to include specific packages and configurations required by the customer.
- **CI Usage**: The Enterprise image can be used in CI/CD pipelines to ensure that the same image is used across all environments.
## How to use the image?
- After the image is pushed to the customer-specific ECR repository, the customer can pull and push it to their internal Docker registry.
- Developers within the customer’s network can then pull the image from this registry.
- To use the image from the command line interface (CLI), set the `image` field on the container block to the name of the Enterprise image:
```toml
# .lstk/config.toml
[[containers]]
type = "aws"
image = "localstack-enterprise"
```
```bash
lstk start
```
See [Custom container image](/aws/developer-tools/running-localstack/lstk/configuration/#custom-container-image) for details, including how `lstk` falls back to a locally present image when a pull fails.
## "Online" vs "Offline" image
This section compares the standard [LocalStack for AWS Docker image](/aws/customization/other-installations/docker-images) ("online") with the customer-specific Enterprise image ("offline").
### Key differences
| Area | Standard image | Enterprise image |
|---|---|---|
| Internet requirement for core startup | Requires network access for normal [license activation](/aws/getting-started/auth-token). | Designed to run without internet access in air-gapped environments. |
| License behavior | Activates via LocalStack licensing endpoints. If unreachable, LocalStack attempts offline activation and requires re-activation every 24 hours. | Includes an embedded keypair/decryption key so LocalStack can run without contacting the license server. |
| Service dependencies | Some services may download dependencies on demand during runtime. | Service dependencies are pre-baked into the image for offline usage. |
| Cloud Pods | Platform remote integration can sync state with your LocalStack account. | LocalStack Platform remotes are typically unavailable in fully air-gapped setups. Use self-managed remotes (for example S3 or ORAS) when available in your environment. |
| Ephemeral instances | Available via Web App/CLI as cloud-hosted LocalStack runtimes. | Not available in air-gapped/offline deployments because they run on LocalStack Cloud infrastructure. |
| Telemetry | Can send usage events for features such as [Stack Insights](/aws/organizations-admin/stack-insights). | Keep event reporting disabled (`DISABLE_EVENTS=1`) for strict offline setups. |
### What communicates with LocalStack Cloud?
The main integrations are:
- **License activation**: The standard image performs online activation using your `LOCALSTACK_AUTH_TOKEN`. See [Auth Token](/aws/getting-started/auth-token) for activation behavior and fallbacks.
- **Event reporting (telemetry)**: Used for Stack Insights and related usage analytics. You can disable this via `DISABLE_EVENTS=1`.
- **Cloud Pods (platform remote)**: Saving/loading pods against the default platform remote uses LocalStack-managed infrastructure. See [Cloud Pods](/aws/developer-tools/snapshots/cloud-pods/) for where that data is held. For stricter data residency, consider other [remote storage options](/aws/developer-tools/snapshots/saving-snapshots-to-s3).
- **Ephemeral instances**: These are managed cloud instances and therefore require connectivity to LocalStack Cloud services.
### Recommended setup for offline environments
- Use the **offline Enterprise image** when no outbound connectivity is permitted.
- Keep `DISABLE_EVENTS=1` to prevent event reporting.
- Prefer local persistence or self-managed Cloud Pod remotes instead of platform remotes.
- Do not rely on Ephemeral Instances in fully isolated networks; run LocalStack directly in your controlled environment instead.
# LocalStack Docker Extension
> Manage your LocalStack container directly from Docker Desktop with the LocalStack Extension.
## Introduction
The LocalStack Extension for Docker Desktop enables developers working with LocalStack to operate their LocalStack container via Docker Desktop, including checking service status, container logs, and configuring profiles.
To install the LocalStack Extension for Docker Desktop, you need to have [Docker Desktop installed on your machine](https://www.docker.com/products/docker-desktop).
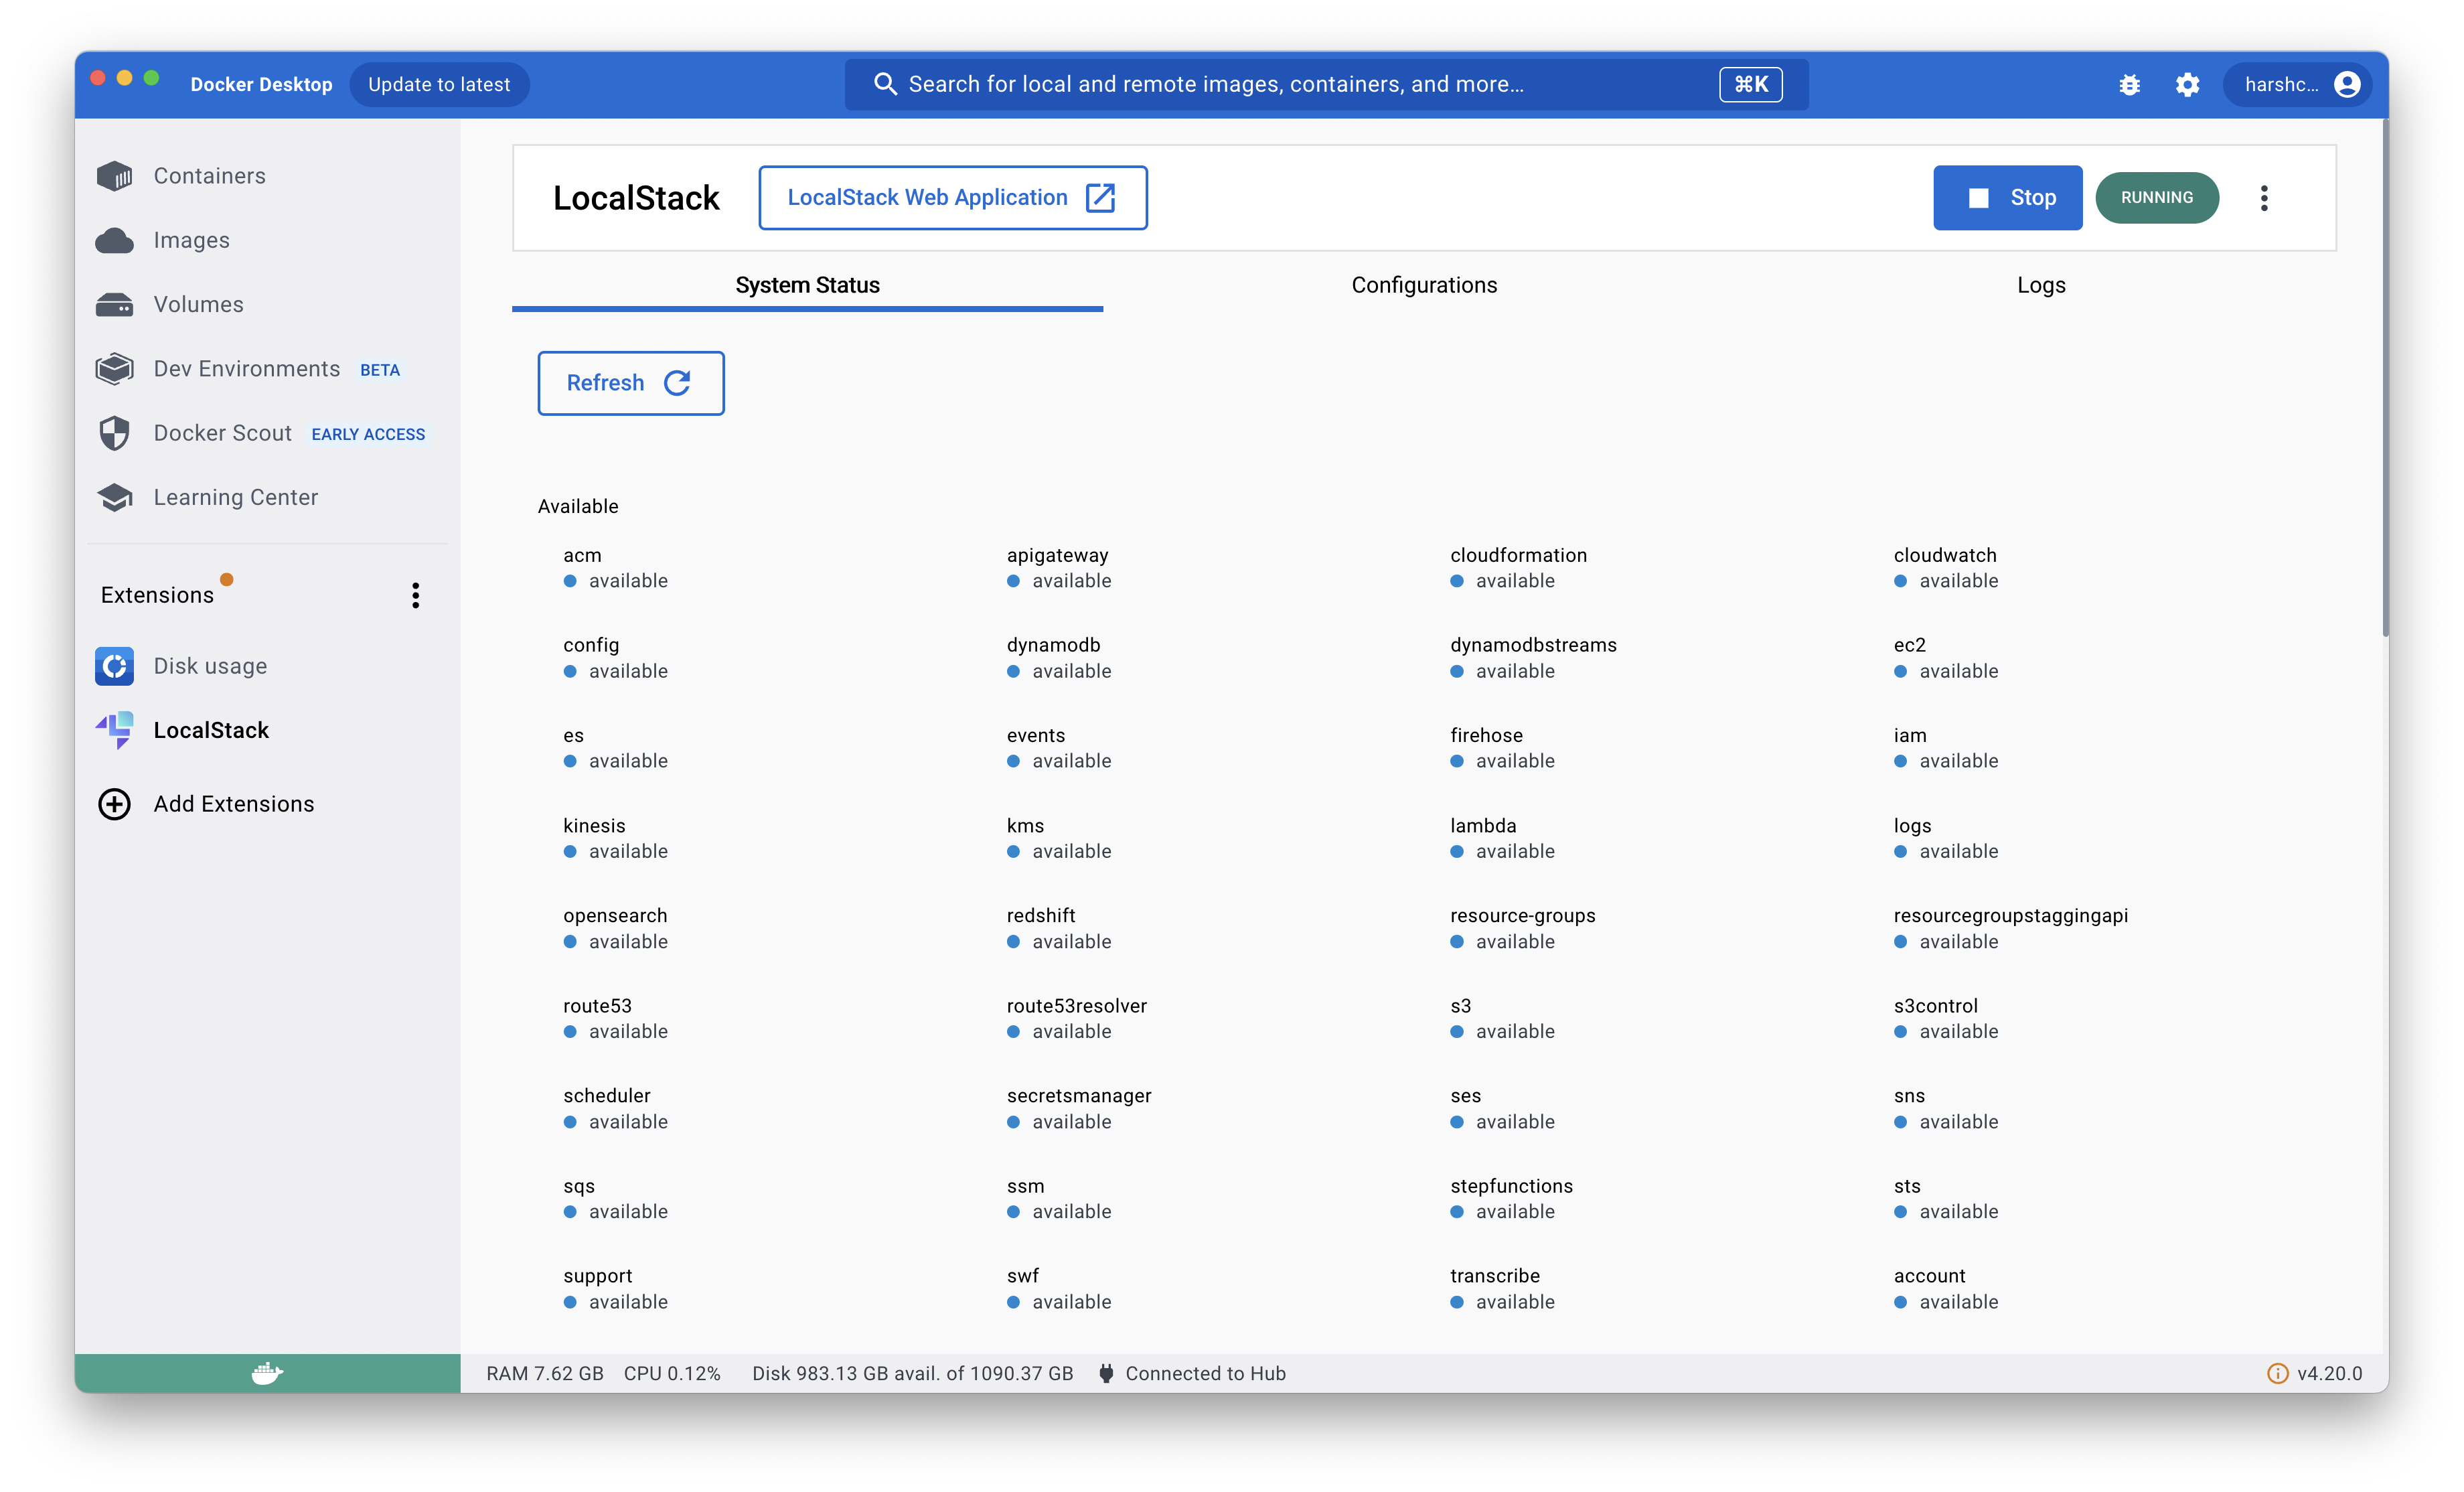
## Installation
To utilize LocalStack's Docker Extension, it is necessary to have a recent version of Docker Desktop (v4.8 or higher) installed on the local machine.
To enable the extension, access the **Extensions** tab and select the **Enable Docker Extensions** and **Show Docker Extensions system containers** option.
The LocalStack Extension for Docker Desktop has been validated and can be accessed on the Extensions Marketplace.
To begin using it, navigate to the **Extensions Marketplace**, search for **LocalStack**, and click the **Install** button to proceed with the installation.
An alternative method for installing the LocalStack's Extension for Docker Desktop is pulling the [public Docker image](https://hub.docker.com/r/localstack/localstack-docker-desktop) from Docker Hub and installing it!
```bash
docker extension install localstack/localstack-docker-desktop:latest
```
After installation, you can access the LocalStack Extension for Docker Desktop from the **Extensions** tab.
Upon the initial launch of the extension, a prompt to select a mount point for the LocalStack container will appear.
Select your username from the drop-down menu.
Furthermore, you can modify this setting later by navigating to the **Configurations** tab and choosing a different mount point.
Select the mount point upon the launch of LocalStack's Docker extension.
## Features
LocalStack's Docker Extension helps users to manage their LocalStack container with a simple and intuitive user interface through Docker Desktop.
The extension includes container management, configuration profile management, service status, and container logs!
### Container management
You can start, stop, and restart LocalStack from the Docker Desktop.
You can also see the current status of your LocalStack container and navigate to LocalStack Web Application.
### Container logs
You can see the log information of the LocalStack container and all the available services and their status on the service page.
### Configuration management
You can manage and use your profiles via configurations and create new configurations for your LocalStack container.
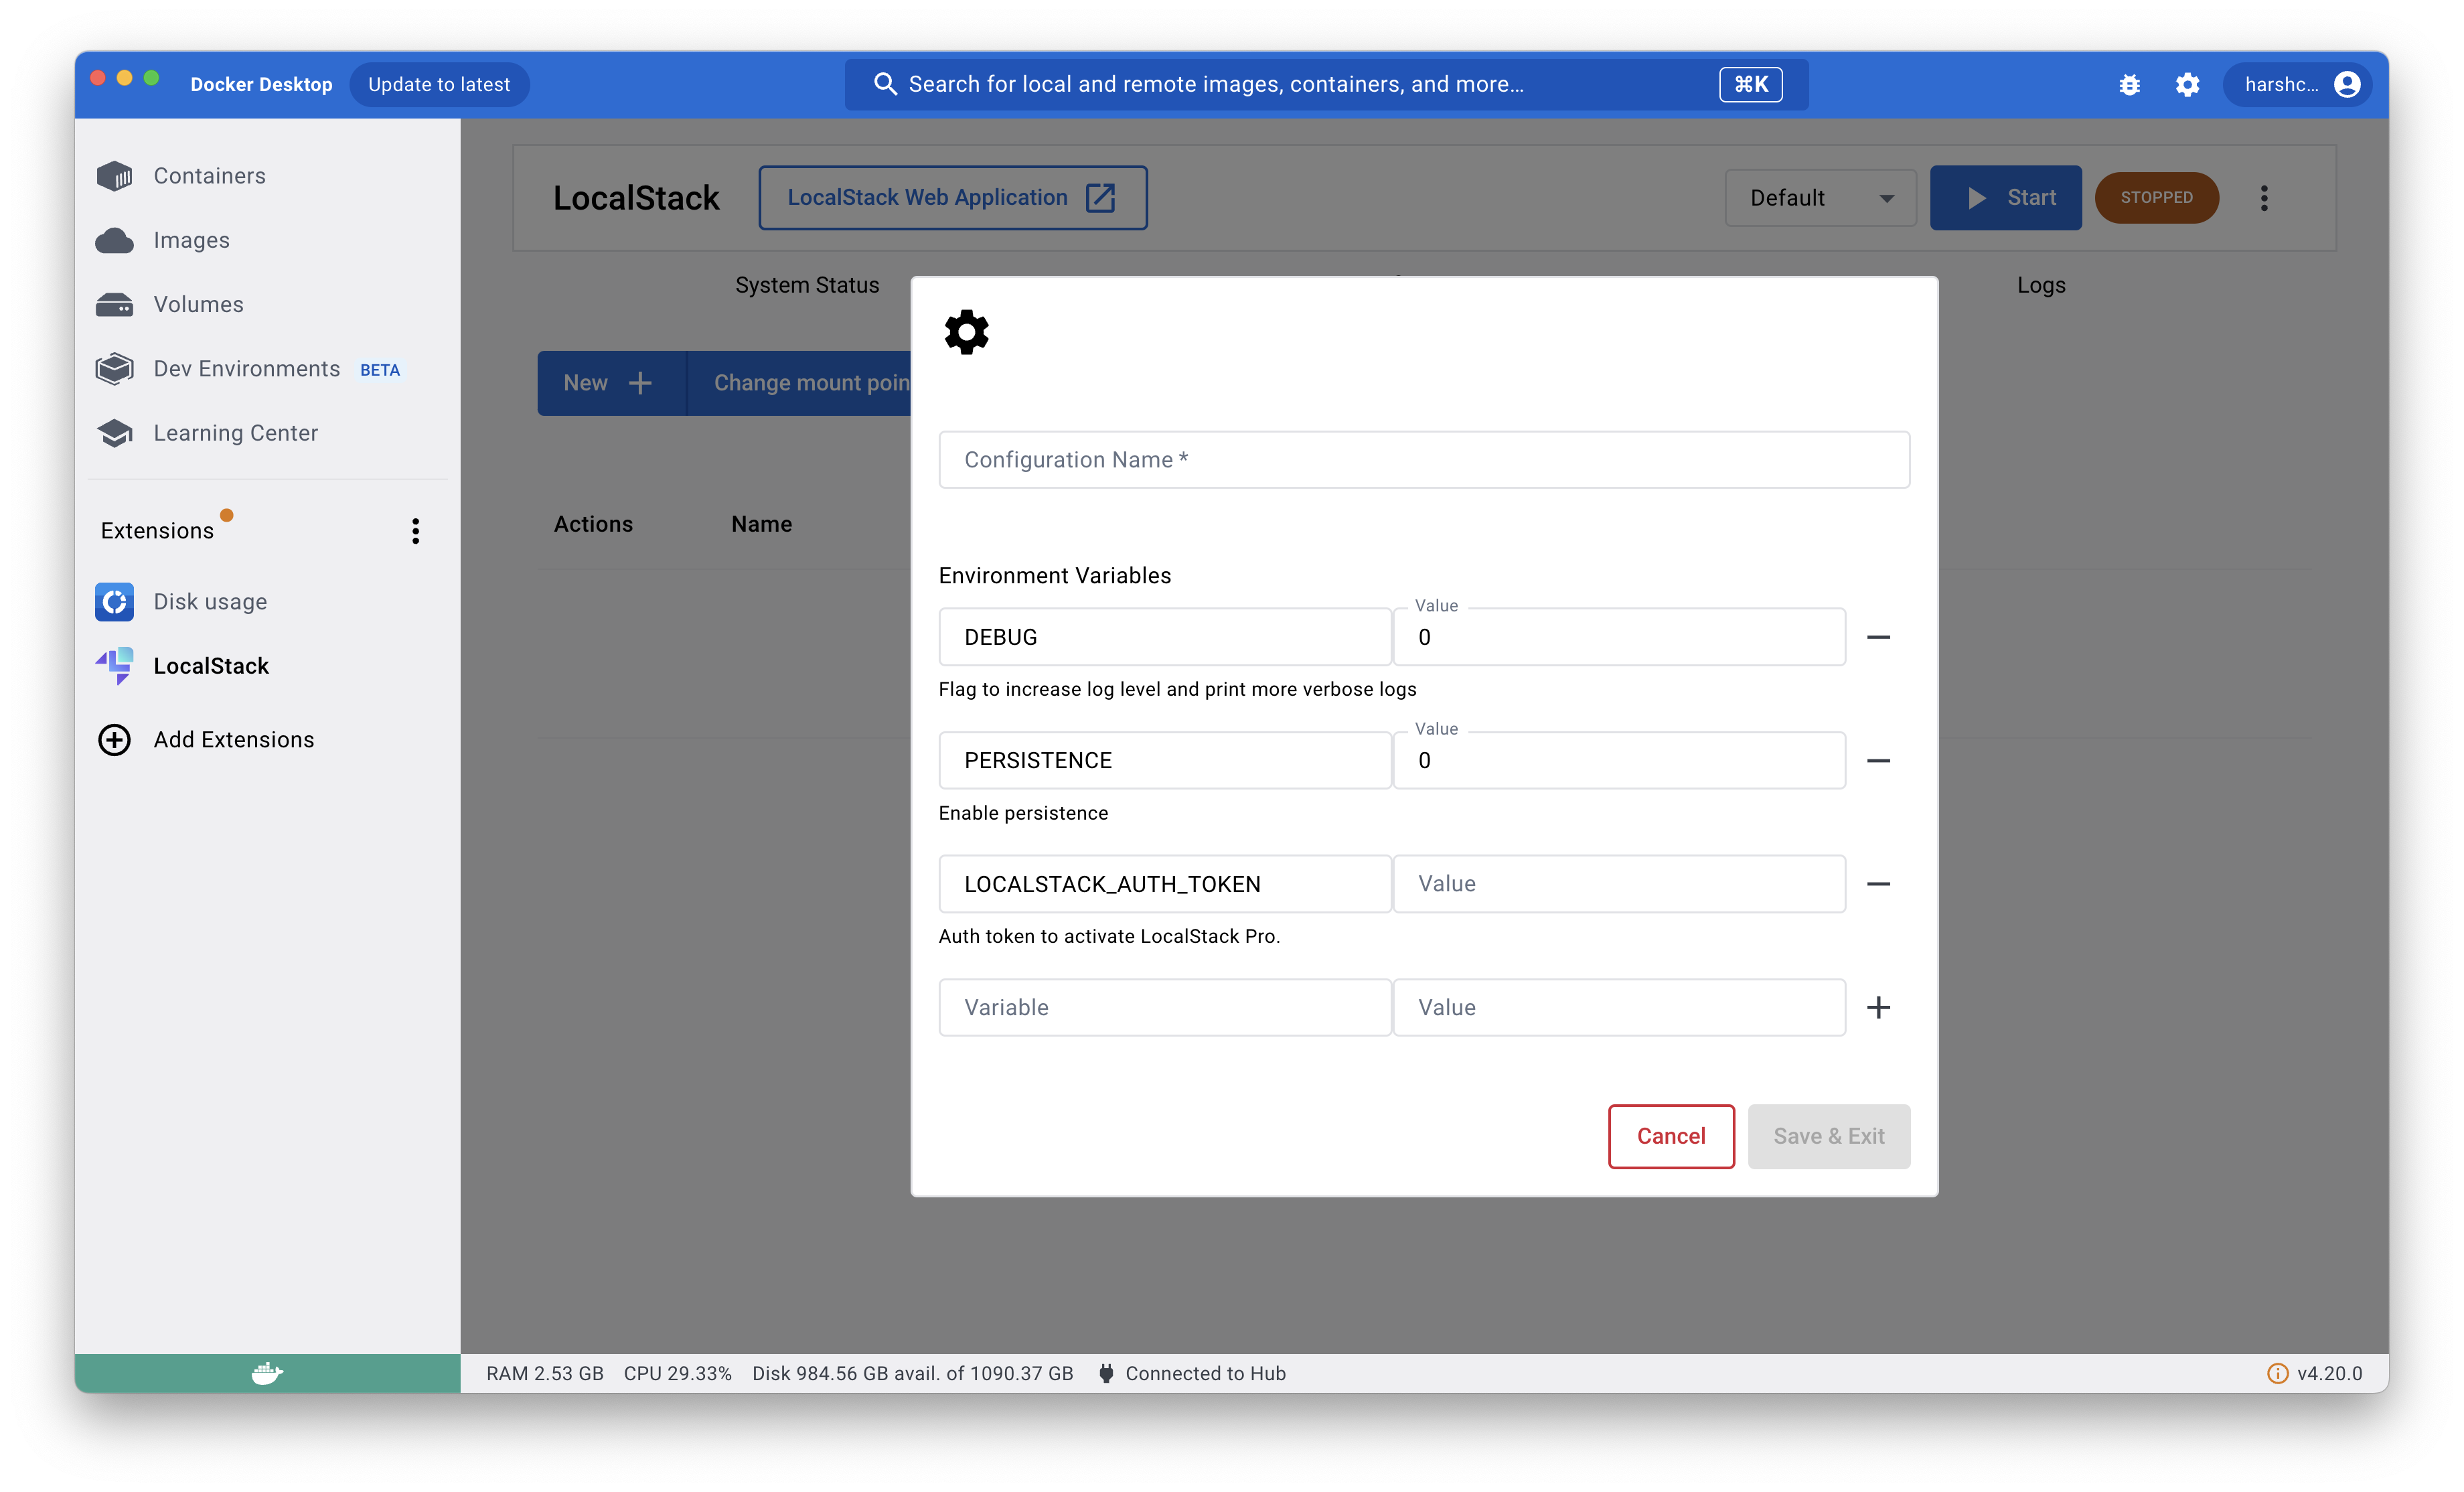
## Configure an Auth Token
To configure an Auth Token for the LocalStack Docker Extension, you need to create a new configuration profile.
Navigate to the **Configurations** tab and click the **New +** button.
Enter the configuration name and add the `LOCALSTACK_AUTH_TOKEN` environment variable with the desired value.
To start the LocalStack for AWS container with the Auth Token, select the configuration profile from the drop-down menu and click the **Start** button.
# Podman
> Run LocalStack inside Podman, a Docker-compatible container engine.
## Introduction
By default, the LocalStack CLI starts the LocalStack runtime inside a Docker container.
Docker may not be available on your system, and a popular alternative is [Podman](https://podman.io/get-started) which you can use to run LocalStack.
Podman support is still experimental, and the following docs give you an overview of the current state.
:::note
The new CLI experience, `lstk`, does not yet fully support Podman.
The commands and environment variables on this page refer to the legacy [LocalStack CLI](/aws/developer-tools/running-localstack/localstack-cli/), which you should continue to use for Podman setups.
:::
From the Podman docs:
> Podman is a daemonless, open source, Linux native tool designed to make it easy to find, run, build, share and deploy applications using Open Containers Initiative (OCI) Containers and Container Images.
> Podman provides a command line interface (CLI) familiar to anyone who has used the Docker Container Engine.
> Most users can simply alias Docker to Podman (`alias docker=podman`) without any problems.
## Options
To run `localstack`, simply aliasing `alias docker=podman` is not enough, for the following reasons:
- `localstack` is using [docker-py](https://pypi.org/project/docker/) which requires a connection to `/var/run/docker.sock`
- Lambda requires mounting the Docker socket `/var/run/docker.sock` into the container (see [Lambda providers](/aws/services/lambda)).
Here are several options on running LocalStack using podman:
### podman-docker
The package `podman-docker` emulates the Docker CLI using podman.
It creates the following links:
- `/usr/bin/docker -> /usr/bin/podman`
- `/var/run/docker.sock -> /run/podman/podman.sock`
This package is available for some distros:
- https://archlinux.org/packages/extra/x86_64/podman-docker/
- https://packages.ubuntu.com/oracular/podman-docker
- https://packages.debian.org/sid/podman-docker
### Rootfull Podman with podman-docker
The simplest option is to run `localstack` using `podman` by having `podman-docker` and running `localstack start` as root
```bash
# you have to start the podman socket first
sudo systemctl start podman
# then
sudo sh -c 'DEBUG=1 localstack start --network podman'
```
### Rootfull Podman without podman-docker
```sh
# you still have to start the podman socket first
sudo systemctl start podman
# you have to pass a bunch of env variables
sudo sh -c 'DEBUG=1 DOCKER_CMD=podman DOCKER_HOST=unix://run/podman/podman.sock DOCKER_SOCK=/run/podman/podman.sock localstack start --network podman'
```
### Rootless Podman
You have to prepare your environment first:
- https://wiki.archlinux.org/title/Podman#Rootless_Podman
- https://github.com/containers/podman/blob/main/docs/tutorials/rootless_tutorial.md
- https://www.redhat.com/sysadmin/rootless-podman
```bash
# again, you have to start the podman socket first
systemctl --user start podman.service
# and then localstack
DEBUG=1 DOCKER_CMD="podman" DOCKER_SOCK=$XDG_RUNTIME_DIR/podman/podman.sock DOCKER_HOST=unix://$XDG_RUNTIME_DIR/podman/podman.sock localstack start --network podman
```
If you have problems with [subuid and subgid](https://wiki.archlinux.org/title/Podman#Set_subuid_and_subgid), you could try to use [overlay.ignore_chown_errors option](https://www.redhat.com/sysadmin/controlling-access-rootless-podman-users)
```bash
DEBUG=1 DOCKER_CMD="podman --storage-opt overlay.ignore_chown_errors=true" DOCKER_SOCK=$XDG_RUNTIME_DIR/podman/podman.sock DOCKER_HOST=unix://$XDG_RUNTIME_DIR/podman/podman.sock localstack start --network podman
```
### Podman on Windows
You can run Podman on Windows using [WSLv2](https://learn.microsoft.com/en-us/windows/wsl/about#what-is-wsl-2).
In the guide, we use a Docker Compose setup to run LocalStack.
Initialize and start Podman:
```bash
podman machine init
podman machine start
```
At this stage, Podman operates in rootless mode, where exposing port 443 on Windows is not possible.
To enable this, switch Podman to rootful mode using the following command:
```bash
podman machine set --rootful
```
For the Docker Compose setup, use the following configuration.
When running in rootless mode, ensure to comment out the HTTPS gateway port, as it is unable to bind to privileged ports below 1024.
```yaml showshowLineNumbers
services:
localstack:
container_name: "${LOCALSTACK_DOCKER_NAME:-localstack-main}"
image: localstack/localstack-pro
ports:
- "127.0.0.1:4566:4566"
- "127.0.0.1:4510-4559:4510-4559"
- "0.0.0.0:443:443"
networks:
- podman
security_opt:
- "label=disable"
environment:
- LOCALSTACK_AUTH_TOKEN=${LOCALSTACK_AUTH_TOKEN:?}
- DEBUG=${DEBUG:-0}
- PERSISTENCE=${PERSISTENCE:-0}
volumes:
- "${LOCALSTACK_VOLUME_DIR:-./volume}:/var/lib/localstack"
- "/var/run/docker.sock:/var/run/docker.sock"
```
The docker socket `/var/run/docker.sock` is correctly linked by default in a Podman setup.
To start the services, use `docker compose up` or `podman compose up`, depending on the availability of docker-compose.
# Rancher Desktop
> Run LocalStack on the local container runtime provided by Rancher Desktop, a Docker Desktop alternative.
import { Tabs, TabItem } from '@astrojs/starlight/components';
## Introduction
Rancher Desktop is a desktop application that provides a Kubernetes cluster on your local machine.
Rancher Desktop allows you to run Docker containers and Kubernetes clusters without relying on remote or cloud-based systems.
It utilizes `containerd` and `dockerd`, enabling users to easily switch between container runtimes.
By default, the LocalStack CLI launches the LocalStack runtime inside a Docker container.
However, if Docker is not available on your system, you can use Rancher Desktop as a popular alternative to run LocalStack.
:::note
The new CLI experience, `lstk`, does not yet fully support Rancher Desktop.
The commands and environment variables on this page refer to the legacy [LocalStack CLI](/aws/developer-tools/running-localstack/localstack-cli/), which you should continue to use for Rancher Desktop setups.
:::
## Getting started
To run LocalStack using Rancher Desktop, simply aliasing Docker commands to Rancher Desktop's `dockerd` service may not be sufficient for these reasons:
1. LocalStack depends on `docker-py`, which needs to connect to `/var/run/docker.sock`.
2. Lambda services in LocalStack require the Docker socket at `/var/run/docker.sock` to be mounted into the container.
Depending on your operating system, you may need to make additional configurations to ensure LocalStack runs smoothly with Rancher Desktop.
- 1. Make sure there is no existing socket at /var/run/docker.sock
- 2. Adjust the path if your Rancher Desktop socket is in a different location
- [Rancher Desktop with containerd](#rancher-desktop-with-containerd)
- [Windows](#windows)
These setups enable LocalStack to run smoothly with Rancher Desktop across various operating systems, ensuring compatibility with Docker-based workflows.
### Linux/macOS
:::note
### Recommended Settings for Rancher Desktop on macOS
If you're using Rancher Desktop on macOS, particularly on Apple Silicon (M1, M2, etc.), it's crucial to adjust both the emulation engine and the volume-sharing method.
It is recommended to switch to the VZ virtualization engine and use VirtioFS for optimal performance and to avoid permission issues.
Without these adjustments, you may encounter permission issues with volume mounts in LocalStack.
#### Switching Emulation from QEMU to VZ (Apple Virtualization Framework)
For macOS users, Rancher Desktop allows switching from QEMU to the Apple Virtualization Framework (VZ) for virtualization.
Using VZ can enhance performance and resolve permission issues with volume mounts when running LocalStack.
Here’s how to switch from QEMU to VZ:
1. Open Rancher Desktop and navigate to **Settings**.
2. Go to the **Virtual Machine** section.
3. Find the **Virtualization Engine** option, which is set to QEMU by default.
4. Change the setting from `QEMU` to `VZ (Apple Virtualization)`.
5. Restart Rancher Desktop to apply the changes.
#### Changing Volume from Reverse-SSHFS to VirtioFS
By default, Rancher Desktop uses `reverse-sshfs` for mounting volumes inside the virtual machine.
However, you can switch to `VirtioFS` to improve performance and address permission issues.
VirtioFS is a faster and more reliable volume sharing method on macOS.
To switch the volume sharing method from reverse-SSHFS to VirtioFS:
1. Open Rancher Desktop and access the **Settings**.
2. Proceed to the **Virtual Machine** section, where you'll find the volume mount options.
3. Select the **File Sharing** setting and change it from `reverse-sshfs` to `VirtioFS`.
4. Restart Rancher Desktop to implement the changes.
:::
#### Rancher Desktop with dockerd
The simplest way to run LocalStack using Rancher Desktop involves making sure that Rancher Desktop's `dockerd` is active and properly configured.
Rancher Desktop typically places its Docker socket file somewhere under your user directory, such as `~/.rancher-desktop`.
LocalStack, however, expects the Docker socket to be at `/var/run/docker.sock`.
In this scenario, you need to create a symlink from the Rancher Desktop socket to the expected location.
Start Rancher Desktop and verify it is set to use the Docker runtime.
Link the Docker socket with the following command:
```bash
1. Make sure there is no existing socket at /var/run/docker.sock
sudo rm -f /var/run/docker.sock
2. Adjust the path if your Rancher Desktop socket is in a different location
sudo ln -s /var/run/rancher-desktop-lima/docker.sock /var/run/docker.sock
```
Start LocalStack using this command:
```bash
DEBUG=1 localstack start --network rancher
```
#### Rancher Desktop with containerd
If you are using the `containerd` runtime in Rancher Desktop, you'll need to make some additional configurations.
Ensure that the `docker` command is available through Rancher Desktop's setup, or alternatively, use the [`nerdctl` command line interface](https://github.com/containerd/nerdctl).
To start LocalStack with the `containerd` environment, use the following command:
```bash
DEBUG=1 DOCKER_CMD=nerdctl localstack start --network rancher
```
### Windows
You can run Rancher Desktop on Windows using WSL2 (Windows Subsystem for Linux) with a Docker Compose setup for LocalStack.
Ensure Rancher Desktop is configured to use `dockerd`, and that the Docker socket is accessible in WSL2:
```bash
rancher-desktop settings set --docker
```
Initialize and start Rancher Desktop:
```bash
rancher-desktop --start
```
Modify your Docker Compose configuration to work with Rancher Desktop:
```yml showshowLineNumbers
services:
localstack:
container_name: "${LOCALSTACK_DOCKER_NAME:-localstack-main}"
image: localstack/localstack-pro
ports:
- "127.0.0.1:4566:4566"
- "127.0.0.1:4510-4559:4510-4559"
- "0.0.0.0:443:443"
networks:
- rancher
environment:
- LOCALSTACK_AUTH_TOKEN=${LOCALSTACK_AUTH_TOKEN:?}
- DEBUG=${DEBUG:-0}
- PERSISTENCE=${PERSISTENCE:-0}
volumes:
- "${LOCALSTACK_VOLUME_DIR:-./volume}:/var/lib/localstack"
- "/var/run/docker.sock:/var/run/docker.sock"
```
Finally, start the services using `docker compose up` or `nerdctl compose up`, depending on your configuration.
This will launch your LocalStack instance configured to interact with Rancher Desktop.
# Overview
> LocalStack's developer tools build on the emulator to give developers additional ways to increase their velocity in day-to-day cloud development.
import SectionCards from '../../../../components/SectionCards.astro';
LocalStack's developer tools build upon the emulator by providing additional ways for developers to increase their velocity. They go beyond running cloud services locally, helping you start and manage LocalStack, inspect what your application is doing, manage state, test resilience and security, and replicate resources from real AWS environments.
In this documentation, developers will be shown how they can incorporate these tools into their day to day development activities.
# App Inspector
> App Inspector is a LocalStack tool designed to enhance system observability by enabling users to view, collect, and inspect data exchanges, including event payloads and metadata, between AWS services.
## Introduction
App Inspector allows users to view, collect, and inspect data exchanges, including payloads and metadata, between AWS services.
It enhances system observability by displaying the data exchanged at every stage, facilitating clear understanding of operation flows.
In addition, it serves as a single point of truth to understand potential errors, service configuration mismatches, and IAM permission issues.
With App Inspector, you can:
- Observe and understand the flow of operations through your system.
- Identify errors and obtain detailed information for corrections.
- Get immediate feedback on any misconfigurations in your services.
- Gain insights into IAM policies and detect missing permissions.
## Requirements
App Inspector requires **LocalStack 2026.04.0** or later.
## Use Cases
**Understanding service-to-service information flow**
When a service call doesn't reach its intended target, App Inspector shows exactly where it stopped and why — tracing the flow of information between services at every hop. You get a precise answer without deploying to AWS or adding instrumentation.
**Verifying service-to-service payloads**
Inspect the exact data passed between services at every hop of your workflow. For example, confirming that a Lambda function is passing the correct payload to SNS, or that an SQS message body matches what the downstream consumer expects — before it becomes a production issue.
**Catching IAM misconfigurations early**
App Inspector runs against the LocalStack emulator, which monitors use of IAM policies. Missing or overly restrictive permissions show up immediately — in your local environment, where they're fast and cheap to fix, rather than at deployment time in the cloud.
## LocalStack Toolkit for VS Code
App Inspector is built into the [LocalStack Toolkit for VS Code](/aws/connecting/ides/vscode-extension), so you can trace operation flows and inspect payloads without leaving your editor. Once LocalStack is running, open the App Inspector panel directly in the LocalStack Toolkit extension to view operations and drill into service interactions.
If you haven't set up the toolkit yet, see [LocalStack Toolkit for VS Code](/aws/connecting/ides/vscode-extension) to get started.
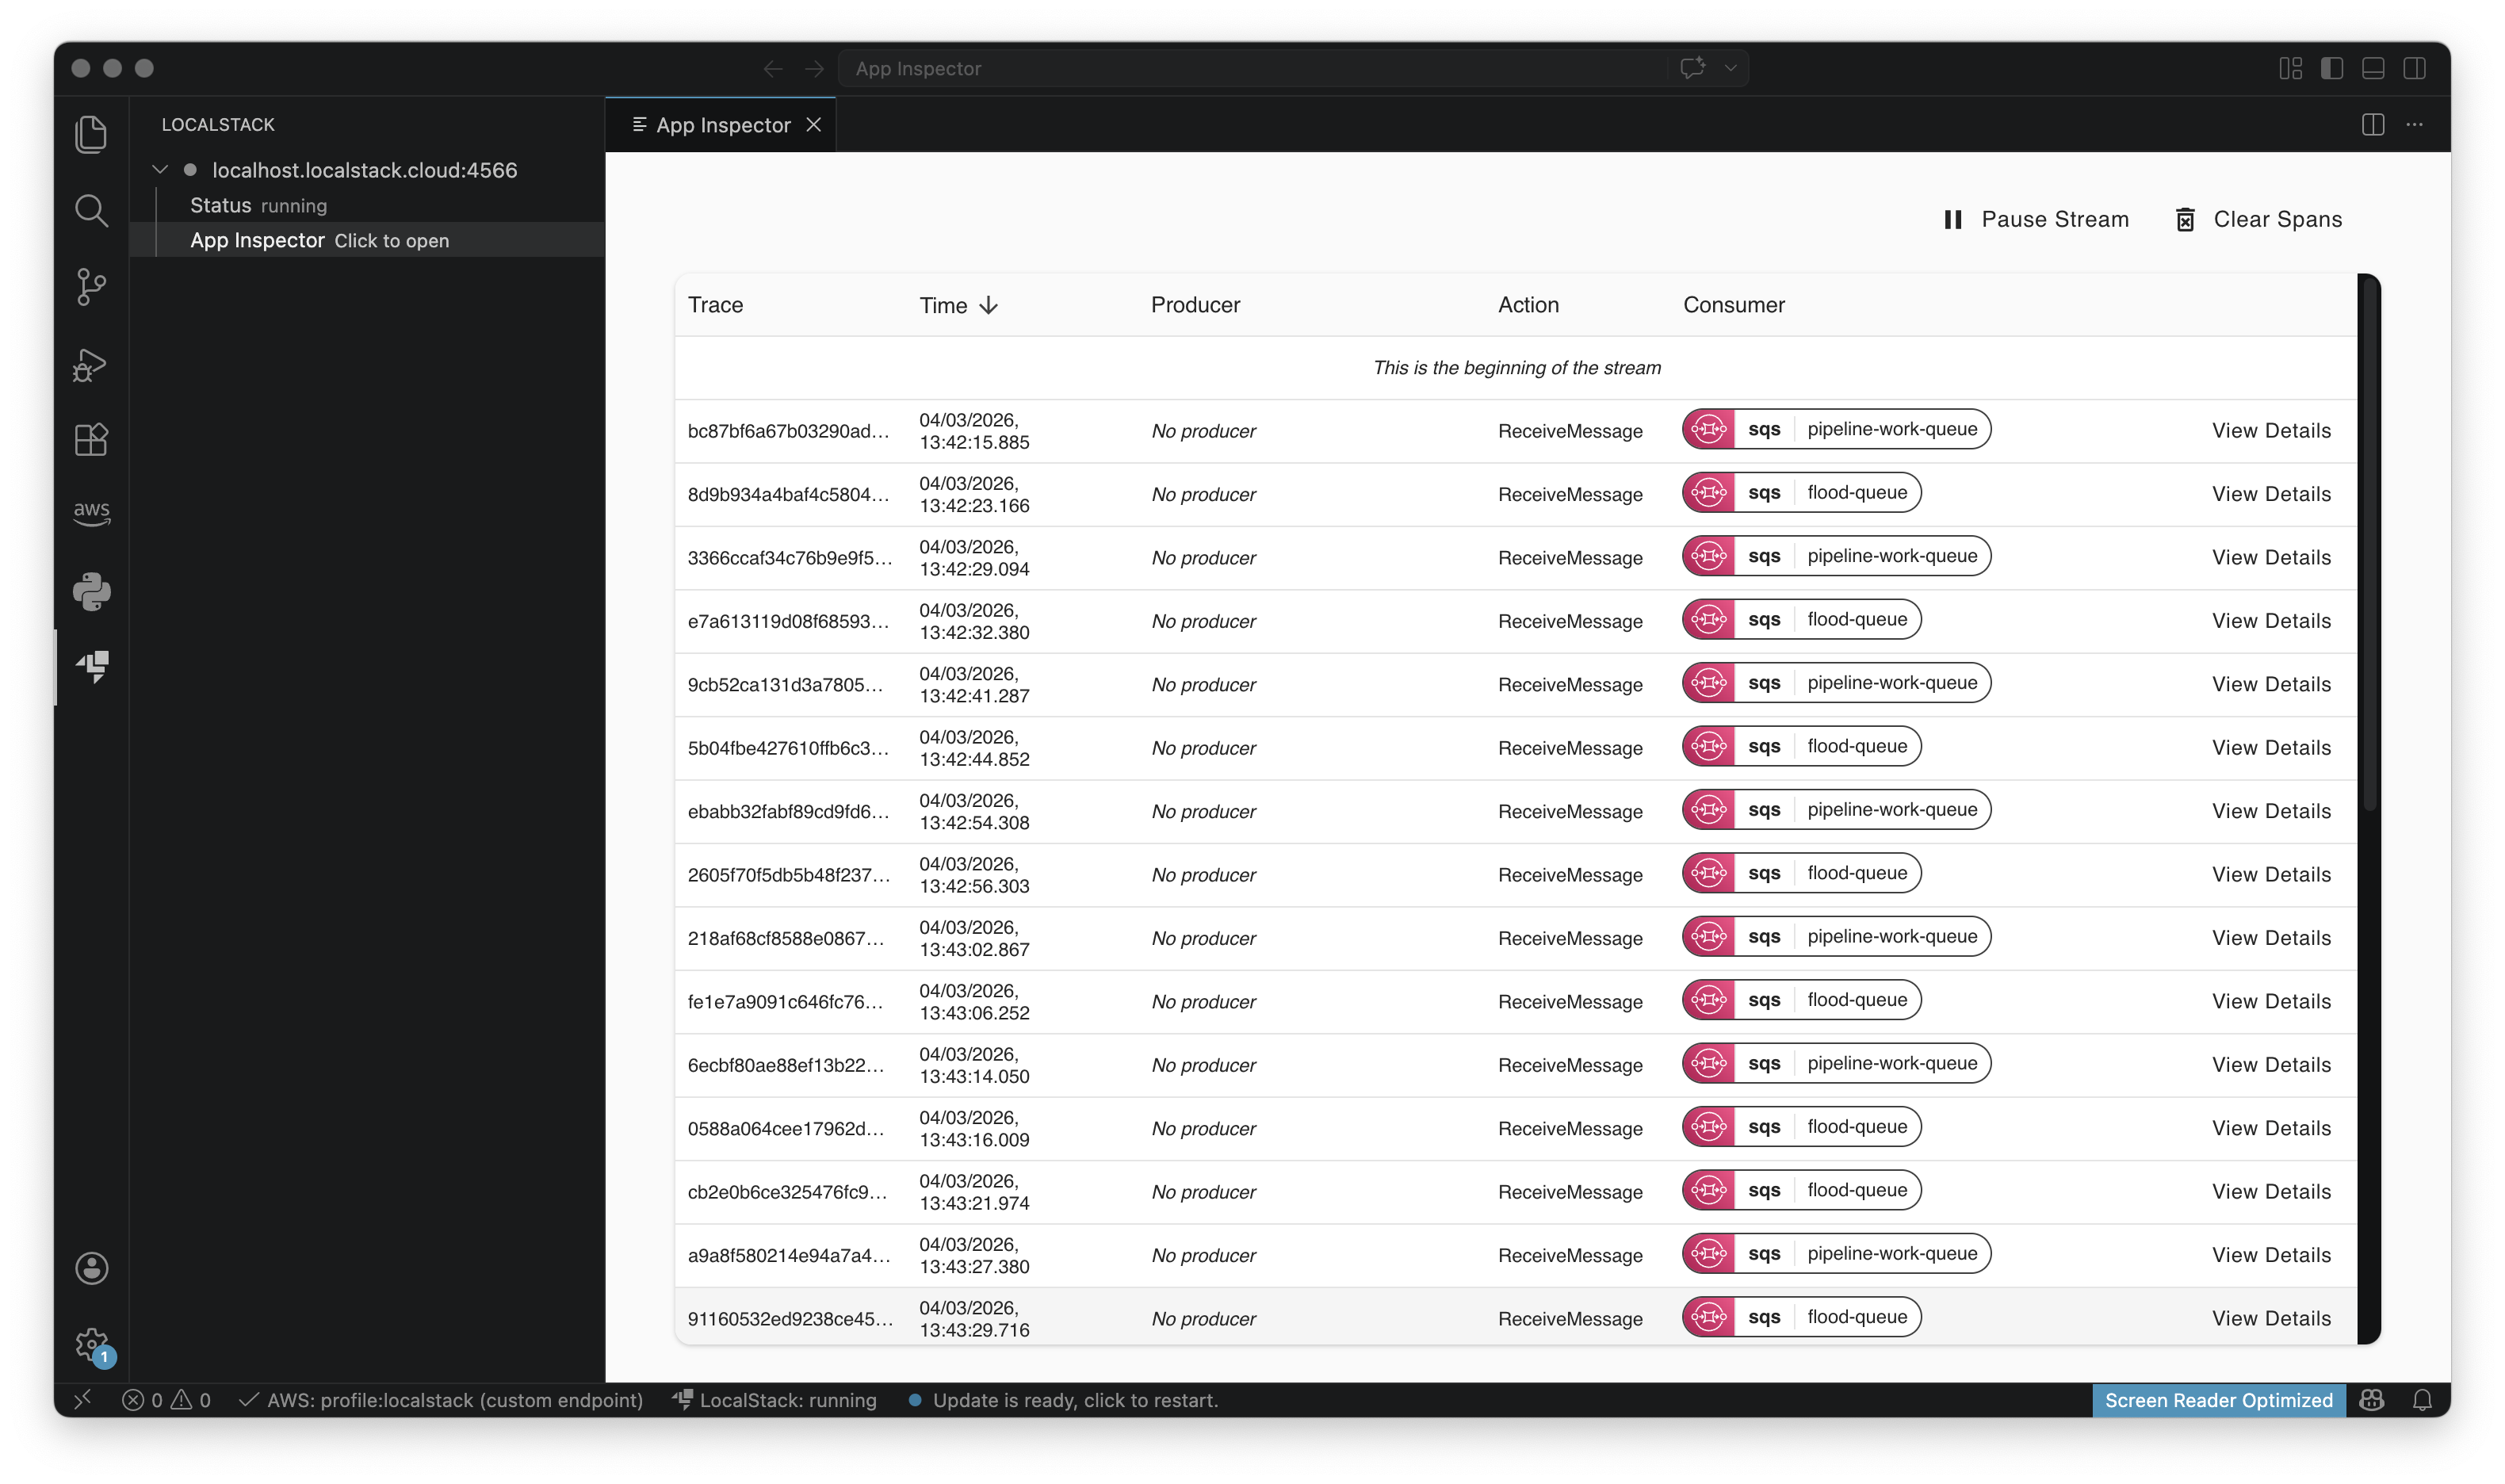
## Web Application
You can access App Inspector directly in the [LocalStack Web Application](https://app.localstack.cloud/inst/default/appinspector/spans). Navigate to **App Inspector** in your browser to view operations captured from your running LocalStack instance, inspect payloads, and trace service connections.
:::note
Operations generated during resource creation will appear in App Inspector alongside your application operations. To keep your trace clean, click **Clear Operations** before sending requests so only the relevant activity is captured.
:::
### Features
### List Operations
You can view a detailed list of operations in your application, including the **Producer** (the service that initiated the call), **Consumer** (the target service), **Action** (the specific API call made), and **Timestamp**. Operations that encountered errors are flagged inline, so you can identify failures at a glance. Click **View Graph** on any operation to switch to the graph view and see how services connect.
The interface enables you to trace the flow of operations, identify relationships between services, and analyze patterns for debugging or optimization.
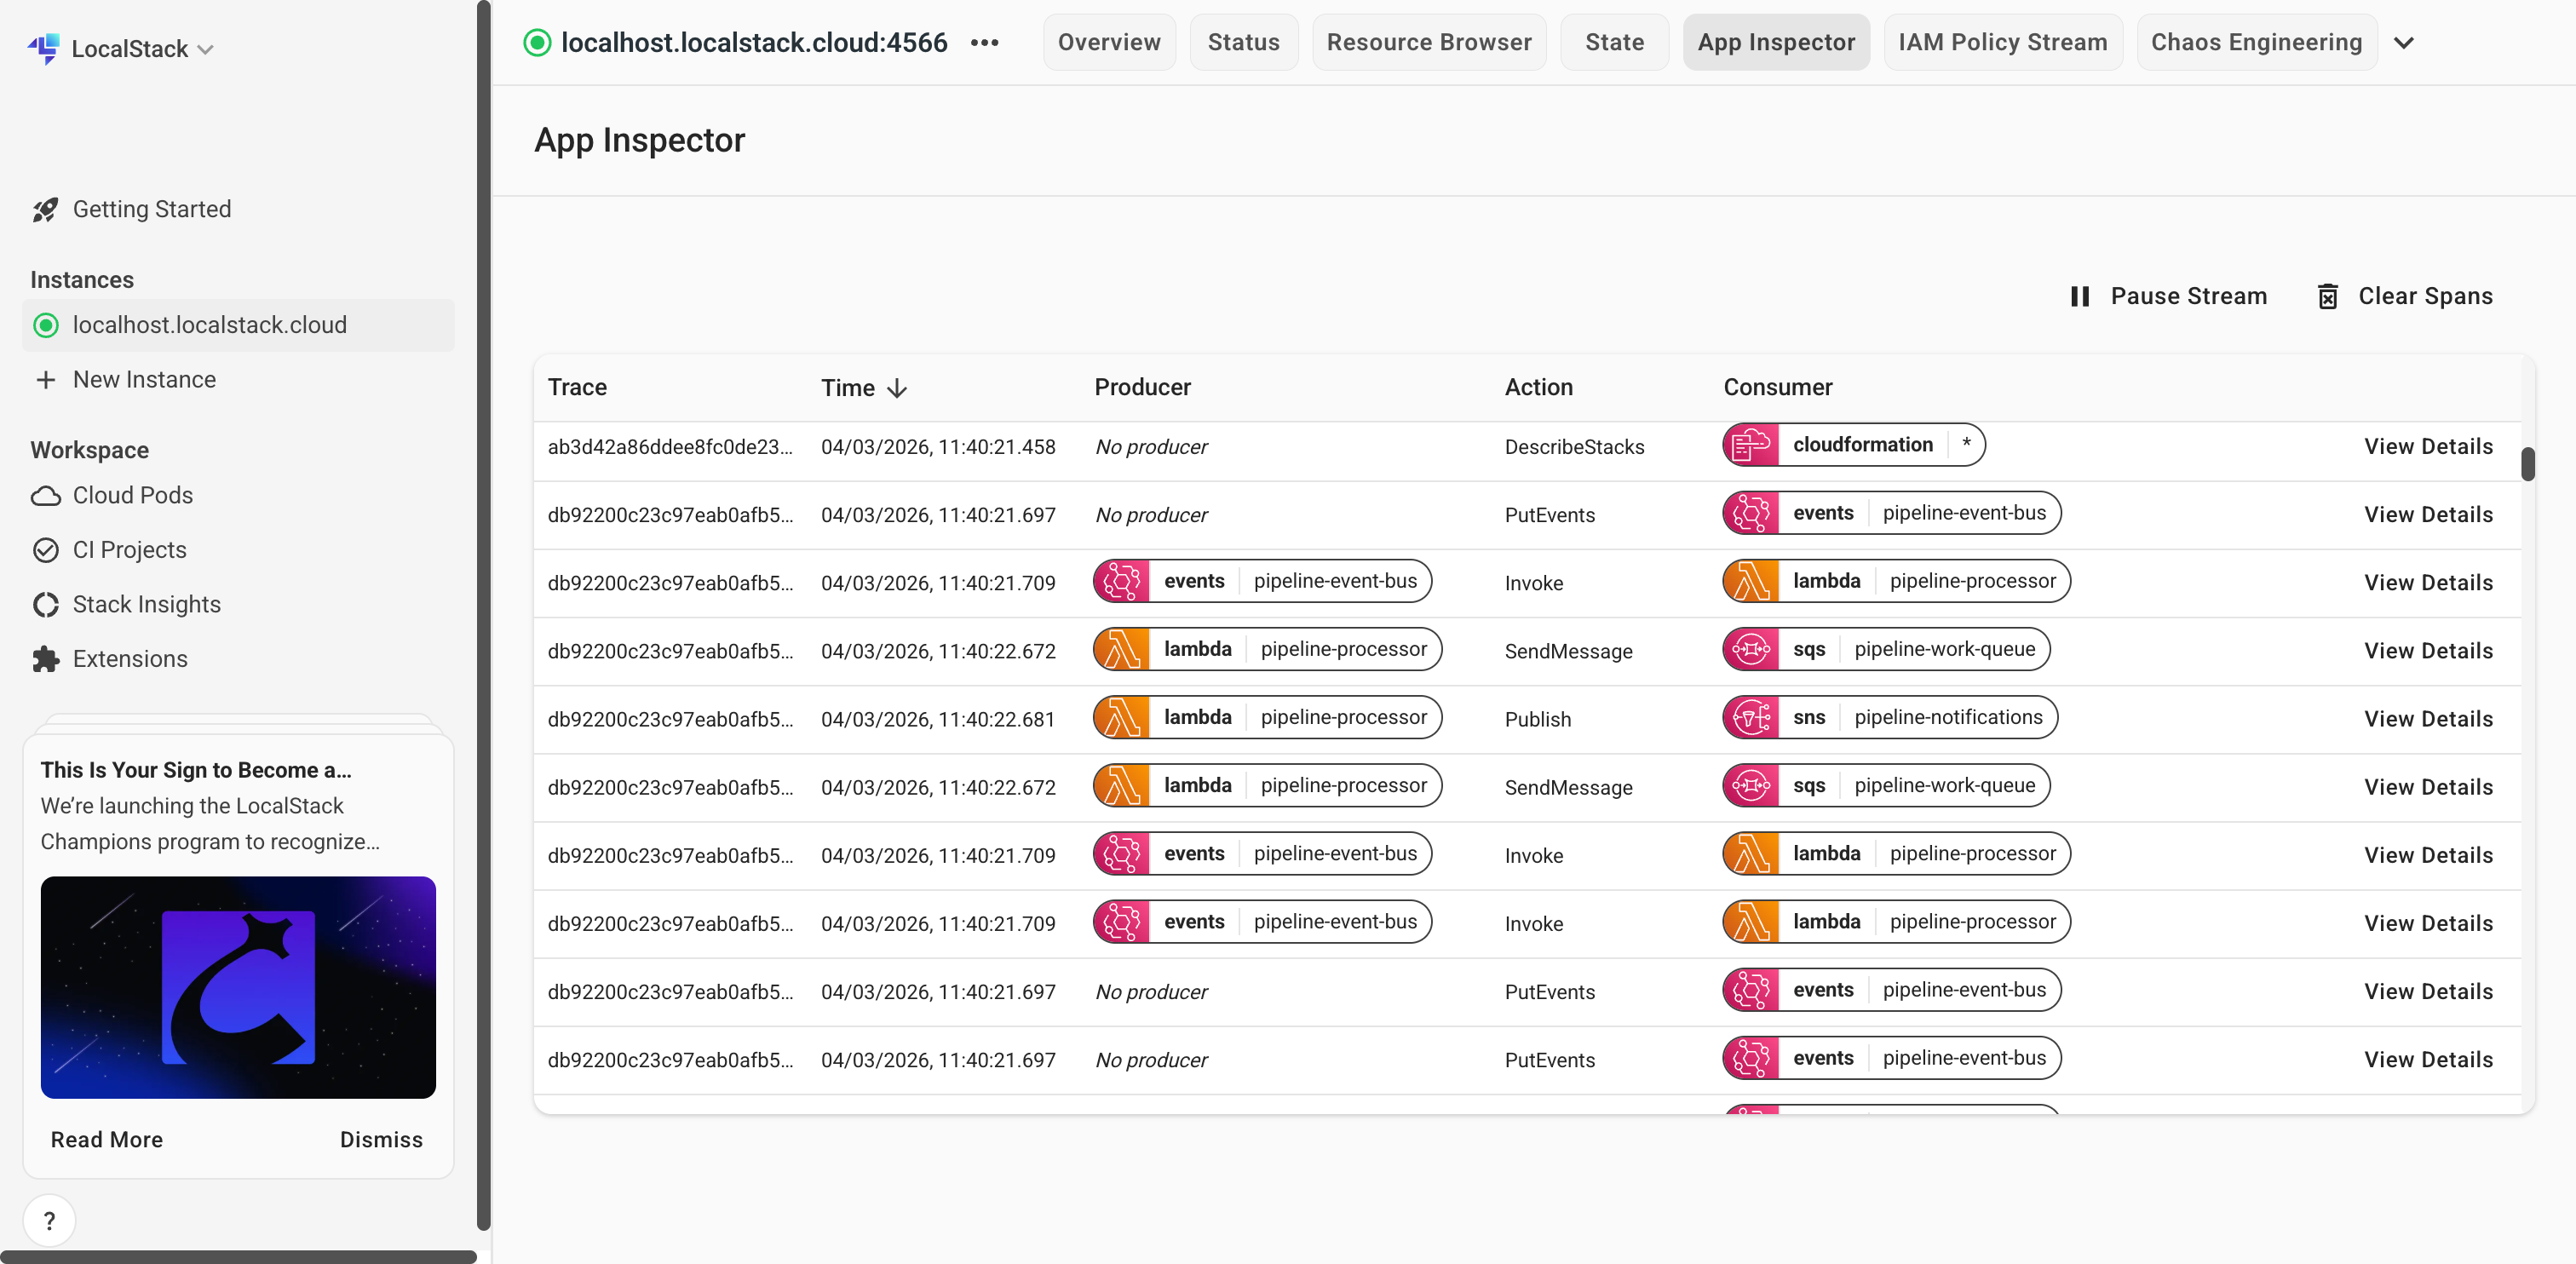
Use the search box above the operations list to filter by any text fragment, such as a resource name, an ARN segment, a status message, or a payload snippet. Search is case-insensitive, matches substrings anywhere in the field, and covers the full result set rather than just the operations currently loaded on screen.
### Graph View and Operation Details
Click **View Detail** to visualize the relationships between AWS services in your application as an interactive graph. Each node represents a service, and each edge represents a call between them, making it easy to follow the path of a request across your architecture.
By clicking on an operation in the graph or list, you can drill down into the specifics of each interaction. App Inspector displays detailed payloads, metadata, and status for each operation, and highlights errors, warnings, and potential IAM permission issues, enabling precise debugging and troubleshooting.
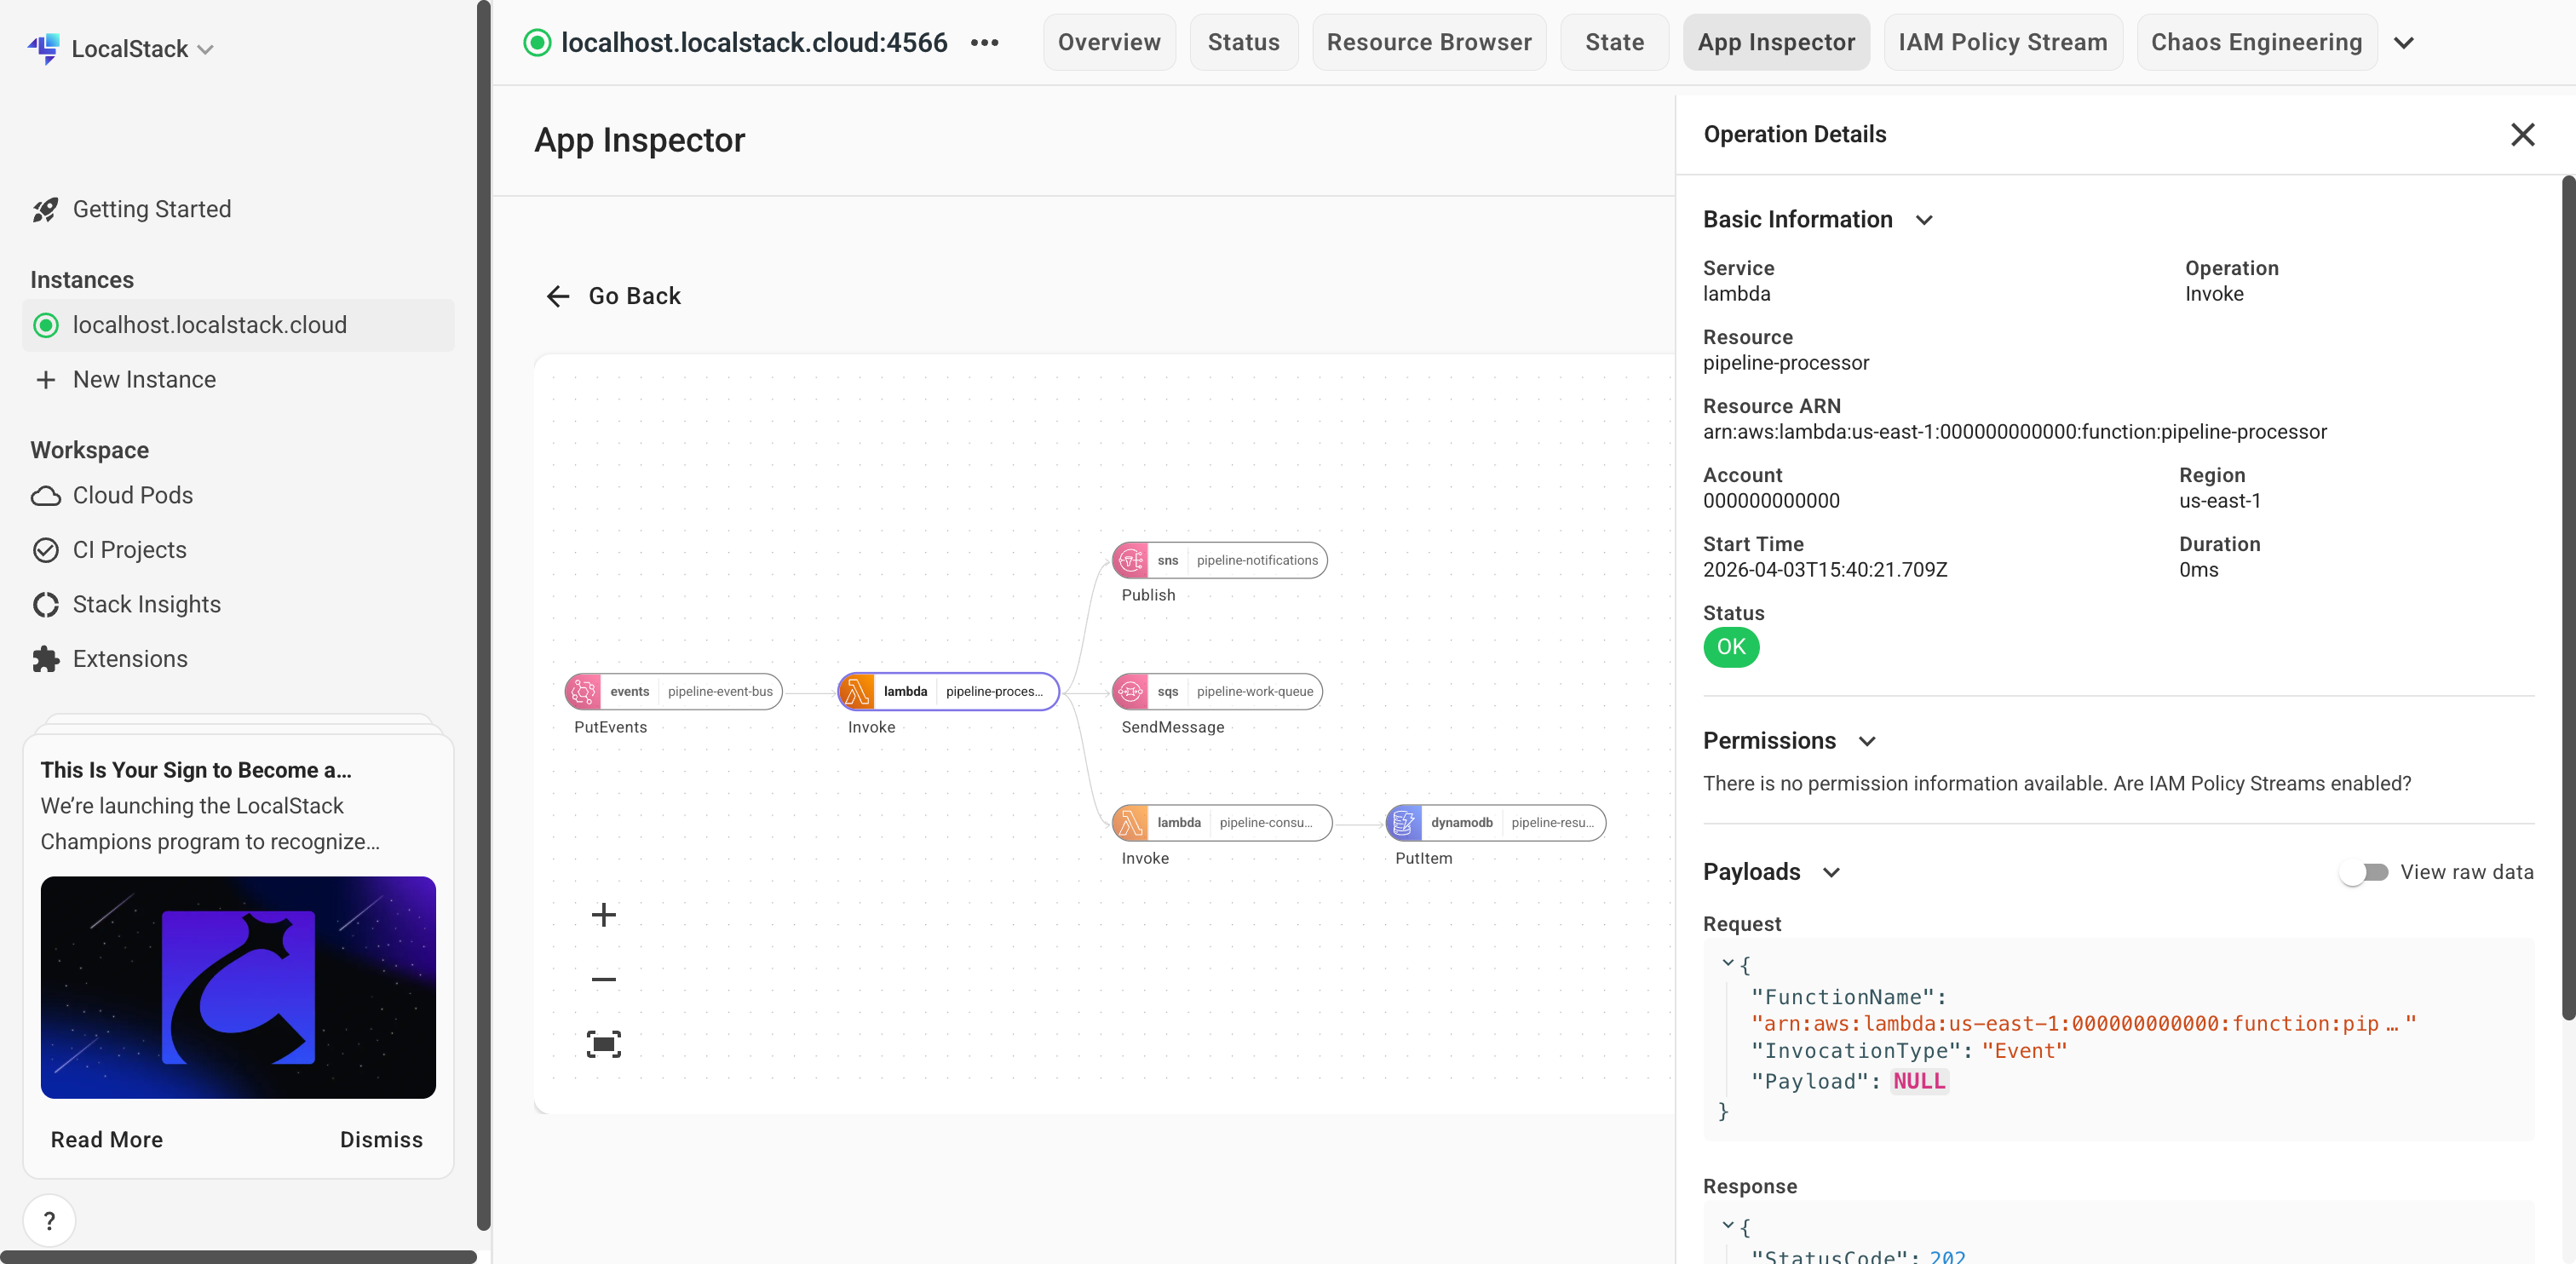
## Supported Services
:::note
Visit our [Licensing & Tiers](https://docs.localstack.cloud/aws/licensing/) doc to explore usage with App Inspector.
:::
All service operations appear in App Inspector. The following services have been optimized for improved visual layout in the graph view:
- [S3](/aws/services/s3)
- [SQS](/aws/services/sqs/)
- [SNS](/aws/services/sns/)
- [DynamoDB](/aws/services/dynamodb/)
- [Lambda](/aws/services/lambda/)
- [EventBridge](/aws/services/events/)
- [Step Functions](/aws/services/stepfunctions)
- [EventBridge Pipes](/aws/services/pipes/)
- [Kinesis Data Streams](/aws/services/kinesis/)
- [API Gateway V1](/aws/services/apigateway/)
# AWS Replicator
> AWS Replicator makes it easier to use LocalStack in shared AWS environments by copying resources into LocalStack.
import { Tabs, TabItem } from '@astrojs/starlight/components';
import ReplicatorCoverage from '@/components/replicator-coverage/ReplicatorCoverage';
## Introduction
Applications deployed on AWS often depend on shared resources defined outside their own stack, for example a VPC managed by another team.
Reproducing this kind of setup in LocalStack is hard: the dependencies may not live in IaC you have access to, and some resources are referenced by ARN, which is partly random, so simply recreating the resource in LocalStack produces a different ARN.
The AWS Replicator solves this by creating identical copies of existing AWS resources directly inside a running LocalStack instance.
This lets you replicate external dependencies before deploying your application, without changing existing stacks or building custom bootstrap infrastructure.
:::note
The AWS Replicator is in a preview state, supporting only [selected resources](#supported-resources). The new CLI experience, `lstk`, does not yet support the AWS Replicator.
Continue using the legacy [LocalStack CLI](/aws/developer-tools/running-localstack/localstack-cli/) version 4.2.0 or newer.
:::
## Getting started
A valid `LOCALSTACK_AUTH_TOKEN` must be configured to start the LocalStack for AWS image.
### Retrieve credentials to access AWS
The AWS Replicator needs read access to your AWS account and performs a limited set of read-only operations on supported resources.
These operations can be limited by creating a minimal IAM role with just the policy actions required for replication, and providing credentials to assume this role.
See the [supported resources section](#supported-resources) for details of what policy actions are required for each resource.
Replication should be triggered from a shell that has access to AWS.
Here are some options for providing credentials:
If you have the AWS CLI v2 installed, the CLI will read credentials from your configured `AWS_PROFILE`.
```bash
export AWS_PROFILE=my-aws-profile
localstack replicator ...
```
If you have the AWS CLI v1 installed or no installation of the AWS CLI, the following environment variables must be set:
- `AWS_ACCESS_KEY_ID`
- `AWS_SECRET_ACCESS_KEY`
- `AWS_SESSION_TOKEN` (optional)
- `AWS_DEFAULT_REGION`
### Trigger a replication job
Replication jobs can be triggered using the LocalStack CLI or an HTTP API.
Both methods have two steps:
1. Submit a replication job.
2. Check the job status.
#### Replication strategies
The Replicator supports different strategies depending on how many resources you want to copy and whether their related resources should be included.
The [supported resources](#supported-resources) table shows which strategies are available for each resource type, along with the IAM actions required for each.
- **Single** (`SINGLE_RESOURCE`): replicate a single resource identified by its identifier or ARN. This is the default.
- **Batch** (`BATCH`): discover and replicate every matching resource in a single job, for example all SSM parameters under a path prefix or all S3 buckets matching a prefix. Only some resource types support batch discovery, check the **Batch** badge in the [supported resources](#supported-resources) table.
- **Tree** (`TREE` explore strategy): starting from a single resource, also replicate its related child resources. For example, replicating an `AWS::Organizations::Organization` also replicates its organizational units, accounts, and policies.
`replication_type` (single vs. batch discovery) and `explore_strategy` (`SIMPLE` or `TREE`, whether related resources are followed) are independent settings and can be combined.
Two options apply regardless of strategy:
- **Cross-region source discovery**: if the resource lives in a different AWS region than your credentials' default region (or its ARN has no region component, as with S3 buckets), set a source region explicitly.
- **Skip existing resources**: by default a job fails if the target resource already exists. Set [`ignore_already_existing`](#skip-existing-resources) to skip it instead and continue the job.
#### Using the LocalStack CLI
The Replicator CLI is part of the LocalStack CLI.
Follow the [installation instructions](/aws/developer-tools/running-localstack/localstack-cli/#installation) to set it up.
Trigger a job with `localstack replicator start`, identifying the resource by its ARN:
```bash showLineNumbers
export LOCALSTACK_AUTH_TOKEN=
export AWS_DEFAULT_REGION=...
# if required
# export AWS_ACCESS_KEY_ID=
# export AWS_SECRET_ACCESS_KEY=
localstack replicator start --resource-arn
```
Or, identify the resource by its CloudControl type and identifier instead, using `--resource-type` and `--resource-identifier`:
```bash
localstack replicator start \
--resource-type \
--resource-identifier
```
The command outputs the new job, including its `job_id`:
```json showLineNumbers
{
"job_id": "50005865-1589-4f6d-a720-c86f5a5dd021",
"state": "TESTING_CONNECTION",
"resources": {"succeeded": [], "failed": [], "skipped": []},
"error_message": null,
"type": "SINGLE_RESOURCE",
"explore_strategy": "SIMPLE"
}
```
**Batch replication**: pass `--replication-type BATCH` to discover and replicate every matching resource in a single job, instead of one resource at a time. Only some resource types support batch discovery, check the **Batch** badge in the [supported resources](#supported-resources) table. For example, to replicate all SSM parameters under `/dev/`:
```bash
localstack replicator start \
--replication-type BATCH \
--resource-type AWS::SSM::Parameter \
--resource-identifier /dev/
```
`--resource-identifier` means something different for each resource type in batch mode: for `AWS::SSM::Parameter` it's a path prefix (not a wildcard or glob). Check the [supported resources](#supported-resources) table for the identifier format each resource type expects.
**Targeting**:
- `--target-account-id` sets the destination LocalStack account. Defaults to `000000000000`.
- `--target-region-name` sets the destination region. Defaults to the source region.
- `--source-region-name` sets the AWS region to read the resource from. Use it when the resource lives in a different region than your credentials' default region, or when its ARN has no region component, as with S3 buckets.
**Resource-specific configuration**: some resource types accept parameters that aren't covered by the flags above. Pass them with `--extra-config KEY=VALUE` (repeat the flag for multiple entries). For example, replicating an `AWS::RDS::DBCluster` or `AWS::RDS::DBInstance` accepts a `master_user_password`:
```bash
localstack replicator start \
--resource-type AWS::RDS::DBCluster \
--resource-identifier my-cluster \
--extra-config master_user_password=
```
Check the [supported resources](#supported-resources) table for which resource types accept extra configuration and which keys they support.
##### Skip existing resources
By default, a replication job fails when creating a resource that already exists in LocalStack.
To keep the existing resource unchanged and continue the job, set `ignore_already_existing` to `true`:
```bash
localstack replicator start \
--resource-type AWS::SSM::Parameter \
--resource-identifier myparam \
--extra-config ignore_already_existing=true
```
```json title="Output"
{
"job_id": "50005865-1589-4f6d-a720-c86f5a5dd021",
"state": "TESTING_CONNECTION",
"resources": {"succeeded": [], "failed": [], "skipped": []},
"error_message": null,
"type": "SINGLE_RESOURCE",
"explore_strategy": "SIMPLE"
}
```
Only conflicts caused by an existing target resource are skipped.
The Replicator does not overwrite or synchronize the existing resource, and other errors still fail the job.
After the job completes, the identifier appears in `resources.skipped` and the job state is `SUCCEEDED`:
```json
{
"job_id": "50005865-1589-4f6d-a720-c86f5a5dd021",
"state": "SUCCEEDED",
"resources": {"succeeded": [], "failed": [], "skipped": ["myparam"]},
"error_message": null,
"type": "SINGLE_RESOURCE",
"explore_strategy": "SIMPLE"
}
```
The option applies to single, batch, and tree replication jobs.
Tree replication also automatically skips some shared related resources, such as an IAM managed policy referenced by multiple roles.
#### Using the HTTP API
To trigger replication via the HTTP API, send a `POST` request to:
```bash
http://localhost.localstack.cloud:4566/_localstack/replicator/jobs
```
with a payload identifying the resource, the replication strategy, and AWS credentials to read it:
```json showLineNumbers
{
"replication_type": "SINGLE_RESOURCE",
"replication_job_config": {
"resource_type": "",
"resource_identifier": ""
},
"source_aws_config": {
"aws_access_key_id": "...",
"aws_secret_access_key": "...",
"aws_session_token": "...", // optional
"region_name": "...",
"endpoint_url": "..." // optional
},
"target_aws_config": {} // optional, same shape as `source_aws_config`
}
```
Unlike the CLI, the HTTP API always requires `aws_access_key_id` and `aws_secret_access_key` in `source_aws_config` — it cannot fall back to a local AWS profile.
For example, to replicate an SSM parameter named `myparam` using credentials whose default region is `eu-central-1`:
```json showLineNumbers
{
"replication_type": "SINGLE_RESOURCE",
"replication_job_config": {
"resource_type": "AWS::SSM::Parameter",
"resource_identifier": "myparam"
},
"source_aws_config": {
"aws_access_key_id": "...",
"aws_secret_access_key": "...",
"region_name": "eu-central-1"
}
}
```
Use `replication_type: "BATCH"` to discover and replicate every matching resource instead of one.
For example, to replicate all SSM parameters under `/dev/`:
```json
{
"replication_type": "BATCH",
"replication_job_config": {
"resource_type": "AWS::SSM::Parameter",
"resource_identifier": "/dev/"
},
"source_aws_config": {
"aws_access_key_id": "...",
"aws_secret_access_key": "...",
"region_name": "eu-central-1"
}
}
```
Set `explore_strategy` to `TREE` to also replicate a resource's related resources.
For example, to replicate an entire organization tree:
```json
{
"replication_type": "SINGLE_RESOURCE",
"explore_strategy": "TREE",
"replication_job_config": {
"resource_type": "AWS::Organizations::Organization",
"resource_identifier": "o-exampleorgid"
},
"source_aws_config": {
"aws_access_key_id": "...",
"aws_secret_access_key": "...",
"region_name": "..."
}
}
```
When omitted, `explore_strategy` defaults to `SIMPLE`, which replicates only the requested resource.
The related resources replicated by `TREE` are listed in the [supported resources](#supported-resources) table, along with the additional IAM actions they require.
`replication_job_config` also accepts `source_region_name`, any resource-specific extra configuration such as `master_user_password`, and `ignore_already_existing: true` to use the [skip existing resources](#skip-existing-resources) behavior.
To list every replication job instead of one, send a `GET` request to the same `/_localstack/replicator/jobs` endpoint without a job ID.
### Check Replication Job Status
Replication jobs run asynchronously, so you need to poll their status to check when they finish.
#### Using the LocalStack CLI
When creating a replication job, the response includes a `job_id`.
Use this ID to check the job status:
```bash
export LOCALSTACK_AUTH_TOKEN=
localstack replicator status
```
This command returns the job status in JSON format. For example, here's a single-resource replication job:
```json showLineNumbers
{
"job_id": "50005865-1589-4f6d-a720-c86f5a5dd021",
"state": "SUCCEEDED",
"resources": {"succeeded": ["myParameter"], "failed": [], "skipped": []},
"error_message": null,
"type": "SINGLE_RESOURCE",
"explore_strategy": "SIMPLE"
}
```
`state` is one of `TESTING_CONNECTION`, `RUNNING`, `SUCCEEDED`, or `ERROR`.
`resources` lists the identifiers of resources that succeeded, failed, or were [skipped](#skip-existing-resources) — for a single-resource job these lists have at most one entry, for a batch job they can have many:
```json
{
"job_id": "9acdc850-f71b-4474-b138-1668eb8b8396",
"state": "SUCCEEDED",
"resources": {
"succeeded": ["/dev/param1", "/dev/param2"],
"failed": [],
"skipped": []
},
"error_message": null,
"type": "BATCH",
"explore_strategy": "SIMPLE"
}
```
For long-running jobs, the CLI can poll the status until the job reaches a terminal state. To wait for the job to finish, use the `--follow` flag.
#### Using the HTTP API
To check the status of a replication job via the HTTP API, send a `GET` request to `http://localhost.localstack.cloud:4566/_localstack/replicator/jobs/`.
:::tip
If the replication state is `SUCCEEDED` but the resource is missing, check in account `000000000000`.
:::
## Quickstart
This quickstart example creates an SSM parameter in AWS and replicates it to LocalStack.
To start, create the parameter in AWS.
This example uses an SSO profile named `ls-sandbox` for AWS configuration, and replicates resources from the `eu-central-1` region.
```bash
AWS_PROFILE=ls-sandbox aws ssm put-parameter\
--name myparam \
--type String \
--value abc123
```
```json
{
"Version": 1,
"Tier": "Standard"
}
```
```bash
AWS_PROFILE=ls-sandbox aws ssm get-parameters --names myparam
```
```json showLineNumbers
{
"Parameters": [
{
"Name": "myparam",
"Type": "String",
"Value": "abc123",
"Version": 1,
"LastModifiedDate": "2025-02-07T13:36:56.240000+00:00",
"ARN": "arn:aws:ssm:eu-central-1::parameter/myparam",
"DataType": "text"
}
],
"InvalidParameters": []
}
```
The SSM parameter has the ARN: `arn:aws:ssm:eu-central-1::parameter/myparam`.
Next, we can check that the parameter is not present in LocalStack using `awslocal`:
```bash
awslocal ssm get-parameters --name myparam
```
```json showLineNumbers
{
"Parameters": [],
"InvalidParameters": [
"myparam"
]
}
```
Next, trigger replication from AWS to LocalStack, using the same `ls-sandbox` profile:
```bash
LOCALSTACK_AUTH_TOKEN= \
AWS_PROFILE=ls-sandbox \
localstack replicator start \
--resource-type AWS::SSM::Parameter \
--resource-identifier myparam
```
```json showLineNumbers
{
"job_id": "9acdc850-f71b-4474-b138-1668eb8b8396",
"state": "TESTING_CONNECTION",
"resources": {"succeeded": [], "failed": [], "skipped": []},
"error_message": null,
"type": "SINGLE_RESOURCE",
"explore_strategy": "SIMPLE"
}
```
You can check the replication job status using the `job_id`:
```bash
LOCALSTACK_AUTH_TOKEN= \
localstack replicator status 9acdc850-f71b-4474-b138-1668eb8b8396
```
```json showLineNumbers
{
"job_id": "9acdc850-f71b-4474-b138-1668eb8b8396",
"state": "SUCCEEDED",
"resources": {"succeeded": ["myparam"], "failed": [], "skipped": []},
"error_message": null,
"type": "SINGLE_RESOURCE",
"explore_strategy": "SIMPLE"
}
```
The state is `SUCCEEDED`, indicating the replication job completed successfully.
The SSM parameter is now accessible.
```bash
awslocal ssm get-parameters --name myparam --region eu-central-1
```
```json showLineNumbers
{
"Parameters": [
{
"Name": "myparam",
"Type": "String",
"Value": "abc123",
"Version": 1,
"LastModifiedDate": 1738935663.08,
"ARN": "arn:aws:ssm:eu-central-1:000000000000:parameter/myparam",
"DataType": "text"
}
],
"InvalidParameters": []
}
```
The resource is replicated into the same AWS region by default.
Use the `--target-region-name` flag to change it.
By default, replication occurs in LocalStack account `000000000000`.
Use the `--target-account-id` flag to specify a different account.
## Supported Resources
We welcome feedback and bug reports.
Please open a [new GitHub Discussion](https://github.com/orgs/localstack/discussions/new/choose) to request and upvote for support for new resources.
:::tip
To ensure support for all resources, use the latest LocalStack Docker image.
:::
The table below lists every supported resource type and the [replication strategies](#replication-strategies) available for each.
Select a row to expand it and view the resource identifier, the IAM actions required for each strategy, and any related resources replicated by the Tree strategy.
# Overview
> Chaos Engineering with LocalStack enables you to build resilient systems early on in the development phase.
Chaos engineering in LocalStack helps you build more resilient systems by deliberately introducing controlled disruptions into your cloud environment. Simulating failures early in the development process helps teams proactively uncover weaknesses, improve error handling, and validate system behavior under stress.
Different teams benefit from chaos engineering in different ways:
- Software Developers test application logic and error response behavior
- Architects evaluate the robustness of system design
- Operations teams investigate infrastructure reliability under adverse conditions
LocalStack supports the following chaos engineering features:
- **Application behavior and error management**: AWS Fault Injection Service (FIS) simulates errors and latency
- **Robust architecture**: Failover testing and resilience validation via the Chaos API
- **Consistent infrastructure setup**: Disruption-tolerant provisioning to verify consistent infrastructure under unstable conditions
The best way to get started is by practicing running experiments yourself. Check out our [chaos engineering tutorials](/aws/tutorials).
# AWS Fault Injection Service
> Use Fault Injection Service to simulate faults in your infrastructure and test its fault tolerance.
The [Fault Injection Service (FIS)](https://aws.amazon.com/fis/) is a fully managed service by AWS designed to help you improve the resilience of your applications by simulating real-world outages and operational issues.
This service allows you to conduct controlled experiments on your AWS infrastructure, injecting faults and observing how your system responds under various conditions.
By using the Fault Injection Service, you can identify weaknesses, test recovery procedures, and ensure that your applications can withstand unexpected disruptions.
This proactive approach to reliability engineering enables you to enhance system robustness, minimize downtime, and maintain a high level of service availability for your users.
:::note
Fault Injection Service emulation is available as part of the LocalStack Enterprise plan.
If you'd like to try it out, please [contact us](https://www.localstack.cloud/demo) to request access.
:::
:::tip
For more information, please refer to the [FIS service docs](/aws/services/fis).
:::
Some of the most important concepts associated with a FIS experiment are:
**1.
Experiment Templates**: Experiment templates define the actions, targets, and any stop conditions for your experiment.
They serve as blueprints for conducting fault injection experiments, allowing you to specify what resources are targeted, what faults are injected, and under what conditions the experiment should automatically stop.
**2.
Actions**: Actions are the specific fault injection operations that the experiment performs on the target resources.
These can be injecting latency or throttling to API requests, completely blocking access to instances, etc.
Actions define the type of fault, parameters for the fault injection, and the targets affected.
**3.
Targets**: Targets are the AWS resources on which the experiment actions will be applied.
To make things even more fine-grained, a specific operation of the service can be targeted.
**4.
Stop Conditions**: Stop conditions are criteria that, when met, will automatically stop the experiment.
**5.
IAM Roles and Permissions**: To run experiments, AWS FIS requires specific IAM roles and permissions.
These are necessary for AWS FIS to perform actions on your behalf, like injecting faults into your resources.
**6.
Experiment Execution**: When you start an experiment, AWS FIS executes the actions defined in the experiment template against the specified targets, adhering to any defined stop conditions.
The execution process is logged, and detailed information about the experiment's progress and outcome is provided.
# Chaos API
> Simulate outages and network failures to test the resiliency of your infrastructure
## Introduction
LocalStack Chaos API allows you to mimic outages across any AWS region or service.
Intentionally triggering service outages and monitoring the system's response in situations where the infrastructure is compromised offers a powerful way to test.
This strategy helps gauge the effectiveness of the system's deployment procedures and its resilience against infrastructure disruptions, which is a key element of chaos engineering.
You can use LocalStack Chaos API to cause API failures for any combination of the following:
- Service
- Region
- Operation
You can customize the HTTP error code and message that LocalStack responds with.
If required, you can make the failures occur probabilistically.
Furthermore, the Chaos API can also be configured to add a network latency for all calls.
:::note
Chaos API is available as part of the LocalStack Enterprise plan.
If you'd like to try it out, please [contact us](https://www.localstack.cloud/demo) to request access.
:::
## Prerequisites
The prerequisites for this guide are:
- LocalStack for AWS and [`lstk`](/aws/developer-tools/running-localstack/lstk/#installation)
- [LocalStack Auth Token](/aws/getting-started/auth-token/)
- [Docker](https://docs.docker.com/get-docker/) and [Docker Compose](https://docs.docker.com/compose/install/)
- [Python](https://www.python.org/downloads/)
## Configuration
The disruption types supported by Chaos API are broadly categorised into two groups.
**Service Faults** lead to an application-level HTTP error in an AWS service, and **Network Effects** introduce network-level effects to all connections.
### Service Faults
Service faults can be configured using the endpoint at `/_localstack/chaos/faults`.
The configuration schema consists of an array of one or more rules, where each rule specifies the conditions for the fault to occur.
When active, rules are evaluated sequentially on every request to LocalStack until the first match.
The schema for the configuration is as follows.
```json showshowLineNumbers
[
{
"region": "(str) Region name, e.g. 'ap-south-1'. If omitted, all regions are affected.",
"service": "(str) Name of the service, e.g. 'kinesis'. If omitted, all services are affected.",
"operation": "(str) Name of the operation, e.g. 'PutRecord'. If omitted, all operations are affected.",
"probability": "(num) Probability of invoking this rule, e.g. 0.5. If omitted, 1 is used.",
"error": {
"statusCode": "(int) HTTP status code to use in response, e.g. 503. If omitted, 503 is used.",
"code": "(str) Descriptive error code used in response. If omitted, 'ServiceUnavailable' is used."
}
},
...
]
```
The endpoint allows the following operations:
- `GET`: Get current configuration
- `POST`: Add new configuration
- `PATCH`: Add a rule
- `DELETE`: Delete a rule
An empty array `[]` disables the faults entirely, while an empty rule in the array `[{}]` causes all AWS operations to lead to faults.
### Network Effects
Network effects are configured using the endpoint `/_localstack/chaos/effects`.
Currently the Chaos API only supports a latency factor.
```json
{
"latency": "(int) Network latency in milliseconds. By default, 0 is used."
}
```
This endpoint allows the following operations:
- `GET`: Get current configuration
- `POST`: Add new configuration
## Examples
To cause faults, make a POST request as follows:
```bash
curl --location --request POST 'http://localhost.localstack.cloud:4566/_localstack/chaos/faults' \
--header 'Content-Type: application/json' \
--data '
[
{
"service": "s3",
"region": "us-east-1"
},
{
"service": "s3",
"region": "ap-south-1"
},
{
"service": "lambda"
}
]'
```
In this example, S3 is affected in `us-east-1` and `ap-south-1,` and Lambda is affected in all regions.
All calls to these services in these regions will return a 503 Service Unavailable error.
To see this in action, try to create an S3 bucket in `us-east-1`:
```bash
lstk aws s3 mb s3://test-bucket --region us-east-1
```
```bash
make_bucket failed: s3://test-bucket An error occurred (ServiceUnavailableException) when calling the CreateBucket operation (reached max retries: 4): Service 's3' not accessible due to an outage
```
However, the same operation, when run in `eu-central-1` will work as expected.
```bash
lstk aws s3 mb s3://test-bucket --region eu-central-1
```
```bash
make_bucket: test-bucket
```
Faults can be disabled by setting an empty rule list in the configuration.
The following request will clear the current configuration:
```bash
curl --location --request POST 'http://localhost.localstack.cloud:4566/_localstack/chaos/faults' \
--header 'Content-Type: application/json' \
--data '[]'
```
To retrieve the current configuration, make the following GET call:
```bash
curl --location --request GET 'http://localhost.localstack.cloud:4566/_localstack/chaos/faults'
```
To add a new rule to the current configuration, make a PATCH call as follows:
```bash
curl --location --request PATCH 'http://localhost.localstack.cloud:4566/_localstack/chaos/faults' \
--header 'Content-Type: application/json' \
--data '
[
{
"service": "kinesis",
"operation": "PutRecord",
"probability": 0.3,
"error": {
"statusCode": 400,
"code": "ProvisionedThroughputExceededException"
}
}
]'
```
This new rule will cause probabilistic failures for Kinesis PutRecord operation.
Here, the returned error is also customised to be HTTP 400 ProvisionedThroughputExceededException.
To remove a rule from the configuration, make a DELETE call as follows:
```bash
curl --location --request DELETE 'http://localhost.localstack.cloud:4566/_localstack/chaos/faults' \
--header 'Content-Type: application/json' \
--data '[{"service": "lambda"}]'
```
The rule to be removed must be exactly the same as in the existing configuration.
## Comparison with Fault Injection Service
AWS [Fault Injection Service (FIS)](/aws/services/fis) also allows controlled chaos engineering experiments on infrastructure.
While similar in purpose, there are notable differences between FIS and LocalStack Chaos API.
This table highlights those differences, offering a detailed comparison of how each service approaches chaos engineering, their capabilities, and their integration options.
| **Aspect** | **AWS Fault Injection Service (FIS)** | **LocalStack Chaos API** |
|-----------------------------------|----------------------------------------------------------------------------------------------------------------------------------------------------|---------------------------------------------------------------------------------------------------------------------------------------------------|
| **Fault Types** | • EC2 Stop/Terminate Instances
• RDS Reboot Instances
• SSM Send Command
• Inject API errors (e.g., `aws:fis:inject-api-internal-error` for EC2 only) | • API failures (HTTP error codes and messages for any service)
• Network effects (latency)
• Can be probabilistic and customized. |
| **Procedural vs Declarative** | • Capable of running procedural experiments where it invokes API actions affecting AWS resources (e.g., `aws:ec2:stop-instances`). | • Focuses on declarative effects impacting the AWS API, such as returning errors or adding latency, without invoking AWS resource actions. |
| **Experiment Execution** | • Requires creating and running controlled experiments with predefined templates. Systems are restored after disruption duration. | • Faults are applied dynamically based on configuration rules. Can inject faults on-the-fly without predefining experiments. |
| **Customization** | • Limited to predefined actions (e.g., stopping EC2 instances, inducing specific errors like InternalError for EC2). | • Highly customizable, including probabilistic failures, custom error codes, HTTP status codes, and errors for any AWS operation. |
| **Service Coverage** | • Covers specific AWS services such as EC2, RDS, and SSM. | • Covers all AWS services and operations (e.g., S3, Lambda, Kinesis) with no service-specific restrictions. |
| **Network Effects** | • Not supported. | • Supports adding network latency to simulate slow network conditions. |
| **API Interaction** | • `create-experiment-template` to create templates
• `start-experiment` to begin experiments
| • `POST` to `/chaos/faults` to configure faults
• `POST` to `/chaos/effects` to introduce network effects.
|
| **Probabilistic Failure Injection** | • Not available. | • Supports probabilistic failure injection, introducing partial failures, which mimic intermittent outages. |
| **Broader Fault Injection** | • Limited to predefined actions (e.g., stop instances, reboot databases, inject errors for specific services). | • Broader fault injection for any AWS operation (e.g., PutObject for S3, Invoke for Lambda). |
# Chaos Engineering Dashboard
> Chaos Engineering Dashboard allows users to run chaos experiments within their application stack to test the system's resilience.
## Introduction
The Chaos Engineering Dashboard in LocalStack offers streamlined testing for cloud applications, enabling you to simulate server errors, service outages, regional disruptions, and network latency with ease, ensuring your app is ready for real-world challenges.
The dashboard uses [LocalStack Chaos API](/aws/developer-tools/chaos-engineering/chaos-api) under the hood to offer a set of customizable templates that can be seamlessly integrated into any automation workflows.
You can find this feature in the LocalStack Web Application by navigating to [**app.localstack.cloud/chaos-engineering**](https://app.localstack.cloud/chaos-engineering).
:::note
Chaos Engineering Dashboard is offered as a **preview** feature and is under active development.
:::
## Features
The dashboard offers the following features:
* **DynamoDB Error**: Randomly inject `ProvisionedThroughputExceededException` errors into DynamoDB API responses.
* **Kinesis Error**: Randomly inject `ProvisionedThroughputExceededException` errors into Kinesis API responses.
* **500 Internal Error**: Randomly terminate incoming requests, returning an `Internal Server Error` with a response code of 500.
* **Service Unavailable**: Cause a specified percentage of service API calls to receive a 503 `Service Unavailable` response.
* **AWS Region Unavailable**: Simulate regional outages and failovers by disabling entire AWS regions.
* **Latency**: Introduce specified latency to every API call, useful for simulating network latency or degraded network performance.
# Overview
> You can run a LocalStack instance as a Cloud Sandbox and access it from your local machine.
## Introduction
LocalStack Cloud Sandbox lets you deploy a fully functional LocalStack instance in the cloud instead of running it locally. This enables new workflows for testing, previewing, and collaboration across teams.
Key use cases include:
- Running ephemeral instances locally for dev/test loops in CI
- Generating on-demand preview environments by enabling preview-per-PR type workflows
- Facilitate collaboration by sharing a consistent testing environment for all developers
:::note
The Cloud Sandbox feature is currently in **preview** and under active development.
:::
# Application Preview
> Create an Application Preview to deploy your application changes in an Ephemeral Instance.
## Introduction
Application Preview generates a preview environment from GitHub Actions workflows.
For example, you can create a preview URL for every GitHub Pull Request (PRs).
It allows temporary deployment of AWS powered applications on a LocalStack Ephemeral Instance to preview changes.
This feature is currently only available for GitHub repositories that use GitHub Actions.
:::note
Application Preview is offered as a **preview** feature and is under active development.
:::
## Getting started
This guide is designed for users new to Application Preview and assumes basic knowledge of GitHub Actions.
We will configure a CI pipeline that runs on pull requests using GitHub Actions.
### Prerequisites
- [LocalStack Account](https://app.localstack.cloud/)
- [GitHub Account](https://github.com)
### Create the Application Preview
To create an Application Preview, use the [`LocalStack/setup-localstack` action](https://github.com/localstack/setup-localstack).
Create a file named `preview-pipeline.yml` in the `.github/workflows` directory of your custom repository.
The example below contains the details that can be used for a step in an existing CI pipeline that activates on every pull request.
The pipeline deploys the application to a LocalStack Ephemeral Instance.
The steps necessary for building and deploying the application to LocalStack should be listed within the `preview-cmd` property.
The example below aggregates these steps into a single deployment script called `deploy.sh`.
A comment containing the preview link is automatically added to a Pull Request when created.
This preview is available for 30 minutes
```yaml
uses: LocalStack/setup-localstack@v0.2.3
with:
github-token: ${{ secrets.GITHUB_TOKEN }}
state-backend: ephemeral
state-action: start
# Adding this option prevents Ephemeral Instance to be stopped after the `preview-cmd` run
skip-ephemeral-stop: 'true'
# Optional script/command to run
preview-cmd: deploy.sh
env:
LOCALSTACK_API_KEY: ${{ secrets.LOCALSTACK_API_KEY }}
```
The `LOCALSTACK_API_KEY` must be set as a repository secret.
You can create a [CI key](https://app.localstack.cloud/workspace/ci-keys) via the LocalStack Web Application (note that you may need permission from your administrator to access this capability).
To add this secret to a GitHub repository, go to the "Settings" tab and then on the left-hand navigation choose "Secrets and variables" and then "Actions".
The `GITHUB_TOKEN` is automatically generated by GitHub and requires no further configuration.
### Stop the Application Preview
It's important to understand that the ephemeral instance that powers the application preview is created _before_ the steps in the `preview-cmd` are run.
If the `preview-cmd` fails to complete successfully, the ephemeral instance will still be running on your account.
To address this, you can create an additional workflow step that shuts down the ephemeral instance if the workflow run fails (see the [GitHub Actions documentation](https://docs.github.com/en/actions/writing-workflows/choosing-when-your-workflow-runs/events-that-trigger-workflows#running-a-workflow-based-on-the-conclusion-of-another-workflow) for help in determining whether a workflow completed successfully).
To stop the Application Preview, you can configure the `state-action` to `stop`.
```yaml
uses: LocalStack/setup-localstack@v0.2.2
with:
github-token: ${{ secrets.GITHUB_TOKEN }}
state-backend: ephemeral
state-action: stop
env:
LOCALSTACK_API_KEY: ${{ secrets.LOCALSTACK_API_KEY }}
```
## Configuration
| Input | Description | Default |
|------------------------------|---------------------------------------------------------------------------|--------------|
| `auto-load-pod` | Specifies which Cloud Pod to load during LocalStack startup | `None` |
| `extension-auto-install` | Defines which extensions to install during LocalStack startup for Application Previews | `None` |
| `lifetime` | Duration an Application Preview remains active | 30 |
| `state-backend` | Starts an Application Preview, used with `state-action` to manage state | `ephemeral` |
| `state-action` | Commands `start`/`stop` for managing Application Previews | |
| `skip-ephemeral-stop` | Option to bypass stopping the Application Preview | `false` |
| `preview-cmd` | Commands to generate the application Preview of the PR (supports `$AWS_ENDPOINT_URL`) | |
## Overriding the Application Preview URL
The Application Preview URL is automatically generated and added as a comment to the Pull Request.
However, if your application is served on a different URL, you can override the URL using the `LS_PREVIEW_URL`.
It is beneficial if you are using a CloudFront distribution or a custom domain.
Here is an example of how to override the URL:
```yaml
preview-cmd: |
make build;
make bootstrap;
make deploy;
make build-frontend;
make deploy-frontend;
distributionId=$(lstk aws cloudfront list-distributions | jq -r '.DistributionList.Items[0].Id');
echo LS_PREVIEW_URL=$AWS_ENDPOINT_URL/cloudfront/$distributionId/ >> $GITHUB_ENV;
```
## Examples
- [Creating ephemeral application previews with LocalStack and GitHub Actions](/aws/tutorials/ephemeral-application-previews/) and the [example repository](https://github.com/localstack-samples/sample-notes-app-dynamodb-lambda-apigateway)
# Ephemeral Instances
> Create an Ephemeral Instance in the cloud using the LocalStack Web Application
## Introduction
Ephemeral Instances allows you to run a LocalStack instance in the cloud.
You can interact with these instances via the LocalStack Web Application, or by configuring your integrations and developer tools with the endpoint URL of the ephemeral instance.
:::note
Ephemeral Instances is offered as a **preview** feature. `lstk` does not yet support Ephemeral Instances.
Continue using the legacy [LocalStack CLI](/aws/developer-tools/running-localstack/localstack-cli/) for this feature.
:::
## Getting started
This guide is designed for users new to Ephemeral Instance and assumes basic knowledge of the LocalStack Web Application.
In this guide, we will create an Ephemeral Instance and interact with it via the LocalStack Web Application and the AWS CLI.
### Create a new Ephemeral Instance
Navigate to the [**LocalStack Ephemeral Instance Management**](https://app.localstack.cloud/instances/ephemeral) page.
In the form, enter the name of the new Ephemeral Instance, select the lifetime of the instance by dragging the slider, and click on **Launch**.
Optionally, you can specify a LocalStack Extension to be installed or loaded in the Ephemeral Instance.
You can select the extension from the **Extension settings** dropdown list before launching the Ephemeral Instance.
In case you have access to Cloud Pods and a pod you want to start your instance with, you can also choose it from the **Cloud Pod Settings** dropdown.
### Interact with the Ephemeral Instance
After the Ephemeral Instance is created, you will be able to see the instance in the **LocalStack Instance Management** page.
You will also be able to access the following features with your Ephemeral Instance:
- Status Page
- Resource Browser
- State Management
- Extensions
- Logs
### Access the Ephemeral Instance via AWS CLI
You can access the Ephemeral Instance via the AWS CLI by configuring the AWS CLI with the endpoint URL of the Ephemeral Instance.
You can find the endpoint URL of the Ephemeral Instance in the **LocalStack Instance Management** page.
Copy the endpoint URL and set it as the `--endpoint-url` parameter in the AWS CLI command.
To create an S3 bucket in the Ephemeral Instance, run the following command:
```bash
aws --endpoint-url= s3 mb s3://
```
You can replace `` with the endpoint URL of the Ephemeral Instance and `` with the name of the S3 bucket you want to create.
To query the list of S3 buckets in the Ephemeral Instance, run the following command:
```bash
aws --endpoint-url= s3 ls
```
You can also use integrations, such as [CDK](/aws/connecting/infrastructure-as-code/aws-cdk/), [SAM CLI](/aws/connecting/infrastructure-as-code/aws-sam/), and [Terraform](/aws/connecting/infrastructure-as-code/terraform/), to interact with the Ephemeral Instance.
In these integrations, you can change the `AWS_ENDPOINT_URL` environment variable to the endpoint URL of the Ephemeral Instance.
### View the Logs of the Ephemeral Instance
You can view the logs of the Ephemeral Instance by navigating to the **Logs** tab in the **LocalStack Instance Management** page.
### Shut Down the Ephemeral Instance
Open the Ephemeral Instance in the LocalStack Web Application.
Click the three-dot menu next to the instance endpoint in the upper-left corner, then select **Shut down**.
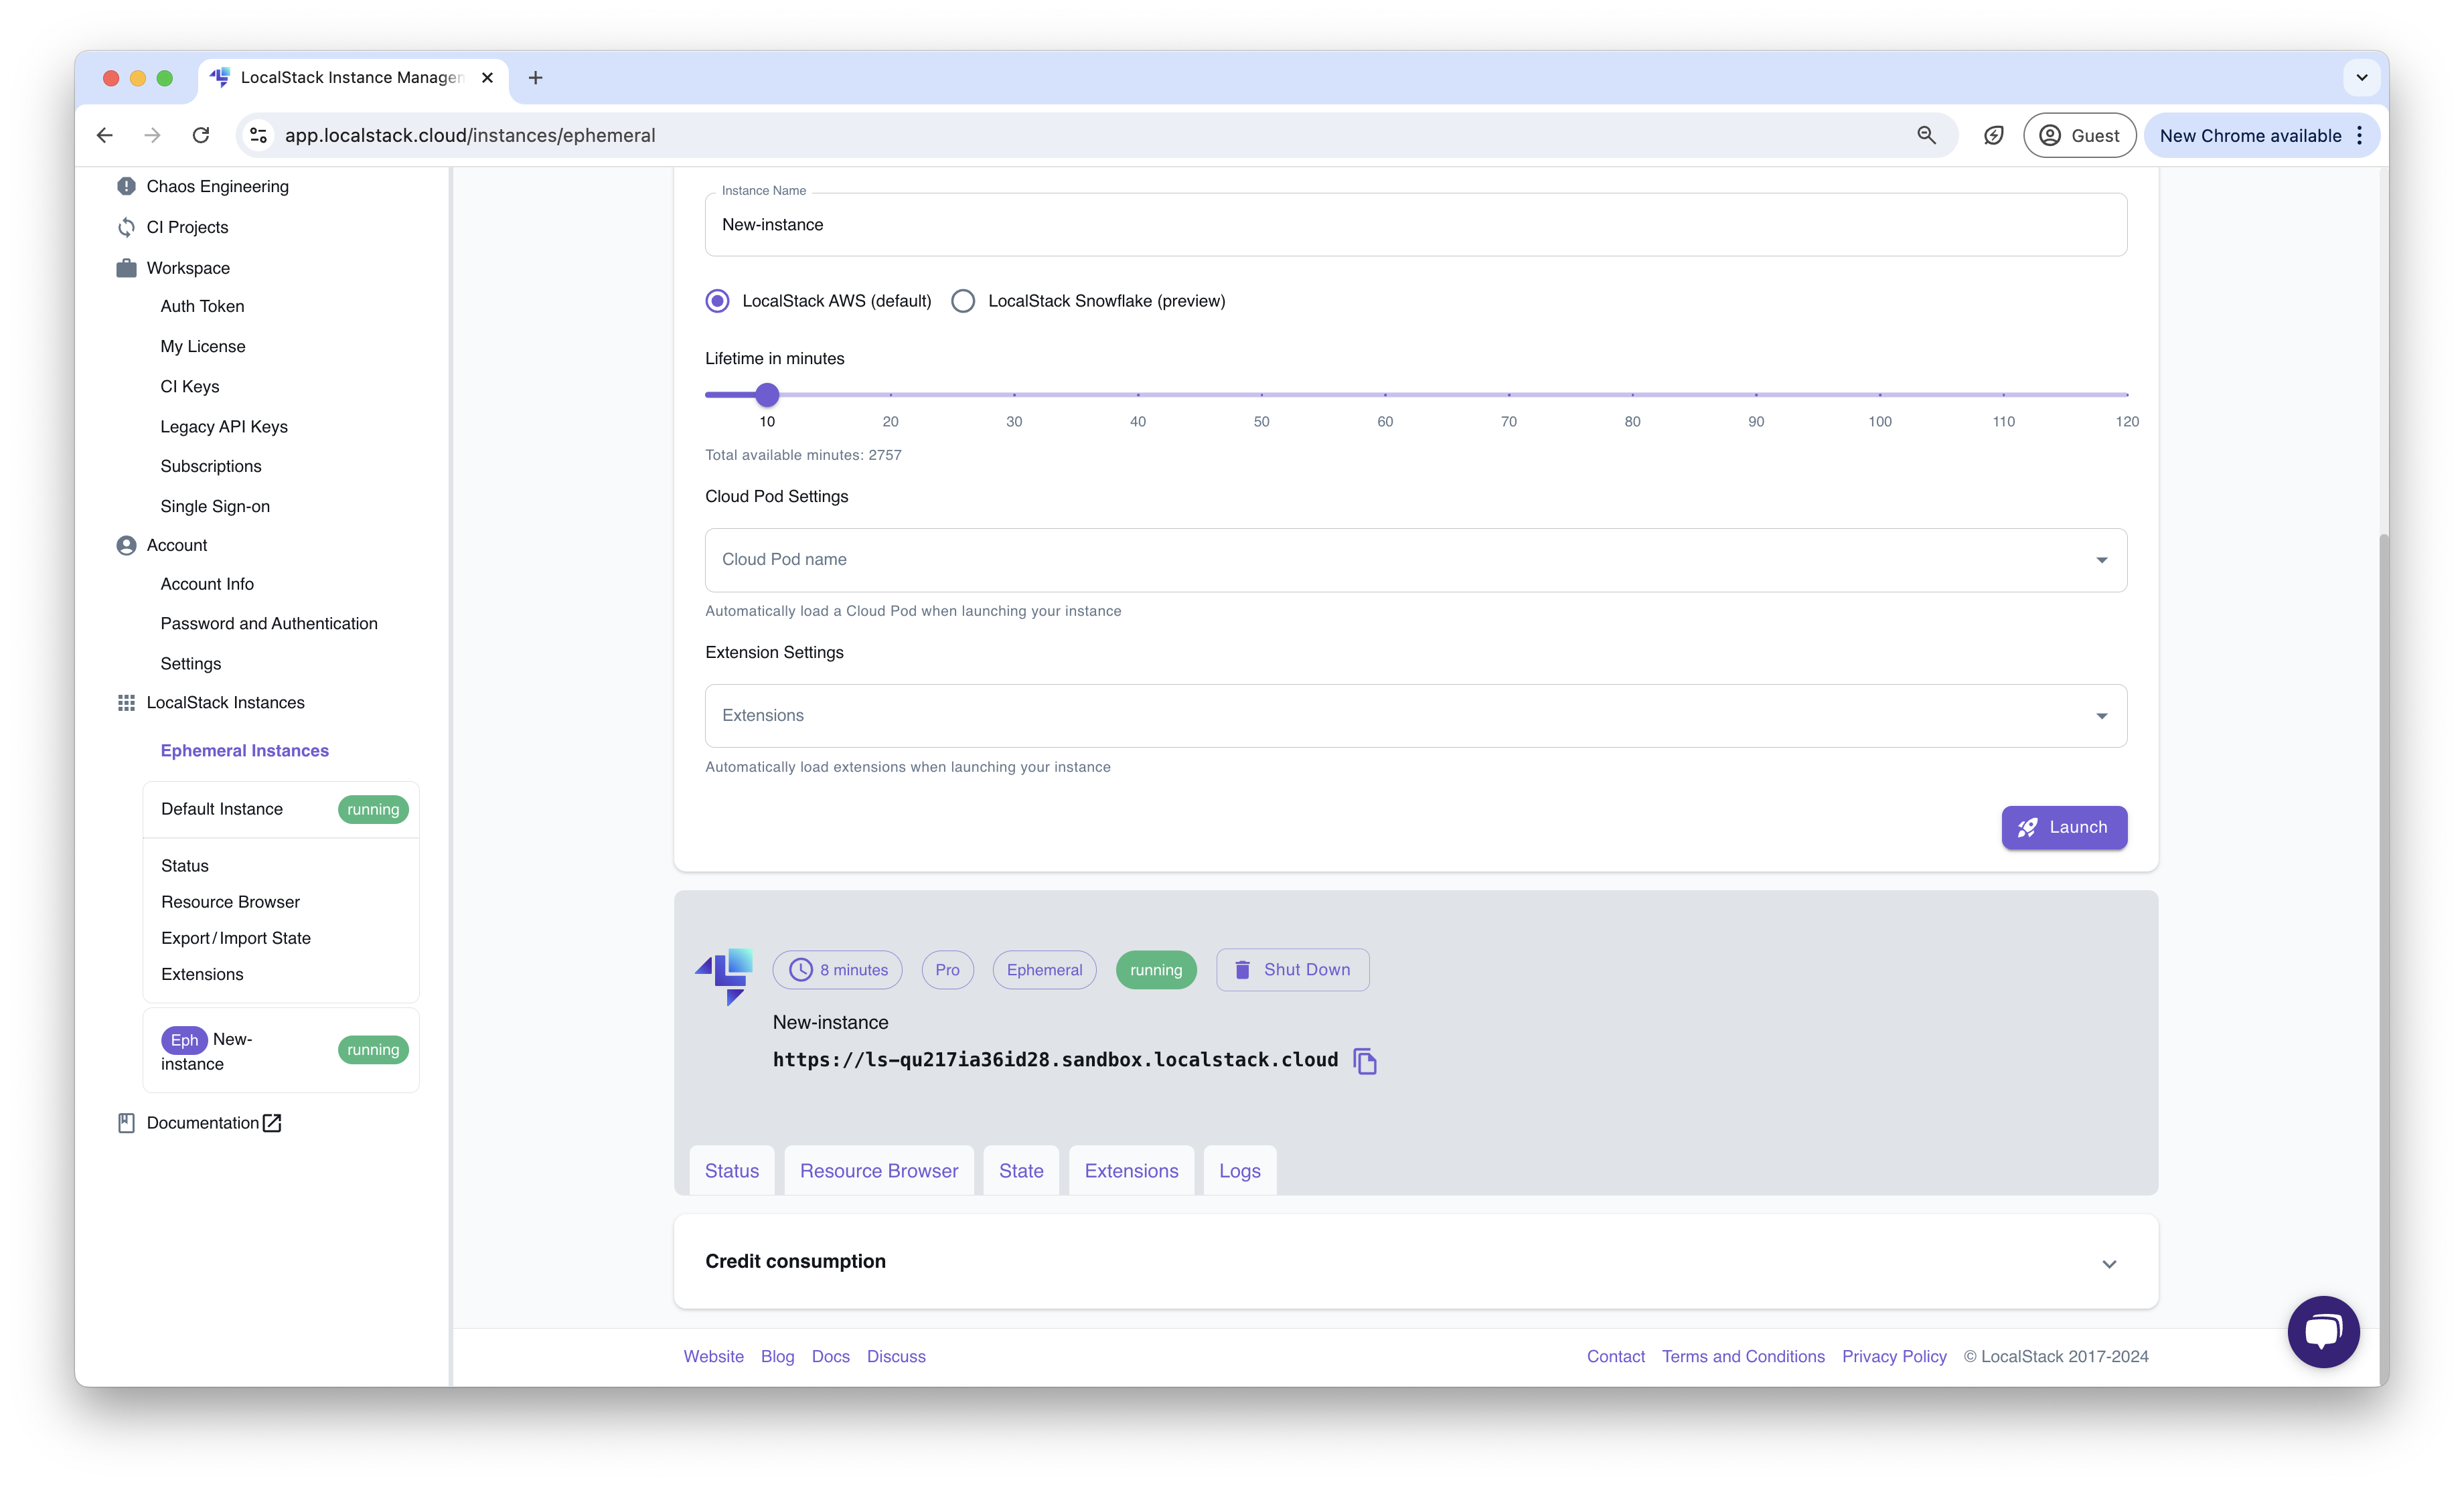
:::danger
Ephemeral Instances, by default, are created with the latest version of LocalStack.
If you have created a Cloud Pod from an older version of LocalStack, you need to update the Cloud Pod to the latest version before loading it into an Ephemeral Instance.
:::
## Ephemeral Instances CLI
The Ephemeral Instances CLI is included in the [LocalStack CLI](/aws/developer-tools/running-localstack/localstack-cli/#installation), so no additional installations are needed to start using it.
If you're a licensed user, setting the `LOCALSTACK_AUTH_TOKEN` as an environment variable is recommended to access all features of the Ephemeral Instances CLI.
Access the Ephemeral Instances CLI by running the `localstack ephemeral` command from your terminal.
```bash
localstack ephemeral --help
```
```bash
Usage: localstack ephemeral [OPTIONS] COMMAND [ARGS]...
(Preview) Manage ephemeral LocalStack instances in the cloud.
This command group allows you to create, list, and delete ephemeral
LocalStack instances.
Ephemeral instances are temporary cloud instances that
can be used for testing and development.
Options:
-h, --help Show this message and exit.
Commands:
create Create a new ephemeral instance
delete Delete an ephemeral instance
list List all ephemeral instances
logs Fetch logs from an ephemeral instance
```
To start an Ephemeral Instance, run the following command:
```bash
localstack ephemeral create --name my-instance-123
```
The output of the command should look like this:
```bash
{
"creation_time": 1731347416,
"endpoint_url": "https://ls-ji9gajoqrveou.sandbox.localstack.cloud",
"expiry_time": 1731351016,
"id": "ji9gajoqrveou",
"image": {
"image_name": "localstack/localstack-pro",
"tag": "latest"
},
"instance_name": "my-instance-123",
"labels": {
"image-name": "localstack/localstack-pro",
"image-tag": "latest",
"instance-name": "my-instance-123",
"requestor": "4e60f2cb"
},
"requestor": "4e60f2cb",
"shape": {
"memory_megabytes": 2048,
"virtual_cpus": 1
},
"status": "running"
}
```
List your available running Ephemeral Instances with:
```bash
localstack ephemeral list
```
Retrieve your Ephemeral Instance logs with:
```bash
localstack ephemeral logs --name my-instance-123
```
The logs output will look like this:
```bash
LocalStack version: 3.8.2.dev98
LocalStack build date: 2024-11-11
LocalStack build git hash: c624ee66
2024-11-11T17:50:42.373 INFO --- [ MainThread] l.p.c.b.licensingv2 : Successfully requested and activated new license 636c4b55-b09c-4a93-bef6-2f6d024f7d8a:enterprise 🔑✅
2024-11-11T17:50:43.504 INFO --- [ MainThread] l.p.c.extensions.platform : loaded 0 extensions
Ready.
```
Finally, delete your Ephemeral Instance with:
```bash
localstack ephemeral delete --name my-instance-123
```
```bash
Successfully deleted instance: my-instance-123 ✅
```
## Credit Consumption
Ephemeral Instances consume credits based on the resources used and the duration of the instance.
You can view the credit consumption of the Ephemeral Instance in the **Ephemeral Instance** page.
Currently, for every 1 credit, you can run an Ephemeral Instance for 1 minute.
You can view the available minutes under the **Lifetime in minutes** slider when creating an Ephemeral Instance.
You can also see the credit consumption in the **Credit Consumption** section of the Ephemeral Instance page.
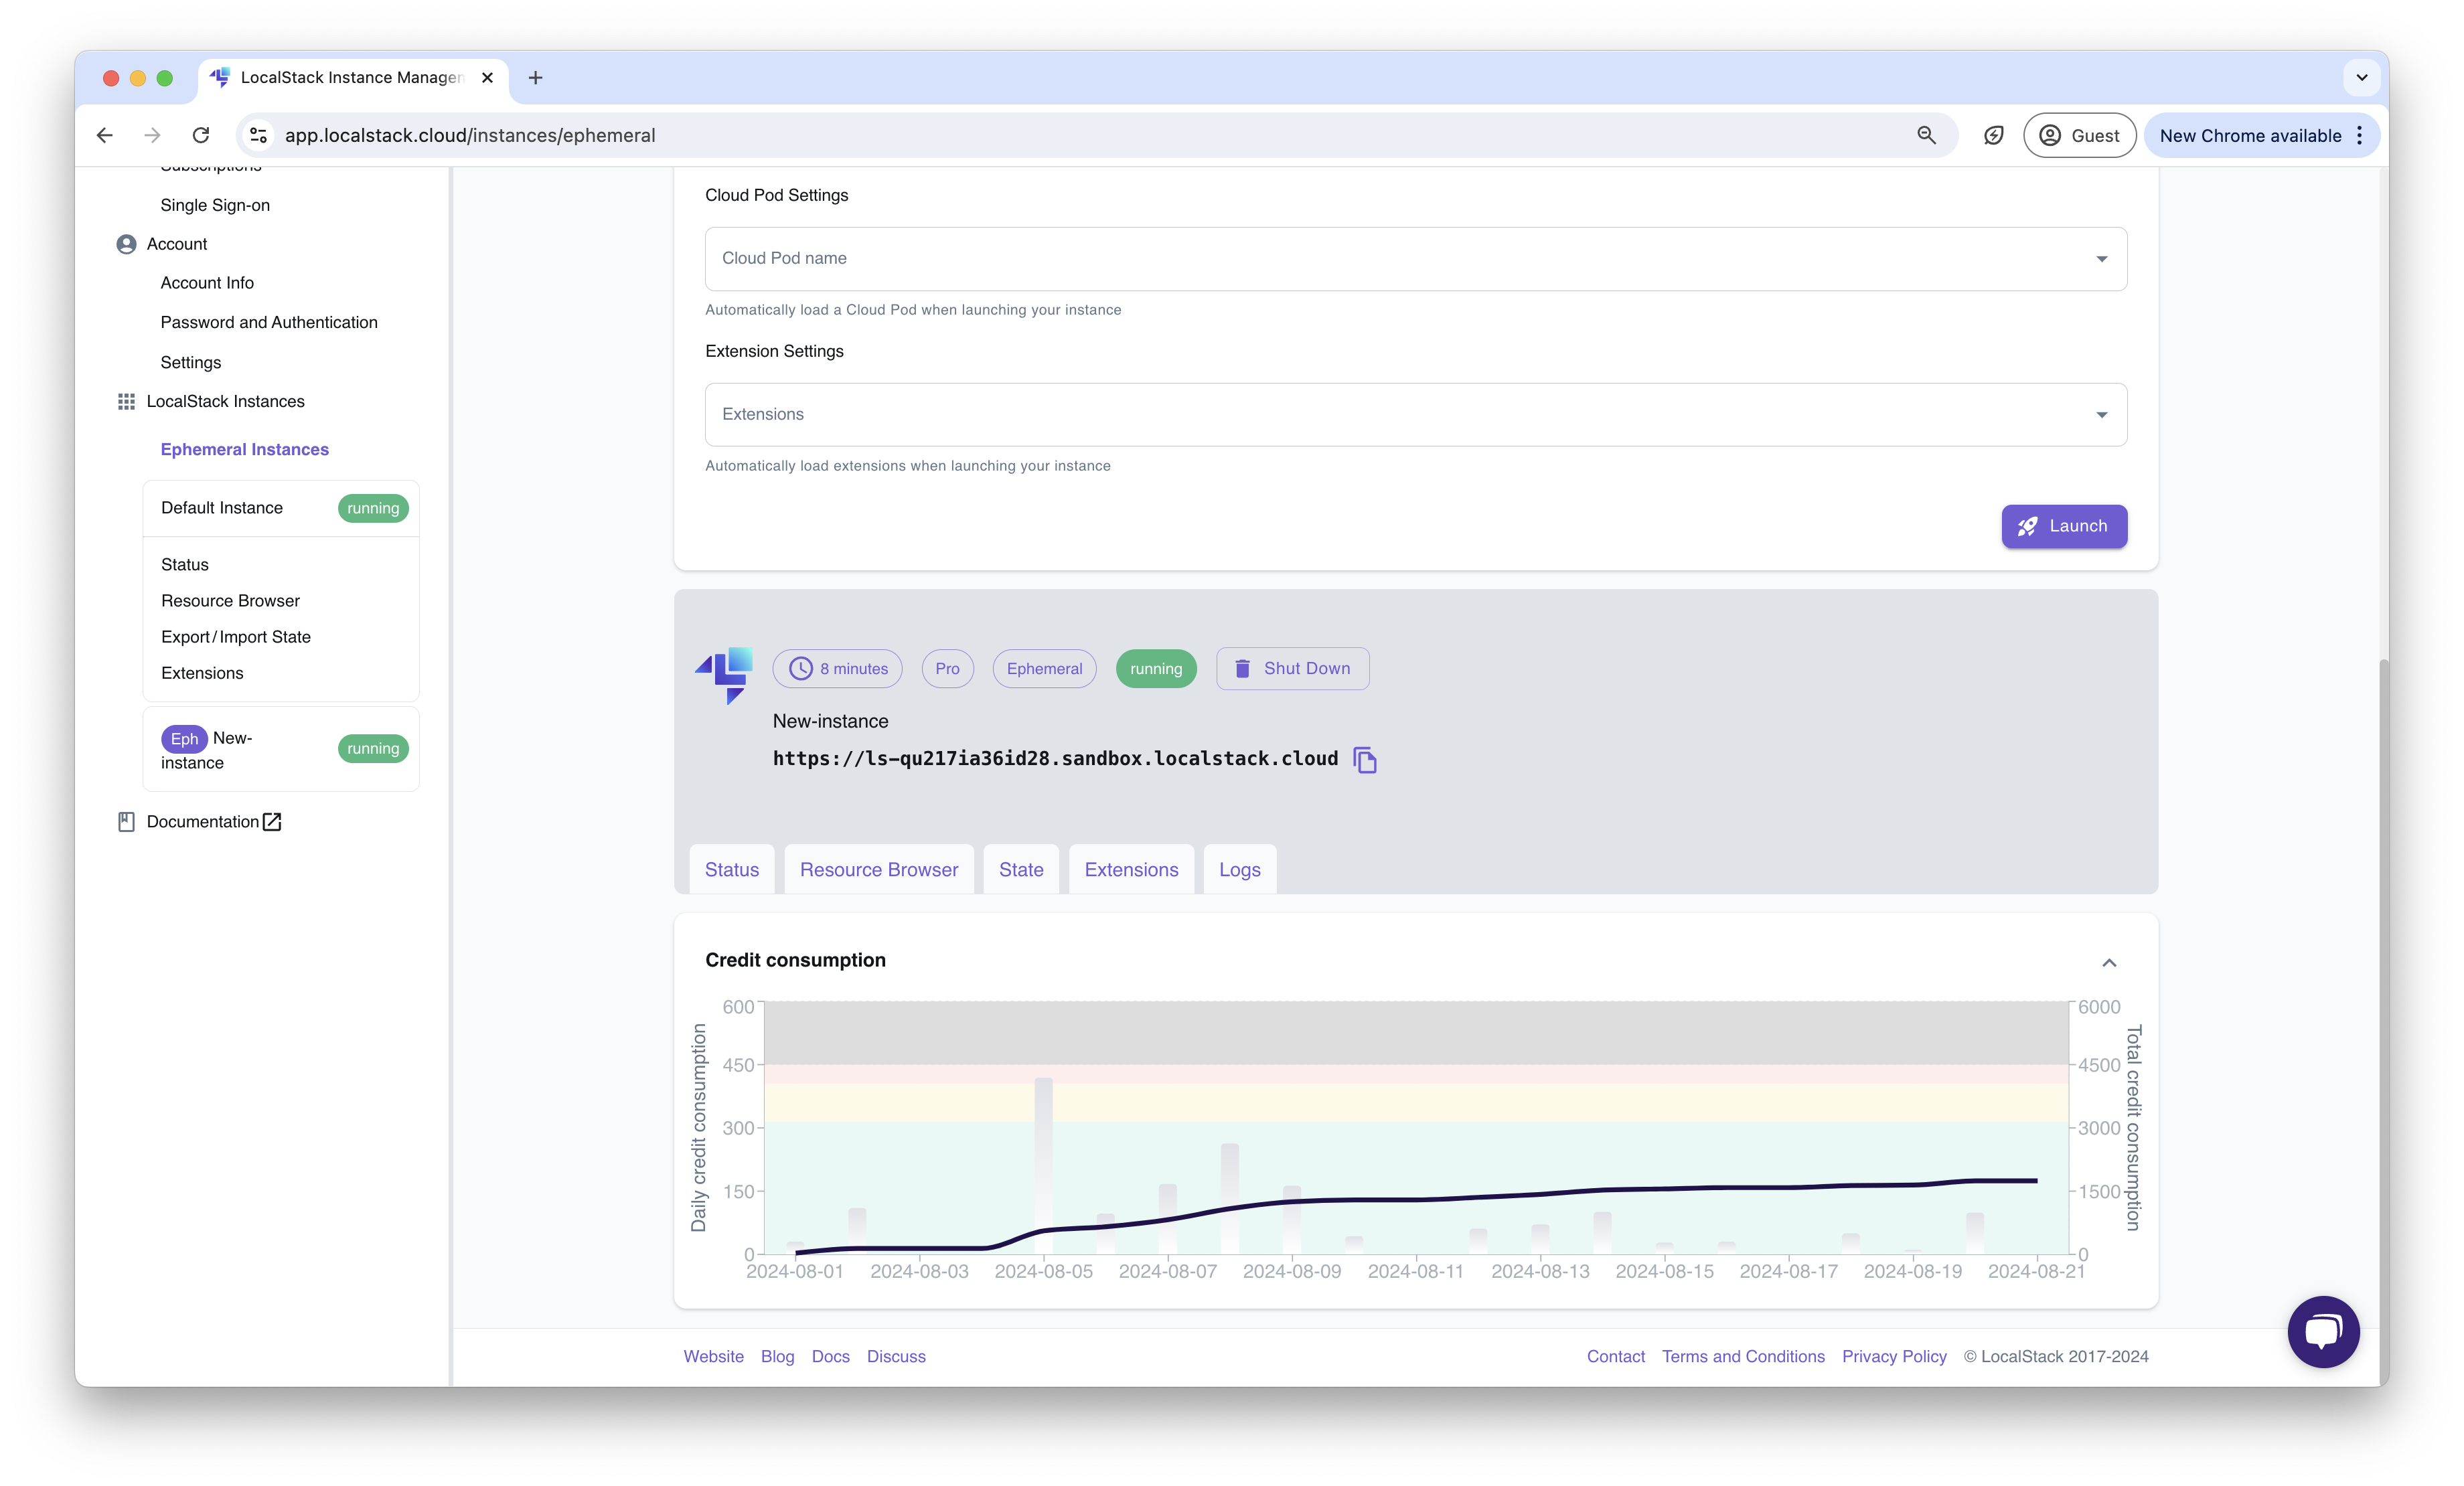
# Overview
> Develop your Lambdas more efficiently.
LocalStack’s Lambda Tools offer a set of utilities to streamline the local development, testing, and debugging of AWS Lambda functions. Emulating Lambda behavior on your machine lets you skip cloud deployments and iterate faster in a fully local environment.
These tools are designed to shorten feedback loops and improve the developer experience with features like:
- **IDE debugging**: Attach a debugger to your running Lambda function, set breakpoints, inspect variables, and step through code.
- **Hot reload**: Automatically apply code changes without needing to redeploy the function, enabling rapid iteration.
# Hot Reloading
> Hot code reloading continuously applies code changes to Lambda functions.
import { Tabs, TabItem } from '@astrojs/starlight/components';
## Introduction
Hot reloading (formerly known as hot swapping) continuously applies code changes to Lambda functions without manual redeployment.
Quickly iterating over Lambda function code can be quite cumbersome, as you need to deploy your function on every change.
LocalStack enables fast feedback cycles during development by automatically reloading your function code.
Pro users can also hot-reload Lambda layers.
:::note
The magic S3 bucket name changed from `__local__` to `hot-reload` in LocalStack v2.0.
Please change your deployment configuration accordingly because the old value is an invalid bucket name.
The configuration `BUCKET_MARKER_LOCAL` is still supported.
More information about the new Lambda provider is available under [Lambda providers](/aws/services/lambda).
:::
## Hot Reloading Behavior
**Delay in code change detection:**
It can take up to 700ms to detect code changes.
In the meantime, invocations still execute the former code.
Hot reloading triggers after 500ms without changes, and it can take up to an additional 200ms until the reloaded code is in effect.
**Runtime restart after each code change:**
The runtime inside the container is restarted after every code change.
During the runtime restart, the handler function re-executes any initialization code *outside* your handler function.
The container itself is not restarted.
Therefore, filesystem changes persist between code changes for invocations dispatched to the same container.
**File sharing permissions with Docker Desktop on macOS:**
If using Docker Desktop on macOS, you might need to allow [file sharing](https://docs.docker.com/desktop/settings/mac/#file-sharing) for your target folders.
MacOS may prompt you to grant Docker access to your target folders.
**Layer limit with hot reloading for layers:**
When hot reloading is active for a Lambda layer (Pro), the function can use at most one layer.
:::note
Configuring the file sharing mechanism in Rancher Desktop or Colima distributions is necessary to enable hot reloading for Lambda.
* For Rancher Desktop it is required to set the configuration `LAMBDA_DOCKER_FLAGS=-e LOCALSTACK_FILE_WATCHER_STRATEGY=polling`.
* For Colima, it is required to start with the Virtiofs mount type: `colima start --vm-type vz --mount-type virtiofs`.
:::
:::note
**WSL2-compatible paths required with Rancher Desktop on Windows:**
Make sure your Lambda handler paths are specified using WSL2-compatible paths. For example, instead of using a Windows-style path such as:
```bash
C:\Users\myuser\projects\lambda\handler.py
```
Use the corresponding WSL-style path:
```bash
/mnt/c/Users/myuser/projects/lambda/handler.py
```
This ensures that LocalStack can properly mount and watch your Lambda code inside the container when running under WSL2.
:::
## Application Configuration Examples
### Hot reloading for JVM Lambdas
Since lambda containers lifetime is usually limited, regular hot code reloading
techniques are not applicable here.
In our implementation, we will be watching for fs changes under the project folder,
then build a `FatJar`, unzip it, and mount it into the Lambda Docker Container.
We assume you already have:
* [watchman](https://facebook.github.io/watchman/)
* configured JVM project capable of building FatJars using your preferred build tool
First, create a watchman wrapper by using
[one of our examples](https://github.com/localstack/localstack-pro-samples/tree/master/sample-archive/spring-cloud-function-microservice/bin/watchman.sh)
Don't forget to adjust permissions:
```bash
chmod +x bin/watchman.sh
```
Now configure your build tool to unzip the FatJar to some folder, which will be
then mounted to LocalStack.
We are using `Gradle` build tool to unpack the
`FatJar` into the `build/hot` folder:
```groovy
// We assume you are using something like `Shadow` plugin that comes with `shadowJar` task
task buildHot(type: Copy) {
from zipTree("${project.buildDir}/libs/${project.name}-all.jar")
into "${project.buildDir}/hot"
}
buildHot.dependsOn shadowJar
```
Now run the following command to start watching your project in a hot-reloading mode:
```bash
bin/watchman.sh src "./gradlew buildHot"
```
Please note that you still need to configure your deployment tool to use
local code mounting.
Read the [Deployment Configuration Examples](#deployment-configuration-examples)
for more information.
### Hot reloading for Python Lambdas
We will show you how you can do this with a simple example function, taken directly from the
[AWS Lambda developer guide](https://github.com/awsdocs/aws-doc-sdk-examples/blob/main/python/example_code/lambda/lambda_handler_basic.py).
You can check out that code, or use your own lambda functions to follow along.
To use the example just do:
```bash
cd /tmp
git clone git@github.com:awsdocs/aws-doc-sdk-examples.git
```
#### Creating the Lambda Function
To create the Lambda function, you just need to take care of two things:
1. Deploy via an S3 Bucket.
You need to use the magic variable `hot-reload` as the bucket.
2. Set the S3 key to the path of the directory your lambda function resides in.
The handler is then referenced by the filename of your lambda code and the function in that code that needs to be invoked.
So, using the AWS example, this would be:
```bash
lstk aws lambda create-function --function-name my-cool-local-function \
--code S3Bucket="hot-reload",S3Key="/tmp/aws-doc-sdk-examples/python/example_code/lambda" \
--handler lambda_handler_basic.lambda_handler \
--runtime python3.8 \
--role arn:aws:iam::000000000000:role/lambda-role
```
You can also check out some of our [Deployment Configuration Examples](#deployment-configuration-examples).
We can also quickly make sure that it works by invoking it with a simple payload:
```bash
lstk aws lambda invoke --function-name my-cool-local-function \
--cli-binary-format raw-in-base64-out \
--payload '{"action": "increment", "number": 3}' \
output.txt
```
The invocation returns itself returns:
```bash title="Output"
{
"StatusCode": 200,
"LogResult": "",
"ExecutedVersion": "$LATEST"
}
```
and `output.txt` contains:
```text
{"result":4}
```
#### Changing things up
Now, that we got everything up and running, the fun begins.
Because the function is now mounted as a file in the executing container, any change that we save on the file will be there in an instant.
For example, we can now make a minor change to the API and replace the response in [line 36](https://github.com/awsdocs/aws-doc-sdk-examples/blob/main/python/example_code/lambda/lambda_handler_basic.py#L36) with the following:
```python
response = {'math_result': result}
```
Without redeploying or updating the function, the result of the previous request will look like this:
```json
{"math_result":4}
```
Cool!
#### Usage with Virtualenv
For [virtualenv](https://virtualenv.pypa.io)-driven projects, all dependencies should be made
available to the Python interpreter at runtime.
There are different ways to achieve that, including:
* expanding the Python module search path in your Lambda handler
* creating a watchman script to copy the libraries
##### Expanding the module search path in your Lambda handler
The easiest approach is to expand the module search path (`sys.path`) and add the `site-packages` folder inside the virtualenv.
We can add the following two lines of code at the top of the Lambda handler script:
```python
import sys, glob
sys.path.insert(0, glob.glob(".venv/lib/python*/site-packages")[0])
...
import some_lib_from_virtualenv # import your own modules here
```
This way you can easily import modules from your virtualenv, without having to change the file system layout.
Note: As an alternative to modifying `sys.path`, you could also set the `PYTHONPATH` environment variable when creating your Lambda function, to add the additional path.
##### Using a watchman script to copy libraries
Another alternative is to implement a watchman script that will be preparing a special folder for hot code reloading.
In our example, we are using `build/hot` folder as a mounting point for our Lambdas.
First, create a watchman wrapper by using
[one of our examples](https://github.com/localstack/localstack-pro-samples/tree/master/sample-archive/spring-cloud-function-microservice/bin/watchman.sh)
After that, you can use the following `Makefile` snippet, or implement another shell script to prepare the codebase for hot reloading:
```make showLineNumbers
BUILD_FOLDER ?= build
PROJECT_MODULE_NAME = my_project_module
build-hot:
rm -rf $(BUILD_FOLDER)/hot && mkdir -p $(BUILD_FOLDER)/hot
cp -r $(VENV_DIR)/lib/python$(shell python --version | grep -oE '[0-9]\.[0-9]')/site-packages/* $(BUILD_FOLDER)/hot/
cp -r $(PROJECT_MODULE_NAME) $(BUILD_FOLDER)/hot/$(PROJECT_MODULE_NAME)
cp *.toml $(BUILD_FOLDER)/hot
watch:
bin/watchman.sh $(PROJECT_MODULE_NAME) "make build-hot"
.PHONY: build-hot watch
```
To run the example above, run `make watch`.
The script is copying the project module `PROJECT_MODULE_NAME`
along with all dependencies into the `build/hot` folder, which is then mounted into
LocalStack's Lambda container.
### Hot reloading for TypeScript Lambdas
You can hot-reload your [TypeScript Lambda functions](https://docs.aws.amazon.com/lambda/latest/dg/lambda-typescript.html).
You can use the following options to build your TypeScript code:
* ESbuild
* Webpack
#### ESbuild
We will check-out a simple example to create a simple `Hello World!` Lambda function using TypeScript and ESbuild.
##### Setting up the Lambda function
Create a new Node.js project with `npm` or an alternative package manager:
```bash
npm init -y
```
Install the the [@types/aws-lambda](https://www.npmjs.com/package/@types/aws-lambda) and [esbuild](https://esbuild.github.io/) packages in your Node.js project:
```bash
npm install -D @types/aws-lambda esbuild
```
Create a new file named `index.ts`.
Add the following code to the new file:
```ts showLineNumbers
import { Context, APIGatewayProxyResult, APIGatewayEvent } from 'aws-lambda';
export const handler = async (event: APIGatewayEvent, context: Context): Promise => {
console.log(`Event: ${JSON.stringify(event, null, 2)}`);
console.log(`Context: ${JSON.stringify(context, null, 2)}`);
return {
statusCode: 200,
body: JSON.stringify({
message: 'Hello World!',
}),
};
};
```
Add a build script to your `package.json` file:
```json title="package.json"
"scripts": {
"build": "esbuild index.ts --bundle --minify --sourcemap --platform=node --target=es2020 --outfile=dist/index.js --watch"
},
```
The build script will use `esbuild` to bundle and minify the TypeScript code into a single JavaScript file, which will be placed in the `dist` folder.
You can now run the build script to create the `dist/index.js` file:
```bash
npm run build
```
##### Creating the Lambda Function with ESbuild
To create the Lambda function, you need to take care of two things:
* Deploy via an S3 Bucket.
You need to use the magic variable `hot-reload` as the bucket.
* Set the S3 key to the path of the directory your lambda function resides in.
The handler is then referenced by the filename of your lambda code and the function in that code that needs to be invoked.
Create the Lambda Function using `lstk aws`:
```bash
lstk aws lambda create-function \
--function-name hello-world \
--runtime "nodejs16.x" \
--role arn:aws:iam::123456789012:role/lambda-ex \
--code S3Bucket="hot-reload",S3Key="/absolute/path/to/dist" \
--handler index.handler
```
You can quickly make sure that it works by invoking it with a simple payload:
```bash
lstk aws lambda invoke \
--function-name hello-world \
--cli-binary-format raw-in-base64-out \
--payload '{"action": "test"}' \
output.txt
```
The invocation returns itself returns:
```bash title="Output"
{
"StatusCode": 200,
"ExecutedVersion": "$LATEST"
}
```
The `output.txt` file contains the following:
```text
{"statusCode":200,"body":"{\"message\":\"Hello World!\"}"}
```
##### Changing the Lambda Function
The Lambda function is now mounted as a file in the executing container, hence any change that we save on the file will be there in an instant.
Change the `Hello World!` message to `Hello LocalStack!` and run `npm run build`.
Trigger the Lambda once again.
You will see the following in the `output.txt` file:
```text
{"statusCode":200,"body":"{\"message\":\"Hello LocalStack!\"}"}
```
#### Webpack
In this example, you can use our public [Webpack example](https://github.com/localstack-samples/localstack-pro-samples/tree/master/lambda-hot-reloading/lambda-typescript-webpack) to create a simple Lambda function using TypeScript and Webpack.
To use the example, run the following commands:
```bash
cd /tmp
git clone https://github.com/localstack-samples/localstack-pro-samples.git
cd lambda-hot-reloading/lambda-typescript-webpack
```
##### Setting up the build
Before you can build the Lambda function, you need to install the dependencies:
```bash
yarn install
```
Next, you can build the Lambda function:
```bash
yarn run build
```
The `build` script in the `package.json` file uses Nodemon to watch for changes in the `src` directory and rebuild the Lambda.
This is enabled using the [`nodemon-webpack-plugin`](https://www.npmjs.com/package/nodemon-webpack-plugin) plugin, which has been pre-configured in the `webpack.config.js` file.
##### Creating the Lambda Function with Webpack
You can now create the Lambda function using `lstk aws`:
```bash
lstk aws lambda create-function \
--function-name localstack-example \
--runtime nodejs18.x \
--role arn:aws:iam::000000000000:role/lambda-ex \
--code S3Bucket="hot-reload",S3Key="/absolute/path/to/dist" \
--handler api.default
```
Additionally, you can create a Lambda Function URL with the following command:
```bash
function_url=$(lstk aws lambda create-function-url-config \
--function-name localstack-example \
--auth-type NONE | jq -r '.FunctionUrl')
```
##### Trigger the Hot Reload
Before triggering the Lambda function, you can check the current response by running the following command:
```bash
curl -X GET "$function_url"
```
```bash title="Output"
{"error":"Only JSON payloads are accepted"}
```
Go to `src/api.ts` and make the `errorResponse` function return `"Only JSON payload is accepted"` instead of `"Only JSON payloads are accepted"`.
Save the file and run the last `curl` command again.
The output should now be:
```bash title="Output"
{"error":"Only JSON payload is accepted"}
```
You can now see that the changes are applied without redeploying the Lambda function.
## Deployment Configuration Examples
```yaml showLineNumbers
custom:
localstack:
...
lambda:
mountCode: true
# or if you need to enable code mounting only for specific stages
custom:
stages:
local:
mountCode: true
testing:
mountCode: false
localstack:
stages:
- local
- testing
lambda:
mountCode: ${self:custom.stages.${opt:stage}.mountCode}
```
```kotlin showLineNumbers
package org.localstack.cdkstack
import java.util.UUID
import software.amazon.awscdk.core.Construct
import software.amazon.awscdk.core.Duration
import software.amazon.awscdk.core.Stack
import software.amazon.awscdk.services.lambda.*
import software.amazon.awscdk.services.s3.Bucket
private val STAGE = System.getenv("STAGE") ?: "local"
private val LAMBDA_MOUNT_CWD = System.getenv("LAMBDA_MOUNT_CWD") ?: ""
private const val JAR_PATH = "build/libs/localstack-sampleproject-all.jar"
class ApplicationStack(parent: Construct, name: String) : Stack(parent, name) {
init {
val lambdaCodeSource = this.buildCodeSource()
SingletonFunction.Builder.create(this, "ExampleFunctionOne")
.code(lambdaCodeSource)
.handler("org.localstack.sampleproject.api.LambdaApi")
.environment(mapOf("FUNCTION_NAME" to "functionOne"))
.timeout(Duration.seconds(30))
.runtime(Runtime.JAVA_11)
.uuid(UUID.randomUUID().toString())
.build()
}
/**
* Mount code for hot-reloading when STAGE=local
*/
private fun buildCodeSource(): Code {
if (STAGE == "local") {
val bucket = Bucket.fromBucketName(this, "HotReloadingBucket", "hot-reload")
return Code.fromBucket(bucket, LAMBDA_MOUNT_CWD)
}
return Code.fromAsset(JAR_PATH)
}
}
```
```hcl showLineNumbers
variable "STAGE" {
type = string
default = "local"
}
variable "AWS_REGION" {
type = string
default = "us-east-1"
}
variable "JAR_PATH" {
type = string
default = "build/libs/localstack-sampleproject-all.jar"
}
variable "LAMBDA_MOUNT_CWD" {
type = string
}
provider "aws" {
access_key = "test_access_key"
secret_key = "test_secret_key"
region = var.AWS_REGION
s3_force_path_style = true
skip_credentials_validation = true
skip_metadata_api_check = true
endpoints {
apigateway = var.STAGE == "local" ? "http://localhost:4566" : null
cloudformation = var.STAGE == "local" ? "http://localhost:4566" : null
cloudwatch = var.STAGE == "local" ? "http://localhost:4566" : null
cloudwatchevents = var.STAGE == "local" ? "http://localhost:4566" : null
iam = var.STAGE == "local" ? "http://localhost:4566" : null
lambda = var.STAGE == "local" ? "http://localhost:4566" : null
s3 = var.STAGE == "local" ? "http://localhost:4566" : null
}
}
resource "aws_iam_role" "lambda-execution-role" {
name = "lambda-execution-role"
assume_role_policy = <
You can then pass `LAMBDA_MOUNT_CWD` as an environment variable to your deployment tool.
```bash
LAMBDA_MOUNT_CWD=$(pwd)/build/hot serverless deploy --stage local
```
```bash
STAGE=local && LAMBDA_MOUNT_CWD=$(pwd)/build/hot &&
lstk cdk bootstrap aws://000000000000/$(AWS_REGION) && \
lstk cdk deploy
```
```bash
terraform init && \
terraform apply -var "STAGE=local" -var "LAMBDA_MOUNT_CWD=$(pwd)/build/hot"
```
## Share deployment configuration between different machines
The paths provided for hot reloading have to be absolute paths on the host running the LocalStack container.
This, however makes sharing the same configuration between multiple machines difficult, whether using [Cloud Pods](/aws/developer-tools/snapshots/cloud-pods) or sharing IaC templates between different developers.
In order to remove the need for manual adjustments for your hot-reloading paths specified in the `S3Key` field, you can use placeholders for environment variables inside the path.
The placeholders use the same format as you would use for shell parameter expansion, namely `$ENV_VAR` or `${ENV_VAR}`.
These used environment variables have to be set inside the LocalStack container.
Please note that the final path, after substituting the placeholders for their values, has to be an absolute path.
:::note
Please make sure the placeholder is not substituted by your shell before being sent to LocalStack.
This is mostly relevant when using the AWS CLI to create a function.
Please use string quotation marks which prevent parameter expansion in your shell.
For bash, please use single quotes `'` instead of double quotes `"` to make sure the placeholder does not get expanded before being sent to LocalStack.
:::
### Example
In order to make use of the environment variable placeholders, you can inject them into the LocalStack container, for example using the following `docker-compose.yml` file.
```yaml showLineNumbers
services:
localstack:
container_name: "${LOCALSTACK_DOCKER_NAME:-localstack-main}"
image: localstack/localstack
ports:
- "127.0.0.1:4566:4566" # LocalStack Gateway
- "127.0.0.1:4510-4559:4510-4559" # external services port range
environment:
# LocalStack configuration: https://docs.localstack.cloud/references/configuration/
- DEBUG=${DEBUG:-0}
- HOST_LAMBDA_DIR=${PWD}
volumes:
- "${LOCALSTACK_VOLUME_DIR:-./volume}:/var/lib/localstack"
- "/var/run/docker.sock:/var/run/docker.sock"
```
This will set a `HOST_LAMBDA_DIR` environment variable to the current working directory when creating the Docker Compose stack.
Please note that this environment variable name is arbitrary - you can use any you want, but need to refer to that variable in your templates or commands to deploy your function correctly.
You can then deploy a hot-reloading function with the following command:
```bash
lstk aws lambda create-function \
--function-name test-function \
--code S3Bucket=hot-reload,S3Key='$HOST_LAMBDA_DIR/src' \
--handler handler.handler \
--runtime python3.12 \
--role 'arn:aws:iam::000000000000:role/lambda-ex'
```
Please note the single quotes `'` which prevent our shell to replace `$HOST_LAMBDA_DIR` before the function is created.
With the above example, you can make hot-reloading paths sharable between machines, as long as there is a point on the host to which the relative paths will stay the same.
One example for this are checked out git repositories, where the code is located in the same structure - the absolute location of the checked out repository on the machine might however differ.
If the chosen variable always points to the checked out directory, you can set the path using the placeholder in the checked out IaC template, or can share a Cloud Pod between machines.
## Hot Reloading on LocalStack Web Application
You can use the LocalStack Web Application to hot reload your Lambda functions.
The [Lambda Resource Browser](https://app.localstack.cloud/inst/default/resources/lambda/functions) allows you to update your Lambda function and specify the file path for your Lambda code and dependencies.
To set up Lambda Hot Reloading via the LocalStack Web Application:
1. Navigate to the [Lambda Resource Browser](https://app.localstack.cloud/inst/default/resources/lambda/functions).
2. Click **Create** to create a new Lambda function, or select **Update Function Code** for an existing Lambda function.
3. In the **Code Source** section, choose **Hot Reload**.
4. Enter the path to the directory containing your Lambda code for hot reloading.
5. Click **Submit** to save the configuration.
LocalStack will automatically set up the magic S3 bucket and the S3 key pointing to your specified file path.
Changes to your Lambda code locally will be reflected immediately upon saving.
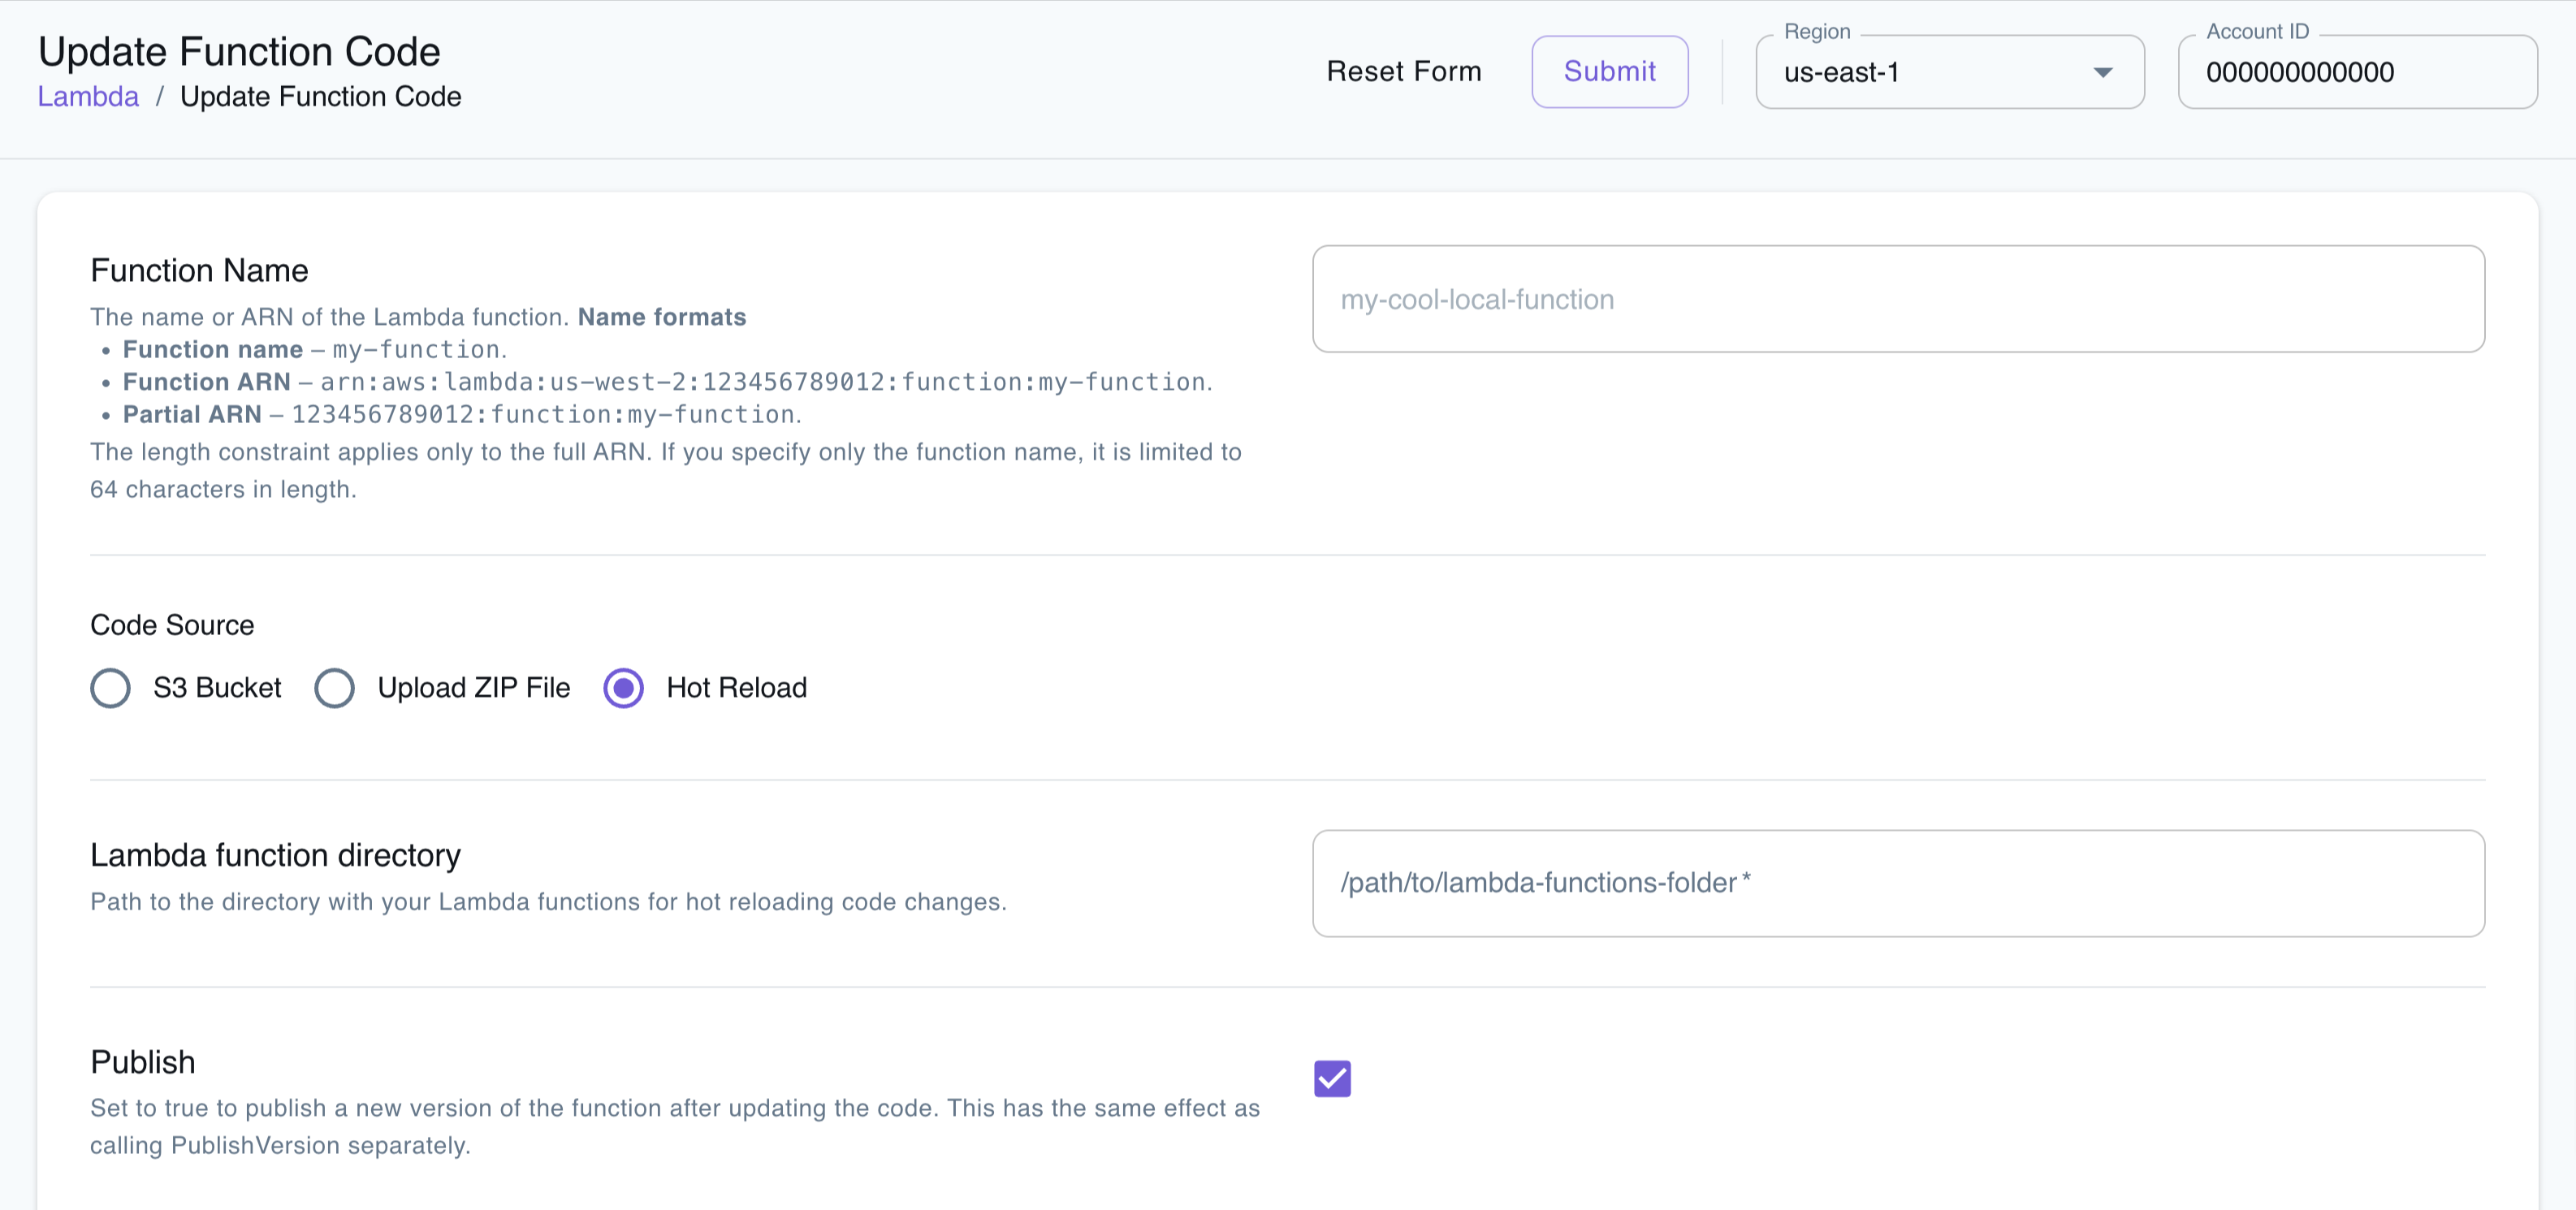
## Examples
- [Lambda Hot Reloading](https://github.com/localstack/localstack-pro-samples/tree/master/lambda-hot-reloading)
# Remote Debugging
> Attach a debugger to your Lambda functions from within your IDE.
import { Tabs, TabItem } from '@astrojs/starlight/components';
import { Badge } from '@astrojs/starlight/components';
# Overview
Lambda Remote Debugging lets you use breakpoints, inspect variables, and step through your Lambda function code locally within VS Code. It is supported for Python, Node.js, and Java, and works with SAM-based or standalone Lambda projects.
:::note
For examples and sample apps, visit the [LocalStack Samples Repository](https://github.com/localstack-samples/localstack-pro-samples):
- [Debug your Python Lambda Function](https://github.com/localstack-samples/localstack-pro-samples/tree/master/lambda-debugging-sam-python)
- [Debug your JavaScript Lambda Function](https://github.com/localstack-samples/localstack-pro-samples/tree/master/lambda-debugging-sam-javascript)
- [Debug your TypeScript Lambda Function](https://github.com/localstack-samples/localstack-pro-samples/tree/master/lambda-debugging-sam-typescript)
- [Debug your Java Lambda Function](https://github.com/localstack-samples/localstack-pro-samples/tree/master/lambda-debugging-sam-java)
:::
## Lambda Remote Debugging with AWS Toolkit for VS Code
This guide describes how to use the AWS Toolkit for VS Code to debug Lambda functions running in LocalStack. This new integration enables interactive, IDE-native debugging for Python, Node.js, and Java Lambda functions with minimal setup.
### Key Benefits
* One-click remote automatic debugger configuration and injection via the AWS Toolkit for VS Code
* Automatic Timeout Management
* Support for Python, Node.js, and Java runtimes
## Getting Started with AWS Toolkit (VS Code)
### Prerequisites
* Install the [`lstk` CLI](/aws/developer-tools/running-localstack/lstk)
* [VS Code](https://code.visualstudio.com/) (>= v1.83.0)
* [AWS Toolkit for VS Code](https://marketplace.visualstudio.com/items?itemName=AmazonWebServices.aws-toolkit-vscode) (>= v3.74)
* [LocalStack Toolkit for VS Code](https://marketplace.visualstudio.com/items?itemName=LocalStack.localstack) (>= v1.2.0)
* [Docker](https://www.docker.com/)
* A valid LocalStack Auth Token. Sign up for a [free LocalStack account](https://www.localstack.cloud/pricing).
* A valid **auth token**
* VS Code running on the **same machine** as LocalStack (container-based setups like Kubernetes are not yet supported).
### Setup Steps
The following setup creates the required `~/.aws/config` and `~/.aws/credentials` entries and ensures LocalStack runs with your active license.
1. Install [AWS Toolkit](https://marketplace.visualstudio.com/items?itemName=AmazonWebServices.aws-toolkit-vscode) and [LocalStack Toolkit](https://marketplace.visualstudio.com/items?itemName=LocalStack.localstack) from the VS Code Marketplace.
2. Install the latest version of the [AWS SAM CLI](https://docs.aws.amazon.com/serverless-application-model/latest/developerguide/install-sam-cli.html) for using the AWS Application builder functionality in the AWS Toolkit.
3. Run the `LocalStack: Run Setup Wizard` from the Command Palette. (This sets your auth token and configures the `localstack` AWS profile.)

4. Start LocalStack using the status bar or the command `Start LocalStack`.
5. Switch your AWS profile in the status bar to `profile:localstack`.
### Debugging Node.js, Python, Java (with Examples)
You can debug either your own Lambda function or our sample project.
### Use AWS Toolkit Sample
1. Open the **AWS Explorer** in VS Code.

2. To install the sample application, select the `...` menu in the AWS Explorer view and choose *Create application with Serverless template*.
3. Choose the **"Process SQS Records with Lambda"** sample.
4. Select a runtime (Python, Node.js, or Java).
5. Complete the wizard to generate the project.
:::note
If you want to use your own Lambda function, ensure your function and SAM template are compatible with LocalStack.
If using our sample app, you may need to change the Lambda architecture from `arm64` to `x86_64` in `template.yaml` if running on an Intel machine.
:::
### Deploy and Debug
1. Deploy the function:
* Go to Application Builder view
* Click **Deploy SAM Application** (cloud icon)
* Follow the wizard to deploy to LocalStack
2. Open Remote Invoke Configuration:
* In **AWS Explorer**, right-click your deployed Lambda function
* Select **Invoke Remotely**
3. Enable Remote Debugging:
* In the configuration view, check **Remote debugging**
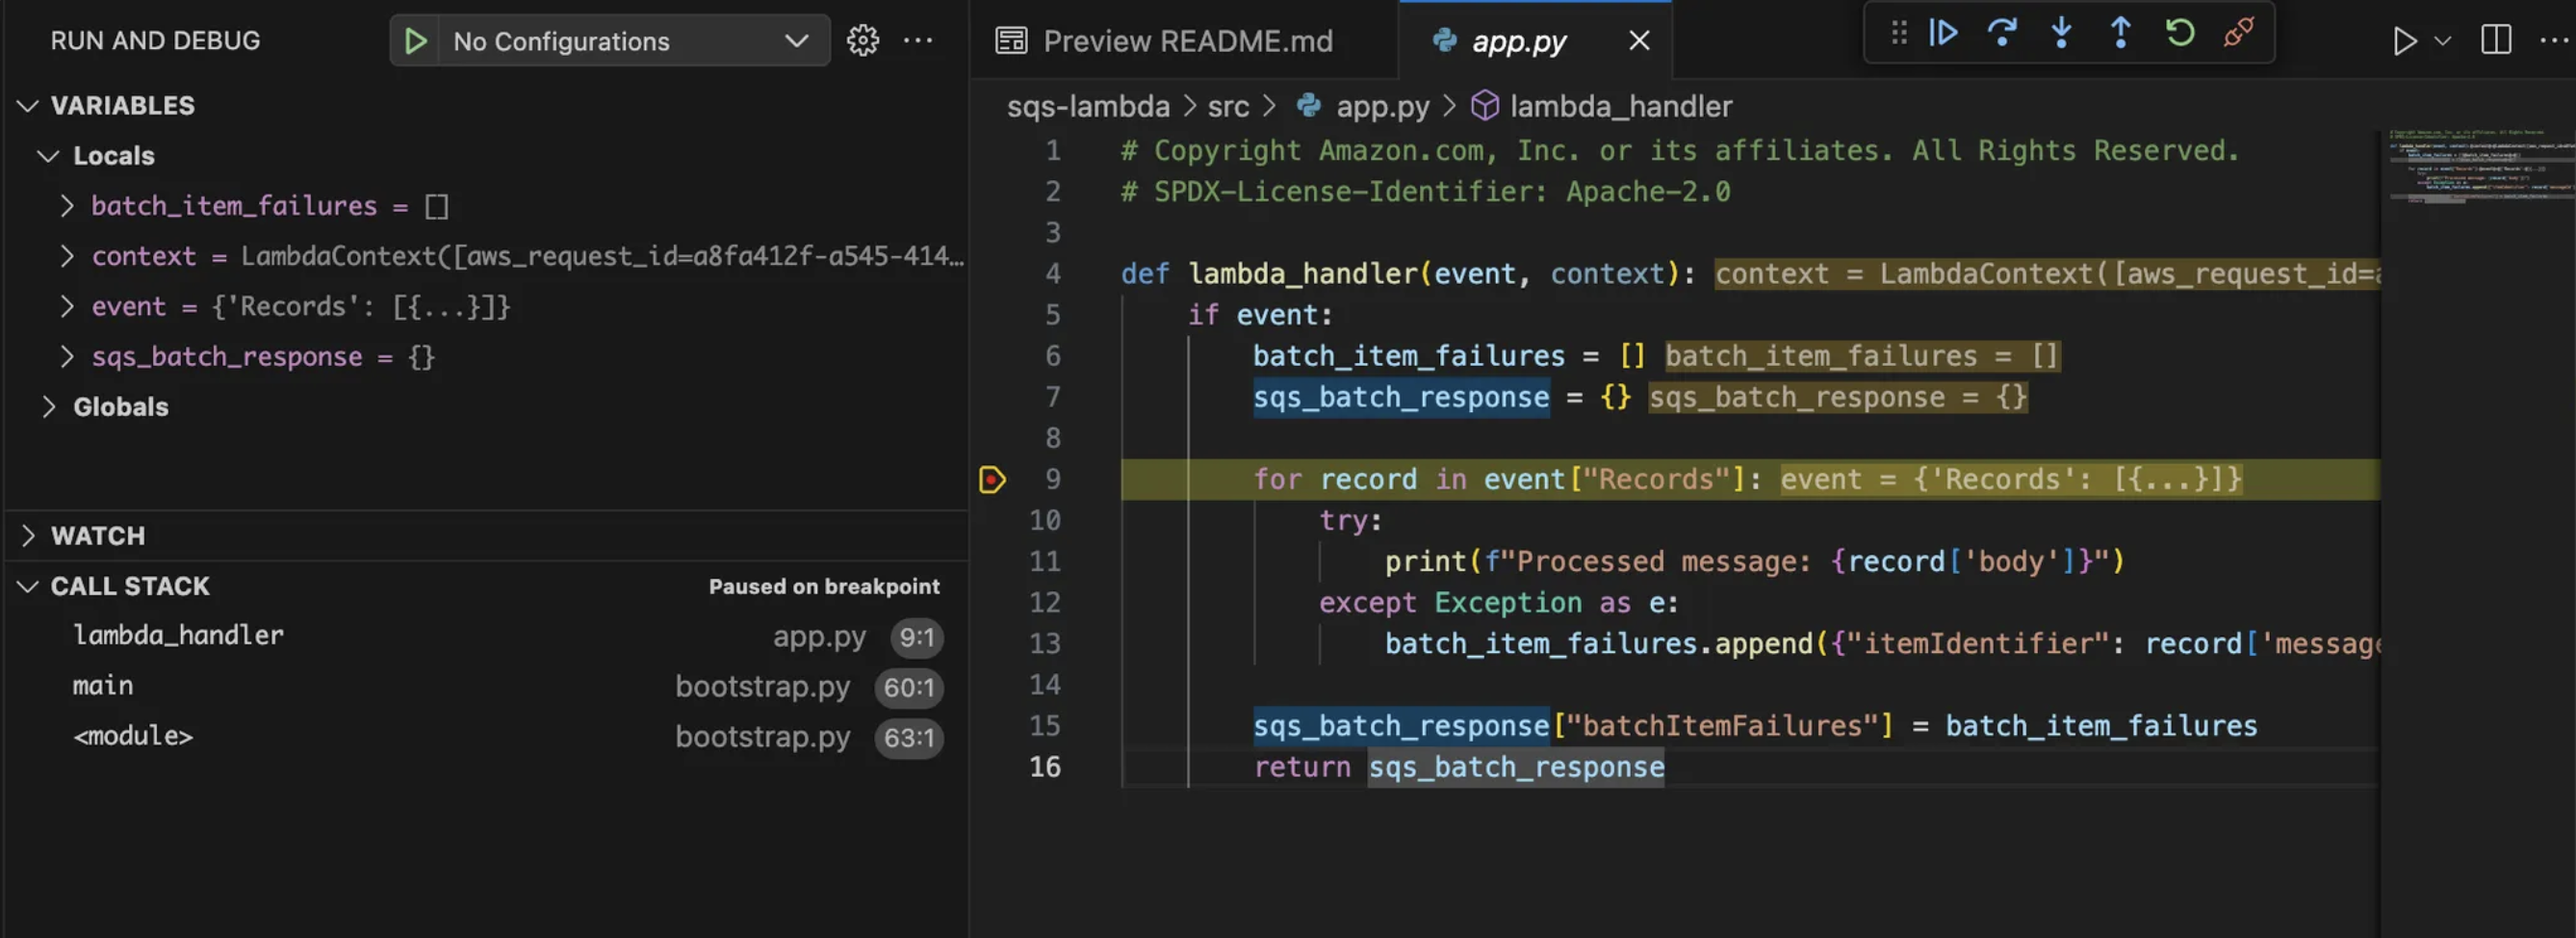
* If prompted, provide the event input (e.g., SQS sample event)
4. Set Breakpoints and Debug:
* Open your Lambda handler source file
* Set breakpoints in the margin
* Click **Remote Invoke**
Your Lambda function will execute in LocalStack and pause at your breakpoint. You can inspect variables, step through code, and continue execution.
### Debugging TypeScript with Source Maps
To enable source-level debugging for TypeScript:
1. Build your TypeScript Lambda with source maps enabled:
```bash
tsc --sourceMap true
```
2. Ensure the compiled `.js` and `.map` files are present in the deployment package.
3. Open the `.ts` source file in VS Code, set breakpoints, and proceed as with other runtimes.
## Troubleshooting
### `UnsupportedLocalStackVersion` Error
If you receive the following error message:
```
UnsupportedLocalStackVersion: Your current LocalStack version does not support Lambda remote debugging. Update LocalStack and check your license.
```
Here's how to fix it:
1. Make sure you are running **LocalStack for AWS >= v4.8.0**
```bash
docker pull localstack/localstack-pro:latest
```
2. Ensure your **auth token is valid** and has an **assigned license**.
* You can re-run the **LocalStack Setup Wizard** in VS Code to verify.
* Or log into [app.localstack.cloud](https://app.localstack.cloud) and check your token and [license status](https://docs.localstack.cloud/aws/licensing/).
### DNS Rebind Protection Issues
Should downloading the Lambda function code fail, here's how to fix it:
* Disable DNS rebind protection (see [LocalStack DNS docs](https://docs.localstack.cloud/aws/customization/networking/dns-server/#dns-rebind-protection))
* Use `127.0.0.1` instead of `localhost.localstack.cloud` (**Automatic** setup)
* Run the `LocalStack: Configure AWS Profile "localstack"` command from the VS Code Command Palette which will auto-configure the correct endpoint.
* Use `127.0.0.1` instead of `localhost.localstack.cloud` (**Manual** setup)
* Set `LOCALSTACK_HOST=127.0.0.1:4566` in `~/.localstack/default.env`
* Update your `endpoint_url` in your `localstack` profile located in `~/.aws/config`
## Lambda Debug Mode (Preview)
Lambda Debug Mode is a preview feature in LocalStack designed to enhance your Lambda debugging workflows.
This feature provides an optimized environment for debugging Lambda functions, ensuring that you have the
necessary tools and flexibility to troubleshoot effectively.
### Key Features
* **Automatic Timeout Management**: Integrates with API Gateway to prevent Lambda function timeouts,
giving developers ample time to connect remote debuggers and inspect the function's behavior.
* **Multi-Function Debugging**: Supports debugging multiple Lambda functions concurrently.
### Enabling Lambda Debug Mode
To enable Lambda Debug Mode, set the `LAMBDA_DEBUG_MODE` environment variable as shown below:
```toml
# .lstk/config.toml
[[containers]]
type = "aws"
env = ["lambda-debug"]
[env.lambda-debug]
LAMBDA_DEBUG_MODE = "1"
LAMBDA_DOCKER_FLAGS = "-p 19891:19891"
```
```bash
lstk start
```
When enabled, Lambda Debug Mode automatically adjusts timeouts to accommodate debugging needs:
* **Lambda Container Startup Timeout**: Provides additional time for debugger connection during container creation.
* **Lambda Execution Timeout**: Extends the execution window, allowing for in-depth remote debugging.
* **API Gateway-Lambda Integration Timeout**: Increases timeout settings to avoid premature terminations.
### Advanced Configuration
For further customization, you can use a configuration file.
Specify the path to this file with the `LAMBDA_DEBUG_MODE_CONFIG_PATH` environment variable, ensuring the
file is mounted into the LocalStack container.
Manually setting `LAMBDA_DOCKER_FLAGS` is unnecessary when using this configuration.
Here is an example of mounting a `debug_config.yaml` in your LocalStack container to start your Debug Mode:
```toml
# .lstk/config.toml
[[containers]]
type = "aws"
env = ["lambda-debug-advanced"]
volumes = ["/path/to/debug-config.yaml:/tmp/lambda_debug_mode_config.yaml"]
[env.lambda-debug-advanced]
LAMBDA_DEBUG_MODE = "1"
LAMBDA_DEBUG_MODE_CONFIG_PATH = "/tmp/debug_config.yaml"
```
```bash
lstk start
```
```yaml showLineNumbers
services:
localstack:
container_name: "${LOCALSTACK_DOCKER_NAME:-localstack-main}"
image: localstack/localstack-pro
ports:
- "127.0.0.1:4566:4566" # LocalStack Gateway
- "127.0.0.1:4510-4559:4510-4559" # external services port range
- "127.0.0.1:443:443" # LocalStack HTTPS Gateway (Pro)
environment:
# LocalStack configuration: https://docs.localstack.cloud/references/configuration/
- DEBUG=${DEBUG:-0}
- LAMBDA_DEBUG_MODE=1
- LAMBDA_DEBUG_MODE_CONFIG_PATH=/tmp/debug_config.yaml
volumes:
- "./debug_config.yaml:/tmp/debug_config.yaml"
- "${LOCALSTACK_VOLUME_DIR:-./volume}:/var/lib/localstack"
- "/var/run/docker.sock:/var/run/docker.sock"
```
Any change to the configuration file on your local filesystem would be automatically picked by the LocalStack container.
After debugging a Lambda function, its associated container will automatically stop.
The configuration file should contain a `functions` block where you can define debug settings
for each specific Lambda function ARN.
#### Example: Basic Debugging Configuration
This example configures Lambda Debug Mode to use port 19891 for the remote debugger.
```yaml showLineNumbers
functions:
arn:aws:lambda:eu-central-1:000000000000:function:func-one:
debug-port: 19891
```
#### Example: Disabling Automatic Timeout Handling
In this example, the automatic timeout handling feature is disabled for the specified Lambda function,
enforcing the predefined timeouts instead.
```yaml showLineNumbers
functions:
arn:aws:lambda:eu-central-1:000000000000:function:func-one:
debug-port: 19891
enforce-timeouts: true
```
### Handling Unqualified ARNs
Specifying an unqualified Lambda ARN in the configuration is equivalent to specifying the ARN
with the `$LATEST` version qualifier.
```yaml showLineNumbers
functions:
arn:aws:lambda:eu-central-1:000000000000:function:func-one:$LATEST:
debug-port: 19891
```
### Debugging Multiple Functions
To debug multiple Lambda functions simultaneously, assign a different debug port to each function.
Note that this configuration affects the container's internal debugger port as well, so the debugger
port must be set accordingly.
```yaml showLineNumbers
functions:
arn:aws:lambda:eu-central-1:000000000000:function:func-one:
debug-port: 19891
arn:aws:lambda:eu-central-1:000000000000:function:func-two:
debug-port: 19892
```
### Debugging Different Versions
You can also debug different versions of the same Lambda function by assigning unique ports to each version.
```yaml showLineNumbers
functions:
arn:aws:lambda:eu-central-1:000000000000:function:func-one:1:
debug-port: 19891
arn:aws:lambda:eu-central-1:000000000000:function:func-two:2:
debug-port: 19892
```
## Manual Lambda Debugging (Legacy)
* [Debugging Python Lambda functions](#debugging-python-lambda-functions)
* [Debugging JVM Lambda functions](#debugging-jvm-lambda-functions)
* [Debugging Node.js Lambda functions](#debugging-nodejs-lambda-functions)
:::note
Due to the ports published by the Lambda container for the debugger, it is currently only possible to debug one Lambda function at a time.
This limitation only applies to advanced manual debugging scenarios in legacy mode, such as those requiring multiple ports.
:::
### Debugging Python Lambda functions
Lambda functions debugging used to be a difficult task.
LocalStack changes that
with the same local code mounting functionality that also helps you
to [iterate quickly over your function code](/aws/developer-tools/lambda-tools/hot-reloading).
### Debugging a Python Lambda in Visual Studio Code
#### Configure LocalStack for VS Code remote Python debugging
First, make sure that LocalStack is started with the following configuration (see the [Configuration docs](/aws/customization/configuration-options#lambda) for more information):
```toml
# .lstk/config.toml
[[containers]]
type = "aws"
env = ["lambda-debug"]
[env.lambda-debug]
LAMBDA_DOCKER_FLAGS = "-p 19891:19891"
```
```bash
lstk start
```
#### Preparing your code
For providing the debug server, we use [`debugpy`](https://github.com/microsoft/debugpy)
inside the Lambda function code.
In general, all you need is the following code
fragment placed inside your handler code:
```python showLineNumbers
import debugpy
debugpy.listen(("0.0.0.0", 19891))
debugpy.wait_for_client() # blocks execution until client is attached
```
For extra convenience, you can use the `wait_for_debug_client` function from our example.
It implements the above-mentioned start of the debug server and also adds an automatic cancellation of the wait task if the debug client (i.e. VSCode) doesn't connect.
```python showLineNumbers
def wait_for_debug_client(timeout=15):
"""Utility function to enable debugging with Visual Studio Code"""
import time, threading
import sys, glob
sys.path.append(glob.glob(".venv/lib/python*/site-packages")[0])
import debugpy
debugpy.listen(("0.0.0.0", 19891))
class T(threading.Thread):
daemon = True
def run(self):
time.sleep(timeout)
print("Canceling debug wait task ...")
debugpy.wait_for_client.cancel()
T().start()
print("Waiting for client to attach debugger ...")
debugpy.wait_for_client()
```
#### Configuring Visual Studio Code for remote Python debugging
For attaching the debug server from Visual Studio Code, you need to add a run configuration.
```json showLineNumbers
{
"version": "0.2.0",
"configurations": [
{
"name": "Python: Remote Attach",
"type": "python",
"request": "attach",
"connect": {
"host": "localhost",
"port": 19891
},
"pathMappings": [
{
"localRoot": "${workspaceFolder}",
"remoteRoot": "."
}
]
}
]
}
```
In the next step we create our function.
In order to debug the function in Visual Studio Code, run the preconfigured remote debugger, which will wait about 15 seconds as defined above, and then invoke the function.
Make sure to set a breakpoint in the Lambda handler code first, which can then later be inspected.
The screenshot below shows the triggered breakpoint with our `'Hello from LocalStack!'` in the variable inspection view:
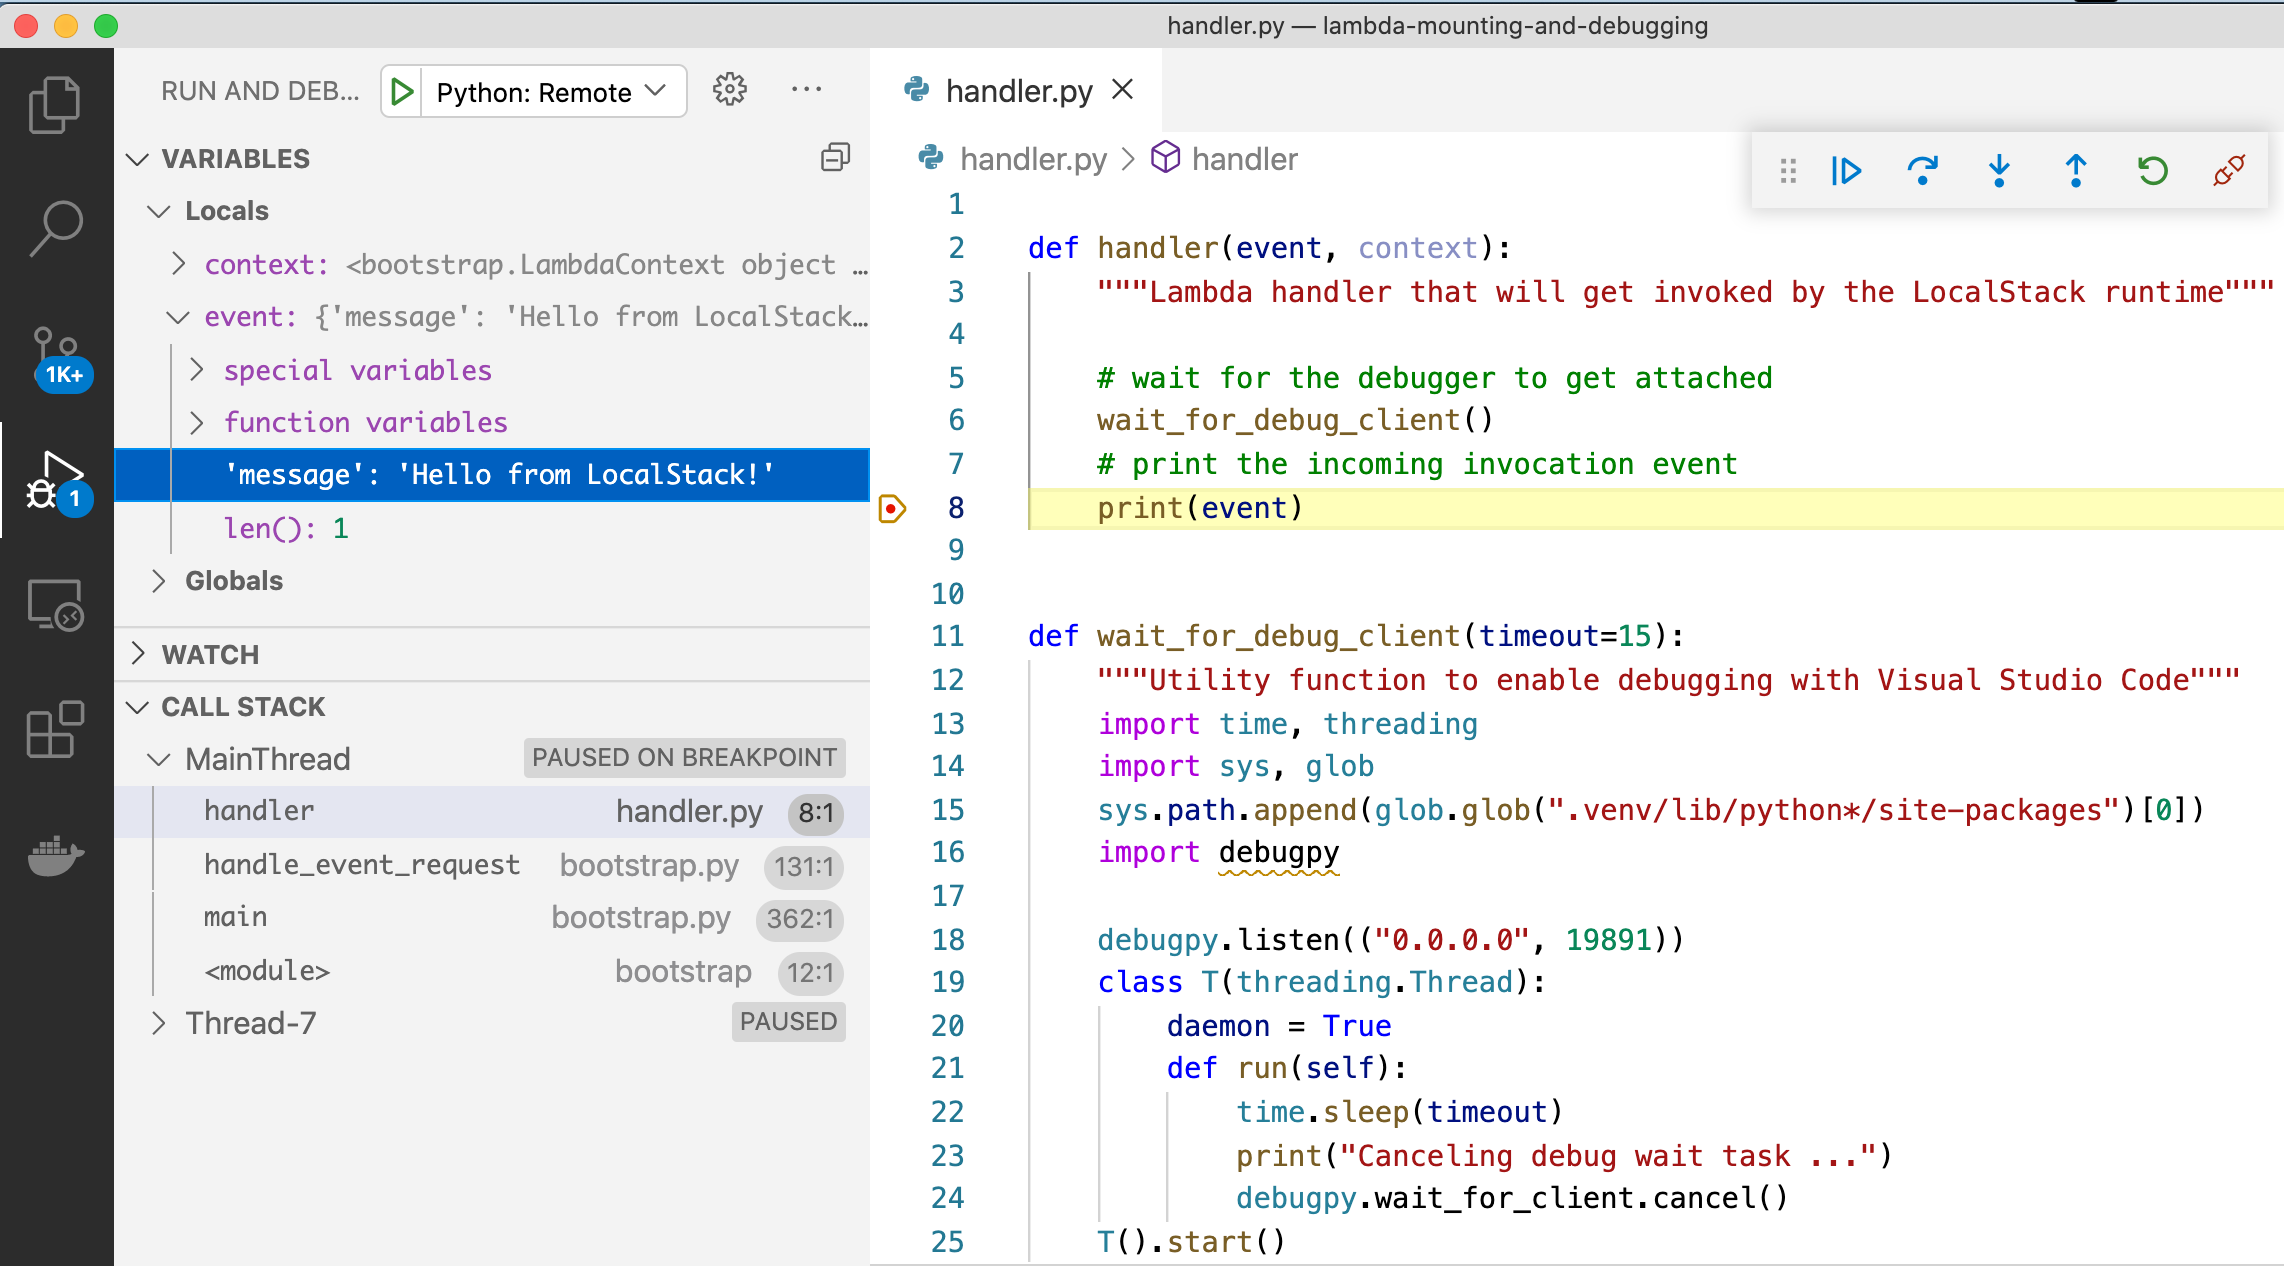
#### Current Limitations
Due to the ports published by the lambda container for the debugger, you can currently only debug one Lambda at a time.
Due to the port publishing, multiple concurrently running lambda environments are not supported.
### Debugging a Python Lambda in PyCharm Professional
Please be aware that [remote debugging in PyCharm](https://www.jetbrains.com/help/pycharm/remote-debugging-with-product.html) is only available in the Professional version.
You do not need to change the `LAMBDA_DOCKER_FLAGS` when debugging with PyCharm Professional.
#### Configuring PyCharm for remote Python debugging
You can [follow the steps in the official docs](https://www.jetbrains.com/help/pycharm/remote-debugging-with-product.html#remote-debug-config), which will come down to:
* Create a debug configuration with the IDE host name `localhost` and the debug port `19891`.
* Add path mapping with your project files on the host and map it to the remote directory `/var/task`.
* Copy the `pip install` command, and make sure to install the correct `pydevd-pycharm` version for your PyCharm IDE.
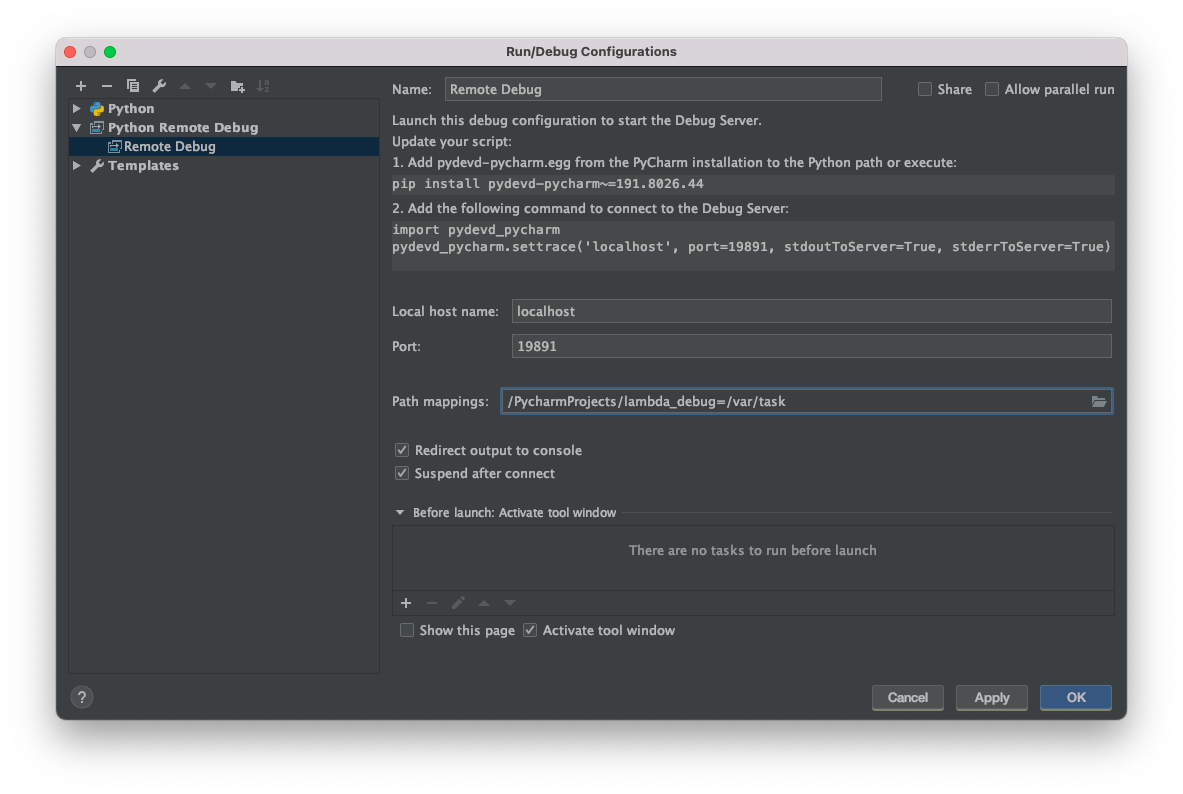
#### Preparing your code
PyCharm provides its own debugging package, called `pydevd-pycharm`.
Essentially, you will add the following code to your lambda:
```python
import pydevd_pycharm
pydevd_pycharm.settrace('host.docker.internal', port=19891, stdoutToServer=True,
stderrToServer=True)
```
The `host.docker.internal` is a [special DNS name by Docker](https://docs.docker.com/desktop/networking/#use-cases-and-workarounds-for-all-platforms) and will make sure that the lambda running in the docker can connect to PyCharm running on your Localhost.
You can use the `wait_for_debug_client` and add it to your lambda (please adapt the path to your `venv` directory if necessary):
```python
def wait_for_debug_client():
"""Utility function to enable debugging with PyCharm"""
import sys, glob
# enter the correct path here to your venv (where pydev_pycharm is installed
my_venv = "venv/lib/python*/site-packages"
sys.path.insert(0, glob.glob(my_venv)[0])
import pydevd_pycharm
# host.docker.internal should resolve to the host
# see also: https://docs.docker.com/desktop/networking#use-cases-and-workarounds-for-all-platforms
pydevd_pycharm.settrace('host.docker.internal', port=19891, stdoutToServer=True,
stderrToServer=True)
```
In the next step we create our function.
In order to debug the function in PyCharm set a breakpoint in your function, run the Remote Debug configuration and then invoke the function.
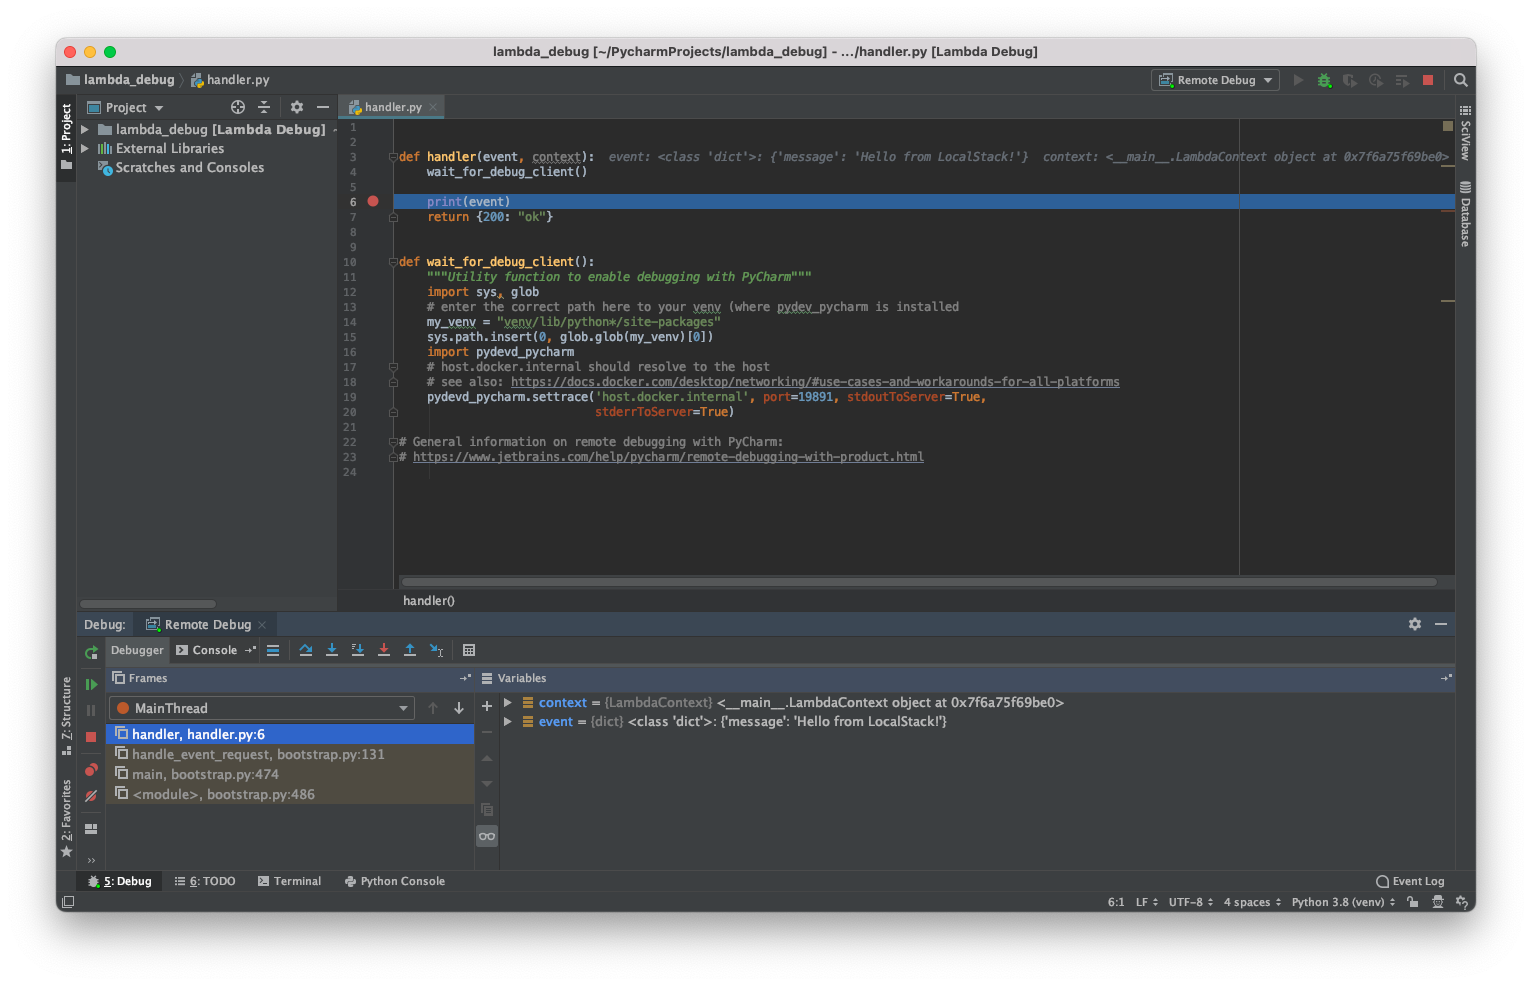
### Creating the Lambda function
To create the Lambda function, you just need to take care of two things:
1. Deploy the function via an S3 Bucket.
You need to use the magic variable `hot-reload` as the bucket name.
2. Set the S3 key to the path of the directory your lambda function resides in.
The handler is then referenced by the filename of your lambda code and the function in that code that should be invoked.
Using the AWS CLI, this would be:
```bash
lstk aws lambda create-function --function-name my-cool-local-function \
--code S3Bucket="hot-reload",S3Key="$(pwd)/" \
--handler handler.handler \
--runtime python3.13 \
--timeout 150 \
--role arn:aws:iam::000000000000:role/lambda-role
```
We can quickly verify that it works by invoking it with a simple payload:
```bash
lstk aws lambda invoke --function-name my-cool-local-function \
--cli-binary-format raw-in-base64-out \
--payload '{"message": "Hello from LocalStack!"}' \
output.txt
```
### Debugging JVM Lambda functions
### Configure LocalStack and your Lambda function for remote JVM debugging
Set `LAMBDA_DOCKER_FLAGS` to export the `5050` (you can use any other port of your choice) port which your IDE debugger will connect to.
```yaml
#docker-compose.yml
services:
localstack:
...
environment:
...
- LAMBDA_DOCKER_FLAGS=-p 127.0.0.1:5050:5050
```
When creating your Lambda function, set the `_JAVA_OPTIONS` environment variable like so:
```bash
lstk aws lambda create-function --function-name debugfunc \
--zip-file fileb://java-handler.zip \
--handler myindex.handler \
--runtime java8.al2 \
--timeout 150 \
--role arn:aws:iam::000000000000:role/lambda-role \
--environment '{"Variables": {"_JAVA_OPTIONS": "-Xshare:off -agentlib:jdwp=transport=dt_socket,server=y,suspend=y,address=0.0.0.0:5050"}}'
```
Note the `suspend=y` option here, it will delay code execution until the debugger is attached to the debugger server.
If you want to change that, simply switch to `suspend=n`.
By default the runtime environment for Java will set `-Xshare: on`, so we'll have to disable it here again.
Your IDE might show you the listen address as `*:5050`, but please note that this only works for Java 9+.
### Configuring IntelliJ IDEA for remote JVM debugging
Open the `Run/Debug Configurations` window and create a new `Shell Script` with
the following content:
```shell
while [[ -z $(docker ps | grep :5050) ]]; do sleep 1; done
```
This shell script should simplify the process a bit since the debugger server is not immediately available (only once Lambda container is up).
Then create a new `Remote JVM Debug` configuration and use the script from above as a `Before launch` target:
Now to debug your Lambda function, simply click on the `Debug` icon with `Remote JVM on LS Debug` configuration selected, and then invoke your Lambda function.
### Alternative setup for IntelliJ IDEA
The debugger can also act as a server by changing the drop-down "Debugger mode" to "Listen to remote JVM".
In this case you should not set `LAMBDA_DOCKER_FLAGS` since the port will be exposed on your host instead of the Lambda container.
Compared to the previous setup the "Wait Remote Debugger Server" run configuration should also be removed and instead tick the mark at "Auto restart" after switching to the "Listen to remote JVM" mode.
For the Lambda function you will have to adjust the environment variable to `"_JAVA_OPTIONS": "-Xshare:off -agentlib:jdwp=transport=dt_socket,server=n,address=172.17.0.1:5050,suspend=y,onuncaught=n"`.
Notice the `address=172.17.0.1:5050`.
Here we tell the Lambda function to connect to port 5050 on 172.17.0.1.
When using Docker desktop you might have to set this to `address=host.docker.internal:5050` instead.
### Configuring Visual Studio Code for remote JVM debugging
Make sure you installed the following extensions:
* [Language Support for Java(TM) by Red Hat](https://marketplace.visualstudio.com/items?itemName=redhat.java)
* [Debugger for Java](https://marketplace.visualstudio.com/items?itemName=vscjava.vscode-java-debug)
Add a new task by creating/modifying the `.vscode/tasks.json` file:
```json showLineNumbers
{
"version": "2.0.0",
"tasks": [
{
"label": "Wait Remote Debugger Server",
"type": "shell",
"command": "while [[ -z $(docker ps | grep :5050) ]]; do sleep 1; done; sleep 1;"
}
]
}
```
Create a new `launch.json` file or edit an existing one from the `Run and Debug` tab,
then add the following configuration:
```json showLineNumbers
{
"version": "0.2.0",
"configurations": [
{
"type": "java",
"name": "Remote JVM on LS Debug",
"projectRoot": "${workspaceFolder}",
"request": "attach",
"hostName": "localhost",
"preLaunchTask": "Wait Remote Debugger Server",
"port": 5050
}
]
}
```
Now to debug your lambda function, click on the `Debug` icon with
`Remote JVM on LS Debug` configuration selected, and then invoke your
lambda function.
### Debugging Node.js Lambda functions
### Configure LocalStack for remote Node.js debugging
Set the `LAMBDA_DOCKER_FLAGS` to enable the debugger using `NODE_OPTIONS`:
```yaml showLineNumbers
#docker-compose.yml
services:
localstack:
...
environment:
...
- LAMBDA_DOCKER_FLAGS=-e NODE_OPTIONS=--inspect-brk=0.0.0.0:9229 -p 9229:9229
```
### Configuring Visual Studio Code for remote Node.js debugging
Add a new task by creating/modifying the `.vscode/tasks.json` file:
```json showLineNumbers
{
"version": "2.0.0",
"tasks": [
{
"label": "Wait Remote Debugger Server",
"type": "shell",
"command": "while [[ -z $(docker ps | grep :9229) ]]; do sleep 1; done; sleep 1;"
}
]
}
```
Create a new `launch.json` file or edit an existing one from the `Run and Debug` tab,
then add the following configuration:
```json showLineNumbers
{
"version": "0.2.0",
"configurations": [
{
"address": "127.0.0.1",
"localRoot": "${workspaceFolder}",
"name": "Attach to Remote Node.js",
"port": 9229,
"remoteRoot": "/var/task/",
"request": "attach",
"type": "node",
"preLaunchTask": "Wait Remote Debugger Server"
},
]
}
```
A simple example of a Node.js lambda, `myindex.js` could look like this:
```js showLineNumbers
exports.handler = async (event) => {
console.log(event);
const response = {
statusCode: 200,
body: "ok",
};
return response;
};
```
Create the lambda function using:
```bash
lstk aws lambda create-function --function-name func1 \
--code S3Bucket="hot-reload",S3Key="$(pwd)/" \
--handler myindex.handler \
--runtime nodejs14.x \
--timeout 150 \
--role arn:aws:iam::000000000000:role/lambda-role
```
Now to debug your lambda function, click on the `Debug` icon with
`Attach to Remote Node.js` configuration selected, and then invoke your
lambda function:
```bash
lstk aws lambda invoke --function-name func1 \
--cli-binary-format raw-in-base64-out \
--payload '{"hello":"world"}' \
output.txt
```
## Examples
- [Debug your Python Lambda Function](https://github.com/localstack-samples/localstack-pro-samples/tree/master/lambda-debugging-sam-python)
- [Debug your JavaScript Lambda Function](https://github.com/localstack-samples/localstack-pro-samples/tree/master/lambda-debugging-sam-javascript)
- [Debug your TypeScript Lambda Function](https://github.com/localstack-samples/localstack-pro-samples/tree/master/lambda-debugging-sam-typescript)
- [Debug your Java Lambda Function](https://github.com/localstack-samples/localstack-pro-samples/tree/master/lambda-debugging-sam-java)
# Overview
> Tools for starting, stopping, and managing your LocalStack emulator.
import SectionCards from '../../../../../components/SectionCards.astro';
Several tools are available to install, start, and manage the LocalStack emulator. Your starting point should be `lstk`, the modern CLI for managing LocalStack. The MCP server is also available for AI-driven management, giving you complete control over the lifecycle of your local cloud environment.
Note that the previous `localstack` CLI is now deprecated, but can [still be used](/aws/developer-tools/running-localstack/localstack-cli/) if necessary.
# Deprecated LocalStack CLI
> Reference guide for the deprecated LocalStack CLI commands, options, and usage. We recommend using lstk instead.
import { Tabs, TabItem } from '@astrojs/starlight/components';
import { LinkButton, Code } from '@astrojs/starlight/components';
import { LOCALSTACK_AWS_VERSION } from 'astro:env/server';
## Introduction
The LocalStack Command Line Interface (CLI) is a tool for starting, managing, and configuring your LocalStack container.
It provides convenience features to interact with LocalStack features like Cloud Pods, Extensions, State Management, and more.
:::caution
The LocalStack CLI is deprecated and will be removed in a future version.
Please use [lstk](/aws/developer-tools/running-localstack/lstk/) instead.
:::
## Installation
You can download the pre-built binary for your architecture using the link below:
{' '}
x86-64
ARM64
or use the curl commands below:
For x86-64:
Alternative: Homebrew on Linux
If you are using [Homebrew for Linux](https://docs.brew.sh/Homebrew-on-Linux), you can install the LocalStack CLI directly from our official LocalStack tap:
```bash
brew install localstack/tap/localstack-cli
```
:::caution
macOS x86_64 (Intel) is no longer officially supported for the legacy LocalStack CLI.
The `cryptography` package used by the CLI has dropped support for macOS x86_64, so the CLI now pins an older, unsupported version of it as a stopgap to keep working on Intel Macs.
If you are on an Intel Mac, we recommend switching to [`lstk`](/aws/developer-tools/running-localstack/lstk/) instead.
:::
You can install the LocalStack CLI using Brew directly from our official LocalStack tap:
```bash
brew install localstack/tap/localstack-cli
```
You can download the pre-built binary for your architecture using the link below:
{' '}
Intel (AMD64)
Then extract the archive and execute the binary in Powershell.
If you cannot use the binary releases of LocalStack, you can install the Python distribution.
Please make sure to install the following before moving ahead:
- [Python](https://docs.python.org/3/using/index.html)
- [pip](https://pip.pypa.io/en/stable/installation/)
Next install the LocalStack CLI in your Python environment by running:
```bash
python3 -m pip install --upgrade localstack
```
:::note
To download a specific version of LocalStack, replace `` with the required version from [changelog page](/aws/changelog).
```bash
python3 -m pip install localstack==
```
:::
:::tip[MacOS Sierra?]
If you have problems with permissions in MacOS X Sierra, install with:
```bash
python3 -m pip install --user localstack
```
:::
:::danger
Do not use `sudo` or the `root` user when starting LocalStack.
It should be installed and started entirely under a local non-root user.
:::
### Starting LocalStack
To verify that the LocalStack CLI was installed correctly, you can check the version in your terminal:
Subcommands for localstack auth
#### `auth clear-token`
Clear any existing LocalStack auth token from your environment
```bash
Usage: localstack auth clear-token [OPTIONS]
Options:
-h, --help Show this message and exit.
```
#### `auth set-token`
Set your Localstack auth token to allow you to start LocalStack
```bash
Usage: localstack auth set-token [OPTIONS] AUTH_TOKEN
Configure your auth token. Your auth token is used the license activation to
activate LocalStack Pro. This is different from `localstack auth login`
which enables platform features such as pushing cloud pods to your webapp
account.
The auth token you configure here will be passed to the
`LOCALSTACK_AUTH_TOKEN` environment variable of the LocalStack container
when you run `localstack start`.
AUTH_TOKEN: Your Localstack auth token that you can find in
https://app.localstack.cloud.
Options:
-h, --help Show this message and exit.
```
#### `auth show-token`
Show the auth token in your configuration
```bash
Usage: localstack auth show-token [OPTIONS]
Show the token that LocalStack picks up from your environment. This can
either be the auth token set via `localstack auth set-token`, or the value
of `LOCALSTACK_AUTH_TOKEN`.
Options:
--plain Setting this flag will output only the value of the token in
plain text, so it can be used as input to other programs, like
`LOCALSTACK_AUTH_TOKEN=$(localstack auth show-token --plain)`.
-h, --help Show this message and exit.
```
#### `auth login`
(Deprecated) Login to the your LocalStack account (DEPRECATED)
```bash
Usage: localstack auth login [OPTIONS]
Login to the LocalStack Platform.
This command performs a login to your LocalStack account, giving you access
to features that require platform permissions, such as uploading cloud pods
to your account.
This command is deprecated and it will be removed soon. To use LocalStack
features that requires authentication to the LocalStack platform (e.g.,
Cloud Pods), please run `localstack auth set-token `, or set the
environment variable `LOCALSTACK_AUTH_TOKEN` to a valid auth token.
(DEPRECATED)
Options:
-u, --username USER Username (email address) for login [required]
-p, --password PWD Password for login [required]
-h, --help Show this message and exit.
```
#### `auth logout`
(Deprecated) Log out from your LocalStack account (DEPRECATED)
```bash
Usage: localstack auth logout [OPTIONS]
Log out from the LocalStack Platform.
This command performs a logout from the LocalStack platform and deletes all
session information on your machine. (DEPRECATED)
Options:
-h, --help Show this message and exit.
```
### `completion`
CLI shell completion
```bash
Usage: localstack completion [OPTIONS] {bash|zsh|fish}
Options:
-h, --help Show this message and exit.
```
### `config`
Manage your LocalStack config
```bash
Usage: localstack config [OPTIONS] COMMAND [ARGS]...
Options:
-h, --help Show this message and exit.
Commands:
show Show your config
validate Validate your config
```
Subcommands for localstack config
#### `config show`
Show your config
```bash
Usage: localstack config show [OPTIONS]
Options:
-f, --format [table|plain|dict|json]
The formatting style for the command output.
[default: table]
-h, --help Show this message and exit.
```
#### `config validate`
Validate your config
```bash
Usage: localstack config validate [OPTIONS]
Options:
-f, --file PATH Path to compose file [default: docker-compose.yml]
-h, --help Show this message and exit.
```
### `logs`
Show LocalStack logs
```bash
Usage: localstack logs [OPTIONS]
Options:
-f, --follow Block the terminal and follow the log output
-n, --tail N Print only the last lines of the log output
-h, --help Show this message and exit.
```
### `restart`
Restart LocalStack
```bash
Usage: localstack restart [OPTIONS]
Options:
-h, --help Show this message and exit.
```
### `ssh`
Obtain a shell in LocalStack
```bash
Usage: localstack ssh [OPTIONS]
Options:
-h, --help Show this message and exit.
```
### `start`
Start LocalStack
```bash
Usage: localstack start [OPTIONS]
Options:
--docker Start LocalStack in a docker container [default]
--host Start LocalStack directly on the host (DEPRECATED)
--no-banner Disable LocalStack banner
-d, --detached Start LocalStack in the background
--network TEXT The container network the LocalStack container should be
started in. By default, the default docker bridge
network is used.
-e, --env TEXT Additional environment variables that are passed to the
LocalStack container
-p, --publish TEXT Additional port mappings that are passed to the
LocalStack container
-v, --volume TEXT Additional volume mounts that are passed to the
LocalStack container
--host-dns Expose the LocalStack DNS server to the host using port
bindings.
-s, --stack TEXT Use a specific stack with optional version. Examples:
[localstack:4.5, snowflake]
-h, --help Show this message and exit.
```
### `status`
Query status info
```bash
Usage: localstack status [OPTIONS] COMMAND [ARGS]...
Options:
-h, --help Show this message and exit.
Commands:
docker Query LocalStack Docker status
services Query LocalStack services status
```
Subcommands for localstack status
#### `status docker`
Query LocalStack Docker status
```bash
Usage: localstack status docker [OPTIONS]
Options:
-f, --format [table|plain|dict|json]
The formatting style for the command output.
[default: table]
-h, --help Show this message and exit.
```
#### `status services`
Query LocalStack services status
```bash
Usage: localstack status services [OPTIONS]
Options:
-f, --format [table|plain|dict|json]
The formatting style for the command output.
[default: table]
-h, --help Show this message and exit.
```
### `stop`
Stop LocalStack
```bash
Usage: localstack stop [OPTIONS]
Options:
-h, --help Show this message and exit.
```
### `update`
Update LocalStack
```bash
Usage: localstack update [OPTIONS] COMMAND [ARGS]...
Options:
-h, --help Show this message and exit.
Commands:
all Update all LocalStack components
docker-images Update docker images LocalStack depends on
localstack-cli Update LocalStack CLI
```
Subcommands for localstack update
#### `update all`
Update all LocalStack components
```bash
Usage: localstack update all [OPTIONS]
Options:
-h, --help Show this message and exit.
```
#### `update docker-images`
Update docker images LocalStack depends on
```bash
Usage: localstack update docker-images [OPTIONS]
Options:
-h, --help Show this message and exit.
```
#### `update localstack-cli`
Update LocalStack CLI
```bash
Usage: localstack update localstack-cli [OPTIONS]
Options:
-h, --help Show this message and exit.
```
### `wait`
Wait for LocalStack
```bash
Usage: localstack wait [OPTIONS]
Options:
-t, --timeout N Only wait for seconds before raising a timeout error
-h, --help Show this message and exit.
```
## Advanced Commands
The following advanced commands provide additional functionality for power users.
### `aws`
Access additional functionality on LocalStack AWS Services
```bash
Usage: localstack aws [OPTIONS] COMMAND [ARGS]...
Accesses additional functionality on LocalStack emulated AWS services.
This command provides tools to enhance your experience with certain emulated
AWS services.
Options:
-h, --help Show this message and exit.
Commands:
iam (Preview) Access LocalStack IAM features
```
Subcommands for localstack aws
#### `aws iam`
(Preview) Access LocalStack IAM features
```bash
Usage: localstack aws iam [OPTIONS] COMMAND [ARGS]...
Access LocalStack IAM features.
This command provides tools to make it easier to write IAM policies for your
cloud application.
Options:
-h, --help Show this message and exit.
Commands:
stream Stream policies for all requests enforced on LocalStack
summary Summary of policies for all requests enforced on LocalStack
```
### `dns`
Manage LocalStack DNS host config
```bash
Usage: localstack dns [OPTIONS] COMMAND [ARGS]...
Manage the usage of the LocalStack DNS on your host.
This command provides tools to configure your the DNS on your host machine
to use the LocalStack DNS on your host machine. The LocalStack DNS is used
for certain Pro features (like the transparent endpoint injection).
Visit https://docs.localstack.cloud/user-guide/tools/transparent-endpoint-injection/dns-server/
for more information on the LocalStack DNS and how it is used.
Options:
-h, --help Show this message and exit.
Commands:
systemd-resolved Manage LocalStack DNS in systemd-resolved
```
Subcommands for localstack dns
#### `dns systemd-resolved`
Manage LocalStack DNS in systemd-resolved
```bash
Usage: localstack dns systemd-resolved [OPTIONS]
Manage the LocalStack DNS configuration using systemd-resolved (Ubuntu,
Debian, etc.).
This command sets (or reverts) the LocalStack DNS, running in the current
LocalStack runtime, in systemd-resolved for the docker network interface.
Most current Linux systems - like Ubuntu, Debian, or Fedora - use systemd-
resolved for the network name resolution.
Options:
-s, --set / -r, --revert Set or revert DNS settings [default: set]
-h, --help Show this message and exit.
```
### `ephemeral`
Manage ephemeral LocalStack instances
```bash
Usage: localstack ephemeral [OPTIONS] COMMAND [ARGS]...
Manage ephemeral LocalStack instances in the cloud.
This command group allows you to create, list, and delete ephemeral
LocalStack instances. Ephemeral instances are temporary cloud instances that
can be used for testing and development.
Options:
-h, --help Show this message and exit.
Commands:
create Create a new ephemeral instance
delete Delete an ephemeral instance
describe Describe an ephemeral instance
list List all ephemeral instances
logs Fetch logs from an ephemeral instance
```
Subcommands for localstack ephemeral
#### `ephemeral create`
Create a new ephemeral instance
```bash
Usage: localstack ephemeral create [OPTIONS]
Create a new ephemeral LocalStack instance in the cloud.
Specify an instance name and optional parameters like lifetime and
environment variables. The instance will be created with the specified
configuration and its connection details will be returned.
Examples:
localstack ephemeral create --name my-test-instance
localstack ephemeral create --name my-instance --lifetime 60
localstack ephemeral create --name my-instance --env DEBUG=1
Options:
--name TEXT Name of the ephemeral instance [required]
--lifetime INTEGER Lifetime of the instance in minutes
-e, --env TEXT Additional environment variables that are passed to the
LocalStack instance
-h, --help Show this message and exit.
```
#### `ephemeral delete`
Delete an ephemeral instance
```bash
Usage: localstack ephemeral delete [OPTIONS]
Delete a specific ephemeral LocalStack instance.
Specify the name of the instance you want to delete. Once deleted, the
instance cannot be recovered.
Example:
localstack ephemeral delete --name my-test-instance
Options:
--name TEXT Name of the ephemeral instance to delete [required]
--wait Wait until the instance is fully deleted
--timeout INTEGER Maximum seconds to wait for deletion when --wait is set
[default: 300]
-h, --help Show this message and exit.
```
#### `ephemeral describe`
Describe an ephemeral instance
```bash
Usage: localstack ephemeral describe [OPTIONS]
Describe a specific ephemeral LocalStack instance and show its current
state.
Retrieve the full details and current state of an ephemeral instance by
specifying its name.
Example:
localstack ephemeral describe --name my-test-instance
Options:
--name TEXT Name of the ephemeral instance to describe [required]
-h, --help Show this message and exit.
```
#### `ephemeral list`
List all ephemeral instances
```bash
Usage: localstack ephemeral list [OPTIONS]
List all available ephemeral LocalStack instances.
This command shows all ephemeral instances associated with your account,
including their names, status, and other relevant details.
Examples:
localstack ephemeral list
Options:
-h, --help Show this message and exit.
```
#### `ephemeral logs`
Fetch logs from an ephemeral instance
```bash
Usage: localstack ephemeral logs [OPTIONS]
Fetch logs from a specific ephemeral LocalStack instance.
Retrieve the logs of a running ephemeral instance by specifying its name.
The logs are returned in chronological order.
Example:
localstack ephemeral logs --name my-test-instance
Options:
--name TEXT Name of the ephemeral instance to fetch logs from [required]
-h, --help Show this message and exit.
```
### `extensions`
(Preview) Manage LocalStack extensions
```bash
Usage: localstack extensions [OPTIONS] COMMAND [ARGS]...
(Preview) Manage LocalStack extensions.
LocalStack Extensions allow developers to extend and customize LocalStack.
The feature and the API are currently in a preview stage and may be subject
to change.
If you are using LocalStack extensions with docker-compose, you can use the
CLI by pointing the `LOCALSTACK_VOLUME_DIR=` variable to localstack volume
directory on your host. By default, the volume on your host is located in
`~/.cache/localstack` on Linux, and `~/Library/Caches` on Mac.
Visit https://docs.localstack.cloud/references/localstack-extensions/ for
more information on LocalStack Extensions.
Options:
-v, --verbose Print more output
-h, --help Show this message and exit.
Commands:
dev
init Initialize the LocalStack extensions environment.
install Install a LocalStack extension.
list List installed extension.
uninstall Remove a LocalStack extension.
```
Subcommands for localstack extensions
#### `extensions dev`
```bash
Usage: localstack extensions dev [OPTIONS] COMMAND [ARGS]...
Options:
-h, --help Show this message and exit.
Commands:
disable Disables an extension on the host for developer mode.
enable Enables an extension on the host for developer mode.
list List LocalStack extensions for which dev mode is enabled.
new Create a new LocalStack extension from the official extension...
```
#### `extensions init`
Initialize the LocalStack extensions environment.
```bash
Usage: localstack extensions init [OPTIONS]
Initialize the LocalStack extensions environment.
The environment variable `LOCALSTACK_VOLUME_DIR` currently defaults to
~/.cache/localstack, where the extension environment will be installed into
./lib/extensions/
Options:
-h, --help Show this message and exit.
```
#### `extensions install`
Install a LocalStack extension.
```bash
Usage: localstack extensions install [OPTIONS] NAME
Install a LocalStack extension.
This command installs a LocalStack extension, where the name can be any
valid pip dependency identifier. Additionally, we support the installation
of distribution files from disk, which you can indicate by a ``file://``
prefix in the name
Example invocations:
localstack extensions install localstack-extension-stripe
localstack extensions install "git+https://github.com/localstack/localstack-stripe.git#egg=localstack-stripe"
localstack extensions install file://./dist/localstack-extension-hello-world-0.1.0.tar.gz
localstack extensions install file://. # assumes the current directory is a source distribution
Options:
-h, --help Show this message and exit.
```
#### `extensions list`
List installed extension.
```bash
Usage: localstack extensions list [OPTIONS]
List installed extension.
The environment variable `LOCALSTACK_VOLUME_DIR` currently defaults to
~/.cache/localstack, where the extension environment will be installed into
./lib/extensions/
Options:
-h, --help Show this message and exit.
```
#### `extensions uninstall`
Remove a LocalStack extension.
```bash
Usage: localstack extensions uninstall [OPTIONS] NAME
Remove a LocalStack extension.
This command removes a previously installed LocalStack extension, where the
name can be any valid package name.
Example invocations:
localstack extensions uninstall localstack-extension-stripe
Options:
-h, --help Show this message and exit.
```
### `license`
(Preview) Manage and verify your LocalStack license
```bash
Usage: localstack license [OPTIONS] COMMAND [ARGS]...
(Preview) Manage and verify your LocalStack license.
Your LocalStack license allows you to use advanced features of LocalStack.
Options:
-h, --help Show this message and exit.
Commands:
activate
info
```
Subcommands for localstack license
#### `license activate`
```bash
Usage: localstack license activate [OPTIONS]
Options:
-h, --help Show this message and exit.
```
#### `license info`
```bash
Usage: localstack license info [OPTIONS]
Options:
-h, --help Show this message and exit.
```
### `pod`
Manage the state of your instance via Cloud Pods.
```bash
Usage: localstack pod [OPTIONS] COMMAND [ARGS]...
Manage the state of your instance via Cloud Pods.
Options:
-h, --help Show this message and exit.
Commands:
delete Delete a Cloud Pod
list List all available Cloud Pods
load Load the state of a Cloud Pod into the application runtime.
remote Manage cloud pod remotes
save Create a new Cloud Pod
versions List all available versions for a Cloud Pod
```
Subcommands for localstack pod
#### `pod delete`
Delete a Cloud Pod
```bash
Usage: localstack pod delete [OPTIONS] NAME [REMOTE]
Delete a Cloud Pod registered on a remote (by default, the LocalStack
platform).
This command will remove all the versions of a Cloud Pod, and the operation
is not reversible.
Options:
-h, --help Show this message and exit.
```
#### `pod list`
List all available Cloud Pods
```bash
Usage: localstack pod list [OPTIONS] [REMOTE]
List all the Cloud Pods available for a single user, or for an entire
organization, if the user is part of one.
With the --public flag, it lists the all the available public Cloud Pods. A
public Cloud Pod is available across the boundary of a user and/or
organization. In other words, any public Cloud Pod can be injected by any
other user holding a LocalStack Pro (or above) license.
Options:
-p, --public List all the available public Cloud Pods
-m, --mine List only the Cloud Pods created by the current
user
-f, --format [table|json] The formatting style for the list pods command
output. [default: table]
-h, --help Show this message and exit.
```
#### `pod load`
Load the state of a Cloud Pod into the application runtime.
```bash
Usage: localstack pod load [OPTIONS] NAME [REMOTE]
Load the state of a Cloud Pod into the application runtime. Users can import
Cloud Pods from different remotes, with the LocalStack platform being the
default one. Users can also load a specific version by appending a version
number to the pod name after a colon (e.g., `localstack pod load my-pod:3`).
If not specified, the latest version will be loaded. Use the `localstack pod
versions` to list all the available versions.
Loading the state of a Cloud Pod into LocalStack might cause some conflicts
with the current state of the container. LocalStack will attempt a best-
effort merging strategy between the current state and the one from the Cloud
Pod. For a service X present in both the current state and the Cloud Pod, we
will attempt to merge states across different accounts and regions. If the
service X has a state for the same account and region both in the running
container and the Cloud Pod, the latter will be used. If a service Y is
present in the running container but not in the Cloud Pod, it will be left
untouched. This is the default merge strategy which is activated by either
the `--strategy account-region-merge` option or by omitting the `--strategy`
option at all.
In addition to the default one, LocalStack provides two more strategies:
- overwrite, in which the state of LocalStack is completely reset before loading the state from the Cloud Pod.
This strategy is activated with the `--strategy overwrite` option .
- service-merge: in which LocalStack merges the state of a service under the same account and region when
there is no resource overlap. In such a case, the loaded resources are preferred.
This option is activated with the `--strategy service-merge` option.
To load a local copy of a LocalStack state, you can use the 'localstack
state import' command.
Options:
-s, --secret TEXT Secret for the Cloud Pod encryption.
Encryption is an Enterprise only feature.
--strategy [overwrite|account-region-merge|service-merge]
The merge strategy to adopt when loading the
Cloud Pod. [default: account-region-merge]
-y, --yes Automatic yes to prompts. Assume a positive
answer to all prompts and run non-
interactively.
--dry-run Checks the resources added or modified in
the application runtime by loading a Cloud
Pod.
-h, --help Show this message and exit.
```
#### `pod remote`
Manage cloud pod remotes
```bash
Usage: localstack pod remote [OPTIONS] COMMAND [ARGS]...
Manage cloud pod remotes
Options:
-h, --help Show this message and exit.
Commands:
add Add a remote
delete Delete a remote
list Lists the available remotes
```
#### `pod save`
Create a new Cloud Pod
```bash
Usage: localstack pod save [OPTIONS] NAME [REMOTE]
Save the current state of the LocalStack container in a Cloud Pod.
A Cloud Pod can be registered and saved with different storage options,
called remotes. By default, Cloud Pods are hosted in the LocalStack
platform. However, users can decide to store their Cloud Pods in other
remotes, such as AWS S3 buckets or ORAS registries.
An optional message can be attached to any Cloud Pod. Furthermore, one could
decide to export only a subset of services with the optional --services
option.
To use the LocalStack platform for storage, the desired Cloud Pod's name will suffice, e.g.:
localstack pod save
Please be aware that each following save invocation with the same name will
result in a new version being created.
To save a local copy of your state, you can use the 'localstack state export' command.
Options:
-m, --message TEXT Add a comment describing this Cloud Pod's
version
-s, --services TEXT Comma-delimited list of services to push in
the Cloud Pod (all by default)
--visibility [public|private] Set the visibility of the Cloud Pod [`public`
or `private`]. Does not create a new version
-S, --secret TEXT Secret for the Cloud Pod encryption.
Encryption is an Enterprise only feature.
-f, --format [json] The formatting style for the save command
output.
-h, --help Show this message and exit.
```
#### `pod versions`
List all available versions for a Cloud Pod
```bash
Usage: localstack pod versions [OPTIONS] NAME
List all available versions for a Cloud Pod
This command lists the versions available for a Cloud Pod. Each invocation
of the save command is going to create a new version for a named Cloud Pod,
if a Pod with such name already does exist in the LocalStack platform.
Options:
-f, --format [table|json] The formatting style for the version command
output. [default: table]
-h, --help Show this message and exit.
```
### `replicator`
(Preview) Start a replication job or check its status
```bash
Usage: localstack replicator [OPTIONS] COMMAND [ARGS]...
*** Preview Feature ***
This feature is currently in preview mode in our Teams offering and it's
availability may change in future releases.
The replicator command group allows you to replicate AWS resources into
LocalStack.
Options:
-h, --help Show this message and exit.
Commands:
resources List supported resources
start Replicate an AWS resource
status Check replication status
```
Subcommands for localstack replicator
#### `replicator resources`
List supported resources
```bash
Usage: localstack replicator resources [OPTIONS]
Options:
-h, --help Show this message and exit.
*** Preview Feature ***
This feature is currently in preview mode in our Teams offering and it's availability may change in future releases.
```
#### `replicator start`
Replicate an AWS resource
```bash
Usage: localstack replicator start [OPTIONS]
Starts a job to replicate an AWS resource into localstack. You must have
credentials with sufficient read access to the resource trying to replicate.
At the moment only environment variables are recognized.
`AWS_ACCESS_KEY_ID`, `AWS_SECRET_ACCESS_KEY` and `AWS_DEFAULT_REGION` must
be set. `AWS_ENDPOINT_URL` and `AWS_SESSION_TOKEN` are optional.
Options:
--replication-type [SINGLE_RESOURCE|BATCH]
Type of replication job: SINGLE_RESOURCE,
BATCH [default: SINGLE_RESOURCE]
--explore-strategy [SIMPLE|TREE]
How we explore the resource tree. SIMPLE
only replicates the resource requested.
[default: SIMPLE]
--resource-arn TEXT ARN of the resource to recreate. Optional
for SINGLE_RESOURCE replication
--resource-type TEXT CloudControl type of the resource to
recreate. Optional for SINGLE_RESOURCE
replication
--resource-identifier TEXT CloudControl identifier of the resource to
recreate. Mandatory if --resource-type is
used
--target-account-id TEXT Localstack account ID where the resources
will be replicated. Defaults to
000000000000. See to enable same
account replication
--target-region-name TEXT Localstack region where the resources will
be replicated. Only provide if different
than source AWS account.
--delay TEXT Delay for the MOCK replication work
--extra-config KEY=VALUE Additional entries to merge into
replication_job_config as key=value pairs.
Repeat the flag for multiple entries
(--extra-config k1=v1 --extra-config k2=v2)
Values are sent as strings.
-h, --help Show this message and exit.
*** Preview Feature ***
This feature is currently in preview mode in our Teams offering and it's availability may change in future releases.
```
#### `replicator status`
Check replication status
```bash
Usage: localstack replicator status [OPTIONS] JOB_ID
Check the status of a replication job using its Job ID. Use the --follow
flag to continuously check the status until the job is completed.
Options:
--follow Follow the status until completed
--delay INTEGER Delay between calls [default: 5]
-h, --help Show this message and exit.
*** Preview Feature ***
This feature is currently in preview mode in our Teams offering and it's availability may change in future releases.
```
### `state`
(Preview) Export, restore, and reset LocalStack state.
```bash
Usage: localstack state [OPTIONS] COMMAND [ARGS]...
(Preview) Manage and manipulate the localstack state.
The state command group allows you to interact with LocalStack's state
backend.
Read more: https://docs.localstack.cloud/references/persistence-
mechanism/#snapshot-based-persistence
Options:
-h, --help Show this message and exit.
Commands:
export Export the state of LocalStack services
import Import the state of LocalStack services
inspect Inspect the state of LocalStack services
reset Reset the state of LocalStack services
```
Subcommands for localstack state
#### `state export`
Export the state of LocalStack services
```bash
Usage: localstack state export [OPTIONS] [DESTINATION]
Save the current state of the LocalStack container to a file on the local
disk. This file can be restored at any point in time using the `localstack
state import` command. Please be aware that this might not be possible when
importing the state with a different version of LocalStack.
If you are looking for a managed solution to handle the state of your
LocalStack container, please check out the Cloud Pods feature:
https://docs.localstack.cloud/user-guide/tools/cloud-pods/.
Use the DESTINATION argument to specify an absolute or relative path for the
exported file. If no destination is specified, a file named `ls-state-
export` will be saved in the current working directory.
Examples:
localstack state export my-state
localstack state export ../parent-dir/my-state
localstack state export /home/johndoe/my-state
You can also specify a subset of services to export with the `--services`
option.
For example:
localstack state export my-state --services s3,lambda
By default, the state of all running services is exported.
Options:
-s, --services TEXT Comma-delimited list of services to reset. By default,
the state of all running services is exported.
-f, --format [json] The formatting style for the save command output.
-h, --help Show this message and exit.
```
#### `state import`
Import the state of LocalStack services
```bash
Usage: localstack state import [OPTIONS] SOURCE
Load the state of LocalStack from a file into the running container. The
SOURCE argument is the absolute or relative path to the file containing the
state to import. This file must have been generated from a previous
`localstack state export` command. Please be aware that it might not be
possible to import a state generated from a different version of LocalStack.
Examples:
localstack state import my-state
localstack state import ../parent-dir/my-state
localstack state import /home/johndoe/my-state
Options:
-h, --help Show this message and exit.
```
#### `state inspect`
Inspect the state of LocalStack services
```bash
Usage: localstack state inspect [OPTIONS]
Inspect the state of the Localstack Container.
By default, it starts a curses interface which allows an interactive
inspection of the contents of the LocalStack running instance.
Options:
-f, --format [curses|rich|json]
The formatting style for the inspect command
output. [default: curses]
-h, --help Show this message and exit.
```
#### `state reset`
Reset the state of LocalStack services
```bash
Usage: localstack state reset [OPTIONS]
Reset the service states of the current LocalStack runtime.
This command invokes a reset of services in the currently running LocalStack
container. By default, all services are rest. The `services` options allows
to select a subset of services which should be reset.
This command tries to automatically discover the running LocalStack
instance. If LocalStack has not been started with `localstack start` (and is
not automatically discoverable), please set `LOCALSTACK_HOST`.
Options:
-s, --services TEXT Comma-delimited list of services to reset. By default,
the state of all running services is reset.
-h, --help Show this message and exit.
```
# LocalStack Desktop
> Getting started with the LocalStack Desktop application.
LocalStack Desktop is a desktop client that allows users to easily control and interact with their LocalStack instance.
Using LocalStack Desktop, users can start and stop their LocalStack instance with a single click, create a new container, view logs, interact with LocalStack container via cli and use our resource browser.
:::note
LocalStack Desktop replaces the previous LocalStack Cockpit application.
Cockpit isn't available or maintained anymore and we recommend you to use LocalStack Desktop instead.
:::
## Installation
You can download LocalStack Desktop from our [web application](https://app.localstack.cloud/download).
To install LocalStack Desktop, **Docker** is the only prerequisite.
## Features
LocalStack Desktop helps users to interact with their LocalStack instance with a simple and intuitive UI.
Some of the features of LocalStack Desktop includes the ability to: Control LocalStack, Interact with LocalStack, get LocalStack insights and use the Resource browser.
### Control LocalStack
Using our Desktop application you will be able to start, stop, delete and create new containers with just a click.
It also allows to set up a custom URL if you are using LocalStack outside of Docker or in Kubernetes.
### Interact with LocalStack
You can run commands within the LocalStack container by using our CLI
### LocalStack Insights
LocalStack Desktop provides quick access to your LocalStack logs for instant insights.
See what's happening in details from the Logs tab.
### Resource browser
You can also create, modify, delete and read all of your resources from the Resource Browser tab, having the same experience that you would have using it in our [web application](https://app.localstack.cloud/inst/default/resources)
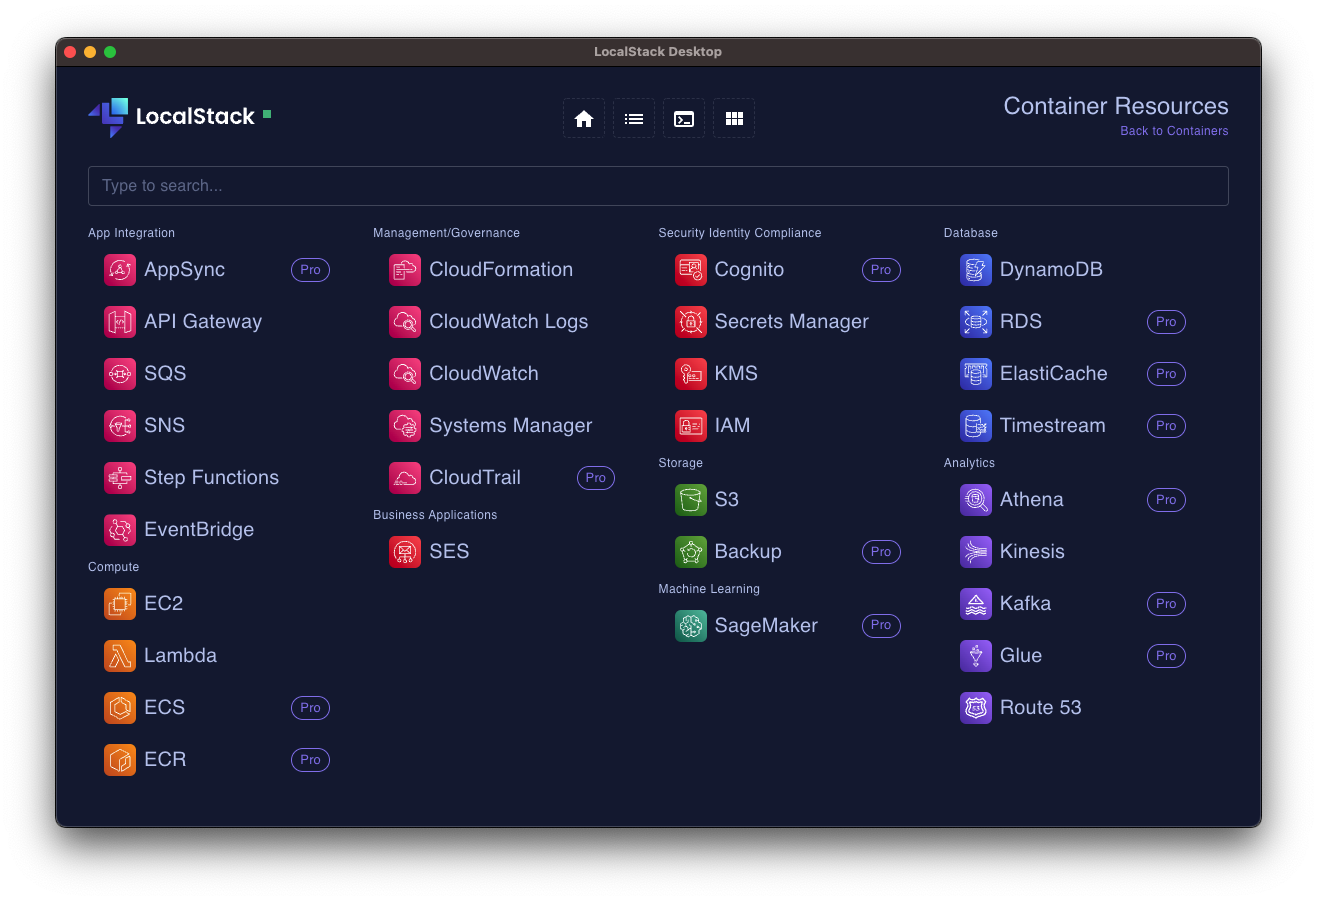
# lstk CLI
> Overview, installation, and quick start for lstk, the modern CLI for managing LocalStack.
import { Tabs, TabItem } from '@astrojs/starlight/components';
## Introduction
`lstk` is a high-performance command-line interface for LocalStack, built in Go.
It provides a built-in terminal UI (TUI) for interactive use and plain text output for CI/CD pipelines and scripting.
`lstk` handles the full emulator lifecycle: authentication, pulling the Docker image, starting, stopping, and restarting the container, streaming logs, and checking status.
It can also save and load emulator state (as local snapshots or Cloud Pods) reset running state, run AWS CLI commands against the emulator, and manage the on-disk volume.
Running `lstk` with no arguments takes you through the entire startup flow automatically.
`lstk` also proxies developer tools so they run directly against LocalStack: the AWS CLI (`lstk aws`), the Azure CLI (`lstk az`), Terraform (`lstk terraform`), the AWS CDK (`lstk cdk`), and the AWS SAM CLI (`lstk sam`).
:::tip[Recommended]
`lstk` is the recommended way to run and manage LocalStack. The [legacy LocalStack CLI](/aws/developer-tools/running-localstack/localstack-cli/) is deprecated.
:::
This section is split into focused pages:
- **Overview** (this page): installation, quick start, global options, and shell completions.
- [Authentication](/aws/developer-tools/running-localstack/lstk/authentication/): logging in and out, and how `lstk` resolves your auth token.
- [Configuration](/aws/developer-tools/running-localstack/lstk/configuration/): the `config.toml` file, emulator types, environment variables, and volumes.
- [Lifecycle commands](/aws/developer-tools/running-localstack/lstk/lifecycle-commands/): `start`, `stop`, `restart`, `status`, `logs`, `reset`, `volume`.
- [Cloud & IaC commands](/aws/developer-tools/running-localstack/lstk/cloud-and-iac-commands/): `aws`, `az`, `terraform`, `cdk`, `sam`.
- [Snapshots](/aws/developer-tools/running-localstack/lstk/snapshots/): save and load emulator state with `snapshot save`/`load`/`list`/`remove`/`show`/`versions`.
- [Automation & CI](/aws/developer-tools/running-localstack/lstk/automation/): non-interactive mode, structured output, targeting an external emulator, and environment variables.
- [Setup & maintenance](/aws/developer-tools/running-localstack/lstk/setup-and-maintenance/): `setup`, `config`, `update`, and offline/enterprise environments.
- [FAQ & Troubleshooting](/aws/developer-tools/running-localstack/lstk/faq-and-troubleshooting/).
## Prerequisites
- [Docker](https://docs.docker.com/get-docker/) installed and running.
- A [LocalStack account](https://www.localstack.cloud/pricing) with a [license](/aws/getting-started/auth-token/#license-assignment), and `lstk` handles authentication for you (see [Authentication](/aws/developer-tools/running-localstack/lstk/authentication/)).
## Installation
```bash
brew install localstack/tap/lstk
```
Homebrew also installs shell completions for bash, zsh, and fish automatically.
```bash
npm install -g @localstack/lstk
```
Download the binary for your platform from [GitHub Releases](https://github.com/localstack/lstk/releases), extract it, and place it on your `PATH`.
Verify the installation:
```bash
lstk --version
```
### Updating
`lstk` can update itself.
It detects how it was originally installed (Homebrew, npm, or binary) and uses the matching update method:
```bash
# Check for updates without installing
lstk update --check
# Update to the latest version
lstk update
```
See the [`update`](/aws/developer-tools/running-localstack/lstk/setup-and-maintenance/#update) command for details, including the start-time update notification.
## Quick start
```bash
lstk
```
Running `lstk` without arguments performs the full startup sequence: authenticates you automatically, pulls the latest image if needed, and starts the LocalStack container.
In an interactive terminal it launches the TUI; in a non-interactive environment it prints plain text output.
On the very first interactive run, `lstk` prompts you to pick which emulator to run (AWS, Snowflake, or Azure) and writes your choice to `config.toml`.
See [Emulator types](/aws/developer-tools/running-localstack/lstk/configuration/#emulator-types) for the available options.
For CI or headless environments, set `LOCALSTACK_AUTH_TOKEN` and use `--non-interactive`:
```bash
LOCALSTACK_AUTH_TOKEN= lstk --non-interactive
```
CI environments require a CI Auth Token; a personal Developer Auth Token cannot be used there.
## Global options
These options are available for all commands:
| Option | Description |
|:--------------------|:------------------------------------------------------------------------------|
| `--config ` | Path to a specific TOML config file |
| `--endpoint-url ` | Target an existing, externally-managed emulator at this URL instead of discovering one via local Docker. See [Targeting an external emulator](/aws/developer-tools/running-localstack/lstk/automation/#targeting-an-external-emulator). |
| `--non-interactive` | Disable the interactive TUI, use plain output |
| `--json` | Emit a single machine-readable JSON envelope on stdout instead of human-oriented output. Supported by `start`, `stop`, `status`, `reset`, and `update`; any other command rejects it. See [Structured output](/aws/developer-tools/running-localstack/lstk/automation/#structured-output). |
| `--persist` | Persist emulator state across restarts (on `start`/bare `lstk` and `restart`) |
| `--type `, `-t ` | Emulator type to start: `aws`, `snowflake`, or `azure` (on `start`/bare `lstk`; records the choice in config). See [Selecting the emulator with `--type`](/aws/developer-tools/running-localstack/lstk/lifecycle-commands/#selecting-the-emulator-with---type). |
| `--snapshot [` | Snapshot REF to auto-load after start (on `start`/bare `lstk`; overrides config for one run) |
| `--no-snapshot` | Skip auto-loading the configured snapshot (on `start`/bare `lstk`) |
| `--timeout ` | Startup readiness deadline for `start`/bare `lstk`, as a Go duration; overrides `LSTK_STARTUP_TIMEOUT` for one run. See [`start`](/aws/developer-tools/running-localstack/lstk/lifecycle-commands/#start). |
| `-v`, `--version` | Print the version and exit |
| `-h`, `--help` | Print help and exit |
These apply to both interactive and non-interactive (scripted/CI) use, see [Automation & CI](/aws/developer-tools/running-localstack/lstk/automation/) for the details behind `--non-interactive`, `--json`, and `--endpoint-url`.
## Shell completions
`lstk` includes completion scripts for bash, zsh, fish, and powershell.
If you installed via Homebrew, completions are set up automatically.
For manual setup:
```bash
# Load in current session
eval "$(lstk completion bash)"
# Persist (Linux)
lstk completion bash > /etc/bash_completion.d/lstk
# Persist (macOS with Homebrew)
lstk completion bash > $(brew --prefix)/etc/bash_completion.d/lstk
```
:::note
Use `eval "$(lstk completion bash)"` rather than `source <(lstk completion bash)`.
The `lstk` script works with or without the `bash-completion` package (it bundles a fallback for stock macOS bash 3.2), but `source <(...)` is a silent no-op on that shell.
:::
```bash
# Load in current session
source <(lstk completion zsh)
# Persist (Linux)
lstk completion zsh > "${fpath[1]}/_lstk"
# Persist (macOS with Homebrew)
lstk completion zsh > $(brew --prefix)/share/zsh/site-functions/_lstk
```
```bash
# Load in current session
lstk completion fish | source
# Persist
lstk completion fish > ~/.config/fish/completions/lstk.fish
```
Restart your shell after persisting completions.
### `completion`
Generate shell completion scripts.
```bash
lstk completion [bash|zsh|fish|powershell]
```
See [Shell completions](#shell-completions) above for setup instructions.
# lstk Authentication
> How lstk resolves your auth token, and the login and logout commands.
`lstk` resolves your auth token in the following order:
1. **`LOCALSTACK_AUTH_TOKEN` environment variable**: takes precedence over a stored token.
2. **System keyring**: a token stored by a previous `lstk login`, used when the environment variable is not set.
3. **Browser login**: triggered automatically in interactive mode when neither of the above provides a token.
:::note
`LOCALSTACK_AUTH_TOKEN` takes precedence over a token in the keyring.
A per-invocation token (a CI secret, or `LOCALSTACK_AUTH_TOKEN=... lstk start` for a second account) therefore overrides a previous `lstk login` without needing `lstk logout` first.
To go back to the stored token, unset the environment variable.
:::
## Logging in
```bash
lstk login
```
Opens a browser window for authentication and stores the resulting token in your system keyring.
This command requires an interactive terminal.
See the [`login`](#login) command below for the full flow and the endpoints it uses.
## Logging out
```bash
lstk logout
```
Removes the stored credentials from the system keyring and the file-based fallback, and clears the cached license.
`logout` cannot clear a token supplied via `LOCALSTACK_AUTH_TOKEN`; if you authenticated that way, unset the variable instead.
See the [`logout`](#logout) command below for the full behavior.
## File-based token storage
On systems where the system keyring is unavailable, `lstk` automatically falls back to storing the token in a file (`/auth-token`, mode `0600`).
You can force file-based storage by setting:
```bash
export LSTK_KEYRING=file
```
## `login`
Authenticate with LocalStack via a browser-based device authorization flow and store the resulting credential in your system keyring.
This command requires an interactive terminal.
```bash
lstk login
```
`lstk` opens your default browser to the LocalStack Web Application, shows a one-time code, and waits for you to approve the request.
If the browser cannot open automatically, `lstk` prints the URL to visit manually.
On success it stores the **license token** returned by the platform (not the raw browser bearer token).
If you are already authenticated — either `LOCALSTACK_AUTH_TOKEN` is set or a token already exists in storage — `login` prints `You're already logged in` and exits without starting a new flow.
In non-interactive mode (piped output, CI, or `--non-interactive`), `login` fails with `login requires an interactive terminal`.
The `--config ` flag selects which `config.toml` is loaded, which affects `keyring`, `web_app_url`, and `api_endpoint` resolution.
:::note
If you approve the request in the browser only *after* pressing a key in the terminal, `lstk` reports `auth request not confirmed - please complete the authentication in your browser`.
Re-run `lstk login` and approve in the browser before continuing.
:::
The credential is written to the system keyring (service `lstk`, key `lstk.auth-token`).
When the keyring is unavailable — or `LSTK_KEYRING=file` is set — `lstk` stores it in a file at `/auth-token` (mode `0600`) instead.
Endpoints used by the flow can be overridden via config or environment:
| Config key | Env var | Default | Description |
|:---------------|:--------------------|:-------------------------------|:-----------------------------------------------------------------------------|
| `keyring` | `LSTK_KEYRING` | (system keyring) | Set to `file` to force file-based token storage instead of the OS keyring. |
| `web_app_url` | `LSTK_WEB_APP_URL` | `https://app.localstack.cloud` | Base URL used to build the browser authorization link. |
| `api_endpoint` | `LSTK_API_ENDPOINT` | `https://api.localstack.cloud` | LocalStack platform API endpoint used for the device flow and license token. |
```bash
# Force file-based token storage during login
LSTK_KEYRING=file lstk login
# Use a specific config file
lstk --config ./.lstk/config.toml login
```
## `logout`
Remove stored authentication credentials.
```bash
lstk logout
lstk logout --non-interactive
```
`logout` deletes the auth token from your system keyring (falling back to the file-based token at `/auth-token` when the keyring is unavailable or `LSTK_KEYRING=file` is set) and removes the cached license file.
On success it prints `Logged out successfully`.
The outcome depends on how you are authenticated:
| Situation | Behavior |
|:----------|:---------|
| A token is stored (from `lstk login`) | The token is deleted from the keyring and file fallback, the cached license is removed, and `lstk` prints `Logged out successfully`. |
| No stored token, but `LOCALSTACK_AUTH_TOKEN` is set | Nothing is deleted. `lstk` prints a note that you are authenticated via the environment variable and to unset it to log out. |
| No stored token and no `LOCALSTACK_AUTH_TOKEN` | `lstk` prints `Not currently logged in` and exits successfully. |
:::note
`logout` never clears the `LOCALSTACK_AUTH_TOKEN` environment variable, and it does not stop running emulators.
If a LocalStack emulator is still running after logout, `lstk` prints a note reminding you it is running in the background; run `lstk stop` to stop it.
:::
# lstk Automation & CI
> Non-interactive mode, structured JSON output, targeting an external emulator, environment variables, tracing, and logging for scripting lstk.
## Interactive and non-interactive mode
`lstk` automatically selects its output mode:
- **Interactive mode** (TUI): used when both stdin and stdout are connected to a terminal.
Commands like `start`, `stop`, `restart`, `status`, `login`, `update`, and the confirmation prompts of `reset`/`volume clear` display a Bubble Tea-powered terminal UI.
- **Non-interactive mode** (plain text): used when the output is piped, redirected, or running in CI.
Force this in a TTY with `--non-interactive`.
```bash
# Force plain output even in an interactive terminal
lstk --non-interactive start
```
:::note
`lstk login` requires an interactive terminal; if you need to authenticate in CI, set `LOCALSTACK_AUTH_TOKEN` instead.
Commands that mutate state without prompting in CI (`reset`, `volume clear`) require `--force`.
`lstk setup aws` works non-interactively — it writes the profile with defaults and needs `--force` only to overwrite a conflicting `localstack` profile.
:::
## Targeting an external emulator
By default `lstk` discovers the emulator it manages through local Docker.
The `--endpoint-url ` global flag (or the `LSTK_ENDPOINT_URL` environment variable) instead points a command at an emulator `lstk` did not start — a Docker Compose or host-network deployment, one running in CI or on another machine, or a LocalStack cloud-hosted ephemeral instance.
```bash
# Run against an emulator reachable at a custom URL
lstk aws --endpoint-url http://localhost:4566 s3 ls
# Equivalent via the environment
LSTK_ENDPOINT_URL=https://my-ephemeral-instance.localstack.cloud lstk status
```
The endpoint is resolved from, in order of precedence: the `--endpoint-url` flag, `LSTK_ENDPOINT_URL`, then `AWS_ENDPOINT_URL` (a full synonym for `LSTK_ENDPOINT_URL`, one tier lower).
Both `http://` and `https://` URLs are accepted (any other scheme is rejected), and the scheme is preserved end-to-end, so `https://` ephemeral instances work.
The commands that accept an external endpoint are the ones that only *talk to* an already-running emulator: [`aws`](/aws/developer-tools/running-localstack/lstk/cloud-and-iac-commands/#aws), [`az`](/aws/developer-tools/running-localstack/lstk/cloud-and-iac-commands/#az), [`terraform`](/aws/developer-tools/running-localstack/lstk/cloud-and-iac-commands/#terraform)/`tf`, [`cdk`](/aws/developer-tools/running-localstack/lstk/cloud-and-iac-commands/#cdk), [`sam`](/aws/developer-tools/running-localstack/lstk/cloud-and-iac-commands/#sam), [`status`](/aws/developer-tools/running-localstack/lstk/lifecycle-commands/#status), [`reset`](/aws/developer-tools/running-localstack/lstk/lifecycle-commands/#reset), and the [`snapshot`](/aws/developer-tools/running-localstack/lstk/snapshots/) `save`/`load`/`remove` subcommands (including the `lstk save`/`lstk load` aliases) and `list s3://…`.
Commands that manage the emulator's lifecycle or on-disk state have no remote equivalent and **reject** any endpoint source: `start`, the bare `lstk`, `stop`, `restart`, `logs`, and `volume`.
The emulator's type (AWS, Azure, or Snowflake) is auto-detected by probing the endpoint's health API — there is no override flag or config setting, and an inconclusive probe is a hard failure. The AWS-only tools (`terraform`, `cdk`, `sam`) reject an endpoint whose detected type is not AWS.
## Structured output
The global `--json` flag makes a command emit a single, machine-readable JSON object on stdout instead of human-oriented text, for scripting and CI.
JSON support is available per command: `start`, `stop`, `status`, `reset`, and `update` accept `--json`.
Any other command rejects it with an error envelope (`error.code: NOT_JSON_CAPABLE`) rather than silently printing plain text.
Every JSON-capable command writes **exactly one** JSON object with the following envelope shape:
```json
{
"schemaVersion": 1,
"command": "stop",
"status": "ok",
"data": {
"emulators": [
{ "type": "aws", "name": "localstack-aws", "wasRunning": true }
]
},
"warnings": [],
"error": null
}
```
| Field | Type | Description |
|:----------------|:-----------------|:--------------------------------------------------------------------------------------------------------|
| `schemaVersion` | integer | Wire-format version of the envelope, always `1` for this schema. Check it once before parsing. |
| `command` | string | The command that produced the envelope (e.g. `"stop"`, `"reset"`). |
| `status` | string | `"ok"` or `"error"` — branch on this first. |
| `data` | object or `null`| Command-specific result. Non-null when `status` is `"ok"`, `null` when it is `"error"`. |
| `warnings` | array | Non-fatal notices, always present (empty array when there are none). Each entry is `{ "code", "message" }`. |
| `error` | object or `null`| The machine-readable failure. Non-null when `status` is `"error"`, `null` otherwise. |
When `status` is `"error"`, the `error` object carries a stable `code` (e.g. `EMULATOR_NOT_RUNNING`, `CONFIRMATION_REQUIRED`, `RUNTIME_UNAVAILABLE`), a coarse `category`, a human-readable `message` (informational only — branch on `code`, not `message`), and a `retryable` boolean:
```json
{
"schemaVersion": 1,
"command": "reset",
"status": "error",
"data": null,
"warnings": [],
"error": {
"code": "CONFIRMATION_REQUIRED",
"category": "USAGE",
"message": "reset requires confirmation; use --force to skip in non-interactive mode",
"retryable": false
}
}
```
### Exit codes
For a full enumeration, read `error.code` from the envelope; the process exit code carries only the two most common, mechanically-remediable failures:
| Exit code | Meaning |
|:----------|:-------------------------------------------------------------------------------------------|
| `0` | `status: "ok"`. |
| `1` | `status: "error"` for any code other than the two below. |
| `2` | A Cobra-level usage error that occurred before `--json` could be recognized (plain-text error on stderr, not an envelope). |
| `3` | `error.code == "CONFIRMATION_REQUIRED"` (re-run with `--force`). |
| `4` | `error.code == "AUTH_REQUIRED"` (run `lstk login` or set `LOCALSTACK_AUTH_TOKEN`). |
:::note
`--json` implies non-interactive behavior: no TUI and no prompts.
Combining it with a destructive command that would otherwise prompt (`reset`) still requires `--force`, which surfaces as `CONFIRMATION_REQUIRED` (exit code `3`) when omitted.
:::
## Environment variables
The following environment variables configure `lstk` itself (not the LocalStack container):
| Variable | Description |
|:-------------------------------|:---------------------------------------------------------------------------------------------------------------------|
| `LOCALSTACK_AUTH_TOKEN` | Auth token for non-interactive runs or to skip browser login. Takes precedence over a token stored in the keyring. |
| `LSTK_ENDPOINT_URL` | Target an existing, externally-managed emulator at this URL (equivalent to `--endpoint-url`). `AWS_ENDPOINT_URL` is a lower-precedence synonym. See [Targeting an external emulator](#targeting-an-external-emulator). |
| `LOCALSTACK_HOST` | Override the host (and optional port) used when resolving and printing the emulator endpoint, and when writing the AWS CLI profile. Bypasses the `localhost.localstack.cloud` DNS probe. |
| `LOCALSTACK_DISABLE_EVENTS` | Set to `1` to disable anonymous telemetry event reporting. |
| `DOCKER_HOST` | Override the Docker daemon socket (e.g. `unix:///home/user/.colima/default/docker.sock`). |
| `LSTK_KEYRING` | Set to `file` to force file-based token storage instead of the system keyring. |
| `LSTK_STARTUP_TIMEOUT` | Startup readiness deadline for `lstk start`, as a Go duration (e.g. `90s`, `2m`). Zero/unset uses the per-mode default (20s interactive, 60s non-interactive). See [`start`](/aws/developer-tools/running-localstack/lstk/lifecycle-commands/#start). |
| `LSTK_MERGE_STRATEGY` | Default merge strategy for `snapshot load` / `load` (`account-region-merge`, `overwrite`, or `service-merge`) when `--merge` is not passed. An explicit `--merge` always wins. |
| `LSTK_OTEL` | Set to `1` to enable OpenTelemetry trace export (disabled by default). See [OpenTelemetry tracing](#opentelemetry-tracing). |
| `LSTK_GITHUB_TOKEN` | Optional GitHub token used when checking for or downloading `lstk` updates (raises GitHub API rate limits). |
| `LSTK_API_ENDPOINT` | Override the LocalStack platform API base URL. Default: `https://api.localstack.cloud`. |
| `LSTK_WEB_APP_URL` | Override the LocalStack Web Application URL used for browser login. Default: `https://app.localstack.cloud`. |
When `LSTK_OTEL` is enabled, the standard `OTEL_EXPORTER_OTLP_*` environment variables are honored by the OpenTelemetry SDK.
### Container runtime discovery
`lstk` talks to a Docker-compatible runtime and works with Docker Desktop, Rancher Desktop, Colima, OrbStack, Lima, and Podman. When `DOCKER_HOST` is not set, it resolves the daemon endpoint in this order:
1. **`DOCKER_HOST`**, if set, always wins.
2. **`DOCKER_CONTEXT`** or the active Docker CLI context, when it is non-default and reachable (a stale or unreachable context is skipped rather than failing).
3. On **Linux**, a live `/var/run/docker.sock` — a running Docker daemon is preferred over a co-installed runtime such as Podman.
4. A probe of known runtime sockets (Docker Desktop, Rancher Desktop, Colima, OrbStack, Podman, Lima). Each candidate is dialed, not just checked for existence, so a leftover socket file never shadows a live daemon.
5. The Docker SDK's own default.
If no runtime is reachable, the error tailors its suggested start command (`rdctl start`, `colima start`, `podman machine start`, …) to the runtime it detects. Set `DOCKER_HOST` to point at a specific socket to bypass discovery entirely.
### Container-injected variables
`lstk` injects several environment variables into the LocalStack container on every start, in addition to any profiles you configure:
| Variable | Default value | Description |
|:-----------------------------|:-------------------------------------------------|:---------------------------------------------|
| `LOCALSTACK_AUTH_TOKEN` | (your resolved token) | Passed from the CLI to activate the license. |
| `GATEWAY_LISTEN` | `:4566,:443` | Ports the emulator binds inside the container. |
| `MAIN_CONTAINER_NAME` | `localstack-aws` | Container name for internal references. |
| `LOCALSTACK_HOST` | `localhost.localstack.cloud:` | Hostname/port the emulator advertises. |
| `LOCALSTACK_PERSISTENCE` | `1` (only with `--persist`) | Enables state persistence across restarts. |
| `LOCALSTACK_CLIENT_NAME` | `lstk` | Identifies the client that started the emulator. |
| `LOCALSTACK_CLIENT_VERSION`| (the `lstk` version) | Version of the client that started the emulator. |
When a Docker socket is detected it is bind-mounted into the container and `DOCKER_HOST=unix:///var/run/docker.sock` is injected so the emulator can spawn its own containers.
`lstk` also forwards host environment variables matching `CI` and `LOCALSTACK_*` (the host `LOCALSTACK_AUTH_TOKEN` is dropped so it cannot override the token resolved by `lstk`).
The container also gets port mappings for `4566`, `443`, and the service port range `4510-4559`.
:::note
`GATEWAY_LISTEN` is read from the container's resolved environment (set it via an `[env.*]` profile), not hardcoded.
Beyond controlling which ports the emulator binds, its host part sets the host publish IP for all published ports: a value like `GATEWAY_LISTEN = "0.0.0.0:4566,0.0.0.0:443"` exposes the emulator beyond loopback (e.g. on a remote host), whereas the default binds to `127.0.0.1` only.
:::
## OpenTelemetry tracing
`lstk` can export traces of its own command execution over OTLP/HTTP.
Tracing is **disabled by default**.
Enable it with:
```bash
LSTK_OTEL=1 lstk start
```
When enabled, every command is wrapped in a span (e.g. `lstk.start`) recording the exit code and any error.
`lstk` does not hardcode an export target, so the OpenTelemetry Go SDK reads the standard `OTEL_EXPORTER_OTLP_*` environment variables automatically (default target: OTLP/HTTP at `localhost:4318`).
You need an OTLP-compatible backend running to receive the traces.
## Logging
`lstk` writes its own diagnostic logs to `lstk.log` in the same directory as the active config file.
This is separate from the LocalStack container logs (which you view with [`lstk logs`](/aws/developer-tools/running-localstack/lstk/lifecycle-commands/#logs)).
- The log file is created automatically and appended to across runs.
- When the file exceeds **1 MB**, it is cleared on the next run.
- Use `lstk config path` to find the config directory; `lstk.log` sits alongside `config.toml`.
# lstk Cloud & IaC Commands
> The aws, az, terraform, cdk, and sam commands that proxy cloud and infrastructure-as-code tools against LocalStack.
`lstk` proxies developer tools so they run directly against LocalStack.
:::note
Like `lstk aws`, the `az`, `terraform`, `cdk`, and `sam` proxies do not start the emulator — start it first with [`lstk start`](/aws/developer-tools/running-localstack/lstk/lifecycle-commands/#start).
Each requires the corresponding third-party CLI to be installed and on your `PATH`.
To run any of them against an emulator `lstk` did not start, pass [`--endpoint-url`](/aws/developer-tools/running-localstack/lstk/automation/#targeting-an-external-emulator) (or set `LSTK_ENDPOINT_URL`).
:::
:::note
When you interrupt a proxied tool (for example Ctrl+C or `kill` during `lstk terraform apply`), `lstk` forwards the termination signal to the wrapped tool and waits for it to shut down cleanly rather than killing it outright, so operations like releasing a Terraform state lock can complete. The wrapped tool's real exit code is passed through unchanged.
:::
## `aws`
Run AWS CLI commands against the running LocalStack emulator.
`lstk aws` proxies your host `aws` CLI with the endpoint, credentials, and region pre-configured, so you don't have to pass `--endpoint-url` or set test credentials yourself.
```bash
lstk aws s3 ls
lstk aws sqs list-queues
lstk aws s3 mb s3://my-bucket
```
It is equivalent to running:
```bash
aws --endpoint-url http://localhost:4566
```
with `AWS_ACCESS_KEY_ID`, `AWS_SECRET_ACCESS_KEY`, and `AWS_DEFAULT_REGION` set automatically.
Everything after `lstk aws` is forwarded verbatim to the host `aws` binary, including AWS CLI flags such as `--region` or `--output`.
The exit code and `stdout`/`stderr` of the underlying `aws` process are passed through unchanged, so piping and interactive subcommands work as expected.
| Option | Description |
|:--------------------|:--------------------------------------------------------------------------------------------------|
| `--account ` | Target a specific 12-digit LocalStack account (default `000000000000`). Must appear immediately after `lstk aws`, before the AWS CLI's own action. Falls back to a 12-digit `AWS_ACCESS_KEY_ID`. See [Selecting the account](#selecting-the-account). |
| `--non-interactive` | Suppress the loading spinner. Unlike other commands, this flag is stripped before invoking `aws` (not forwarded). |
:::note
`lstk aws` does not start the emulator.
The AWS emulator must already be running (`lstk start`), Docker must be healthy, and the host `aws` CLI must be installed and on your `PATH`.
:::
### Credentials and region
`lstk aws` injects credentials in one of two ways:
- **Profile mode**: if a complete `localstack` profile exists in both `~/.aws/config` and `~/.aws/credentials`, `lstk` appends `--profile localstack` and lets `aws` read the region, credentials, and endpoint from that profile.
- **Profile-less mode**: if the profile is not present, `lstk` runs `aws` with `AWS_ACCESS_KEY_ID=test`, `AWS_SECRET_ACCESS_KEY=test`, and `AWS_DEFAULT_REGION=us-east-1` injected only when those variables are not already set in your environment. In this mode it also prints an informational note: `No AWS profile found, run 'lstk setup aws'`.
Run [`lstk setup aws`](/aws/developer-tools/running-localstack/lstk/setup-and-maintenance/#setup-aws) to create the `localstack` profile for use with the AWS CLI and SDKs.
### Endpoint resolution
By default, `lstk` probes whether `localhost.localstack.cloud` resolves to `127.0.0.1` and uses `localhost.localstack.cloud:` if so, otherwise it falls back to `127.0.0.1:`.
Set [`LOCALSTACK_HOST`](/aws/developer-tools/running-localstack/lstk/automation/#environment-variables) to override the host:port used to reach LocalStack and skip the DNS probe.
The port comes from the AWS container's `port` in `config.toml` (default `4566`).
### Selecting the account
LocalStack derives the AWS account from the access key id it receives, so `lstk aws --account ` targets a specific 12-digit LocalStack account by controlling the credentials `aws` runs with (a neutral, real-looking `AKIA…`/`ASIA…` key never reaches the emulator):
```bash
lstk aws --account 111111111111 s3 mb s3://my-bucket
```
The flag must appear immediately after `lstk aws`, before the AWS CLI's own action (placing it before `lstk aws` is a placement error; placing it after the action is not caught — `lstk` silently forwards it to the `aws` CLI, which then rejects it). When it is omitted, `lstk` falls back to a 12-digit `AWS_ACCESS_KEY_ID` if one is set, then to the default account `000000000000`. The same leading-flag account selection is available on [`lstk terraform`](#terraform) and [`lstk sam`](#sam); `lstk cdk` does not support it.
### Tab completion
`lstk aws ` completes AWS services, operations, and parameters using the AWS CLI's own completer. It is enabled together with the rest of `lstk`'s completion — see [Shell completions](/aws/developer-tools/running-localstack/lstk/#shell-completions).
## `az`
Run Azure CLI commands against the running LocalStack Azure emulator.
`lstk az` runs `az` with an isolated `AZURE_CONFIG_DIR` in which a custom Azure cloud is registered against LocalStack's endpoints, so your global `~/.azure` configuration is left untouched and plain `az` keeps talking to real Azure.
Run [`lstk setup azure`](/aws/developer-tools/running-localstack/lstk/setup-and-maintenance/#setup-azure) once before using this mode.
Arguments are forwarded to the host `az` binary, and its exit code and output are passed through unchanged. `lstk`'s own flags (`--non-interactive`, `--config`) are consumed by `lstk` rather than forwarded — for example `lstk az --non-interactive …` suppresses the loading spinner instead of passing the flag to `az`.
```bash
lstk az group list
lstk az storage account list
```
The Azure CLI has no `--endpoint-url`/`--profile` equivalent, so the isolation relies entirely on the dedicated config directory prepared by `setup azure`.
### Global interception (optional)
If a script must invoke plain `az` (not `lstk az`), you can redirect your **global** `~/.azure` to LocalStack instead:
```bash
# Point global 'az' at the LocalStack Azure emulator
lstk az start-interception
# Switch back to real Azure
lstk az stop-interception
```
`start-interception` registers and activates the `LocalStack` cloud in your global Azure configuration so every `az` invocation targets LocalStack until you stop it.
`stop-interception` switches the active cloud back to `AzureCloud` (override with `--cloud `) and re-enables instance discovery, but only when `LocalStack` is still the active cloud, to avoid clobbering an unrelated selection.
:::caution
Interception changes global state that affects every `az` command in any terminal.
Use the isolated `lstk az ` mode unless you specifically need plain `az` to target LocalStack.
:::
## `terraform`
Run Terraform against LocalStack, using LocalStack endpoints as AWS provider overrides.
`lstk terraform` (alias `lstk tf`) generates a provider-override file and forwards your arguments to the real `terraform` binary.
:::note
`lstk terraform` targets the AWS emulator.
To use Terraform with the other emulators, see the relevant emulator docs.
:::
```bash
lstk terraform init
lstk terraform --region us-west-2 plan
lstk tf apply
```
lstk-specific flags must appear **before** the Terraform action:
| Option | Default | Description |
|:------------------|:---------------------|:---------------------------------------|
| `--region ` | `us-east-1` | Deployment region. |
| `--account ` | `test` | Target AWS account id (12 digits). |
Relevant environment variables: `AWS_ENDPOINT_URL` (override the auto-resolved endpoint), `LSTK_TF_CMD` (binary to invoke, e.g. `tofu`; default `terraform`), `LSTK_TF_OVERRIDE_FILE_NAME` (override file name; default `localstack_providers_override.tf`), `LSTK_TF_DRY_RUN` (generate the override file but do not run Terraform), `AWS_REGION` (fallback for `--region`), and `AWS_ACCESS_KEY_ID` (fallback for `--account`).
## `cdk`
Run the AWS CDK against LocalStack.
Requires the AWS CDK CLI version `2.177.0` or newer on your `PATH`.
```bash
lstk cdk bootstrap
lstk cdk --region us-west-2 deploy
lstk cdk synth
```
The only lstk-specific flag (before the CDK action) is `--region ` (default `us-east-1`); CDK always targets the default LocalStack account `000000000000`, so there is no `--account` flag.
Relevant environment variables: `AWS_ENDPOINT_URL`, `AWS_ENDPOINT_URL_S3`, `LSTK_CDK_CMD` (default `cdk`), and `AWS_REGION`.
## `sam`
Run the AWS SAM CLI against LocalStack.
Requires the AWS SAM CLI version `1.95.0` or newer on your `PATH` (older versions ignore `AWS_ENDPOINT_URL` and would target real AWS).
```bash
lstk sam build
lstk sam --region us-west-2 deploy
lstk sam validate
```
lstk-specific flags (before the SAM action): `--region ` (default `us-east-1`) and `--account ` (12 digits, default `000000000000`).
Relevant environment variables: `AWS_ENDPOINT_URL`, `AWS_ENDPOINT_URL_S3`, `LSTK_SAM_CMD` (default `sam`), `AWS_REGION` (fallback for `--region`), and `AWS_ACCESS_KEY_ID` (fallback for `--account`).
:::note
Compared with `samlocal`, image/container-based Lambda (ECR) deploys and nested CloudFormation stacks are not supported; use `samlocal` for those workflows.
:::
# lstk Configuration
> The lstk config.toml file, emulator types, environment variables, custom images, and volume mounts.
`lstk` uses a TOML configuration file, created automatically on first run.
## Config file search order
`lstk` uses the first `config.toml` it finds in this order:
1. `./.lstk/config.toml`: project-local config in the current directory.
2. `$HOME/.config/lstk/config.toml`: user config (created here if `$HOME/.config/` exists).
3. OS default:
- **macOS**: `$HOME/Library/Application Support/lstk/config.toml`
- **Windows**: `%AppData%\lstk\config.toml`
- **Linux**: `$XDG_CONFIG_HOME/lstk/config.toml` or `$HOME/.config/lstk/config.toml`
On first run, the config is created at path #2 if `$HOME/.config/` already exists; otherwise at the OS default (#3).
To see the active config file path:
```bash
lstk config path
```
To use a specific config file:
```bash
lstk --config /path/to/config.toml start
```
## Default configuration
The default `config.toml` created on first run. The `type` field reflects whichever emulator you chose at first run (see [Emulator types](#emulator-types)); the example below shows the `aws` default:
```toml
[[containers]]
type = "aws" # Emulator type. Supported: "aws", "snowflake", "azure"
tag = "latest" # Docker image tag, e.g. "latest", "2026.4"
port = "4566" # Host port the emulator will be accessible on
# container_name = "" # Override the derived container name (also MAIN_CONTAINER_NAME)
# image = "" # Full image override (e.g. an internal mirror or offline image)
# expose_ports = [] # Extra container ports to publish, e.g. [53] for the DNS server
# volume = "" # Host directory for persistent state (default: OS cache dir)
# volumes = [] # Docker-style "host:container[:ro]" bind mounts (see Volumes)
# env = [] # Named environment profiles to apply (see [env.*] sections below)
# snapshot = "" # Snapshot REF to auto-load after start (AWS only)
```
## Config field reference
| Field | Type | Default | Description |
|:-----------|:---------|:-----------|:-----------------------------------------------------------------------------------------------------|
| `type` | string | `"aws"` | Emulator type. One of `"aws"`, `"snowflake"`, `"azure"`. Run a single `[[containers]]` block at a time. See [Emulator types](#emulator-types). |
| `tag` | string | `"latest"` | Docker image tag (`"latest"`, `"2026.4"`, etc.). Useful for pinning a specific version. Zero-padded months (`"2026.04"`) are normalized to `"2026.4"`. |
| `port` | string | `"4566"` | Host port the emulator listens on (1–65535). The in-container port is always `4566`. |
| `container_name` | string | (derived) | Override the derived container name (`localstack-`, plus `-` when `tag` is not `"latest"`). This is also what the emulator reports as `MAIN_CONTAINER_NAME`. Set it when something outside `lstk` addresses the emulator by a fixed name, e.g. a sidecar proxy on a CI agent. |
| `image` | string | (default) | Full image reference that overrides the default Docker Hub image, e.g. an internal-registry mirror or a locally loaded offline image. If it already carries a tag, `tag` is ignored; otherwise `tag` (or `latest`) is appended. |
| `expose_ports` | (int \| string)[] | `[]` | Publish additional container ports on the host, beyond the gateway and service ports `lstk` publishes by default. Each entry is a bare port number (published on the same host port) or a Docker-style `"[host:]container[/proto]"` string — e.g. `expose_ports = [53]` to use the emulator's DNS server as the host's resolver, or `expose_ports = ["5354:5353/udp"]`. |
| `volume` | string | (OS cache) | Host directory for persistent emulator state. Defaults to `/lstk/volume/`. See also `volumes`. |
| `volumes` | string[] | `[]` | Docker-style `"host:container[:ro]"` bind mounts (e.g. init hooks). May also carry the persistence mount (target `/var/lib/localstack`). See [Volume mounts](#volume-mounts). |
| `env` | string[] | `[]` | List of named environment profiles to inject into the container (see below). |
| `snapshot` | string | `""` | Snapshot REF (e.g. `pod:my-baseline` or a local path) to auto-load after the emulator starts. AWS emulator only. See [Auto-loading a snapshot on start](/aws/developer-tools/running-localstack/lstk/lifecycle-commands/#auto-loading-a-snapshot-on-start). |
:::note
There is no `update_prompt` config key.
`lstk` always checks for available updates on startup.
Once you choose to skip a version, `lstk` records it under the `[cli]` table as `update_skipped_version` and stops prompting for that version.
This value is written automatically and is not meant to be hand-edited (see [`update`](/aws/developer-tools/running-localstack/lstk/setup-and-maintenance/#update)).
:::
## Emulator types
`lstk` can run more than one kind of emulator.
The `type` field in your `config.toml` selects which one:
| Type | Docker image | Description |
|:------------|:------------------------------|:-------------------------------------|
| `aws` | `localstack/localstack-pro` | LocalStack AWS emulator (default). |
| `snowflake` | `localstack/snowflake` | LocalStack Snowflake emulator. |
| `azure` | `localstack/localstack-azure` | LocalStack Azure emulator. |
On the first interactive run, `lstk` prompts you to pick an emulator (`a` for AWS, `s` for Snowflake, `z` for Azure) and writes your choice to `config.toml`.
In non-interactive mode the default `aws` emulator is used if no config file is found.
Lifecycle commands operate on the emulators defined in your `config.toml`.
Run a single `[[containers]]` block at a time; the AWS-specific commands (`status` resources, `aws`, `reset`, `setup aws`) require an `aws` emulator to be configured.
:::note
The AWS emulator's license is validated by `lstk` before the container starts.
The Snowflake and Azure emulators validate their own license inside the container at startup, so `lstk` skips its pre-flight license check for them.
If your license does not include the selected emulator, the container exits and `lstk` reports the missing entitlement.
:::
## Passing environment variables to the container
Define reusable environment profiles under `[env.]` and reference them in your container config:
```toml
[[containers]]
type = "aws"
tag = "latest"
port = "4566"
env = ["debug", "ci"]
[env.debug]
DEBUG = "1"
ENFORCE_IAM = "1"
PERSISTENCE = "1"
[env.ci]
SERVICES = "s3,sqs"
EAGER_SERVICE_LOADING = "1"
```
When `lstk start` runs, the key-value pairs from each referenced profile are injected as environment variables into the LocalStack container.
Keys are uppercased automatically.
:::note
If you reference an `env` profile name that doesn't exist in your config, `lstk` returns an error: `environment "..." referenced in container config not found`.
:::
In addition to your custom profiles, `lstk` always injects several variables into the container.
See [Container-injected variables](/aws/developer-tools/running-localstack/lstk/automation/#container-injected-variables) for the full list.
## Custom container image
By default the emulator image is pulled from Docker Hub (`localstack/localstack-pro`, `localstack/snowflake`, or `localstack/localstack-azure` depending on `type`).
Set `image` on a container block to override it — for example, to pull from an internal-registry mirror or to run a locally loaded image in an air-gapped environment:
```toml
[[containers]]
type = "aws"
image = "registry.internal.example.com/localstack/localstack-pro"
tag = "2026.4"
```
If `image` already carries a tag (e.g. `...:2026.4`), the separate `tag` field is ignored; otherwise `tag` (or `latest`) is appended.
See [Offline and enterprise environments](/aws/developer-tools/running-localstack/lstk/setup-and-maintenance/#offline-and-enterprise-environments) for how `lstk` falls back to a locally present image when a pull fails.
## Volume mounts
Beyond the single persistence directory set by `volume`, a container block can declare arbitrary Docker-style bind mounts with `volumes`.
Each entry is a `"host:container[:ro]"` spec — useful, for example, for mounting a [Snowflake init hook](/snowflake/capabilities/init-hooks/) script into `/etc/localstack/init/{boot,start,ready,shutdown}.d`:
```toml
[[containers]]
type = "snowflake"
port = "4566"
volumes = [
"./test.sf.sql:/etc/localstack/init/ready.d/test.sf.sql",
"./data:/var/lib/localstack",
]
```
- A `volumes` entry whose container target is `/var/lib/localstack` sets the persistence directory (the same mount `volume` configures); this is what [`lstk volume path`](/aws/developer-tools/running-localstack/lstk/lifecycle-commands/#volume) and [`lstk volume clear`](/aws/developer-tools/running-localstack/lstk/lifecycle-commands/#volume) resolve.
- Relative host sources and a leading `~/` are resolved against the config file's directory. This differs from the legacy `volume` field, whose value is passed to Docker verbatim.
- Setting the persistence directory through both `volume` and a `volumes` entry with a different source is a validation error.
`volume` and `volumes` overlap only for the persistence mount: `volume` can *only* set the persistence directory, while `volumes` is a superset that can also express init hooks and other mounts.
## Using a project-local config
Place a `.lstk/config.toml` in your project directory.
When you run `lstk` from that directory, the local config takes precedence over the global one.
This lets each project pin its own emulator type, image tag, and environment profiles.
For example, a project that targets the Snowflake emulator can keep its own config:
```toml
# .lstk/config.toml
[[containers]]
type = "snowflake"
port = "4566"
```
An AWS project might instead pin a specific image tag and enable a debug profile:
```toml
# .lstk/config.toml
[[containers]]
type = "aws"
tag = "2026.4"
port = "4566"
env = ["dev"]
[env.dev]
DEBUG = "1"
PERSISTENCE = "1"
```
# lstk FAQ & Troubleshooting
> Frequently asked questions and common issues when using lstk.
## FAQ
### Can I use `lstk` with Docker Compose?
Yes, for the commands that talk to an already-running emulator.
`lstk start`, `lstk stop`, and the other lifecycle commands manage their own Docker container and are not meant to drive a Compose-managed instance, so don't point `lstk stop` at one.
But if you run LocalStack from a `docker-compose.yml`, you can still use `lstk`'s emulator-facing commands against it — `aws`, `az`, `terraform`/`cdk`/`sam`, `status`, `reset`, and `snapshot` — by passing `--endpoint-url ` (or setting `LSTK_ENDPOINT_URL`) to target the Compose deployment.
See [Targeting an external emulator](/aws/developer-tools/running-localstack/lstk/automation/#targeting-an-external-emulator) for the commands that accept an endpoint, and the [Docker Compose installation guide](/aws/getting-started/installation/#docker-compose) for the Compose setup itself.
### Which Docker image does `lstk` use?
It depends on the emulator type configured in your `config.toml`.
The AWS emulator uses `localstack/localstack-pro`, the Snowflake emulator uses `localstack/snowflake`, and the Azure emulator uses `localstack/localstack-azure`.
All require a valid auth token (including the free Hobby tier).
See [Emulator types](/aws/developer-tools/running-localstack/lstk/configuration/#emulator-types).
### How do I pass configuration options like `DEBUG` or `PERSISTENCE` to the container?
Use environment profiles in your `config.toml`.
Define the variables under an `[env.]` section and reference that name in the `env` list of your container config.
See [Passing environment variables to the container](/aws/developer-tools/running-localstack/lstk/configuration/#passing-environment-variables-to-the-container) for details.
### How do I save and restore emulator state?
Use [`lstk snapshot save`](/aws/developer-tools/running-localstack/lstk/snapshots/#snapshot-save) to capture the running AWS emulator's state to a local file or a Cloud Pod, and [`lstk snapshot load`](/aws/developer-tools/running-localstack/lstk/snapshots/#snapshot-load) (or the `lstk save` / `lstk load` aliases) to restore it.
To drop in-memory state without writing a snapshot, use [`lstk reset`](/aws/developer-tools/running-localstack/lstk/lifecycle-commands/#reset) (AWS emulator only).
### How do I pin a specific LocalStack version?
Set the `tag` field in your `config.toml` to a specific version tag:
```toml
[[containers]]
type = "aws"
tag = "2026.4"
port = "4566"
```
## Troubleshooting
### Port 443 already in use
By default, LocalStack publishes both port `4566` and port `443` (controlled by the `GATEWAY_LISTEN` variable).
On some systems port 443 is already taken — Windows with Hyper-V, IIS, or VPN software, or an ingress proxy such as Rancher Desktop's Traefik.
Because port 443 comes from the **default** `GATEWAY_LISTEN`, a busy 443 is **not fatal**: `lstk` drops that publication with a warning and starts anyway, and HTTPS is still served on the edge port `4566`. You only need to act if you want to silence the warning or bind 443 elsewhere.
To skip port 443 entirely, override `GATEWAY_LISTEN` to bind only to `4566`:
```toml
[[containers]]
type = "aws"
tag = "latest"
port = "4566"
env = ["nossl"]
[env.nossl]
GATEWAY_LISTEN = "0.0.0.0:4566"
```
:::note
A port you list **explicitly** in a custom `GATEWAY_LISTEN` is treated as a hard requirement, so a busy one there fails the start rather than being dropped. Only the `443` from the default value is best-effort.
:::
### Docker is not running
`lstk` requires a running Docker daemon.
If Docker is not reachable, you will see an error like:
```text
Error: runtime not healthy
```
**Fix:** Start your container runtime. `lstk` works with Docker Desktop, Rancher Desktop, Colima, OrbStack, Lima, and Podman — start the Docker daemon (`sudo systemctl start docker` on Linux) or the relevant VM (`rdctl start`, `colima start`, `podman machine start`, …). When the runtime is unavailable, `lstk`'s error tailors its suggested start command to whichever runtime it detects.
You can also point `lstk` at a specific socket with `DOCKER_HOST`. See [Container runtime discovery](/aws/developer-tools/running-localstack/lstk/automation/#container-runtime-discovery) for how the daemon is located.
### Authentication required in non-interactive mode
When running without a TTY (e.g. in CI), `lstk` cannot open a browser for login.
If no token is found in the keyring or environment, it fails:
```text
authentication required: set LOCALSTACK_AUTH_TOKEN or run in interactive mode
```
**Fix:** Set the `LOCALSTACK_AUTH_TOKEN` environment variable before running `lstk`:
```bash
export LOCALSTACK_AUTH_TOKEN=
lstk --non-interactive start
```
You can find your auth token on the [Auth Tokens page](https://app.localstack.cloud/workspace/auth-tokens).
### License validation failed
If your auth token is invalid, expired, or not linked to an active license, the LocalStack container exits with a license error:
```text
The license activation failed for the following reason:
No credentials were found in the environment.
```
**Fix:**
- Verify your token is valid at the [Auth Tokens page](https://app.localstack.cloud/workspace/auth-tokens).
- Make sure the token is set correctly, either via `lstk login` or the `LOCALSTACK_AUTH_TOKEN` environment variable.
- A stale token or cached license no longer requires a manual `lstk logout`: when the platform definitively rejects it, `lstk` drops the cached license and, in an interactive terminal, prompts you to log in again and retries automatically. In non-interactive mode, run `lstk logout && lstk login` (or set a valid `LOCALSTACK_AUTH_TOKEN`) and re-run.
### Image pull failed
If `lstk` cannot pull the Docker image, check your network connection and Docker configuration.
On corporate networks, you may need to configure Docker's proxy settings, see [How do I configure LocalStack to use my corporate HTTP and HTTPS proxy?](/aws/getting-started/faq/#how-do-i-configure-localstack-to-use-my-corporate-http-and-https-proxy).
### Unknown environment profile
If your container config references an `env` profile that doesn't exist, `lstk` returns:
```text
environment "myprofile" referenced in container config not found
```
**Fix:** Make sure the profile name in the `env` list matches an `[env.]` section in your `config.toml`:
```toml
[[containers]]
type = "aws"
env = ["myprofile"] # must match the section name below
[env.myprofile]
DEBUG = "1"
```
### Getting help
If the steps above don't resolve your issue, see [Get Help](/aws/help-support/get-help/) for the available support channels, including the support email and in-app chat.
# lstk Lifecycle Commands
> The start, stop, restart, status, logs, reset, and volume commands for managing the LocalStack emulator with lstk.
`lstk` uses a flat command structure.
Running `lstk` with no command is equivalent to `lstk start`.
## `start`
Start the LocalStack emulator.
Launches the TUI in interactive terminals and prints plain output otherwise.
`lstk start` launches the emulator defined in the first `[[containers]]` entry of the resolved `config.toml` (not necessarily AWS).
```bash
lstk start
lstk start --persist
lstk start --non-interactive
```
| Option | Description |
|:--------------------|:-----------------------------------------------------------------------------|
| `--persist` | Persist emulator state across restarts (sets `LOCALSTACK_PERSISTENCE=1` in the container) |
| `--type `, `-t ` | Select the emulator to start (`aws`, `snowflake`, or `azure`) non-interactively, recording the choice in `config.toml`. See [Selecting the emulator with `--type`](#selecting-the-emulator-with---type). |
| `--snapshot ][` | Auto-load this snapshot after the emulator starts, overriding the configured `snapshot` for one run (AWS only) |
| `--no-snapshot` | Skip auto-loading the configured `snapshot` for this run |
| `--timeout ` | Maximum time to wait for the emulator to become ready, as a Go duration (e.g. `90s`, `2m`). Overrides `LSTK_STARTUP_TIMEOUT` for this run; `0` uses the per-mode default. |
| `--non-interactive` | Disable the interactive TUI and use plain output |
`lstk start` forwards host environment variables prefixed with `LOCALSTACK_` to the emulator (the host `LOCALSTACK_AUTH_TOKEN` is dropped so it cannot override the token `lstk` resolved). See [Container-injected variables](/aws/developer-tools/running-localstack/lstk/automation/#container-injected-variables).
`lstk` applies a readiness deadline while waiting for the emulator to come up (a crash during startup is detected instantly, with its exit code, and does not wait for the deadline). In an interactive terminal the deadline defaults to 20 seconds and is only a recoverable prompt — you can keep waiting or stop; in non-interactive mode it defaults to 60 seconds and is fatal, leaving the container running for inspection. Override the deadline for a single run with `--timeout` (a Go duration such as `90s` or `2m`), or for every run with [`LSTK_STARTUP_TIMEOUT`](/aws/developer-tools/running-localstack/lstk/automation/#environment-variables); an explicit `--timeout` wins over the environment variable, and `--timeout 0` falls back to the per-mode default. The flag is available on `start` and the bare `lstk` command only — `restart` and the snapshot auto-start path do not expose it.
By default the emulator starts with a fresh state on every run.
Pass `--persist` to keep data across restarts: `lstk` injects `LOCALSTACK_PERSISTENCE=1` into the container so state is written to the mounted [`volume`](/aws/developer-tools/running-localstack/lstk/configuration/#config-field-reference) and reloaded on the next start.
When persistence is active, the AWS emulator's startup summary includes a `• Persistence: Enabled` line.
```bash
# Start with persistent state
lstk start --persist
```
:::note
`--persist` is a flag on `start` (and the bare `lstk` command) and on [`restart`](#restart).
For finer-grained control, you can also set `PERSISTENCE = "1"` in an environment profile (see [Passing environment variables to the container](/aws/developer-tools/running-localstack/lstk/configuration/#passing-environment-variables-to-the-container)).
:::
`start` supports [`--json`](/aws/developer-tools/running-localstack/lstk/automation/#structured-output) (as does the bare `lstk` command, which reports `"command": "start"`): the `data` payload is a flat object describing the started emulator — its `emulator` type, `container` name, `endpoint`, `version`, whether it was `alreadyRunning`, and whether `persistence` is enabled.
### Selecting the emulator with `--type`
`--type` (shorthand `-t`, also available on the bare `lstk` command) is the non-interactive answer to the first-run emulator picker.
It selects which emulator to start (`aws`, `snowflake`, or `azure`) and **records the choice in `config.toml`**, so lifecycle commands (`stop`, `status`, `logs`, `volume`, snapshot auto-load) stay in sync with what you started.
```bash
# Start the Snowflake emulator, recording the choice in config
lstk start --type snowflake
# Shorthand
lstk start -t azure
```
- On first run, the config is created with the selected type.
- If the configured type already matches, `--type` is a no-op.
- If it differs, `lstk` rewrites the `type` line in place (comments and formatting preserved) and prints a note naming the config file.
When switching an existing config to a different type:
- A custom `image` is a **hard error** — it pins a specific product that cannot be reinterpreted under a new emulator type. Use a separate config (`--config`) for that profile instead.
- A non-`latest` `tag` and any `volume`/`volumes` mounts are kept, but `lstk` warns that they may be product-specific.
- `port`, `env`, and `snapshot` are kept silently.
`--type` is a flag only; passing the emulator as a positional (`lstk start azure`) is rejected with a hint pointing at `--type`.
### Auto-loading a snapshot on start
For the **AWS emulator**, you can have `lstk` load a snapshot automatically every time it starts the emulator.
Set the `snapshot` field on the container block to any load REF (a `pod:` Cloud Pod or a local path):
```toml
[[containers]]
type = "aws"
port = "4566"
snapshot = "pod:my-baseline"
```
The snapshot is loaded only when the emulator is **freshly started** this run; if it is already running, the auto-load is skipped.
Override it for a single run with `--snapshot REF`, or skip it entirely with `--no-snapshot`:
```bash
# Start and load a different snapshot for this run only
lstk start --snapshot pod:other-baseline
# Start without loading the configured snapshot
lstk start --no-snapshot
```
The `snapshot` field is only read on start; [`snapshot save`](/aws/developer-tools/running-localstack/lstk/snapshots/#snapshot-save) never writes it back into your config.
## `stop`
Stop the running LocalStack emulator.
Stops every emulator container defined in the resolved `config.toml` (the `[[containers]]` entries), with a 30-second stop timeout per container.
```bash
lstk stop
lstk stop --non-interactive
```
`stop` fails fast if the Docker runtime is not healthy (for example, Docker is not running), or if a configured emulator is not currently running (`LocalStack is not running`).
In an interactive terminal it shows an animated "Stopping LocalStack..." spinner and a styled confirmation; in non-interactive mode it prints the same progress and result as plain text.
`stop` supports [`--json`](/aws/developer-tools/running-localstack/lstk/automation/#structured-output): the `data` payload lists each configured emulator and whether it `wasRunning`.
## `restart`
Stop and restart the LocalStack emulator.
Performs a stop of the running emulator followed by a fresh start, using the same auth, config, and Docker settings as [`start`](#start).
Launches the TUI in interactive terminals and prints plain output otherwise.
```bash
lstk restart
lstk restart --persist
```
| Option | Description |
|:-------------|:-------------------------------------------|
| `--persist` | Persist emulator state across the restart |
By default, emulator state is **not** retained across the restart and the container starts clean.
Pass `--persist` to keep the emulator's state so it survives the restart.
## `status`
Show the status of a running emulator and its deployed resources.
Before contacting the emulator, `lstk` checks that the Docker runtime is healthy; if it is not, the command reports `runtime not healthy` and exits with a non-zero status.
```bash
lstk status
lstk --non-interactive status
```
For each emulator configured in your `config.toml` (the `[[containers]]` entries), `status` reports whether it is running and, if so, prints an instance summary:
```text
LocalStack AWS Emulator is running
• Endpoint: localhost:4566
• Persistence: Enabled
• Container: localstack-aws
• Version: 4.0.0
• Uptime: 1h 12m 4s
```
- **Endpoint** is the live `host:port`, queried from Docker, so it stays correct even if the configured `port` was changed while the container kept running.
- **Persistence** appears only for the AWS emulator and only when persistence is enabled.
- **Uptime** is computed from the container's start time and is omitted if it cannot be determined.
If an emulator is not running, `status` prints an error and exits non-zero without checking the remaining emulators:
```text
LocalStack AWS Emulator is not running
Start LocalStack: lstk
See help: lstk -h
```
For the **AWS emulator**, `status` additionally lists deployed resources.
When resources exist it prints a summary line followed by a table; when none exist it prints `No resources deployed`.
```text
~ 3 resources · 2 services
Service Resource Region Account
S3 my-bucket us-east-1 000000000000
SQS my-queue us-east-1 000000000000
```
In an interactive terminal the output is rendered through the TUI; in non-interactive mode (or with `--non-interactive`) the same content is printed as plain text, with the resource table shown at full width when stdout is not a TTY.
The Snowflake and Azure emulators show the instance summary only and never report resources.
`status` supports [`--json`](/aws/developer-tools/running-localstack/lstk/automation/#structured-output): the `data` payload lists one entry per configured emulator with its running state, health, version, host, and (for the AWS emulator) a `resourceSummary` and the deployed `resources`. Pass `--no-resources` to omit the resource details for a faster response when polling. `--json` also honors [`--endpoint-url`](/aws/developer-tools/running-localstack/lstk/automation/#targeting-an-external-emulator) to report on an emulator `lstk` did not start.
## `logs`
Show or stream emulator logs.
```bash
lstk logs [options]
```
| Option | Description |
|:------------|:-----------------------------------------|
| `--follow`, `-f` | Stream logs in real-time. Without this flag, `lstk` prints the currently available logs and exits. |
| `--verbose`, `-v` | Show all logs without filtering. By default, `lstk` drops noisy lines (internal request logs, provider chatter); `--verbose` shows every line verbatim. |
| `--tail `, `-n ` | Show only the last `N` lines from the end of the logs. Accepts a non-negative integer or `all` (the default, showing all available lines). |
By default, `lstk logs` reads from the first configured emulator container and applies a noise filter.
In an interactive terminal, lines are color-coded by log level (`DEBUG`, `INFO`, `WARN`, `ERROR`); in non-interactive mode, raw log lines are written to stdout.
Example:
```bash
# Print current filtered logs and exit
lstk logs
# Stream filtered logs in real-time
lstk logs --follow
# Show only the last 100 lines
lstk logs --tail 100
# Stream all logs without filtering
lstk logs --follow --verbose
```
## `reset`
Discard the running AWS emulator's in-memory state (all created resources such as S3 buckets and Lambda functions are dropped).
The emulator **keeps running**; only its state is cleared.
`reset` is **AWS-only** and errors out with `reset is only supported for the AWS emulator` for the Snowflake and Azure emulators.
```bash
lstk reset
lstk reset --force
```
| Option | Description |
|:----------|:------------------------------------------------------------------|
| `--force` | Skip the confirmation prompt. Required in non-interactive mode. |
In interactive mode, `reset` prompts for confirmation before clearing state.
In non-interactive mode it fails unless `--force` is passed:
```text
reset requires confirmation; use --force to skip in non-interactive mode
```
`reset` supports [`--json`](/aws/developer-tools/running-localstack/lstk/automation/#structured-output): on success the `data` payload reports the reset emulator and `"reset": true`.
:::note
`reset` clears in-memory state only.
It does **not** wipe the on-disk volume (certificates, persistence data, cached tools).
To clear that, stop the emulator and run [`lstk volume clear`](#volume-clear).
:::
## `volume`
Manage the emulator volume: the host directory that holds persistent state such as certificates, downloaded tools, and persistence data.
```bash
lstk volume path
lstk volume clear [options]
```
### `volume path`
Prints the resolved volume directory for every emulator in your config, one per line.
With the default config (a single `aws` emulator) it prints one path.
Each path is the container's configured `volume` value, or the default OS cache location if `volume` is unset (`~/Library/Caches/lstk/volume/localstack-aws` on macOS, `~/.cache/lstk/volume/localstack-aws` on Linux).
```bash
# Print the volume directory for each configured emulator
lstk volume path
```
### `volume clear`
Removes all data from the emulator volume directory, resetting cached state.
It operates on all configured emulators by default, or a single one with `--type`.
Before clearing, it lists each target as `: ()`.
| Option | Description |
|:----------------|:-----------------------------------------|
| `--force` | Skip the confirmation prompt |
| `--type ` | Clear only the emulator of this type |
```bash
# Clear all configured emulator volumes (prompts for confirmation)
lstk volume clear
# Clear only the AWS emulator volume
lstk volume clear --type aws
# Skip the confirmation prompt
lstk volume clear --force
# Clear without prompting in a non-interactive environment
lstk volume clear --type snowflake --force
```
In an interactive terminal, `lstk volume clear` prompts `Clear volume data? This cannot be undone` before deleting anything; choosing **NO** or pressing Ctrl+C cancels with no changes.
In non-interactive mode, `--force` is required, otherwise the command fails with `volume clear requires confirmation; use --force to skip in non-interactive mode`.
:::caution
If the volume contains files owned by `root` (created by Docker), clearing fails with a permission error.
Re-run with elevated privileges:
```bash
sudo lstk volume clear
```
:::
# lstk Migration Guide
> Migration guide for lstk, the new command-line interface for LocalStack.
import { Tabs, TabItem } from '@astrojs/starlight/components';
# Migrating from `localstack` to `lstk`
## Introduction
`lstk` is the new command-line interface for LocalStack. It is a single, self-contained binary that starts and manages the emulator, runs the AWS CLI and your infrastructure-as-code tools, and saves and restores emulator state. In other words, it replaces both the Python-based `localstack` CLI and the family of wrapper scripts that many projects installed alongside it. Those scripts are `awslocal`, `tflocal`, `samlocal`, and `cdklocal`.
There are three good reasons to start using `lstk`:
1. Installation is simpler, because there is no Python environment to manage, and no separate wrapper script to install for each tool you use.
2. `lstk` works with every LocalStack emulator, not just AWS. Snowflake and Azure are supported today, and future emulators will be available too.
3. `lstk` is the place for new CLI functionality to be added from now on. The `localstack` CLI is deprecated, and will no longer be supported.
What does not change is LocalStack itself. The emulator is the same Docker image with the same behavior and the same configuration variables (`DEBUG`, `SERVICES`, `PERSISTENCE`, and the rest). You are changing the tool you drive LocalStack with, not the LocalStack emulator itself. For most teams the migration is a short exercise in translating a handful of commands in shell history, scripts, and CI pipelines.
:::note
The legacy CLI and the wrapper scripts continue to work, so you can migrate gradually rather than all at once. A small number of features are still only available with the legacy `localstack` CLI. Those are listed under [Unsupported features](#unsupported-features).
:::
## Installation
`lstk` is distributed through the LocalStack Homebrew tap and the `@localstack/lstk` npm package. Pre-built binaries for Linux, macOS, and Windows are published on GitHub Releases. Pick whichever fits your environment.
```bash
brew install localstack/tap/lstk
```
```bash
npm install -g @localstack/lstk
```
Check for correct installation by invoking `lstk --version`. Docker must be installed and running, exactly as before. Homebrew installs shell completions automatically. With the other methods you'll need generate them yourself, using `lstk completion bash|zsh|fish|powershell`. Full instructions are in the [lstk documentation](https://docs.localstack.cloud/aws/developer-tools/running-localstack/lstk/).
There is no need to uninstall the `localstack` CLI, as the two can exist side by side. This is useful while you migrate, and necessary if you rely on a feature that is not yet available with `lstk`. However, we recommend against using them at the same time. Each CLI starts and manages its own LocalStack container, so stop whichever is running before you start the other.
## Logging in
Both CLIs need a LocalStack license to run the emulator, but they ask for it in different ways. With the `localstack` CLI you copied an auth token out of the web application and stored it with `localstack auth set-token`, or exported `LOCALSTACK_AUTH_TOKEN` yourself.
`lstk` replaces that with a browser-based login triggered automatically: simply running `lstk` or `lstk start` takes you through the login flow the first time, opening a browser window for you to approve the request. The credential is then stored securely on your machine. There is no token to copy, and none to keep in your shell profile.
Run `lstk login` directly if you want to authenticate ahead of time, or to switch accounts:
```bash
lstk login
```
Similarly, use `lstk logout` to remove the auth token from your machine.
Continuous integration has no browser, so auth tokens remain the right approach there. Set `LOCALSTACK_AUTH_TOKEN` as a secret in your pipeline, and `lstk` will use it without any login step. Use a CI Auth Token rather than a personal developer token, as described in the [Auth Token documentation](https://docs.localstack.cloud/aws/getting-started/auth-token/#ci-environments).
## The `config.toml` file
`lstk` keeps its settings in a TOML file named `config.toml`. This is the central place for describing the LocalStack container you want to run: which emulator to start, which image tag to use, which port to publish, and which environment variables to pass through. Where the `localstack` CLI took all of this as flags and environment variables at start-up, `lstk` reads it from this file on every run.
You do not need to write the file by hand. `lstk` creates a default `config.toml` the first time you run it, and `lstk config path` prints the location of the file currently in effect:
```bash
lstk config path
```
A bare-bones file looks like this:
```toml
[[containers]]
type = "aws" # aws, snowflake, or azure
tag = "latest" # image tag to run
port = "4566" # host port to publish
```
`lstk` looks for `.lstk/config.toml` in the current directory first, and falls back to a user-level file in your personal home directory (such as `/Users/maureen/.config/lstk/config.toml`). A project can therefore carry its own settings in version control, while your personal defaults apply outside of that project. To use a file somewhere else entirely, pass `lstk --config `. The [Configuration parameters](#configuration-parameters) section covers what else you can put in it.
## Starting, stopping, restarting, and upgrading
Day-to-day lifecycle management is where the two CLIs line up most closely, and the commands you already know have direct counterparts. The most noticeable difference is that `lstk start` completes only once the emulator is ready to serve requests, so the familiar pattern of starting in the background and then waiting is no longer necessary. Running `lstk` with no arguments does the same thing as `lstk start`.
The other difference is presentation. In a terminal, `lstk` renders a compact interactive view of what it is doing. When its output is piped, redirected, or running in CI, it prints plain text instead. You can force the plain output at any time with `--non-interactive`.
| With `localstack` | With `lstk` |
| --- | --- |
| `localstack start`, `localstack start -d` | `lstk start`, or simply `lstk` |
| `localstack wait` | Not needed, as `lstk` waits until the emulator is ready. |
| `localstack stop` | `lstk stop` |
| `localstack restart` | `lstk restart` |
| `localstack status docker` | `lstk status` |
| `localstack logs -f -n 100` | `lstk logs --follow --tail 100` |
| `localstack start -s snowflake` | `lstk start -t snowflake` |
| `localstack update localstack-cli` | `lstk update` |
`lstk status` is worth a second look for AWS users. Alongside the endpoint, container, version, and uptime, it lists the resources currently deployed in the AWS emulator. That makes it a quick way to confirm that a script or a snapshot did what you expected.
Upgrading now involves two separate things. First, `lstk update` upgrades the CLI itself, using whichever method you installed it with, and it also offers the upgrade when you start the emulator. Second, the emulator image is upgraded independently, by choosing an image tag in your `config.toml` file. Use `latest` to track the newest monthly emulator release, or pin a specific version such as `2026.4`. See the command reference for the full set of options.
## Configuration parameters
LocalStack's own configuration variables are unchanged. `DEBUG`, `SERVICES`, `PERSISTENCE`, `EXTENSION_AUTO_INSTALL` and everything else in the configuration reference mean exactly what they meant before. What changes is how you get them into the container.
For a one-off run, pass the variable on the command line as you always have, with a `LOCALSTACK_` prefix so that `lstk` knows to forward it to the emulator:
```bash
LOCALSTACK_DEBUG=1 lstk start
```
For anything you use more than once, put it in the `config.toml` file instead. The file describes the container you want to run, and groups environment variables into named profiles that you can switch on and off:
```toml
[[containers]]
type = "aws"
tag = "latest"
port = "4566"
env = ["dev"]
[env.dev]
DEBUG = "1"
SERVICES = "s3,sqs"
```
With that in place, `lstk start` is the whole command. The configuration section of the docs describes every available field.
## Infrastructure as code
If you deploy infrastructure into LocalStack, you have almost certainly been using the wrapper scripts: `awslocal` for the AWS CLI, and `tflocal`, `cdklocal`, or `samlocal` for Terraform, the CDK, and SAM. Each script existed to point its underlying tool at LocalStack instead of AWS. `lstk` folds all four into subcommands, so there is nothing extra to install and one less thing to keep up to date.
| Wrapper script | With `lstk` |
| --- | --- |
| `awslocal s3 ls` | `lstk aws s3 ls` |
| `tflocal init`, `tflocal apply` | `lstk terraform init`, `lstk tf apply` |
| `cdklocal bootstrap`, `cdklocal deploy` | `lstk cdk bootstrap`, `lstk cdk deploy` |
| `samlocal build`, `samlocal deploy` | `lstk sam build`, `lstk sam deploy` |
These subcommands are simply wrappers around the standard commands. You must still install the AWS CLI, Terraform, the CDK, or SAM yourself, and `lstk` runs them with the endpoint, credentials, and region configured to point to LocalStack. Everything you type after the subcommand is passed through untouched, and the output and exit code come back unchanged. In practice, migrating a script means prefixing each of these commands with `lstk`, such as `lstk aws`.
## Snapshots
Saving and restoring emulator state is no longer split across two command groups that behave differently. Previously, `localstack state` wrote to a local file, while `localstack pod` published Cloud Pods to the LocalStack platform. `lstk` merges them into a single `snapshot` command group where the destination decides where the snapshot is saved. Use a path for a local file, a `pod:` reference for a Cloud Pod, or an `s3://` location for your own bucket.
```bash
lstk snapshot save ./my-state # a local file
lstk snapshot save pod:my-baseline # a Cloud Pod
lstk snapshot load pod:my-baseline # restore it, starting the emulator if needed
```
Because saving and loading are such common operations, `lstk save` and `lstk load` are available as shorthands.
| With `localstack` | With `lstk` |
| --- | --- |
| `localstack state export`, `localstack state import` | `lstk snapshot save `, `lstk snapshot load ` |
| `localstack pod save`, `localstack pod load` | `lstk snapshot save pod:`, `lstk snapshot load pod:` |
| `localstack pod list`, `localstack pod versions` | `lstk snapshot list`, `lstk snapshot versions pod:` |
| `localstack pod inspect`, `localstack pod delete` | `lstk snapshot show pod:`, `lstk snapshot remove pod:` |
| `localstack state reset` | `lstk reset` |
The underlying concepts are unchanged. Every save to an existing Cloud Pod creates a new version, and you can load an earlier version by appending the version number to the reference, as in `pod:my-baseline:3`. The merge strategies that control how a loaded snapshot combines with running state are unchanged, and are selected with `--merge`. Snapshots can be restricted to a subset of services with `--services`.
Two related features are also available. The first is automatic persistence, where the emulator saves and restores its own state across restarts. It is enabled with `lstk start --persist`, the equivalent of the `PERSISTENCE` variable. The second is auto-loading. A snapshot can be loaded every time the emulator starts, by naming it in your configuration file. That replaces the old auto-load behavior. The snapshots documentation covers local snapshots, Cloud Pods, S3 storage, merging, and persistence in detail.
## Accessing remote emulators
Not every LocalStack instance is started by `lstk`. You might instead use `docker-compose.yml`, or run it on a remote machine, or share a single deployment with others in your team. `lstk` works with these too. The global `--endpoint-url` option instructs `lstk` to communicate with an emulator that wasn't started locally by `lstk`:
```bash
lstk --endpoint-url http://localhost:4566 status
lstk --endpoint-url https://localstack.example.com aws s3 ls
```
If you target the same instance repeatedly, set `LSTK_ENDPOINT_URL` in your environment:
```bash
export LSTK_ENDPOINT_URL=https://localstack.example.com
lstk aws s3 ls
lstk snapshot save pod:my-baseline
```
Every `lstk` subcommand that communicates with a running emulator works as expected, including `lstk status`, the AWS CLI and infrastructure-as-code wrappers, and the snapshot commands. However, commands that manage the container itself, such as starting or stopping it or clearing its volume, do not support the `--endpoint-url` option. This is because `lstk` did not create the container and does not control its lifecycle.
## Using `lstk` with Continuous Integration
Continuous integration is where LocalStack does much of its work, and the shape of a pipeline does not change when you move to `lstk`. You still install a CLI, start the emulator, run your tests against it, and let the job tear everything down at the end. The steps are simply shorter than they used to be.
There is no dedicated GitHub Action for `lstk`. The existing setup-localstack Action installs the legacy CLI, so for now you install `lstk` in a step of your own and call it directly. The npm package is often the most convenient option on a hosted runner. The pre-built binaries suit images where Node.js is not available.
Authentication is the only part that differs from your personal machine. `lstk login` needs a browser, so a CI pipeline must supply a CI Auth Token through the `LOCALSTACK_AUTH_TOKEN` environment variable instead, normally from your CI system secret store. No login step is required.
A GitHub Actions job then looks like this:
```yaml
- name: Install lstk
run: npm install -g @localstack/lstk
- name: Start LocalStack
env:
LOCALSTACK_AUTH_TOKEN: ${{ secrets.LOCALSTACK_AUTH_TOKEN }}
run: lstk start
- name: Run tests
run: |
lstk aws s3 mb s3://test-bucket
make test
- name: Reset the emulator between test suites
run: lstk reset --force
- name: Run integration tests
run: make integration-test
```
A couple of practices from the legacy `localstack` CLI are being dropped here. `lstk start` returns only once the emulator is ready, removing the need to explicitly wait for it to become ready. Additionally, subcommand output will be in plain text (not interactive) when running in CI, so commands that would normally ask for confirmation, such as `lstk reset` and `lstk volume clear`, require an additional `--force` option, as in the reset step above.
If your pipeline seeds LocalStack with fixtures or infrastructure before the tests run, snapshots are worth a look. Saving a snapshot once and loading it at the start of each job with `lstk snapshot load` is usually much faster than re-running Terraform or a long list of AWS CLI commands.
The same three steps apply to GitLab CI, CircleCI, Jenkins, and the others. Only the syntax around them changes. See the CI/CD documentation for the general guidance, and the CI pipelines section for per-platform examples.
## Migrating your existing configuration
Much of the work in a migration is not learning new commands but relocating settings. Start by gathering everything that currently configures LocalStack: flags on your `localstack start` command line, environment variables set in a shell profile, alias, or Makefile, any `~/.localstack` profile files, and the environment section of a `docker-compose.yml` file if you have one. Nearly all of it maps onto fields in the `lstk` configuration file.
| Previously | In `config.toml` |
| --- | --- |
| `localstack start -e DEBUG=1 -e SERVICES=s3,sqs` | An `[env.]` profile, referenced by `env` on the container |
| `localstack start -v ./init.sh:/etc/localstack/init/ready.d/init.sh` | `volumes = ["./init.sh:/etc/localstack/init/ready.d/init.sh"]` |
| `IMAGE_NAME=localstack-enterprise` | `image = "localstack-enterprise"` |
| A pinned LocalStack version | `tag = "2026.4"` |
| `LOCALSTACK_VOLUME_DIR=./volume` | `volume = "./volume"` |
| `localstack start -s snowflake` | `type = "snowflake"` |
| `localstack start --host-dns` | `expose_ports = [53]` |
| `AUTO_LOAD_POD=my-baseline` | `snapshot = "pod:my-baseline"` |
To illustrate, the following before-and-after shows the mapping. Where you previously ran:
```bash
DEBUG=1 PERSISTENCE=1 localstack start -d \
-e SERVICES=s3,sqs \
-v ./init.sh:/etc/localstack/init/ready.d/init.sh
localstack wait
```
you would now write a `.lstk/config.toml` in the project.
```toml
[[containers]]
type = "aws"
port = "4566"
env = ["dev"]
volumes = ["./init.sh:/etc/localstack/init/ready.d/init.sh"]
[env.dev]
DEBUG = "1"
SERVICES = "s3,sqs"
PERSISTENCE = "1"
```
then start it with `lstk start`. Because the `config.toml` file lives in the repository, everyone on the team gets the same environment. Your CI jobs also pick up the same file.
The existing `CONFIG_PROFILE` mechanism in the `localstack` CLI and its `~/.localstack/*.env` files have no direct equivalent with `lstk`. The recommended replacement is a per-project `.lstk/config.toml`. If you need to switch between several configurations for the same project, keep them as separate files and choose between them with `lstk --config `.
## Unsupported features
A handful of capabilities have not moved to `lstk`, although they may do so in a future release. In most cases the recommendation is to keep the `localstack` CLI installed for that one task, but migrate the rest of your workflow to `lstk`. The table below is deliberately high-level, and you should follow the linked documentation for more detail.
If you are an active user of one of these unsupported features, please contact LocalStack Support.
| Not supported in `lstk` | Recommended alternative |
| --- | --- |
| [Ephemeral Instances](https://docs.localstack.cloud/aws/developer-tools/cloud-sandbox/ephemeral-instances/) | Use the `localstack` CLI or the LocalStack Console. Ephemeral Instances are a preview feature and are not yet available in `lstk`. |
| [AWS Replicator](https://docs.localstack.cloud/aws/developer-tools/aws-replicator/) | Use the `localstack` CLI, version 4.2.0 or newer. Also a preview feature. |
| [IAM Policy Stream](https://docs.localstack.cloud/aws/developer-tools/security-testing/iam-policy-stream/) | Use the `localstack` CLI, or the dashboard in the LocalStack Console. IAM enforcement itself needs no CLI support and can be switched on with configuration variables, which `lstk` passes through as usual. |
| [Extensions](https://docs.localstack.cloud/aws/customization/integrations/extensions/) | Use the `localstack` CLI to install, manage, and develop extensions. To install one at start-up without the CLI, set `EXTENSION_AUTO_INSTALL` in your configuration. |
| [Cloud Pod](https://docs.localstack.cloud/aws/developer-tools/snapshots/cloud-pods/) publishing, snapshot encryption, and version messages | These features remain available only in the `localstack` CLI. `lstk` covers the everyday save, load, list, and inspect operations. |
| [Cloud Pod](https://docs.localstack.cloud/aws/developer-tools/snapshots/cloud-pods/) remotes other than S3 | Use the `localstack` CLI. `lstk` supports the LocalStack platform and your own S3 bucket, with the location passed inline rather than registered in advance. |
| [Host DNS setup](https://docs.localstack.cloud/aws/customization/networking/dns-server/) on Linux | Use the `localstack` CLI for the one-off resolver configuration. Publishing the DNS port itself is supported through the `expose_ports` setting. |
| Arbitrary Docker options, such as custom networks | Use `docker-compose.yml` when you need full control of the container and the many Docker configuration options. The `lstk` configuration file covers only the basic features, such as the image, tag, port, exposed ports, volumes, and environment variables. |
| Shell access to the container (`localstack ssh`) | Use `docker exec -it localstack-aws bash`. Note that `lstk` names its container `localstack-[aws,azure,snowflake]`. |
| [GitHub Action](https://github.com/localstack/setup-localstack) | There is no GitHub Action for `lstk` yet, and the existing `setup-localstack` Action installs the `localstack` CLI. Install `lstk` in a step of your own instead, as shown in [Using lstk with Continuous Integration](#using-lstk-with-continuous-integration). |
## Next steps
- The lstk reference documents every command, flag, and configuration field.
- The configuration options page lists the LocalStack variables themselves, which are unchanged.
- The snapshots section covers local snapshots, Cloud Pods, persistence, and merging.
- The deprecated wrapper scripts and legacy CLI pages remain available for as long as you need them.
# lstk Setup & Maintenance
> The setup, config, and update commands, and running lstk in offline or enterprise environments.
## `setup`
Set up CLI integration for an emulator type.
`lstk setup` is a grouping command with no action of its own; the work is done by its subcommands, `setup aws` and `setup azure`.
```bash
lstk setup aws
lstk setup azure
```
### `setup aws`
Create or update a `localstack` profile in `~/.aws/config` and `~/.aws/credentials` so the AWS CLI and SDKs can target LocalStack.
```bash
lstk setup aws
lstk setup aws --force
```
| Option | Description |
|:----------|:-----------------------------------------------------------------------------------------|
| `--force` | Overwrite an existing `localstack` profile whose values differ, and skip the confirmation prompt. |
On an interactive terminal it prompts (Y/n) before making changes.
In non-interactive mode (piped output, CI, or `--non-interactive`) it writes the profile with defaults without prompting and exits `0`; a failed write or check returns a non-zero exit code so automation notices.
Overwriting an existing `localstack` profile whose values differ requires `--force` (which also skips the interactive prompt); creating a fresh profile, completing a partial one, or leaving an already-correct profile in place never needs it.
It writes the following profile (existing unrelated profiles are preserved):
```ini
# ~/.aws/config
[profile localstack]
region = us-east-1
output = json
endpoint_url = http://localhost.localstack.cloud:4566
# ~/.aws/credentials
[localstack]
aws_access_key_id = test
aws_secret_access_key = test
```
Afterwards, target LocalStack by passing `--profile localstack` or exporting `AWS_PROFILE`:
```bash
export AWS_PROFILE=localstack
aws s3 ls
```
The endpoint host is resolved the same way as for [`lstk aws`](/aws/developer-tools/running-localstack/lstk/cloud-and-iac-commands/#endpoint-resolution) (probing `localhost.localstack.cloud` and falling back to `127.0.0.1`), and [`LOCALSTACK_HOST`](/aws/developer-tools/running-localstack/lstk/automation/#environment-variables) overrides the host and port written into the profile.
The port comes from your AWS emulator's configured `port` (default `4566`); if no `aws` emulator is configured, the command fails with `no aws emulator configured`.
If the `localstack` profile is already configured correctly, `lstk` reports `LocalStack AWS profile is already configured.` and makes no changes.
:::note
The former `lstk config profile` command has been removed; use `lstk setup aws`.
:::
### `setup azure`
Prepare an isolated Azure CLI configuration directory (under the `lstk` config dir, via `AZURE_CONFIG_DIR`) that routes [`lstk az`](/aws/developer-tools/running-localstack/lstk/cloud-and-iac-commands/#az) commands to the LocalStack Azure emulator.
Your global `~/.azure` configuration is left untouched.
```bash
lstk setup azure
# alias:
lstk setup az
```
`setup azure` registers a custom Azure cloud (`LocalStack`) whose endpoints point at the LocalStack Azure emulator, activates it, disables Azure CLI instance discovery and telemetry, and performs a one-time dummy service-principal login — all inside a dedicated config directory under the `lstk` config dir (via `AZURE_CONFIG_DIR`).
It requires the `az` CLI to be installed and a running LocalStack Azure emulator.
Run this once; afterwards use `lstk az ` to run Azure CLI commands against LocalStack.
To instead redirect your **global** `az` (so existing scripts run unmodified against LocalStack), see [`lstk az start-interception`](/aws/developer-tools/running-localstack/lstk/cloud-and-iac-commands/#global-interception-optional).
## `config`
Manage CLI configuration.
`config` has no behavior of its own; run it with a subcommand.
### `config path`
Print the resolved path to the active `config.toml`.
```bash
lstk config path
```
This subcommand is read-only: it never creates or initializes a config file.
If `--config ` is set, it prints that path verbatim.
Otherwise it prints the already-loaded config path, the first existing config in the search order, or the path where a config would be created on first run.
## `update`
Check for and apply updates to the `lstk` CLI itself.
`lstk` auto-detects how it was installed (Homebrew, npm, or direct binary) and updates using that same method.
Development builds (version `dev`) are skipped, and updates are checked against the latest [GitHub release](https://github.com/localstack/lstk/releases/latest).
```bash
lstk update [options]
```
| Option | Description |
|:--------------------|:------------------------------------------------------------|
| `--check` | Check for updates without installing them |
| `--non-interactive` | Use plain output instead of the TUI (update logic unchanged) |
| `--json` | Emit the result as a JSON envelope (see [Structured output](/aws/developer-tools/running-localstack/lstk/automation/#structured-output)). With `--check`, `data` reports `currentVersion`/`latestVersion`/`updateAvailable`; after an applied update, `updatedVersion`/`updated`/`method`. |
Examples:
```bash
# Check for updates without installing
lstk update --check
# Update to the latest version
lstk update
# Update with plain (non-TUI) output
lstk update --non-interactive
```
By install method:
- **Homebrew** (binary under a `Caskroom` path): runs `brew upgrade localstack/tap/lstk`.
- **npm** (binary under `node_modules`): runs `npm install -g @localstack/lstk@latest`.
- **Binary** (anything else): downloads the release asset for your OS/arch from GitHub, verifies its SHA-256 against the release's `checksums.txt` (a missing, malformed, or mismatched checksum aborts the update), extracts it, and replaces the running executable in place.
With `--check`, `lstk` only reports whether a newer version is available and exits without downloading or installing anything.
:::note
Set `LSTK_GITHUB_TOKEN` to send an authenticated GitHub request and avoid API rate limits during update checks.
It is optional; updates also work unauthenticated.
:::
If more than one `lstk` installation is found on your `PATH` (for example a Homebrew binary and an npm one), `lstk update` and the start-time update notification print a warning listing each location, its install method, and which one is currently running, so you can tell which binary an update will actually replace.
### Update notification on start
Separately from `lstk update`, `lstk` checks for a newer version when you run `lstk start` (the default command), using a short timeout that fails silently if GitHub is unreachable.
In an interactive terminal, when an update is available `lstk` prints the new version and a release-notes link, then prompts:
```text
Update lstk to latest version?
> Update now [U]
Remind me next time [R]
Skip this version [S]
```
- **Update now [U]**: downloads and applies the update, then asks you to re-run your command.
- **Remind me next time [R]**: does nothing; you are reminded on the next run.
- **Skip this version [S]**: records the version in `config.toml` so you are not prompted about it again.
In non-interactive mode the notification is not a prompt — `lstk` emits a single note (`Update available: → (run lstk update)`) and continues.
When you choose **Skip this version**, `lstk` writes the skipped version under a `[cli]` table:
```toml
[cli]
update_skipped_version = "0.5.0"
```
While this value matches the latest available version, the start-time update notification for that version is suppressed.
This key is managed automatically and is not intended to be edited by hand.
## Offline and enterprise environments
There is no `--offline` flag. Instead, `lstk` degrades gracefully when common enterprise blockers (Docker Hub unreachable, a proxy/TLS interceptor, or an unreachable license server) prevent an internet request:
- **Image pull**: if the image pull fails but the image is already present locally, `lstk` warns and uses the local image instead of failing. In interactive mode you can also press Esc to abort an in-progress pull and fall back to the local image.
- **License pre-flight**: when the pinned image is already present locally, `lstk` skips its pre-flight license check so a fully offline start is not blocked; the emulator validates the license itself once it starts. When a check does run, a transport-level failure (offline, proxy, or certificate error) is treated as non-fatal and the emulator validates the license instead. A definitive server rejection (HTTP 400/401/403) is handled differently: `lstk` drops the cached license and, in an interactive terminal, offers to log in again and retries the start once with the refreshed credentials (a rejected token often just predates a license purchase or plan change); in non-interactive mode it fails with an error pointing at `lstk logout && lstk login` or a valid `LOCALSTACK_AUTH_TOKEN`. The pre-flight is also skipped — with a warning — when the license server does not recognize the image *tag format* (for example a `dev` nightly or a custom internal-mirror tag): that is not a verdict on the license, so `lstk` defers to the emulator's own startup check rather than blocking the start.
- **Telemetry and update checks** are best-effort and fail silently when offline.
Pair this behavior with a custom [`image`](/aws/developer-tools/running-localstack/lstk/configuration/#custom-container-image) that points at an internal-registry mirror or a locally loaded image to run `lstk` in an air-gapped environment.
# lstk Snapshots
> Save, load, list, remove, and show emulator snapshots with lstk, including S3 remotes.
## `snapshot`
Manage emulator snapshots.
A snapshot captures the running emulator's state, either as a local file on disk, as a Cloud Pod on the LocalStack platform, or in your own S3 bucket.
The `snapshot` command groups six subcommands — `save`, `load`, `list`, `remove`, `show`, and `versions`. The first two are also exposed as the top-level aliases `lstk save` and `lstk load`.
:::note
Snapshots are best supported on the **AWS emulator**.
`snapshot save`/`load` (and the `save`/`load` aliases) also work for the Snowflake emulator, but its snapshot support is experimental and not fully tested — `lstk` prints a warning such as `Snapshot support for the snowflake emulator is experimental and not fully tested.`
The Azure emulator does not support snapshots.
:::
## `snapshot save`
Save a snapshot of the running emulator's state.
The emulator must already be running; this command does **not** auto-start it.
```bash
# Auto-named snapshot file in the current directory
lstk snapshot save
# Save to a specific local path
lstk snapshot save ./my-snapshot
# Save to a Cloud Pod on the LocalStack platform (requires auth)
lstk snapshot save pod:my-baseline
# Save to your own S3 bucket (pod name is auto-generated if omitted)
lstk snapshot save my-pod s3://my-bucket/prefix
# Limit the snapshot to a subset of services
lstk snapshot save --services s3,lambda
```
The optional `[destination]` argument takes one of these forms:
| Destination | Description |
|:---------------------------------|:--------------------------------------------------------------------------------------------------|
| (omitted) | Auto-generates a timestamped snapshot file in the current directory (`./snapshot--.snapshot`). |
| local path | Writes a snapshot archive to that path. The `.snapshot` extension is forced. |
| `pod:` | Saves a Cloud Pod to the LocalStack platform. Requires authentication. |
| ` s3://bucket/prefix` | Saves to your own S3 bucket. The pod name is a separate positional (auto-generated when omitted). See [S3 remotes](#s3-remotes). |
Pod operations require an auth token (`LOCALSTACK_AUTH_TOKEN` or a prior `lstk login`); local-file snapshots do not.
Every save to an existing `pod:` snapshot creates a new **version** rather than replacing it; use [`snapshot versions`](#snapshot-versions) to list them and [`snapshot load`](#snapshot-load)/[`snapshot show`](#snapshot-show) with a `pod::` ref to act on a specific one. `save` itself rejects a version suffix (you cannot save "as version 3").
By default a snapshot captures every service's state. Pass `-s`/`--services` with a comma-separated list to limit it to a subset; this applies uniformly to local files, `pod:` Cloud Pods, and `s3://` remotes.
| Option | Description |
|:--------------------|:------------------------------------------------------------------------------------------------|
| `--services ]`, `-s ` | Comma-separated list of services to include in the snapshot (all services by default). Applies to local, `pod:`, and `s3://` destinations. |
| `--profile ` | AWS profile to read S3 credentials from (used only for `s3://` destinations). Defaults to `AWS_*` env vars, then `AWS_PROFILE`. |
## `snapshot load`
Load a snapshot into the emulator, **auto-starting it first** if it is not already running.
```bash
# Load a local snapshot by path or name
lstk snapshot load my-baseline
lstk snapshot load ./checkpoint
# Load from a Cloud Pod (requires auth; latest version)
lstk snapshot load pod:my-baseline
# Load a specific version of a Cloud Pod
lstk snapshot load pod:my-baseline:3
# Load from your own S3 bucket (pod name is required)
lstk snapshot load my-pod s3://my-bucket/prefix
# Control how the snapshot merges with running state
lstk snapshot load pod:my-baseline --merge=overwrite
# Preview what a Cloud Pod load would change, without applying it
lstk snapshot load pod:my-baseline --dry-run
```
The `REF` argument is required and identifies a local path/name or a `pod:` Cloud Pod.
For a Cloud Pod you can append a version (`pod::`) to load an older version; the latest is used when no version is given.
To load from S3, pass the pod name followed by an `s3://bucket/prefix` location (see [S3 remotes](#s3-remotes)).
| Option | Description |
|:---------------------|:------------------------------------------------------------------------------------------------------------|
| `--merge ` | How the loaded state combines with running state. One of `account-region-merge` (default), `overwrite`, `service-merge`. |
| `--dry-run` | Preview the resource additions and modifications the load would produce, per service, without changing any state. Supported for `pod:` refs only; requires a running emulator (it does not auto-start one). |
| `--profile ` | AWS profile to read S3 credentials from (used only for `s3://` sources). Defaults to `AWS_*` env vars, then `AWS_PROFILE`. |
- `account-region-merge` (default): the snapshot wins on any `(service, account, region)` overlap.
- `overwrite`: running state is reset first, then the snapshot is imported onto a clean state.
- `service-merge`: the snapshot wins per resource; non-overlapping resources are combined.
Set [`LSTK_MERGE_STRATEGY`](/aws/developer-tools/running-localstack/lstk/automation/#environment-variables) to change the default strategy used when `--merge` is not passed; an explicit `--merge` always wins.
Pass `--dry-run` with a `pod:` ref to preview a load before committing to it: `lstk` queries the platform and prints, per service, how many resources the snapshot would add or modify under the chosen merge strategy, without touching running state. It is supported for `pod:` refs only (other refs are rejected) and requires the emulator to already be running, since it does not auto-start one.
### `save`/`load` aliases
`snapshot save` and `snapshot load` are also exposed as the top-level aliases `lstk save` and `lstk load`. The aliases behave identically:
```bash
lstk save pod:my-baseline
lstk load ./checkpoint
```
## `snapshot list`
List the Cloud Pod snapshots available on the LocalStack platform.
By default, only snapshots you created are listed; pass `--all` to include every snapshot in your organization.
This subcommand operates on Cloud Pods, so it requires authentication.
```bash
# Snapshots you created
lstk snapshot list
# Every snapshot in your organization
lstk snapshot list --all
# List snapshots in your own S3 bucket (requires a running emulator)
lstk snapshot list s3://my-bucket/prefix
```
Passing an `s3://bucket/prefix` location lists snapshots stored in your own S3 bucket instead of the platform (see [S3 remotes](#s3-remotes)). Unlike the platform listing, this queries the emulator, so it requires a running emulator.
| Option | Description |
|:--------------------|:--------------------------------------------------------------|
| `--all` | List all snapshots in your organization, not just your own. |
| `--profile ` | AWS profile to read S3 credentials from (used only with an `s3://` location). Defaults to `AWS_*` env vars, then `AWS_PROFILE`. |
## `snapshot remove`
Delete a Cloud Pod snapshot from the LocalStack platform.
Only cloud snapshots (the `pod:` prefix) can be removed; local snapshots are plain files you delete yourself.
This operation cannot be undone.
```bash
lstk snapshot remove pod:my-baseline
# Skip the confirmation prompt (required in non-interactive mode)
lstk snapshot remove pod:my-baseline --force
```
The required `REF` argument must be a `pod:` Cloud Pod reference.
| Option | Description |
|:----------|:-------------------------------------------------------------------------|
| `--force` | Skip the confirmation prompt. Required when running non-interactively. |
## `snapshot show`
Show metadata for a single Cloud Pod snapshot on the LocalStack platform: its name, created date, size, LocalStack version, message, the services it contains, and per-service resource counts (resource counts render only when the platform has them for that snapshot).
This subcommand is cloud-only and requires authentication.
```bash
# Latest version
lstk snapshot show pod:my-baseline
# A specific version
lstk snapshot show pod:my-baseline:3
```
The required `REF` argument must be a `pod:` Cloud Pod reference.
It defaults to the latest version; append `:` to inspect an older one. Use [`snapshot versions`](#snapshot-versions) to see which versions exist.
## `snapshot versions`
List the version history of a Cloud Pod on the LocalStack platform.
Every save to an existing pod adds a new version; this prints each version's number, created date, LocalStack version, and services.
This subcommand is cloud-only and requires authentication.
```bash
lstk snapshot versions pod:my-baseline
```
The required `REF` argument must be a `pod:` Cloud Pod reference.
Only Cloud Pods have versions — local files and `s3://` remotes do not, and passing a version suffix to `versions` is rejected.
Act on a specific version elsewhere by appending it to the ref, e.g. `lstk snapshot load pod:my-baseline:3` or `lstk snapshot show pod:my-baseline:3`.
## S3 remotes
`snapshot save`, `load`, and `list` can target a snapshot stored in your **own S3 bucket** by passing an `s3://bucket/prefix` location.
The pod name (the snapshot's identity within the bucket) is a positional separate from the `s3://` location — required for `load`, auto-generated for `save` when omitted, and unused for `list`.
```bash
lstk snapshot save my-pod s3://my-bucket/prefix
lstk snapshot load my-pod s3://my-bucket/prefix
lstk snapshot list s3://my-bucket/prefix
```
Credentials follow AWS CLI precedence: `--profile ` wins, otherwise the static `AWS_ACCESS_KEY_ID`/`AWS_SECRET_ACCESS_KEY` (plus optional `AWS_SESSION_TOKEN`) environment variables, otherwise the profile named by `AWS_PROFILE`.
Only static credentials are supported (no SSO, assume-role, or `credential_process`), and credentials must never be embedded in the URL.
`lstk` runs a pre-flight check that the target bucket exists and errors out rather than letting the emulator auto-create a bucket on a typo.
Because the transfer is performed by the emulator (not the CLI), S3 remotes require a **running emulator**, and `list s3://…` in particular queries the emulator rather than the platform API.
:::note
`remove` and `show` do not support S3; they operate on Cloud Pods only.
:::
# LocalStack MCP Server
> Use the LocalStack MCP Server to manage your local cloud development environment through AI-powered MCP clients.
import { Tabs, TabItem } from '@astrojs/starlight/components';
## Introduction
The [LocalStack MCP Server](https://github.com/localstack/localstack-mcp-server) is a [Model Context Protocol](https://modelcontextprotocol.io/) (MCP) server that connects MCP-compatible clients to your LocalStack environment.
It enables AI agents to manage the full local cloud development lifecycle: starting containers, deploying infrastructure, analyzing logs, injecting chaos faults, managing state snapshots, and running AWS CLI commands, all through natural language prompts.
## Prerequisites
Before configuring the MCP server, ensure the following are installed and available on your system `PATH`:
- [Node.js](https://nodejs.org/en/download/) (v22.x or later) to run `npx`.
- [Docker](https://docs.docker.com/get-docker/) to manage the LocalStack container.
- A [LocalStack Auth Token](/aws/getting-started/auth-token/) configured as `LOCALSTACK_AUTH_TOKEN`. All MCP server tools require a valid Auth Token.
- [`cdklocal`](https://github.com/localstack/aws-cdk-local), [`tflocal`](https://github.com/localstack/terraform-local), or [`samlocal`](https://github.com/localstack/aws-sam-cli-local) if you plan to use the infrastructure deployment tool. (**optional**)
- [Snowflake CLI](https://docs.snowflake.com/en/developer-guide/snowflake-cli/index) (`snow`) if you plan to use the Snowflake client tool. (**optional**)
:::note
The MCP server currently manages LocalStack via the legacy `localstack` CLI and the `awslocal`, `cdklocal`, `tflocal`, and `samlocal` wrapper scripts. `lstk` support is not yet available for the MCP server.
:::
## Installation
The LocalStack MCP Server is published on npm as [`@localstack/localstack-mcp-server`](https://www.npmjs.com/package/@localstack/localstack-mcp-server).
The recommended approach is to let your MCP client run the server via `npx`, which downloads and caches the package automatically.
:::note
All MCP server tools require `LOCALSTACK_AUTH_TOKEN` to be set.
You must include it in the `env` block of your configuration.
You can get your Auth Token from the [LocalStack Web App](https://app.localstack.cloud).
:::
The quickest way to get started with the MCP server is to use the interactive setup wizard:
```bash
npx -y @localstack/localstack-mcp-server init
```
The wizard detects your installed clients, asks how you want to run the server, and writes the configuration for you. You need a valid [Auth Token](/aws/getting-started/auth-token/) to configure the server.
For manual setup of the MCP server, choose your MCP client below for setup instructions.
Click the button below to install the LocalStack MCP Server in Cursor automatically:
[](https://cursor.com/en/install-mcp?name=localstack-mcp-server&config=eyJjb21tYW5kIjoibnB4IC15IEBsb2NhbHN0YWNrL2xvY2Fsc3RhY2stbWNwLXNlcnZlciJ9)
After installing, open `~/.cursor/mcp.json` and add the `env` block with your Auth Token:
```json
{
"mcpServers": {
"localstack-mcp-server": {
"command": "npx",
"args": ["-y", "@localstack/localstack-mcp-server"],
"env": {
"LOCALSTACK_AUTH_TOKEN": ""
}
}
}
}
```
Restart Cursor after saving.
The server appears in **Cursor Settings > MCP** once detected.
Add the following to your VS Code user settings JSON (`settings.json`) or workspace `.vscode/mcp.json`:
```json
{
"mcp": {
"servers": {
"localstack-mcp-server": {
"command": "npx",
"args": ["-y", "@localstack/localstack-mcp-server"],
"env": {
"LOCALSTACK_AUTH_TOKEN": ""
}
}
}
}
}
```
You can also run the command **MCP: Add Server** from the Command Palette and paste the server command.
MCP support requires the [GitHub Copilot Chat](https://marketplace.visualstudio.com/items?itemName=GitHub.copilot-chat) extension.
Run the following command in your terminal:
```bash
claude mcp add localstack-mcp-server \
-e LOCALSTACK_AUTH_TOKEN= \
-- npx -y @localstack/localstack-mcp-server
```
Claude Code stores this in its project-level configuration and starts the server automatically when you open a conversation.
Add the following to your OpenCode configuration file (`opencode.json`):
```json
{
"mcpServers": {
"localstack-mcp-server": {
"command": "npx",
"args": ["-y", "@localstack/localstack-mcp-server"],
"env": {
"LOCALSTACK_AUTH_TOKEN": ""
}
}
}
}
```
Add the following to your Amazon Q MCP configuration at `~/.aws/amazonq/mcp.json`:
```json
{
"mcpServers": {
"localstack-mcp-server": {
"command": "npx",
"args": ["-y", "@localstack/localstack-mcp-server"],
"env": {
"LOCALSTACK_AUTH_TOKEN": ""
}
}
}
}
```
For any MCP-compatible client, configure a stdio server with:
- **Command:** `npx`
- **Arguments:** `["-y", "@localstack/localstack-mcp-server"]`
- **Environment:** `LOCALSTACK_AUTH_TOKEN` set to your token
If your client uses a JSON configuration file, the entry follows this format:
```json
{
"mcpServers": {
"localstack-mcp-server": {
"command": "npx",
"args": ["-y", "@localstack/localstack-mcp-server"],
"env": {
"LOCALSTACK_AUTH_TOKEN": ""
}
}
}
}
```
Refer to your client's documentation for the exact location of its MCP configuration file.
### Connecting to a custom LocalStack endpoint
By default the MCP server connects to `http://localhost:4566`.
If your LocalStack instance runs on a different host or port, set the following environment variables in the `env` block:
| Variable | Default | Description |
| --------------------- | ----------- | ----------------------------------- |
| `LOCALSTACK_HOSTNAME` | `localhost` | Hostname of the LocalStack instance |
| `LOCALSTACK_PORT` | `4566` | Port of the LocalStack instance |
You can also pass any [LocalStack configuration variable](/aws/customization/configuration-options/) through the `env` block.
These are forwarded to the container when the `localstack-management` tool starts it.
```json
{
"mcpServers": {
"localstack-mcp-server": {
"command": "npx",
"args": ["-y", "@localstack/localstack-mcp-server"],
"env": {
"LOCALSTACK_AUTH_TOKEN": "",
"LOCALSTACK_HOSTNAME": "my-host",
"LOCALSTACK_PORT": "4566"
}
}
}
}
```
## Tools
The MCP server exposes the following tools that your AI agent can call.
Each tool runs pre-flight checks (verifying the CLI is available, the container is running, and the Auth Token is present) and returns structured responses.
### `localstack-management`
Manage the LocalStack runtime lifecycle for both the AWS emulator and the Snowflake emulator.
| Parameter | Type | Required | Description |
| --------- | ------------------------------------------ | -------- | --------------------------------------------- |
| `action` | `start` \| `stop` \| `restart` \| `status` | Yes | The operation to perform |
| `service` | `aws` \| `snowflake` | No | The stack to manage (default: `aws`) |
| `envVars` | `Record` | No | Extra environment variables passed on `start` |
**Example prompts:**
- "Start my LocalStack container."
- "What's the current status of LocalStack?"
- "Start the Snowflake emulator."
### `localstack-deployer`
Deploy or destroy infrastructure on LocalStack using CDK, Terraform, SAM, or CloudFormation.
| Parameter | Type | Required | Description |
| -------------- | --------------------------------------------------------- | --------------------------------------- | -------------------------------------------------------------------------------------------------- |
| `action` | `deploy` \| `destroy` \| `create-stack` \| `delete-stack` | Yes | The deployment operation |
| `projectType` | `cdk` \| `terraform` \| `sam` \| `auto` | No | Framework to use (default: `auto`, detected from project files) |
| `directory` | `string` | Yes (for `deploy`/`destroy`) | Path to the project directory |
| `variables` | `Record` | No | Variables passed as Terraform `-var` flags, CDK `--context` values, or SAM `--parameter-overrides` |
| `stackName` | `string` | Yes (for `create-stack`/`delete-stack`) | CloudFormation/SAM stack name |
| `templatePath` | `string` | No | Path to a CloudFormation/SAM template |
| `s3Bucket` | `string` | No | S3 bucket for SAM deployments (if omitted, SAM uses `--resolve-s3`) |
| `resolveS3` | `boolean` | No | For SAM deployments, whether to use `--resolve-s3` when no `s3Bucket` is provided |
| `saveParams` | `boolean` | No | For SAM deployments, whether to persist resolved parameters to `samconfig.toml` |
**Example prompts:**
- "Deploy my CDK project in the `infra/` directory on LocalStack."
- "Destroy the Terraform deployment in `./terraform`."
- "Deploy my SAM application in `./sam-app`."
- "Create a CloudFormation stack named `my-stack` from `template.yaml`."
:::note
The `deploy` and `destroy` actions require [`cdklocal`](https://github.com/localstack/aws-cdk-local), [`tflocal`](https://github.com/localstack/terraform-local), or [`samlocal`](https://github.com/localstack/aws-sam-cli-local) to be installed on your system `PATH`, depending on the project type.
The `create-stack` and `delete-stack` actions run `awslocal` inside the LocalStack container and require the container to be running.
:::
### `localstack-logs-analysis`
Analyze LocalStack logs to find errors, summarize API activity, or inspect raw output.
| Parameter | Type | Required | Description |
| -------------- | --------------------------------------------- | -------- | ---------------------------------------------------------------- |
| `analysisType` | `summary` \| `errors` \| `requests` \| `logs` | No | Type of analysis (default: `summary`) |
| `lines` | `number` | No | Number of log lines to fetch (default: `2000`) |
| `service` | `string` | No | Filter by AWS service name |
| `operation` | `string` | No | Filter by API operation (used with `service` in `requests` mode) |
| `filter` | `string` | No | Keyword filter (used with `logs` mode only) |
**Example prompts:**
- "Analyze LocalStack logs for any errors."
- "Show me the S3 API requests from the last 500 log lines."
- "Get the raw LocalStack logs filtered by 'lambda'."
### `localstack-iam-policy-analyzer`
Configure IAM enforcement and generate IAM policies from access denials in the logs.
| Parameter | Type | Required | Description |
| --------- | ------------------------------------------------ | -------------------- | ------------------------ |
| `action` | `set-mode` \| `analyze-policies` \| `get-status` | Yes | The operation to perform |
| `mode` | `ENFORCED` \| `SOFT_MODE` \| `DISABLED` | Yes (for `set-mode`) | IAM enforcement level |
**Example prompts:**
- "Enable IAM enforcement in soft mode on LocalStack."
- "Analyze the logs for IAM policy violations and generate the required policies."
- "What's the current IAM enforcement status?"
### `localstack-chaos-injector`
Inject faults and network latency into LocalStack services to test application resilience.
| Parameter | Type | Required | Description |
| ------------ | -------------------------------------------------------------------------------------------------------------------------------------------------------- | ---------------------------------------------------------------- | ---------------------------------------------- |
| `action` | `inject-faults` \| `add-fault-rule` \| `remove-fault-rule` \| `get-faults` \| `clear-all-faults` \| `inject-latency` \| `get-latency` \| `clear-latency` | Yes | The chaos operation |
| `rules` | `Array` | Yes (for `inject-faults`, `add-fault-rule`, `remove-fault-rule`) | Fault rules to inject/modify |
| `latency_ms` | `number` | Yes (for `inject-latency`) | Latency in milliseconds to add to all requests |
Each **fault rule** can include:
| Field | Type | Description |
| ------------- | ---------------------------------------- | ----------------------------------------- |
| `service` | `string` | Target AWS service (e.g., `s3`, `lambda`) |
| `region` | `string` | Target region (e.g., `us-east-1`) |
| `operation` | `string` | Target API operation (e.g., `PutObject`) |
| `probability` | `number` (0-1) | Probability of the fault triggering |
| `error` | `{ statusCode?: number, code?: string }` | Error response to return |
**Example prompts:**
- "Inject a 500 error for all Lambda Invoke calls in us-east-1 with 100% probability."
- "Add 2000ms of network latency to all LocalStack requests."
- "Clear all chaos faults."
### `localstack-cloud-pods`
Save, load, and manage LocalStack state snapshots using [Cloud Pods](/aws/developer-tools/snapshots/cloud-pods/).
| Parameter | Type | Required | Description |
| ---------- | --------------------------------------- | -------------------------------- | ------------------------------------------------------------------------------------ |
| `action` | `save` \| `load` \| `delete` \| `reset` | Yes | The state management operation |
| `pod_name` | `string` | Yes (for `save`/`load`/`delete`) | Name of the Cloud Pod (alphanumeric, dots, hyphens, underscores; max 128 characters) |
**Example prompts:**
- "Save the current LocalStack state as a Cloud Pod named `my-app-state`."
- "Load the Cloud Pod `my-app-state`."
- "Reset the LocalStack state completely."
### `localstack-aws-client`
Execute AWS CLI commands inside the running LocalStack container via `awslocal`.
| Parameter | Type | Required | Description |
| --------- | -------- | -------- | ------------------------------------------------------------------- |
| `command` | `string` | Yes | The AWS CLI command to run (without the `aws` or `awslocal` prefix) |
**Example prompts:**
- "List all S3 buckets in LocalStack."
- "Describe my Lambda functions."
- "Query the DynamoDB table `users` for all items."
The tool sanitizes input to prevent shell injection (pipes, redirects, and command chaining are blocked).
If a command fails due to a service not being emulated, the tool returns a link to the relevant [service coverage documentation](/aws/services/).
### `localstack-extensions`
Install, uninstall, list, and discover [LocalStack Extensions](/aws/customization/integrations/extensions/) from the marketplace.
| Parameter | Type | Required | Description |
| --------- | ------------------------------------------------- | ------------------------------- | ------------------------------------------------------------ |
| `action` | `list` \| `install` \| `uninstall` \| `available` | Yes | The extensions operation |
| `name` | `string` | Yes (for `install`/`uninstall`) | Extension package name (e.g., `localstack-extension-typedb`) |
| `source` | `string` | No | Git URL to install from (alternative to `name`) |
**Example prompts:**
- "List my installed LocalStack extensions."
- "Browse the available extensions in the marketplace."
- "Install the `localstack-extension-typedb` extension."
- "Uninstall the `localstack-extension-stripe` extension."
:::note
After installing or uninstalling an extension, the tool automatically restarts LocalStack to apply the changes.
:::
### `localstack-ephemeral-instances`
Manage cloud-hosted [Ephemeral Instances](/aws/developer-tools/cloud-sandbox/ephemeral-instances/) for remote LocalStack testing workflows.
| Parameter | Type | Required | Description |
| ----------- | ---------------------------------------- | ---------------------------------- | ---------------------------------------------------------------- |
| `action` | `create` \| `list` \| `logs` \| `delete` | Yes | The ephemeral instance operation |
| `name` | `string` | Yes (for `create`/`logs`/`delete`) | Instance name |
| `lifetime` | `number` | No | Lifetime in minutes for the instance (only for `create`) |
| `extension` | `string` | No | Extension package to preload on the instance (only for `create`) |
| `cloudPod` | `string` | No | Cloud Pod name to initialize state from (only for `create`) |
| `envVars` | `Record` | No | Extra environment variables for the instance (only for `create`) |
**Example prompts:**
- "Create an ephemeral LocalStack instance named `test-env` with a 60-minute lifetime."
- "List all my ephemeral instances."
- "Get the logs from the `test-env` ephemeral instance."
- "Delete the ephemeral instance named `test-env`."
### `localstack-docs`
Search the LocalStack documentation to find guides, API references, and configuration details.
| Parameter | Type | Required | Description |
| --------- | -------- | -------- | ------------------------------------------------------------- |
| `query` | `string` | Yes | The search query |
| `limit` | `number` | No | Maximum number of results to return (default: `5`, max: `10`) |
**Example prompts:**
- "Search the LocalStack docs for how to configure S3."
- "Find the LocalStack documentation on Cloud Pods."
### `localstack-snowflake-client`
Execute SQL queries and commands against the [LocalStack Snowflake emulator](/snowflake/) using the Snowflake CLI (`snow`).
| Parameter | Type | Required | Description |
| ----------- | ------------------------------- | ------------------------------------------------ | ----------------------------------------- |
| `action` | `execute` \| `check-connection` | Yes | The operation to perform |
| `query` | `string` | Yes (for `execute`, if `file_path` not provided) | SQL query to execute |
| `file_path` | `string` | Yes (for `execute`, if `query` not provided) | Absolute path to a `.sql` file to execute |
| `database` | `string` | No | Snowflake database context |
| `schema` | `string` | No | Snowflake schema context |
| `warehouse` | `string` | No | Snowflake warehouse to use |
| `role` | `string` | No | Snowflake role to use |
**Example prompts:**
- "Check the connection to the LocalStack Snowflake emulator."
- "Run `SELECT * FROM my_table` on the Snowflake emulator."
- "Execute the SQL file at `/path/to/setup.sql` on Snowflake."
:::note
This tool requires the [Snowflake CLI](https://docs.snowflake.com/en/developer-guide/snowflake-cli/index) (`snow`) to be installed on your system `PATH`.
The tool automatically configures a `localstack` connection profile pointing to the Snowflake emulator.
:::
## Quickstart
Once your MCP client is configured, verify the setup by opening a conversation with your AI agent.
**1. Start LocalStack**
> _"Start my LocalStack container."_
The agent uses the `localstack-management` tool to start the container and confirms the status.
**2. Deploy infrastructure**
> _"Deploy my CDK project in the `./my-app` directory."_
The agent detects the framework, runs `cdklocal bootstrap` and `cdklocal deploy`, and returns the stack outputs.
**3. Verify resources**
> _"List the Lambda functions and DynamoDB tables that were created."_
The agent runs `awslocal` commands inside the container and returns the results.
**4. Analyze logs**
> _"Check the LocalStack logs for any errors."_
The agent fetches recent logs and highlights any errors or warnings.
**5. Save state**
> _"Save a Cloud Pod named `my-checkpoint`."_
The agent persists the current LocalStack state so you can restore it later.
## Configuration reference
The following environment variables can be set in the `env` block of your MCP configuration:
| Variable | Default | Description |
| -------------------------------------- | ----------------- | -------------------------------------------------------------- |
| `LOCALSTACK_AUTH_TOKEN` (**required**) | None | Your LocalStack Auth Token. Required for all MCP server tools. |
| `LOCALSTACK_HOSTNAME` | `localhost` | Hostname of the LocalStack instance |
| `LOCALSTACK_PORT` | `4566` | Port of the LocalStack instance |
| `MAIN_CONTAINER_NAME` | `localstack-main` | Name of the LocalStack Docker container |
| `MCP_ANALYTICS_DISABLED` | `0` | Set to `1` to disable MCP analytics |
Any [LocalStack configuration variable](/aws/customization/configuration-options/) can also be passed through the `env` block.
These are forwarded to the container when the `localstack-management` tool starts it.
For example, to enable debug logging and persistence:
```json
{
"mcpServers": {
"localstack-mcp-server": {
"command": "npx",
"args": ["-y", "@localstack/localstack-mcp-server"],
"env": {
"LOCALSTACK_AUTH_TOKEN": "",
"DEBUG": "1",
"PERSISTENCE": "1"
}
}
}
}
```
## Troubleshooting
### LocalStack container fails to start
**Symptoms:** The `localstack-management` tool reports a timeout after 120 seconds.
**Solutions:**
- Ensure Docker is running on your machine.
- Verify the LocalStack CLI is installed and on your `PATH` by running `localstack --version`.
- Check Docker resource limits. LocalStack needs at least 2 GB of memory.
- If you are using a custom `LOCALSTACK_HOSTNAME`, ensure the host is reachable.
### MCP server not detected by the client
**Symptoms:** The server does not appear in your client's MCP server list.
**Solutions:**
- Verify Node.js (v22+) is installed by running `node --version`.
- Run `npx -y @localstack/localstack-mcp-server` manually in a terminal to check for errors.
- Ensure the JSON in your MCP configuration file is valid (no trailing commas, correct key names).
- Restart your MCP client after saving configuration changes.
### Tools return "Auth Token Required"
**Symptoms:** Any tool call fails with an "Auth Token Required" error.
**Solutions:**
- Confirm your `LOCALSTACK_AUTH_TOKEN` is set in the `env` block of your MCP configuration.
- Verify the token is valid by running `localstack auth show-token`.
- Ensure there are no extra spaces or quotes around the token value in your configuration file.
# Overview
> Security Testing in LocalStack allows you to test your IAM policies and permissions locally resembling the AWS environment.
Security Testing in LocalStack allows you to enforce and validate IAM policies in a local environment that closely mirrors real AWS behavior. This helps you catch misconfigurations, uncover missing permissions, and confidently test access control logic.
LocalStack supports the following security testing features:
- Enforce IAM policies to simulate realistic permission boundaries in your application
- Retrieve Policy engine logs for debugging and understanding how policies are evaluated
- Apply IAM policy streams to discover required permissions and resolve access issues efficiently
- Simulate IAM policies, including Service Control Policies, to check access decisions before making live requests
# Custom TLS certificates
> Using custom TLS certificates with LocalStack
import { Tabs, TabItem } from '@astrojs/starlight/components';
## Background
LocalStack sometimes performs on-demand fetching of resources from the public internet.
This requires that LocalStack is able to access public URLs.
If there is a proxy server in your network that uses a non-standard TLS certificate, LocalStack will not be able to download any files on demand.
You may see errors in the logs relating to TLS such as "unable to get local issuer certificate".
There are two options when running LocalStack:
1. [creating a custom Docker image](#creating-a-custom-docker-image) or
2. [using init hooks](#custom-tls-certificates-with-init-hooks)
They all can be summarised as:
1. get your proxy's custom certificate into the system certificate store, and
2. configure [`requests`](https://pypi.python.org/pypi/requests) to use the custom certificate,
3. configure [`curl`](https://curl.se/) to use the custom certificate, and
4. configure [`node.js`](https://nodejs.org/) to use the custom certificate.
## Creating a custom docker image
If you run LocalStack in a docker container (which includes using [`lstk`](/aws/developer-tools/running-localstack/lstk/), [docker](/aws/getting-started/installation/#docker-cli), [docker-compose](/aws/getting-started/installation/#docker-compose), or [helm](/aws/customization/kubernetes/deploy-helm-chart)), to include a custom TLS root certificate a new docker image should be created.
Create a `Dockerfile` containing the following commands:
```yaml showshowLineNumbers
FROM localstack/localstack:latest
# or if using the pro image:
FROM localstack/localstack-pro:latest
COPY /usr/local/share/ca-certificates/cert-bundle.crt
RUN update-ca-certificates
ENV CURL_CA_BUNDLE=/etc/ssl/certs/ca-certificates.crt
ENV REQUESTS_CA_BUNDLE=/etc/ssl/certs/ca-certificates.crt
ENV NODE_EXTRA_CA_CERTS=/etc/ssl/certs/ca-certificates.crt
```
and build the image:
```bash
docker build -t .
```
:::tip
Certificate files must end in `.crt` to be included in the system certificate store.
If your certificate file ends with `.pem`, you can rename it to end in `.crt`.
:::
### Starting LocalStack with the custom image
LocalStack now needs to be configured to use this custom image.
The workflow is different depending on how you start localstack.
```toml
# .lstk/config.toml
[[containers]]
type = "aws"
image = ""
```
```bash
lstk start
```
```bash
docker run
```
```yaml showshowLineNumbers
services:
localstack:
image:
# the rest of your configuration
```
## Custom TLS certificates with init hooks
It is recommended to create a `boot` init hook.
Create a directory on your local system that includes
- the certificate you wish to copy, and
- the following shell script:
```bash
#!/bin/bash
set -euo pipefail
cp /etc/localstack/init/boot.d/.crt /usr/local/share/ca-certificates
update-ca-certificates
```
Then run LocalStack with the environment variables
- `REQUESTS_CA_BUNDLE=/etc/ssl/certs/ca-certificates.crt`, and
- `CURL_CA_BUNDLE=/etc/ssl/certs/ca-certificates.crt`, and
- `NODE_EXTRA_CA_CERTS=/etc/ssl/certs/ca-certificates.crt`
and follow the instructions fn the [init hooks documentation](/aws/customization/advanced/initialization-hooks) for configuring LocalStack to use the hook directory as a `boot` hook.
## Disabling TLS verification for LocalStack Cloud
If your proxy intercepts traffic to LocalStack cloud services (e.g., license server), you can disable TLS verification for these specific requests using the `SSL_NO_VERIFY` [configuration variable](/aws/customization/configuration-options#security) (or `LOCALSTACK_SSL_NO_VERIFY` in Docker).
```toml
# .lstk/config.toml
[[containers]]
type = "aws"
env = ["tls"]
[env.tls]
SSL_NO_VERIFY = "1"
```
```bash
lstk start
```
:::caution
This approach disables certificate verification rather than trusting your proxy's certificate.
Use custom certificates (as described above) when you need to maintain proper TLS verification for all traffic.
:::
# Explainable IAM
> Discover IAM Policy Engine logs related to failed policy evaluation.
## Introduction
When IAM enforcement denies a request, the IAM Policy Engine returns a descriptive denial message in the API response and records the same information in the LocalStack logs.
These messages identify the action that was denied, the policy type responsible (identity-based policy, resource-based policy, permissions boundary, or service control policy), the specific policy document involved, and whether the denial was explicit or implicit.
This helps you pinpoint the additional policies required for your request to succeed.
Enable `DEBUG=1` to surface the full log output.
## Getting started
This guide is designed for users new to Explainable IAM and assumes basic knowledge of the AWS CLI and our [`lstk aws` AWS CLI proxy](/aws/developer-tools/running-localstack/lstk/cloud-and-iac-commands/#aws).
Start your LocalStack container with the `DEBUG=1` and `ENFORCE_IAM=1` environment variables set:
```toml
# .lstk/config.toml
[[containers]]
type = "aws"
env = ["iam-enforcement"]
[env.iam-enforcement]
DEBUG = "1"
ENFORCE_IAM = "1"
```
```bash
lstk start
```
In this guide, we will create a policy for creating Lambda functions by only allowing the `lambda:CreateFunction` permission.
However we have not included the `iam:PassRole` permission, and we will use the Policy Engine's log to point out adding the necessary permission.
### Create a new user
Create a policy document named `policy_1.json` and add the following content:
```json showshowLineNumbers
{
"Version": "2012-10-17",
"Statement": [
{
"Sid": "FirstStatement",
"Effect": "Allow",
"Action": "lambda:CreateFunction",
"Resource": "*"
}
]
}
```
You can now create a new user named `test-user`, and put the policy in place by executing the following commands:
```bash
lstk aws iam create-user --user-name test-user
```
```bash
{
"User": {
"Path": "/",
"UserName": "test-user",
"UserId": "x8a2eu4mc91yqtjazvhp",
"Arn": "arn:aws:iam::000000000000:user/test-user",
"CreateDate": "2022-07-05T16:08:25.741000+00:00"
}
}
```
```bash
lstk aws iam put-user-policy --user-name test-user --policy-name policy1 --policy-document file://policy_1.json
```
You can further create an access key for the user by executing the following command:
```bash
lstk aws iam create-access-key --user-name test-user
```
Export the access key and secret key as environment variables:
```bash
export AWS_ACCESS_KEY_ID=...
export AWS_SECRET_ACCESS_KEY=...
```
### Attempt to create a Lambda function
You can now attempt to create a Lambda function using the newly created user's credentials:
```bash
lstk aws lambda create-function \
--function-name test-function \
--role arn:aws:iam::000000000000:role/lambda-role \
--runtime python3.8 \
--handler handler.handler \
--zip-file fileb://function.zip
```
The request is denied, and the error response names the exact action that was missing:
```bash
An error occurred (AccessDeniedException) when calling the CreateFunction operation: User: arn:aws:iam::000000000000:user/test-user is not authorized to perform: iam:PassRole on resource: arn:aws:iam::000000000000:role/lambda-role because no identity-based policy allows the iam:PassRole action
```
The same information is written to the LocalStack logs.
Inspect the logs to see the corresponding Policy Engine entry:
```bash
2026-06-23T15:48:09.650 INFO --- [PoolThread-twisted.internet.reactor-2] localstack.pro.core.services.iam.policy_engine.handler : User: arn:aws:iam::000000000000:user/test-user is not authorized to perform: iam:PassRole on resource: arn:aws:iam::000000000000:role/lambda-role because no identity-based policy allows the iam:PassRole action
```
The message tells you that `iam:PassRole` is *implicitly* denied for your user on the resource `arn:aws:iam::000000000000:role/lambda-role`.
This means there is no explicit deny statement in the relevant policies, but there is also no allow statement, so the action is denied by default.
You can incorporate this action into the policy.
### Incorporate the action into the policy
For illustrative purposes, we will keep the example straightforward, using the same wildcard resource.
Edit the `policy_1.json` file to include the `iam:PassRole` action:
```json showshowLineNumbers
{
"Version": "2012-10-17",
"Statement": [
{
"Sid": "FirstStatement",
"Effect": "Allow",
"Action": ["lambda:CreateFunction", "iam:PassRole"],
"Resource": "*"
}
]
}
```
Re-run the Lambda [`CreateFunction`](https://docs.aws.amazon.com/lambda/latest/dg/API_CreateFunction.html) API.
You will notice that the request is now successful, and the function is created.
## Reading denial messages
Every denial message follows the same structure: the **principal** that made the request, the **action** it attempted, the **resource** it targeted, and the **cause** of the denial.
The cause tells you both the policy type and whether the denial was explicit or implicit:
- An **explicit deny** names the policy type and the specific policy document, for example `with an explicit deny in a service control policy: arn:aws:organizations::000000000000:policy/p-abc123`.
- An **implicit deny** indicates that no policy allowed the action, for example `because no identity-based policy allows the s3:ListBucket action`.
The Policy Engine evaluates identity-based policies, resource-based policies, permissions boundaries, and service control policies, and the denial message identifies whichever one is responsible.
### Inline policies
The logs go one step further for inline policies.
On AWS, inline policies are reported anonymously, which makes denials caused by them difficult to trace.
LocalStack instead names the specific inline policy responsible for the denial:
```bash
2026-06-23T15:57:15.197 INFO --- [PoolThread-twisted.internet.reactor-2] localstack.pro.core.services.iam.policy_engine.handler : User: arn:aws:sts::000000000000:assumed-role/role-881f9fff/TestSession is not authorized to perform: kms:DescribeKey on resource: arn:aws:kms:us-east-1:000000000000:key/ad764663-5e3d-4325-81de-c7e0964f7b7f with an explicit deny in a role inline policy: policy-fc33c780
```
Here, the request was blocked by an explicit deny in the inline policy `policy-fc33c780` attached to the assumed role, letting you go straight to the policy that needs changing.
## Soft Mode
Enabling `IAM_SOFT_MODE=1` allows you to review the logs and assess whether your requests would have been denied or granted while executing your entire stack without disruptions.
Using this, you can avoid the need for redeployment to address each missing permission individually, streamlining the debugging process and enhancing the efficiency of your IAM configurations.
# IAM Coverage
> This page lists the IAM Enforcement Feature Coverage for LocalStack's emulation of AWS services.
## Supported Services
In principle, LocalStack supports all operations.
However, not all services and their operations have been tested yet.
The table below lists all IAM services and operations that have been tested, noting if they were ever denied or allowed during testing.
It only includes operations performed with a principal, not as root, so test setups are excluded.
|Name |operation |Access denied|Access allowed|
|--------------|----------------------------|-------------|--------------|
|acm |ListCertificates |Yes |Yes |
|apigateway |DeleteRestApi |No |Yes |
|apigateway |CreateRestApi |Yes |Yes |
|backup |DescribeBackupVault |Yes |Yes |
|batch |CreateComputeEnvironment |No |Yes |
|cloudformation|ListStacks |Yes |Yes |
|cloudwatch |PutMetricData |Yes |Yes |
|dynamodb |DescribeTable |No |Yes |
|dynamodb |CreateTable |Yes |Yes |
|dynamodb |DeleteTable |No |Yes |
|ecr |DescribeImages |Yes |No |
|efs |DescribeFileSystems |Yes |Yes |
|es |DescribeElasticsearchDomains|Yes |Yes |
|events |DeleteEventBus |No |Yes |
|events |PutEvents |Yes |Yes |
|events |CreateEventBus |Yes |Yes |
|kinesis |CreateStream |Yes |Yes |
|kinesis |DeleteStream |No |Yes |
|kms |CreateKey |Yes |Yes |
|kms |DescribeKey |Yes |Yes |
|lambda |DeleteFunction |No |Yes |
|lambda |Invoke |Yes |Yes |
|lambda |GetLayerVersion |Yes |Yes |
|lambda |CreateFunction |Yes |Yes |
|logs |CreateLogGroup |Yes |Yes |
|logs |PutLogEvents |No |Yes |
|logs |CreateLogStream |No |Yes |
|logs |DeleteLogGroup |No |Yes |
|redshift |DescribeClusters |Yes |Yes |
|redshift-data |ListDatabases |Yes |Yes |
|s3 |UploadPart |No |Yes |
|s3 |GetObject |Yes |Yes |
|s3 |DeleteBucket |No |Yes |
|s3 |CreateBucket |Yes |Yes |
|s3 |ListBuckets |Yes |Yes |
|s3 |CreateMultipartUpload |Yes |Yes |
|s3 |CompleteMultipartUpload |No |Yes |
|s3 |DeleteObject |No |Yes |
|s3 |ListObjects |Yes |Yes |
|s3 |PutObject |Yes |Yes |
|secretsmanager|CreateSecret |Yes |Yes |
|secretsmanager|GetSecretValue |Yes |Yes |
|secretsmanager|DeleteSecret |No |Yes |
|sns |Publish |No |Yes |
|sqs |GetQueueAttributes |Yes |No |
|sqs |CreateQueue |Yes |Yes |
|sqs |SendMessage |Yes |Yes |
|sqs |ReceiveMessage |Yes |Yes |
|sqs |DeleteQueue |No |Yes |
|stepfunctions |DeleteStateMachine |No |Yes |
|stepfunctions |CreateStateMachine |Yes |Yes |
|sts |GetCallerIdentity |No |Yes |
## Inter Service Enforcement
|Source Service|Target Service|Feature |Operation |Implemented|Tested|
|--------------|--------------|-----------------------|------------------------------------------------------------|-----------|------|
|sns |sqs |SNS subscription |sqs.SendMessage |Yes |Yes |
|sns |lambda |SNS subscription |lambda.Invoke |Yes |Yes |
|lambda |sqs |Event destinations |sqs.SendMessage |Yes |Yes |
|lambda |logs |Storing Lambda logs |logs.CreateLogGroup, logs.CreateLogStream, logs.PutLogEvents|Yes |No |
|lambda |sns |Event destinations |sns.Publish |Yes |No |
|lambda |sqs |Event source mapping | |Yes |Yes |
|lambda |kinesis |Event source mapping | |Yes |Yes |
|lambda |dynamodb |Event source mapping | |Yes |Yes |
|lambda |kafka |Event source mapping | |No |No |
|events |lambda |Event rule target | |Yes |Yes |
|sns |ses |SNS subscription | |Yes |Yes |
|sns |firehose |SNS subscription | |Yes |Yes |
|events |sns |Event rule target | |Yes |Yes |
|events |sqs |Event rule target | |Yes |Yes |
|events |logs |Event rule target | |Yes |Yes |
|events |firehose |Event rule target | |Yes |Yes |
|events |events |Event rule target | |Yes |Yes |
|events |kinesis |Event rule target | |Yes |Yes |
|events |stepfunctions |Event rule target | |Yes |Yes |
|apigateway |lambda |API integration | |Yes |Yes |
|apigateway |dynamodb |API integration | |Yes |Yes |
|apigateway |kinesis |API integration | |Yes |Yes |
|apigateway |s3 |API integration | |No |No |
|apigateway |sns |API integration | |No |Yes |
|apigateway |sqs |API integration | |Yes |Yes |
|apigateway |stepfunctions |API integration | |No |No |
|apigateway |appsync |API integration | |No |No |
|cloudformation|* |Resource Modification | |No |No |
|lambda |sts |Assuming execution role| |Yes |Yes |
|s3 |sqs |Bucket notification | |Yes |Yes |
|s3 |sns |Bucket notification | |Yes |Yes |
## Supported Policy Types
| Permission Type | Details |
|-----------------------------|-----------------------------------------------------|
| **Identity Based Permissions** | |
| | - Roles |
| | - Users |
| **Resource Based Permissions** | |
| | - Lambda |
| | - ECR (Elastic Container Registry) |
| | - EFS (Elastic File System) |
| | - SQS (Simple Queue Service) |
| | - SNS (Simple Notification Service) |
| | - KMS (Key Management Service) |
| | - S3 (Simple Storage Service) |
| | - Backup |
| | - Events |
| | - Secrets Manager |
| | - IAM/STS (Identity and Access Management/Security Token Service) |
| **Permission Boundaries** | |
| | - Roles |
| | - Users |
| **Service Control Policies (SCPs)** | |
| | - Enforced across the organization hierarchy (root, OU, account) |
| | - Enforced for cross-account access |
| | - Evaluated by the IAM Policy Simulator |
## Supported Policy Features
| Category | Description |
|----------------|--------------------------------------------------------------------------------------|
| **Version** | Not evaluated, but only `"2012-10-17"` supported/tested. |
| **Id** | The policy ID is currently ignored. |
| **Statements** | Supported with the following policy elements: |
| **Effect** | Fully supported. Allow + Deny |
| **Sid** | Currently ignored |
| **Action, NotAction** | Supported including placeholder `*` |
| **Principal, NotPrincipal** | Supported principals: |
| | - Service |
| | - (Assumed) role (ARN only) |
| | - User (ARN only) |
| | Organizations, Federated, CanonicalUsers etc. are currently _not_ supported |
| **Resource, NotResource** | In general supported, including placeholders `*` and `?`. |
| | No support for policy variables |
| **Condition** | Supported condition operators: |
| | - Null |
| | - Bool |
| | - StringEquals |
| | - StringEqualsIgnoreCase |
| | - StringLike |
| | - ArnLike/ArnEquals |
| | Supported [global condition keys](https://docs.aws.amazon.com/IAM/latest/UserGuide/reference_policies_condition-keys.html): |
| | - aws:RequestedRegion |
| | - aws:PrincipalArn |
| | - aws:SourceArn |
| | Supported condition tags: |
| | - aws:ResourceTag |
| | - aws:RequestTag |
| | - aws:PrincipalTag |
## Service-Specific Condition Keys
In addition to the global condition keys above, some services support their own condition keys, matching AWS's [per-service condition key reference](https://docs.aws.amazon.com/service-authorization/latest/reference/reference_policies_actions-resources-contextkeys.html):
- [EC2](/aws/services/ec2/#iam-condition-keys): `ec2:MetadataHttpTokens`, `ec2:Attribute/`
- [RAM](/aws/services/ram/#iam-condition-keys): `ram:RequestedAllowsExternalPrincipals`
## Current Limitations
- CloudFormation stack permissions do not work as expected.
# IAM Policy Enforcement
> Enforce IAM policies in LocalStack to test your policies.
## Introduction
IAM Policy Enforcement feature can be used to test your security policies and create a more realistic environment that more closely resembles real AWS.
The environment configuration `ENFORCE_IAM=1` is required while starting LocalStack to enable this feature.
Per default, IAM enforcement is disabled, and all APIs can be accessed without authentication.
When enabled, LocalStack evaluates identity-based policies, resource-based policies, permissions boundaries, and [service control policies](#service-control-policies) together to decide whether a request is allowed.
When a request is denied, LocalStack returns a descriptive error that identifies the denied action and the policy responsible for the denial.
See [Explainable IAM](/aws/developer-tools/security-testing/explainable-iam/) for a detailed look at these messages.
## Getting started
This guide is designed for users new to IAM Policy Enforcement and assumes basic knowledge of the AWS CLI and our `lstk aws` AWS CLI proxy.
Start your LocalStack container with the `DEBUG=1` and `ENFORCE_IAM=1` environment variables set:
```toml
# .lstk/config.toml
[[containers]]
type = "aws"
env = ["iam-enforcement"]
[env.iam-enforcement]
DEBUG = "1"
ENFORCE_IAM = "1"
```
```bash
lstk start
```
We will demonstrate IAM Policy Enforcement, by creating a user and obtaining the access/secret keys.
We will make an attempt to create a bucket using the user’s credentials, which inevitably fails due to insufficient permissions.
Lastly, a policy is attached to the user, granting the necessary `s3:CreateBucket` permission, thereby enabling the successful creation of the bucket.
### Create a user
To follow this guide, open two separate terminal sessions: **Terminal 1** for the administrative IAM commands, which will utilize the default root IAM user, and **Terminal 2** for executing the commands under the test IAM user you are about to create.
This way, we can demonstrate the differentiation in access permissions between the administrative and test users in real-time.
In **Terminal 1**, execute the following commands to create a `test` user and obtain the access/secret keys:
```bash
lstk aws iam create-user --user-name test
```
```bash
{
"User": {
"Path": "/",
"UserName": "test",
"UserId": "d7ryukg7bls4rq1ihq1d",
"Arn": "arn:aws:iam::000000000000:user/test",
"CreateDate": "2023-11-03T12:20:12.332000Z"
}
}
```
```bash
lstk aws iam create-access-key --user-name test
```
```bash
{
"AccessKey": {
"UserName": "test",
"AccessKeyId": "LKIAQAAAAAAAHFR7QTN3",
"Status": "Active",
"SecretAccessKey": "EYUHpIol7bRJpKd/28c/LI2C4bbEnp82LJCRwXRV",
"CreateDate": "2023-11-03T12:20:27Z"
}
}
```
### Attempt to create a bucket
Navigate to **Terminal 2**, where we will configure the access keys for the user `test` in the environment.
Once the access keys are set, you will attempt to create an S3 bucket using these credentials.
```bash
export AWS_ACCESS_KEY_ID=LKIAQAAAAAAAHFR7QTN3 AWS_SECRET_ACCESS_KEY=EYUHpIol7bRJpKd/28c/LI2C4bbEnp82LJCRwXRV
lstk aws s3 mb s3://mybucket
```
```bash
make_bucket failed: s3://mybucket An error occurred (AccessDeniedException) when calling the CreateBucket operation: User: arn:aws:iam::000000000000:user/test is not authorized to perform: s3:CreateBucket on resource: arn:aws:s3:::mybucket because no identity-based policy allows the s3:CreateBucket action
```
As anticipated, the attempt to create the bucket fails with an `AccessDeniedException` error, confirming that user `test` lacks the necessary permissions for this action.
The error message names the denied action (`s3:CreateBucket`) and explains that no identity-based policy allows it.
You can view the LocalStack logs to validate the policy enforcement:
```bash
2023-11-03T12:21:10.971 INFO --- [ asgi_gw_1] localstack.pro.core.services.iam.policy_engine.handler : User: arn:aws:iam::000000000000:user/test is not authorized to perform: s3:CreateBucket on resource: arn:aws:s3:::mybucket because no identity-based policy allows the s3:CreateBucket action
2023-11-03T12:21:10.972 INFO --- [ asgi_gw_1] localstack.request.aws : AWS s3.CreateBucket => 403 (AccessDenied)
```
### Attach a policy to the user
Let's now return to **Terminal 1** and execute the following commands to attach a policy to the user `test`:
```bash
lstk aws iam create-policy --policy-name p1 --policy-document '{"Version":"2012-10-17","Statement":[{"Effect":"Allow","Action":"s3:CreateBucket","Resource":"*"}]}'
lstk aws iam attach-user-policy --user-name test --policy-arn arn:aws:iam::000000000000:policy/p1
```
### Create a bucket
Now, let's switch back to **Terminal 2** and observe how the bucket creation succeeds with the `test` IAM user:
```bash
lstk aws s3 mb s3://mybucket
```
```bash
make_bucket: mybucket
```
The bucket creation succeeds, confirming that the user `test` now has the necessary permissions to perform this action.
You can view the LocalStack logs to validate the policy enforcement:
```bash
2023-11-03T12:23:11.469 INFO --- [ asgi_gw_1] localstack.request.aws : AWS iam.CreatePolicy => 200
2023-11-03T12:23:15.753 INFO --- [ asgi_gw_1] localstack.request.aws : AWS iam.AttachUserPolicy => 200
2023-11-03T12:23:22.795 INFO --- [ asgi_gw_2] localstack.request.aws : AWS s3.CreateBucket => 200
```
You can further use the IAM Policy Enforcement feature to test your Infrastructure as Code (IaC) deployments and ensure that your policies are correctly enforced.
If the IAM policies are not correctly enforced, you will get an unsuccessful response from the API call, and the LocalStack logs will provide you with the necessary information to debug the issue.
## Service Control Policies
Service Control Policies (SCPs) are a policy type managed by [AWS Organizations](https://docs.aws.amazon.com/organizations/latest/userguide/orgs_manage_policies_scps.html).
Unlike identity-based and resource-based policies, SCPs do not grant permissions on their own — they act as guardrails that define the maximum permissions available to the accounts they apply to.
If an SCP does not allow an action (or explicitly denies it), no `Allow` in an identity-based policy can override that result.
With `ENFORCE_IAM=1`, LocalStack evaluates SCPs alongside identity-based policies, resource-based policies, and permissions boundaries.
This applies both to single-account access and to cross-account access, where a principal in one account acts on a resource owned by another.
The steps below extend the walkthrough above: user `test` already has an identity-based policy that allows `s3:CreateBucket`.
We will add an SCP that denies the action and confirm that the request is blocked despite the identity-based `Allow`.
In **Terminal 1**, create an organization and a service control policy that denies `s3:CreateBucket`:
```bash
awslocal organizations create-organization --feature-set ALL
```
```bash
awslocal organizations create-policy \
--name deny-create-bucket \
--type SERVICE_CONTROL_POLICY \
--description "Deny S3 bucket creation" \
--content '{"Version":"2012-10-17","Statement":[{"Effect":"Deny","Action":"s3:CreateBucket","Resource":"*"}]}'
```
Attach the SCP to the target account:
```bash
awslocal organizations attach-policy \
--policy-id \
--target-id
```
Back in **Terminal 2**, attempt to create the bucket again as user `test`:
```bash
awslocal s3 mb s3://mybucket
```
Even though the user's identity-based policy allows `s3:CreateBucket`, the SCP guardrail blocks the request, and the denial message names the responsible SCP:
```bash
make_bucket failed: s3://mybucket An error occurred (AccessDeniedException) when calling the CreateBucket operation: User: arn:aws:iam::000000000000:user/test is not authorized to perform: s3:CreateBucket on resource: arn:aws:s3:::mybucket with an explicit deny in a service control policy: arn:aws:organizations::000000000000:policy/
```
The LocalStack logs record the same information:
```bash
2023-11-03T12:30:44.512 INFO --- [ asgi_gw_1] localstack.pro.core.services.iam.policy_engine.handler : User: arn:aws:iam::000000000000:user/test is not authorized to perform: s3:CreateBucket on resource: arn:aws:s3:::mybucket with an explicit deny in a service control policy: arn:aws:organizations::000000000000:policy/
2023-11-03T12:30:44.513 INFO --- [ asgi_gw_1] localstack.request.aws : AWS s3.CreateBucket => 403 (AccessDenied)
```
This confirms that the SCP overrides the identity-based `Allow`, matching the AWS evaluation order in which an SCP guardrail takes precedence.
## Feature coverage
The feature coverage is documented in the [IAM coverage documentation](/aws/developer-tools/security-testing/iam-coverage/).
# IAM Policy Simulator
> Test IAM policies and Service Control Policies before applying them using the IAM Policy Simulator.
## Introduction
The [IAM Policy Simulator](https://docs.aws.amazon.com/IAM/latest/UserGuide/access_policies_testing-policies.html) lets you test the effect of IAM policies attached to a user, group, or role, without making a real request against your resources.
It evaluates the policies attached to a principal (and any policies you pass in) and reports whether each requested action would be `allowed`, `explicitDeny`, or `implicitDeny`.
LocalStack implements the [`SimulatePrincipalPolicy`](https://docs.aws.amazon.com/IAM/latest/APIReference/API_SimulatePrincipalPolicy.html) operation, which simulates the policies already attached to an existing IAM user, group, or role.
[`SimulateCustomPolicy`](https://docs.aws.amazon.com/IAM/latest/APIReference/API_SimulateCustomPolicy.html), which simulates policy documents that aren't attached to any principal, is not yet supported.
See the [IAM coverage documentation](/aws/developer-tools/security-testing/iam-coverage/) for the full list of supported operations.
:::tip
Unlike [IAM Policy Enforcement](/aws/developer-tools/security-testing/iam-policy-enforcement/), the Policy Simulator doesn't require `ENFORCE_IAM=1`.
`SimulatePrincipalPolicy` only evaluates your policies; it never performs the underlying AWS operation, so it works the same whether or not enforcement is turned on.
:::
## Getting started
This guide is designed for users new to the IAM Policy Simulator and assumes basic knowledge of the AWS CLI and our [`awslocal`](https://github.com/localstack/awscli-local) wrapper script.
Start your LocalStack container using your preferred method.
### Create a user with a limited policy
Create a user and attach a policy that only allows `s3:CreateBucket`:
```bash
awslocal iam create-user --user-name test-user
```
```bash
awslocal iam create-policy \
--policy-name allow-create-bucket \
--policy-document '{"Version":"2012-10-17","Statement":[{"Effect":"Allow","Action":"s3:CreateBucket","Resource":"*"}]}'
```
```bash
awslocal iam attach-user-policy \
--user-name test-user \
--policy-arn arn:aws:iam::000000000000:policy/allow-create-bucket
```
### Simulate the policy
Use `simulate-principal-policy` to check whether `test-user` can create and delete an S3 bucket, without actually calling S3:
```bash
awslocal iam simulate-principal-policy \
--policy-source-arn arn:aws:iam::000000000000:user/test-user \
--action-names s3:CreateBucket s3:DeleteBucket \
--resource-arns "*"
```
```bash title="Output"
{
"EvaluationResults": [
{
"EvalActionName": "s3:CreateBucket",
"EvalResourceName": "*",
"EvalDecision": "allowed",
"OrganizationsDecisionDetail": {
"AllowedByOrganizations": true
}
},
{
"EvalActionName": "s3:DeleteBucket",
"EvalResourceName": "*",
"EvalDecision": "implicitDeny",
"OrganizationsDecisionDetail": {
"AllowedByOrganizations": true
}
}
],
"IsTruncated": false
}
```
`s3:CreateBucket` is `allowed` because of the attached policy, and `s3:DeleteBucket` is `implicitDeny` because no statement grants it.
## SCP evaluation
If the principal's account is part of an organization, the Policy Simulator also evaluates [Service Control Policies (SCPs)](https://docs.aws.amazon.com/organizations/latest/userguide/orgs_manage_policies_scps.html) covering that account, in addition to the principal's identity-based policies.
This lets you validate SCP behavior with `simulate-principal-policy` before making live requests.
Testing SCPs with the Policy Simulator requires [AWS Organizations](/aws/services/organizations/), available on the Ultimate plan and above.
The `OrganizationsDecisionDetail.AllowedByOrganizations` field indicates whether the final decision was caused by an SCP:
```bash title="Output"
{
"EvaluationResults": [
{
"EvalActionName": "s3:ListAllMyBuckets",
"EvalResourceName": "*",
"EvalDecision": "implicitDeny",
"OrganizationsDecisionDetail": {
"AllowedByOrganizations": false
}
}
],
"IsTruncated": false
}
```
For a full walkthrough of SCP enforcement, including cross-account access, see the [Service Control Policy enforcement](/aws/services/organizations/#service-control-policy-enforcement) section of the Organizations documentation.
:::note
LocalStack's Policy Simulator shares the same evaluation engine as its IAM enforcement, so it reflects real AWS IAM behavior rather than the AWS Policy Simulator, which differs in a few ways:
- AWS ignores SCPs that contain conditions during simulation. LocalStack evaluates SCPs with conditions.
- AWS applies SCPs to the organization's management account during simulation. LocalStack does not apply SCPs to the management account, matching the real behavior of AWS Organizations.
- AWS reports an explicit `Deny` from an SCP as an implicit deny. LocalStack reports it as an explicit deny, which is the expected outcome.
:::
## Limitations
- Only `SimulatePrincipalPolicy` is implemented. `SimulateCustomPolicy`, `GetContextKeysForPrincipalPolicy`, and `GetContextKeysForCustomPolicy` are not yet supported, so you need to know which context keys your policies reference and supply them yourself via `--context-entries`.
- The response only includes `EvalActionName`, `EvalResourceName`, `EvalDecision`, and `OrganizationsDecisionDetail`. Fields such as `MatchedStatements`, `ResourceSpecificResults`, `EvalDecisionDetails`, and `PermissionsBoundaryDecisionDetail` are not populated, so the response doesn't identify which specific statement caused a decision.
## Feature coverage
The feature coverage is documented in the [IAM coverage documentation](/aws/developer-tools/security-testing/iam-coverage/).
# IAM Policy Stream
> Generate a stream of IAM policies as requests are coming into LocalStack using IAM Policy Stream.
## Introduction
The IAM Policy Stream generates a steady stream of policies along with their corresponding principals or resources.
When a request is made, it initially displays the principal or resource to which the policy will be attached.
This is typically a service resource for resource-based policies, or an IAM principal for other cases.
Subsequently, it displays the suggested policy.
This feature aids in identifying the correct permissions for cloud applications and can help spot logical errors, such as unexpected actions in a policy.
:::note
IAM Policy Stream is offered as a **preview** feature and is under active development. `lstk` does not yet support IAM Policy Stream.
Continue using the legacy [LocalStack CLI](/aws/developer-tools/running-localstack/localstack-cli/) for this feature.
:::
## Getting started
This guide is designed for users who are new to the IAM Policy Stream.
It assumes you have basic knowledge of the AWS CLI (and our [`lstk aws`](/aws/developer-tools/running-localstack/lstk/cloud-and-iac-commands/#aws) AWS CLI proxy).
### Start your LocalStack container
To experiment with the IAM Policy Stream, initiate LocalStack using these flags:
1. Enable debugging: `DEBUG=1`
2. Set your LocalStack Auth Token: `LOCALSTACK_AUTH_TOKEN=`
3. Set the IAM Soft Mode: `IAM_SOFT_MODE=1`
You can execute the following command in your terminal to start your LocalStack container:
```bash
DEBUG=1 IAM_SOFT_MODE=1 localstack start
```
### Enable IAM Policy Stream
To enable the IAM Policy Stream, open a new terminal window or tab and run the following command:
```bash
localstack aws iam stream
```
### Create AWS Resources
In a separate terminal tab, we will create AWS resources to observe the necessary policies for them.
In this example, we are creating an SNS topic using the following command:
```bash
lstk aws sns create-topic --name test-topic
```
In the other tab, the required policy will be generated.
This policy can then be attached to an IAM role, enabling it to create the resource.
```bash showshowLineNumbers
Attached to identity: "arn:aws:iam::000000000000:root"
Policy:
{
"Version": "2012-10-17",
"Statement": [
{
"Sid": "Test3a92fb6c",
"Effect": "Allow",
"Action": "sns:CreateTopic",
"Resource": "arn:aws:sns:us-east-1:000000000000:test-topic"
}
]
}
```
## Web Application
The LocalStack Web Application includes an IAM Policy Stream dashboard, which allows you to discover the necessary permissions for AWS API calls.
The Web Application provides the following features:
1. Provides a live display of API calls and the specific policies each call generates.
2. Offers a real-time summary policy, merging all individual policies into one consolidated policy.
3. Includes a feature to activate or deactivate this functionality on-the-fly for performance tuning.
4. Presents an option to reset the stream, facilitating a clean slate to generate new policies.
:::tip
You don't need to set additional configuration variables, such as `DEBUG=1` or `IAM_SOFT_MODE=1`, when using the IAM Policy Stream with Web Application.
However, it won't enforce policies or print IAM-related logs in the LocalStack container.
:::
To use this feature, open the LocalStack Web Application in your browser, go to the IAM Policy Stream section, and click on **Enable** to view the **Summary Policy** and **Output**.
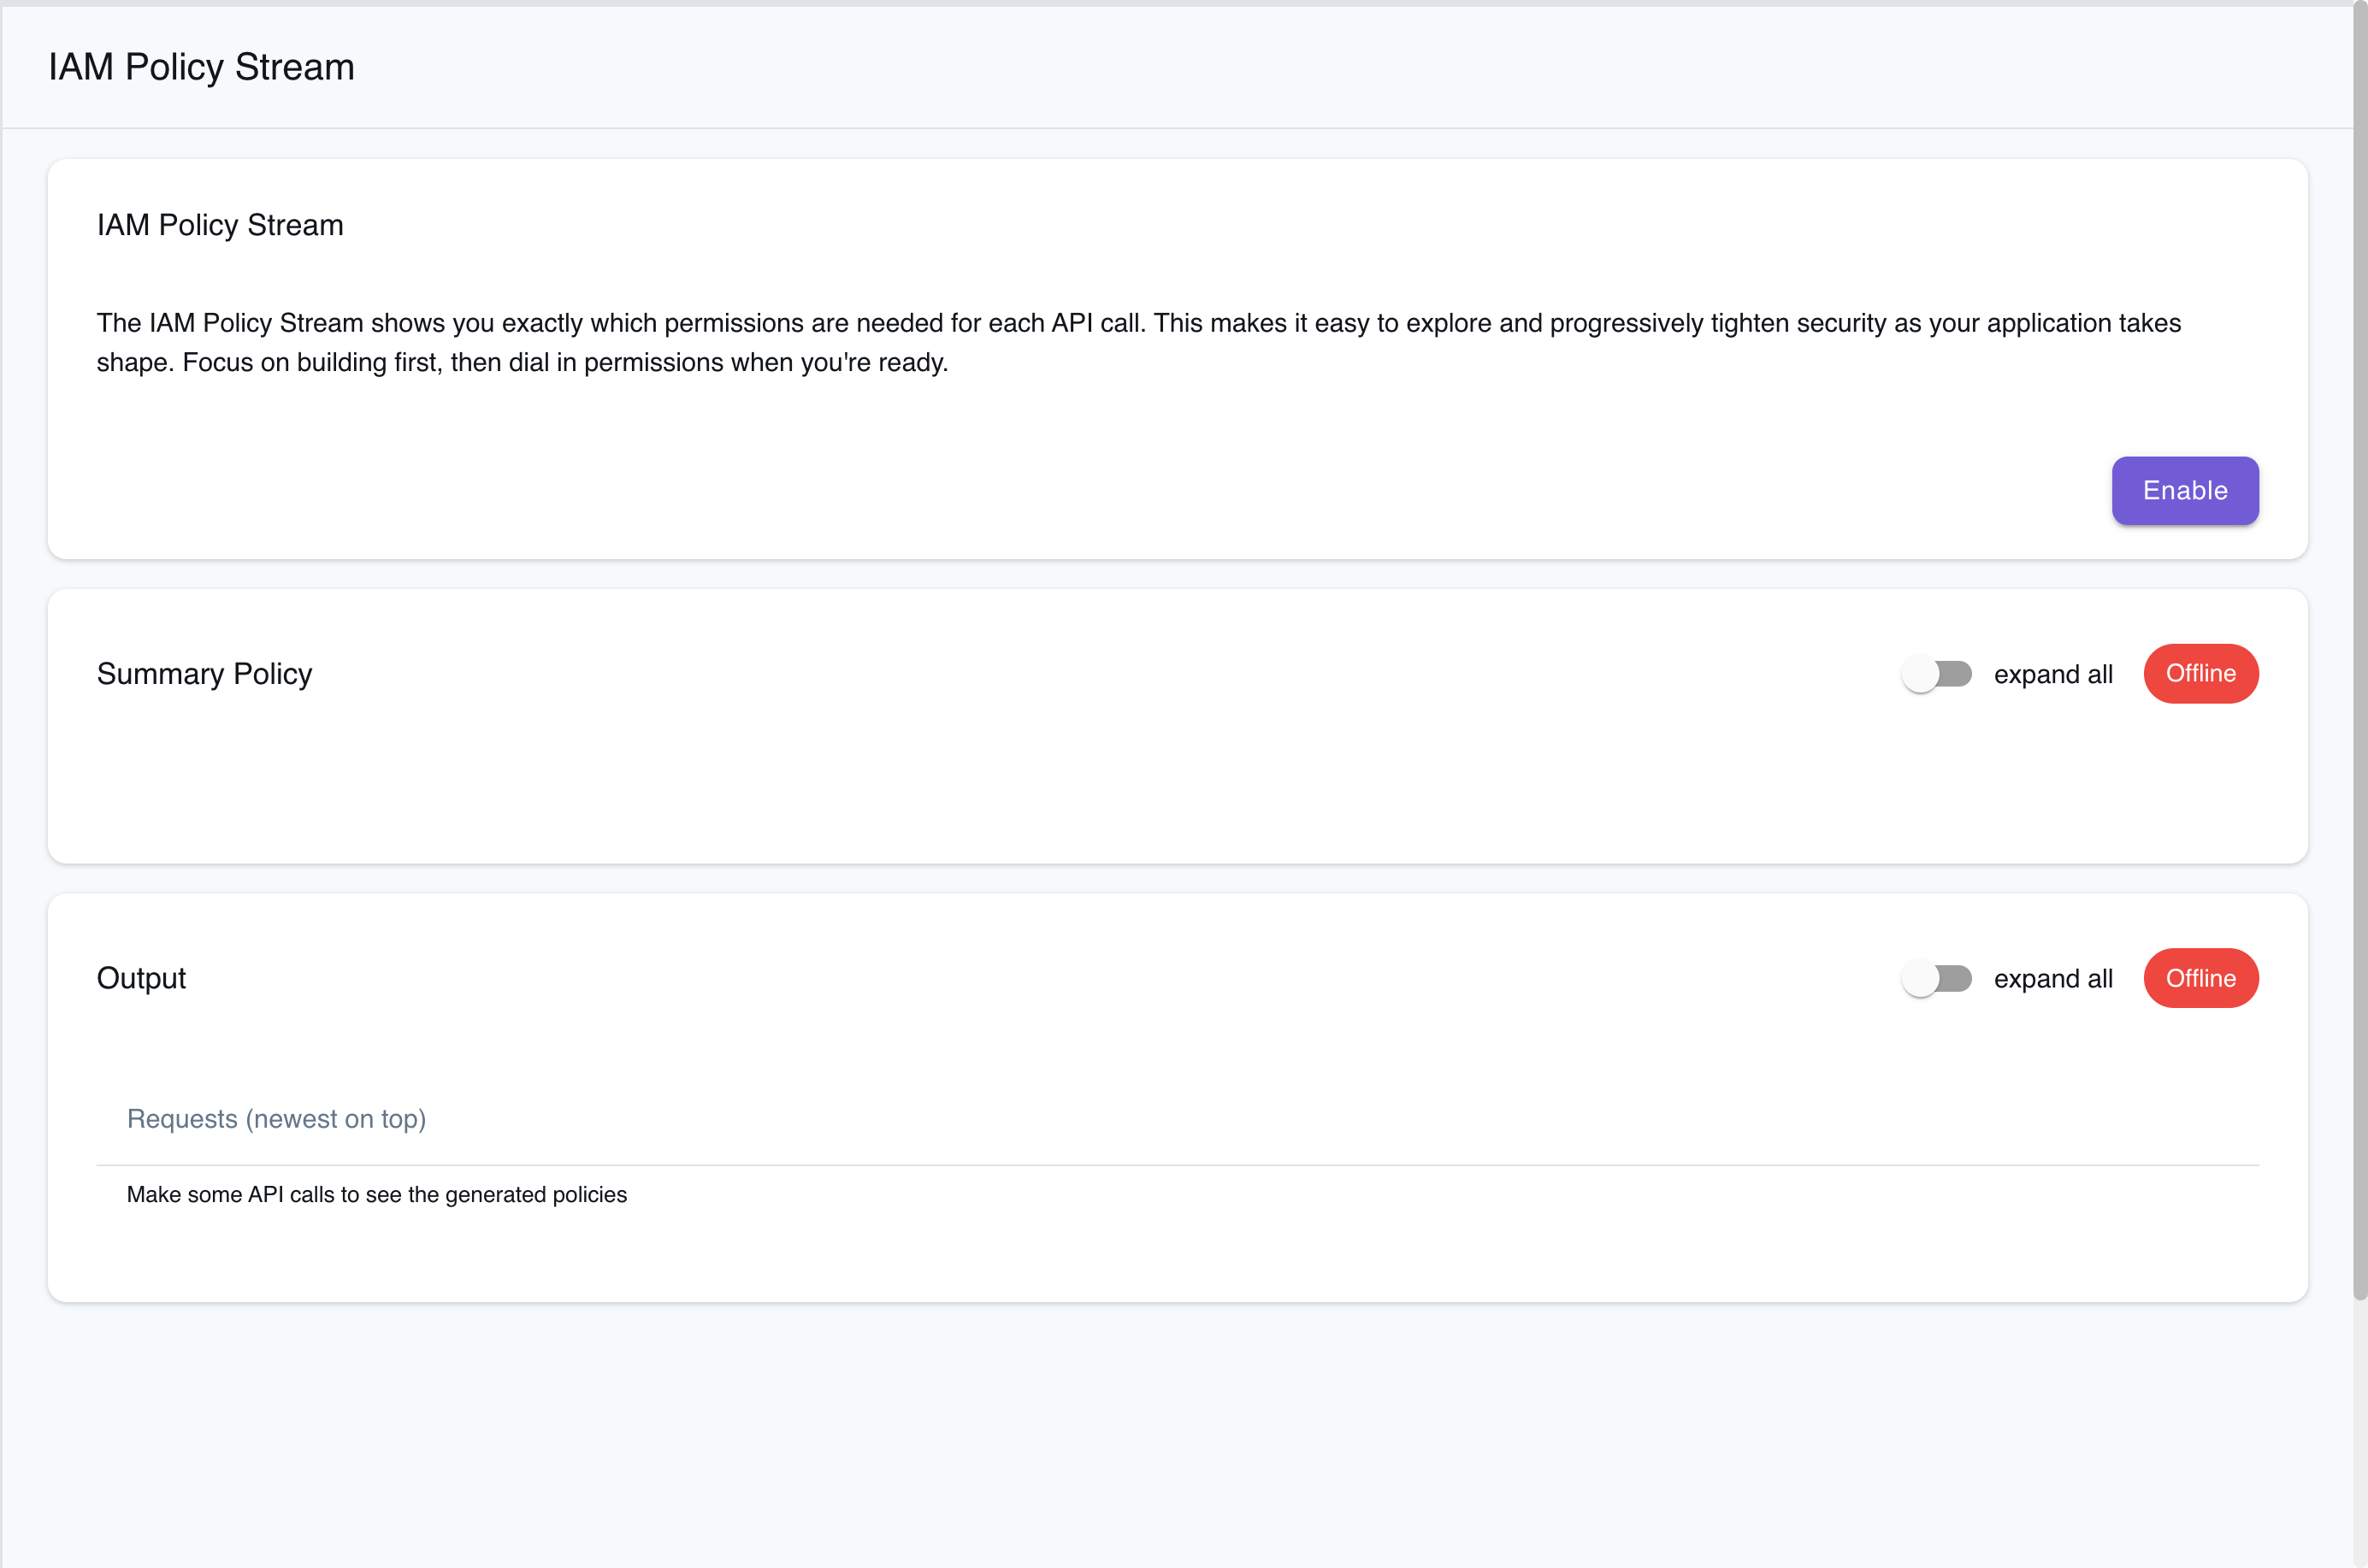
Run the following command in your terminal to generate a corresponding policy in the IAM Policy Stream dashboard:
```bash
lstk aws sns create-topic --name test-topic
```
You will see the following output in the IAM Policy Stream dashboard:
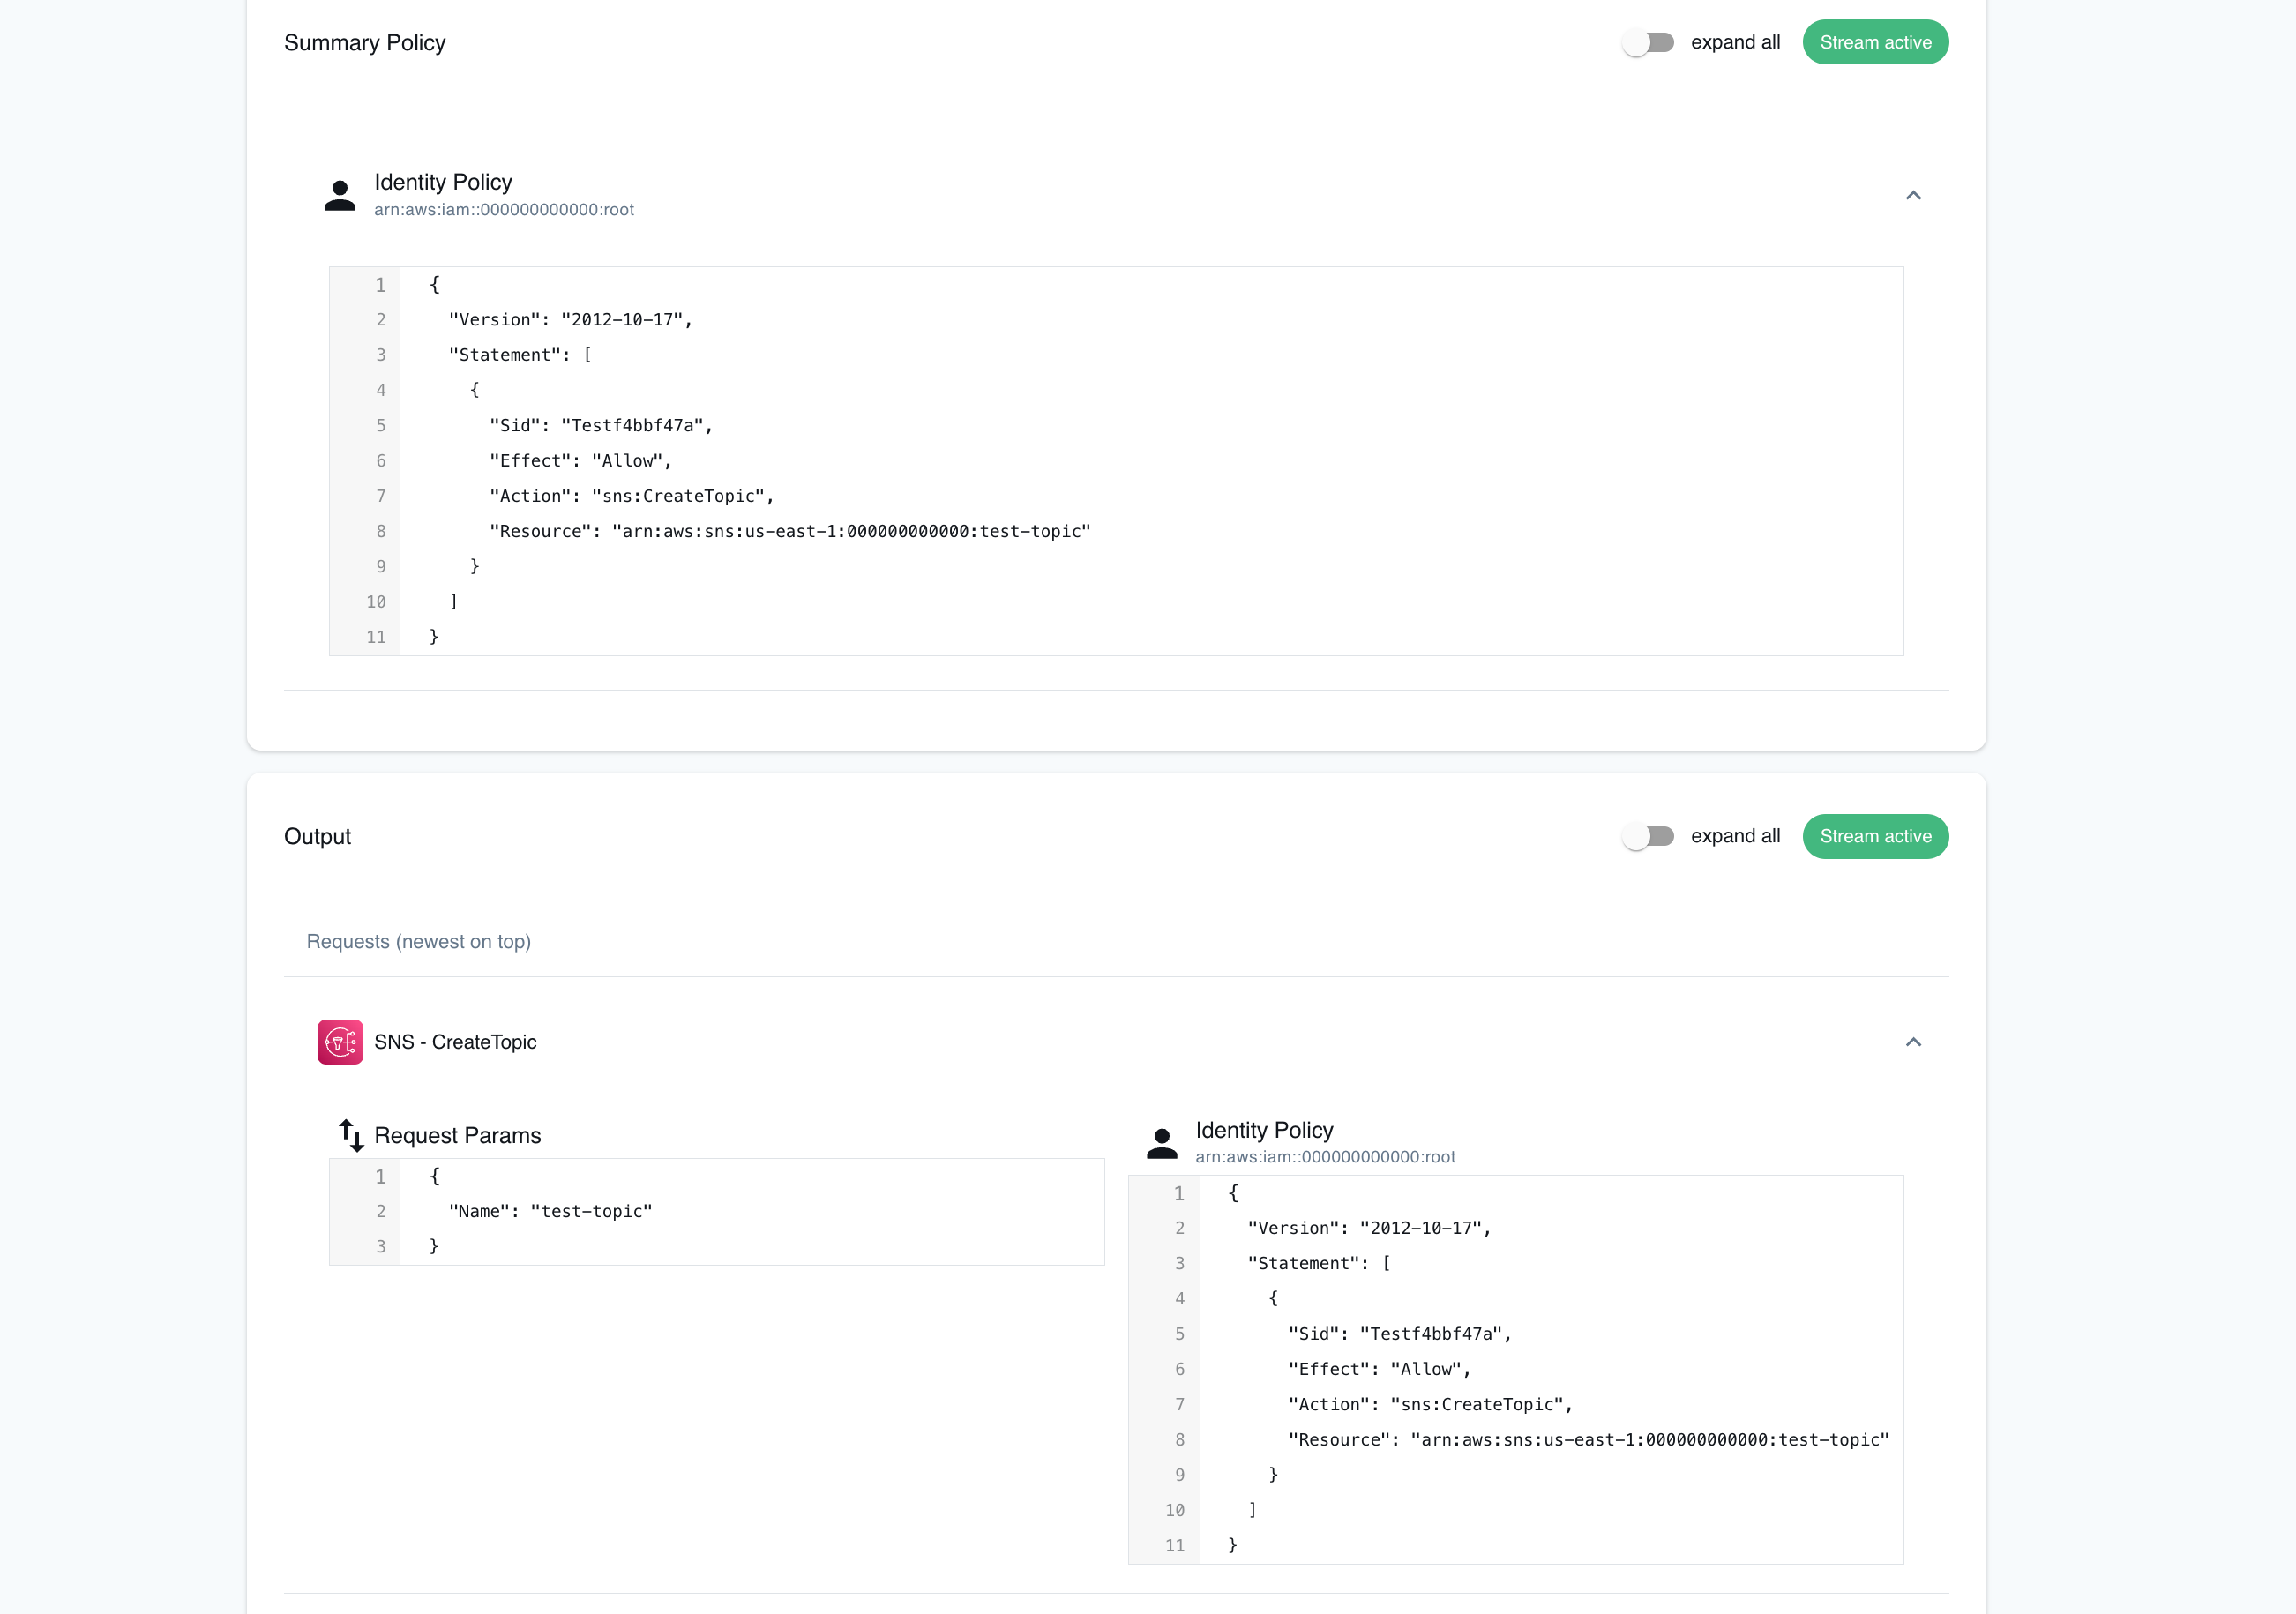
# Overview
> Snapshots in LocalStack allow you to save and load the state of your LocalStack instance.
import { SectionCards } from '../../../../../components/SectionCards.tsx';
LocalStack is designed to be ephemeral by default, meaning all state is lost when the container stops. The _Snapshot_ feature provides tools to persist, reuse, and share the state of your LocalStack instance across sessions or teams. This is useful for preloading test data, debugging workflows, or collaborating with teammates.
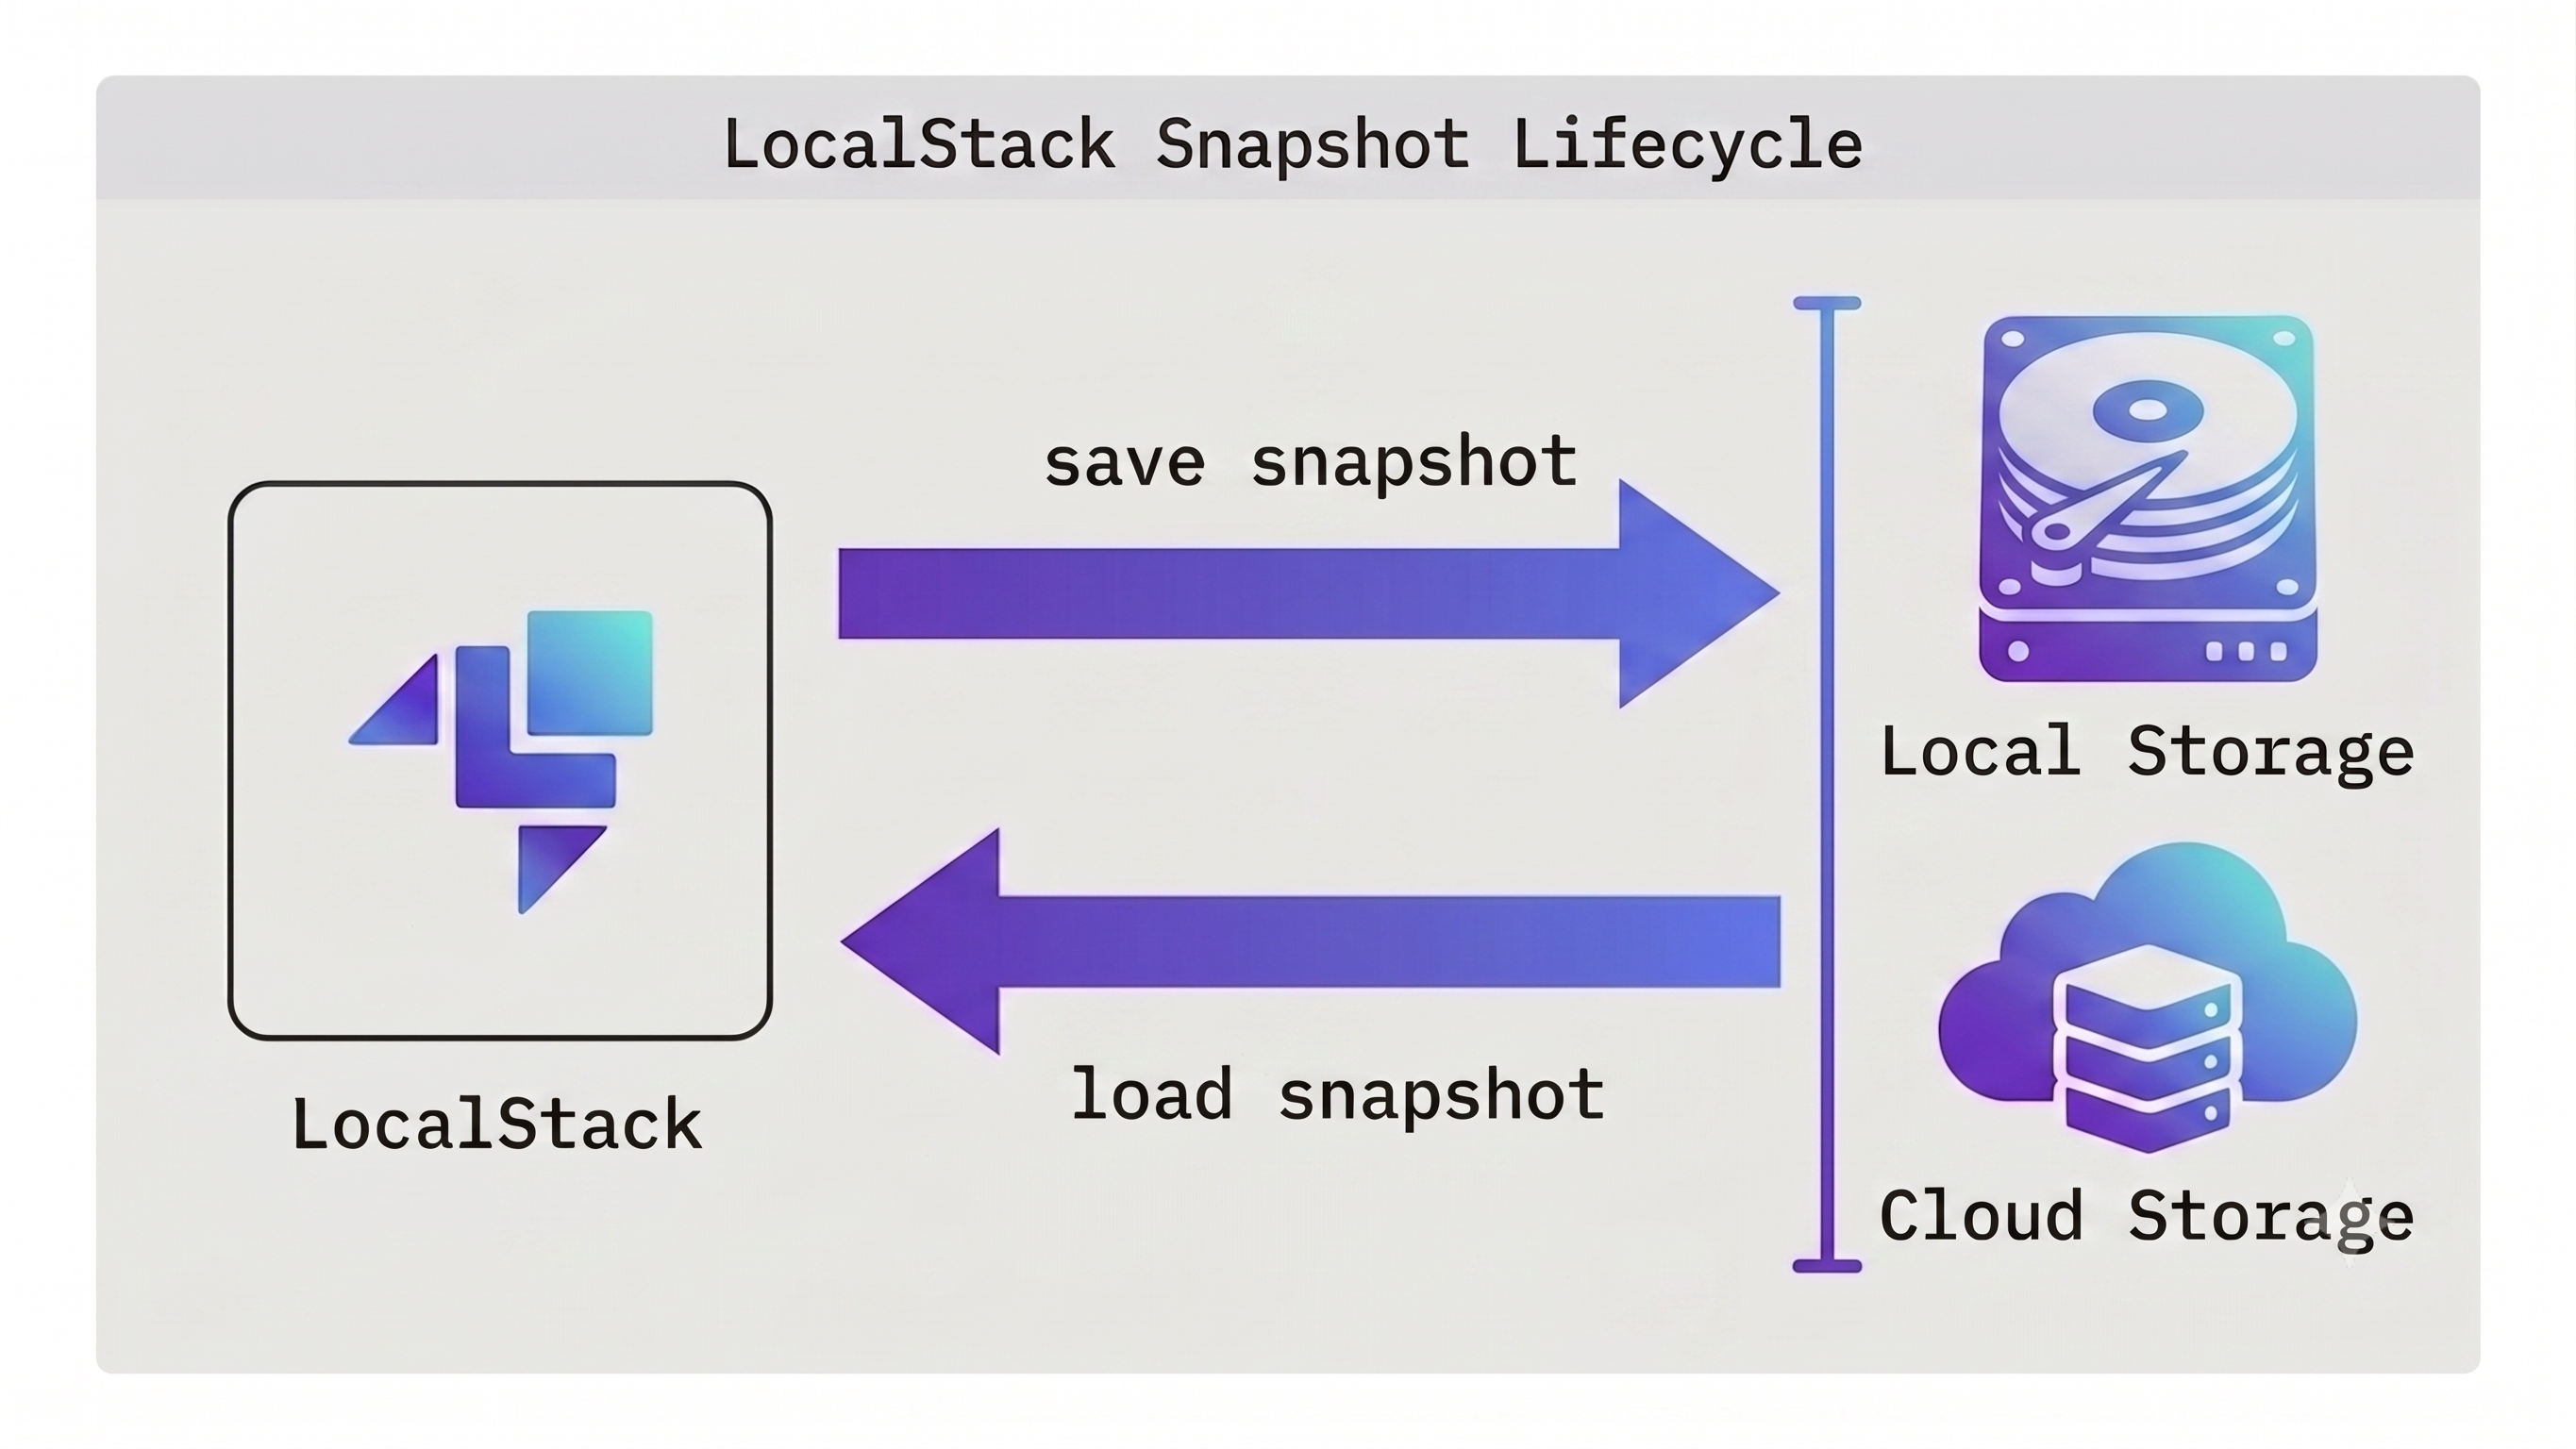
Snapshots enhance your development workflow in the following ways:
* **Faster loading** - Snapshots can be loaded into your instance within a few seconds. Use this to avoid lengthy redeploys of your infrastructure as code, such as Terraform or CDK, each time the emulator is started.
* **Team sharing** - Use a repository, such as _Cloud Pods_, to share snapshots with your team. Snapshots provide a curated set of resources for team members to use as a starting point for their work.
* **Automatic durability** - Enable the _Persistence_ feature to gain the same durability semantics you expect from the AWS cloud. A snapshot is taken automatically when the instance is shut down, or at user-defined intervals during operation, then reloaded when the instance is restarted.
* **Application preview** - During the code review process, share a snapshot so reviewers can see the software in action without redeploying it for themselves.
* **Debugging failures** - Save the state of an instance after a failure has occurred to allow debugging at a later time or by a different team member.
For more detail, see the following sections:
:::caution
Not all LocalStack services support snapshots. If you encounter a limitation, please [contact support](/aws/help-support/get-help/).
:::
# Saving snapshots to Cloud Pods
> Using LocalStack's Cloud Pods repository to share snapshots with your team.
import { Tabs, TabItem } from '@astrojs/starlight/components';
In [the previous section](/aws/developer-tools/snapshots/saving-snapshots-locally/) you learned how to save a snapshot of the emulator's state to a local file,
then reload the snapshot into a different emulator instance. When working in a team environment, it's important to have a standard mechanism for sharing
snapshot files among your team, and for managing updates when new versions are published.
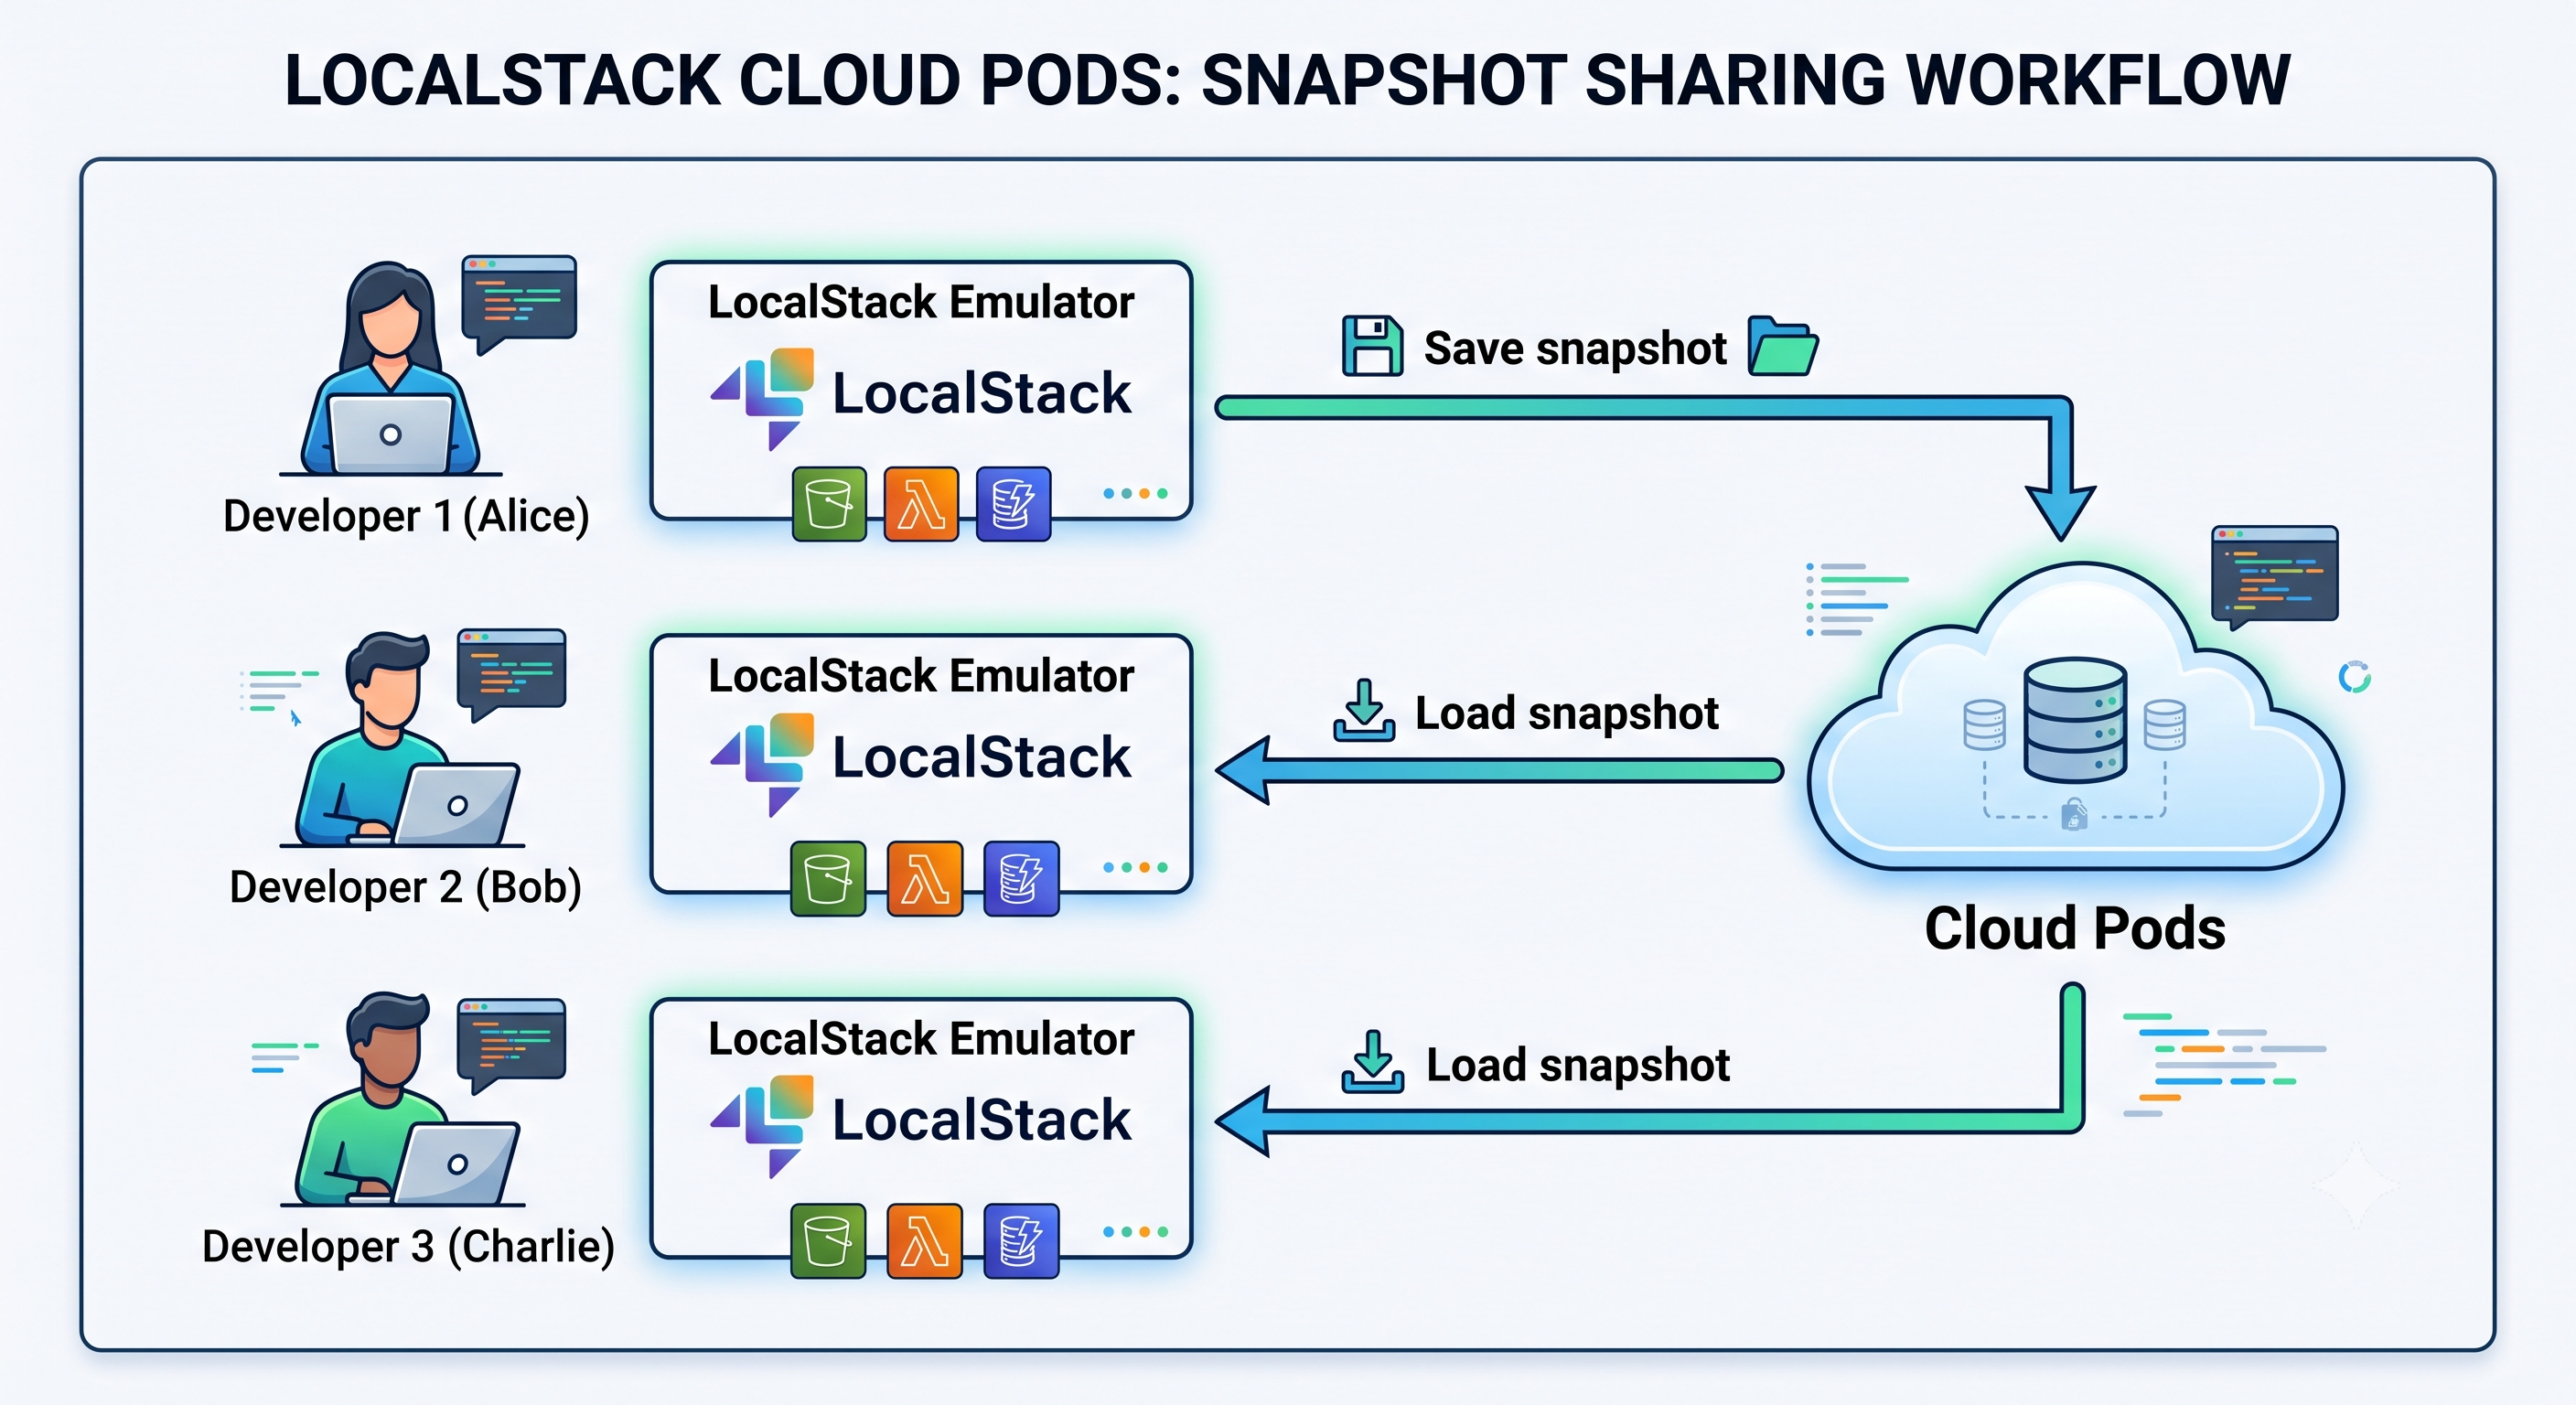
LocalStack provides the web-based _Cloud Pods_ repository for exactly this purpose, accessible only to the users in your organization. Snapshots are
generated by an emulator instance, then automatically published to your Cloud Pods repository. From there, snapshots can be loaded
back into an instance, either in a desktop environment or a CI environment.
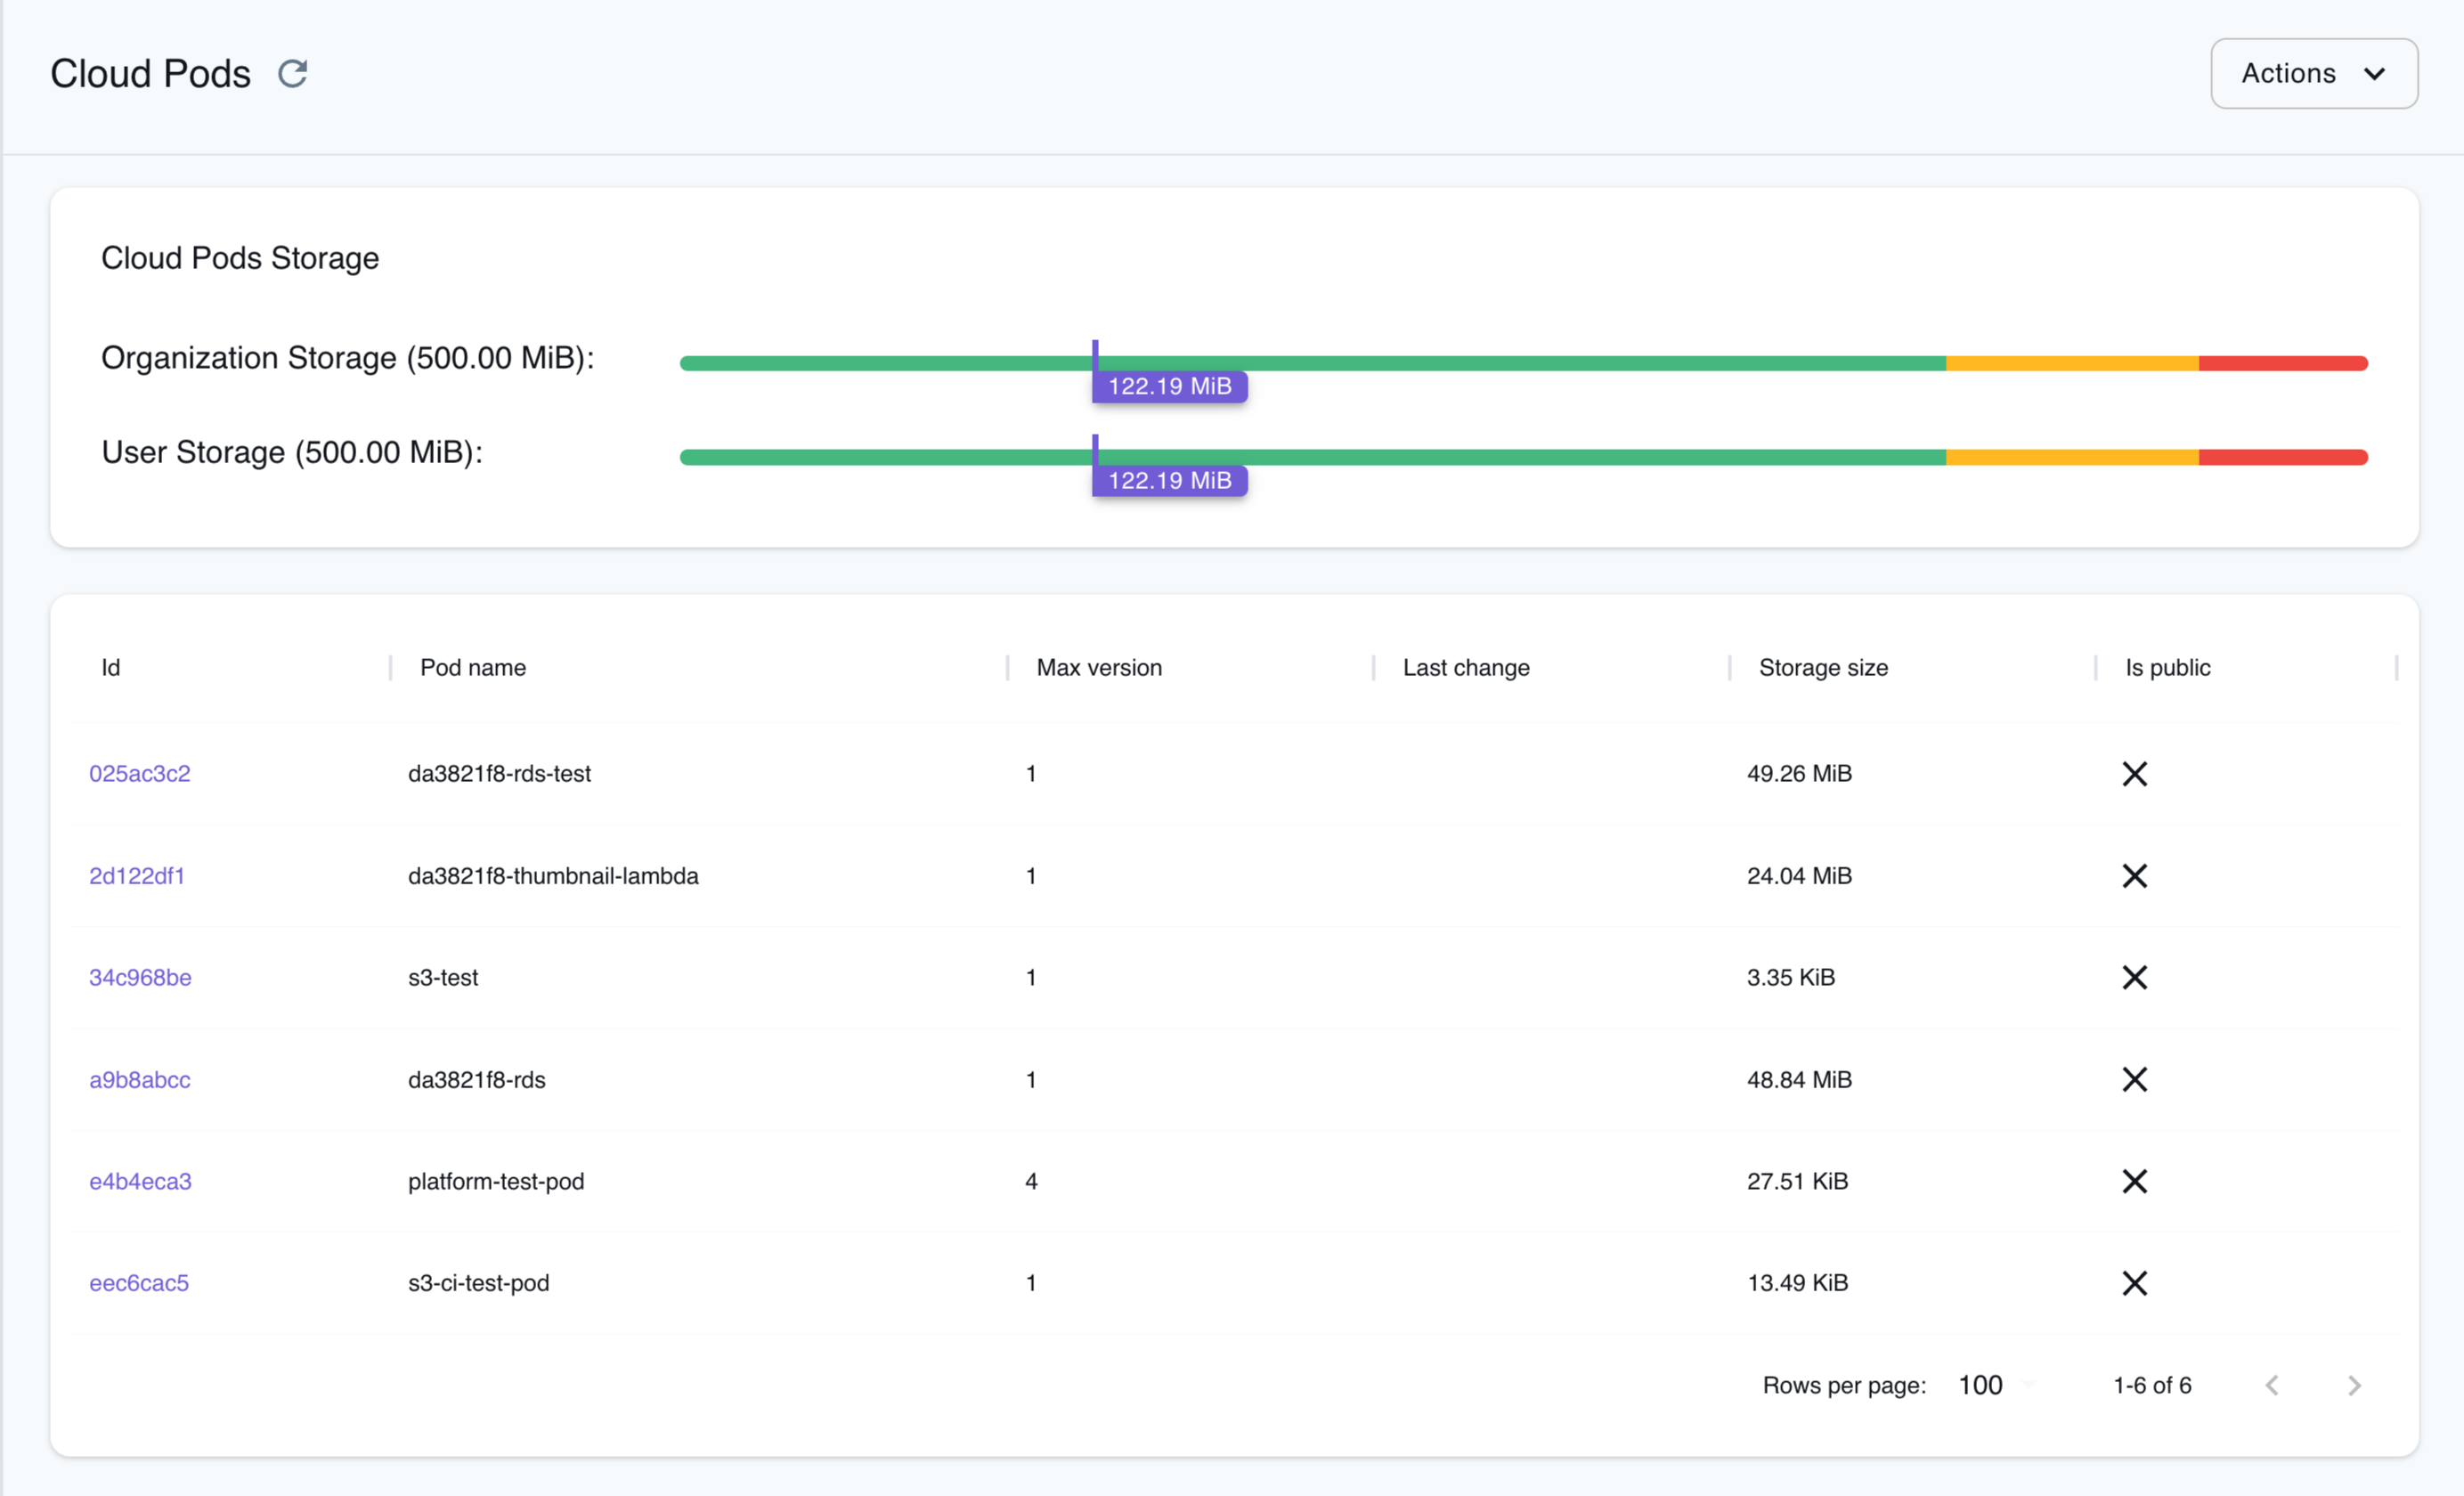
Each organization has its own private Cloud Pods repository, securely managed in LocalStack's cloud. These repositories are backed by dedicated,
isolated Amazon S3 buckets. The LocalStack CLI utilizes secure S3 presigned URLs to directly interface with the S3 bucket, bypassing the need to
transmit the snapshot files through LocalStack's Platform APIs.
:::note[Data residency]
Cloud Pods are stored on LocalStack-managed infrastructure in the AWS `eu-central-1` region. This is the only part of the LocalStack platform that
retains your data long-term. If your organization requires snapshots to remain within infrastructure you control, save them to
[your own S3 bucket](/aws/developer-tools/snapshots/saving-snapshots-to-s3/) instead.
:::
## Using the `lstk` CLI
You can save and load snapshots to or from your Cloud Pods repository using the [`lstk snapshot`](/aws/developer-tools/running-localstack/lstk/snapshots/#snapshot) command.
```bash
lstk snapshot --help
```
```bash title="Output"
Manage emulator snapshots
Usage: lstk snapshot [flags]
Commands:
list List Cloud Pod snapshots available on the LocalStack platform
load Load a snapshot into the running emulator
remove Delete a cloud snapshot from the LocalStack platform
save Save a snapshot of the emulator state
show Show metadata for a cloud snapshot
versions List the version history of a cloud snapshot
Options:
-h, --help help for snapshot
Global Options:
--config string Path to config file
--endpoint-url string Target an existing, externally-managed emulator at this URL
--json Output in JSON format (only supported by some commands)
--non-interactive Disable interactive mode
```
### Saving a snapshot to Cloud Pods
The following examples build up a Cloud Pod over three versions, adding one service at a time.
Start an emulator instance and create a single S3 bucket:
```bash
lstk start
lstk aws s3 mb s3://bucket1
```
The command for saving a snapshot to Cloud Pods is similar to the one for saving locally, but instead of a file name, provide the `pod:` prefix followed by a valid Cloud Pod name.
```bash
lstk snapshot save pod:sample-application
```
```bash title="Output"
✔︎ Snapshot saved to pod:sample-application
• Version: 1
• Services: s3
• Size: 64.2 KB
```
You can list the available Cloud Pods, for both you and your organization, using the `lstk snapshot list` command:
```bash
lstk snapshot list
```
```bash title="Output"
~ 1 snapshot
NAME VERSION LAST CHANGED
sample-application 1 2026-08-04 01:00 UTC
```
With the `save` command, you can create multiple versions of a Cloud Pod.
For instance, to create an SQS queue and save a second version of `sample-application`:
```bash
lstk aws sqs create-queue --queue-name queue-1
lstk snapshot save pod:sample-application
```
```bash title="Output"
✔︎ Snapshot saved to pod:sample-application
• Version: 2
• Services: sqs, s3
• Size: 76.0 KB
```
Adding an SNS topic and saving once more produces a third version:
```bash
lstk aws sns create-topic --name topic1
lstk snapshot save pod:sample-application
```
```bash title="Output"
✔︎ Snapshot saved to pod:sample-application
• Version: 3
• Services: sqs, sns, s3
• Size: 85.4 KB
```
To review the version history of a Cloud Pod, use the `versions` command.
Note how each version covers the services that existed in the emulator at the time it was saved:
```bash
lstk snapshot versions pod:sample-application
```
```bash title="Output"
~ 3 versions
VERSION CREATED LOCALSTACK SERVICES
3 2026-08-04 01:01 UTC 2026.8.0 sqs, sns, s3
2 2026-08-04 01:00 UTC 2026.8.0 sqs, s3
1 2026-08-04 01:00 UTC 2026.8.0 s3
```
:::note
Permissions on Cloud Pods are assigned at the organization level.
This means that every individual in the organization can view, load, and delete snapshots created by other team members.
Similarly, everyone can save a new version on top of a snapshot originally created by someone else.
:::
### Loading snapshots from a Cloud Pod
To load a snapshot from a Cloud Pod into a running emulator, use the `lstk snapshot load` command:
```bash
lstk restart
lstk snapshot load pod:sample-application
```
```bash title="Output"
✔︎ Snapshot loaded from pod:sample-application
• Services: s3, sns, sqs
```
You can examine the loaded resources with the `lstk status` command:
```bash
lstk status
```
```bash title="Output"
✔︎ LocalStack AWS Emulator is running
• Endpoint: localhost.localstack.cloud:4566
• Container: localstack-aws-dev
• Version: 2026.8.0
• Uptime: 59s
~ 3 resources · 3 services
SERVICE RESOURCE REGION ACCOUNT
S3 bucket1 global 000000000000
SNS topic1 us-east-1 000000000000
SQS http://sqs.us-east-1.localhost.localstack.cloud:4566/000000000000/queue-1 us-east-1 000000000000
```
By default, `load` fetches the most recent version of the Cloud Pod. To work with an earlier version, append `:` to the
Cloud Pod name. Before loading, you can inspect the metadata for a specific version with the `show` command:
```bash
lstk snapshot show pod:sample-application:1
```
```bash title="Output"
Name sample-application
Version 1
Created 2026-08-04 01:00 UTC
Size 64.2 KB
LocalStack 2026.8.0
Services s3
```
As expected, version 1 covers only S3, since the SQS queue and SNS topic were created later.
To load this older version into the running emulator, use the same `:` suffix with the `load` command:
```bash
lstk restart
lstk snapshot load pod:sample-application:1
```
```bash title="Output"
✔︎ Snapshot loaded from pod:sample-application:1
• Services: s3
```
Comprehensive instructions on using the `lstk snapshot` CLI command are found in the [`lstk` CLI Guide](/aws/developer-tools/running-localstack/lstk/snapshots/#snapshot).
:::note
The snapshots stored in a Cloud Pod may not remain compatible if used with a different version of LocalStack.
LocalStack applies [snapshot compatibility rules](/aws/developer-tools/snapshots/service-coverage#snapshot-compatibility) to block loading snapshots known to be incompatible with the running LocalStack version.
:::
## Using the LocalStack Console
The LocalStack Console enables you to:
- Browse your Cloud Pods and access your snapshot version history.
- Save and load snapshots to and from Cloud Pods.
- View snapshot metadata, resources, regions, and version history.
### Browse Cloud Pods
The [Cloud Pods Browser](https://app.localstack.cloud/pods) allows you to view, manage, and explore your snapshots through the LocalStack Console.
With Cloud Pods, you can have individual or shared ownership of snapshots.
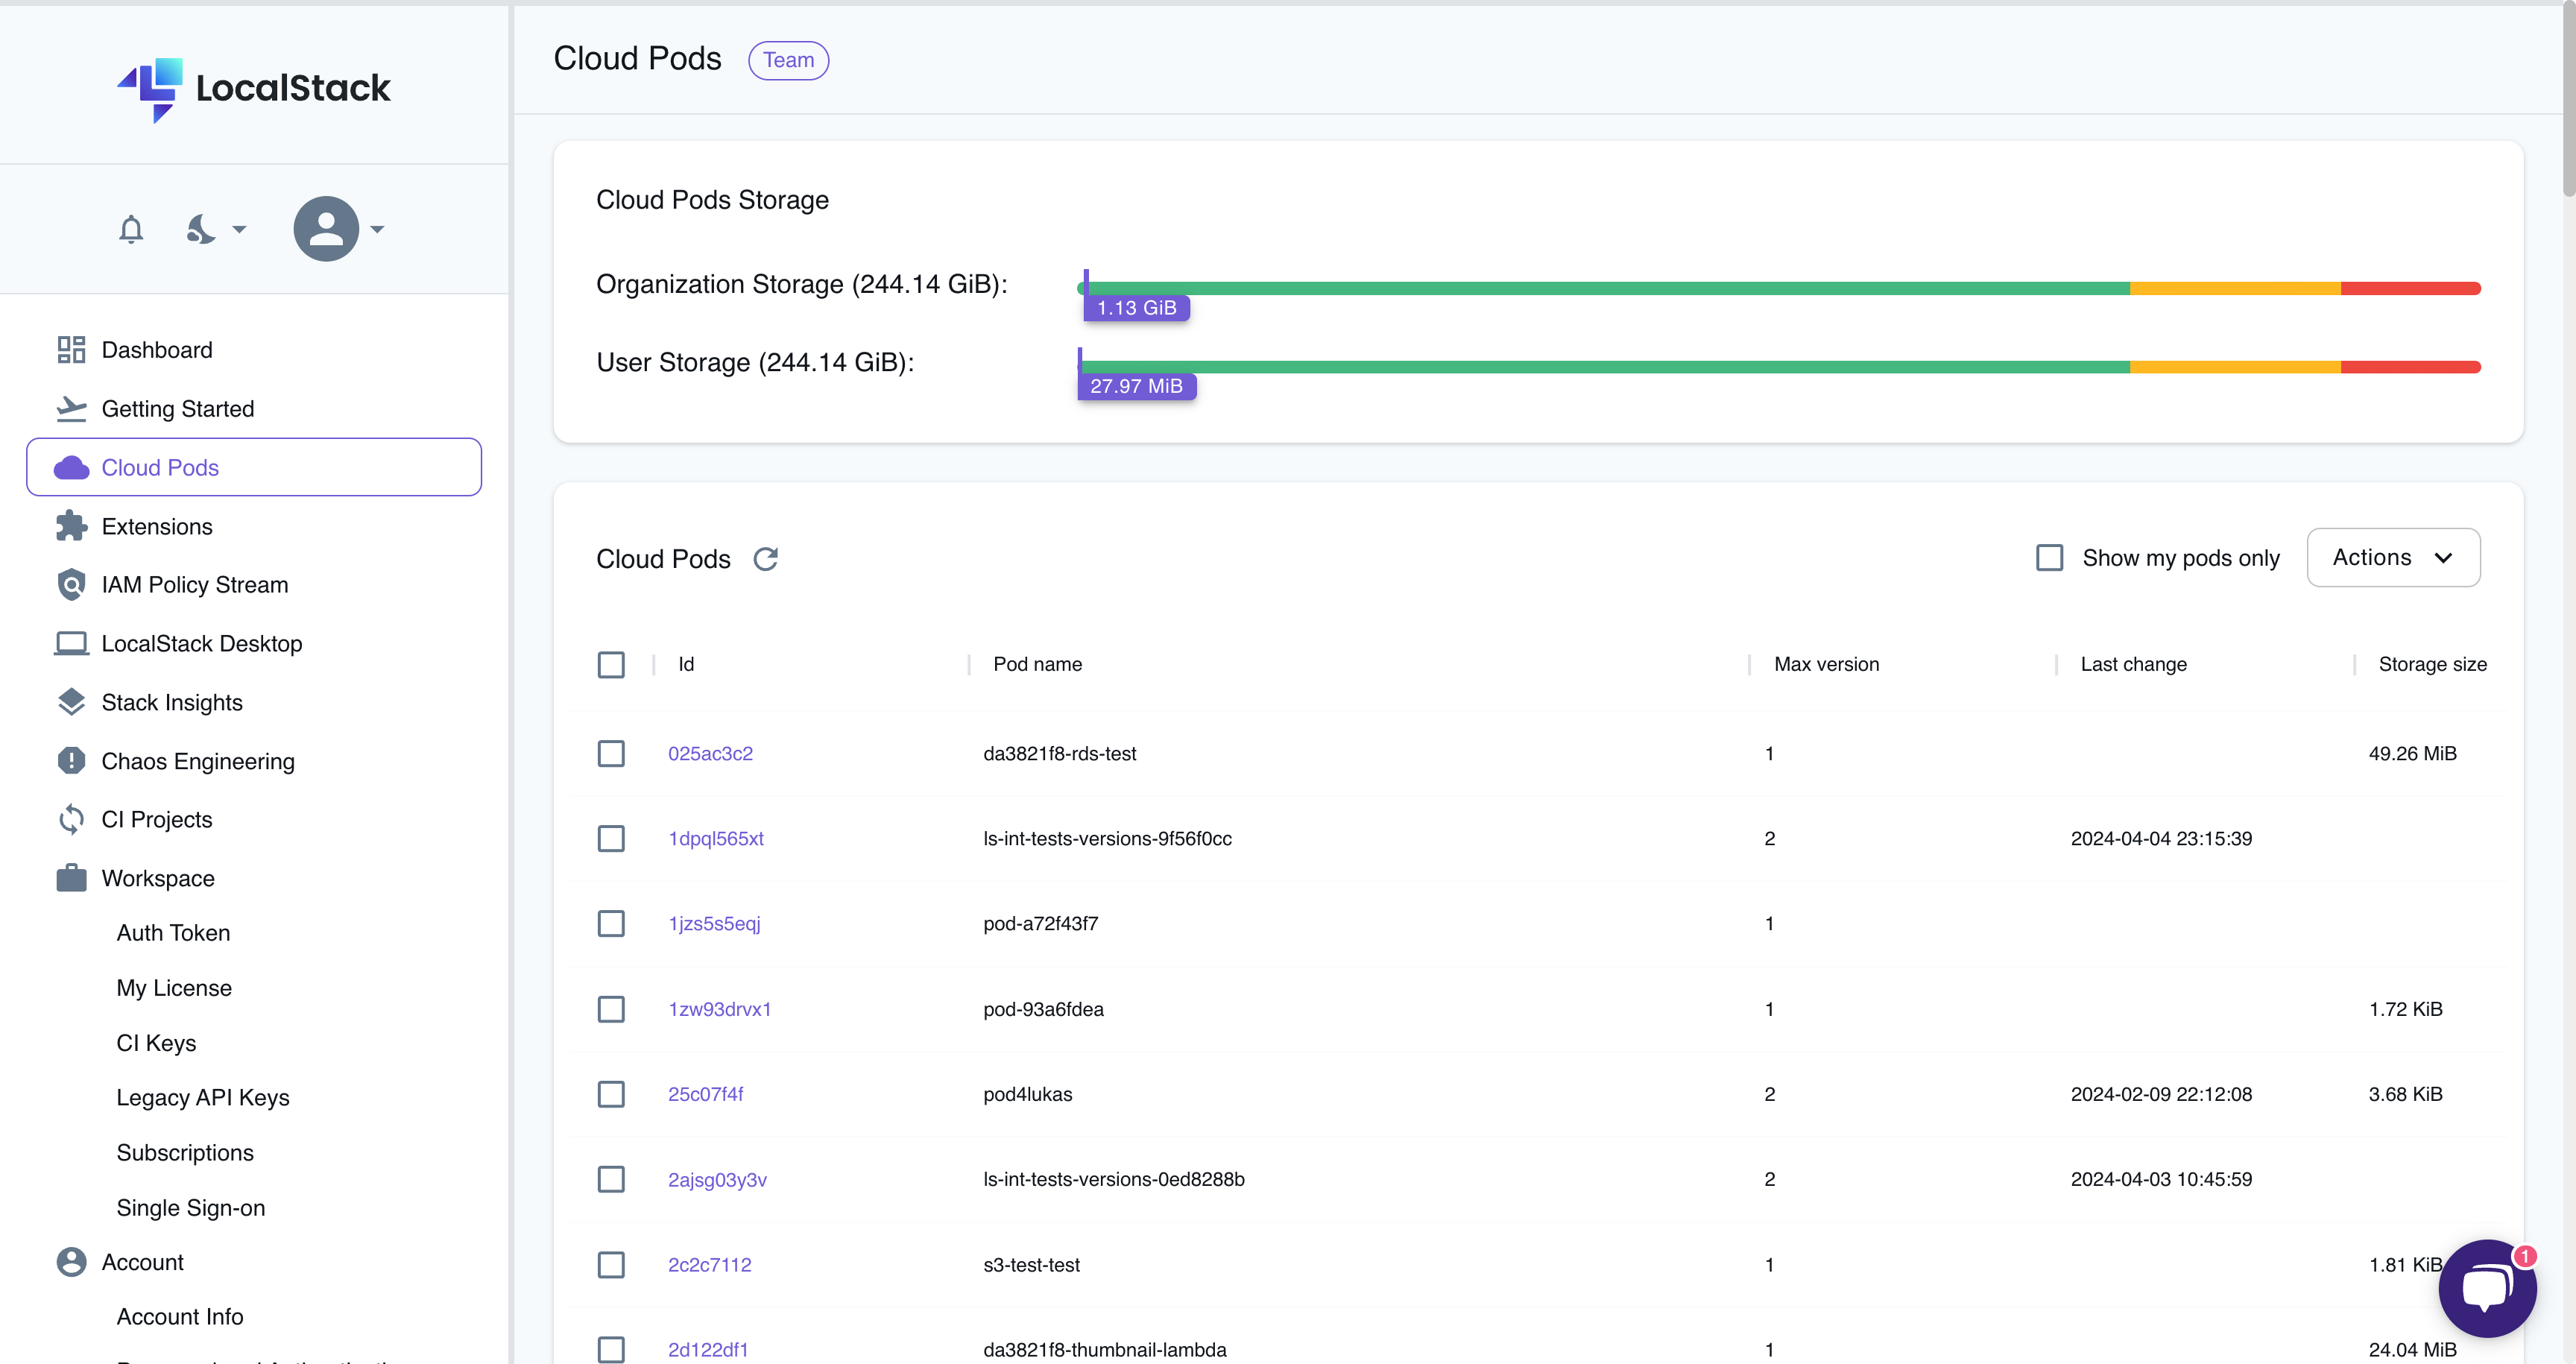
The Cloud Pods Browser provides the following functionality:
- **View Cloud Pods**: View all snapshots saved by you or your organization.
- **View Versions**: View the version history of a Cloud Pod and access previous snapshots by clicking on the Cloud Pod's name.
- **View Snapshot Details**: View the details of a specific version by clicking on the version number.
- **View Cloud Pod Storage**: View both the organization-wide and user-specific storage usage.
- **Delete Cloud Pod**: Delete a Cloud Pod by selecting the name and navigating to the **Actions** button, followed by **Delete**.
### View snapshot metadata
You can view snapshot metadata by selecting any snapshot in the [Cloud Pods Browser](https://app.localstack.cloud/pods).
The metadata includes details such as:
- The user who created the snapshot
- The creation timestamp
- The LocalStack version used to create the snapshot
- The size of the snapshot
- The service resources contained in the snapshot
You can view detailed information within a snapshot, including available resources, categorized services with configurations, and quick access to resource identifiers and endpoints—all without loading the snapshot into your LocalStack runtime.
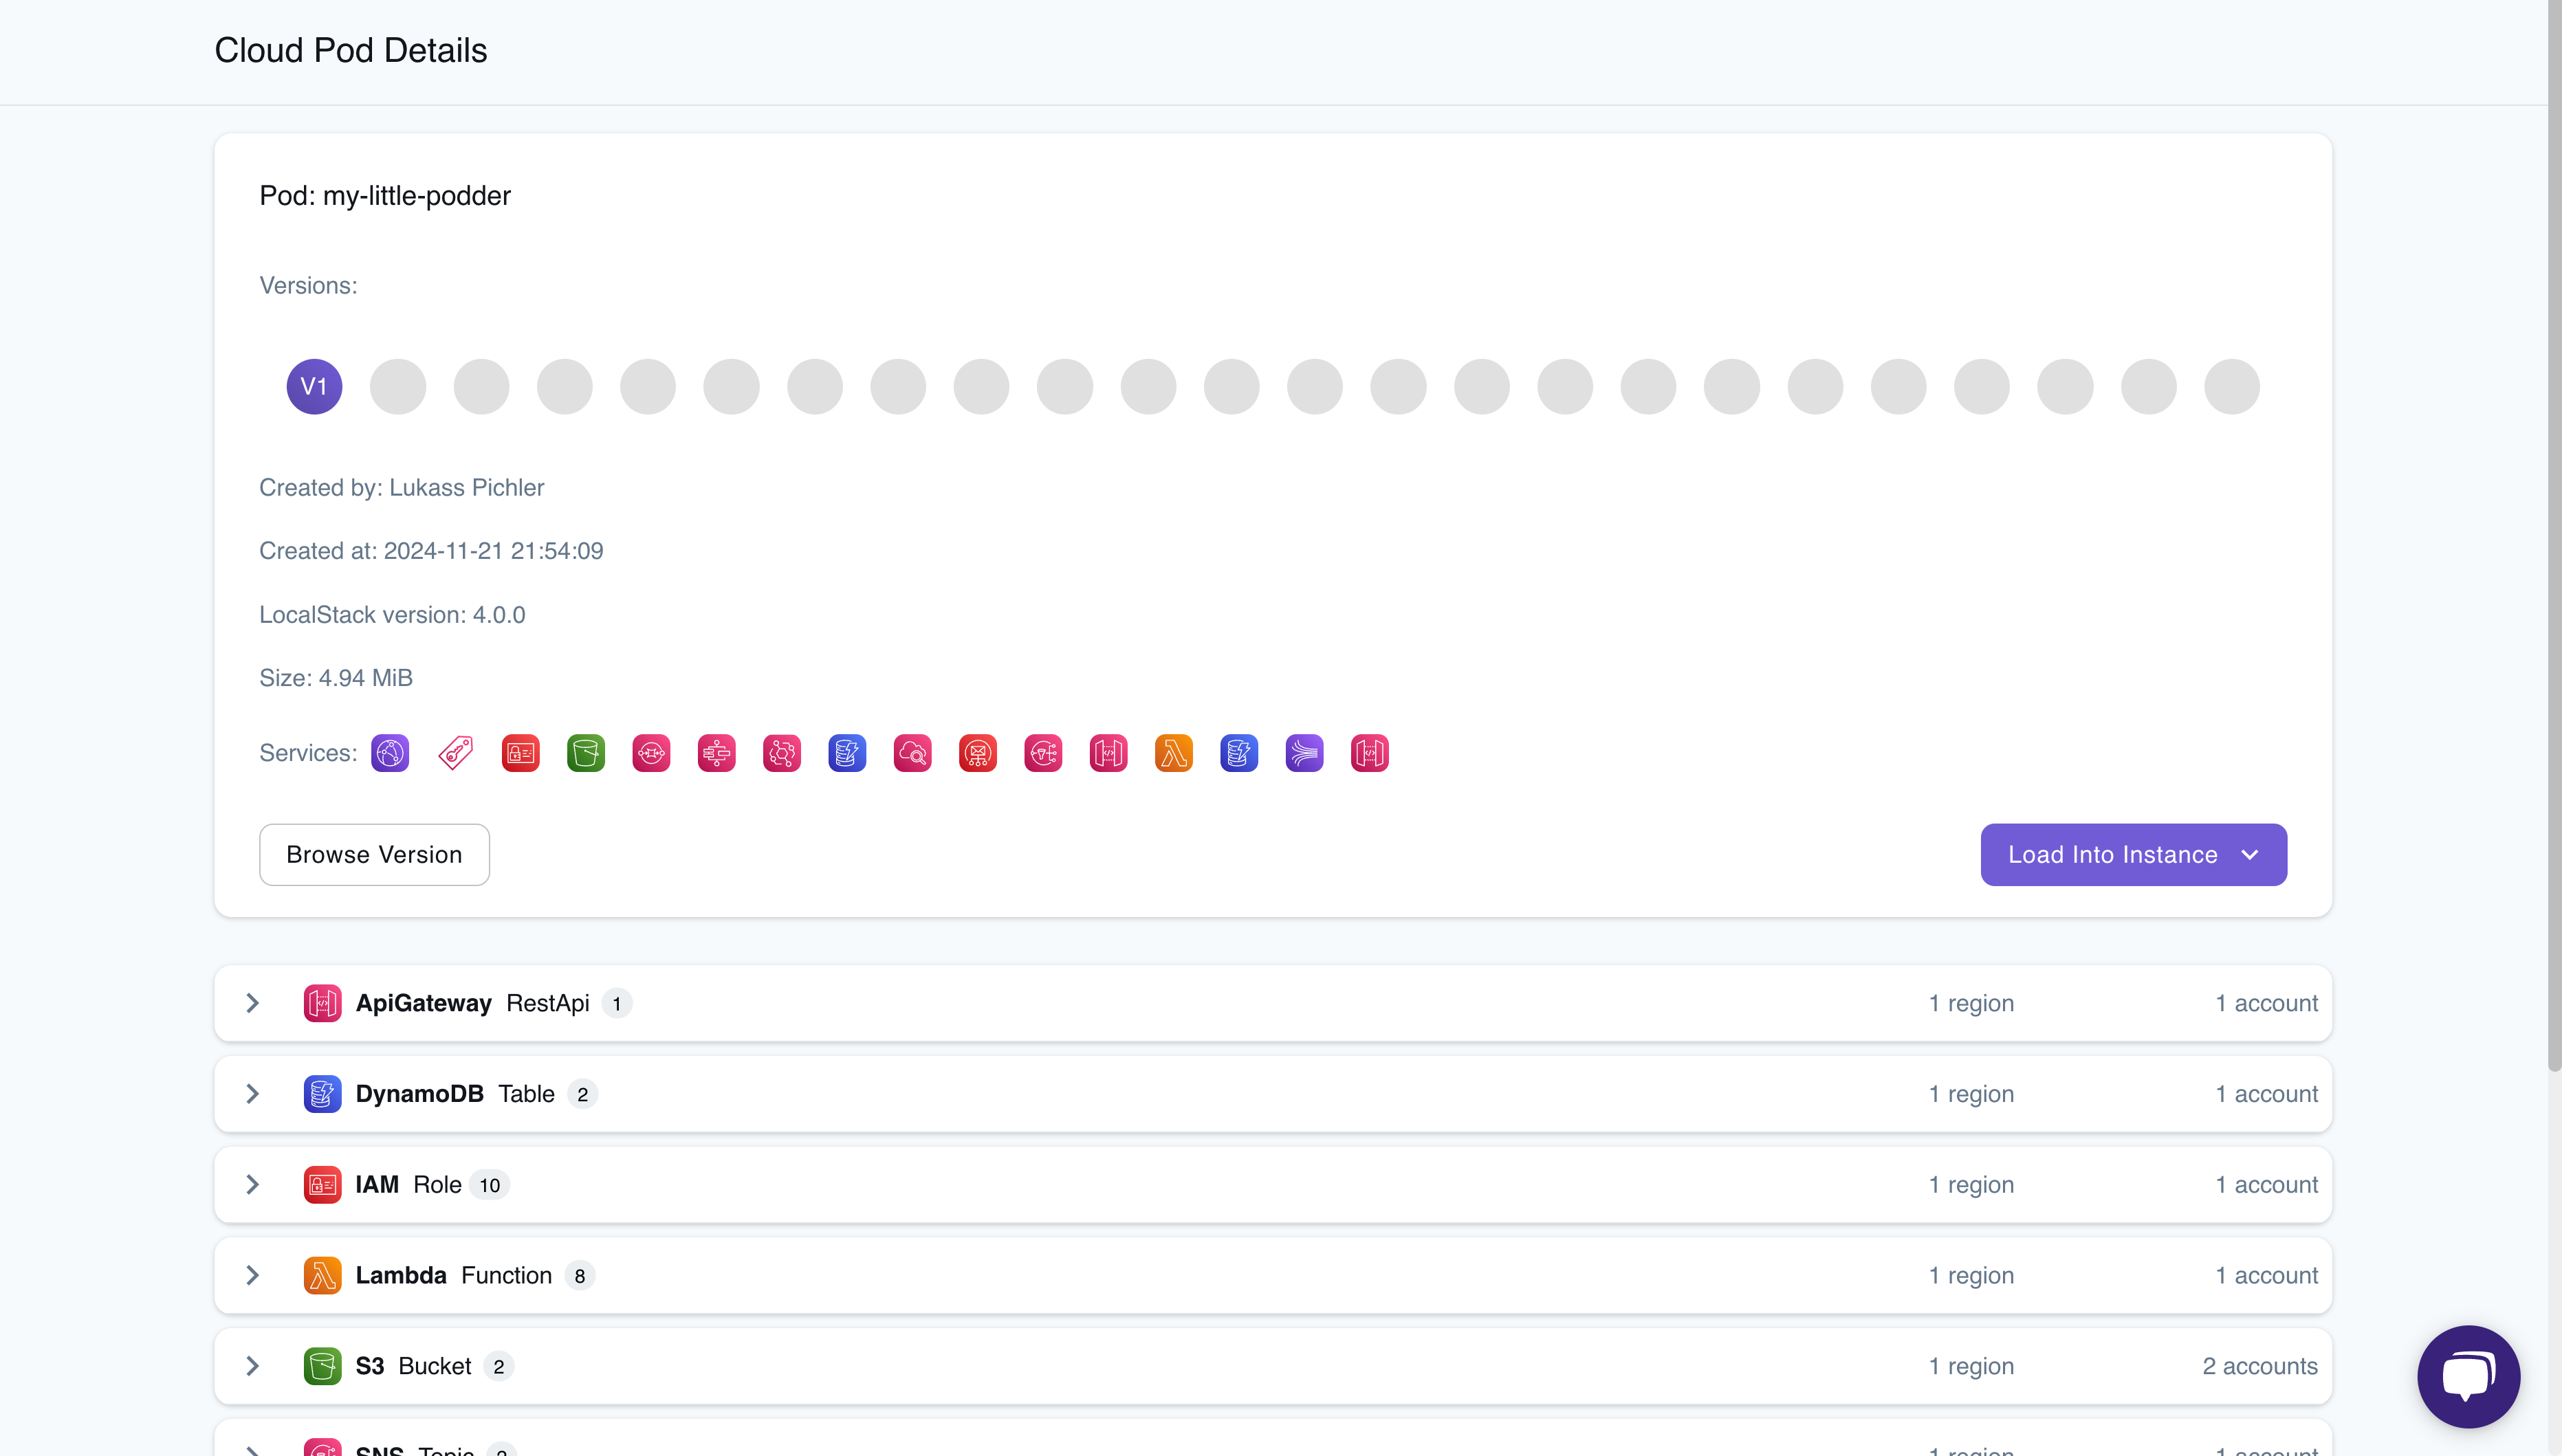
:::note
To save a snapshot with enhanced detail for each of the resources, start your LocalStack instance with the `ENABLE_POD_RESOURCES=1` option.
:::
### Save and load snapshots to or from Cloud Pods
You can save and load snapshots using the LocalStack Console. This is useful when you prefer a user-friendly interface without the need to interact with the CLI.
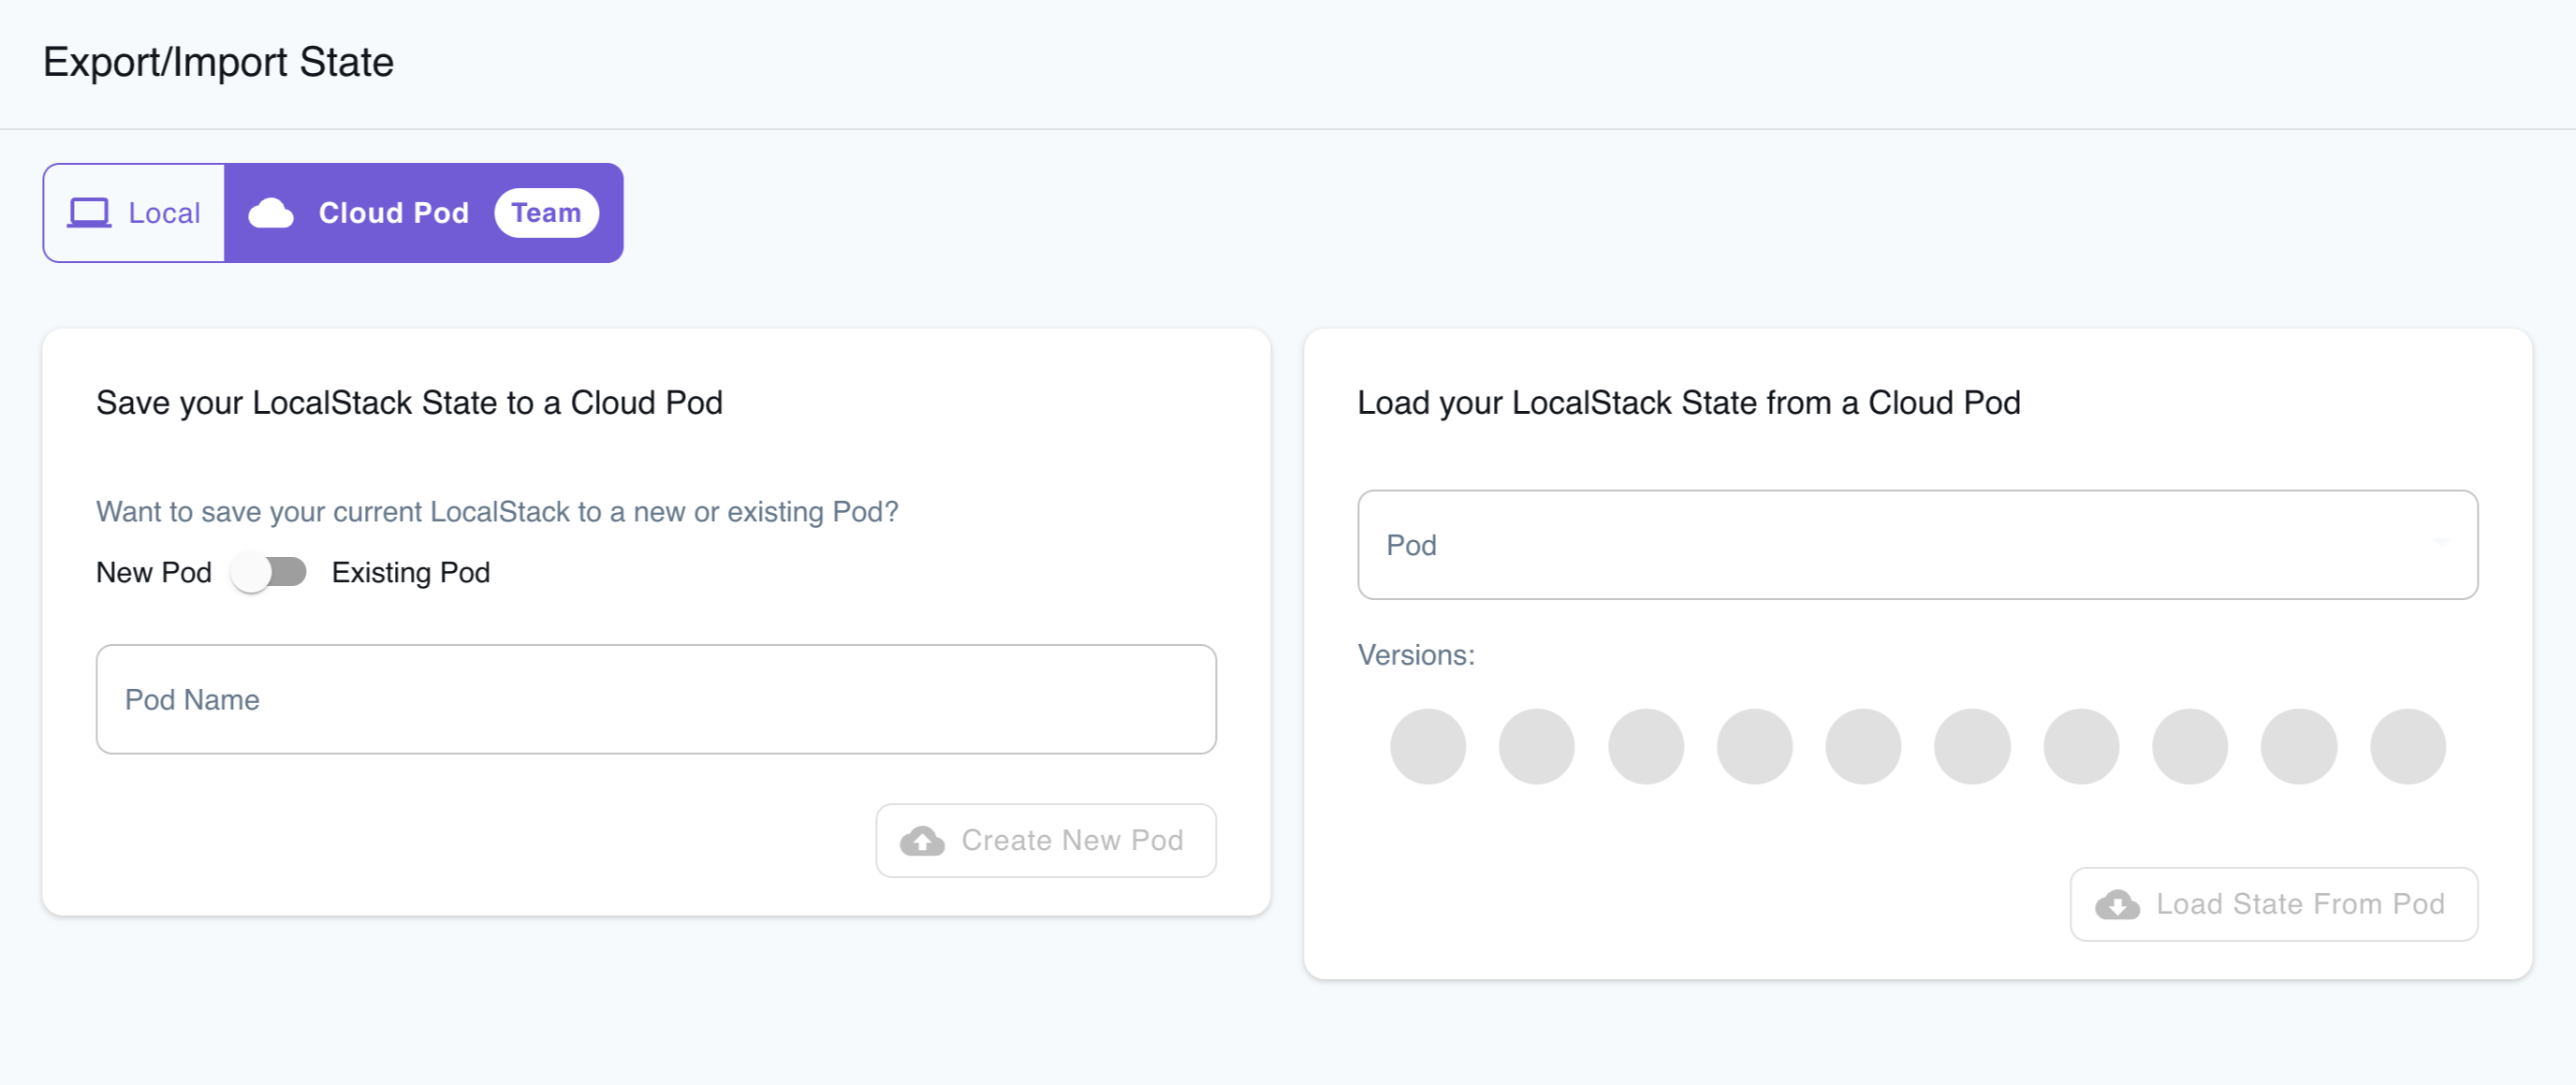
#### Save the snapshot
To save a snapshot, follow these steps:
1. Navigate to the **Cloud** tab within the [State](https://app.localstack.cloud/inst/default/state) page.
2. Create AWS resources locally as needed.
3. Enter the Cloud Pod name and toggle between the **New Pod** and **Existing Pod** options.
4. Enter the services to save resources for.
By default, all available service resources are saved.
5. Click on **Create New Pod**.
A new Cloud Pod will be created, or an existing Cloud Pod will be updated. The snapshot is immediately available for loading into another LocalStack instance.
You can view the list of available Cloud Pods on the [Cloud Pods](https://app.localstack.cloud/pods) page.
#### Load the snapshot
To load a snapshot, follow these steps:
1. Navigate to the **Cloud** tab within the [State](https://app.localstack.cloud/inst/default/state) page.
2. Choose the relevant Cloud Pod from the drop-down list.
3. Click on **Load State From Pod**.
To confirm the successful injection of the container state, visit the respective [Resource Browser](https://app.localstack.cloud/inst/default/resources) for the services and verify the resources.
## Auto-loading from Cloud Pods
In addition to loading snapshots through the Command-Line Interface (CLI) or the Console, you can configure the automatic loading of one or more Cloud Pods upon the startup of the LocalStack instance.
The recommended way to automatically load a snapshot from a Cloud Pod at startup is to set the `snapshot` field in your `lstk` [`config.toml`](/aws/developer-tools/running-localstack/lstk/lifecycle-commands/#auto-loading-a-snapshot-on-start).
However, if you run the LocalStack container directly, for example via Docker Compose or `docker run`, you can instead use the `AUTO_LOAD_POD` [configuration variable](/aws/customization/configuration-options/).
`AUTO_LOAD_POD` can accept multiple Cloud Pod names separated by commas.
To autoload multiple Cloud Pods, such as `foo-pod` and `bar-pod`, use: `AUTO_LOAD_POD=foo-pod,bar-pod`.
The order of Cloud Pods in `AUTO_LOAD_POD` dictates their loading sequence.
When autoloading multiple Cloud Pods, later pods might overwrite the state of earlier ones if they share the same service, account, and region.
Set the `snapshot` field on the container block in your [`config.toml`](/aws/developer-tools/running-localstack/lstk/lifecycle-commands/#auto-loading-a-snapshot-on-start) to the Cloud Pod's `pod:` REF:
```toml
[[containers]]
type = "aws"
port = "4566"
snapshot = "pod:foo-pod"
```
```bash
lstk start
```
```yaml showLineNumbers
services:
localstack:
container_name: "localstack-main"
image: localstack/localstack-pro
ports:
- "127.0.0.1:4566:4566"
- "127.0.0.1:4510-4559:4510-4559"
environment:
- LOCALSTACK_AUTH_TOKEN=${LOCALSTACK_AUTH_TOKEN:?}
- DEBUG=1
- AUTO_LOAD_POD=foo-pod,bar-pod
volumes:
- "./volume:/var/lib/localstack"
- "/var/run/docker.sock:/var/run/docker.sock"
```
```bash
docker run \
-e LOCALSTACK_AUTH_TOKEN=${LOCALSTACK_AUTH_TOKEN:?} \
-e AUTO_LOAD_POD=foo-pod \
-v ./volume:/var/lib/localstack \
-p 4566:4566 \
localstack/localstack-pro
```
# Merging snapshots
> Merge strategies for loading multiple snapshots into the same emulator instance.
LocalStack's snapshot mechanism allows multiple snapshot files to be merged into the same emulator instance.
This is useful when several teams collaborate to build a single running emulator image.
For example, a Platform team may create a snapshot containing VPCs, subnets, S3 buckets, and SSM parameters. An Application team then produces their own snapshot (building on the first) containing Lambda functions, S3 buckets, ECS images, and other application-level resources. It's therefore important to load multiple snapshots, one on top of the other.
LocalStack supports several _merge strategies_ for loading a snapshot into an existing emulator instance. You can think of this as loading two or more snapshots into the same emulator instance, one after the other.
The chosen strategy can be passed to `lstk snapshot load` either by using the `--merge` option, or by setting the `LSTK_MERGE_STRATEGY` environment variable.
```bash
lstk snapshot load --merge=
LSTK_MERGE_STRATEGY= lstk snapshot load
```
## `overwrite` strategy
This strategy completely resets the state of the instance before loading each new snapshot. This results in the instance containing the new snapshot's content, with resources from the older snapshot being discarded.
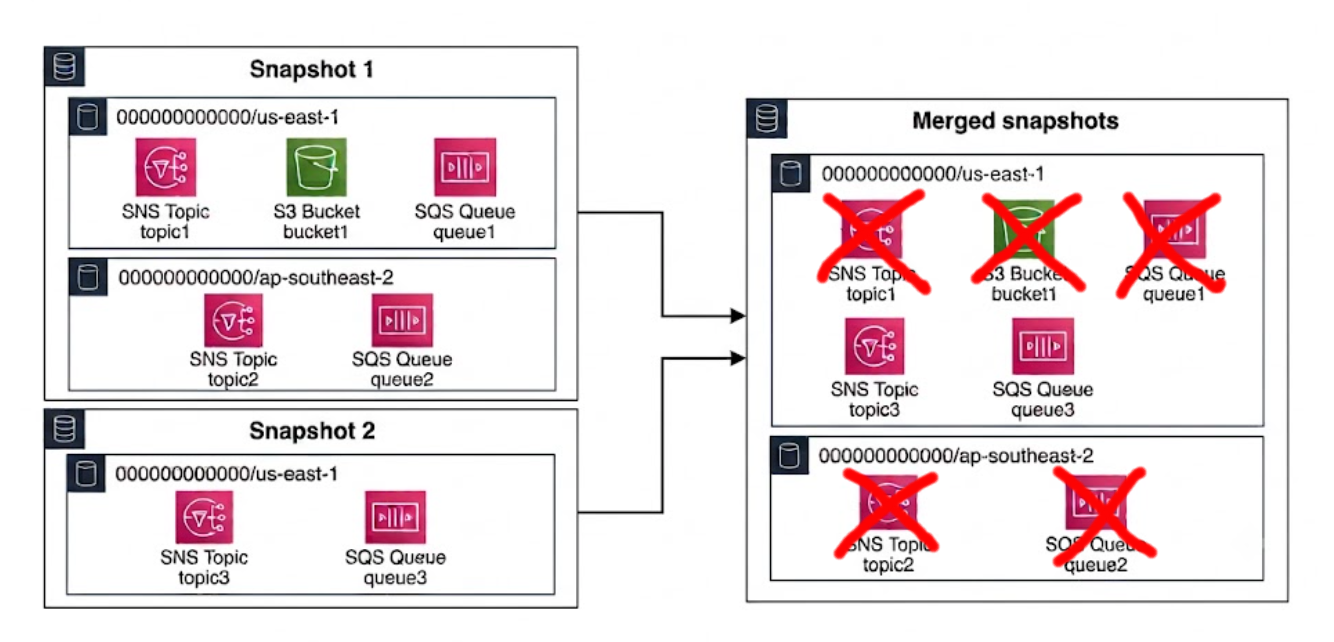
For this merge strategy, use the following:
```bash
lstk snapshot load snapshot1
lstk snapshot load --merge=overwrite snapshot2
lstk status
```
```bash title="Output"
[...]
SNS topic3 us-east-1 000000000000
SQS http://sqs.us-east-1.localhost.localstack.cloud:4566/000000000000/queue-3 us-east-1 000000000000
```
## `account-region-merge` strategy (**default**)
This strategy merges snapshots at the service level, for any given account and region. For example, if the first snapshot contains an SQS queue (`queue-1`) in the `000000000000/us-east-1` account and region, and the second snapshot contains a different SQS queue (`queue-3`), also in the `000000000000/us-east-1` account and region, the first snapshot's SQS resources are discarded. This strategy does not consider whether the SQS queues have different names, since _all_ SQS resources in that account/region are discarded.
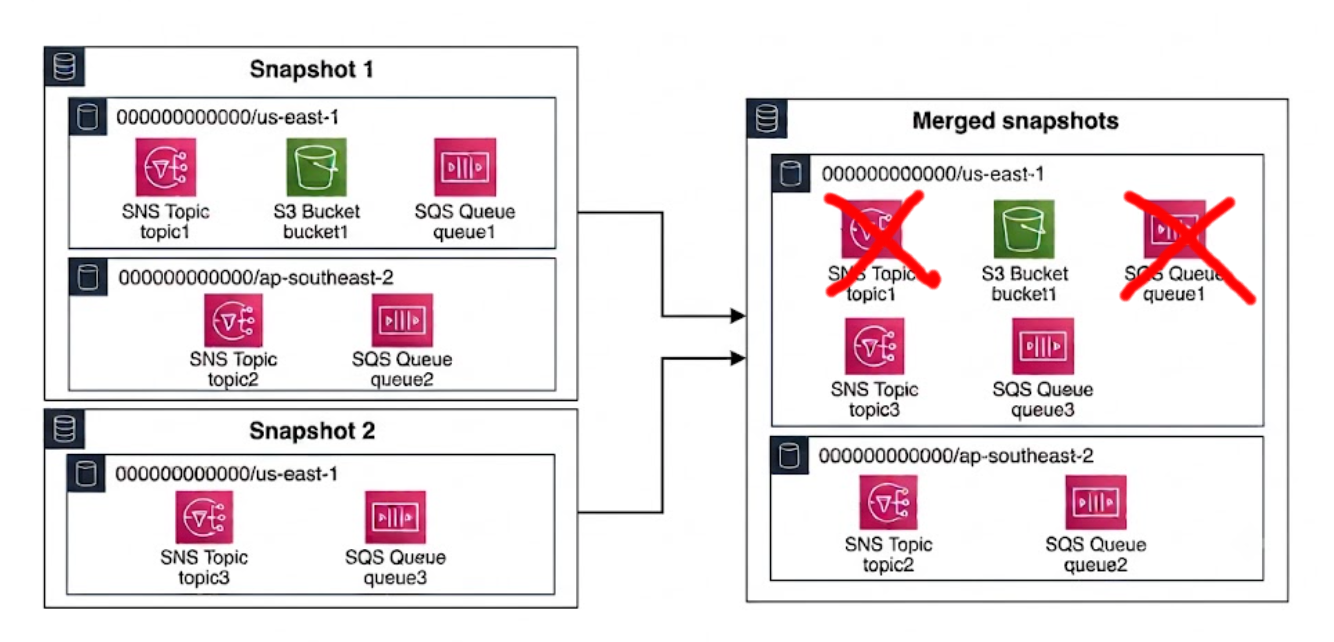
For this merge strategy, use the following:
```bash
lstk snapshot load snapshot1
lstk snapshot load --merge=account-region-merge snapshot2
lstk status
```
```bash title="Output"
[...]
S3 bucket1 global 000000000000
SNS topic2 ap-southeast-2 000000000000
SNS topic3 us-east-1 000000000000
SQS http://sqs.ap-southeast-2.localhost.localstack.cloud:4566/000000000000/queue-2 ap-southeast-2 000000000000
SQS http://sqs.us-east-1.localhost.localstack.cloud:4566/000000000000/queue-3 us-east-1 000000000000
```
## `service-merge` strategy
This strategy performs fine-grained merging, similar to the `account-region-merge` strategy, but also considers the names of resources. For example, if each snapshot contains an SQS queue, but the queues have different names (`queue-1` vs `queue-3`), the merge contains both queues. If the names are the same, the resource from the newer snapshot is kept.
This is the same behavior you'd expect if you applied two infrastructure-as-code stacks, one on top of the other.
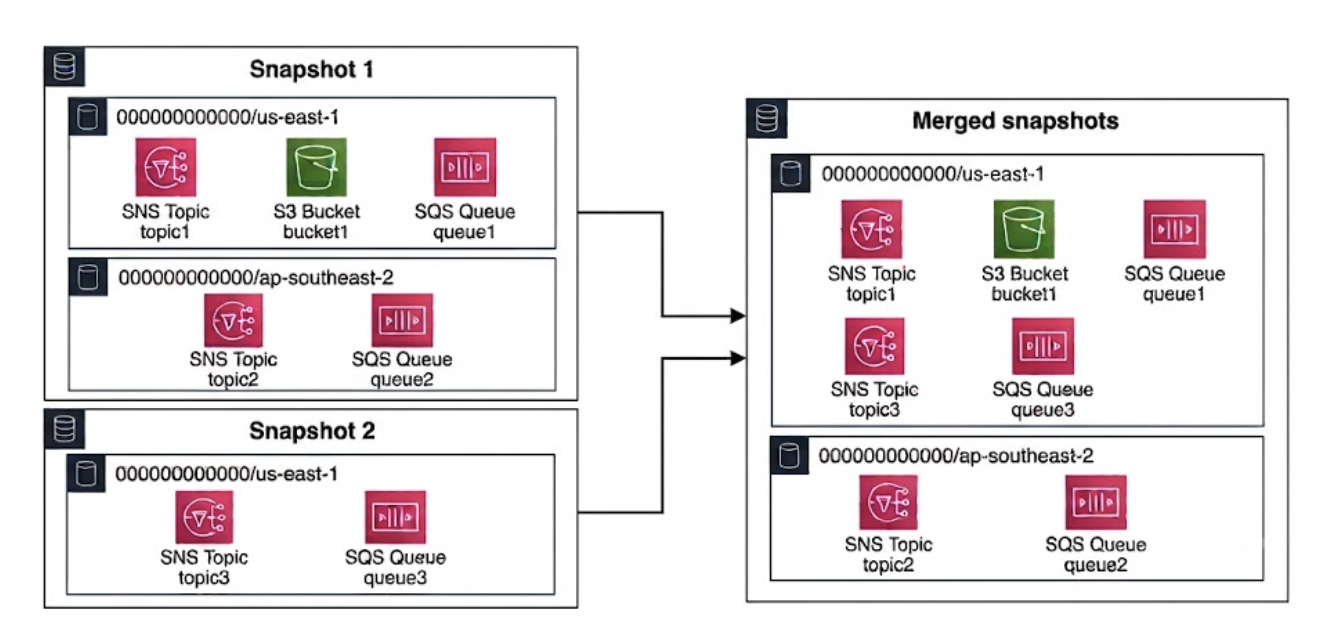
For this merge strategy, use the following:
```bash
lstk snapshot load snapshot1
lstk snapshot load --merge=service-merge snapshot2
lstk status
```
```bash title="Output"
[...]
S3 bucket1 global 000000000000
SNS topic1 us-east-1 000000000000
SNS topic2 ap-southeast-2 000000000000
SNS topic3 us-east-1 000000000000
SQS http://sqs.ap-southeast-2.localhost.localstack.cloud:4566/000000000000/queue-2 ap-southeast-2 000000000000
SQS http://sqs.us-east-1.localhost.localstack.cloud:4566/000000000000/queue-1 us-east-1 000000000000
SQS http://sqs.us-east-1.localhost.localstack.cloud:4566/000000000000/queue-3 us-east-1 000000000000
```
:::note
Merge strategies are not currently supported for file-based snapshots when using the LocalStack Console.
:::
# Persistence
> Enabling automatic persistence of data, providing enhanced durability.
import { Tabs, TabItem } from '@astrojs/starlight/components';
LocalStack's _Persistence_ mechanism uses snapshots to provide an enhanced level of durability, bringing it closer to the behavior you'd expect from a cloud-based service.
By default, LocalStack's internal state is ephemeral, resetting when the emulator is shut down or exits unexpectedly. When the Persistence feature is enabled,
LocalStack takes periodic snapshots of your emulator, then restores it upon restart. This reduces the likelihood of unexpected data loss.
## Configuration
To start snapshot-based persistence, launch LocalStack with the `--persist` command-line option, or the configuration option `PERSISTENCE=1`.
This instructs LocalStack to periodically generate a snapshot, storing it within LocalStack's internal volume directory. There is no visible
snapshot file (or Cloud Pod) created, as the snapshot is managed internally by LocalStack.
Upon restarting LocalStack, the last successful snapshot is automatically reloaded, so you can resume your activities exactly where you left off.
```bash
lstk start --persist
```
```yaml showLineNumbers
image: localstack/localstack-pro
environment:
- LOCALSTACK_AUTH_TOKEN=${LOCALSTACK_AUTH_TOKEN:?}
- PERSISTENCE=1
volumes:
- "${LOCALSTACK_VOLUME_DIR:-./volume}:/var/lib/localstack"
```
```bash
docker run \
-e LOCALSTACK_AUTH_TOKEN=${LOCALSTACK_AUTH_TOKEN:?} \
-e PERSISTENCE=1 \
-v ./volume:/var/lib/localstack \
-p 4566:4566 \
localstack/localstack-pro
```
:::note
Snapshots (stored in LocalStack's volume) may not remain compatible if you upgrade your version of LocalStack.
LocalStack applies [snapshot compatibility rules](/aws/developer-tools/snapshots/service-coverage#snapshot-compatibility) to block loading snapshots known to be incompatible with the running LocalStack version.
:::
### Save strategies
LocalStack generates periodic snapshots of the running emulator. There are four strategies you can choose from to govern when these snapshots are taken.
You can select a particular save strategy by setting `SNAPSHOT_SAVE_STRATEGY=`.
* **`ON_REQUEST`**: On every AWS API call that potentially makes a modification, LocalStack saves the state of that service.
This strategy minimizes the chance of data loss, but also has significant performance implications.
The service must be locked during snapshotting, with any requests to the particular AWS service being blocked until the snapshot is complete.
In many cases this is just a few milliseconds, but can become significant in some services.
* **`ON_SHUTDOWN`**: The state of all services is saved during the shutdown phase of LocalStack.
This strategy has negligible performance impact, but is not good for minimizing the chance of data loss.
Should LocalStack for some reason not shut down properly, or be terminated before it can finalize the snapshot, you may be left with an incomplete state on disk.
* **`SCHEDULED`** (**default**): Saves the state of all services at regular intervals, as long as the state has been modified since the last snapshot.
By default, the flush interval is 15 seconds.
It can be configured via the `SNAPSHOT_FLUSH_INTERVAL` configuration variable.
This is a compromise between `ON_REQUEST` and `ON_SHUTDOWN` in terms of performance and reliability.
* **`MANUAL`**: Turns off automatic snapshotting and gives you control through the internal state endpoints.
### Load strategies
Similarly, you can configure when LocalStack should restore the state snapshots, by using `SNAPSHOT_LOAD_STRATEGY=`.
* **`ON_REQUEST`**: (**default**) The state is loaded lazily when the service is first used (that is, the first API call to that service).
This maintains LocalStack's lazy-loading behavior for AWS services.
* **`ON_STARTUP`**: The state of all services in the snapshot is restored when LocalStack starts up, before any of the services are accessed. This
reduces the cost of lazy-loading when the data is eventually accessed, but does cause an upfront delay to pre-load everything.
* **`MANUAL`**: Turns off automatic loading of snapshots and gives you control through the internal state endpoints.
### Endpoints
With the `MANUAL` save or load strategy, you can trigger snapshotting manually when it best suits your application flow.
* `POST /_localstack/state/