Managed Workflows for Apache Airflow (MWAA)
4 minute read
Introduction
Managed Workflows for Apache Airflow (MWAA) is a fully managed service by AWS that simplifies the deployment, management, and scaling of Apache Airflow workflows in the cloud. MWAA leverages the familiar Airflow features and integrations while integrating with S3, Glue, Redshift, Lambda, and other AWS services to build data pipelines and orchestrate data processing workflows in the cloud.
LocalStack allows you to use the MWAA APIs in your local environment to allow the setup and operation of data pipelines. The supported APIs are available on our API coverage page, which provides information on the extent of MWAA’s integration with LocalStack.
Getting started
This guide is designed for users new to Managed Workflows for Apache Airflow and assumes basic knowledge of the AWS CLI and our awslocal wrapper script.
Start your LocalStack container using your preferred method. We will demonstrate how to create an Airflow environment and access the Airflow UI.
Create a S3 bucket
Create a S3 bucket that will be used for Airflow resources.
Run the following command to create a bucket using the mb command.
$ awslocal s3 mb s3://my-mwaa-bucketCreate an Airflow environment
You can now create an Airflow environment, using the CreateEnvironment API.
Run the following command, by specifying the bucket ARN we created earlier:
$ awslocal mwaa create-environment --dag-s3-path /dags \
        --execution-role-arn arn:aws:iam::000000000000:role/airflow-role \
        --network-configuration {} \
        --source-bucket-arn arn:aws:s3:::my-mwaa-bucket \
        --airflow-version 2.2.2 \
        --airflow-configuration-options agent.code=007,agent.name=bond \
        --name my-mwaa-env
Access the Airflow UI
The Airflow UI can be accessed via the URL in the WebserverUrl attribute of the response of the GetEnvironment operation.
The username and password are always set to localstack.
$ awslocal mwaa get-environment --name my-mwaa-env --query Environment.WebserverUrl
"http://localhost.localstack.cloud:4510"
LocalStack also prints this information in the logs:
2024-03-06T14:54:47.070 INFO --- [functhread10] l.services.mwaa.provider : Airflow environment 'my-mwaa-env' available at http://localhost.localstack.cloud:4510 with username 'localstack' and password 'localstack'
Airflow versions
LocalStack supports the following versions of Apache Airflow:
1.10.12(deprecated)2.0.2(deprecated)2.2.2(deprecated)2.4.32.5.12.6.32.7.22.8.12.9.2(default)
Airflow configuration options
To configure Airflow environments effectively, you can utilize the AirflowConfigurationOptions argument.
These options are transformed into corresponding environment variables and passed to Airflow.
For instance:
agent.code:007is transformed intoAIRFLOW__AGENT__CODE:007.agent.name:bondis transformed intoAIRFLOW__AGENT__NAME:bond.
This transformation process ensures that your configuration settings are easily applied within the Airflow environment.
Adding or updating DAGs
When it comes to adding or updating DAGs in Airflow, the process is simple and efficient.
Just upload your DAGs to the designated S3 bucket path, configured by the DagS3Path argument.
For example, the command below uploads a sample DAG named sample_dag.py to your S3 bucket named my-mwaa-bucket:
$ awslocal s3 cp sample_dag.py s3://my-mwaa-bucket/dagsLocalStack syncs new and changed objects in the S3 bucket to the Airflow container every 30 seconds.
The polling interval can be changed using the MWAA_S3_POLL_INTERVAL config option.
Installing custom plugins
You can extend the capabilities of Airflow by incorporating custom plugins, which introduce new operators, interfaces, or hooks. LocalStack seamlessly supports plugins packaged according to AWS specifications.
To integrate your custom plugins into the MWAA environment, upload the packaged plugins.zip file to the designated S3 bucket path:
$ awslocal s3 cp plugins.zip s3://my-mwaa-bucket/plugins.zipInstalling Python dependencies
LocalStack streamlines the process of installing Python dependencies for Apache Airflow within your environments.
To get started, create a requirements.txt file that lists the required dependencies.
For example:
boto3==1.17.54
boto==2.49.0
botocore==1.20.54
Once you have your requirements.txt file ready, upload it to the designated S3 bucket, configured for use by the MWAA environment.
Make sure to upload the file to /requirements.txt in the bucket:
$ awslocal s3 cp requirements.txt s3://my-mwaa-bucket/requirements.txtAfter the upload, the environment will be automatically updated, and your Apache Airflow setup will be equipped with the new dependencies. It is important to note that, unlike AWS, LocalStack does not install any provider packages by default. Therefore, you must follow the above steps to install any required provider packages.
Connections
When incorporating connections to other AWS services within your DAGs, it is crucial to specify either the internal Docker IP address of the LocalStack container or utilize host.docker.internal.
LocalStack currently does not use the credentials and region from aws_conn_id.
This information must be explicitly passed in operators, hooks, and sensors.
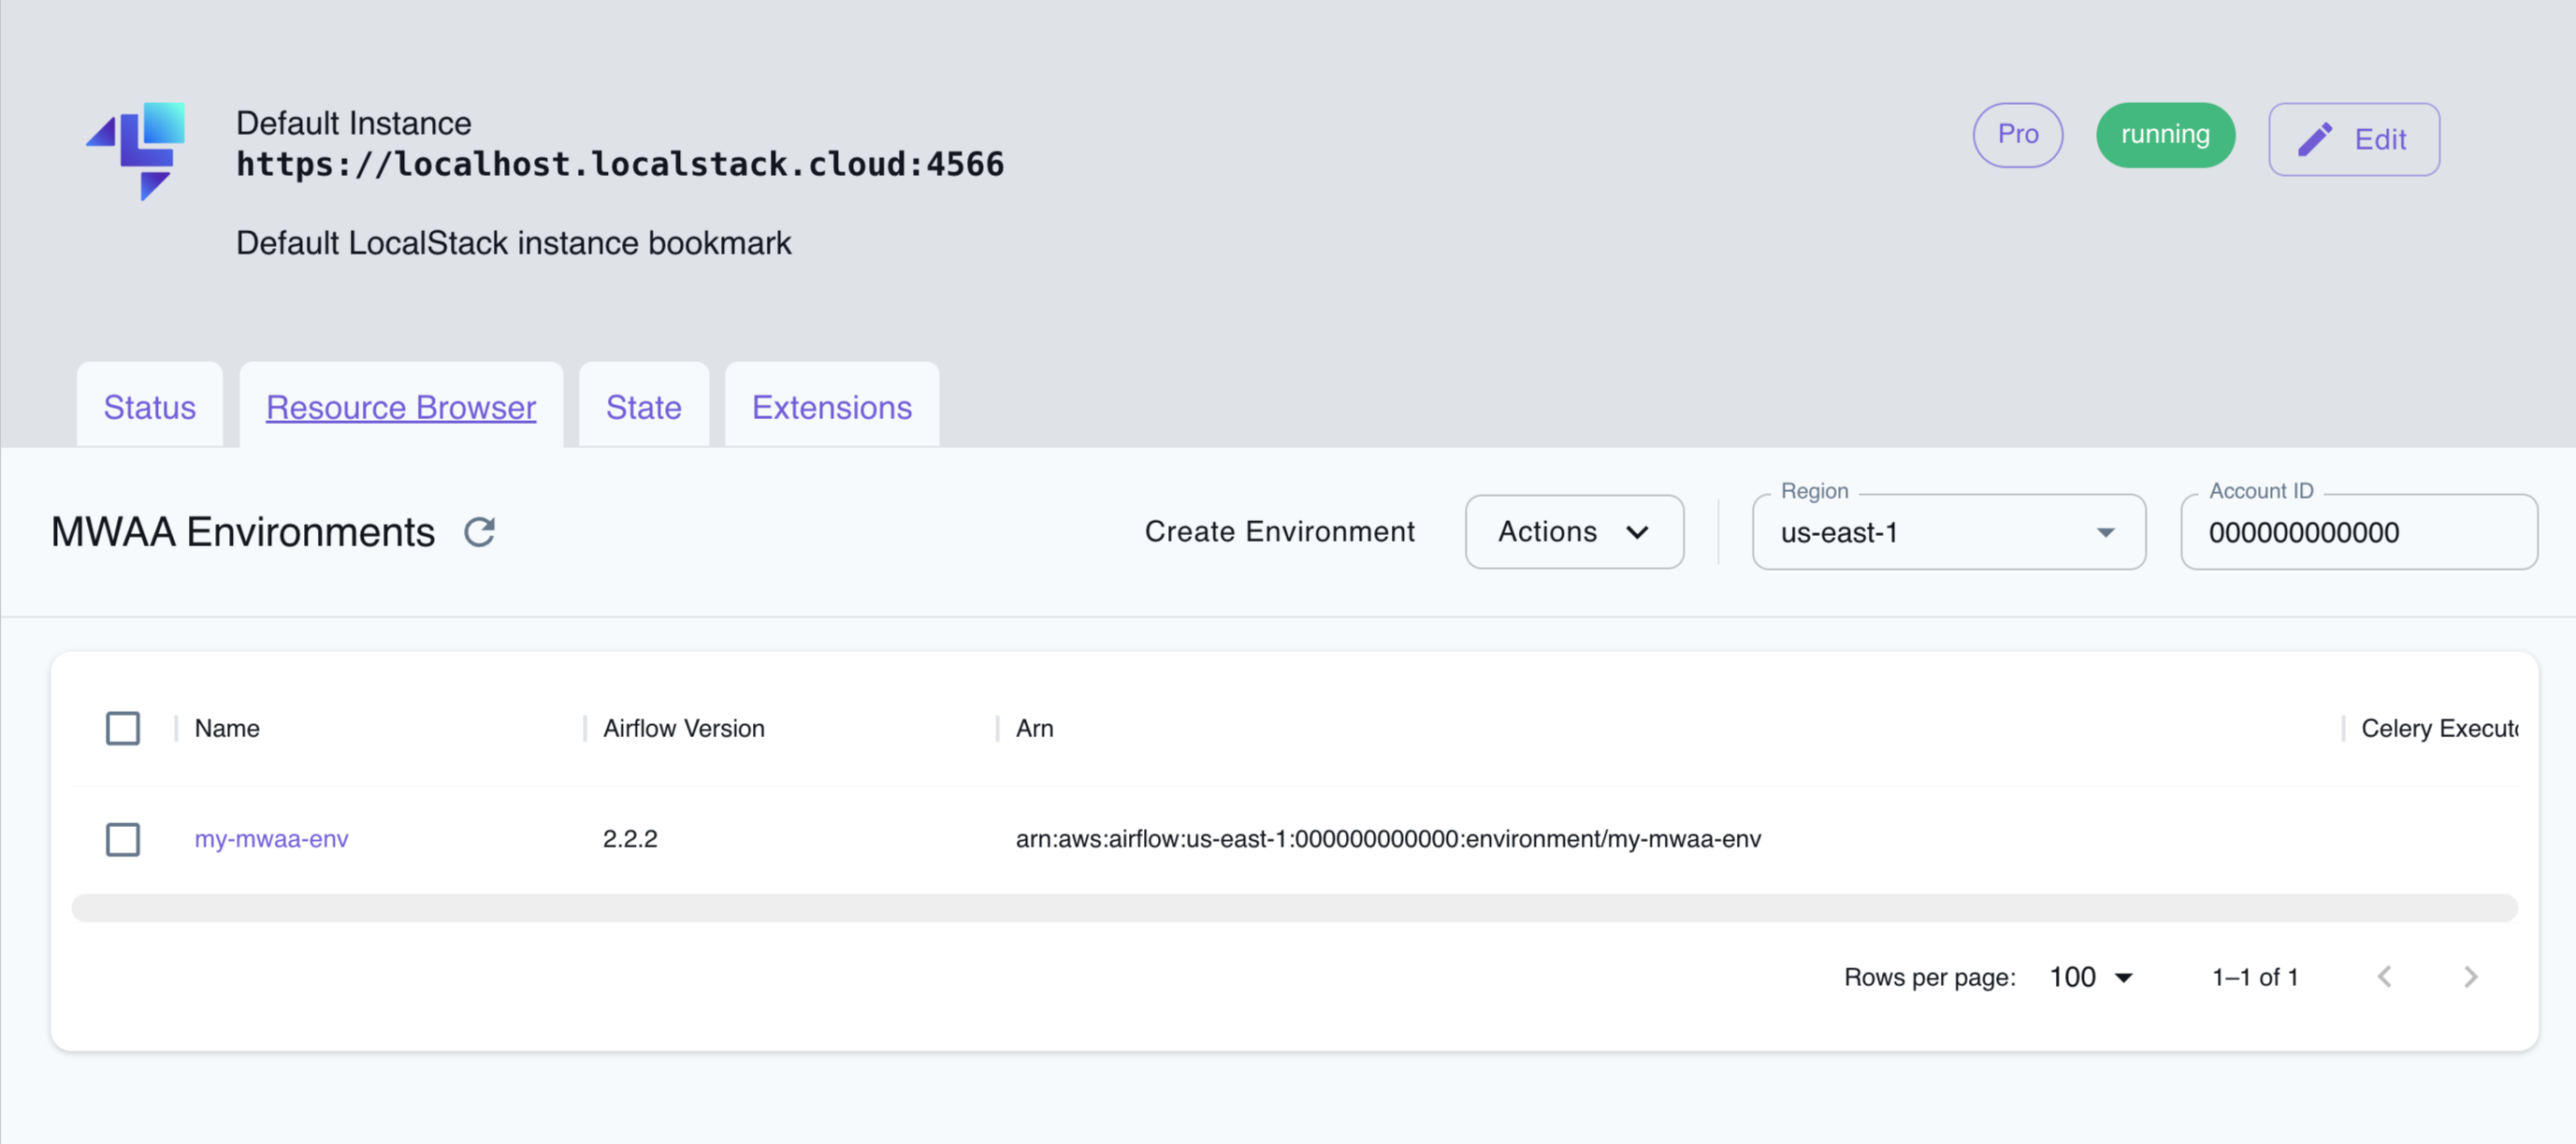
Resource Browser
The LocalStack Web Application provides a Resource Browser for managing MWAA Environments. You can access the Resource Browser by opening the LocalStack Web Application in your browser, navigating to the Resource Browser section, and then clicking on MWAA under the App Integration section.

The Resource Browser allows you to perform the following actions:
- Create Environment: Create a new MWAA environment by clicking on the Create Environment button and providing the required parameters.
- View Environment: View details of an existing MWAA environment by clicking on the environment name.
- Edit Environment: Edit an existing MWAA environment by clicking on the Edit button after clicking on the environment name.
- Delete Environment: Select the environment name and click on the Actions button followed by Remove Selected button.