Managing extensions
You have different options to install and manage your LocalStack extensions depending on your environment and work style.
Extensions are managed through the LocalStack container, but stored in the LocalStack volume on your host. The next time you start up LocalStack, your extensions will still be there!
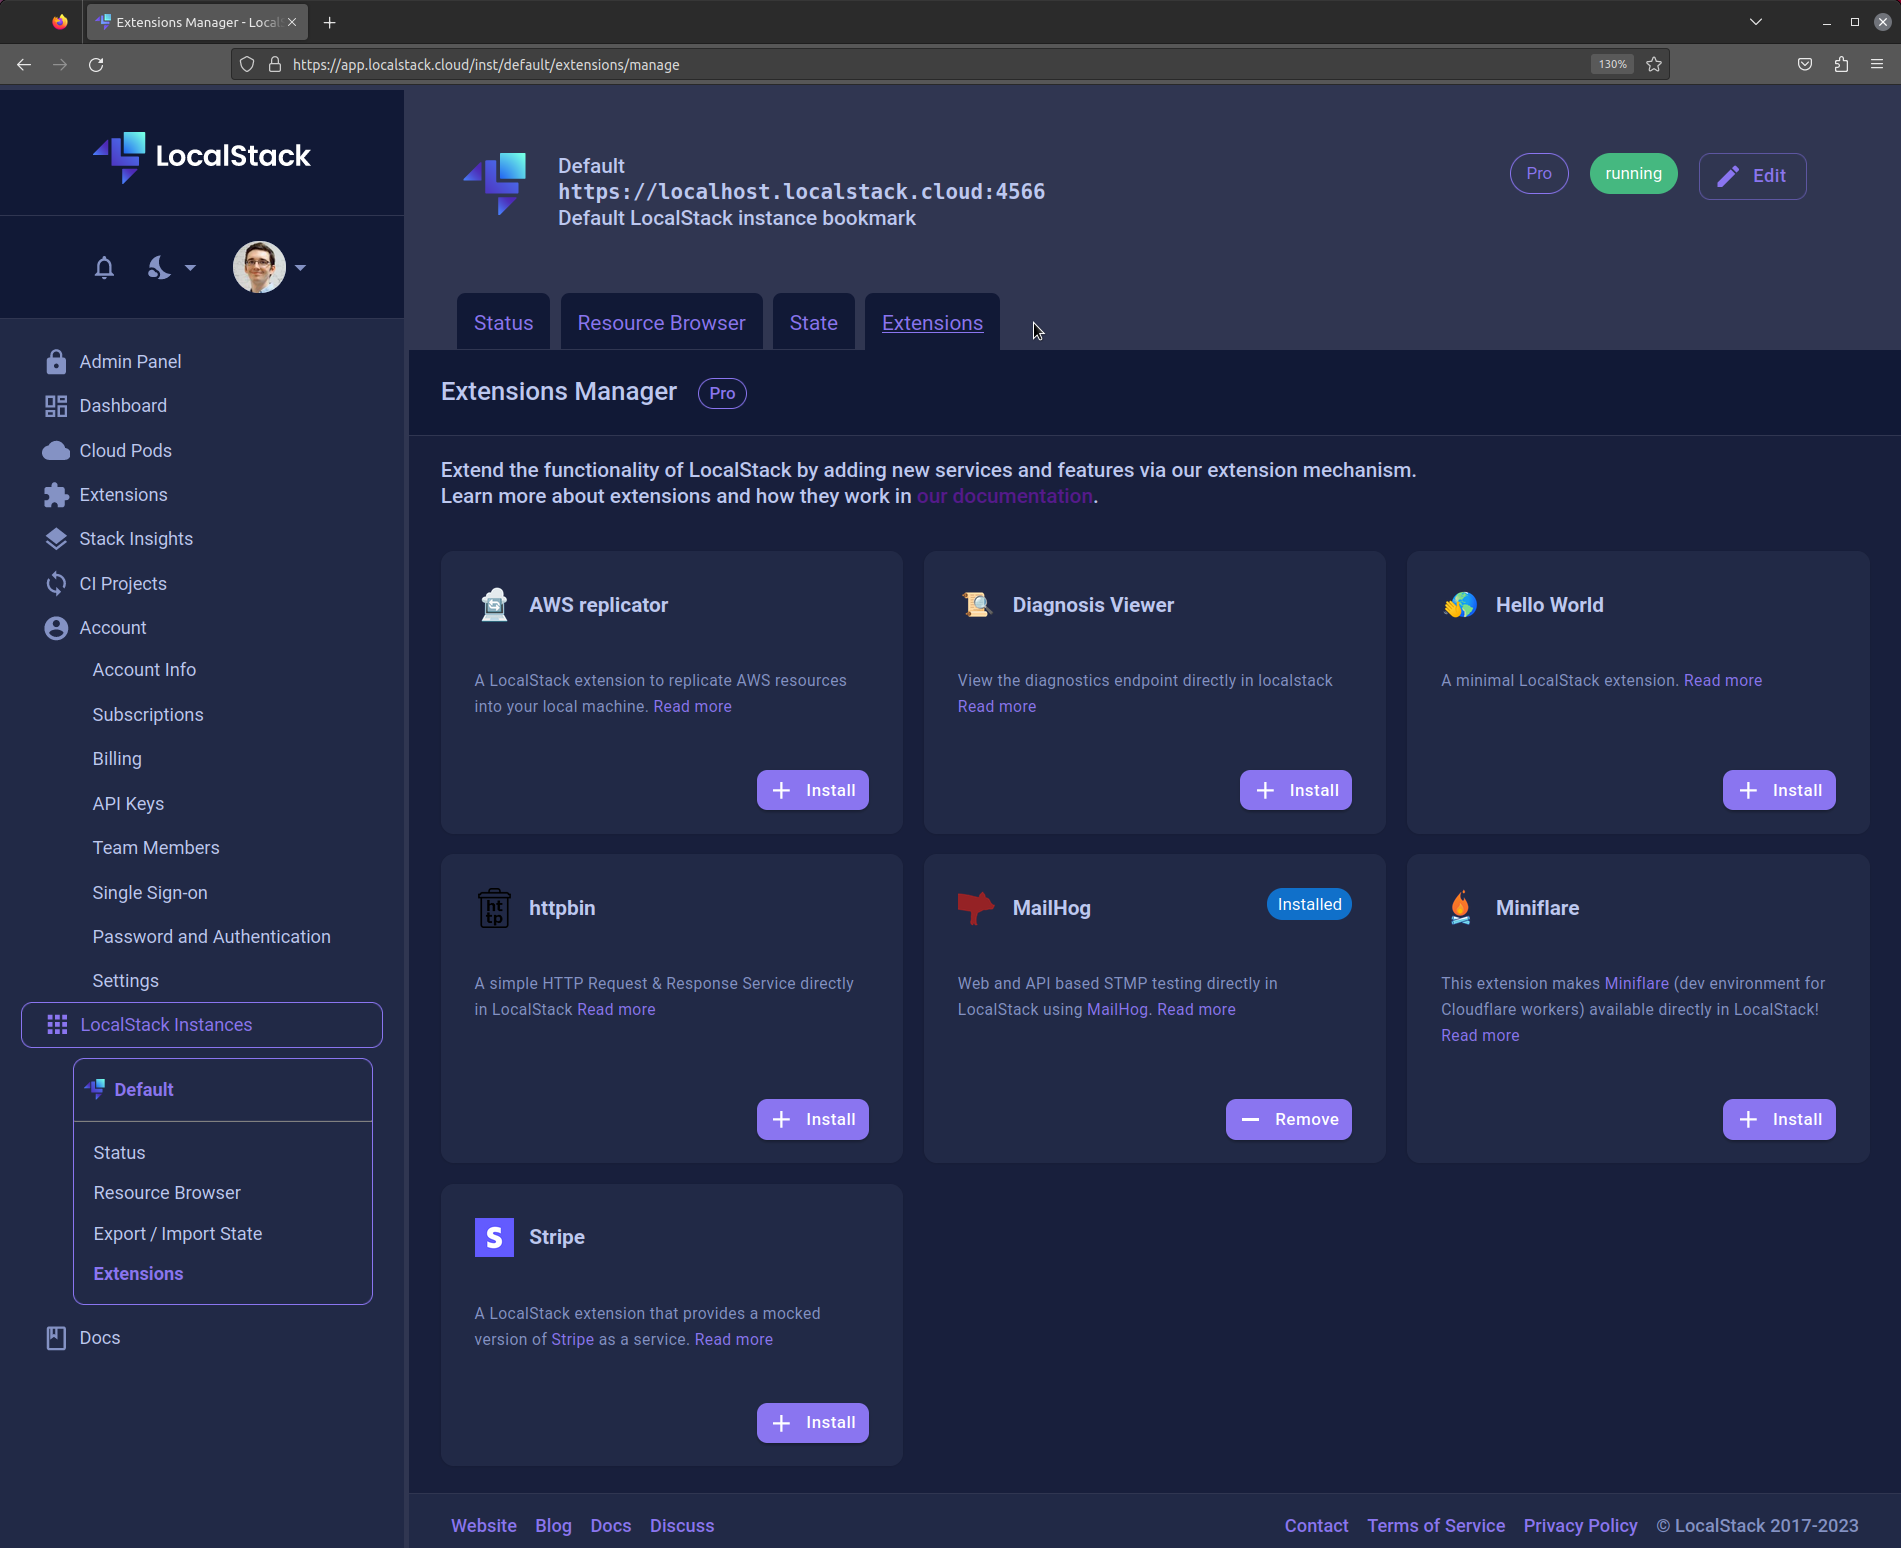
Using the extensions manager in our App
Section titled “Using the extensions manager in our App”The easiest way to manage official extensions is through our webapp and our Extension Manager App. Simply install and remove extensions from your specific LocalStack instance directly from the App.
If you have multiple instances of LocalStack, each instance has its own set of extensions, and our App allows you to manage extensions for each instance individually.

Using the extensions CLI
Section titled “Using the extensions CLI”If you use LocalStack with the CLI, you can also use our localstack extensions CLI command suite.
To get a list of all available commands in LocalStack Extensions, run:
localstack extensions --help
Usage: localstack extensions [OPTIONS] COMMAND [ARGS]...
Manage LocalStack extensions (preview)
Options:-v, --verbose  Print more output-h, --help     Show this message and exit
Commands:dev        Developer tools for developing LocalStack extensionsinit       Initialize the LocalStack extensions environmentinstall    Install a LocalStack extensionlist       List installed extensionuninstall  Remove a LocalStack extension
To install an extension, specify the name of the pip dependency that contains the extension.
For example, for the official Stripe extension, you can either use the package distributed on PyPI:
localstack extensions install localstack-extension-httpbinExtensions are just Python pip packages, and the install command will accept anything that resolves to a valid pip package.
For example, you can install the latest development version directly from our Git repository using the git+https directive.
localstack extensions install "git+https://github.com/localstack/localstack-extensions/#egg=localstack-extension-httpbin&subdirectory=httpbin"If you have Python distribution as files on your local machine, for instance pip wheels or source distributions, then you can also install those via the file:// directive
The file will be automatically mounted into the container and installed from there.
pip install file://./my-extensions/dist/my-extension-0.0.1.dev0.tar.gzSpecify the LOCALSTACK_VOLUME_DIR
Section titled “Specify the LOCALSTACK_VOLUME_DIR”Extensions should be installed in the LOCALSTACK_VOLUME_DIR.
The default directory on your host is currently ~/.cache/localstack.
If you decide to mount a different directory to /var/lib/localstack in your docker-compose file, as shown below, you must specify the LOCALSTACK_VOLUME_DIR before installing extensions.
volumes: - "/tmp/volume:/var/lib/localstack" # LOCALSTACK_VOLUME_DIR mount - "/var/run/docker.sock:/var/run/docker.sock"Here’s how you can use LOCALSTACK_VOLUME_DIR in your commands:
export LOCALSTACK_VOLUME_DIR=/tmp/volumelocalstack extensions install file:///tmp/my_files/my-extension-1.0.0.tar.gzAutomating extensions installation
Section titled “Automating extensions installation”When you are working in CI or with docker-compose, you may want to automate extension management. LocalStack provides two ways to do this:
Environment variable
Section titled “Environment variable”The EXTENSION_AUTO_INSTALL variable is interpreted by LocalStack at startup,
to ensure that the extensions set in the variable value are installed when the container starts up.
The value is a comma-separated list of extensions directives that can also be specified in localstack extensions install.
If you want to use the file:// directive, the distribution file needs to be mounted into the container.
In a docker-compose file, this would look something like:
services: localstack: container_name: "localstack-main" image: localstack/localstack-pro ports: - "127.0.0.1:4566:4566" - "127.0.0.1:4510-4559:4510-4559" environment: - LOCALSTACK_AUTH_TOKEN=${LOCALSTACK_AUTH_TOKEN:?} - DEBUG=1 - EXTENSION_AUTO_INSTALL=localstack-extension-mailhog,localstack-extension-httpbin volumes: - "./volume:/var/lib/localstack" - "/var/run/docker.sock:/var/run/docker.sock"Configuration file
Section titled “Configuration file”LocalStack also supports configuration files to automatically install extensions.
Inside the container, LocalStack will resolve the file /etc/localstack/conf.d/extensions.txt, and will install all extensions defined in this list.
Since LocalStack extensions are essentially just Python pip packages, the extensions.txt has the same format as a pip requirements file.
An example project could look something like this:
-
extensions.txtlocalstack-extension-mailhoggit+https://github.com/localstack/localstack-extensions/#egg=localstack-extension-aws-replicator&subdirectory=aws-replicator -
Project layout:
Directoryextension-install
Directoryconf.d
- extensions.txt
- docker-compose.yml
-
docker-compose.yamlservices:localstack:...volumes:- "./volume:/var/lib/localstack"- "conf.d:/etc/localstack/conf.d"- "/var/run/docker.sock:/var/run/docker.sock"
When LocalStack starts up, you should see it tries to install the extensions and all their dependencies.
Extension Management within LocalStack
Section titled “Extension Management within LocalStack”Extensions in LocalStack are Python distributions that operate within their dedicated virtual environment, residing in the LocalStack Volume.
This involves the creation of a”variable packages folder /var/lib/localstack/lib,” where the volume management system establishes both an extensions folder and a virtual environment named python_venv.
Within this environment, all extensions and their dependencies are managed.
LocalStack integrates its virtual environment, ensuring the resolution of all transitive dependencies associated with extensions.
Here’s an example what the default LocalStack volume looks like after installing the MailHog extension:
pwd~/.cache/localstack/volumetree -L 4Directorycache
- …
Directorylib
Directoryextensions
Directorypython_venv
- bin
- include
- lib
- lib64 -> lib
- pyvenv.cfg
Directorymailhog
Directoryv1.0.1
- MailHog_linux_amd64
- logs
Directorytmp
- state
Troubleshooting
Section titled “Troubleshooting”Fixing "ModuleNotFoundError: No module named 'flask'"
Section titled “Fixing "ModuleNotFoundError: No module named 'flask'"”After a recent update in our packaging, you may see this error in your logs when starting LocalStack with an Extension:
ModuleNotFoundError: No module named 'flask'To resolve this, follow these steps:
- Clear the directory mounted to the LocalStack container at
/var/lib/localstack. - Pull the
latestimage of LocalStack (localstack/localstack-pro:latest). - Restart the LocalStack container.
- Reinstall any extensions you were using, unless you have
EXTENSION_AUTO_INSTALLenabled.