Managing Users and Licenses
4 minute read
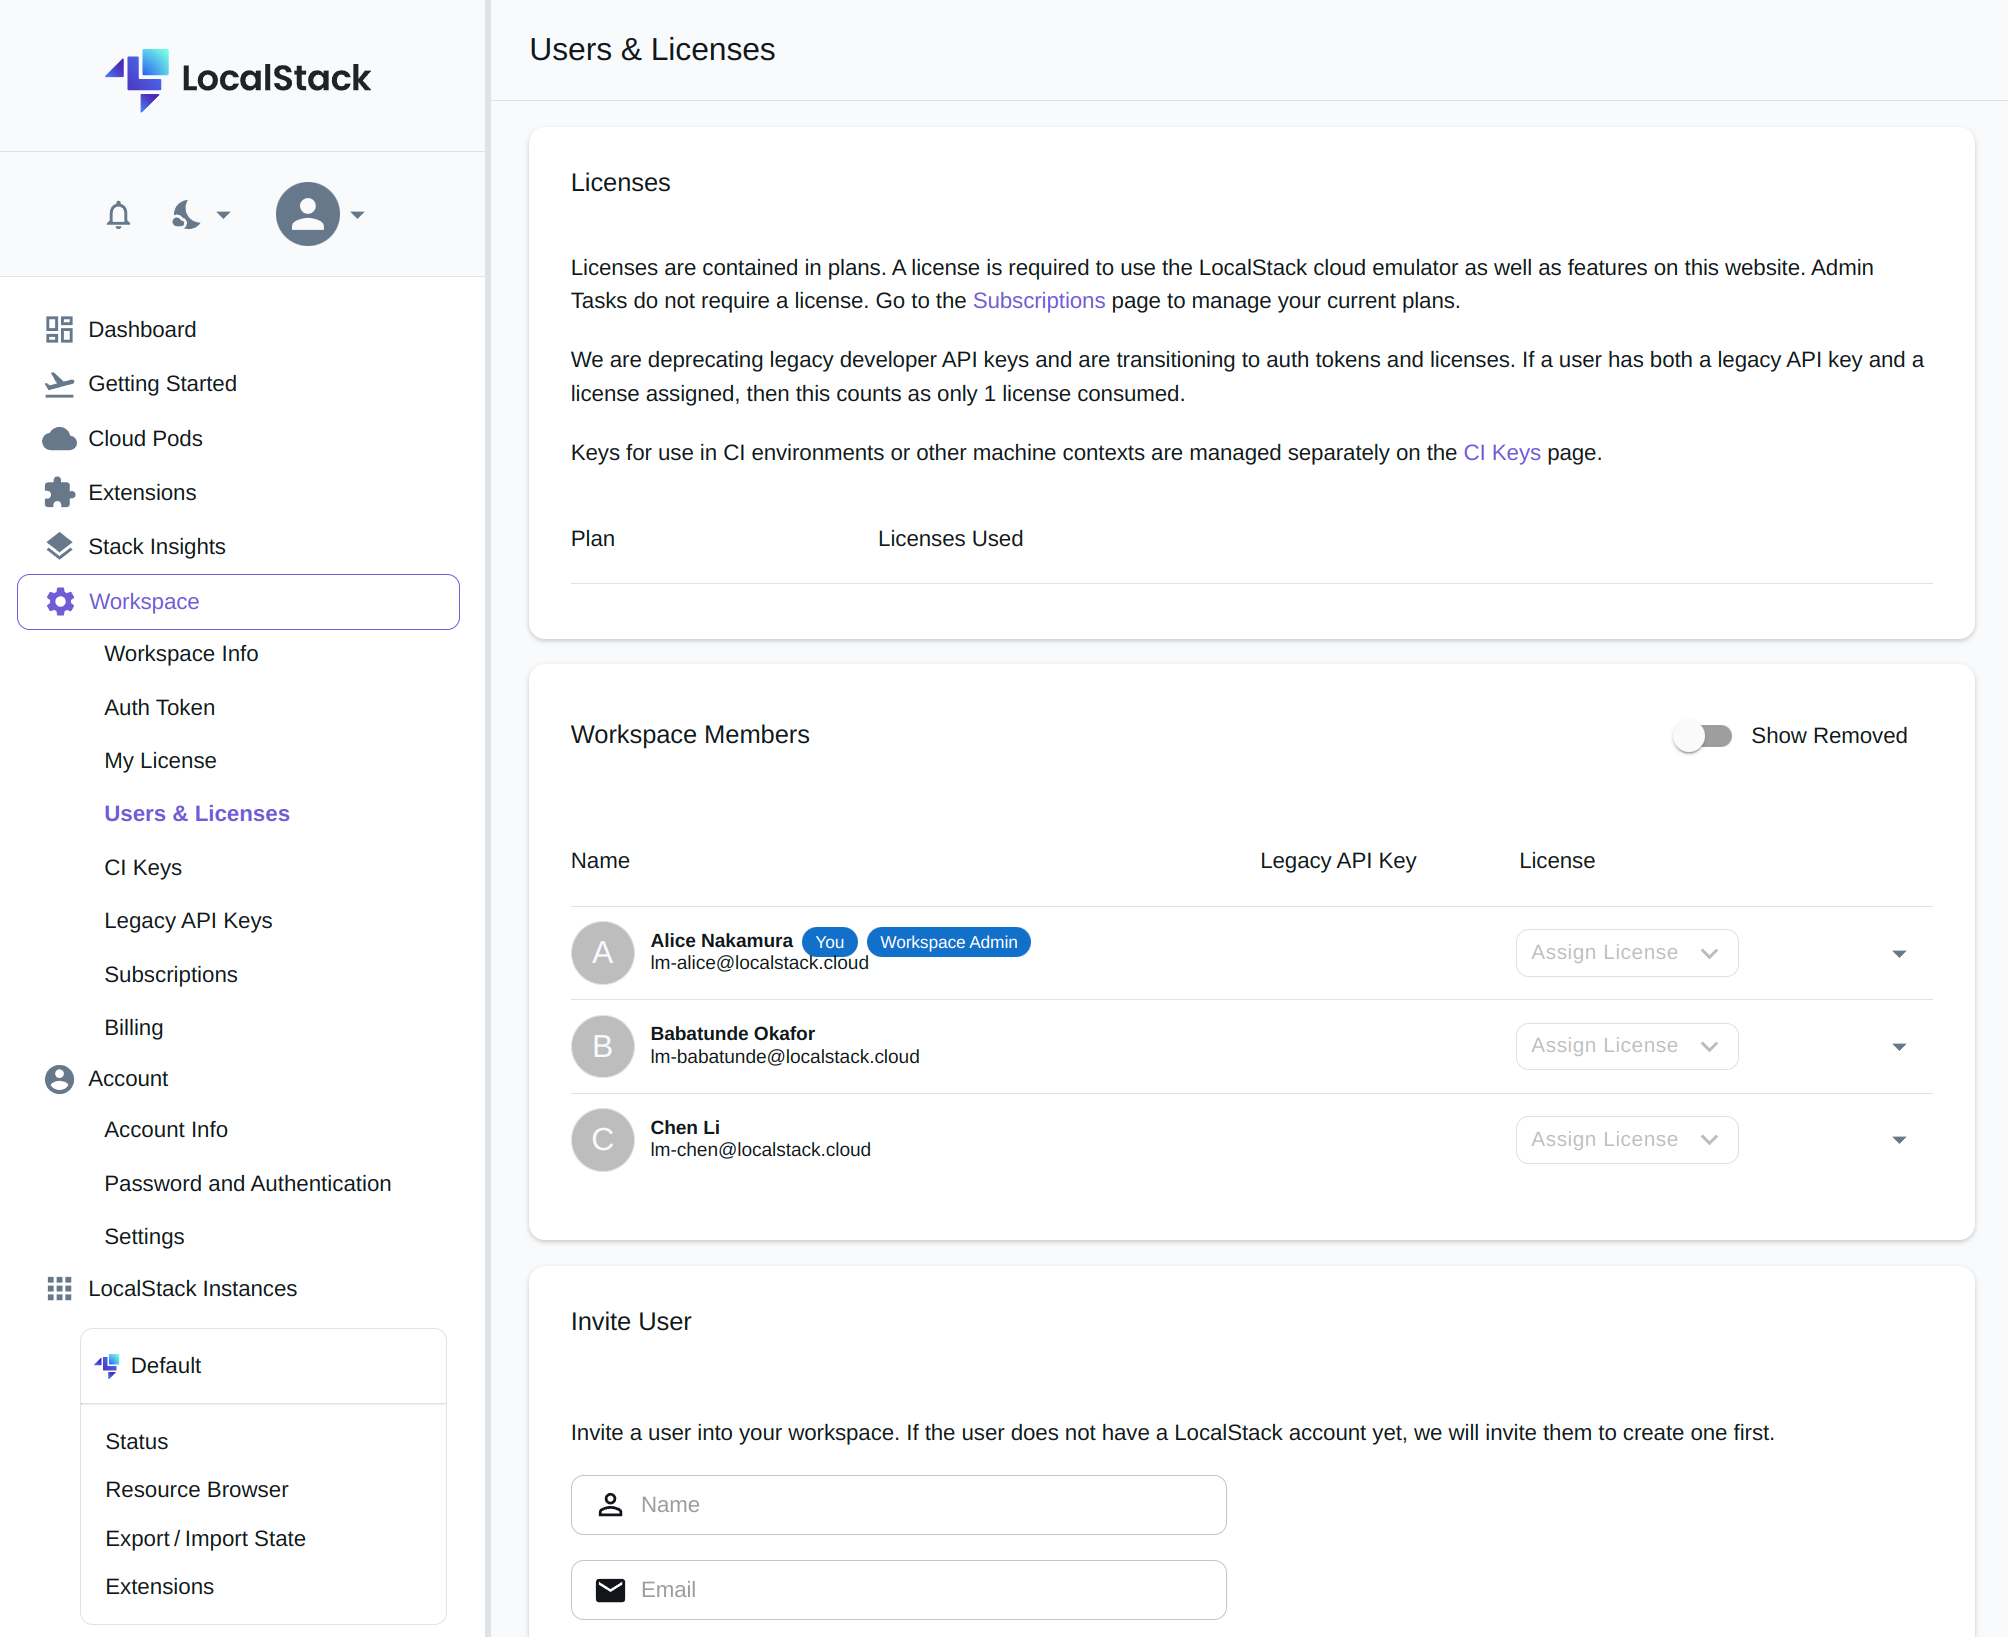
Within a workspace, users and their associated licenses are managed on the Users & Licenses page. This page allows to manage users and assign licenses to them.

Managing Users
Inviting Users to the Workspace
New and existing LocalStack users can be invited to a workspace in the ‘Invite Users’ section. To invite a user, provide the user’s name and email address. If the invitee does not have a LocalStack account yet, an invitation to create an account will be sent to the provided email address. The user’s name is used as placeholder for easier managing and will be replaced by the actual username once the account is created.
Note
Administrators can invite users to a workspace, and can freely assign and unassign licenses or legacy API keys to users. LocalStack automatically assigns a license to the user who is making the purchase, which can be reassigned again with no restrictions.Removing Users
A user can be removed from a workspace by clicking the user entry in the list to show the user’s details. This users detail view also shows the ‘Remove User from Workspace’ button. Removed users can be shown by enabling the ‘Show Removed’ toggle on the top right hand corner of the ‘Workspace Members’ section. Removed users can be reinvited into a workspace with the ‘Resend Invitation’ button.
Managing User Permissions
User permissions can be managed by clicking the user in the list. This will expand the users detailed settings where a predefined role or advanced permissions can be set.
Managing Licenses
A license is required to use advanced features of LocalStack. Licenses are contained in subscriptions and plans. The section ‘Licenses’ lists the active plan/subscription in the workspace and also shows how many licenses (and legacy API keys) are currently in use.
To assign a license to a user, find the user entry in the ‘Workspace Members’ list, and click the ‘Assign License’ button. This button will be greyed out (disabled) if there are no licenses left.
To unassign a user’s license, again, find the user in the list and click the ‘x’ next to the license badge.
Changes to licenses take effect immediately and require no further action of the user.
Moving from legacy API Keys to Licenses
In the past, access to LocalStack and advanced features was granted to individual developers by providing them with a (now legacy) API key.
With the recent change, now the recommended way is to assign a ’license’ to a user instead. Instead of using the legacy API key, the user sets up their personal auth token to access LocalStack advanced features. Upon authentication, the the auth token is used to identify the user and to retrieve and activate an assigned license.
The benefits of this new systems are:
- Auth tokens are longer and more secure (more bits of entropy)
- A user can freely rotate their auth token (if needed) without any changes to their license.
- An admin can manage users’s licenses, not requiring any configuration change of the user. Previously users had to manually update their (legacy) API key.
Note
The transition to auth tokens only affects developer API keys. CI keys are unaffected by this transition and are still the only way to activate a LocalStack instance for use in CI or other automated contexts.Migrating Users to Auth Tokens and Licenses
To migrate users from legacy API keys, assign a license to them in the ‘Workspace Members’ list. The list also shows the legacy API key that is currently assigned to them. If a user already has a legacy API key assigned, assigning a license to them will not consume an additional license. A user holding both a legacy API key and a license is only counted once when the number of used licenses is computed.
If a user uses an API key that was not assigned to them, then it might be necessary to first remove the API key before a license can be assigned.
Once the license is assigned to the user, and the user set up their system to use the new auth token, their legacy API key can be deleted from the workspace. A user can find their personal auth token either in the ‘Auth Token’ or in the ‘Getting Started’ section of the web app.
Sunsetting legacy API keys
In this transition period we continue to support legacy API keys. We will gradually phase them out over the next months, helping customers to smoothly transition over to the new license management.