Cognito
Introduction
Section titled “Introduction”Cognito is a managed identity service provided by AWS that is used for securing user authentication, authorization, and managing user identities in web and mobile applications. Cognito enables developers to add user sign-up, sign-in, and access control functionalities to their applications. Cognito supports various authentication methods, including social identity providers, SAML-based identity providers, and custom authentication flows.
LocalStack allows you to use the Cognito APIs in your local environment to manage authentication and access control for your local application and resources. The supported APIs are available on our Cognito Identity coverage section and Cognito User Pools coverage section, which provides information on the extent of Cognito’s integration with LocalStack.
Getting started
Section titled “Getting started”This guide is designed for users new to Cognito and assumes basic knowledge of the AWS CLI and our awslocal wrapper script.
Start your LocalStack container using your preferred method. We will demonstrate how you can create a Cognito user pool and client, and then sign up and authenticate a new user in the pool.
Creating a User Pool
Section titled “Creating a User Pool”To create a user pool, you can use the CreateUserPool API call.
The following command creates a user pool named test:
awslocal cognito-idp create-user-pool --pool-name test"UserPool": { "Id": "us-east-1_fd924693e9b04f549f989283123a29c2", "Name": "test", "Policies": { "PasswordPolicy": { "MinimumLength": 8, "RequireUppercase": true, "RequireLowercase": true, "RequireNumbers": true, "RequireSymbols": true, "TemporaryPasswordValidityDays": 7 } }, "LastModifiedDate": "2021-10-06T11:57:21.883Z", "CreationDate": "2021-10-06T11:57:21.883Z", "SchemaAttributes": [], "VerificationMessageTemplate": { "DefaultEmailOption": "CONFIRM_WITH_CODE" }, "EmailConfiguration": { "EmailSendingAccount": "COGNITO_DEFAULT" }, "AdminCreateUserConfig": { "AllowAdminCreateUserOnly": false }, "Arn": "arn:aws:cognito-idp:us-east-1:000000000000:userpool/us-east-1_fd924693e9b04f549f989283123a29c2"}You will need the user pool’s id for further operations.
Save it in a pool_id variable:
pool_id=<your-pool-id>Alternatively, you can use JSON processor like jq to extract the essential information right from the outset when creating a pool.
pool_id=$(awslocal cognito-idp create-user-pool --pool-name test | jq -rc ".UserPool.Id")Adding a Client
Section titled “Adding a Client”You can proceed with adding a client to the pool we just created.
You will require the ID of the newly created client for the subsequent steps.
You can use the CreateUserPoolClient for both client creation and extraction of the corresponding ID.
Run the following command:
client_id=$(awslocal cognito-idp create-user-pool-client --user-pool-id $pool_id --client-name test-client | jq -rc ".UserPoolClient.ClientId")Using Predefined IDs for Pool Creation
Section titled “Using Predefined IDs for Pool Creation”When creating Cognito user or identity pools, you have the flexibility to utilize a predefined ID by setting the tag _custom_id_.
This feature proves particularly useful during the testing of authentication flows, especially when dealing with scenarios involving frequent restarts of LocalStack and the recreation of resources.
Please note that a valid custom id must be in the format <region>_<custom_pool_id>.
Run the following command to create a user pool with a predefined ID:
awslocal cognito-idp create-user-pool --pool-name p1 --user-pool-tags "_custom_id_=us-east-1_myid123"{ "UserPool": { "Id": "myid123", "Name": "p1", ...You also have the possibility to create a Cognito user pool client with a predefined ID by specifying a ClientName with the specific format: _custom_id_:<custom_client_id>.
awslocal cognito-idp create-user-pool-client --user-pool-id us-east-1_myid123 --client-name _custom_id_:myclient123{ "UserPoolClient": { "UserPoolId": "us-east-1_myid123", "ClientName": "_custom_id_:myclient123", "ClientId": "myclient123", ...Signing up and confirming a user
Section titled “Signing up and confirming a user”You can now use the SignUp API to sign up a user.
Run the following command:
awslocal cognito-idp sign-up \ --client-id $client_id \ --username example_user \ --password 12345678Aa! \ --user-attributes Name=email,Value=<your.email@address.com>{ "UserConfirmed": false, "UserSub": "5fdbe1d5-7901-4fee-9d1d-518103789c94"}Once the user is successfully created, a confirmation code will be generated. This code can be found in the LocalStack container logs (as shown below). Additionally, if you have SMTP configured, the confirmation code can be optionally sent via email for enhanced convenience and user experience.
INFO:localstack_ext.services.cognito.cognito_idp_api: Confirmation code for Cognito user example_user: 125796DEBUG:localstack_ext.bootstrap.email_utils: Sending confirmation code via email to "your.email@address.com"You can confirm the user with the activation code, using the ConfirmSignUp API.
Execute the following command:
awslocal cognito-idp confirm-sign-up \ --client-id $client_id \ --username example_user \ --confirmation-code <received-confirmation-code>Since the above command does not provide a direct response, we need to verify the success of the request by checking the pool.
Run the following command to use the ListUsers API to list the users in the pool:
awslocal cognito-idp list-users --user-pool-id $pool_id{ "Users": [ { "Username": "example_user", "Attributes": [ { "Name": "email", "Value": "your.email@address.com" }, { "Name": "sub", "Value": "5fdbe1d5-7901-4fee-9d1d-518103789c94" }, { "Name": "cognito:username", "Value": "example_user" } ], "Enabled": true, "UserStatus": "CONFIRMED" } ]}Multi-factor authentication (MFA)
Section titled “Multi-factor authentication (MFA)”LocalStack challenges for multi-factor authentication during the sign-in flow. The following MFA factors are supported:
- SMS text message (
SMS_MFA) - Software token / TOTP (
SOFTWARE_TOKEN_MFA), such as Google Authenticator or Authy - Email (
EMAIL_OTP)
MFA is controlled at two levels.
You configure the available factors and the enforcement mode at the pool level with SetUserPoolMfaConfig, and you enable specific factors per user with AdminSetUserMFAPreference or SetUserMFAPreference.
The pool’s MfaConfiguration determines whether a challenge is issued:
OFF: no MFA challenge is ever issued.OPTIONAL: a challenge is issued only when the user has an MFA factor enabled in their preferences.ON: an MFA challenge is always required.
When a user has multiple factors enabled, the one marked as PreferredMfa is selected.
Software token (TOTP) MFA
Section titled “Software token (TOTP) MFA”First, enable software token MFA at the pool level.
Setting MfaConfiguration to OPTIONAL enforces MFA per-user based on their preferences:
awslocal cognito-idp set-user-pool-mfa-config \ --user-pool-id $pool_id \ --software-token-mfa-configuration Enabled=true \ --mfa-configuration OPTIONALSign in once to obtain an access token, then associate a software token for the user.
This returns a SecretCode that you register in your authenticator app:
awslocal cognito-idp associate-software-token --access-token <access-token>{ "SecretCode": "QDWSDFGRVASRWQRRWE..."}Verify the token by submitting a code generated from the secret, then set the software token as the user’s preferred MFA factor:
awslocal cognito-idp verify-software-token \  --access-token <access-token> \  --user-code <totp-code>
awslocal cognito-idp set-user-mfa-preference \  --access-token <access-token> \  --software-token-mfa-settings Enabled=true,PreferredMfa=true
On the next sign-in, the authentication flow now returns a SOFTWARE_TOKEN_MFA challenge instead of issuing tokens directly:
awslocal cognito-idp initiate-auth \ --client-id $client_id \ --auth-flow USER_PASSWORD_AUTH \ --auth-parameters USERNAME=example_user,PASSWORD=12345678Aa!{ "ChallengeName": "SOFTWARE_TOKEN_MFA", "Session": "abcd1234...", "ChallengeParameters": { "USER_ID_FOR_SRP": "example_user" }}Respond to the challenge with a fresh TOTP code to complete authentication:
awslocal cognito-idp respond-to-auth-challenge \ --client-id $client_id \ --challenge-name SOFTWARE_TOKEN_MFA \ --session <session> \ --challenge-responses USERNAME=example_user,SOFTWARE_TOKEN_MFA_CODE=<totp-code>An invalid code is rejected with a CodeMismatchException.
Email MFA
Section titled “Email MFA”Enable email MFA at the pool level by providing an EmailMfaConfiguration.
The configuration is persisted and returned by GetUserPoolMfaConfig:
awslocal cognito-idp set-user-pool-mfa-config \ --user-pool-id $pool_id \ --email-mfa-configuration 'Message="Your code is {####}",Subject="Your verification code"' \ --mfa-configuration OPTIONALSet email as the user’s preferred MFA factor.
The user must have a verified email attribute:
awslocal cognito-idp admin-set-user-mfa-preference \ --user-pool-id $pool_id \ --username example_user \ --email-mfa-settings Enabled=true,PreferredMfa=trueAdminGetUser now surfaces EMAIL_OTP in the user’s MFA settings:
awslocal cognito-idp admin-get-user --user-pool-id $pool_id --username example_user{ ... "UserMFASettingList": [ "EMAIL_OTP" ], "PreferredMfaSetting": "EMAIL_OTP"}On the next sign-in, the flow returns an EMAIL_OTP challenge:
{ "ChallengeName": "EMAIL_OTP", "Session": "abcd1234...", "ChallengeParameters": { "CODE_DELIVERY_DELIVERY_MEDIUM": "EMAIL", "CODE_DELIVERY_DESTINATION": "e***@example.com" }}The one-time code is printed to the LocalStack container logs (and sent via email if SMTP is configured):
INFO --- [et.reactor-0] l.p.c.s.c.auth_flows : Code verification sent via email: 123456Respond to the challenge with the emailed code to complete authentication:
awslocal cognito-idp respond-to-auth-challenge \ --client-id $client_id \ --challenge-name EMAIL_OTP \ --session <session> \ --challenge-responses USERNAME=example_user,EMAIL_OTP_CODE=<code>As with TOTP, an invalid code is rejected with a CodeMismatchException.
JWT Token Issuer and JSON Web Key Sets (JWKS) endpoints
Section titled “JWT Token Issuer and JSON Web Key Sets (JWKS) endpoints”When Cognito creates JWT tokens, they include an issuer (iss) attribute that specifies the endpoint of the corresponding user pool.
Generally, the issuer endpoint follows this format, with <pool_id> being the ID of the Cognito user pool:
http://localhost:4566/<pool_id>However, depending on your specific configurations, there might be slight variations in the issuer URL, such as:
https://cognito-idp.localhost.localstack.cloud/<pool_id>To access the JSON Web Key Sets (JWKS) configuration for each user pool, you can use the standardized well-known URL below:
curl 'http://localhost:4566/<pool_id>/.well-known/jwks.json'{"keys": [{"kty": "RSA", "alg": "RS256", "use": "sig", "kid": "test-key", "n": "k6lrbEH..."]}Moreover, you can retrieve the global region-specific public keys for Cognito Identity Pools using the following endpoint:
curl http://localhost:4566/.well-known/jwks_uriThe output will be similar to the following:
{"keys": [{"kty": "RSA", "alg": "RS512", "use": "sig", "kid": "ap-northeast-11", "n": "AI7mc1assO5..."]}Cognito Lambda Triggers
Section titled “Cognito Lambda Triggers”Cognito offers a variety of lifecycle hooks called Cognito Lambda triggers, which allow you to react to different lifecycle events and customize the behavior of user signup, confirmation, migration, and more.
To illustrate, suppose you wish to define a user migration Lambda trigger in order to migrate users from your existing user directory into Amazon Cognito user pools at sign-in.
In this case, you can start by creating a Lambda function, let’s say named "migrate_users", responsible for performing the migration by creating a new file index.js with the following code:
const validUsers = {  belladonna: { password: "12345678Aa!", emailAddress: "bella@example.com" },};
// Replace this mock with a call to a real authentication service.const authenticateUser = (username, password) => {  if (validUsers[username] && validUsers[username].password === password) {    return validUsers[username];  } else {    return null;  }};
const lookupUser = (username) => {  const user = validUsers[username];
  if (user) {    return { emailAddress: user.emailAddress };  } else {    return null;  }};
exports.handler = async (event) => {  if (event.triggerSource == "UserMigration_Authentication") {    // Authenticate the user with your existing user directory service    const user = authenticateUser(event.userName, event.request.password);    if (user) {      event.response.userAttributes = {        email: user.emailAddress,        email_verified: "true",      };      event.response.finalUserStatus = "CONFIRMED";      event.response.messageAction = "SUPPRESS";    }  } else if (event.triggerSource == "UserMigration_ForgotPassword") {    // Look up the user in your existing user directory service    const user = lookupUser(event.userName);    if (user) {      event.response.userAttributes = {        email: user.emailAddress,        // Required to enable password-reset code to be sent to user        email_verified: "true",      };      event.response.messageAction = "SUPPRESS";    }  }
  return event;};
Enter the following commands to create the Lambda function:
zip function.zip index.jsawslocal lambda create-function \ --function-name migrate_users \ --runtime nodejs18.x \ --zip-file fileb://function.zip \ --handler index.handler \ --role arn:aws:iam::000000000000:role/lambda-roleSubsequently, you can define the corresponding --lambda-config when creating the user pool to link it with the Lambda function:
awslocal cognito-idp create-user-pool \ --pool-name test2 \ --lambda-config '{"UserMigration":"arn:aws:lambda:us-east-1:000000000000:function:migrate_users"}'Upon successful authentication of a non-registered user, Cognito will automatically trigger the migration Lambda function, allowing the user to be added to the pool after migration.
OAuth Flows via Cognito Login Form
Section titled “OAuth Flows via Cognito Login Form”You can access the local Cognito login form by entering the following URL in your web browser:
https://localhost.localstack.cloud/_aws/cognito-idp/login?response_type=code&client_id=<client_id>&redirect_uri=<redirect_uri>Replace <client_id> with the ID of your existing user pool client (for example, example_user), and <redirect_uri> with the redirect URI specific to your application (e.g., http://example.com).
The login form should look similar to the screenshot below:
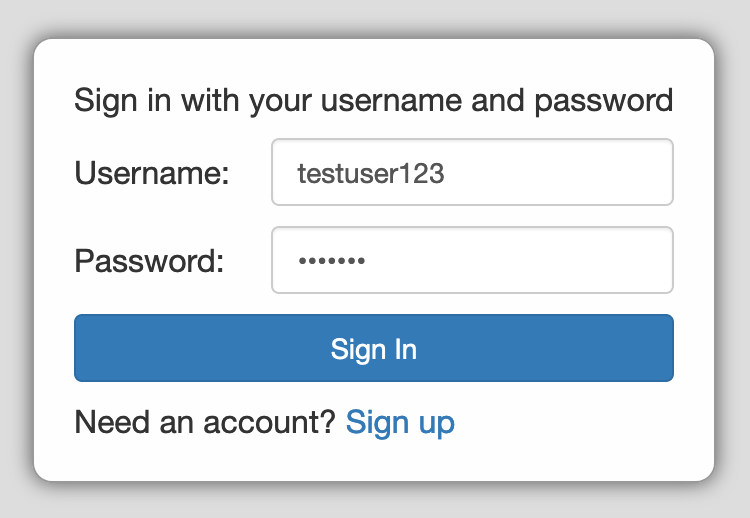
Upon successful login, the page will automatically redirect to the designated <redirect_uri>, with an appended path parameter ?code=<code>.
For instance, the redirect URL might look like http://example.com?code=test123.
To obtain a token, you need to submit the received code using grant_type=authorization_code to LocalStack’s implementation of the Cognito OAuth2 TOKEN Endpoint, which is documented on the AWS Cognito Token endpoint page.
Note that the value of the redirect_uri parameter in your token request must match the value provided during the login process.
Ensuring this match is crucial for the proper functioning of the authentication flow.
curl \ --data-urlencode 'grant_type=authorization_code' \ --data-urlencode 'redirect_uri=http://example.com' \ --data-urlencode "client_id=${client_id}" \ --data-urlencode 'code=test123' \ 'http://localhost:4566/_aws/cognito-idp/oauth2/token'{"access_token": "eyJ0eXAi…lKaHx44Q", "expires_in": 86400, "token_type": "Bearer", "refresh_token": "e3f08304", "id_token": "eyJ0eXAi…ADTXv5mA"}If your use case requires it, you can enforce https in URLs used by the auth flow by setting the environment variable USE_SSL=1
Client credentials grant
Section titled “Client credentials grant”The client credentials grant is designed for machine-to-machine (M2M) communication. The Client Credentials Grant allows the machine (client) to authenticate itself directly with the authorization server using its credentials, such as a client ID and client secret. The client credentials grant allows for scope-based authorization from a non-interactive system to an API. Your app can directly request client credentials from the token endpoint to receive an access token.
To request the token from the LocalStack URL, use the following endpoint: ://cognito-idp.localhost.localstack.cloud:4566/_aws/cognito-idp/oauth2/token.
For additional information on our endpoints, refer to our Internal Endpoints documentation.
If there are multiple user pools, LocalStack identifies the appropriate one by examining the clientid of the request.
To get started, follow the example below:
#Create client user pool with a client.export client_id=$(awslocal cognito-idp create-user-pool-client --user-pool-id $pool_id --client-name test-client --generate-secret  | jq -rc ".UserPoolClient.ClientId")
#Retrieve secret.export client_secret=$(awslocal cognito-idp describe-user-pool-client --user-pool-id $pool_id --client-id $client_id | jq -r '.UserPoolClient.ClientSecret')
#Create resource serverawslocal cognito-idp create-resource-server \  --user-pool-id $pool_id \  --identifier "api-client-organizations" \  --name "Resource Server Name" \  --scopes '[{"ScopeName":"read","ScopeDescription":"Read access to Organizations"}]'
You can retrieve the token from your application using the specified endpoint: http://cognito-idp.localhost.localstack.cloud:4566/_aws/cognito-idp/oauth2/token.
require('dotenv').config();const axios = require('axios');
async function getAccessTokenWithSecret() {    const clientId = process.env.client_id;    const clientSecret = process.env.client_secret;    const scope = 'api-client-organizations/read';    const url = 'http://cognito-idp.localhost.localstack.cloud:4566/_aws/cognito-idp/oauth2/token';
    const authHeader = Buffer.from(`${clientId}:${clientSecret}`).toString('base64');
    const headers = {        'Content-Type': 'application/x-www-form-urlencoded',        'Authorization': `Basic ${authHeader}`    };
    const payload = new URLSearchParams({        grant_type: 'client_credentials',        client_id: clientId,        scope: scope    });
    try {        const response = await axios.post(url, payload, { headers });        console.log(response.data);    } catch (error) {        console.error('Error fetching access token:', error.response ? error.response.data : error.message);    }}
getAccessTokenWithSecret();
Serverless and Cognito
Section titled “Serverless and Cognito”Furthermore, you have the option to combine Cognito and LocalStack seamlessly with the Serverless framework.
For instance, consider this snippet from a serverless.yml configuration:
service: test
plugins:  - serverless-deployment-bucket  - serverless-pseudo-parameters  - serverless-localstack
custom:  localstack:    stages: [local]
functions:  http_request:    handler: http.request    events:      - http:          path: v1/request          authorizer:            arn: arn:aws:cognito-idp:us-east-1:#{AWS::AccountId}:userpool/ExampleUserPool
resources:  Resources:    UserPool:      Type: AWS::Cognito::UserPool      Properties:        ...
After configuring the Serverless setup, you can deploy it using serverless deploy --stage local.
The provided example includes a Lambda function called http_request that’s linked to an API Gateway endpoint.
Once deployed, the v1/request API Gateway endpoint will be protected by the Cognito user pool named “ExampleUserPool”.
As a result, you can register users against the local pool using the same API calls as you would with AWS.
To send requests to the secured API Gateway endpoint, you need to fetch identity credentials from the local Cognito API.
These credentials can then be included as Authentication HTTP headers (where test-1234567 represents the name of the access key ID generated by Cognito):
Authentication: AWS4-HMAC-SHA256 Credential=test-1234567/20190821/us-east-1/cognito-idp/aws4_request ...Resource Browser
Section titled “Resource Browser”The LocalStack Web Application provides a Resource Browser for managing Cognito User Pools, and more. You can access the Resource Browser by opening the LocalStack Web Application in your browser, navigating to the Resources section, and then clicking on Cognito under the Security Identity Compliance section.
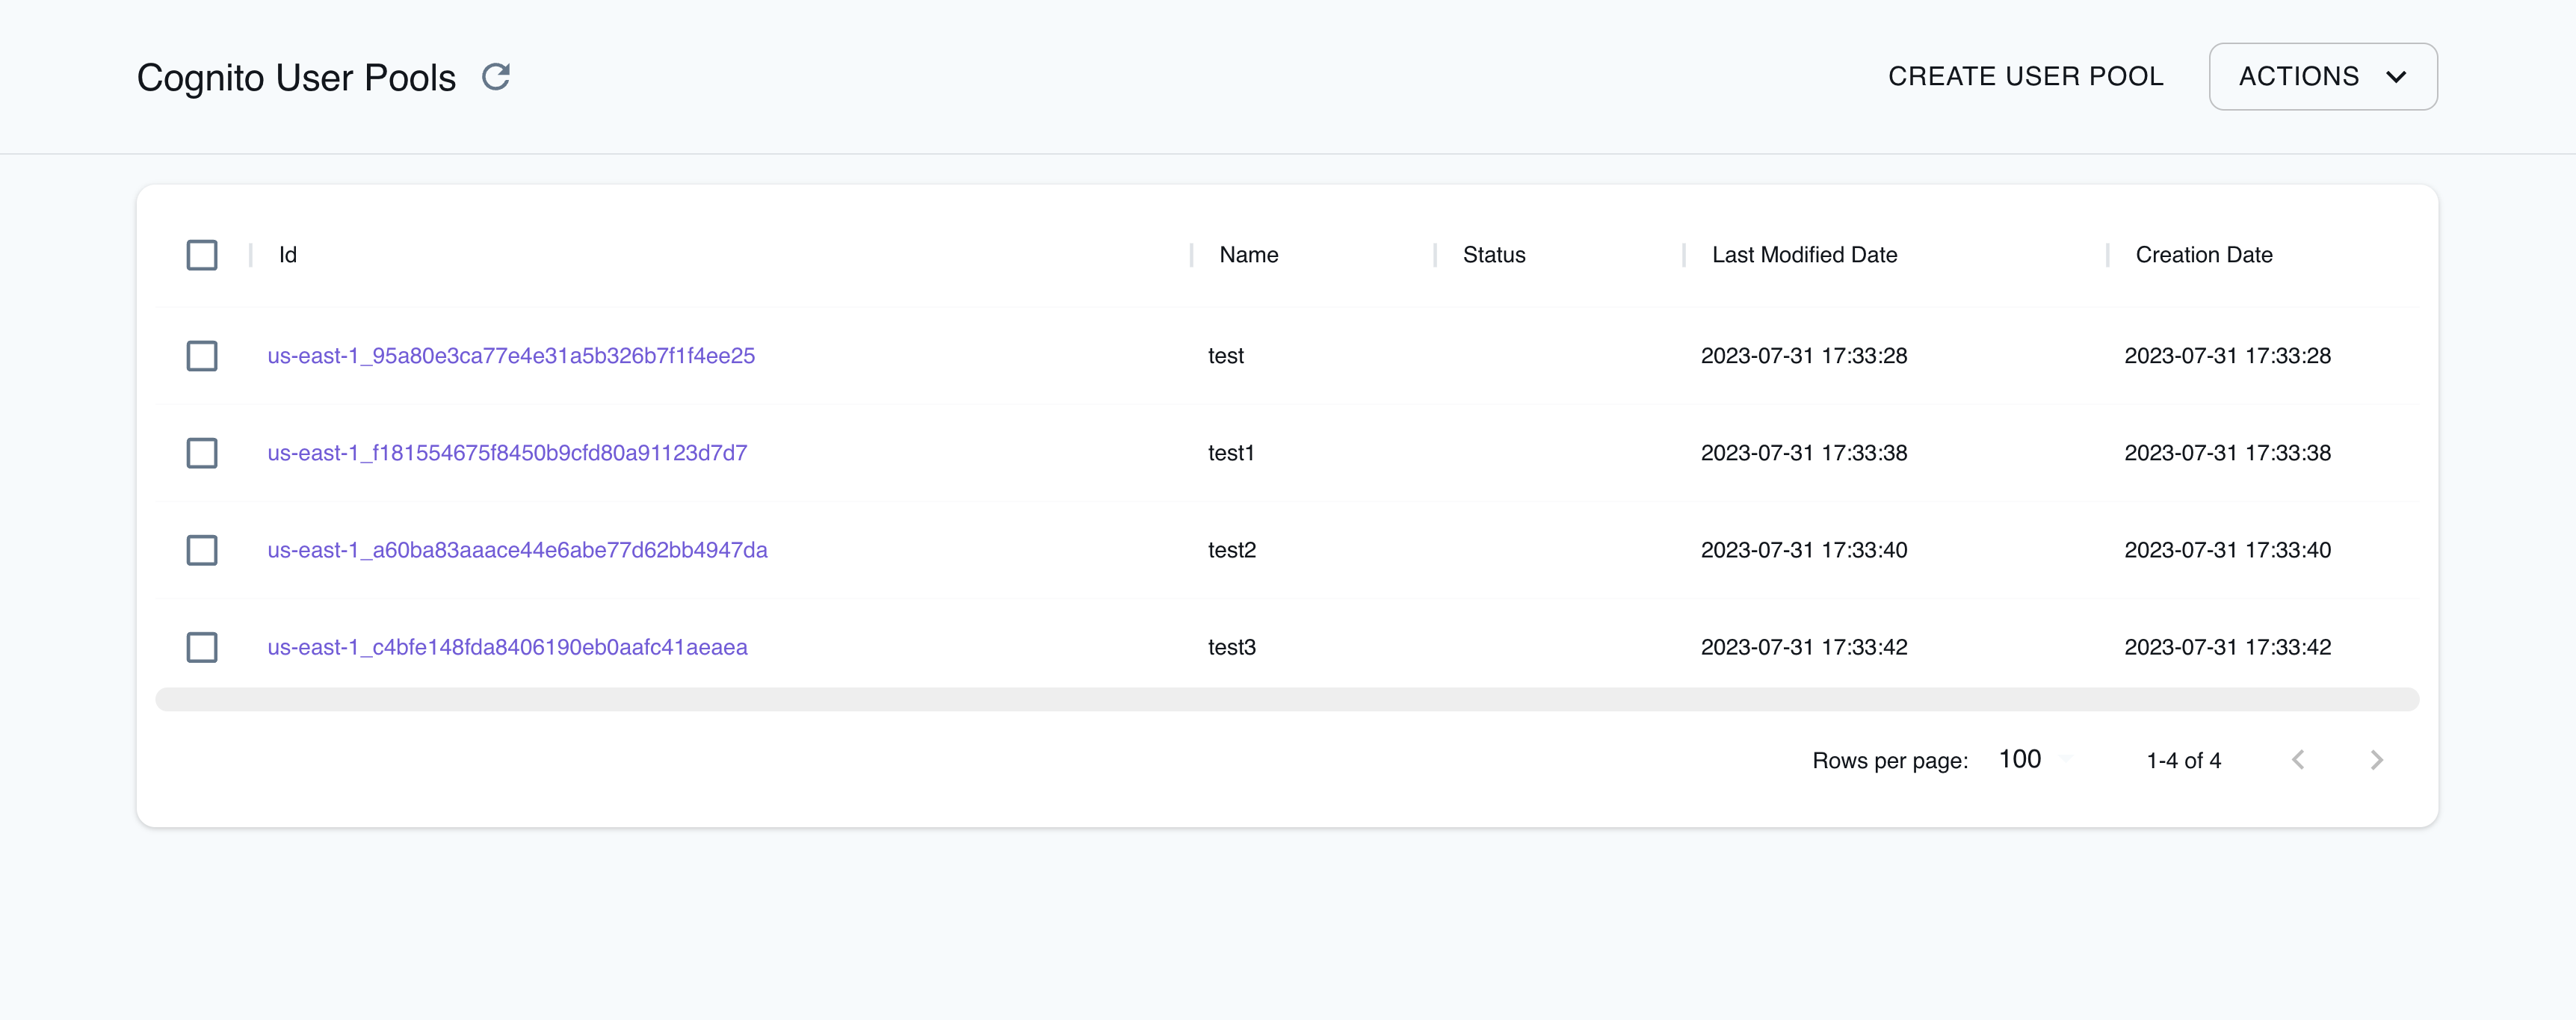
The Resource Browser allows you to perform the following actions:
- Create User Pool: Create a new Cognito User Pool, by specifying the pool name, policies, and other settings.
- View User Pools: View a list of all existing Cognito User Pools, including their Details, Groups, and Users.
- Edit User Pool: Edit an existing Cognito User Pool, by adding additional configurations, policies, and more.
- Create Group: Add a new Group to an existing Cognito User Pool, by specifying the group name, description, Role Arn, and Precedence.
- Create User: Add a new User to an existing Cognito User Pool, by specifying the user name, user attributes, and more.
- Remove Selected: Remove the selected User Pool, Group, or User from the list of existing Cognito resources.
Examples
Section titled “Examples”The following code snippets and sample applications provide practical examples of how to use Cognito in LocalStack for various use cases:
- Running Cognito authentication and user pools locally
- Serverless Container-based APIs with ECS & API Gateway
- Step-up Authentication using Cognito
Current Limitations
Section titled “Current Limitations”By default, LocalStack’s Cognito does not send actual email messages. However, if you wish to enable this feature, you will need to provide an email address and configure the corresponding SMTP settings. The instructions on configuring the connection parameters of your SMTP server can be found in the Configuration guide to allow your local Cognito environment to send email notifications.
API Coverage (Cognito Identity Pools)
Section titled “API Coverage (Cognito Identity Pools)”| Operation ▲ | Implemented ▼ | Verified on Kubernetes |
|---|
API Coverage (Cognito User Pools)
Section titled “API Coverage (Cognito User Pools)”| Operation ▲ | Implemented ▼ | Verified on Kubernetes |
|---|