Route 53
Introduction
Section titled “Introduction”Route 53 is a highly scalable and reliable domain name system (DNS) web service provided by Amazon Web Services. Route 53 allows you to register domain names, and associate them with IP addresses or other resources. In addition to basic DNS functionality, Route 53 offers advanced features like health checks and DNS failover. Route 53 integrates seamlessly with other AWS services, such as route traffic to CloudFront distributions, S3 buckets configured for static website hosting, Elastic Load Balancers, EC2 instances, API Gateway custom domain names, and more.
LocalStack allows you to use the Route53 APIs in your local environment to create hosted zones and to manage DNS entries. The supported APIs are available on our API Coverage section, which provides information on the extent of Route53’s integration with LocalStack. LocalStack supports routing traffic to various AWS resources including S3 static websites and Elastic Load Balancers using alias records. LocalStack also integrates with its DNS server to respond to DNS queries with these domains.
Getting started
Section titled “Getting started”This guide is designed for users new to Route53 and assumes basic knowledge of the AWS CLI and our awslocal wrapper script.
Start your LocalStack container using your preferred method. We will demonstrate how to create a hosted zone and query the DNS record with the AWS CLI.
Create a hosted zone
Section titled “Create a hosted zone”You can created a hosted zone for example.com using the CreateHostedZone API.
Run the following command:
zone_id=$(awslocal route53 create-hosted-zone \ --name example.com \ --caller-reference r1 | jq -r '.HostedZone.Id')echo $zone_id/hostedzone/WBCZ6F10CWV9J1GChange resource record sets
Section titled “Change resource record sets”You can now change the resource record sets for the hosted zone example.com using the ChangeResourceRecordSets API.
Run the following command:
awslocal route53 change-resource-record-sets \ --hosted-zone-id $zone_id \ --change-batch 'Changes=[{Action=CREATE,ResourceRecordSet={Name=test.example.com,Type=A,ResourceRecords=[{Value=1.2.3.4}]}}]'{ "ChangeInfo": { "Id": "/change/C2682N5HXP0BZ4", "Status": "INSYNC", "SubmittedAt": "2010-09-10T01:36:41.958000Z" }}Routing traffic to S3 static websites
Section titled “Routing traffic to S3 static websites”You can route traffic from a Route53 domain to an S3 bucket configured for static website hosting using alias records. This is useful when you want to serve a static website with a custom domain name.
Create an S3 bucket with website hosting
Section titled “Create an S3 bucket with website hosting”First, create an S3 bucket and configure it for static website hosting. Run the following commands:
DOMAIN="example.com"BUCKET_NAME="$DOMAIN"
# Create the bucketawslocal s3api create-bucket --bucket "$BUCKET_NAME"
# Upload your website filesawslocal s3 cp index.html s3://$BUCKET_NAME/awslocal s3 cp error.html s3://$BUCKET_NAME/
# Configure the bucket for website hostingawslocal s3 website s3://"$BUCKET_NAME"/ \    --index-document index.html \    --error-document error.html
# Set bucket policy to allow public read accessawslocal s3api put-bucket-policy \    --bucket $BUCKET_NAME \    --policy '{        "Version": "2012-10-17",        "Statement": [{            "Sid": "PublicReadGetObject",            "Effect": "Allow",            "Principal": "*",            "Action": "s3:GetObject",            "Resource": "arn:aws:s3:::'$BUCKET_NAME'/*"        }]    }'
Create a Route53 alias record
Section titled “Create a Route53 alias record”Now create a hosted zone and an alias record that points to the S3 website endpoint:
# Create the hosted zoneHOSTED_ZONE_ID=$(awslocal route53 create-hosted-zone \    --name "$DOMAIN" \    --caller-reference "$(date +%s)" \    --output text \    --query 'HostedZone.Id' | cut -d'/' -f3)
echo "Hosted Zone created with ID: $HOSTED_ZONE_ID"
# Create an alias record pointing to the S3 website endpointawslocal route53 change-resource-record-sets \    --hosted-zone-id "$HOSTED_ZONE_ID" \    --change-batch '{        "Comment": "Create alias record for S3 static website",        "Changes": [{            "Action": "CREATE",            "ResourceRecordSet": {                "Name": "'$DOMAIN'",                "Type": "A",                "AliasTarget": {                    "HostedZoneId": "'$HOSTED_ZONE_ID'",                    "DNSName": "'$BUCKET_NAME'.s3-website.localhost.localstack.cloud",                    "EvaluateTargetHealth": false                }            }        }]    }'
The key points for S3 website alias records are:
- The
DNSNamefollows the format:<bucket-name>.s3-website.localhost.localstack.cloud - The
Typemust beA(for IPv4) orAAAA(for IPv6) - Set
EvaluateTargetHealthtofalsefor S3 website endpoints
Verify DNS resolution
Section titled “Verify DNS resolution”You can verify that your domain resolves to the S3 website using DNS resolution or by making HTTP requests:
# Using dig to verify DNS resolutiondig @localhost $DOMAIN
# Using curl to access the websitecurl http://$DOMAIN:4566/
Routing traffic to Elastic Load Balancers
Section titled “Routing traffic to Elastic Load Balancers”You can also route traffic to Elastic Load Balancers (ELB) using alias records. This is commonly used for distributing traffic across multiple instances.
After creating your load balancer, you can create an alias record that points to it:
# Assuming you have an ELB with DNS nameELB_DNS_NAME="my-load-balancer-123456.elb.localhost.localstack.cloud"
# Create an alias record pointing to the ELBawslocal route53 change-resource-record-sets \    --hosted-zone-id "$HOSTED_ZONE_ID" \    --change-batch '{        "Comment": "Create alias record for ELB",        "Changes": [{            "Action": "CREATE",            "ResourceRecordSet": {                "Name": "app.example.com",                "Type": "A",                "AliasTarget": {                    "HostedZoneId": "'$HOSTED_ZONE_ID'",                    "DNSName": "'$ELB_DNS_NAME'",                    "EvaluateTargetHealth": true                }            }        }]    }'
For ELB alias records:
- Use the load balancer’s DNS name as the
DNSNamevalue - You can set
EvaluateTargetHealthtotrueto enable health checks - The
Typeshould beAfor IPv4 addresses
DNS resolution
Section titled “DNS resolution”LocalStack for AWS supports the ability to respond to DNS queries for your Route53 domain names, with our integrated DNS server.
Query a DNS record
Section titled “Query a DNS record”You can query the DNS record using dig via the built-in DNS server by running the following command:
dig @localhost test.example.com;; QUESTION SECTION:;test.example.com. IN A
;; ANSWER SECTION:test.example.com. 300 IN A 1.2.3.4Customizing internal endpoint resolution
Section titled “Customizing internal endpoint resolution”The DNS name localhost.localstack.cloud, along with its subdomains like mybucket.s3.localhost.localstack.cloud, serves an internal routing purpose within LocalStack.
It facilitates communication between a LocalStack compute environment (such as a Lambda function) and the LocalStack APIs, as well as your containerised applications with the LocalStack APIs.
For example configurations, see the Network Troubleshooting guide.
For most use-cases, the default configuration of the internal LocalStack DNS name requires no modification. It functions seamlessly in typical scenarios. However, there are instances where adjusting the external resolution of this DNS name becomes necessary. For instance, this might be required when your LocalStack instance operates on a distinct Docker network compared to your application code or even on a separate machine.
Suppose you intend to achieve a scenario in which all subdomains in the format *.localhost.localstack.cloud resolve to the IP address 5.6.7.8.
This IP signifies the accessibility of your LocalStack instance.
This can be accomplished using Route53.
Create a hosted zone for the domain localhost.localstack.cloud using the CreateHostedZone API API.
Run the following command:
zone_id=$(awslocal route53 create-hosted-zone \ --name localhost.localstack.cloud \ --caller-reference r1 | jq -r .HostedZone.Id)echo $zone_id/hostedzone/3NF6SEGOB5EBHS1You can now use the ChangeResourceRecordSets API to create a record set for the domain localhost.localstack.cloud using the zone_id retrieved in the previous step.
Run the following command to accomplish this:
awslocal route53 change-resource-record-sets \ --hosted-zone-id $zone_id \ --change-batch '{"Changes":[{"Action":"CREATE","ResourceRecordSet":{"Name":"localhost.localstack.cloud","Type":"A","ResourceRecords":[{"Value":"5.6.7.8"}]}},{"Action":"CREATE","ResourceRecordSet":{"Name":"*.localhost.localstack.cloud","Type":"A","ResourceRecords":[{"Value":"5.6.7.8"}]}}]}'{ "ChangeInfo": { "Id": "/change/C2682N5HXP0BZ4", "Status": "INSYNC", "SubmittedAt": "2010-09-10T01:36:41.958000Z" }}You can now verify that the DNS name localhost.localstack.cloud and its subdomains resolve to the IP address:
dig @127.0.0.1 bucket1.s3.localhost.localstack.clouddig @127.0.0.1 localhost.localstack.cloud...;; ANSWER SECTION:bucket1.s3.localhost.localstack.cloud. 300 IN A 127.0.0.1bucket1.s3.localhost.localstack.cloud. 300 IN A 5.6.7.8...;; QUESTION SECTION:;localhost.localstack.cloud. IN A
;; ANSWER SECTION:localhost.localstack.cloud. 300 IN A 5.6.7.8Resource Browser
Section titled “Resource Browser”The LocalStack Web Application provides a Route53 for creating hosted zones and to manage DNS entries. You can access the Resource Browser by opening the LocalStack Web Application in your browser, navigating to the Resources section, and then clicking on Route53 under the Analytics section.
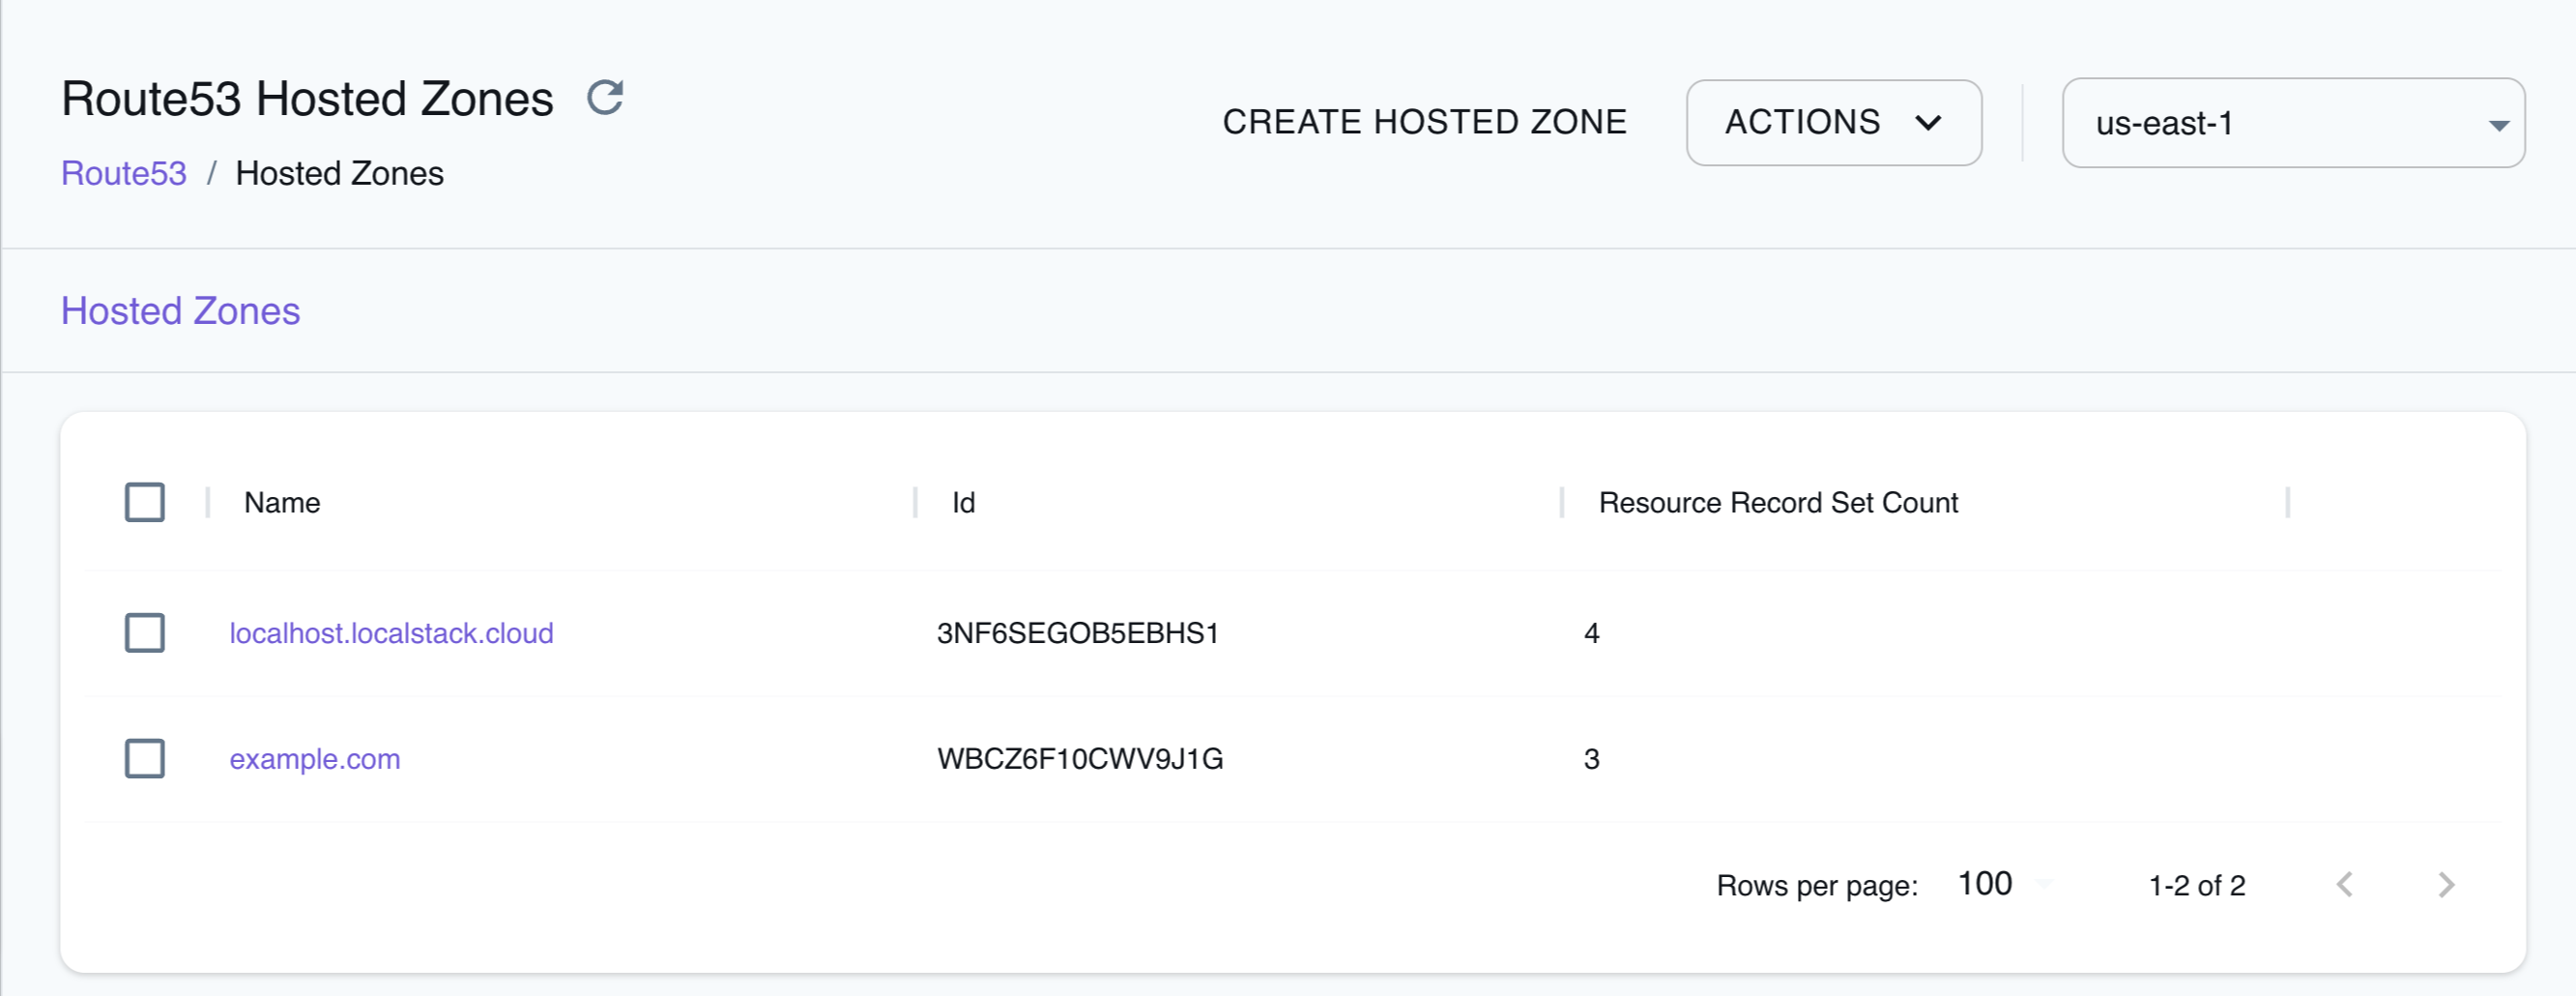
The Resource Browser allows you to perform the following actions:
- Create Hosted Zone: Create a hosted zone for a domain name by clicking on the Create Hosted Zone button. This will open a modal where you can enter the name, VPC, and other parameters and click on the Submit button to create the hosted zone.
- View Hosted Zone: View the details of a hosted zone by clicking on the specific hosted zone name. This will open a modal where you can view the hosted zone details.
- Create Record: Click on the Records button on the individual hosted zone page, followed by clicking Create Record to create a record for the hosted zone. This will open a modal where you can enter the name, type, and other parameters and click on the Submit button to create the record.
- Edit Record: Click on the Records button on the individual hosted zone page, followed by clicking Edit on the specific record to edit the record. This will open a modal where you can edit the record details and click on the Submit button to save the changes.s
- View Records: Click on the Records button on the individual hosted zone page, followed by clicking on the specific record to view the record details. This will open a modal where you can view the record details.
- Delete Hosted Zone: Select the hosted zones you want to delete by clicking on the checkbox next to the hosted zone name, followed by clicking on the Actions button and then clicking on Remove Selected.
- Delete Record: Click on the Records button on the individual hosted zone page, followed by clicking on checkbox next to the specific record, and then clicking on the Actions button and then clicking on Remove Selected.
Examples
Section titled “Examples”The following code snippets and sample applications provide practical examples of how to use Route53 in LocalStack for various use cases:
API Coverage
Section titled “API Coverage”| Operation ▲ | Implemented ▼ | Verified on Kubernetes |
|---|