Ephemeral Instances
Introduction
Section titled “Introduction”Ephemeral Instances allows you to run a LocalStack instance in the cloud. You can interact with these instances via the LocalStack Web Application, or by configuring your integrations and developer tools with the endpoint URL of the ephemeral instance.
Getting started
Section titled “Getting started”This guide is designed for users new to Ephemeral Instance and assumes basic knowledge of the LocalStack Web Application. In this guide, we will create an Ephemeral Instance and interact with it via the LocalStack Web Application and the AWS CLI.
Create a new Ephemeral Instance
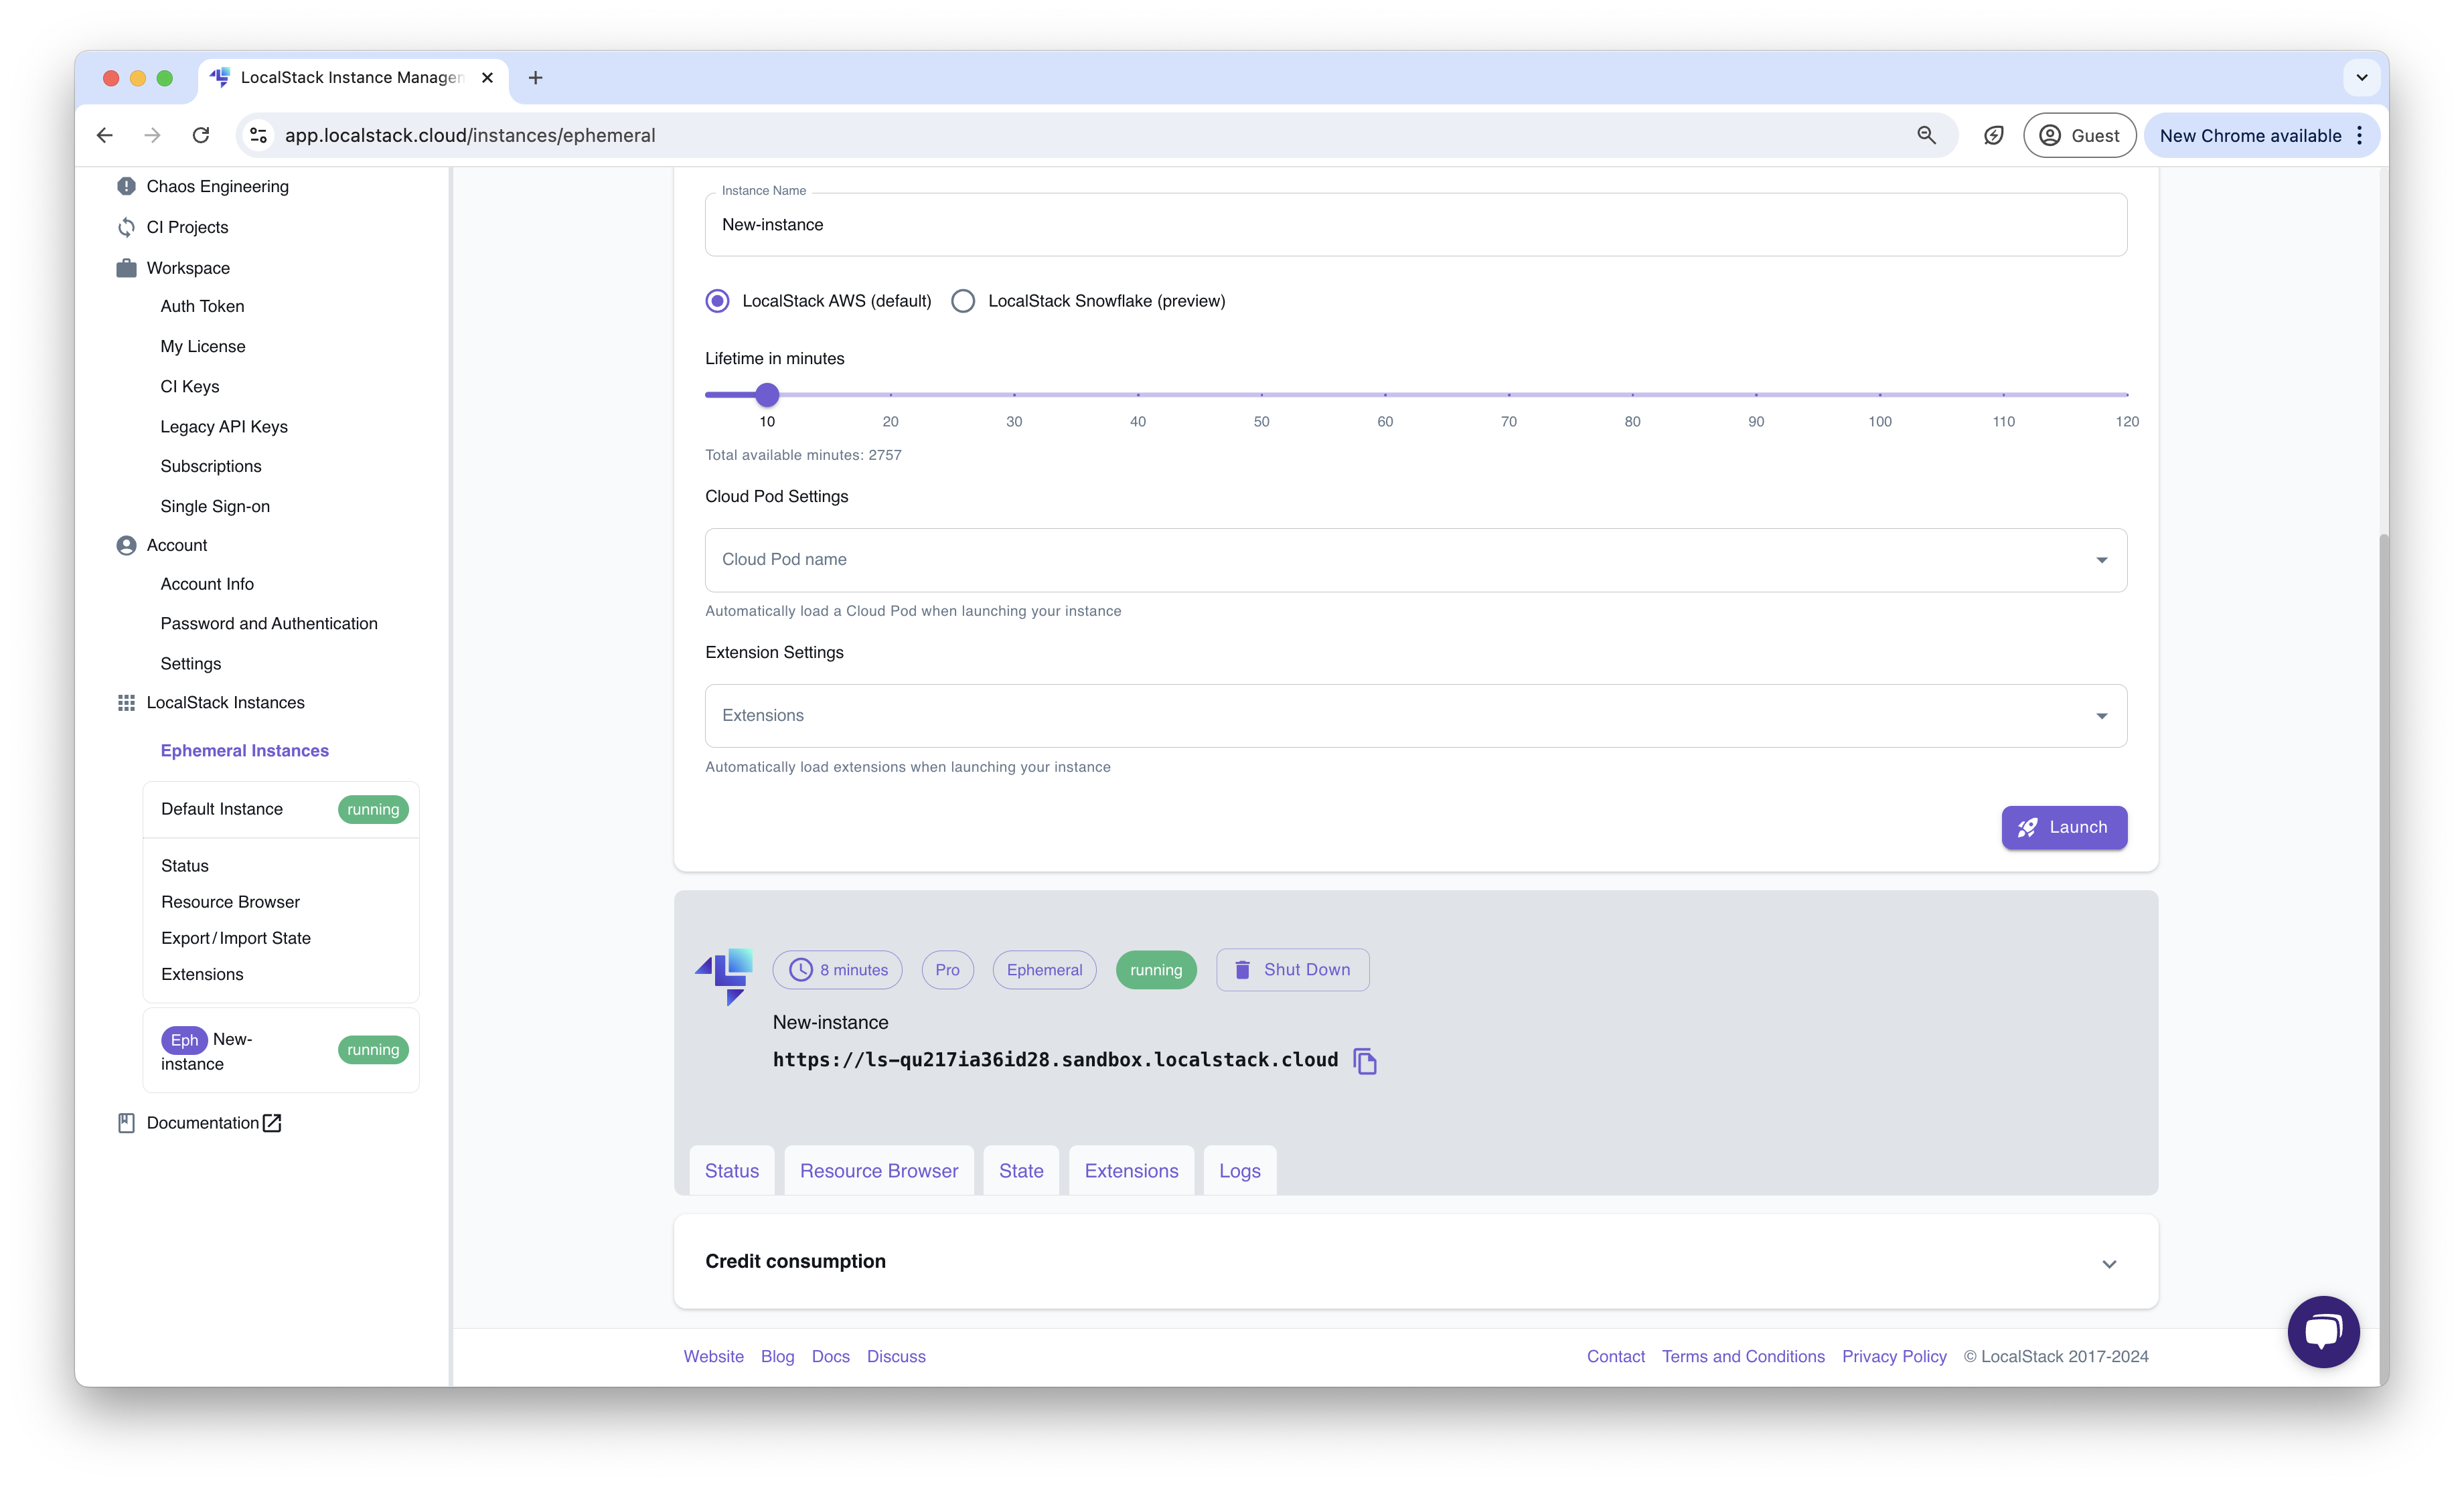
Section titled “Create a new Ephemeral Instance”Navigate to the LocalStack Ephemeral Instance Management page. In the form, enter the name of the new Ephemeral Instance, select the lifetime of the instance by dragging the slider, and click on Launch.

Optionally, you can specify a LocalStack Extension to be installed or loaded in the Ephemeral Instance. You can select the extension from the Extension settings dropdown list before launching the Ephemeral Instance. In case you have access to Cloud Pods and a pod you want to start your instance with, you can also choose it from the Cloud Pod Settings dropdown.
Interact with the Ephemeral Instance
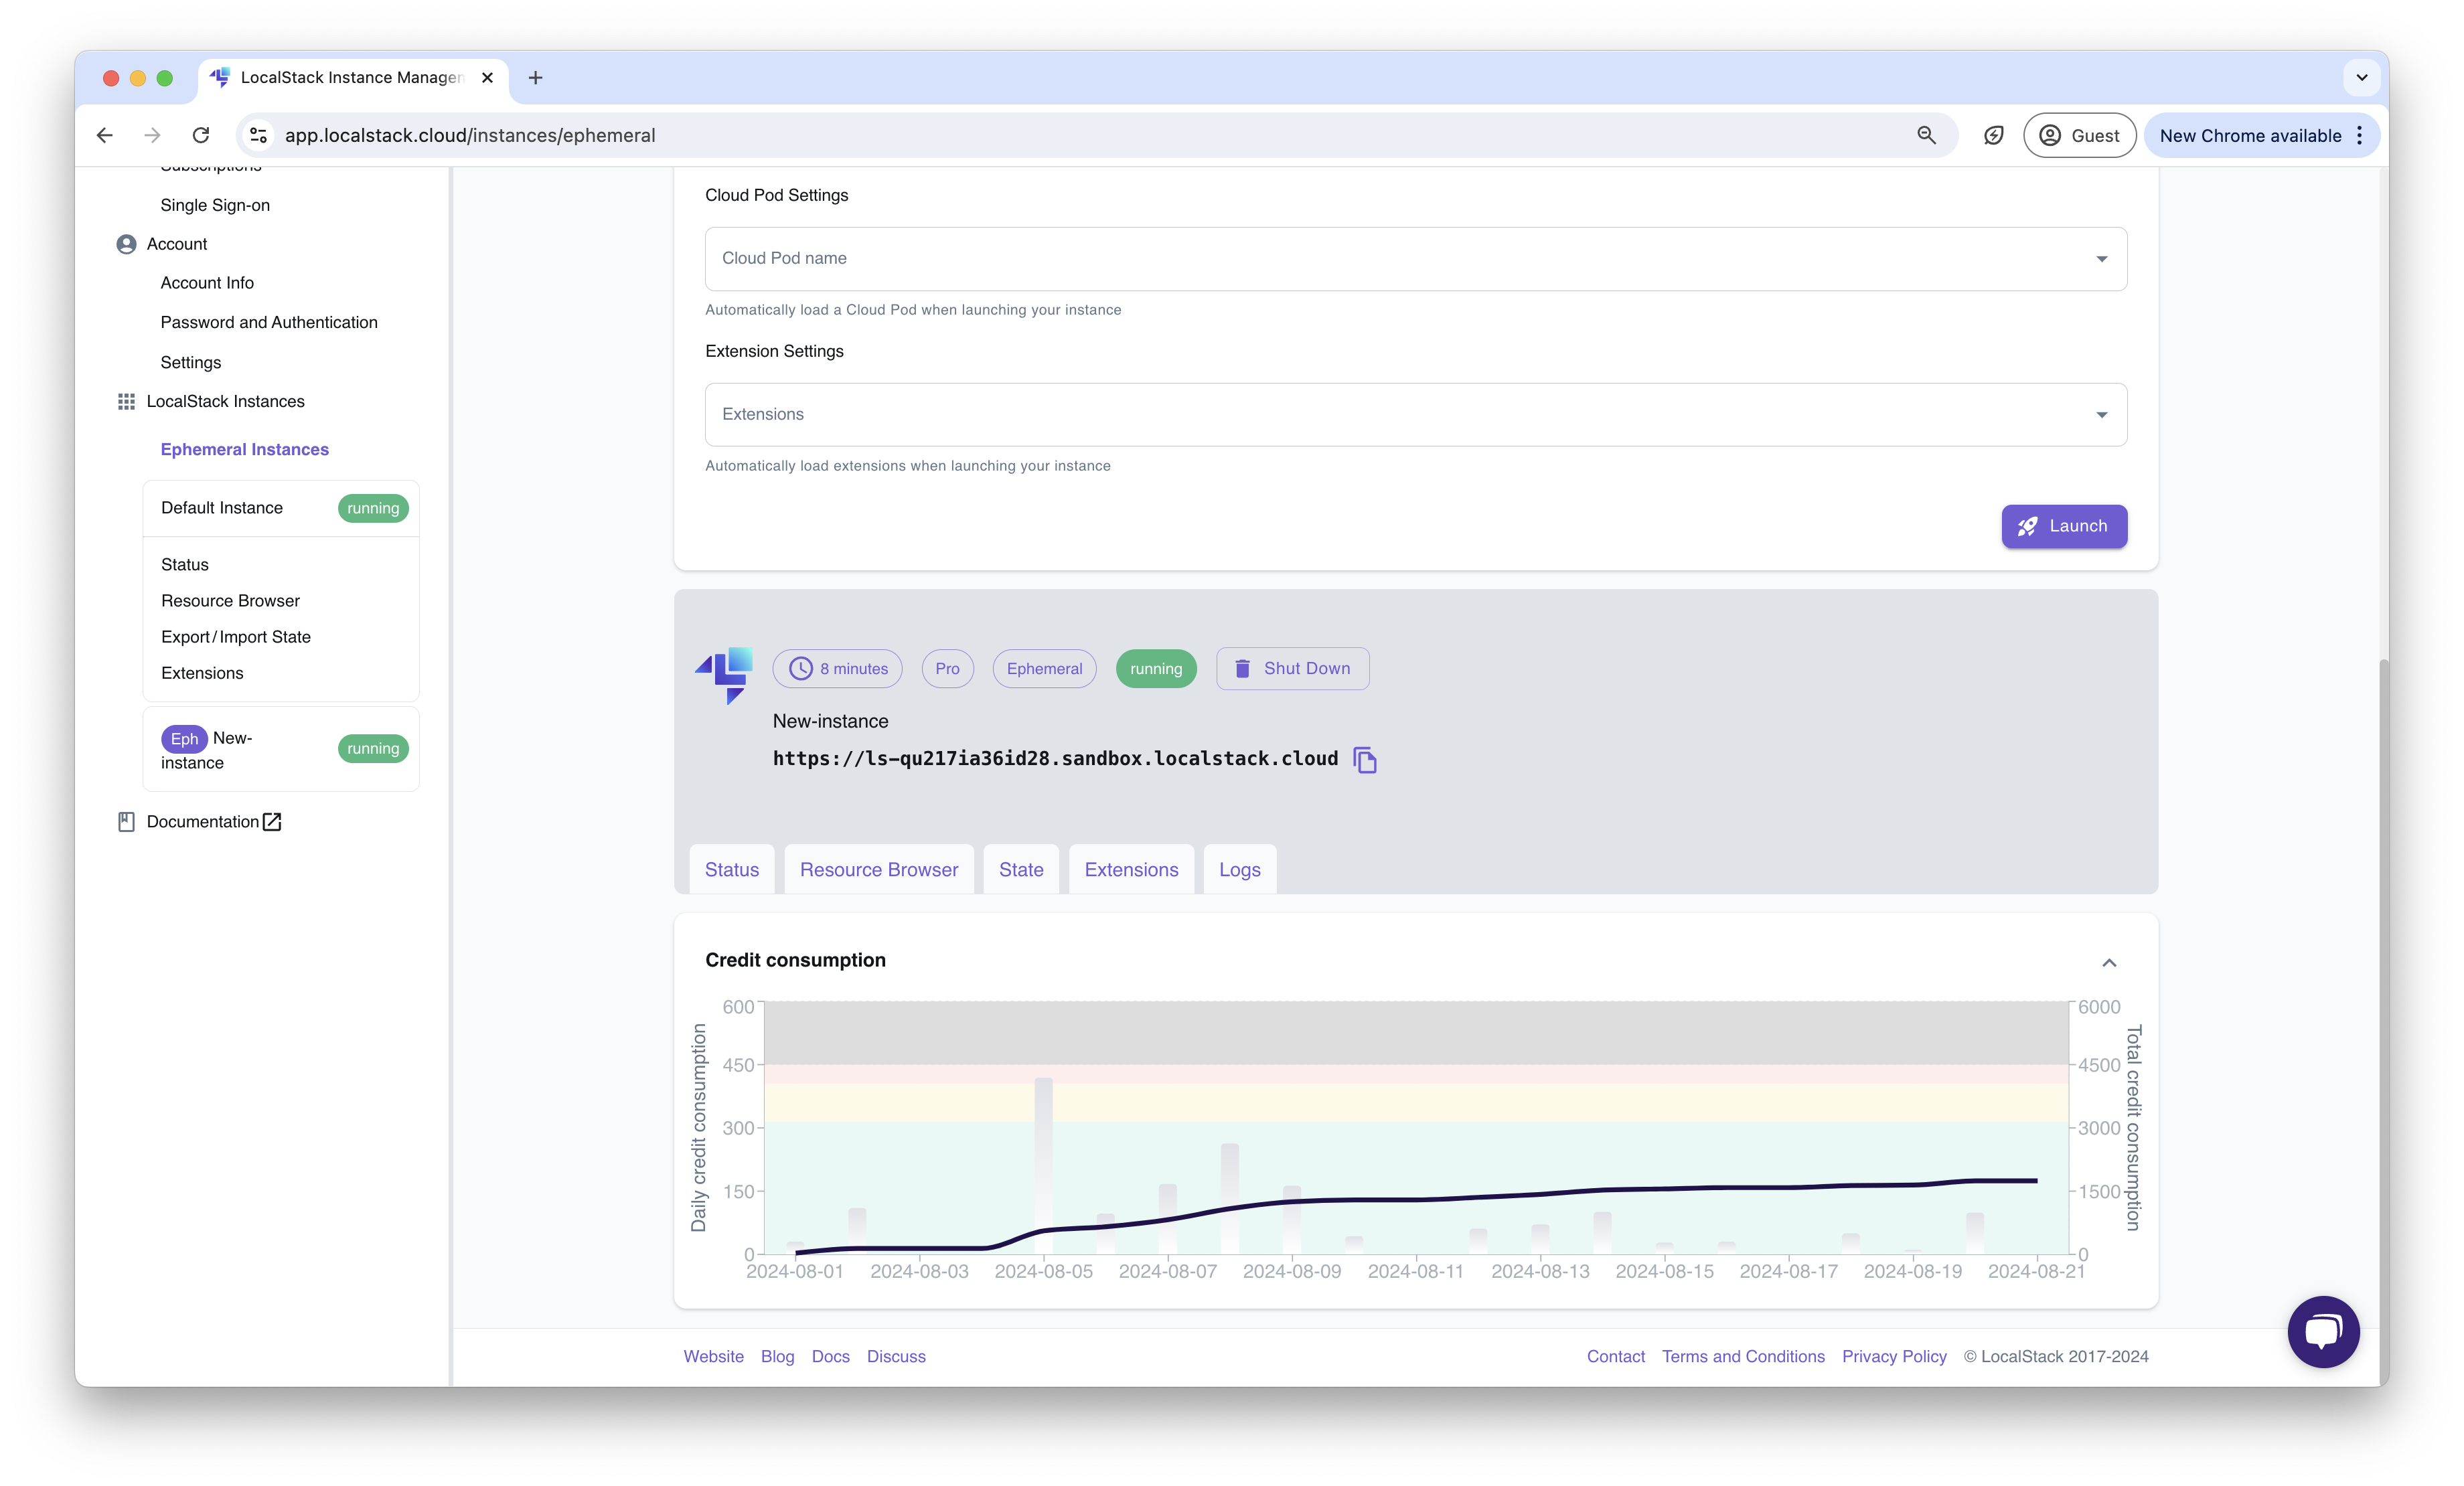
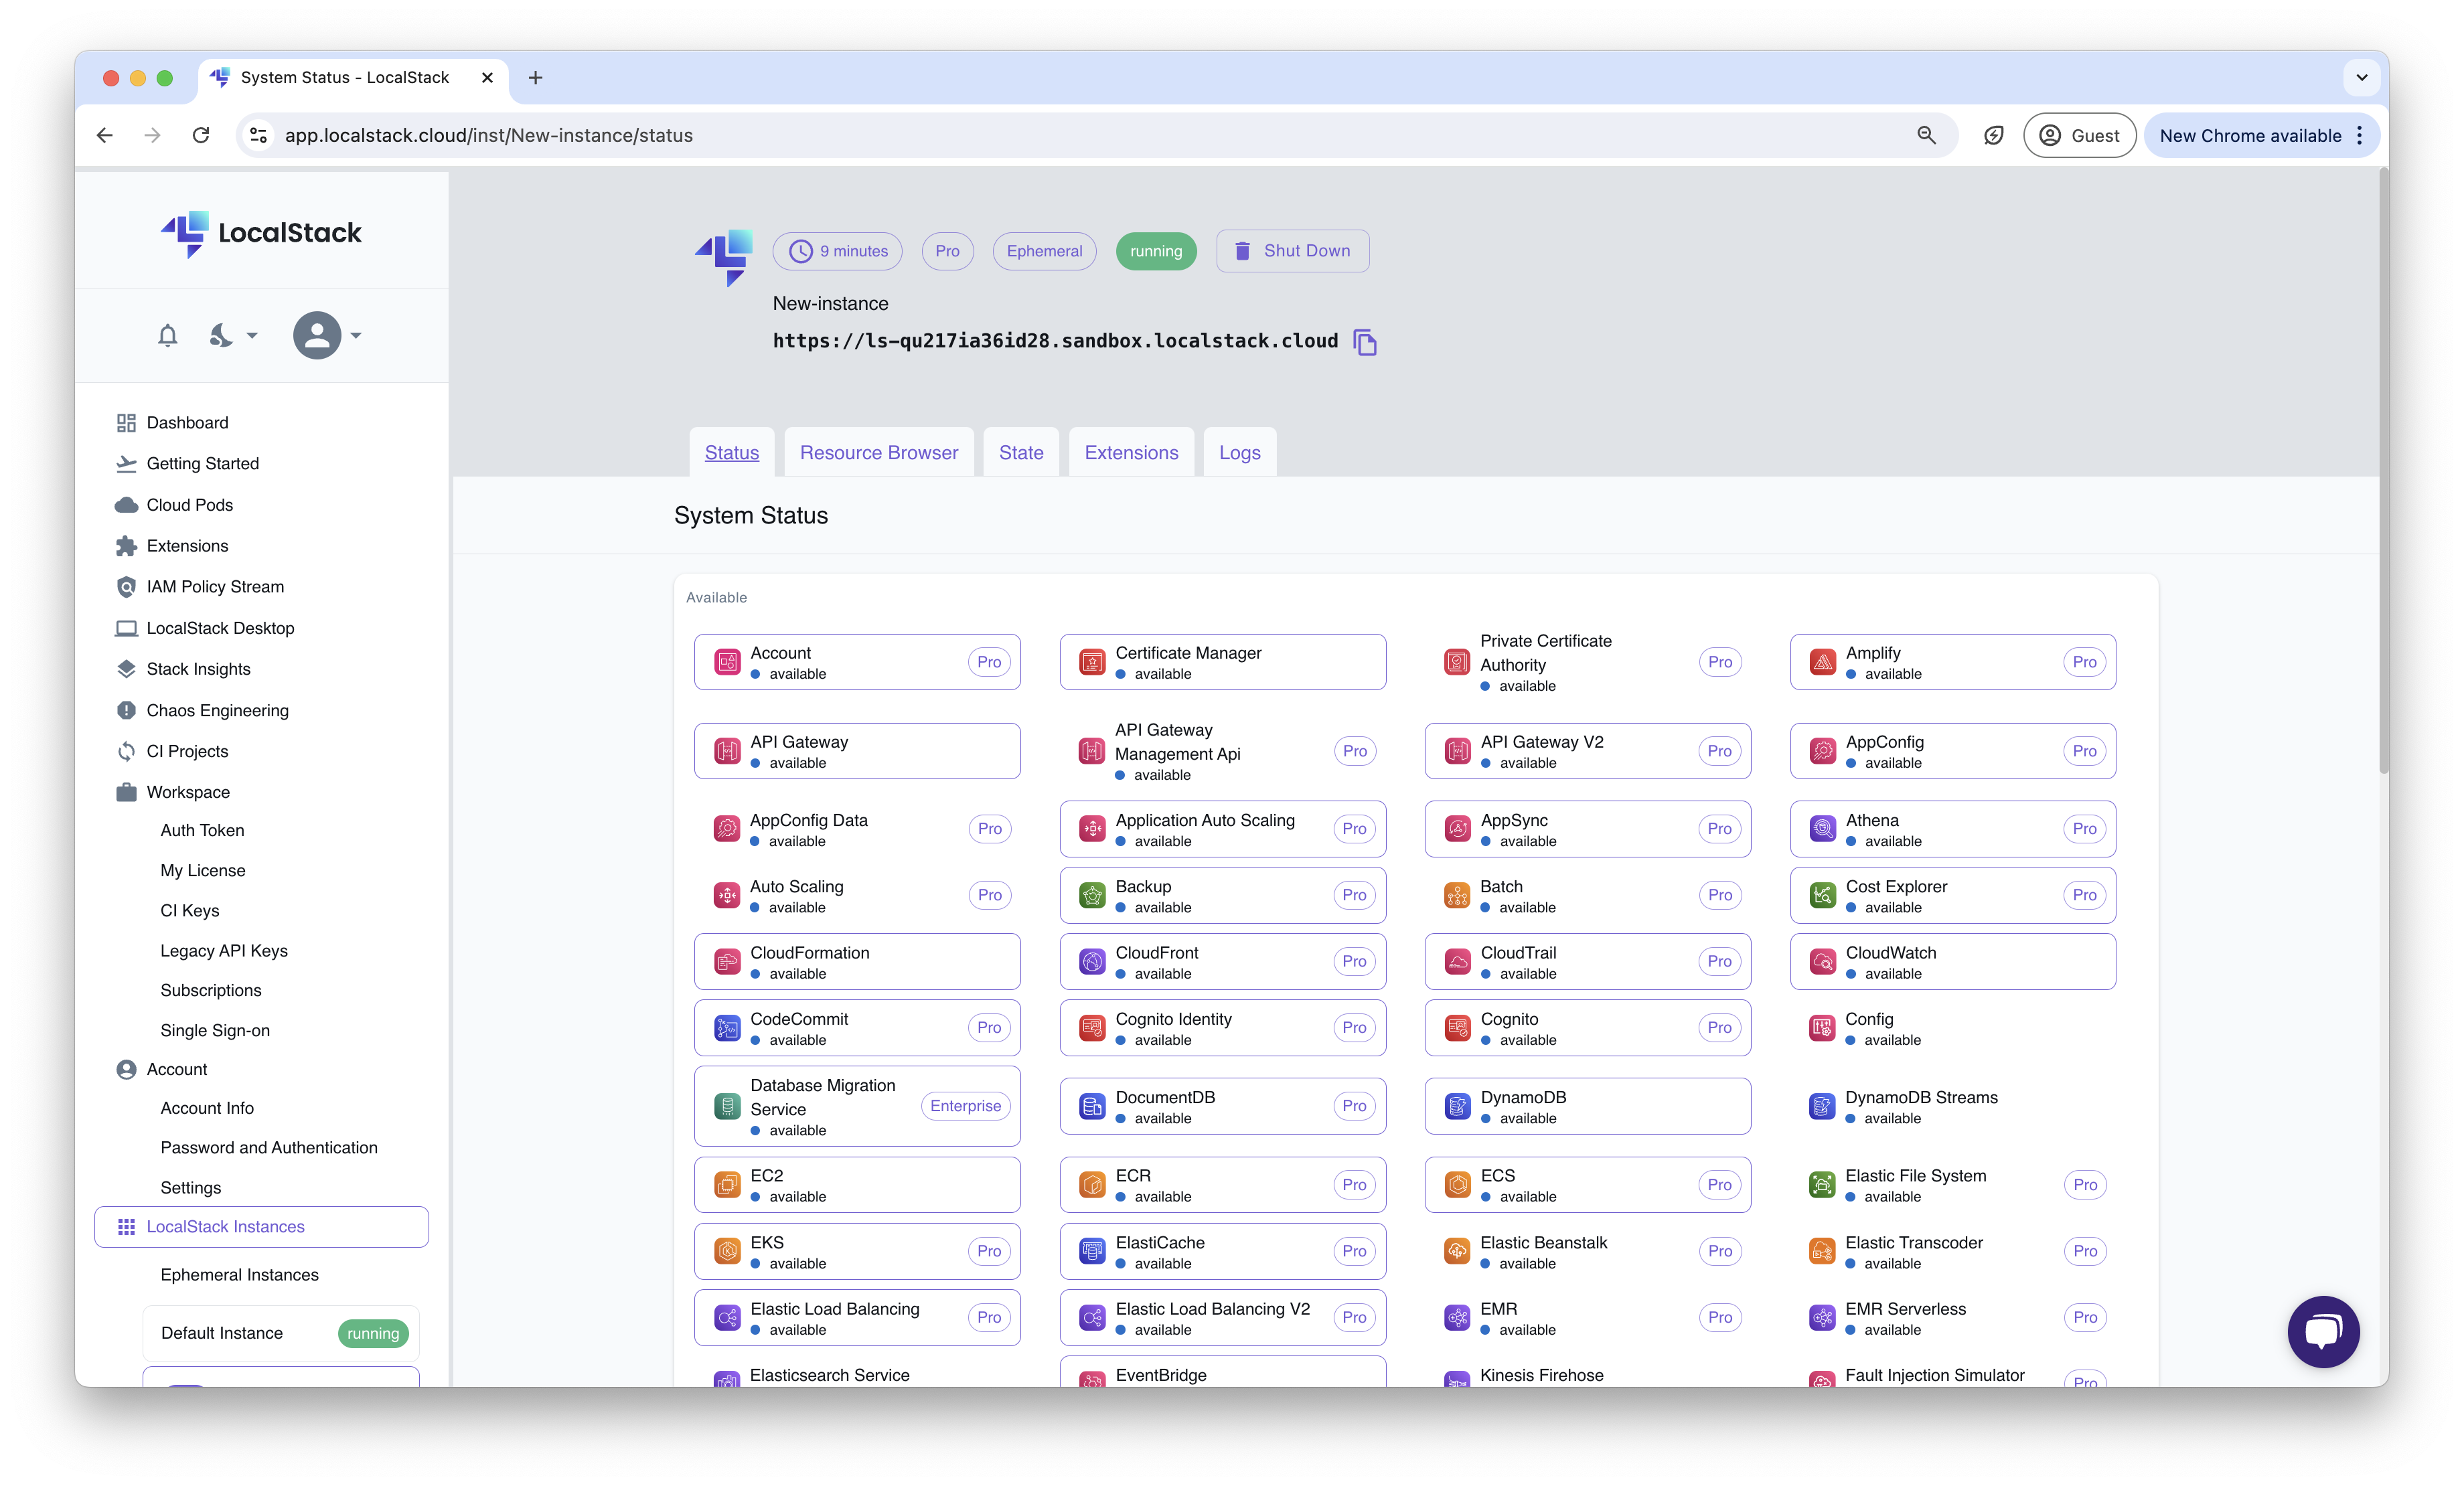
Section titled “Interact with the Ephemeral Instance”After the Ephemeral Instance is created, you will be able to see the instance in the LocalStack Instance Management page.
You will also be able to access the following features with your Ephemeral Instance:
- Status Page
- Resource Browser
- State Management
- Extensions
- Logs
Access the Ephemeral Instance via AWS CLI
Section titled “Access the Ephemeral Instance via AWS CLI”You can access the Ephemeral Instance via the AWS CLI by configuring the AWS CLI with the endpoint URL of the Ephemeral Instance.
You can find the endpoint URL of the Ephemeral Instance in the LocalStack Instance Management page.
Copy the endpoint URL and set it as the --endpoint-url parameter in the AWS CLI command.
To create an S3 bucket in the Ephemeral Instance, run the following command:
aws --endpoint-url=<EPHEMERAL_INSTANCE_ENDPOINT_URL> s3 mb s3://<BUCKET_NAME>You can replace <EPHEMERAL_INSTANCE_ENDPOINT_URL> with the endpoint URL of the Ephemeral Instance and <BUCKET_NAME> with the name of the S3 bucket you want to create.
To query the list of S3 buckets in the Ephemeral Instance, run the following command:
aws --endpoint-url=<EPHEMERAL_INSTANCE_ENDPOINT_URL> s3 lsYou can also use integrations, such as CDK, SAM CLI, and Terraform, to interact with the Ephemeral Instance.
In these integrations, you can change the AWS_ENDPOINT_URL environment variable to the endpoint URL of the Ephemeral Instance.
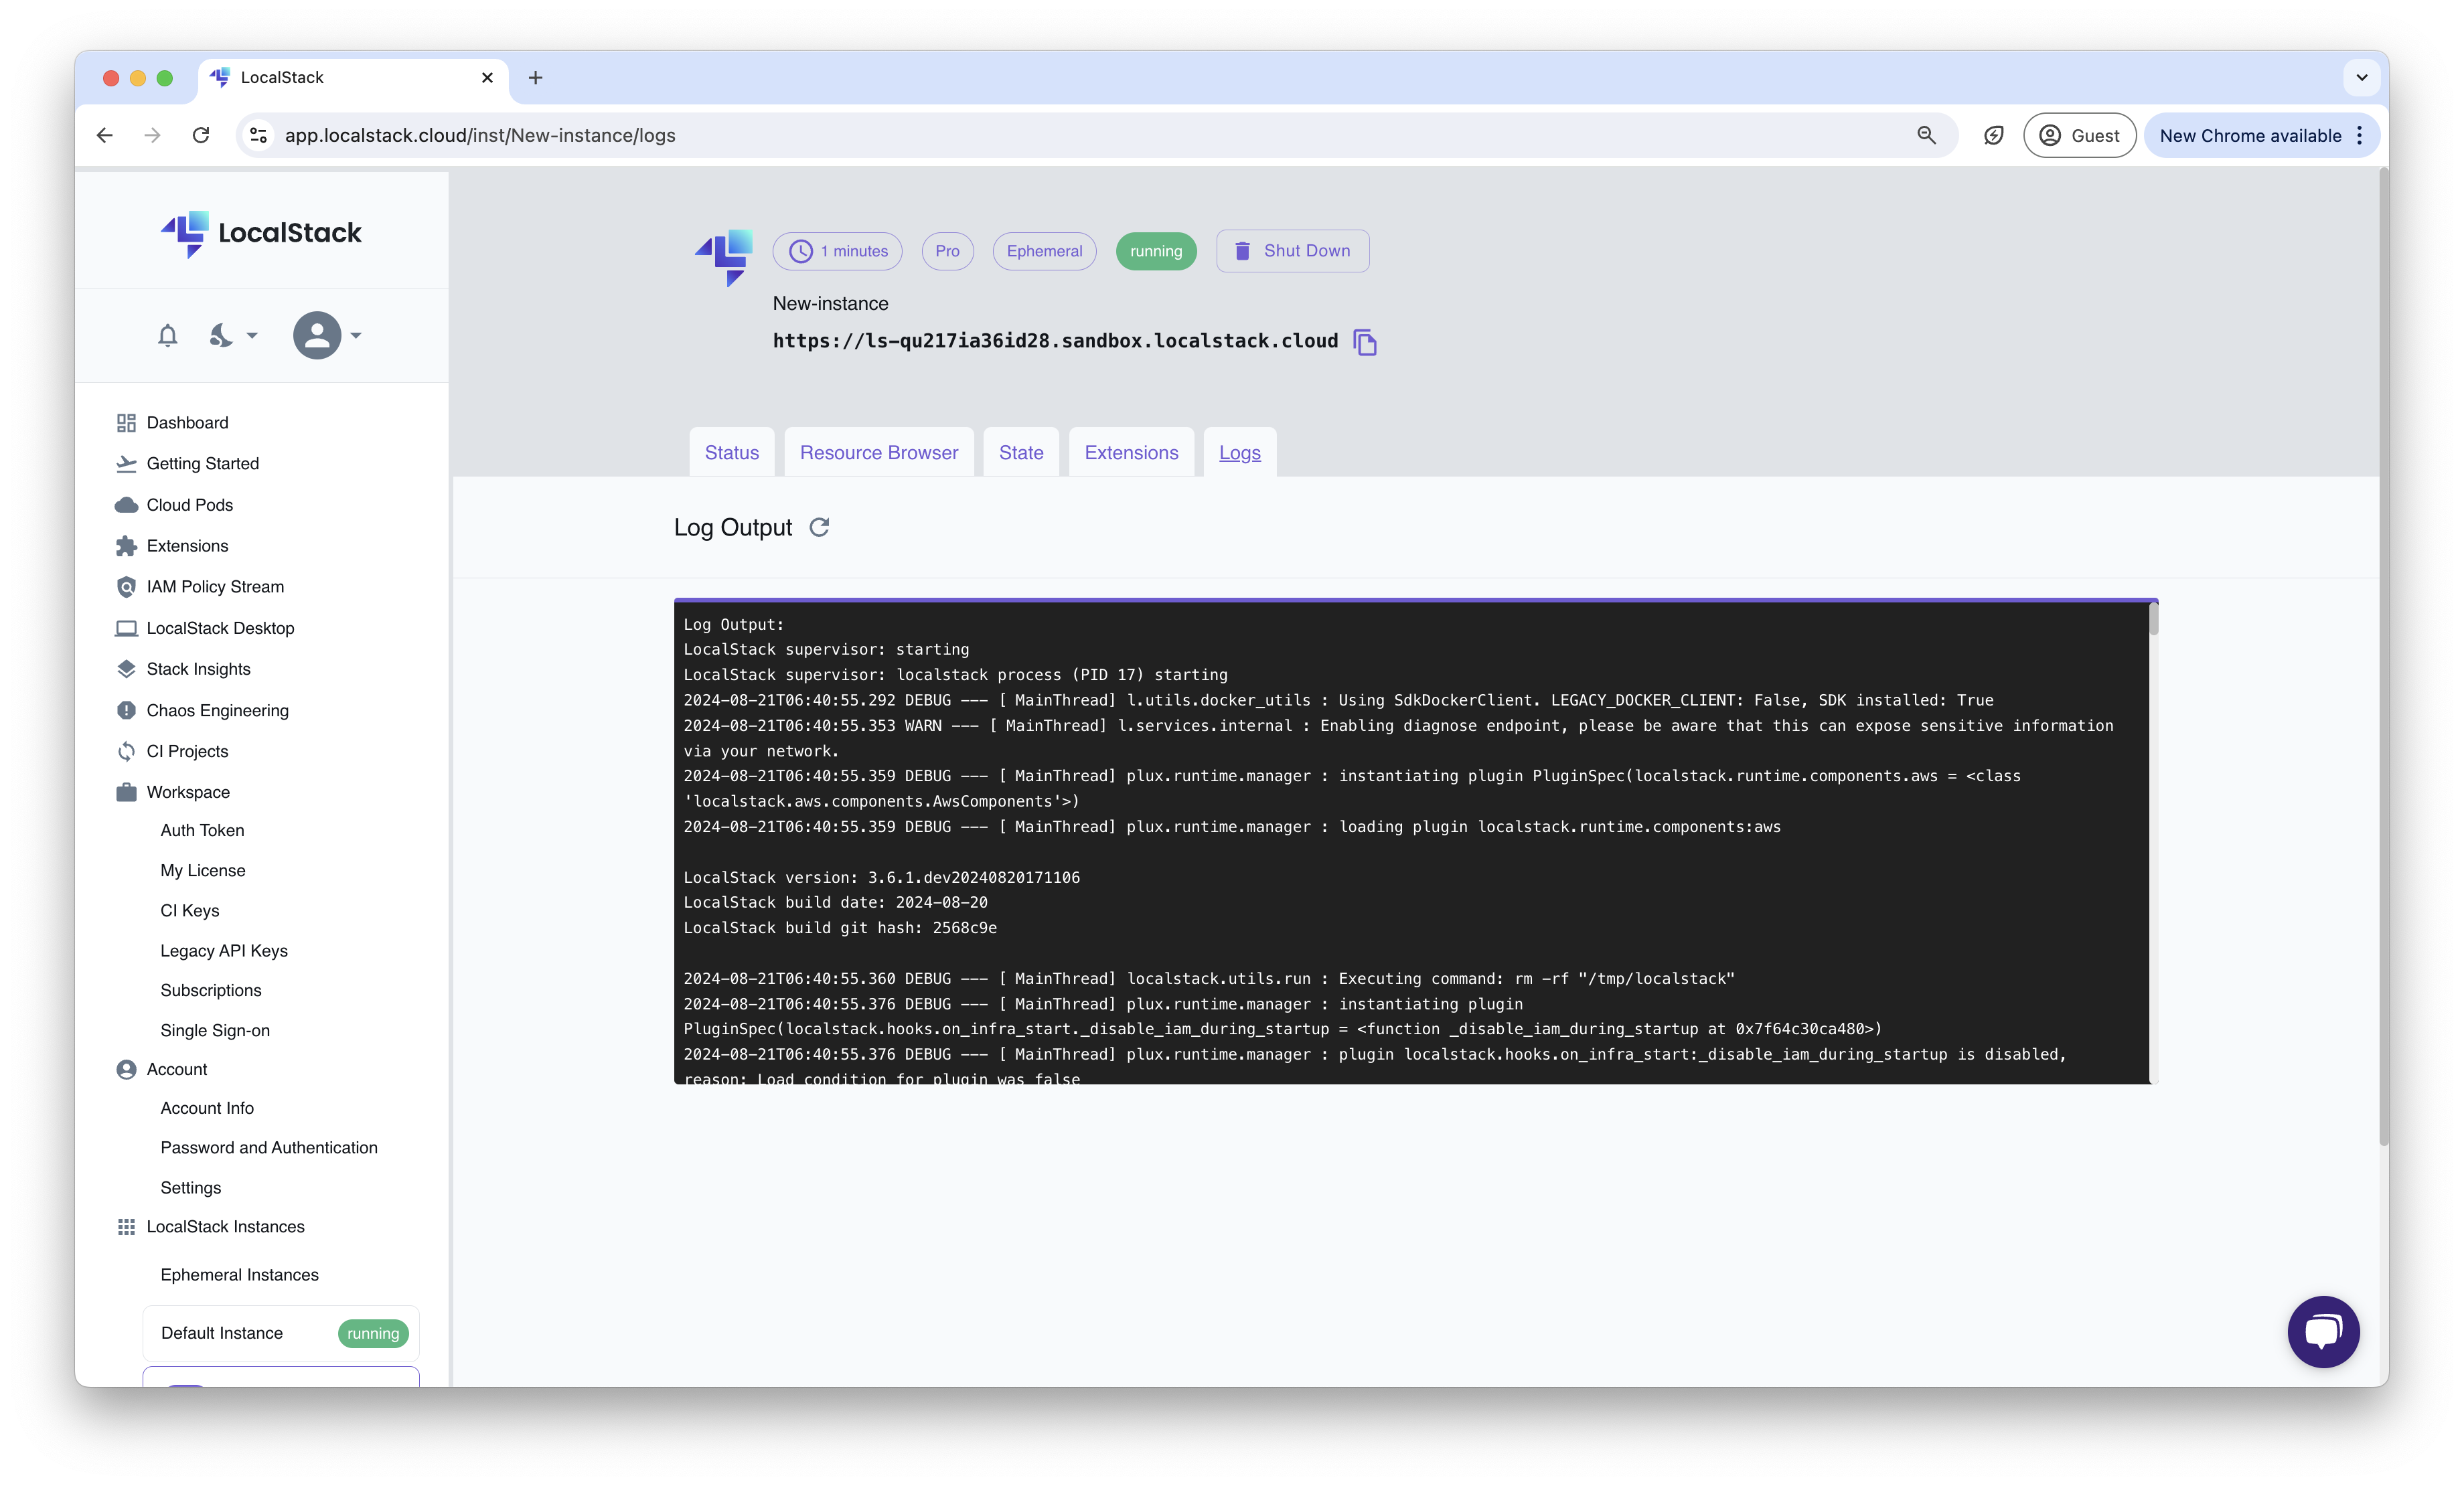
View the Logs of the Ephemeral Instance
Section titled “View the Logs of the Ephemeral Instance”You can view the logs of the Ephemeral Instance by navigating to the Logs tab in the LocalStack Instance Management page.
Shut Down the Ephemeral Instance
Section titled “Shut Down the Ephemeral Instance”You can shut down the instance by navigating to the Ephemeral Instances page and clicking on the Shut Down button.
Ephemeral Instances CLI
Section titled “Ephemeral Instances CLI”The Ephemeral Instances CLI is included in the LocalStack CLI installation, so no additional installations are needed to start using it.
If you’re a licensed user, setting the LOCALSTACK_AUTH_TOKEN as an environment variable is recommended to access all features of the Ephemeral Instances CLI.
Access the Ephemeral Instances CLI by running the localstack ephemeral command from your terminal.
localstack ephemeral --helpUsage: localstack ephemeral [OPTIONS] COMMAND [ARGS]...
(Preview) Manage ephemeral LocalStack instances in the cloud.
This command group allows you to create, list, and delete ephemeral LocalStack instances. Ephemeral instances are temporary cloud instances that can be used for testing and development.
Options: -h, --help Show this message and exit.
Commands: create Create a new ephemeral instance delete Delete an ephemeral instance list List all ephemeral instances logs Fetch logs from an ephemeral instanceTo start an Ephemeral Instance, run the following command:
localstack ephemeral create --name my-instance-123The output of the command should look like this:
{ "creation_time": 1731347416, "endpoint_url": "https://ls-ji9gajoqrveou.sandbox.localstack.cloud", "expiry_time": 1731351016, "id": "ji9gajoqrveou", "image": { "image_name": "localstack/localstack-pro", "tag": "latest" }, "instance_name": "my-instance-123", "labels": { "image-name": "localstack/localstack-pro", "image-tag": "latest", "instance-name": "my-instance-123", "requestor": "4e60f2cb" }, "requestor": "4e60f2cb", "shape": { "memory_megabytes": 2048, "virtual_cpus": 1 }, "status": "running"}List your available running Ephemeral Instances with:
localstack ephemeral listRetrieve your Ephemeral Instance logs with:
localstack ephemeral logs --name my-instance-123The logs output will look like this:
LocalStack version: 3.8.2.dev98LocalStack build date: 2024-11-11LocalStack build git hash: c624ee66
2024-11-11T17:50:42.373  INFO --- [  MainThread] l.p.c.b.licensingv2        : Successfully requested and activated new license 636c4b55-b09c-4a93-bef6-2f6d024f7d8a:enterprise 🔑✅2024-11-11T17:50:43.504  INFO --- [  MainThread] l.p.c.extensions.platform  : loaded 0 extensionsReady.
Finally, delete your Ephemeral Instance with:
localstack ephemeral delete --name my-instance-123Successfully deleted instance: my-instance-123 ✅Credit Consumption
Section titled “Credit Consumption”Ephemeral Instances consume credits based on the resources used and the duration of the instance. You can view the credit consumption of the Ephemeral Instance in the Ephemeral Instance page. Currently, for every 1 credit, you can run an Ephemeral Instance for 1 minute. You can view the available minutes under the Lifetime in minutes slider when creating an Ephemeral Instance. You can also see the credit consumption in the Credit Consumption section of the Ephemeral Instance page.