Quickstart
Introduction
Section titled “Introduction”In this quickstart guide, we’ll walk you through the process of starting LocalStack on your local machine and deploying a serverless image resizer application that utilizes several AWS services. This guide aims to help you understand how to use LocalStack for the development and testing of your AWS applications locally. It introduces you to the following key concepts:
- Starting a LocalStack instance on your local machine.
- Deploying an AWS serverless application infrastructure locally.
- Running an automated integration test suite against local infrastructure.
- Exploring the LocalStack Web Application to view deployed resources.
- Destroying the local infrastructure you have provisioned.
Architecture
Section titled “Architecture”The following diagram shows the architecture that we will deploy locally using LocalStack:

The architecture:
- Configures S3 bucket notifications to invoke a Lambda function.
- Provides S3 pre-signed POST URLs for direct uploads to the S3 bucket.
- Creates S3 website hosting for serving the static application client.
- Configures direct invocation URLs for Lambda functions accessible to the client.
- Establishes Lambda SNS to SNS topic notifications for failure handling.
- Creates SNS to SES subscriptions for email notifications triggered by specific events.
An internal SES LocalStack testing endpoint (/_localstack/aws/ses) is configured as well, to test email sending functionality while running our local integration test suite.
Prerequisites
Section titled “Prerequisites”- LocalStack CLI
- LocalStack Web Application account & Auth Token
- Docker
- Python 3.11+ &
pip - AWS CLI &
awslocalwrapper jq,zip&curl
You can start LocalStack using the localstack CLI.
Start the LocalStack for AWS container with your LOCALSTACK_AUTH_TOKEN pre-configured:
localstack auth set-token <your-auth-token>localstack startlocalstack auth set-token <your-auth-token>localstack startIf you prefer running LocalStack in detached mode, you can add the -d flag to the localstack start command, and use Docker Desktop to view the logs.
Instructions
Section titled “Instructions”To get started, clone the sample application repository from GitHub:
git clone https://github.com/localstack-samples/sample-serverless-image-resizer-s3-lambda.gitcd sample-serverless-image-resizer-s3-lambdaYou can now follow the instructions below to start LocalStack, deploy the sample application, and test the application.
Setup a virtual environment
Section titled “Setup a virtual environment”To deploy the sample application, you need to have specific Python packages are installed.
It is advisable to utilize a virtual environment for the installation process, allowing the packages to be installed in an isolated environment.
Execute the following commands to create a virtual environment and install the packages in requirements-dev.txt:
python -m venv .venvsource .venv/bin/activatepip install -r requirements-dev.txtpython -m venv .venv.venv\Scripts\activatepip install -r requirements-dev.txtSetup the serverless image resizer
Section titled “Setup the serverless image resizer”This application enables serverless image resizing using S3, SSM, Lambda, SNS, and SES. A simple web interface allows users to upload and view resized images. A Lambda function generates S3 pre-signed URLs for direct uploads, while S3 bucket notifications trigger image resizing. Another Lambda function lists and provides pre-signed URLs for browser display. The application also handles Lambda failures through SNS and SES email notifications.
The sample application uses AWS CLI and our awslocal wrapper to deploy the application to LocalStack.
Before going further, you need to build your Lambda functions.
You can use the following script that will cover all three of them:
deployment/build-lambdas.shYou can now deploy the sample application on LocalStack by running the following command:
deployment/awslocal/deploy.shAlternatively, you can follow these instructions to deploy the sample application manually step-by-step.
Create the S3 buckets
Section titled “Create the S3 buckets”awslocal s3 mb s3://localstack-thumbnails-app-imagesawslocal s3 mb s3://localstack-thumbnails-app-resizedAdd bucket names into the parameter store
Section titled “Add bucket names into the parameter store”awslocal ssm put-parameter \ --name /localstack-thumbnail-app/buckets/images \ --type "String" \ --value "localstack-thumbnails-app-images"awslocal ssm put-parameter \ --name /localstack-thumbnail-app/buckets/resized \ --type "String" \ --value "localstack-thumbnails-app-resized"Create SNS DLQ Topic for failed lambda invocations
Section titled “Create SNS DLQ Topic for failed lambda invocations”awslocal sns create-topic --name failed-resize-topicTo receive immediate alerts in case of image resize failures, subscribe an email address to the system. You can use the following command to subscribe an email address to the SNS topic:
awslocal sns subscribe \ --topic-arn arn:aws:sns:us-east-1:000000000000:failed-resize-topic \ --protocol email \ --notification-endpoint my-email@example.comCreate the Presign Lambda
Section titled “Create the Presign Lambda”(cd lambdas/presign; rm -f lambda.zip; zip lambda.zip handler.py)awslocal lambda create-function \ --function-name presign \ --runtime python3.11 \ --timeout 10 \ --zip-file fileb://lambdas/presign/lambda.zip \ --handler handler.handler \ --role arn:aws:iam::000000000000:role/lambda-role \ --environment Variables="{STAGE=local}"awslocal lambda wait function-active-v2 --function-name presignawslocal lambda create-function-url-config \ --function-name presign \ --auth-type NONECreate the Image List Lambda
Section titled “Create the Image List Lambda”(cd lambdas/list; rm -f lambda.zip; zip lambda.zip handler.py)awslocal lambda create-function \ --function-name list \ --handler handler.handler \ --zip-file fileb://lambdas/list/lambda.zip \ --runtime python3.11 \ --timeout 10 \ --role arn:aws:iam::000000000000:role/lambda-role \ --environment Variables="{STAGE=local}"awslocal lambda wait function-active-v2 --function-name listawslocal lambda create-function-url-config \ --function-name list \ --auth-type NONEBuild the Image Resizer Lambda
Section titled “Build the Image Resizer Lambda”cd lambdas/resizerm -rf libs lambda.zipdocker run --platform linux/x86_64 -v "$PWD":/var/task "public.ecr.aws/sam/build-python3.11" /bin/sh -c "pip install -r requirements.txt -t libs; exit"cd libs && zip -r ../lambda.zip . && cd ..zip lambda.zip handler.pyrm -rf libscd ../..cd lambdas/resizerm -rf package lambda.zipmkdir packagepip install -r requirements.txt -t package --platform manylinux_2_28_x86_64 --python-version 3.11 --no-depszip lambda.zip handler.pycd packagezip -r ../lambda.zip *;cd ../..cd lambdas/resizerm -rf package lambda.zipmkdir packagepip install -r requirements.txt -t packagezip lambda.zip handler.pycd packagezip -r ../lambda.zip\_;cd ../..Create the Image Resizer Lambda
Section titled “Create the Image Resizer Lambda”awslocal lambda create-function \ --function-name resize \ --runtime python3.11 \ --timeout 10 \ --zip-file fileb://lambdas/resize/lambda.zip \ --handler handler.handler \ --dead-letter-config TargetArn=arn:aws:sns:us-east-1:000000000000:failed-resize-topic \ --role arn:aws:iam::000000000000:role/lambda-role \ --environment Variables="{STAGE=local}"awslocal lambda wait function-active-v2 --function-name resizeawslocal lambda put-function-event-invoke-config \ --function-name resize \ --maximum-event-age-in-seconds 3600 \ --maximum-retry-attempts 0Connect S3 bucket to Resizer Lambda
Section titled “Connect S3 bucket to Resizer Lambda”awslocal s3api put-bucket-notification-configuration \ --bucket localstack-thumbnails-app-images \ --notification-configuration "{\"LambdaFunctionConfigurations\": [{\"LambdaFunctionArn\": \"$(awslocal lambda get-function --function-name resize --output json | jq -r .Configuration.FunctionArn)\", \"Events\": [\"s3:ObjectCreated:*\"]}]}"Create the S3 static website
Section titled “Create the S3 static website”awslocal s3 mb s3://webappawslocal s3 sync --delete ./website s3://webappawslocal s3 website s3://webapp --index-document index.htmlRetrieve the Lambda Function URLs
Section titled “Retrieve the Lambda Function URLs”Retrieve the Lambda function URLs for the presign and list Lambda functions using the following commands:
awslocal lambda list-function-url-configs --function-name presign --output json | jq -r '.FunctionUrlConfigs[0].FunctionUrl'awslocal lambda list-function-url-configs --function-name list --output json | jq -r '.FunctionUrlConfigs[0].FunctionUrl'Save these URLs for later use in the sample application.
Run the sample AWS application
Section titled “Run the sample AWS application”To access the application, go to https://webapp.s3-website.localhost.localstack.cloud:4566 in your browser.
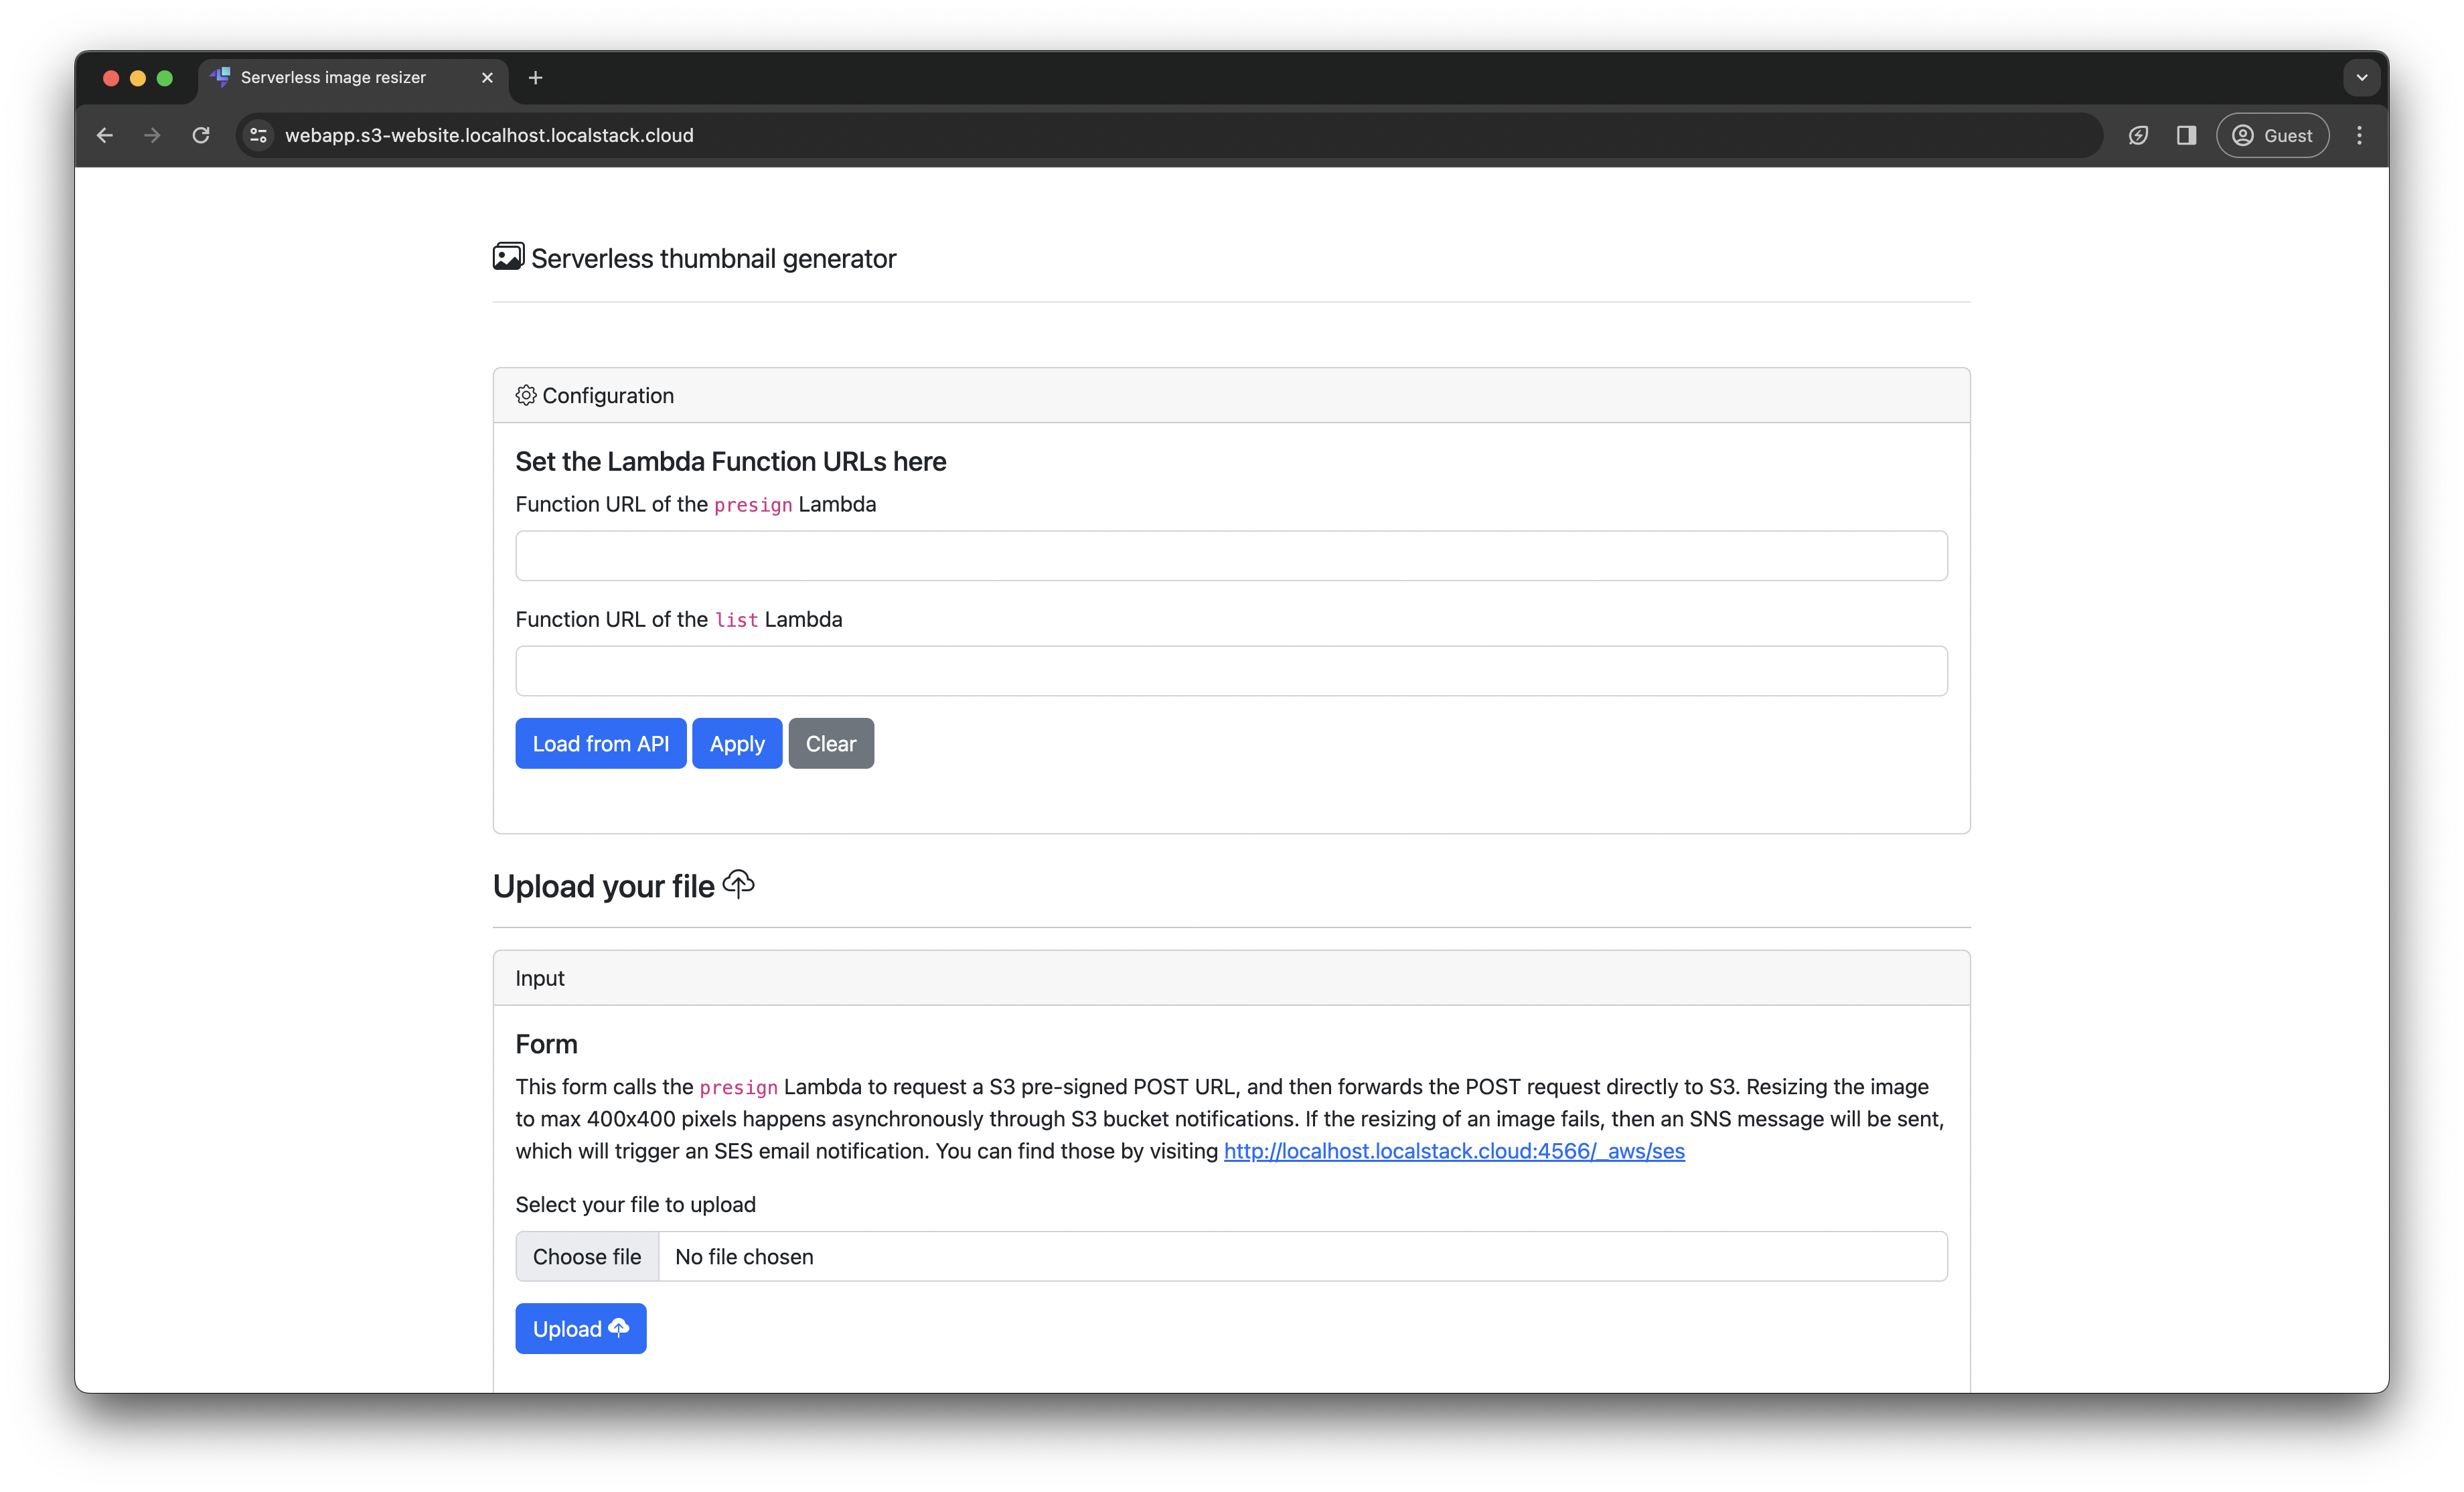
Paste the presign and list Lambda function URLs into the application and click Apply.
Alternatively, click on Load from API to automatically load the URLs.
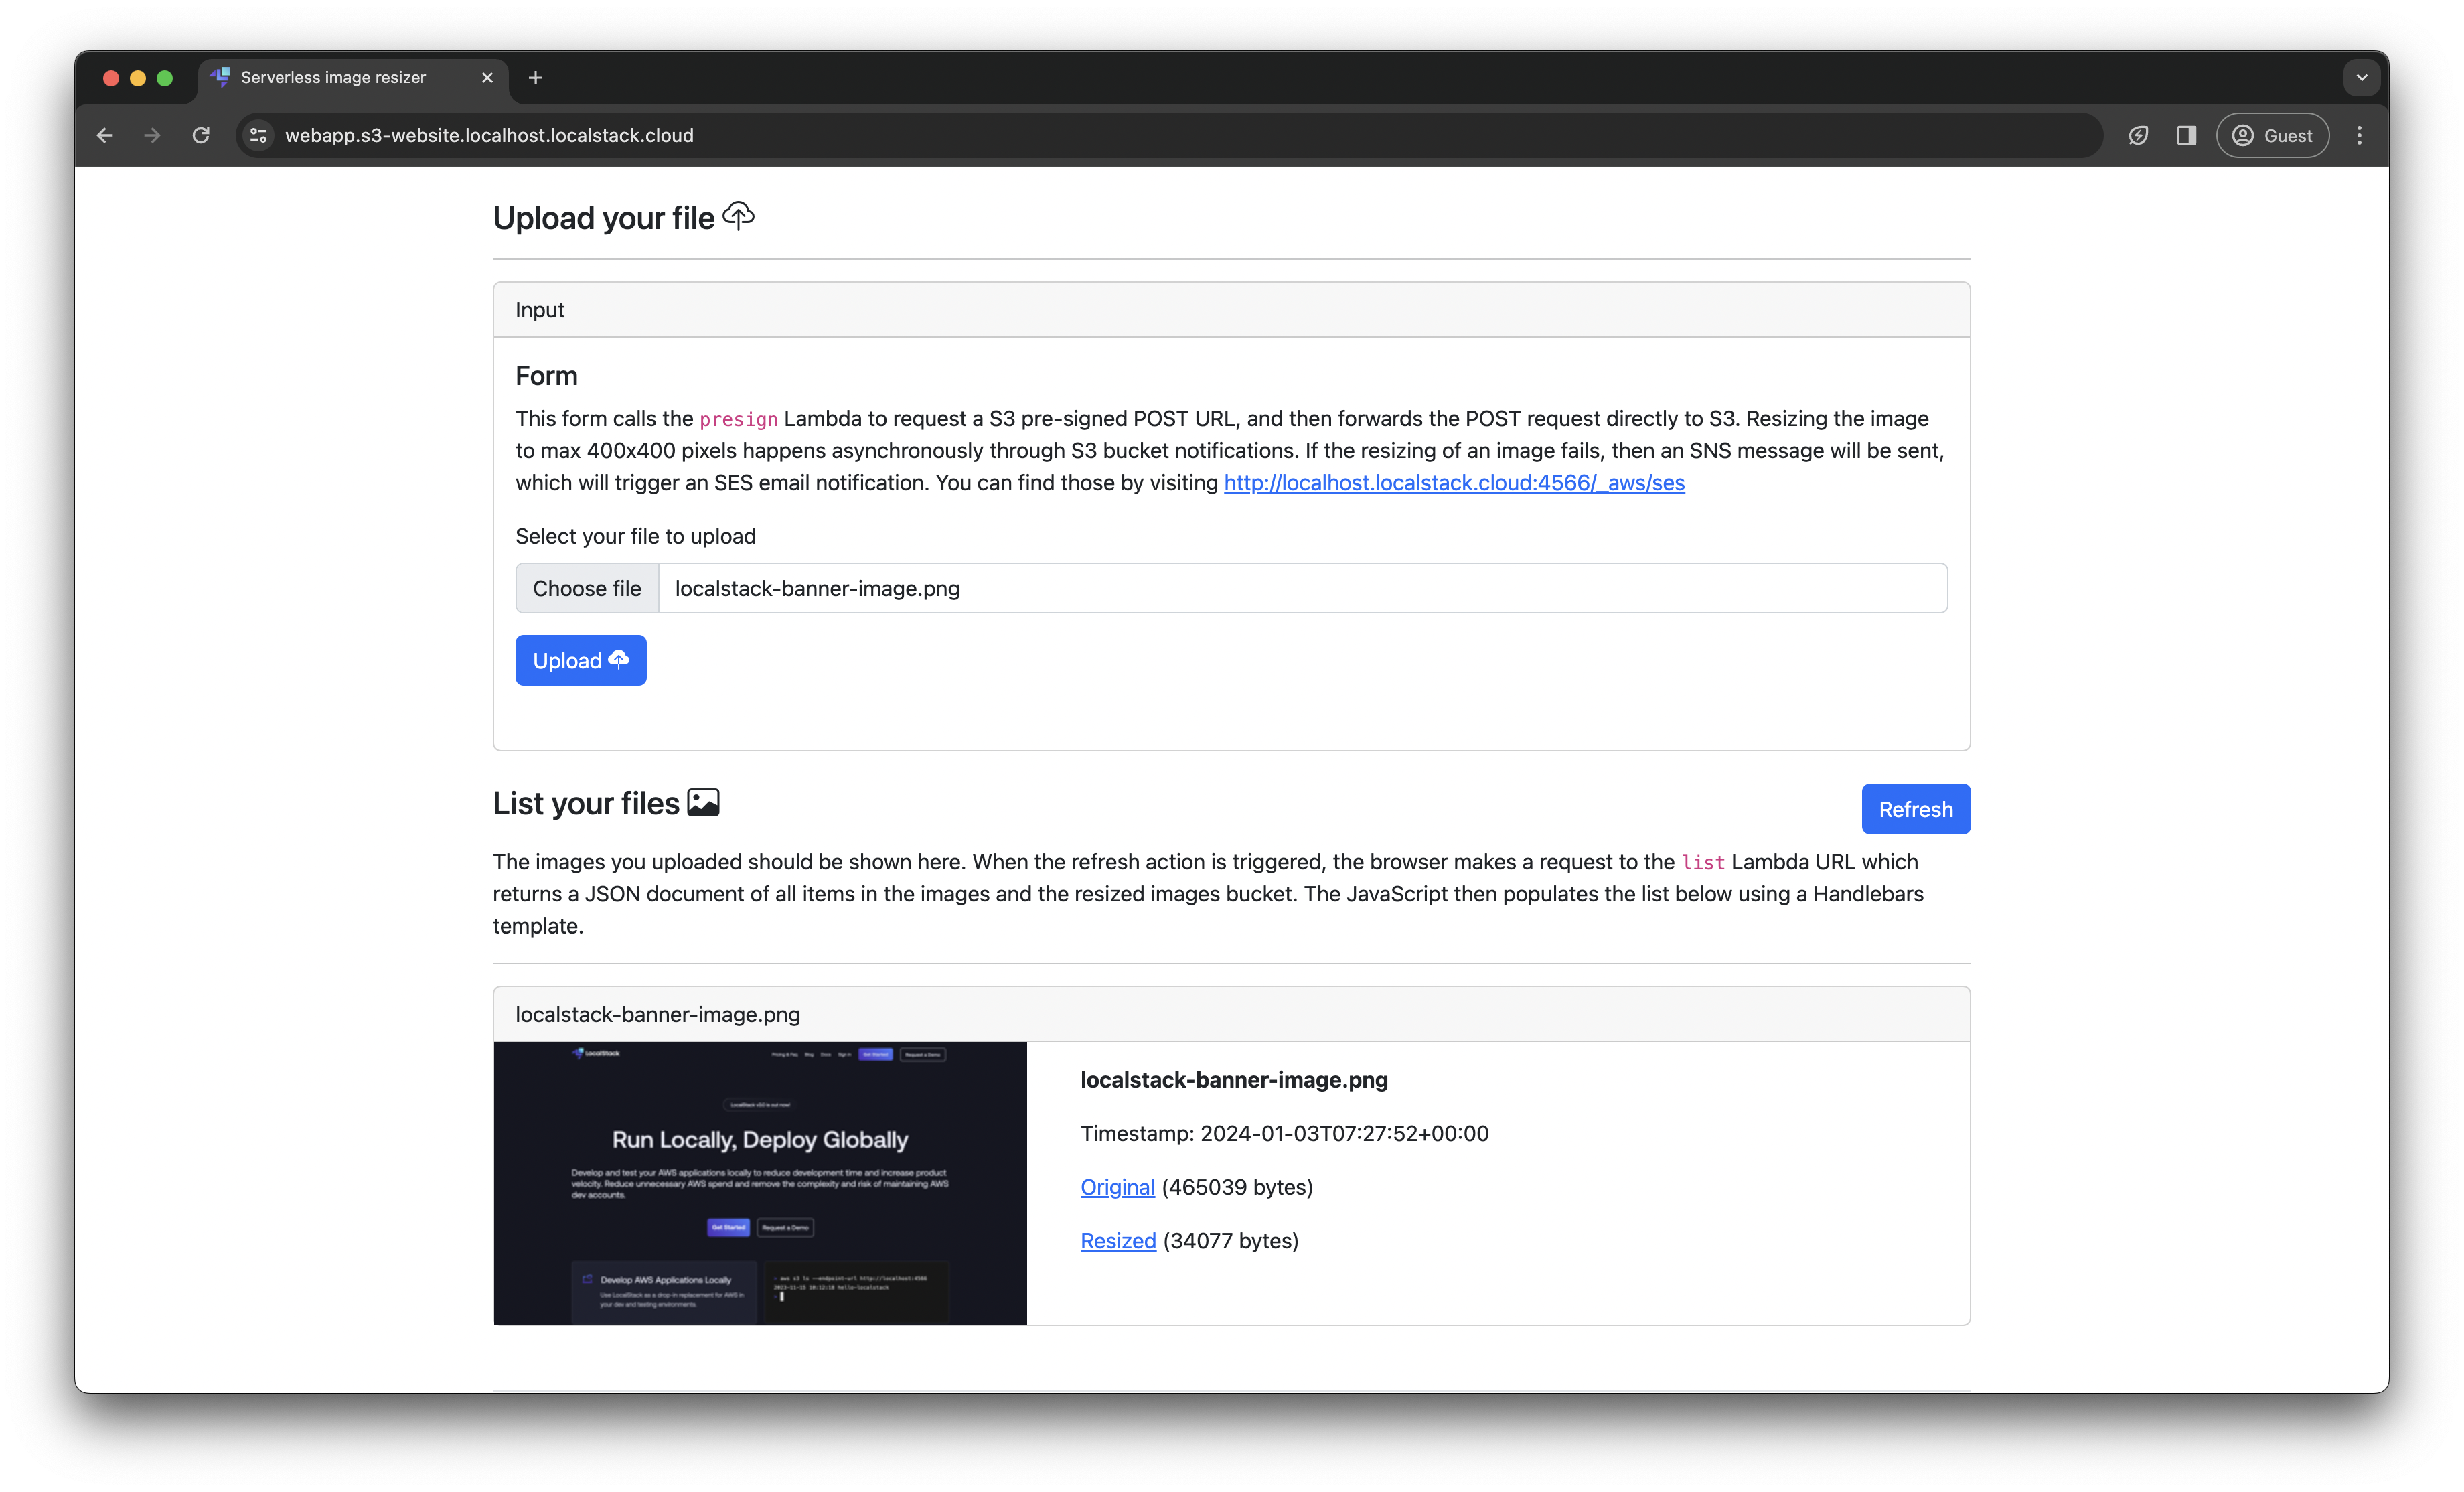
Upload an image, and click Upload.
The upload form uses the presign Lambda to request an S3 pre-signed POST URL, forwarding the POST request to S3.
Asynchronous resizing (maximum 400x400 pixels) occurs through S3 bucket notifications.
If successful, the application displays a success! alert.
Click Refresh to trigger your browser to request the list Lambda URL, returning a JSON document of all items in the images (localstack-thumbnails-app-images) and resized images (localstack-thumbnails-app-resized) bucket.
View the deployed resources
Section titled “View the deployed resources”You can inspect the resources deployed as part of the sample application by accessing the LocalStack Web Application. Navigate to your Default Instance to view the deployed resources.
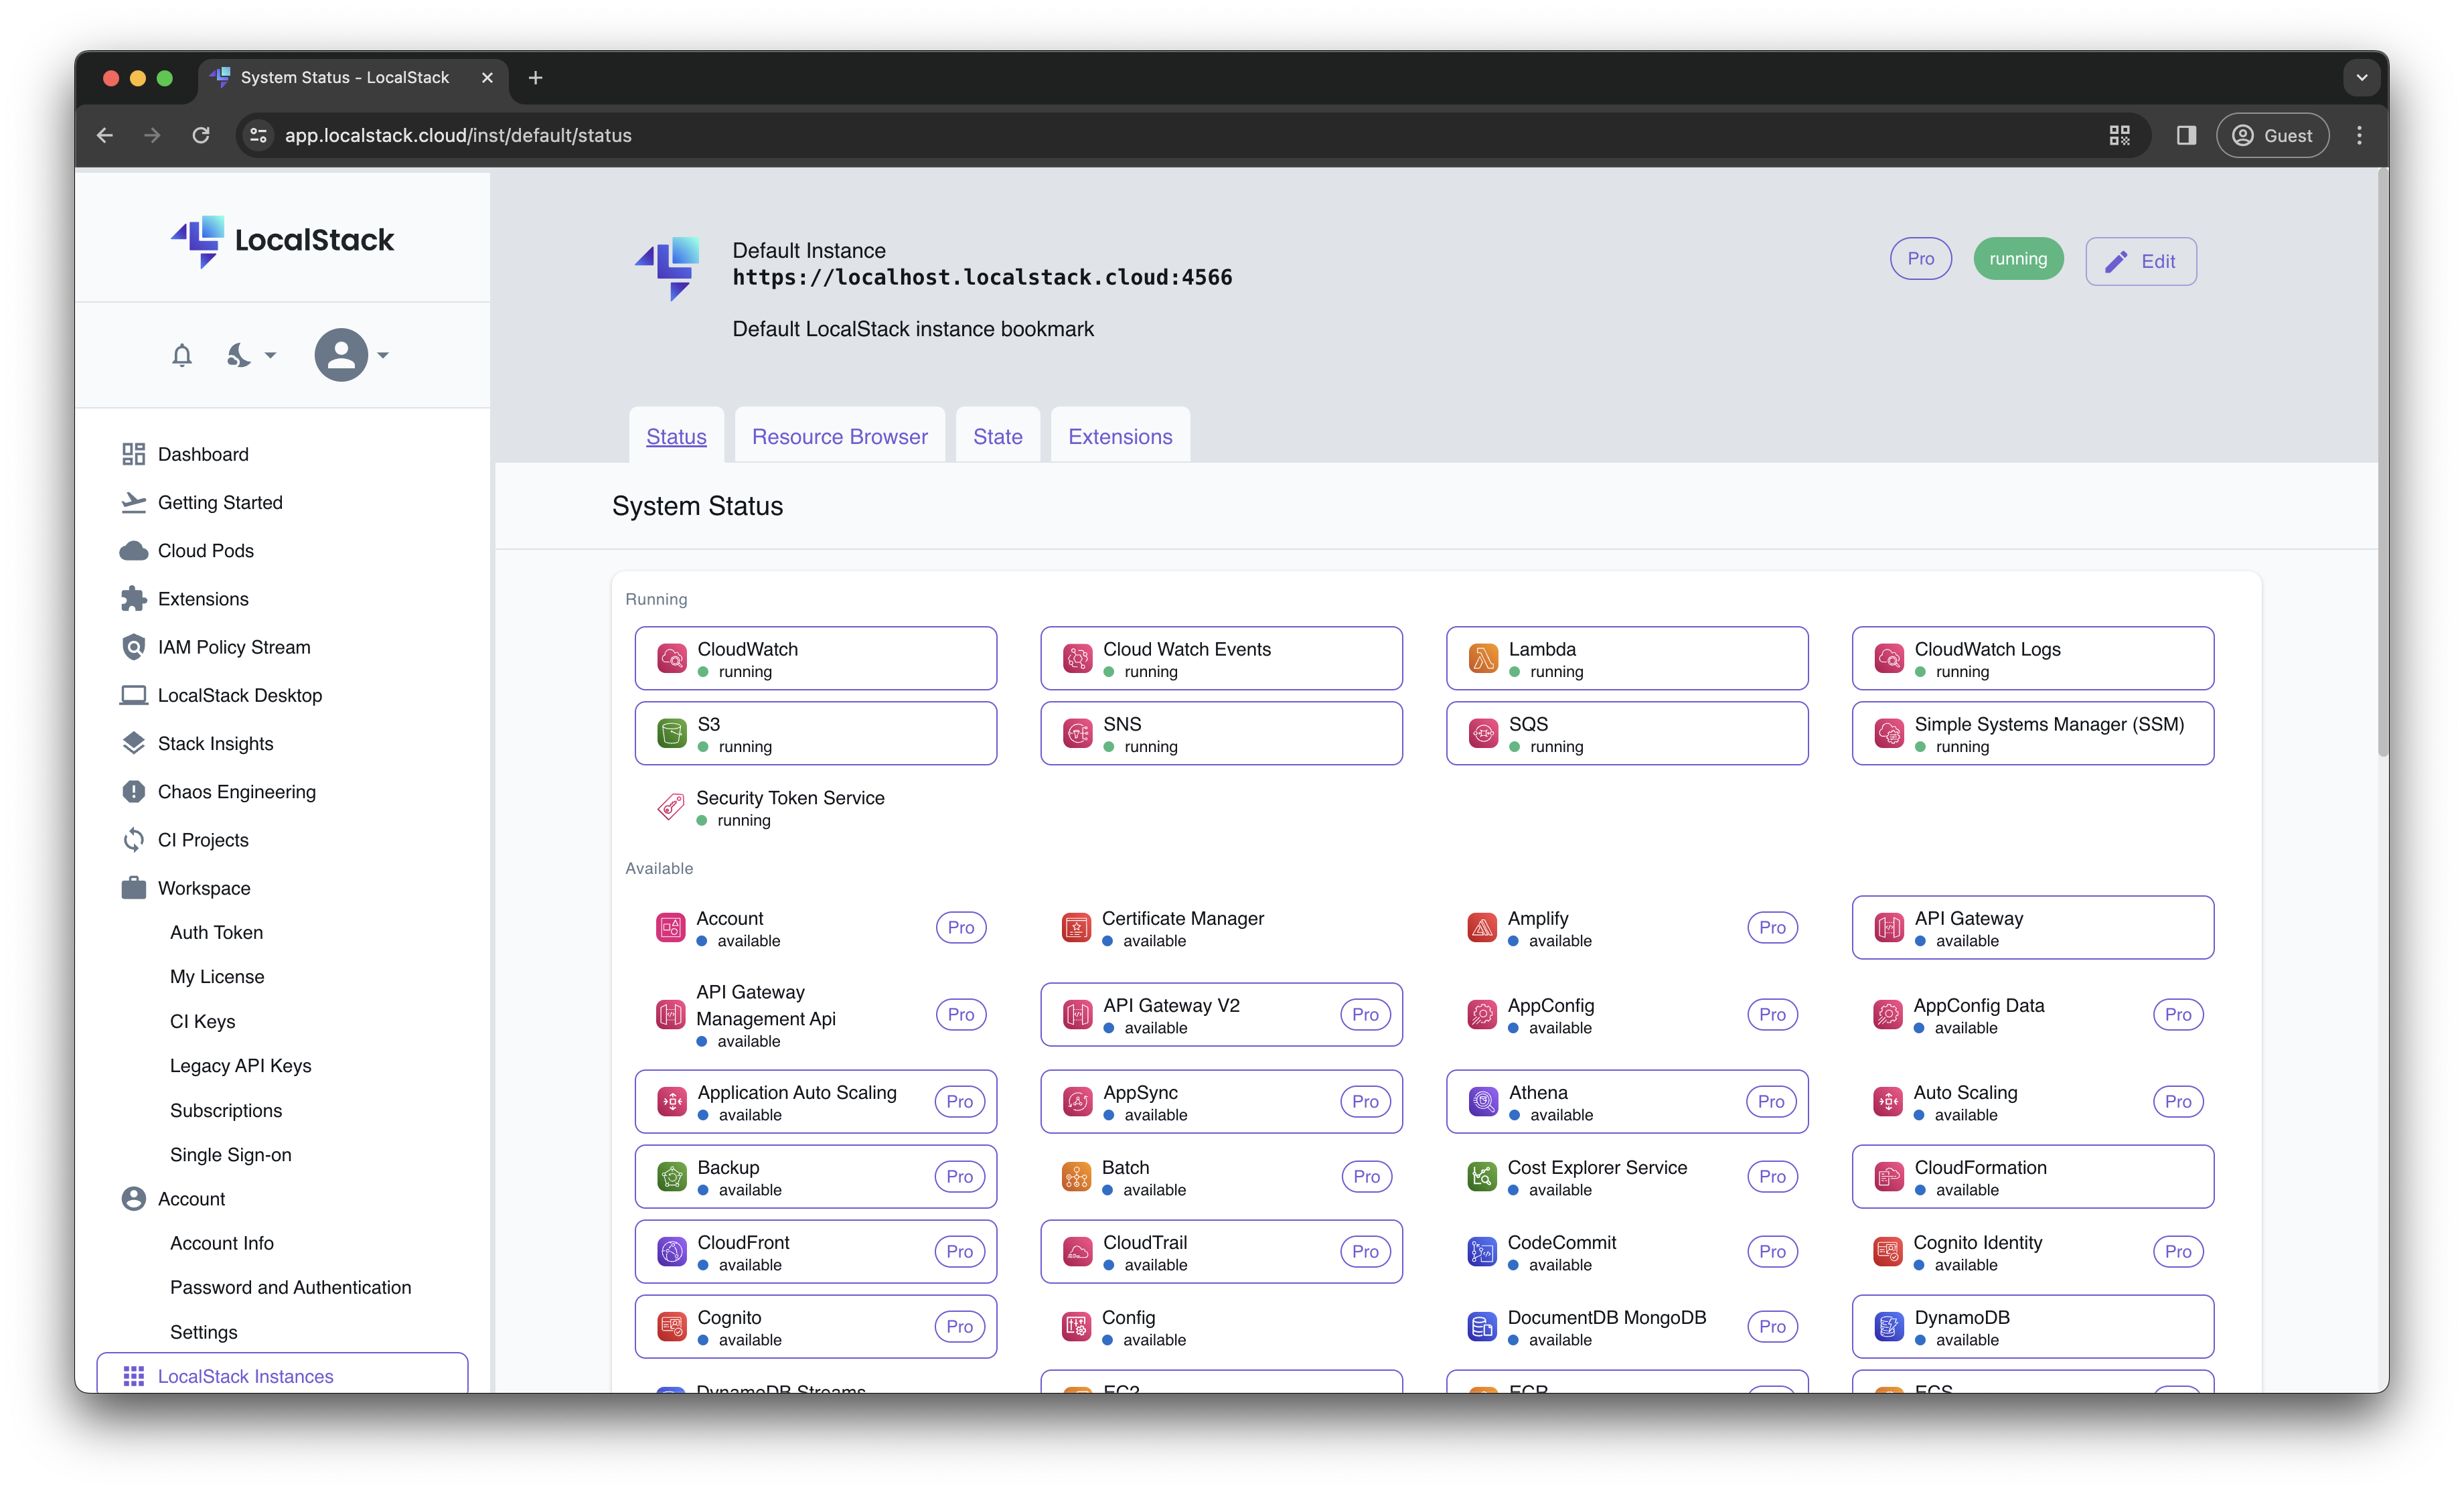
Click on S3 or Lambda to view the S3 buckets and Lambda functions respectively.

Run integration tests
Section titled “Run integration tests”To run automated integration tests against the sample application, use the following command:
pytest -vAdditionally, you can verify that when the resize Lambda fails, an SNS message is sent to a topic that an SES subscription listens to, triggering an email with the raw failure message.
Since there’s no real email server involved, you can use the LocalStack SES developer endpoint to list messages sent via SES:
curl -s http://localhost.localstack.cloud:4566/_aws/ses | jqAn alternative option is to use a service like MailHog or smtp4dev.
Start LocalStack with SMTP_HOST=host.docker.internal:1025, pointing to the mock SMTP server.
Destroy the local infrastructure
Section titled “Destroy the local infrastructure”Now that you’ve learned how to deploy a local AWS infrastructure for your sample application, let’s clean up and tear down the resources associated with the project:
localstack stopLocalStack is ephemeral, meaning it doesn’t persist any data across restarts. It runs inside a Docker container, and once it’s stopped, all locally created resources are automatically removed.
To persist the local cloud resources across restarts, navigate to our persistence documentation or learn about Cloud Pods, our next generation state management utility.
Next Steps
Section titled “Next Steps”Congratulations on deploying an AWS application locally using LocalStack! To expand your LocalStack capabilities, explore the following based on your expertise:
- Tutorials: Check out our tutorials to learn how to use LocalStack across various AWS services and application stacks.
- Supported Services: Explore LocalStack’s emulated AWS services.
- Capabilities: Learn about LocalStack’s capabilities including features like IAM policy stream, state management, and more.
- Tooling: Get details on LocalStack’s tooling and integrations.
- Blog: Read our blog posts about LocalStack and the latest enhancements for a better local development and testing experience.