CloudFront
Introduction
Section titled “Introduction”CloudFront is a content delivery network (CDN) service provided by Amazon Web Services (AWS). CloudFront distributes its web content, videos, applications, and APIs with low latency and high data transfer speeds. CloudFront APIs allow you to configure distributions, customize cache behavior, secure content with access controls, and monitor the CDN’s performance through real-time metrics.
LocalStack allows you to use the CloudFront APIs in your local environment to create local CloudFront distributions to transparently access your applications and file artifacts. The supported APIs are available on our API Coverage section, which provides information on the extent of CloudFront’s integration with LocalStack.
Getting started
Section titled “Getting started”This guide is intended for users who wish to get more acquainted with CloudFront over LocalStack.
It assumes you have basic knowledge of the AWS CLI (and our awslocal wrapper script).
Start your LocalStack container using your preferred method.
We will demonstrate how you can create an S3 bucket, put a text file named hello.txt to the bucket, and then create a CloudFront distribution which makes the file accessible via a https://abc123.cloudfront.net/hello.txt proxy URL (where abc123 is a placeholder for the real distribution ID).
To get started, create an S3 bucket using the mb command:
awslocal s3 mb s3://abc123You can now go ahead, create a new text file named hello.txt and upload it to the bucket:
echo 'Hello World' > /tmp/hello.txtawslocal s3 cp /tmp/hello.txt s3://abc123/hello.txt --acl public-readAfter uploading the file to S3, you can create a CloudFront distribution using the CreateDistribution API call.
Run the following command to create a distribution with the default settings:
domain=$(awslocal cloudfront create-distribution \ --origin-domain-name abc123.s3.amazonaws.com | jq -r '.Distribution.DomainName')curl -k https://$domain/hello.txtIn the example provided above, be aware that the final command (curl https://$domain/hello.txt) might encounter a temporary failure accompanied by a warning message Could not resolve host.
This can occur because different operating systems adopt diverse DNS caching strategies, causing a delay in the availability of the CloudFront distribution’s DNS name (e.g., abc123.cloudfront.net) within the system.
Typically, after a few retries, the command should succeed.
It’s worth noting that similar behavior can be observed in the actual AWS environment, where CloudFront DNS names may take up to 10-15 minutes to propagate across the network.
Lambda@Edge
Section titled “Lambda@Edge”You can enable this feature by setting CLOUDFRONT_LAMBDA_EDGE=1 in your LocalStack configuration.
Current features
Section titled “Current features”- Support for
CreateDistributionAPI to set up CloudFront distributions with Lambda@Edge. - Support for modifying request and response headers dynamically.
- Support for
IncludeBodyparameter. - Support for Node.js & Python 3.x runtime.
Current limitations
Section titled “Current limitations”- The
UpdateDistribution,DeleteDistribution, and Persistence Restore features are not yet supported for Lambda@Edge. - The
origin-requestandorigin-responseevent types currently trigger for each request because caching is not implemented in CloudFront.
Using custom URLs
Section titled “Using custom URLs”LocalStack for AWS supports using an alternate domain name, also referred to as a CNAME or custom domain name, to access your applications and file artifacts instead of relying on the domain name generated by CloudFront for your distribution.
To set up the custom domain name, you must configure it in your local DNS server.
Once that is done, you can designate the desired domain name as an alias for the target distribution.
To achieve this, you’ll need to provide the Aliases field in the --distribution-config option when creating or updating a distribution.
The format of this structure is similar to the one used in AWS CloudFront options.
In the given example, two domains are specified as Aliases for a distribution.
Please note that a complete configuration would entail additional values relevant to the distribution, which have been omitted here for brevity.
--distribution-config {...'Aliases':'{'Quantity':2, 'Items': ['custom.domain.one', 'customDomain.two']}'...}Custom IDs for CloudFront Distributions via tags
Section titled “Custom IDs for CloudFront Distributions via tags”Each CloudFront distribution is created with a random unique identifier automatically assigned by AWS. Given that the distribution ID is part of the generated domain name, it can be useful to have the possibility to create distributions with a deterministic ID (e.g., to simplify testing or integration with other AWS services).
LocalStack offers this possibility by using the _custom_id_ tag when creating a distribution with the CreateDistributionWithTags operation.
Resource Browser
Section titled “Resource Browser”The LocalStack Web Application provides a Resource Browser for CloudFront, which allows you to view and manage your CloudFront distributions. You can access the Resource Browser by opening the LocalStack Web Application in your browser, navigating to the Resource Browser section, and then clicking on CloudFront under the Analytics section.
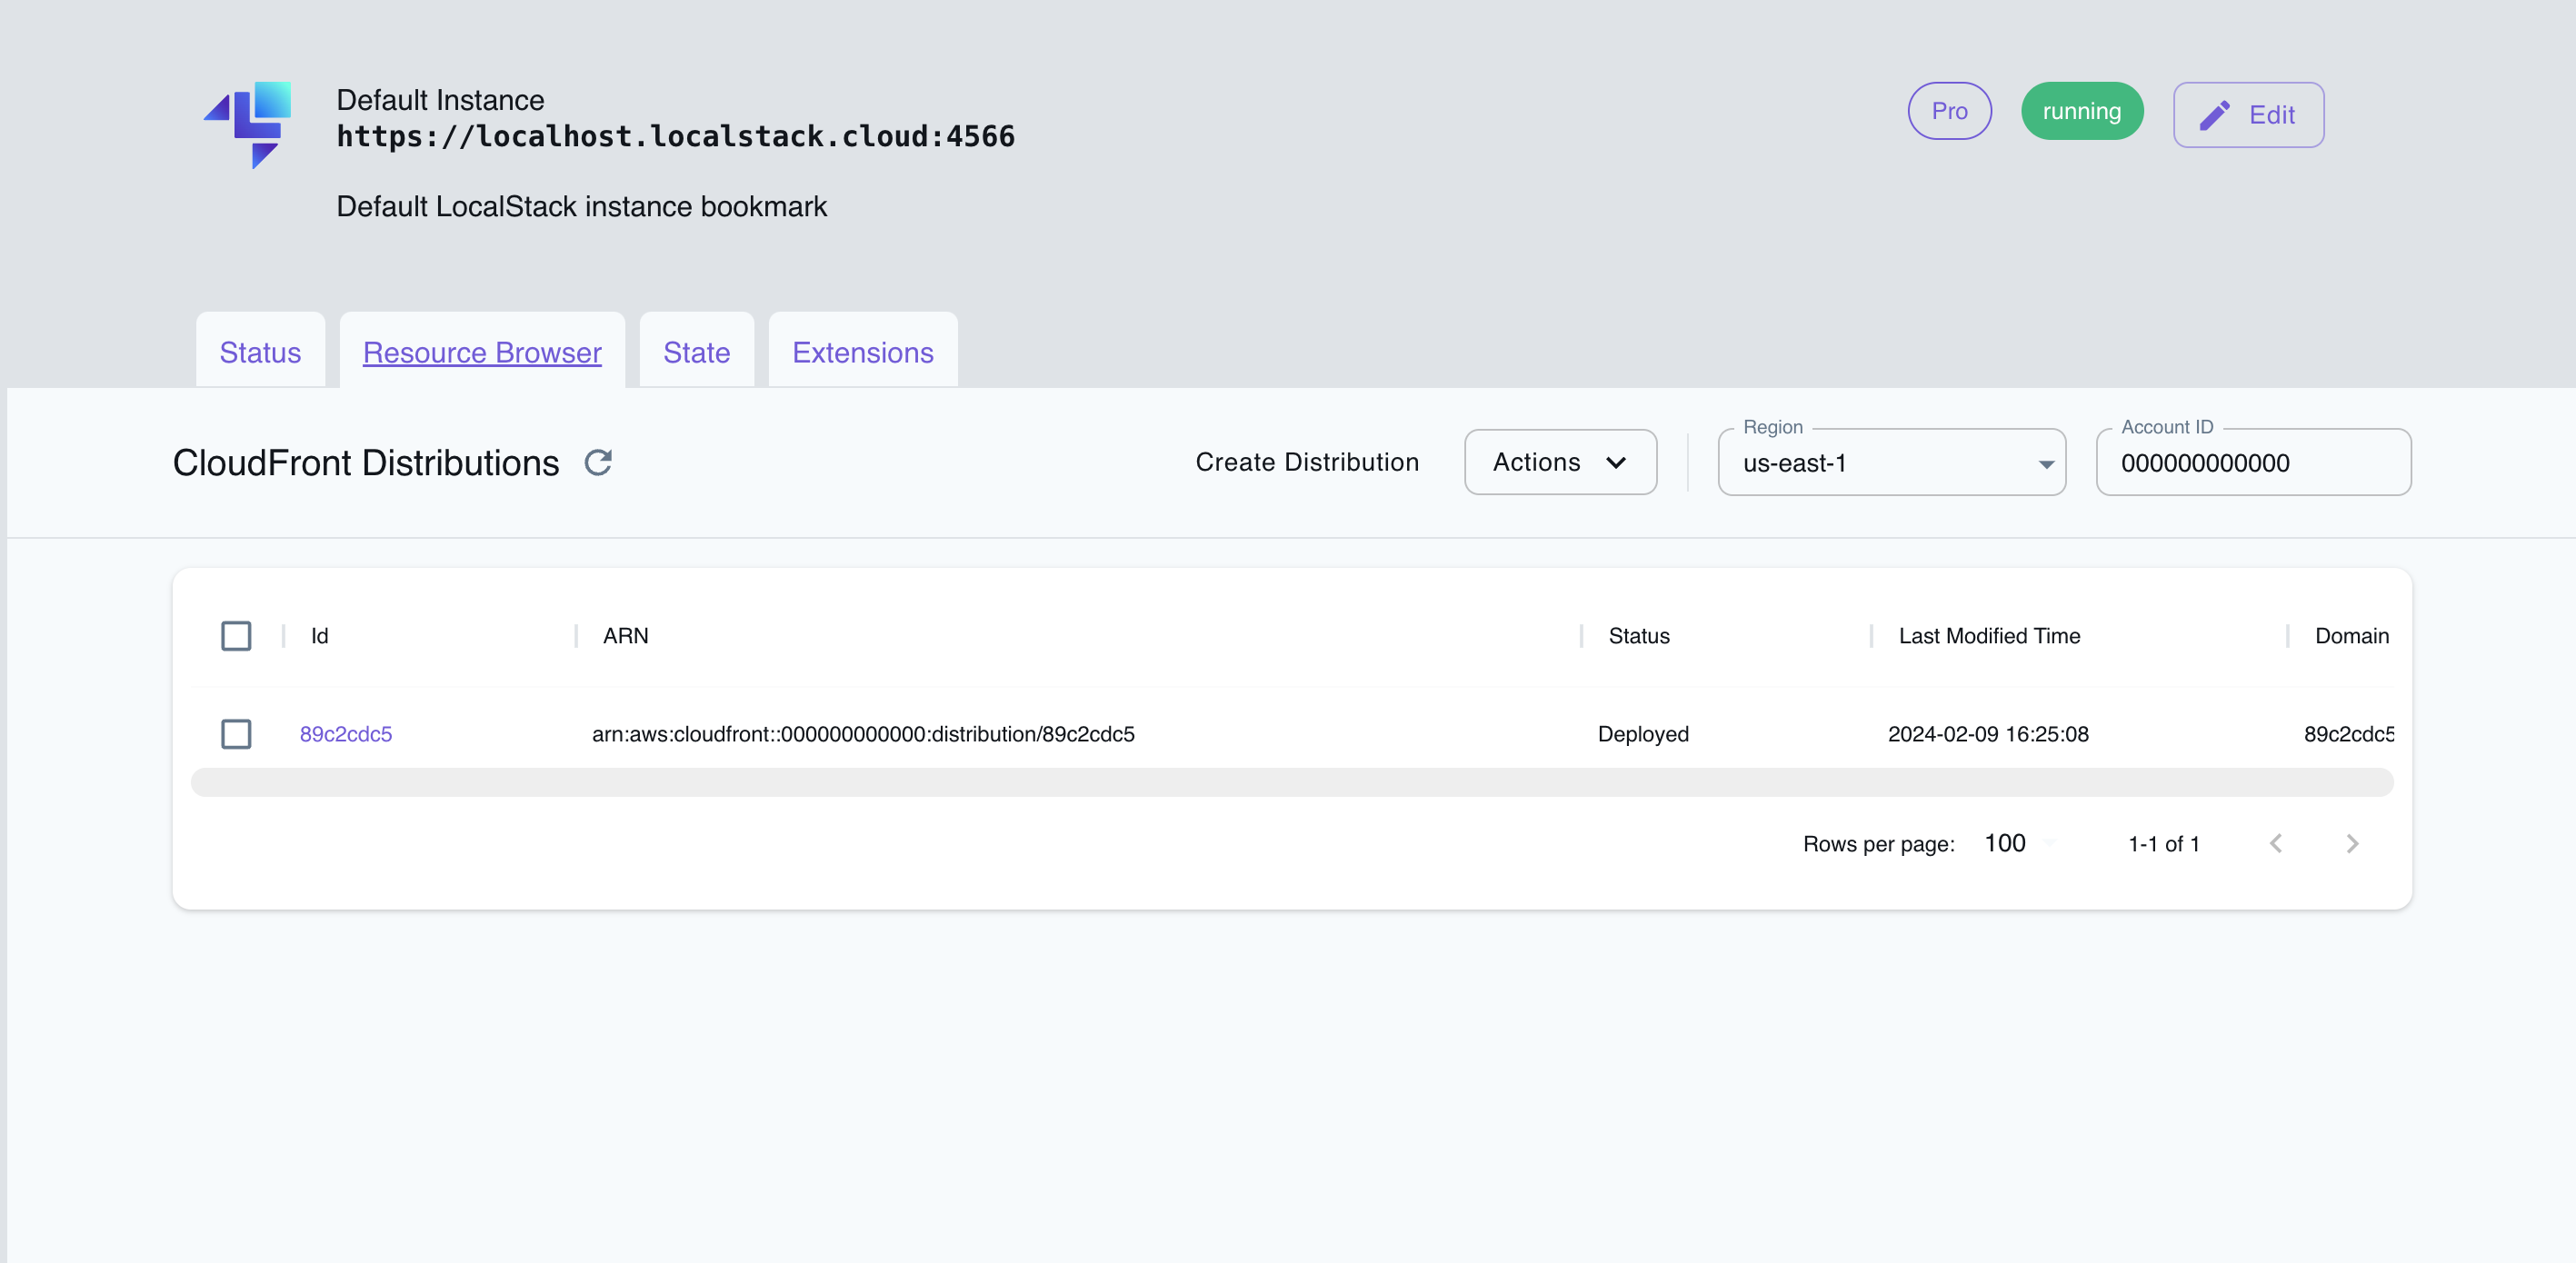
The Resource Browser allows you to perform the following actions:
- Create Distribution: Create a new CloudFront distribution by specifying the Origins and other settings.
- List Distributions: View a list of all CloudFront distributions.
- Edit Distribution: Modify the settings of an existing CloudFront distribution by opening the distribution’s details page and clicking on the Edit Distribution button.
- Delete Distribution: Delete an existing CloudFront distribution by selecting the distribution, click on Actions, and then click on Remove Selected.
Examples
Section titled “Examples”The following code snippets and sample applications provide practical examples of how to use CloudFront in LocalStack for various use cases:
API Coverage
Section titled “API Coverage”| Operation ▲ | Implemented ▼ | Verified on Kubernetes |
|---|