Instance Management
Introduction
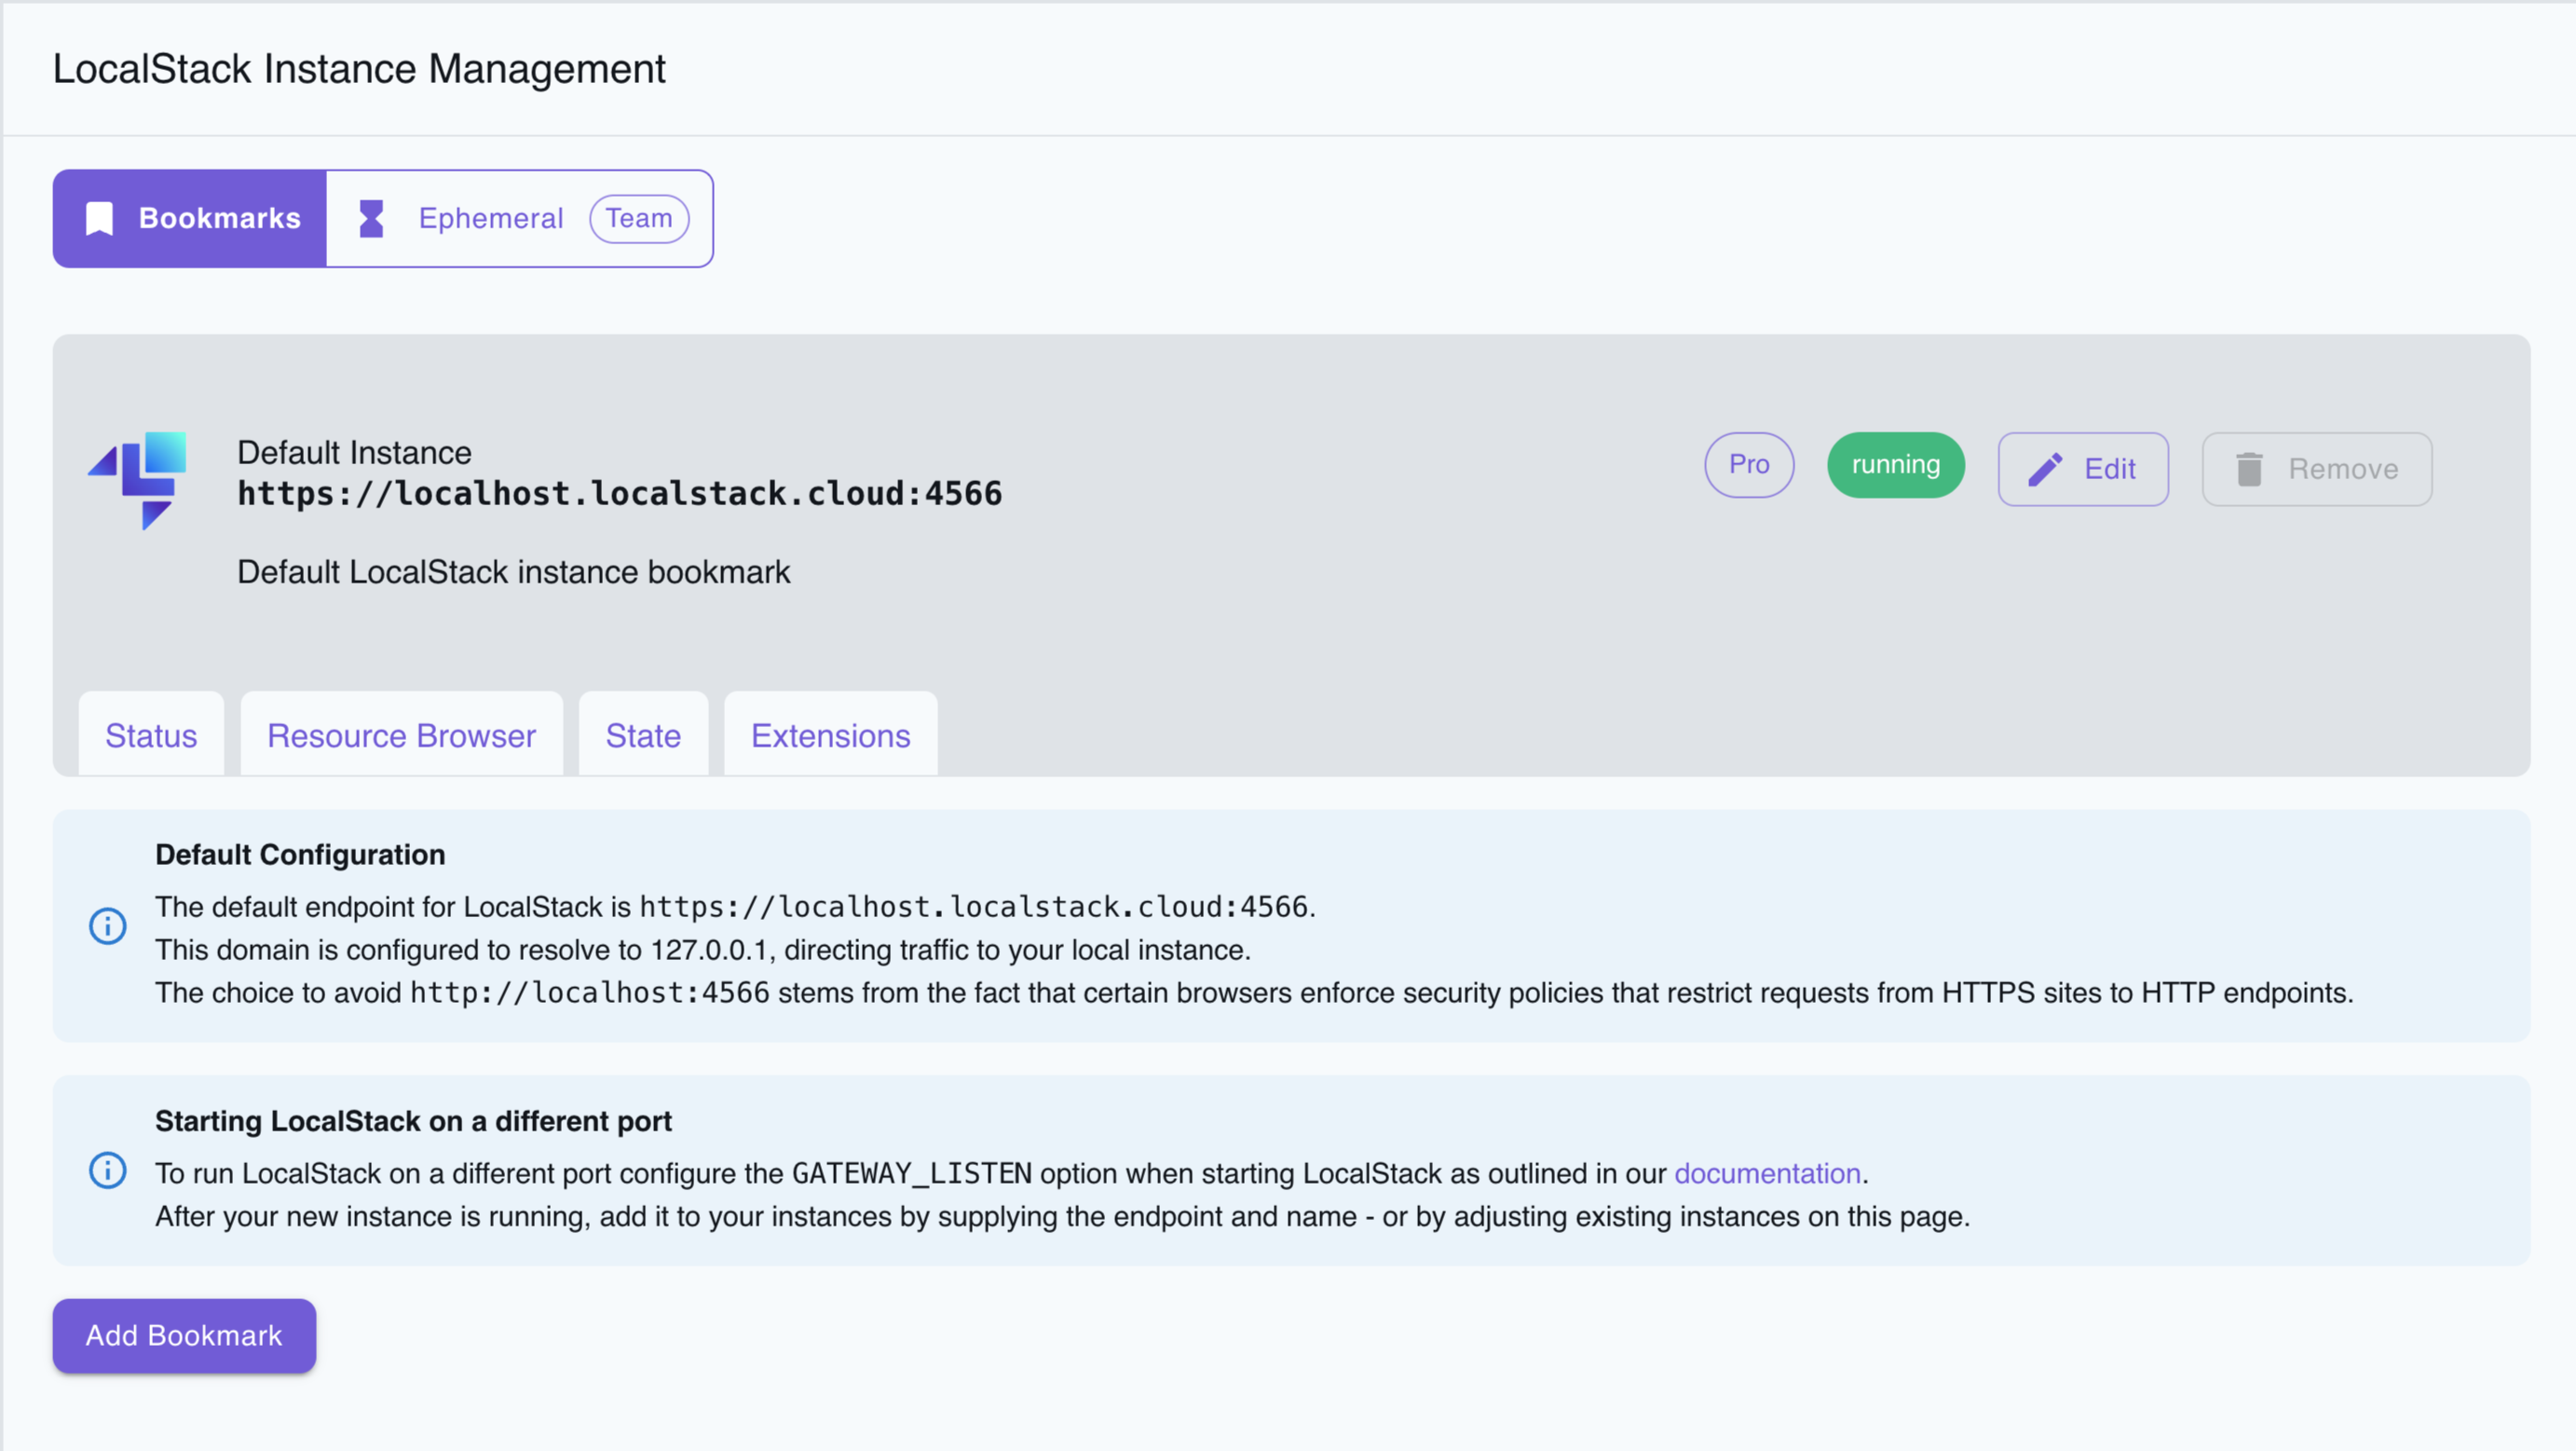
Section titled “Introduction”LocalStack Instance Management lets you view and manage your LocalStack instances while you build and test your cloud applications locally. You can access this feature through the LocalStack Instances section in the sidebar of the LocalStack Web Application.
Instance Management offers these features:
- Overview: Shows the stack details of your LocalStack instances.
- Status: Shows the status of the services running in the LocalStack container.
- Resource Browser: Lets you view and manage your local AWS resources.
- State: Allows you to export and import the state of your LocalStack instances.
- IAM Policy Stream: Provides a stream of IAM policies corresponding to the AWS API calls.
- Chaos Engineering: Allows you to inject failures & simulate outages in your LocalStack instance.
- Extensions: Provides extra integrations to improve your LocalStack experience.

Instance Bookmark
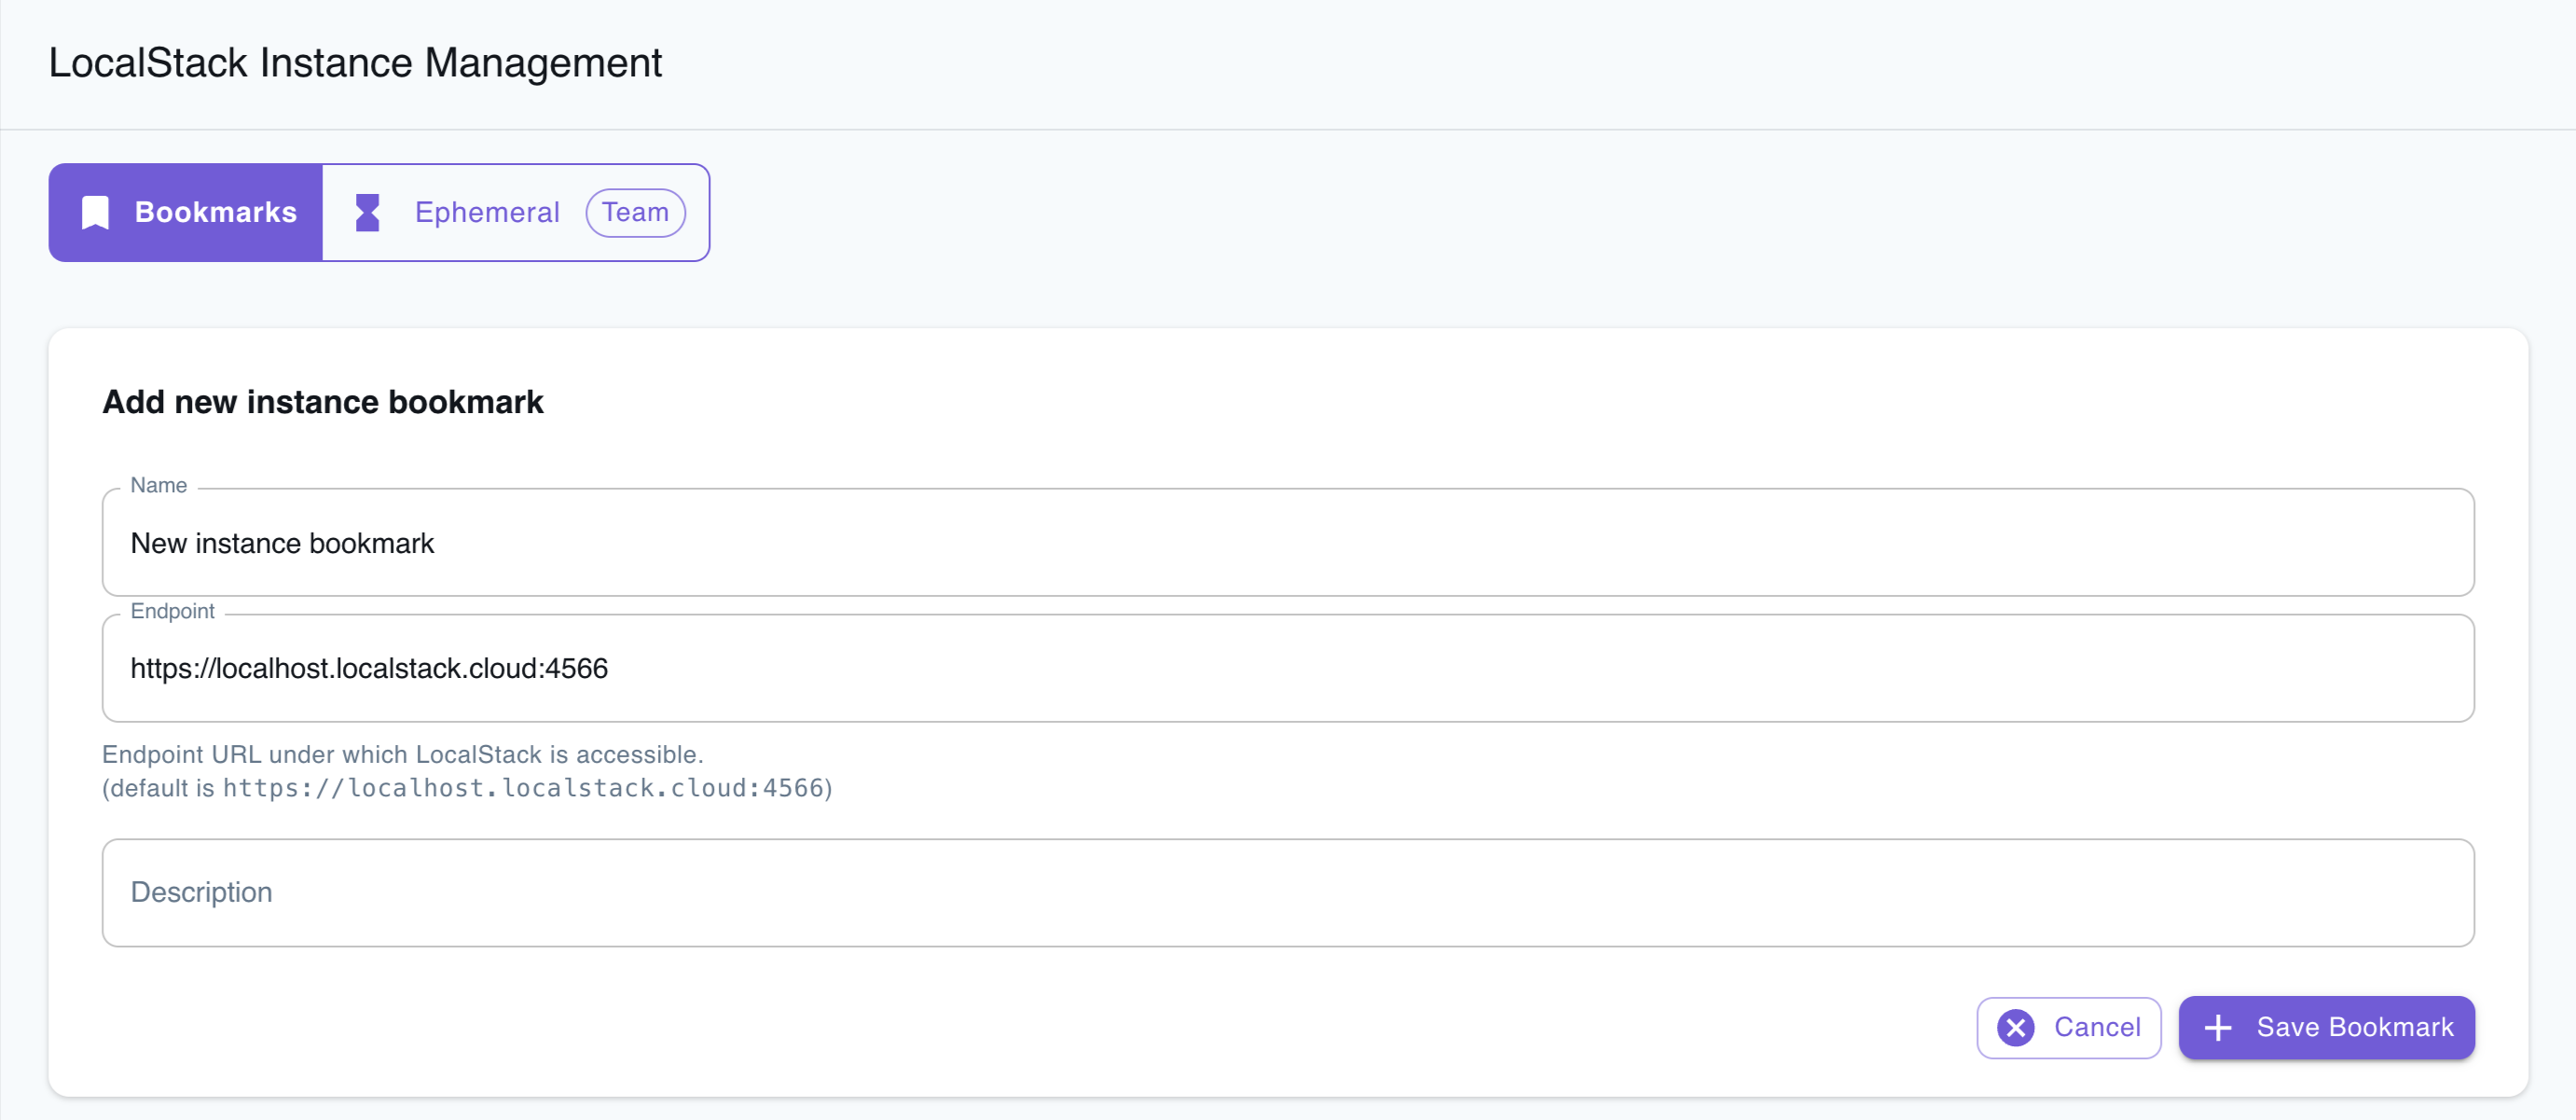
Section titled “Instance Bookmark”Instance Bookmark lets users save references to instances without directly creating or managing them. To create an Instance Bookmark, do the following:
- Click on the Add Bookmark button on the Instance Management page.
- Enter a name for the bookmark, specify the endpoint, and add a description.
- Click on the Save Bookmark button.

Connect to an instance on a different machine
Section titled “Connect to an instance on a different machine”You can use the Instance Bookmark feature to connect the LocalStack Web Application to a LocalStack instance running on a different machine.
To connect the Web Application with your running LocalStack instance, you need to ensure the endpoint URL’s server SSL certificate corresponds to the hostname/IP address of the URL.
This is necessary when the endpoint URL is set as something like https://myhost:4566 or uses an IP address like https://1.2.3.4:4566.
Sites with an https://... URL must use HTTPS for requests, and the SSL certificate must match the hostname (e.g., localhost.localstack.cloud).
To address this, consider setting up a local TCP proxy server that listens on 127.0.0.1:4566 and forwards all requests to the endpoint where your LocalStack instance runs.
In the Web user interface, you can keep the default setting, https://localhost.localstack.cloud:4566.
Tools like simpleproxy or proxy.py can help set this up.
Alternatively, you can direct localhost.localstack.cloud to your target machine’s IP address by modifying the /etc/hosts file, which is useful if you’re using the LocalStack Web UI on a macOS or Linux-based machine.