End-to-End Testing in Gitlab CI with Testcontainers and LocalStack: Understanding Runners and Docker in Docker
Introduction: Testcontainers & LocalStack
Section titled “Introduction: Testcontainers & LocalStack”Testcontainers is an open-source framework that provides lightweight APIs for bootstrapping local development and test dependencies with real services wrapped in Docker containers. Running tests with Testcontainers and LocalStack is crucial for AWS-powered applications because it ensures each test runs in a clean, isolated environment, providing consistency across all development and CI machines. LocalStack avoids AWS costs by emulating services locally, preventing exceeding AWS free tier limits, and eliminates reliance on potentially unstable external AWS services. This allows for the simulation of difficult-to-reproduce scenarios, edge cases, and enables testing of the entire application stack in an integrated manner. Testing with LocalStack and Testcontainers also integrates seamlessly with CI/CD pipelines like GitLab CI or GitHub Actions, allowing developers to run automated tests without requiring AWS credentials or services.
Prerequisites
Section titled “Prerequisites”For this tutorial, you will need:
- LocalStack for AWS to emulate the AWS services. If you don’t have a subscription yet, you can just get a trial license for free.
- Docker
- A GitLab account
GitLab overview
Section titled “GitLab overview”GitLab is striving to be a complete tool for DevOps practices, offering not just source code management and continuous integration, but also features for monitoring, security, planning, deploying and more. By having your code and CI on the same platform, workflows are simplified and collaboration is enhanced. While Jenkins is still a very prominent CI/CD tool in the industry, it is up to the user to figure out where to host it and focuses solely on CI/CD features.
GitLab architecture
Section titled “GitLab architecture”
As users, we only interact directly with a GitLab instance which is responsible for hosting the application code and all the needed configurations, including the ones for pipelines. The instance is then in charge of running the pipelines and assigning runners to execute the defined jobs.
When running CI pipelines, you can choose to use GitLab-hosted runners, or provision and register self-managed runners. This tutorial will cover both.
Runners hosted by GitLab
Section titled “Runners hosted by GitLab”The GitLab documentation highlights some key aspects about the provided runners:
- They can run on Linux, Windows (beta) and MacOS (beta).
- They are enabled by default for all projects, with no configuration required.
- Each job is executed by a newly provisioned VM.
- Job runs have
sudoaccess without a password. - VMs are isolated between job executions.
- Their storage is shared by the operating system, the image with pre-installed software, and a copy of your cloned repository, meaning that the remaining disk space for jobs will be reduced.
- The runners are configured to run in privileged mode to support Docker in Docker to build images natively or run multiple containers within each job.
Self-hosted runners
Section titled “Self-hosted runners”Essentially, the architecture does not change, except the runners will be executing the jobs on a local machine. For developing locally, this approach is very convenient and there are several benefits:
- Customization: you can configure the runners to suit your specific needs and environment.
- Performance: improved performance and faster builds by leveraging your own hardware.
- Security: enhanced control over your data and build environment, reducing exposure to external threats.
- Resource Management: better management and allocation of resources to meet your project’s demands.
- Cost Efficiency: depending on your alternatives, you can avoid usage fees associated with cloud-hosted runners.
Application Overview
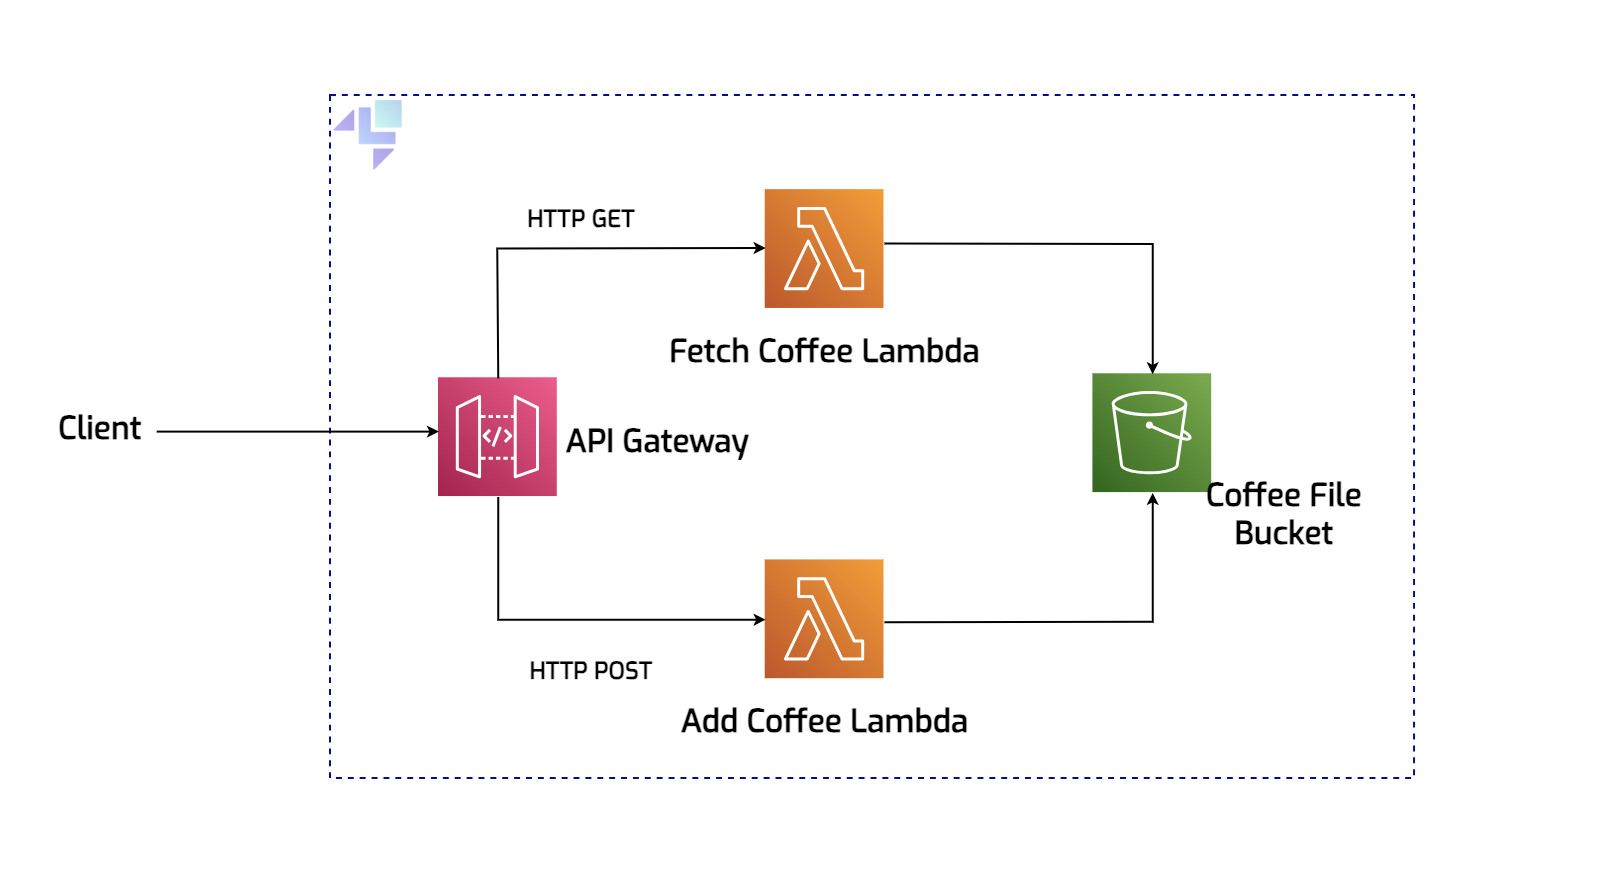
Section titled “Application Overview”Our sample backend application stores information about different types of coffee in files, with descriptions stored in an S3 bucket. It utilizes two Lambda functions to create/update and retrieve these descriptions, all accessible through an API Gateway. While we won’t delve into the details of creating these AWS resources, we’ll use AWS CLI to initialize them during container startup using init hooks. You can find the whole setup in the init-resources.sh file. The following diagram visually explains the simple workflows that we want to check in our automated test in CI, using Testcontainers. We’ll need to make sure that the files are correctly created and named, that the validations and exceptions happen as expected.
CI Pipeline Using GitLab Runners
Section titled “CI Pipeline Using GitLab Runners”Configuring the test container
Section titled “Configuring the test container”To follow along, make changes to the code or run your own pipelines, you may fork the repository from the coffee-backend-localstack sample.
The application is developed, built and tested locally, the next step is to establish a quality gate in the pipeline, to make sure nothing breaks.
The basis for the container used for testing looks like this:
@Testcontainerspublic class LocalStackConfig {    @Container    protected static LocalStackContainer localStack =            new LocalStackContainer(DockerImageName.parse("localstack/localstack-pro:3.4.0"))                    .withEnv("LOCALSTACK_AUTH_TOKEN", System.getenv("LOCALSTACK_AUTH_TOKEN"))                    .withCopyFileToContainer(                            MountableFile.forHostPath("target/lambda.jar", 0777),                            "/etc/localstack/init/ready.d/target/lambda.jar")                    .withCopyFileToContainer(                            MountableFile.forClasspathResource("init-resources.sh", 0777),                            "/etc/localstack/init/ready.d/init-resources.sh")                    .withEnv("DEBUG", "1")                    .withNetworkAliases("localstack")                    .withEnv("LAMBDA_DOCKER_FLAGS", testcontainersLabels())                    .withEnv("LAMBDA_RUNTIME_ENVIRONMENT_TIMEOUT", "90")                    .waitingFor(Wait.forLogMessage(".*Finished creating resources.*\\n", 1));
    ......
Here’s a breakdown of what’s important:
- The
@Testcontainersmarks the test class to use the Testcontainers library. - The
@Containerannotation indicates that the field is a Testcontainers managed container. - The image used for the test LocalStack instance is set to the latest Pro version (at the time of writing).
- In order to use the Pro image, a
LOCALSTACK_AUTH_TOKENvariable needs to be set and read from the environment. - There are two files copied to the container before startup: the JAR file for the Lambda functions and the script for provisioning all the necessary AWS resources. Both files are copied with read/write/execute permissions.
DEBUG=1enables a more verbose logging of LocalStack.LAMBDA_DOCKER_FLAGSsets specific Testcontainers labels to the Lambda containers, as a solution to be correctly managed by Ryuk. Since the compute containers are created by LocalStack and not the Testcontainers framework, they do not receive the necessary tags.LAMBDA_RUNTIME_ENVIRONMENT_TIMEOUTsets an environment variable to configure the Lambda runtime environment timeout to 90 seconds, for slower environments.- The last line
.waitingFor(Wait.forLogMessage(...))configures the container to wait until the specified log message appears, exactly once, indicating that resource creation is complete.
The tests are set up in the CoffeeAppTests class, validating the workflows for creating a coffee description files, retrieving them, and exception throwing when needed.
For this tutorial you don’t really need to dive into the specifics of the tests, but you’re more than welcome to.
Setting up the pipeline configuration
Section titled “Setting up the pipeline configuration”The .gitlab-ci.yml file is a configuration file for defining GitLab CI/CD pipelines, which automate the process of building, testing,
and deploying applications.
It specifies stages (such as build, test, and deploy) and the jobs within each stage, detailing the commands
to be executed.
Jobs can define dependencies, artifacts, and environment variables.
Pipelines are triggered by events like code pushes,
merge requests, or schedules, and they are executed by runners.
This file enables automated, consistent, and repeatable workflows for software development and deployment.
In this example we will focus on
just the building and testing parts.
Let’s break down the .gitlab-ci.yml for this project:
image: ubuntu:latest
before_script:  # install necessary dependencies  - apt-get update && apt-get install -y curl tar bash maven docker.io
  - curl -L https://download.oracle.com/java/21/latest/jdk-21_linux-x64_bin.tar.gz -o /tmp/openjdk.tar.gz  - tar -xzf /tmp/openjdk.tar.gz -C /opt  - mv /opt/jdk-21* /opt/jdk-21
  - export JAVA_HOME="/opt/jdk-21"  - export PATH="$JAVA_HOME/bin:$PATH"
stages:  - build  - test
cache:  paths:    - .m2/repository    - target
build_job:  stage: build  script:    - echo "Running build..."    - mvn clean package -DskipTests  artifacts:    paths:      - target/
test_job:  stage: test  services:    - docker:26.1.2-dind  variables:    DOCKER_HOST: tcp://docker:2375    DOCKER_TLS_CERTDIR: ""    DOCKER_DRIVER: overlay2    LOCALSTACK_AUTH_TOKEN: $LOCALSTACK_AUTH_TOKEN
  script:    - echo "Running tests..."    - mvn test
  allow_failure: false
image: ubuntu:latest- This specifies the base Docker image used for all jobs in the pipeline.ubuntu:latestis a popular and easy choice because it’s a well-known, stable, and widely-supported Linux distribution. It ensures a consistent environment across all pipeline stages. Each job can define its own image (for examplemavenordockerimages), but in this case a generic image with the necessary dependencies (curl, Java, maven, docker) installed covers the needs for both stages.before_script- these commands are run before any job script in the pipeline, on top of the Ubuntu image.- The two stages are defined at the top:
buildandtest. cache- caches the Maven dependencies to speed up subsequent pipeline runs..m2/repository- this is the default location where Maven stores its local repository of dependencies.- The
scriptsection - specifies the scripts that run for each job. artifacts- specifies the build artifacts (e.g., JAR files) to be preserved and passed to the next stages (thetargetfolder).- The build job runs only on the
mainbranch. docker:26.1.2-dind- specifies the service necessary to use Docker-in-Docker to run Docker commands inside the pipeline job. This is useful for integration testing with Docker containers.- Variables:
DOCKER_HOST: tcp://docker:2375- sets the Docker host to communicate with the Docker daemon inside the dind service.DOCKER_TLS_CERTDIR: ""- we’ll disable TLS to simplify the setup in a testing environment.DOCKER_DRIVER: overlay2- specifies the storage driver for Docker, ensuring better performance and compatibility.
- The last line ensures that the pipeline fails if the tests fail.
Executors
Section titled “Executors”We mentioned in the beginning that each job runs in a newly provisioned VM. You can also notice that the pipeline configuration mentions a docker image, which is a template that contains instructions for creating a container. This might look confusing, but a runner is responsible for the execution of one job. This runner is installed on a machine and implements a certain executor. The executor determines the environment in which the job runs. By default, the GitLab-managed runners use a Docker Machine executor. Some other available executor options are: SSH, Shell, Parallels, VirtualBox, Docker, Docker Autoscaler, Kubernetes.
Sometimes visualizing the components of a pipeline can be tricky, so let’s simplify this into a diagram:

Basically, the service is an additional container that starts at the same time as the one running the test_job.
The job container has
a Docker client, and it communicates with the Docker daemon, running in the service container, in order to spin up more containers, in this
case for the Lambda functions.
Don’t forget to add your LOCALSTACK_AUTH_TOKEN as a masked variable in your CI/CD settings.
Settings -> CI/CD -> Expand the Variables section -> Add variable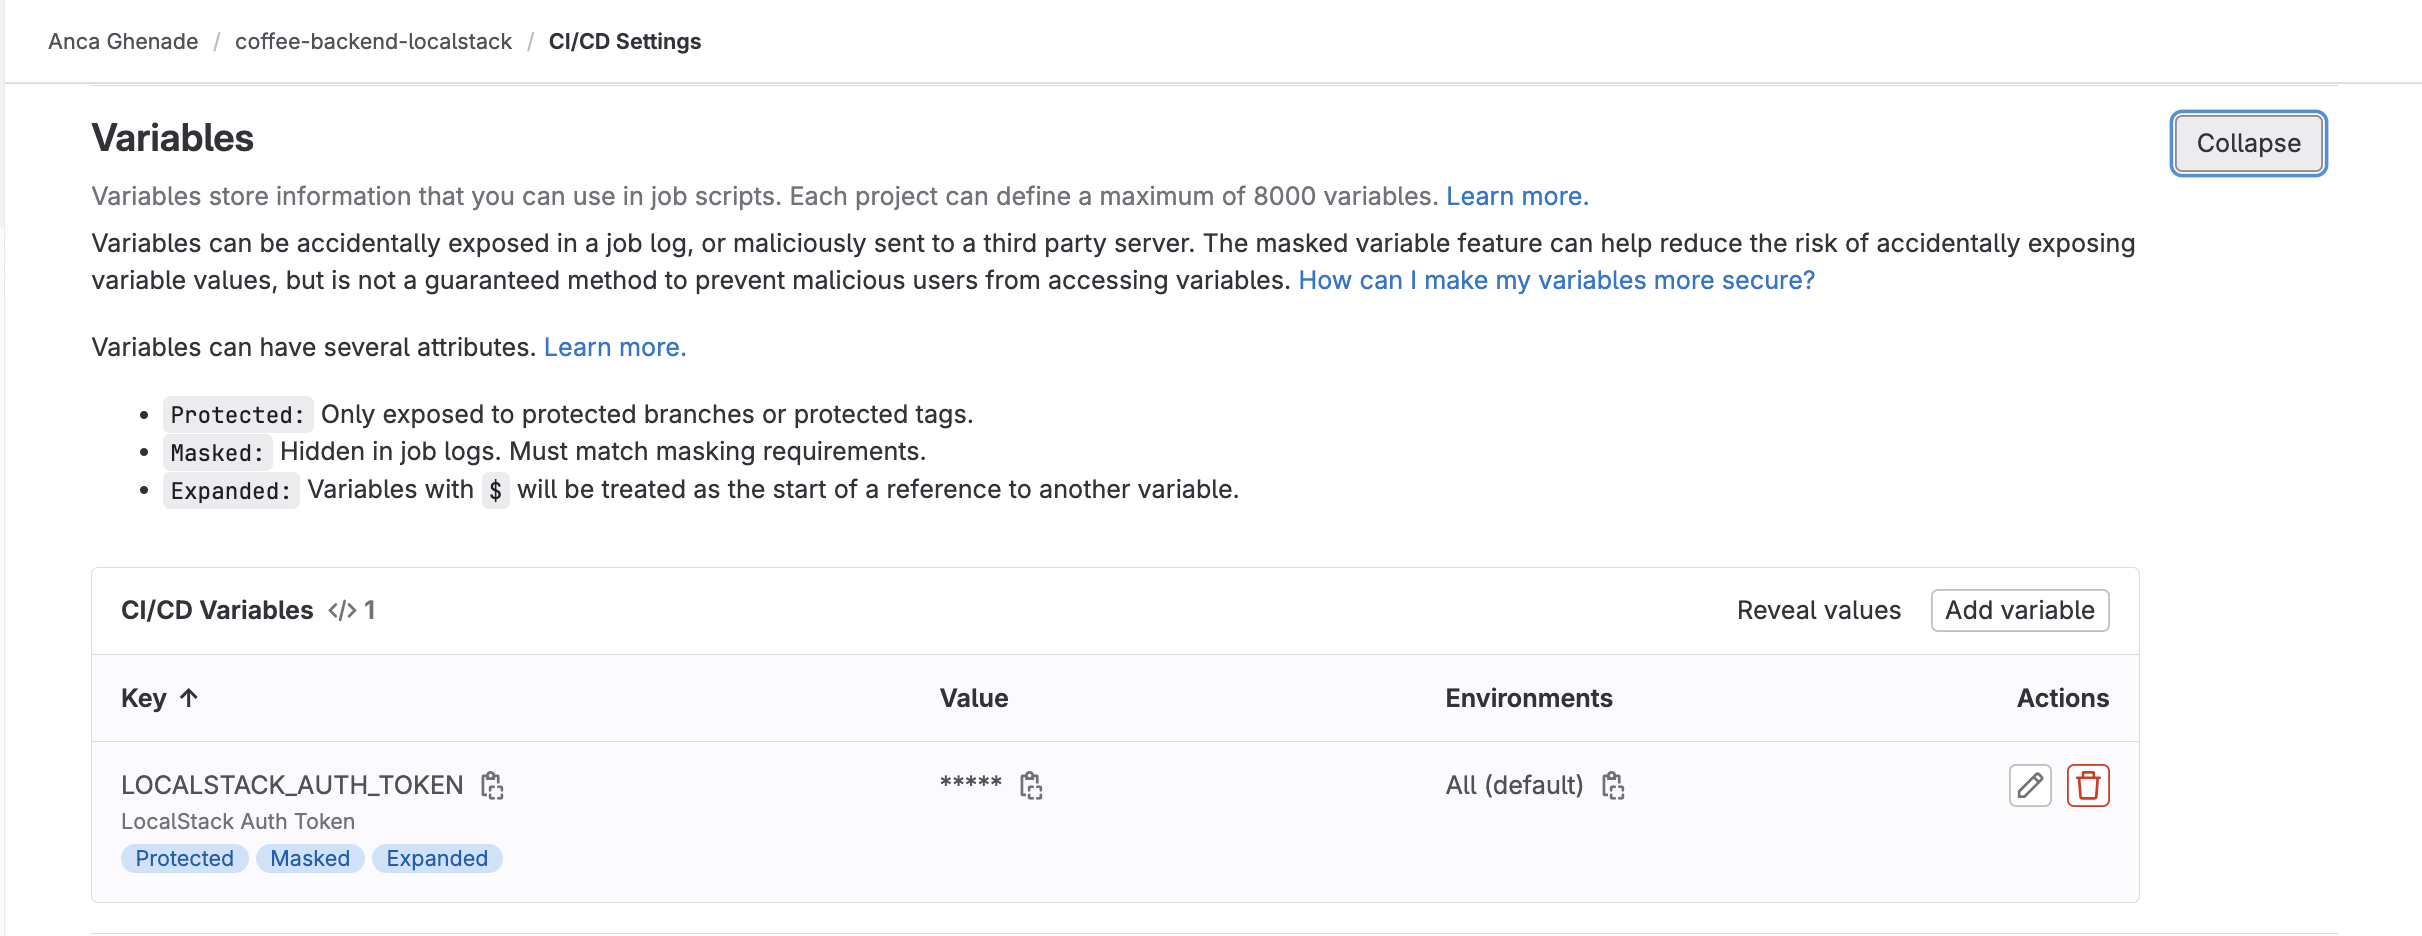
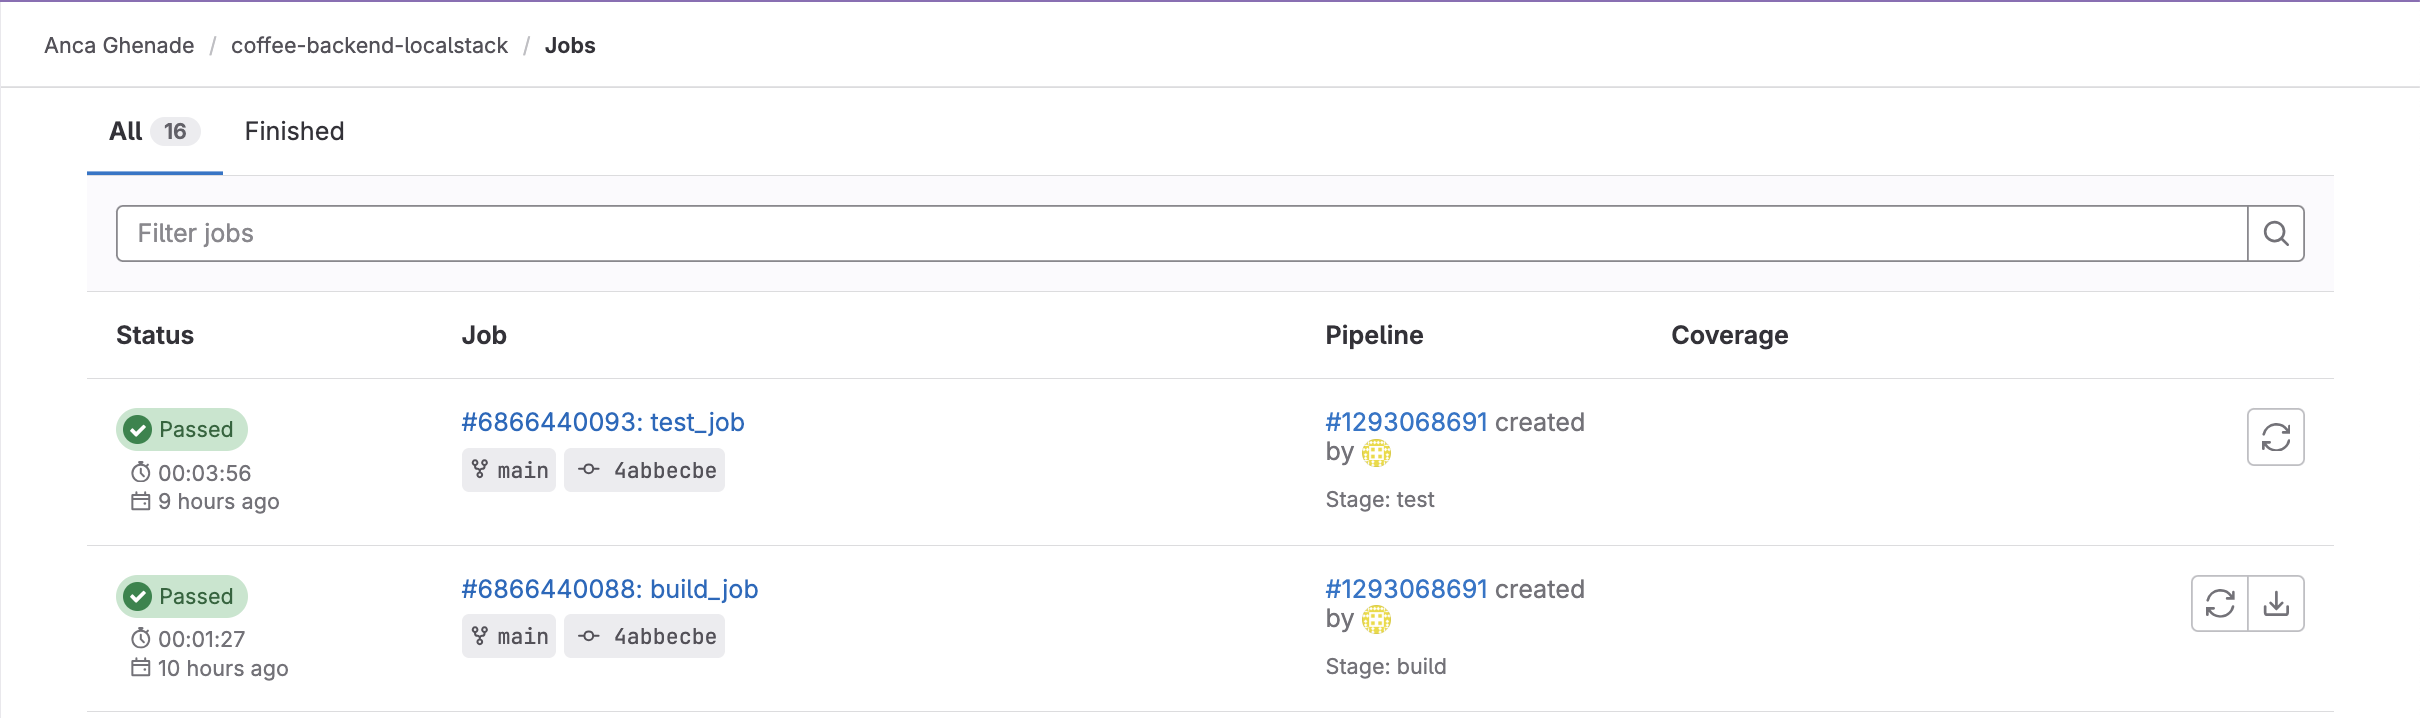
In the web interface, under the Jobs section, you can see the jobs that ran, and you can also filter them based on their status.
CI Pipeline Using Self-hosted Runners
Section titled “CI Pipeline Using Self-hosted Runners”There are some cases when you want to run your pipelines locally and GitLab can provide that functionality. If you’re new to the GitLab ecosystem, you need to be careful in configuring this setup, because it’s easy to overlook an important field which can hinder your job runs.
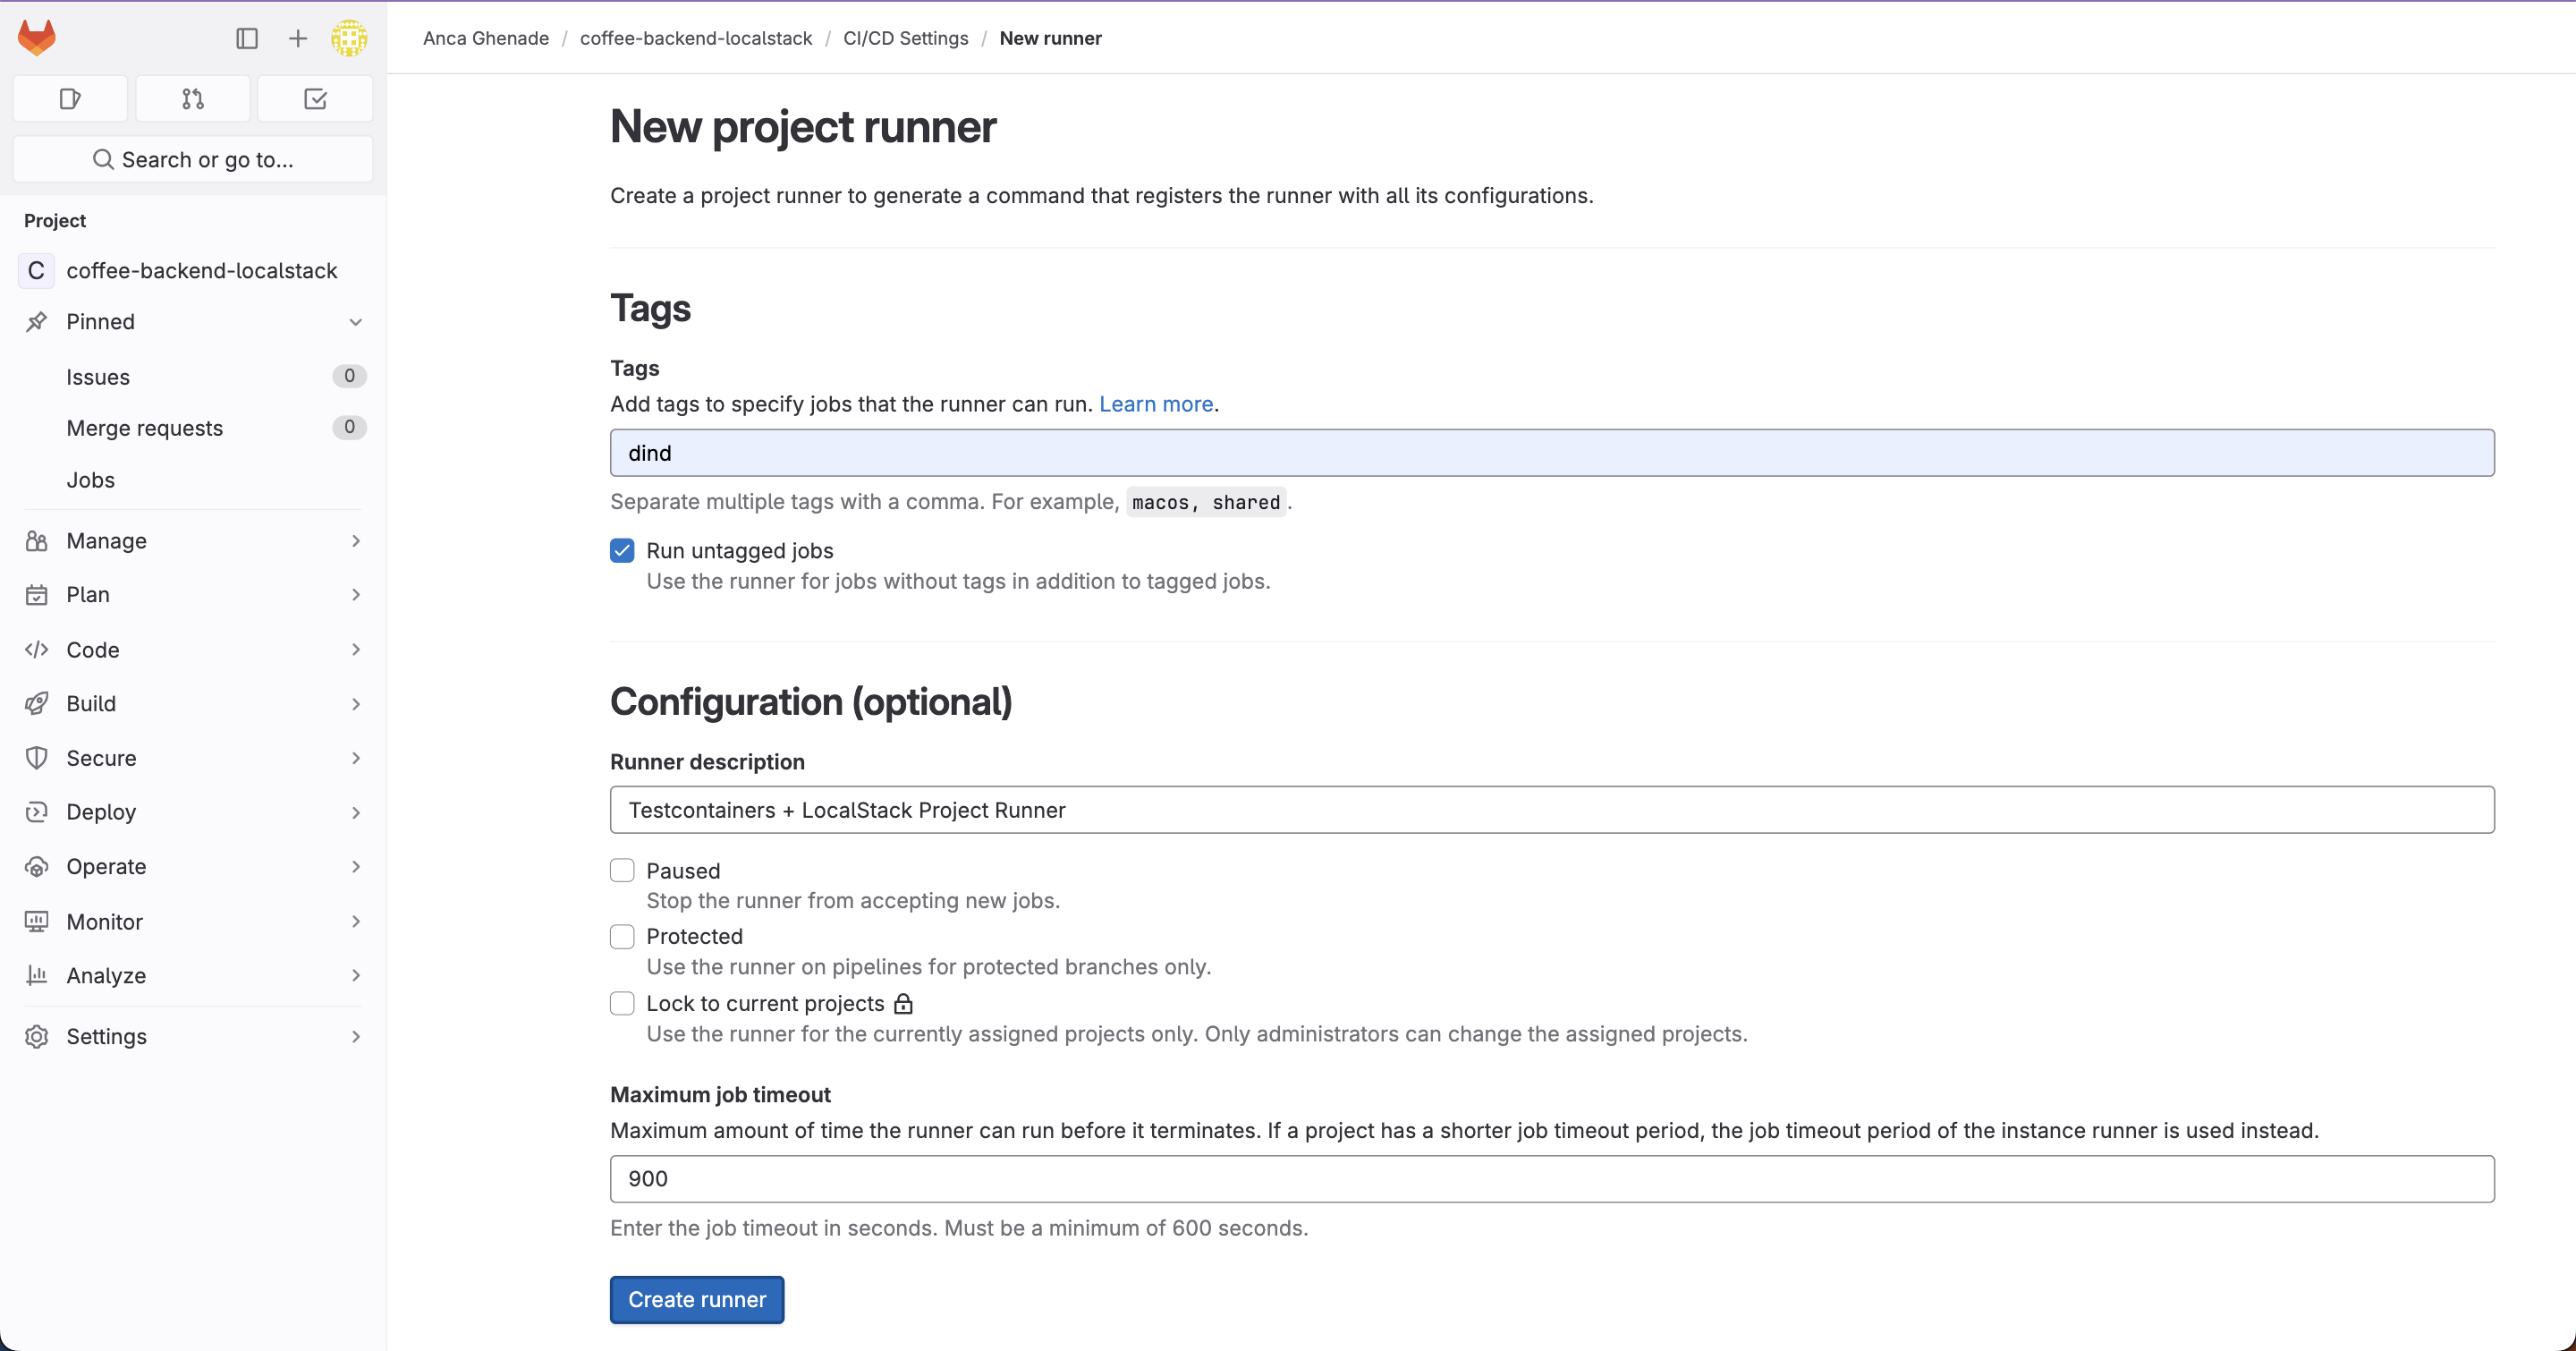
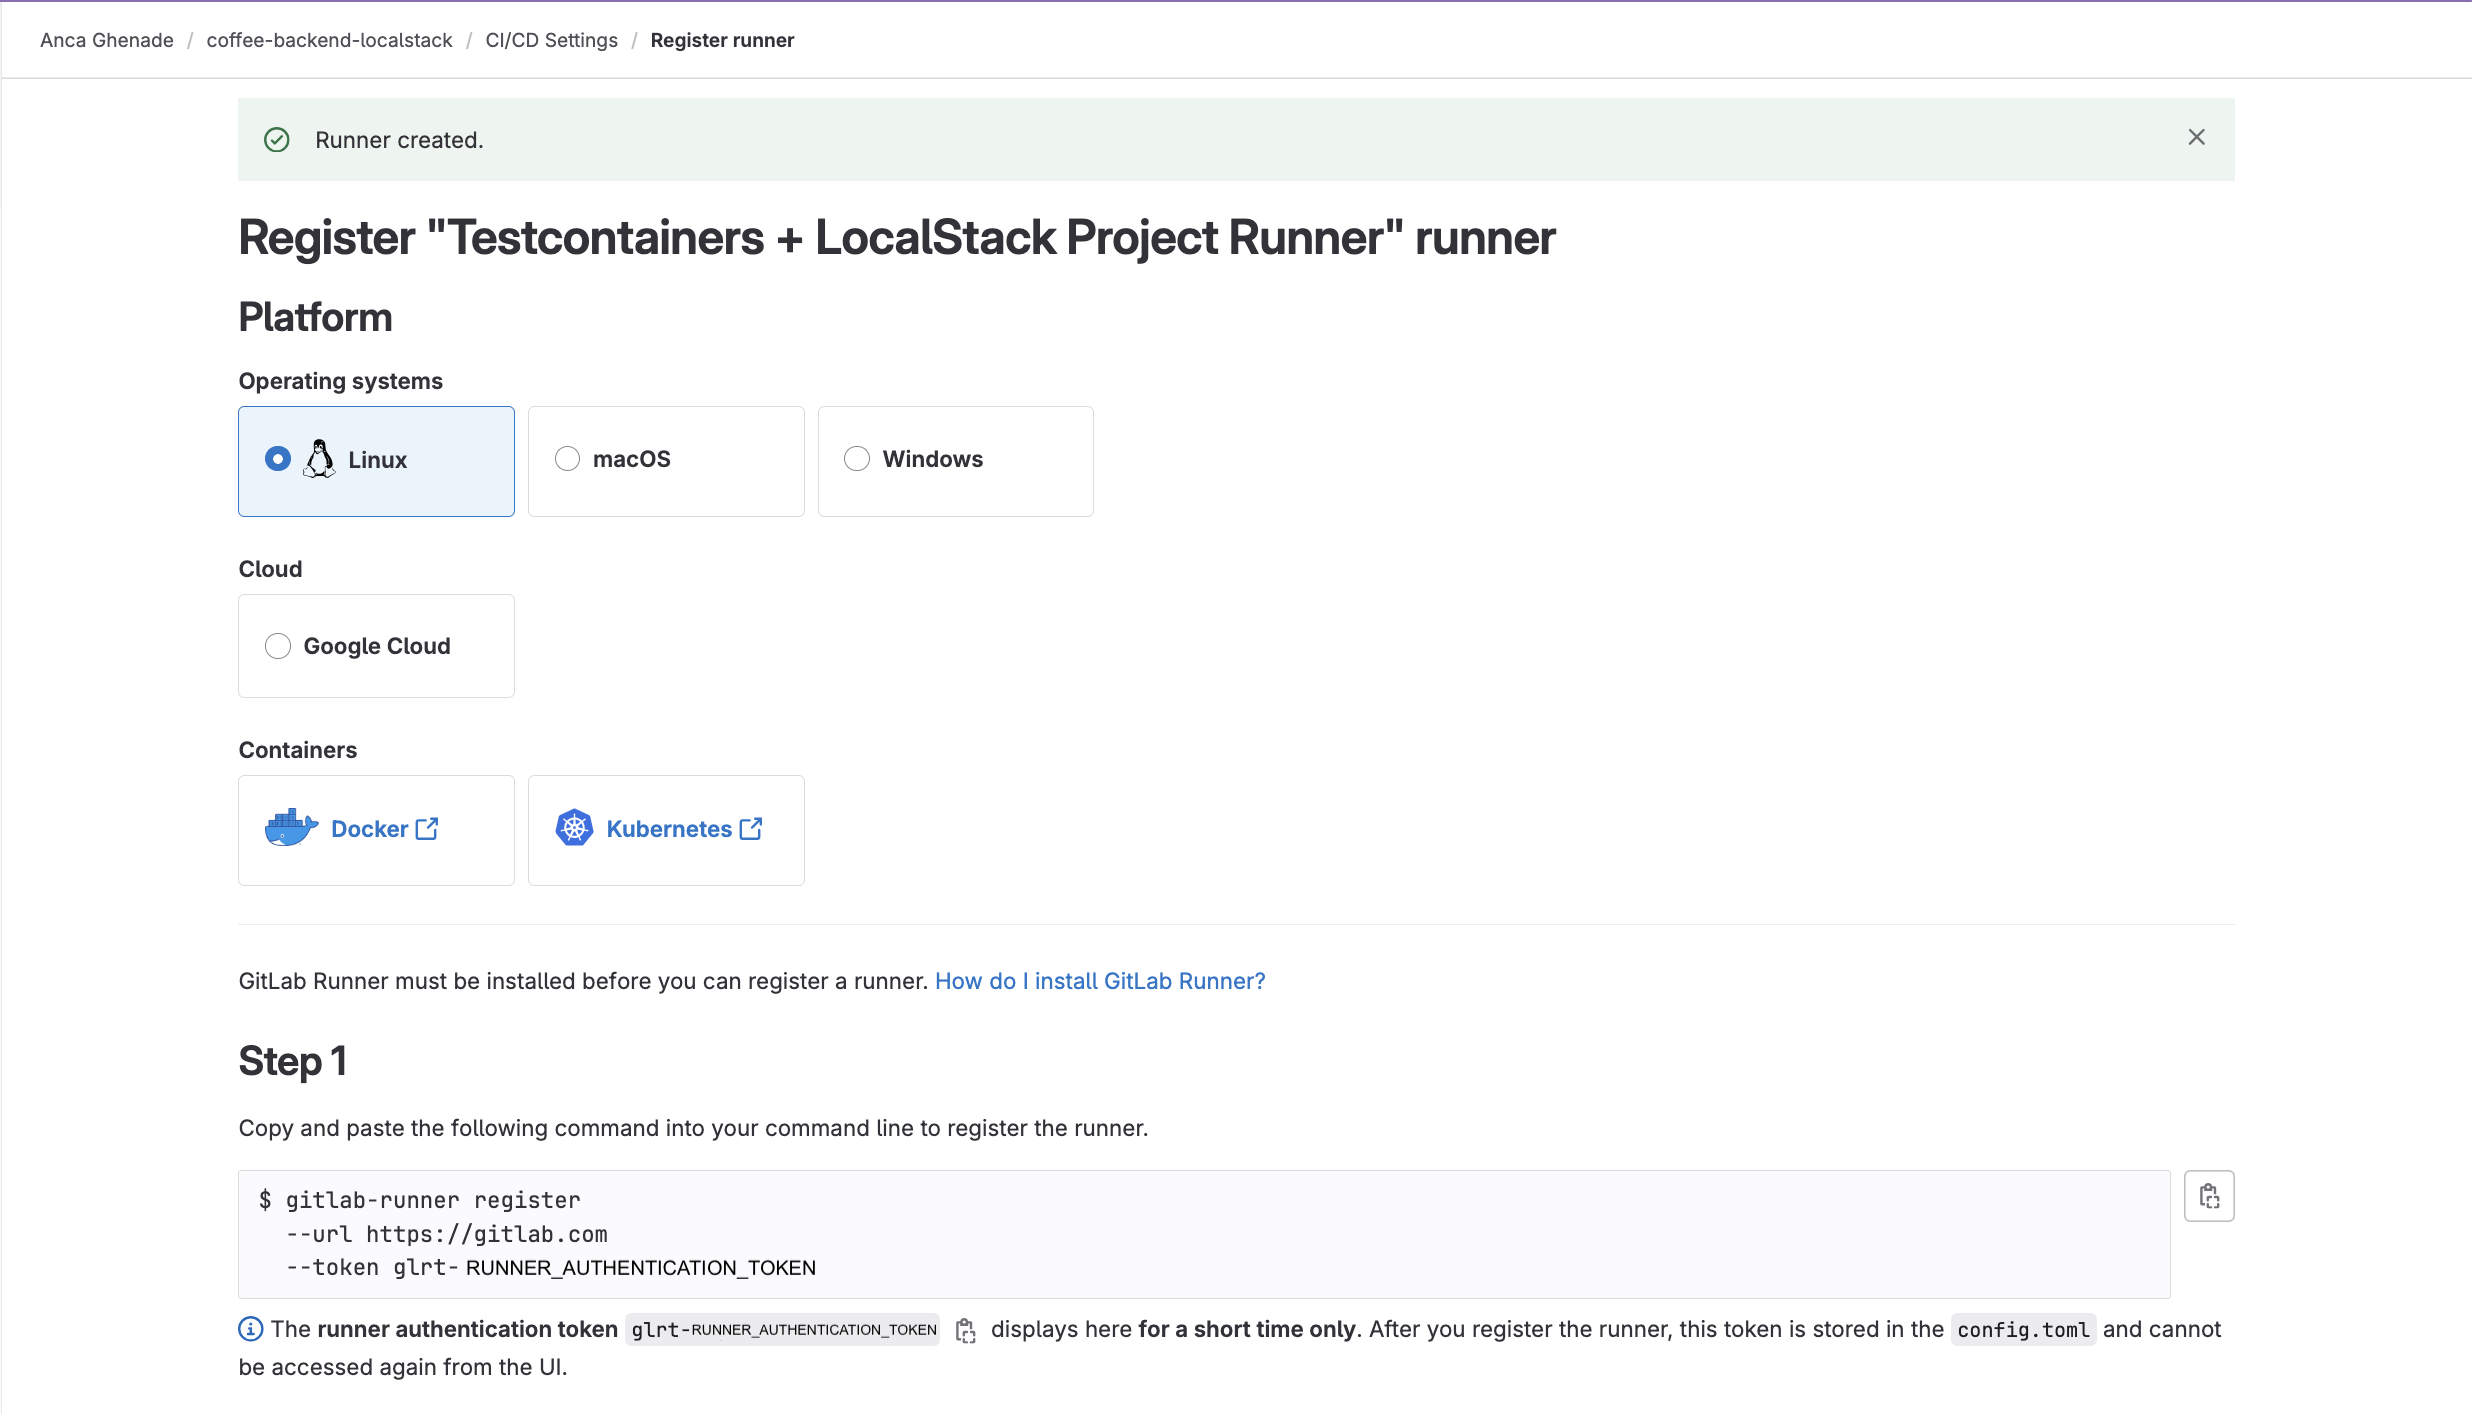
Let’s get started by using the web interface. In your GitLab project, in the left-hand side panel, follow the path:
Settings -> CI/CD -> Expand the Runners section -> Project runners -> New project runner
Adding a tag, will allow you in the future to select a particular subset of runners to execute pipelines that require specific attributes.
You can go ahead an tick the Run untagged jobs checkbox to be able to use this runner for all jobs that don’t have a tag defined.
The following fields are optional, the description of the runner and the maximum job timeout.
This dashboard may suffer changes and improvements over time, but the attributes should essentially remain the same.
After selecting the Linux machine you’re done with defining the runner.
Now you need a place to execute this runner, which will be your local
computer.
Notice the token in the first step command and save it for later.
Runner authentication tokens have the prefix glrt-.
For simplicity, we’ll use a GitLab Runner Docker image.
The GitLab Runner Docker images are designed as wrappers around the standard
gitlab-runner command, like if GitLab Runner was installed directly on the host.
You can read more about it in the GitLab documentation.
Make sure you have Docker installed.
To verify your setup you can run the docker info command.
Now, you need to create a volume on the disk that holds the configuration for the runner. You can have different volumes that can be used for different runners.
docker volume create gitlab-runner-config
```bash title="Output"gitlab-runner-config
The agent that will interact with the system to create the runner needs to be run:
docker run -d --name gitlab-runner \ --restart always \ -v /var/run/docker.sock:/var/run/docker.sock \ -v gitlab-runner-config:/etc/gitlab-runner/ \ gitlab/gitlab-runner:latest79ad150847bd78fc567b08cafd96fc6bfec8f1946feb2beea89d7c6c395c01c4The breakdown for this command:
- The container is named
gitlab-runner. - It is configured to always restart.
- It has access to the Docker socket on the host machine, allowing it to manage Docker containers - which is very important here.
- It uses the named volume previously defined for persistent configuration storage.
- It uses the latest GitLab Runner image.
The next step is to register the runner:
docker run --rm -it \ -v gitlab-runner-config:/etc/gitlab-runner/ \ gitlab/gitlab-runner:latest registerFollow the instructions that are prompted:
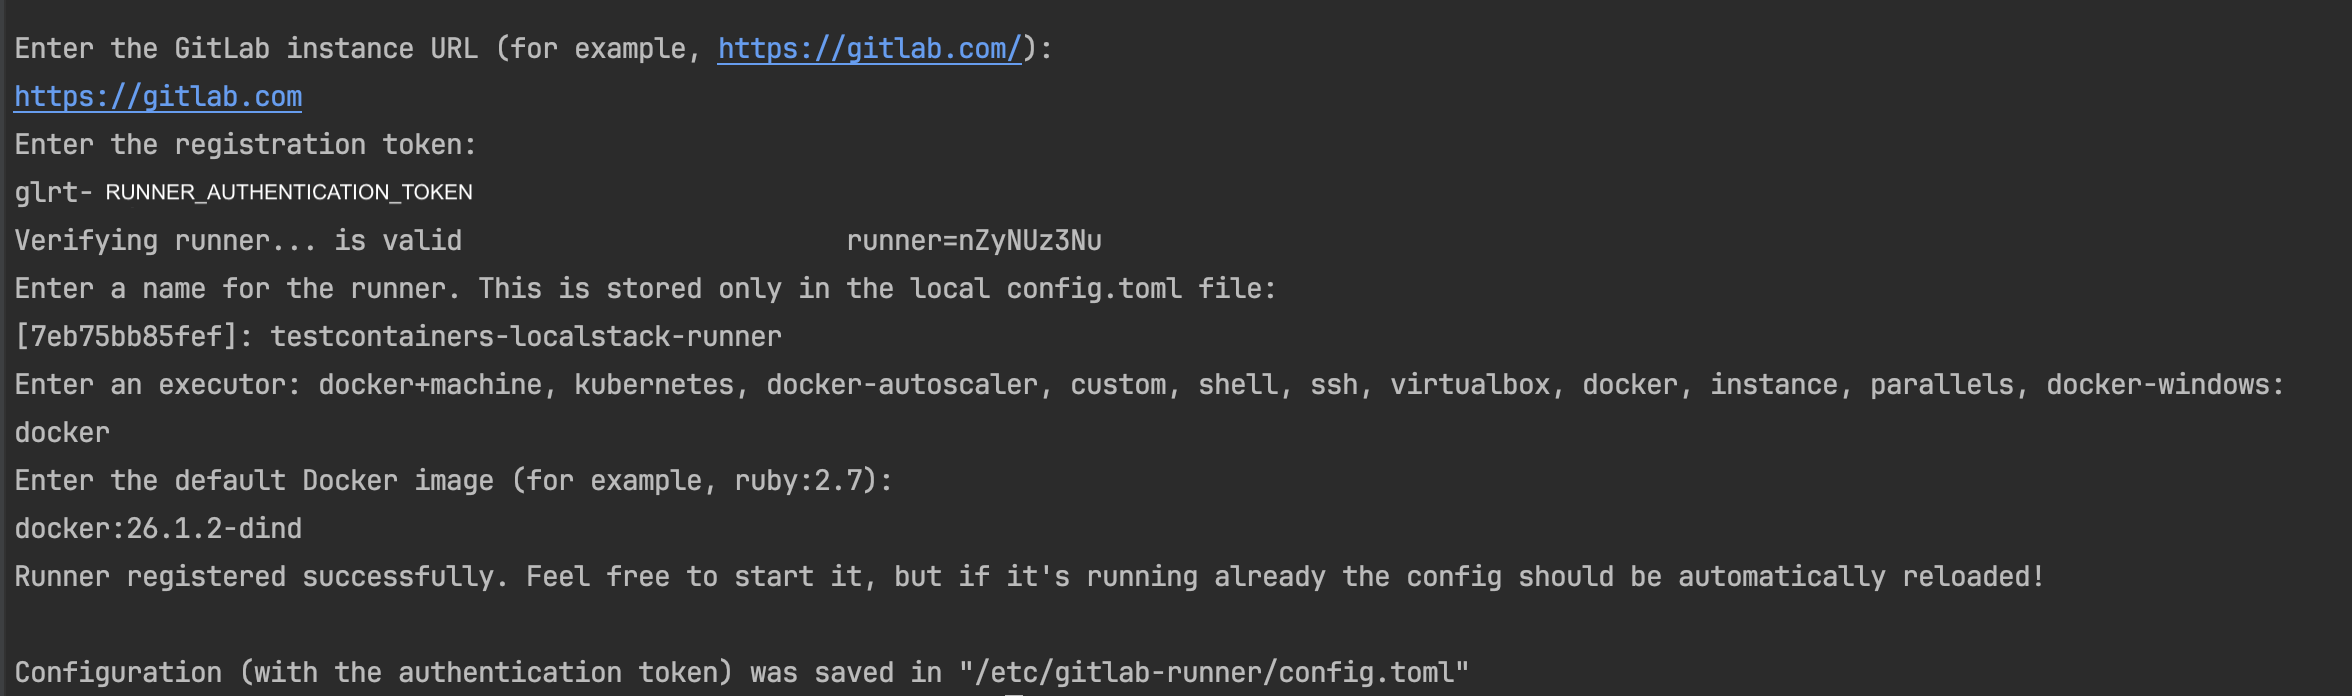
In the container logs you should see this:
Configuration loaded builds=0 max_builds=1Let’s look at the config.toml file and make the final adjustment before successfully running the pipeline.
For running a job that does not require any additional containers to be created, you can stop here.
However, since
we need to run Docker commands in our CI/CD jobs, we must configure GitLab Runner to support those commands.
This method requires privileged mode.
Let’s use the current running container to do that. Run the following:
docker exec -it gitlab-runner bin/bashInside the container, let’s run:
cd etc/gitlab-runnerls -altotal 24drwx------ 3 root root 4096 May 16 19:58 .drwxr-xr-x 1 root root 4096 May 16 19:56 ..-rw------- 1 root root 14 May 16 19:50 .runner_system_iddrwx------ 2 root root 4096 May 3 17:36 certs-rwx------ 1 root root 781 May 16 19:52 config.tomlYou can see the file that contains all the runner configurations.
apt update && apt install nanonano config.tomlThe privileged field needs to be changed to true.
Now the configurations should look like this:
connection_max_age = "15m0s"shutdown_timeout = 0
[session_server]  session_timeout = 1800
[[runners]]  name = "localstack-testcontainers-runner"  url = "https://gitlab.com"  id = 36509569  token = "glrt-RUNNER_AUTHENTICATION_TOKEN"  token_obtained_at = 2024-05-16T19:51:27Z  token_expires_at = 0001-01-01T00:00:00Z  executor = "docker"  [runners.custom_build_dir]  [runners.cache]    MaxUploadedArchiveSize = 0    [runners.cache.s3]    [runners.cache.gcs]    [runners.cache.azure]  [runners.docker]    tls_verify = false    image = "docker:26.1.2-dind"    privileged = true    disable_entrypoint_overwrite = false    oom_kill_disable = false    disable_cache = false    volumes = ["/cache"]    shm_size = 0    network_mtu = 0
[CTRL] + [X] to save and exit the file.
The runner is ready to use.
You can now run your pipeline by pushing changes to your project
or from the dashboard, by going to Build -> Pipelines and using the Run pipeline button.
Conclusion
Section titled “Conclusion”In this tutorial, we’ve covered setting up a CI pipeline with GitLab runners and configuring a local Docker container to run the pipeline using a self-configured GitLab runner. Overall, the GitLab platform is an intricate system that can be used for highly complex projects to serve a multitude of purposes. With the steps learnt in this article, you can efficiently run end-to-end tests for your application using Testcontainers and LocalStack.