Systems Manager (SSM)
Introduction
Section titled “Introduction”Systems Manager (SSM) is a management service provided by Amazon Web Services that helps you effectively manage and control your infrastructure resources. SSM simplifies tasks related to system and application management, patching, configuration, and automation, allowing you to maintain the health and compliance of your environment.
LocalStack allows you to use the SSM APIs in your local environment to run operational tasks on the Dockerized instances. The supported APIs are available on our API Coverage section, which provides information on the extent of SSM’s integration with LocalStack.
Getting started
Section titled “Getting started”This guide is designed for users new to Systems Manager (SSM) and assumes basic knowledge of the AWS CLI and our awslocal wrapper script.
Start your LocalStack container using your preferred method with an additional EC2_VM_MANAGER=docker configuration variable.
We will demonstrate how to use EC2 and SSM functionalities when using the Docker backend with LocalStack with the AWS CLI.
Create an EC2 instance
Section titled “Create an EC2 instance”To get started, pull the ubuntu:focal image from Docker Hub and tag it as localstack-ec2/ubuntu-focal-docker-ami:ami-00a001.
LocalStack uses a naming scheme to recognise and manage the containers and images associated with it.
The container are named localstack-ec2.<InstanceId>, while images are tagged localstack-ec2/<AmiName>:<AmiId>.
docker pull ubuntu:focaldocker tag ubuntu:focal localstack-ec2/ubuntu-focal-docker-ami:ami-00a001LocalStack’s Docker backend treats Docker images with the above naming scheme as AMIs.
The AMI ID is the last part of the image tag, ami-00a001 in this case.
You can run an EC2 instance using the RunInstances API.
Execute the following command to create an EC2 instance using the ami-00a001 AMI.
awslocal ec2 run-instances \ --image-id ami-00a001 --count 1{ ... "Instances": [ { ... "InstanceId": "i-abf6920789a06dd84", "InstanceType": "m1.small", ... "SecurityGroups": [], "SourceDestCheck": true, "Tags": [], "VirtualizationType": "paravirtual" } ], "OwnerId": "000000000000", "ReservationId": "r-e9b21a68" ...You can copy the InstanceId value and use it in the following commands.
Send command using SSM
Section titled “Send command using SSM”You can use the SendCommand API to send a command to the EC2 instance.
The following command sends a cat lsb-release command in the /etc directory to the EC2 instance.
awslocal ssm send-command --document-name "AWS-RunShellScript" \ --document-version "1" \ --instance-ids i-abf6920789a06dd84 \ --parameters "commands='cat lsb-release',workingDirectory=/etc"{ "Command": { "CommandId": "23547a9b-6993-4967-9446-f96b9b5dac70", "DocumentName": "AWS-RunShellScript", "DocumentVersion": "1", "InstanceIds": [ "i-abf6920789a06dd84" ], "Status": "InProgress" }}You can copy the CommandId value and use it in the following commands.
Retrieve the command output
Section titled “Retrieve the command output”You can use the GetCommandInvocation API to retrieve the command output.
The following command retrieves the output of the command sent in the previous step.
awslocal ssm get-command-invocation \ --command-id 23547a9b-6993-4967-9446-f96b9b5dac70 \ --instance-id i-abf6920789a06dd84Change the CommandId and InstanceId values to the ones you received in the previous step.
{ "CommandId": "23547a9b-6993-4967-9446-f96b9b5dac70", "InstanceId": "i-abf6920789a06dd84", "DocumentName": "AWS-RunShellScript", "DocumentVersion": "1", "Status": "Success", "StandardOutputContent": "DISTRIB_ID=Ubuntu\nDISTRIB_RELEASE=20.04\nDISTRIB_CODENAME=focal\nDISTRIB_DESCRIPTION=\"Ubuntu 20.04.6 LTS\"\n", "StandardErrorContent": ""}Resource Browser
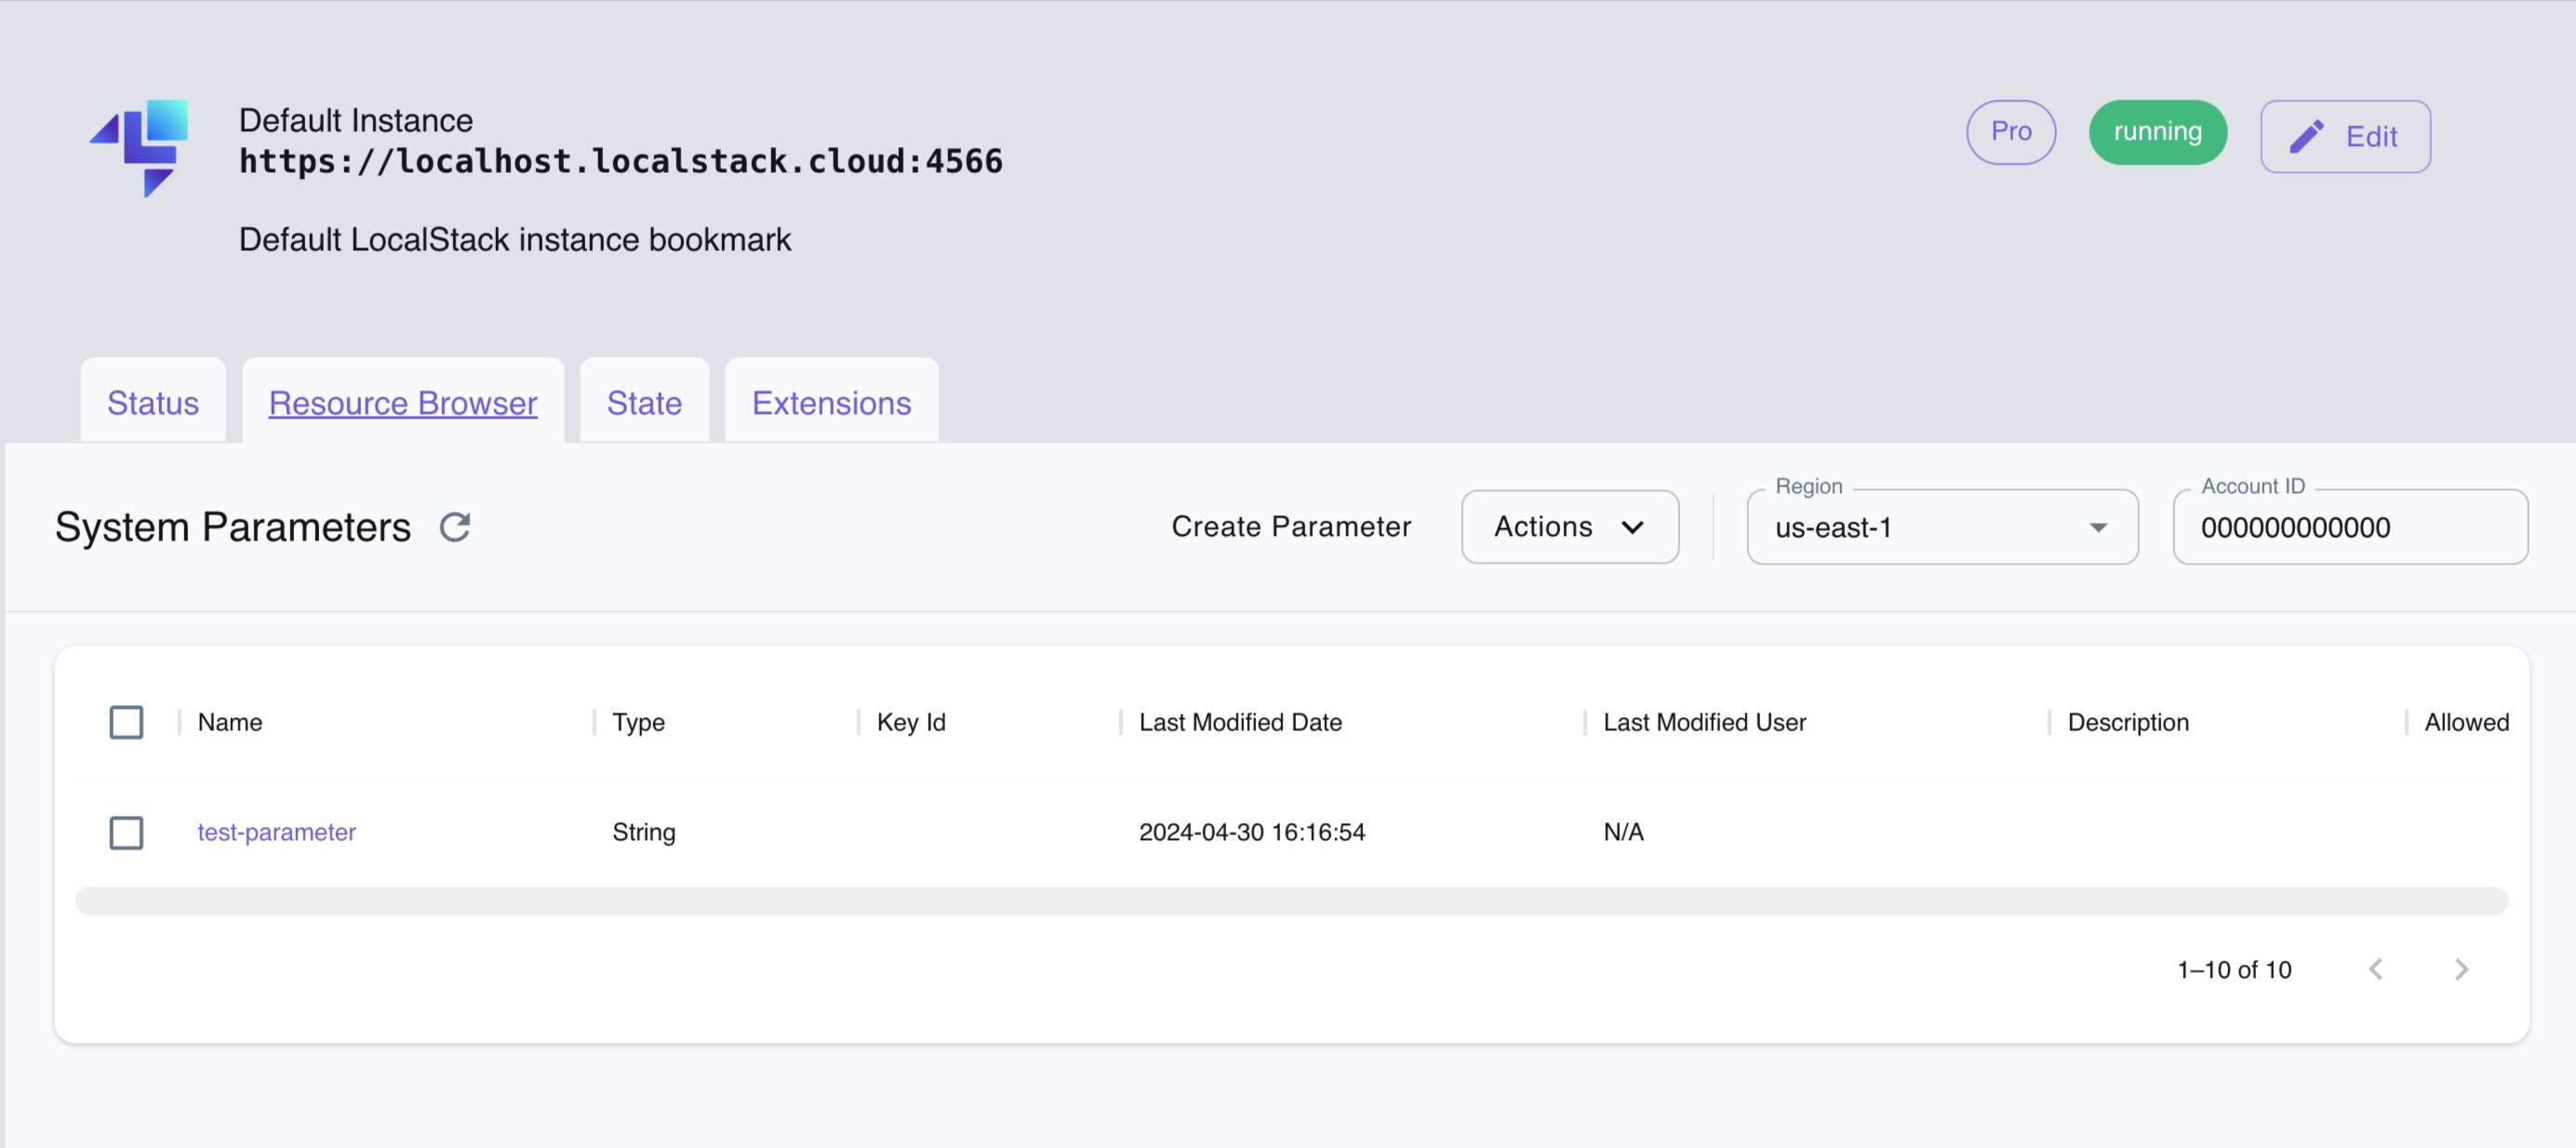
Section titled “Resource Browser”The LocalStack Web Application provides a Resource Browser for managing SSM System Parameters. You can access the Resource Browser by opening the LocalStack Web Application in your browser, navigating to the Resource Browser section, and then clicking on Simple Systems Manager (SSM) under the Management/Governance section.

The Resource Browser allows you to perform the following actions:
- Create System Parameter: Create a new System Parameter by clicking on the Create Parameter button and providing the required details.
- View the System Parameter: View the details of a System Parameter, such as its value, by clicking on the parameter name.
- Delete the System Parameter: Delete a System Parameter by selecting the parameter and clicking on the Actions dropdown menu followed by Remove Selected.
Current Limitations
Section titled “Current Limitations”The following table highlights some differences between LocalStack SSM and AWS SSM.
| LocalStack | AWS |
|---|---|
| Automated SSM registration for instances | Manual instance registration using CreateActivation |
| Operations performed through Docker exec | Operations facilitated by Amazon SSM Agent |
Instance IDs prefixed with i- | Instance IDs prefixed with mi- |
The other limitations of LocalStack SSM are:
- Document Support: LocalStack supports both AWS-managed documents (such as
AWS-RunShellScript) and custom documents withSendCommandAPI.- Parameter substitution in documents using the
{{ parameter-name }}syntax is supported. - Only documents using the
aws:runShellScriptplugin are fully supported for execution in Dockerized instances. - Documents using other plugins will fall back to the Moto implementation, which may not function correctly.
- Parameter substitution in documents using the
- Commands returning non-zero codes won’t capture standard output or error streams, leaving them empty.
- Shell constructs such as job controls (
&&,||), and redirection (>) are not supported.
API Coverage
Section titled “API Coverage”| Operation ▲ | Implemented ▼ | Image | Verified on Kubernetes |
|---|